This operational reference is organized for GoSafer Security customers and staff. Alarm.com product names are retained where required for technical accuracy.
Overview
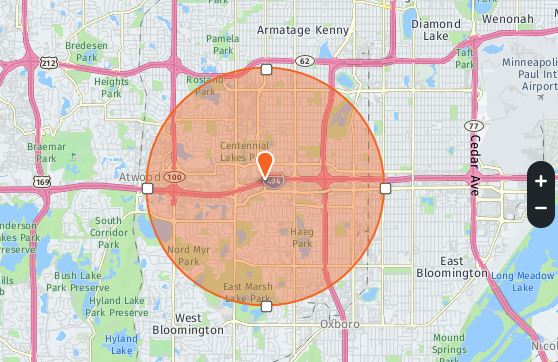
A Geo-Fence is a virtual geographic boundary that by default, is set up around your installation address and lets you create location-based alerts and rules based on the location of one or more …
Platform
App + Web
Content type
How-to / Configuration
Source last updated
2025-06-04
Procedure
Step-by-step guide: Screenshots and videos are placed with the instruction they illustrate.
A Geo-Fence is a virtual geographic boundary that by default, is set up around your installation address and lets you create location-based alerts and rules. Geo-Fence alerts and rules are based on the location of one or more mobile devices, also known as Geo-Devices. Using the GoSafer Security customer portal (powered by Alarm.com), you can edit the Geo-Fence location, name, and radius.
The center of the fence defaults to the system's installation address. To move the fence location, perform either of the following:
Tap and drag the map to move the location marker.
Enter a specific address.
To adjust the radius, either pinch the Geo-Fence, enter the desired radius in the Adjust Radius field (in miles), or tap AddorMinus to adjust the distance.
Note: The minimum Geo-Fence radius is 1 mile (1.6 kilometers), and the maximum is 100 miles (160 kilometers). If the account is in Canada, the minimum radius is 1.5 kilometers and the maximum is 150 kilometers.
In the Name field, enter a name for the Geo-Fence.
Tap Save.
To create a Geo-Fence using the GoSafer Security customer portal (powered by Alarm.com):
Log in to the GoSafer Security customer portal (powered by Alarm.com).
Click Settings.
Click Places.
In Manage Places, click Add a Fence.
The center of the fence defaults to the system's installation address. To move the fence location, perform either of the following:
Click and drag the location marker on the map.
Enter a specific address in the Move fence location to field and click Geofence enter.
In the Fence Name field, enter a name for the Geo-Fence.
To adjust the radius, either click and drag the Geo-Fence anchors on the map overlay, or enter the desired radius in the Geo-Fence Radius field (in miles).
Note: The minimum Geo-Fence radius is 1 mile (1.6 kilometers), and the maximum is 100 miles (160 kilometers). If the account is in Canada, the minimum radius is 1.5 kilometers and the maximum is 150 kilometers.
Click Save.
Edit a Geo-FenceIcn Chevron Up
To edit a Geo-Fence using the Alarm.com app:
Log in to the Alarm.com app.
Tap Menu.
Tap Places.
In Places, tap the desired Geo-Fence to edit.
Tap Edit Place.
To move the fence location, perform either of the following:
Tap and drag the map to move the location marker.
Enter a specific address.
To adjust the radius, either pinch the Geo-Fence, enter the desired radius in the Adjust Radius field (in miles), or tap AddorMinus to adjust the distance.
Note: The minimum Geo-Fence radius is 1 mile (1.6 kilometers), and the maximum is 100 miles (160 kilometers). If the account is in Canada, the minimum radius is 1.5 kilometers and the maximum is 150 kilometers.
In the Name field, enter a name for the Geo-Fence.
Note: The default Geo-Fence cannot be renamed or deleted.
Click Save.
To edit a Geo-Fence using the GoSafer Security customer portal (powered by Alarm.com):
Log in to the GoSafer Security customer portal (powered by Alarm.com).
Click Settings.
Click Places.
In Manage Places, click the desired Geo-Fence to edit.
To move the fence location, perform either of the following:
Click and drag the location marker on the map.
Enter a specific address in the Move fence location to field and click Geofence enter.
In the Fence Name field, enter a name for the Geo-Fence.
To adjust the radius, either click and drag the Geo-Fence anchors on the map overlay, or enter the desired radius in the Geo-FenceRadius field (in miles).
Note: The minimum Geo-Fence radius is 1 mile (1.6 kilometers), and the maximum is 100 miles (160 kilometers). If the account is in Canada, the minimum radius is 1.5 kilometers and the maximum is 150 kilometers.
Click Save.
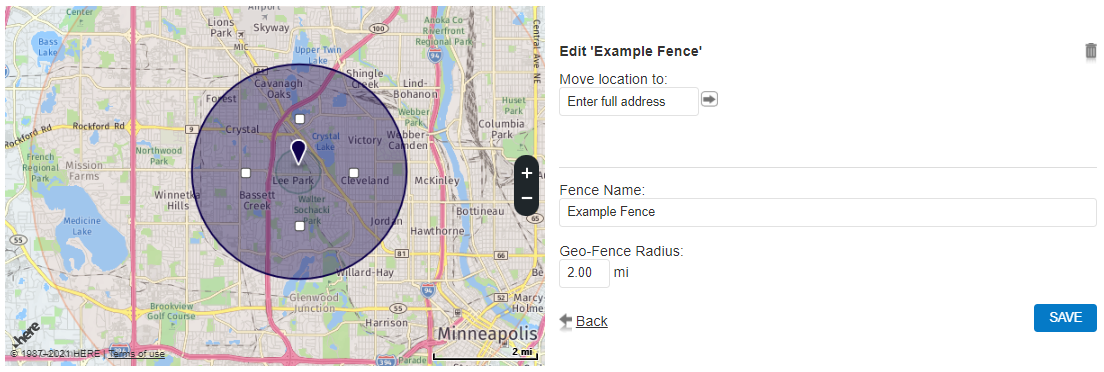
The following image is an example of the map that appears to edit the Geo-Fence:
Geo Fence Edit
Delete a Geo-FenceIcn Chevron Up
To delete a Geo-Fence using the Alarm.com app:
Note: The default Geo-Fence cannot be renamed or deleted.
Log in to the Alarm.com app.
Tap Menu.
Tap Places.
In Places, tap the desired Geo-Fence.
Tap Edit Place.
Tap Delete Place.
Tap Delete Place when prompted to confirm that you want to delete the Geo-Fence.
To delete a Geo-Fence using the GoSafer Security customer portal (powered by Alarm.com):
Note: The default Geo-Fence can be edited, but not deleted.
Log in to the GoSafer Security customer portal (powered by Alarm.com).
Click Settings.
Click Places.
In Manage Places, click thename of the Geo-Fence to be deleted.
Click Delete.
Click Ok when prompted to confirm that you want to delete the Geo-Fence.