Customer application, web portal, device, configuration, and troubleshooting knowledge organized for GoSafer Security. Manufacturer product names and source attribution are retained for accuracy.
GoSafer Security procedures and references for Cellular Sensor.
Cellular Sensor
Cellular Sensor
GoSafer Security Knowledge Base
This operational reference is organized for GoSafer Security customers and staff. Alarm.com product names are retained where required for technical accuracy.
Overview
This GoSafer Security section brings together resources for Cellular Sensor, including setup, configuration, everyday use, and troubleshooting. Choose the related page that matches your device, feature, or task, and follow the current manufacturer guidance linked on that page.
Platform
General / Device
Content type
Troubleshooting
Source last updated
2026-03-06
Procedure
Browse the related pages in this chapter to open the specific procedure, configuration guide, or troubleshooting article you need.
Always verify safety, installation, compatibility, and current UI details against the original manufacturer documentation before operational use.
Cellular Sensor
Alarm.com Flex IO® sensor
GoSafer Security Knowledge Base
This operational reference is organized for GoSafer Security customers and staff. Alarm.com product names are retained where required for technical accuracy.
Overview
This is primarily a video or reference page. Open the original article link below for the current content.
Alarm.com Flex IO® sensor - LED Patterns and Troubleshooting
Frequently asked questions
Can an Alarm.com Flex IO® sensor be installed in a mobile home, trailer, or RV?The Alarm.com Flex IO® sensor can be used in mobile or moving applications, but reliable operation depends on adequate cellular signal strength in all locations where the sensor travels.Can an Alarm.com Flex IO® sensor report alarms to a monitoring station when opened?No. The Alarm.com Flex IO® sensor is designed for property awareness only and cannot forward signals to a monitoring station.What are the battery power options and requirements for an Alarm.com Flex IO® sensor?What is a battery tamper and mounting tamper?What is the Cat-M cellular network?
Always verify safety, installation, compatibility, and current UI details against the original manufacturer documentation before operational use.
Cellular Sensor
Alarm.com Flex IO® sensor - Data Sheet
GoSafer Security Knowledge Base
This operational reference is organized for GoSafer Security customers and staff. Alarm.com product names are retained where required for technical accuracy.
Overview
This is primarily a video or reference page. Open the original article link below for the current content.
Platform
General / Device
Content type
How-to / Configuration
Source last updated
2025-09-30
Procedure
Step-by-step guide: Screenshots and videos are placed with the instruction they illustrate.
Overview
The Alarm.com Flex IO® sensor enables new levels of flexibility for monitoring valuable property and assets anywhere that LTE connectivity is available. Whether used with a backyard gate or a remote storage unit, the Alarm.com Flex IO® sensor empowers users to keep an eye on what matters most. It can be used with the included magnet to monitor doors, gates, and other entryways. It also comes equipped with input and output options for integrating compatible devices that lack long-range connectivity.
Flex IO image
Features
Detect open/close using magnetic reed switch
Detect state change for third-party device using Loop Input
Change state of third-party and device using Relay Output (requires DC power to support always-on cellular connection)
Optional EOL (end of line) resistor to detect cut wires. EOL resistor can be 300 kΩ or higher. Normally Open configuration is preferred for low power usage.
Optional mount tamper and battery door tamper alerts
Multiple mounting options, including screws or zip ties.
Multiple carrier options:
Verizon (US only)
AT&T (US and Canada)
Specifications
Ingress Protection
IP56
Temperature
Battery life will be optimal between temperatures of 32°F to 131°F (0°C to 55°C), though the device can operate from -40°F to 131°F (-40°C to 55°C).
Reed Switches
3 unique reed switch locations to choose from that can be activated with included magnet.
Loop Input
The Alarm.com Flex IO® sensor can be powered by battery or external power.
Dry Contact, Normally Open (NO), or Normally Closed (NC).
Optional EOL resistor can be 300 kΩ or higher.
Relay Output
If used, the Alarm.com Flex IO® sensor must be externally powered (not compatible with battery power).
Up to 24 V (AC or DC), 40 mA max current.
Can be used only for control lines/dry contact.
Caution: Can never be connected directly to control electrical loads. This will damage the device.
Dimensions
Main unit: 6.8 x 2.2 x 1.3" (17.3 x 5.6 x 3.3 cm).
Magnet: 3.1 x 0.68 x 0.87" (7.9 x 1.7 x 2.2 cm).
Power
Works with DC-wired power or battery power (battery backup recommended for wired installations).
Supply Voltage: 6 to 15 VDC
Device Max Current Draw: 500 mA
Max Power Consumption: Up to 7.5 W (at 15 VDC)
Battery Power
Four 1.5 V AA lithium batteries (iron disulfide).
2+ years of battery life, depending on battery chemistry and operating temperature.
Always verify safety, installation, compatibility, and current UI details against the original manufacturer documentation before operational use.
Cellular Sensor
Alarm.com Flex IO® sensor - Installation Guide
GoSafer Security Knowledge Base
This operational reference is organized for GoSafer Security customers and staff. Alarm.com product names are retained where required for technical accuracy.
Overview
This is primarily a video or reference page. Open the original article link below for the current content.
Platform
Customer Website
Content type
Troubleshooting
Source last updated
2025-06-04
Procedure
Step-by-step guide: Screenshots and videos are placed with the instruction they illustrate.
Overview
The Alarm.com Flex IO® sensor enables new levels of flexibility for monitoring valuable property and assets anywhere that LTE connectivity is available. Whether used with a backyard gate or a remote storage unit, the Alarm.com Flex IO® sensor empowers users to keep an eye on what matters most. It can be used with the included magnet to monitor doors, gates, and other entryways.
Important: The Alarm.com Flex IO® sensor is an awareness device that is not intended for life safety use cases.
Follow the on-screen instructions to set up the device. The install wizard will take you through the steps outlined in the following expandable sections.
Using the GoSafer Security customer portal (powered by Alarm.com):
Log in to the GoSafer Security customer portal (powered by Alarm.com).
Tap Settings.
Tap Manage Devices.
Tap Add Device.
Tap Flex Sensor.
Follow the on-screen instructions to set up the device. The install wizard will take you through the steps outlined in the following expandable sections.
Expand all
Enter the device serial numberIcn Chevron Up
The device serial number is printed inside the battery compartment as shown in the following image.
Flex IMEI location
Insert the batteriesIcn Chevron Up
Remove the front card.
Install the included batteries.
Close the battery compartment door, and tighten the screw securely.
Make sure the battery door screw is securely tightened to clear the battery door tamper. This will also ensure a waterproof seal.
If this screw is not fully tightened, the LED will show a single red blink every 2 seconds.
Caution: Be careful to not over-torque the screw. Power tools should be avoided.
Note: Throughout the installation process the LED will start blinking at multiple intervals. This is normal.
Battery compartment
Battery compatibility
Lithium batteries are required for this device. Under normal conditions, battery life is expected to be 2 years.
Any 1.5 V lithium battery should work. Alkaline batteries or any battery greater than 1.5 V (e.g., the Saft 3.6 V) should not be used.
Note: If batteries are not installed, a Low Battery trouble condition appears on the account.
Name your sensorIcn Chevron Up
Give your Alarm.com Flex IO® sensor device a name to help you identify it (e.g., Shed or Fence).
Check for device signalIcn Chevron Up
To check for device signal:
Bring the sensor to the location you would like to install it.
Press the tamper button to check the signal. This tamper button must be fully pressed (until you hear a clicking sound).
The install wizard will look for the device signal.
A Success message should appear if successful.
If unable to get a signal from your device, try again. If you continue to experience issues, contact flexsupport@alarm.com for additional support.
Flex IO tamper
Select magnet positionIcn Chevron Up
Like a standard door/window contact, the Alarm.com Flex IO® sensor can be installed with the accompanying magnet to detect activity at potential entryways.
To determine your installation orientation, consider the following:
Three separate magnet positions are available. Only one magnet position can be active at a time.
Use the tick marks on the sides of the device for guidance:
| = Position 1
|| = Position 2
||| = Position 3
The magnet should be positioned no more than 1.25 inches from the device.
Flex magnet positions
In the following example photo, Position 1 would be selected since the magnet is to the left of the sensor.
If Position 2 or 3 were selected, the sensor would not accurately report when the door opens/closes.
Flex IO example
Mounting options and installationIcn Chevron Up
The Alarm.com Flex IO® sensor can be mounted using either screws or zip ties.
Important: A mounting tamper is located on the back of the Alarm.com Flex IO® sensor. This tamper button must be fully pressed (until you hear a clicking sound) to avoid reporting a mounting tamper malfunction.
If using screws:
Remove batteries to avoid damage to the batteries. Screw mounting holes are located in the battery compartment.
Use two #8 Phillips screws to puncture the gasket and securely mount the Alarm.com Flex IO® sensor.
Take care not to over-torque the screws. Power tools should be avoided. If pilot holes are necessary, a drill bit size of 5/64’’ is recommended.
Once mounted, insert the batteries and close the battery door.
Flex IO Mounting Screw Locations
If using zip ties:
The batteries and battery cover can remain installed.
Use the zip tie grooves at the top and bottom of the Alarm.com Flex IO® sensor to ensure a secure installation so that the Alarm.com Flex IO® sensor is mounted flush to the surface. The magnet also has a zip tie groove across the center.
Zip ties should have a maximum width of 0.34 inches. UV resistant zip ties are recommended.
To establish the connection with your Flex, open the battery door and close it tightly.
Flex IO Zip Tie mounting
Sensor test Icn Chevron Up
Verify that your magnet is in closed position.
Magnet closed
Open the magnet to trigger the sensor. The LED should blink yellow twice when the device is tripped. This prompts the Alarm.com Flex IO® sensor to communicate.
The install wizard will verify if your device is working properly. If there are no errors, the sensor installation is now successfully complete.
Magnet opened
If you receive a Mounting Tamper Error:
Ensure the mounting tamper is fully pressed against a surface, and then click Try Again.
You will hear a clicking sound when the tamper button is fully pressed. A mounting tamper is also indicated by an alternating single Red and Yellow LED pattern.
If this is not possible, you can also disable the mounting tamper error by disabling the Mounting Tamper Error Enabled toggle switch.
Flex IO tamper
If you receive a Battery Door Error:
Verify the battery door is screwed closed otherwise water damage may occur.
Ensure the magnet is in closed position, open the magnet to trigger the sensor, and then click Try Again.
Flex battery door
If you receive a Communication Error:
Verify the magnet is less than 1.25 inches away from the Alarm.com Flex IO® sensor.
Move the magnet and Alarm.com Flex IO® sensor closer to each other, and then click Try Again.
Flex and magnet distance
Post-Installation Checklist
The Alarm.com Flex IO® sensor is installed flush to the mounting surface. If the mounting tamper is enabled, the tamper button on the back of the device should be pressed in.
The LED is not blinking. The only LED activity should occur when the device is activated, which should result in 2 yellow blinks.
Device activations are being reported in the history on the website and app.
Cellular signal strength
Cellular signal strength can be checked using the following steps.
Using a screwdriver, remove the battery door. Leave the battery cover off. The device LED should now be active.
Hold the Alarm.com Flex IO® sensor in the installation location.
Using a paper clip, push the diagnostic button for 5 seconds, then release. The device LED should now be active.
Once diagnostic mode is initiated, the LED will display the cell signal strength in a continuous loop for 2 minutes based on the patterns below. It may take up to 30 seconds for the signal strength to be acquired.
As you move the device, any changes in signal strength will be displayed by updates to the LED pattern. A signal strength of 2 bars or greater is recommended.
Battery life will be optimal between temperatures of 32°F to 131°F (0°C to 55°C), though the device can operate from -40°F to 131°F (-40°C to 55°C).
Reed Switches
3 unique reed switch locations to choose from that can be activated with included magnet.
Loop Input
The Alarm.com Flex IO® sensor can be powered by battery or external power.
Dry Contact, Normally Open (NO), or Normally Closed (NC).
Optional EOL resistor can be 300 kΩ or higher.
Relay Output
If used, the Alarm.com Flex IO® sensor must be externally powered (not compatible with battery power).
Up to 24 V (AC or DC), 40 mA max current.
Can be used only for control lines/dry contact.
Caution: Can never be connected directly to control electrical loads. This will damage the device.
Dimensions
Main unit: 6.8 x 2.2 x 1.3" (17.3 x 5.6 x 3.3 cm).
Magnet: 3.1 x 0.68 x 0.87" (7.9 x 1.7 x 2.2 cm).
Power
Works with DC-wired power or battery power (battery backup recommended for wired installations).
Supply Voltage: 6 to 15 VDC
Device Max Current Draw: 500 mA
Max Power Consumption: Up to 7.5 W (at 15 VDC)
Battery Power
Four 1.5 V AA lithium batteries (iron disulfide).
2+ years of battery life, depending on battery chemistry and operating temperature.
Maximum Installation Height
2000 meters above ground level
Regulatory InformationIcn Chevron Up
Important: The Alarm.com Flex IO® sensor is a monitoring device that is not intended for life safety use cases.
FCC
This device complies with Part 15 of the FCC Rules. Operation is subject to the following two conditions:
this device may not cause harmful interference, and
this device must accept any interference received, including interference that may cause undesired operation.
Changes or modifications not expressly approved by the manufacturer could void the user’s authority to operate the equipment.
Note: This equipment has been tested and found to comply with the limits for a Class B digital device, pursuant to Part 15 of the FCC Rules. These limits are designed to provide reasonable protection against harmful interference in a residential installation. This equipment generates, uses and can radiate radio frequency energy and, if not installed and used in accordance with the instructions, may cause harmful interference to radio communications. However, there is no guarantee that interference will not occur in a particular installation. If this equipment does cause harmful interference to radio or television reception, which can be determined by turning the equipment off and on, the user is encouraged to try to correct the interference by one or more of the following measures:
Reorient or relocate the receiving antenna.
Increase the separation between the equipment and receiver.
Connect the equipment into an outlet on a circuit different from that to which the receiver is connected.
Consult the dealer or an experienced radio/TV technician for help.
ISED
This device contains licence-exempt transmitters(s)/receiver(s) that comply with Innovation, Science and Economic Development Canada’s licence-exempt RSS(s). Operation is subject to the following two conditions:
This device may not cause interference.
This device must accept any interference, including interference that may cause undesired operation of the device.
Cet appareil contient des émetteurs/récepteurs exemptés de licence conformes à la norme Innovation, Sciences, et Développement économique Canada. L'exploitation est autorisée aux deux conditions suivantes:
L'appareil ne doit pas produire de brouillage.
L'utilisateur de l'appareil doit accepter tout brouillage radioélectrique subi, même si le brouillage est susceptible d'en compromettre le fonctionnement.
Contact Information
If you are experiencing difficulties with an Alarm.com Flex IO® sensor installation, contact flexsupport@alarm.com and we’ll be happy to assist you further.
Always verify safety, installation, compatibility, and current UI details against the original manufacturer documentation before operational use.
Cellular Sensor
Alarm.com Flex IO® sensor - LED Patterns and Troubleshooting
GoSafer Security Knowledge Base
This operational reference is organized for GoSafer Security customers and staff. Alarm.com product names are retained where required for technical accuracy.
Overview
The following table displays what the red and yellow LEDs indicate on the Alarm.com Flex IO® sensor.
Platform
General / Device
Content type
Troubleshooting
Source last updated
2023-11-15
Procedure
Step-by-step guide: Screenshots and videos are placed with the instruction they illustrate.
The following table displays what the red and yellow LEDs indicate on the Alarm.com Flex IO® sensor.
Always verify safety, installation, compatibility, and current UI details against the original manufacturer documentation before operational use.
Cellular Sensor
Alarm.com Flex IO® sensor - Supported Use Cases
GoSafer Security Knowledge Base
This operational reference is organized for GoSafer Security customers and staff. Alarm.com product names are retained where required for technical accuracy.
Overview
The following table describes some use cases for Alarm.com Flex IO® sensor. Note: The Alarm.com Flex IO® sensor is designed to self-monitor property and assets. The Alarm.com Flex IO® sensor does not report alarms to a monitoring station.
Platform
General / Device
Content type
FAQ / Explanation
Source last updated
2024-05-24
Procedure
Step-by-step guide: Screenshots and videos are placed with the instruction they illustrate.
The following table describes some use cases for Alarm.com Flex IO® sensor.
Note: The Alarm.com Flex IO® sensor is designed to self-monitor property and assets. The Alarm.com Flex IO® sensor does not report alarms to a monitoring station.
How will the Alarm.com Flex IO® sensor be used?
Example Applications
Contact Sensor allows you to use the Flex and built-in reed switch to monitor if something is opened or closed.
Shed Doors
Storage Units
Chicken Coop
Fences
Delivery Boxes
RV Doors
Wired Contact Sensor allows you to wire a contact sensor to the Flex using the loop input terminal.
Install the Flex IO in a discrete and convenient location and wire the sensor to your door, window, or entry point
Pull-Apart Sensor allows you to use the Flex with a pull-apart or Magnapull sensor. This could be used to determine if something is moved from its location.
Lawn Mowers
Yard Decorations
Jet Skis
Boat Lifts
Motorcycles Machinery
Gate Control allows you to use the Flex with a compatible gate controller.
Install the Flex IO to allow users to open their gate using Alarm.com.
Important: Remote open commands require powered gates in the auto-close configuration.
Virtual sensor integrated with an IQ panel
Install the Flex IO to integrate with a Qolsys IQ security panel.
Always verify safety, installation, compatibility, and current UI details against the original manufacturer documentation before operational use.
Cellular Sensor
Can an Alarm.com Flex IO® sensor be installed in a mobile home, trailer, or RV?
GoSafer Security Knowledge Base
This operational reference is organized for GoSafer Security customers and staff. Alarm.com product names are retained where required for technical accuracy.
Overview
The Alarm.com Flex IO® sensor can be used in mobile or moving applications, but reliable operation depends on adequate cellular signal strength in all locations where the sensor travels.
Platform
General / Device
Content type
FAQ / Explanation
Source last updated
2026-03-06
Procedure
Yes. However, this would be subject to the signal strength of the device at all locations that the Alarm.com Flex IO® sensor could travel to.
For more information about the cellular network the Alarm.com Flex IO® sensor uses, see What is the CAT-M Cellular Network?.
Always verify safety, installation, compatibility, and current UI details against the original manufacturer documentation before operational use.
Cellular Sensor
Can an Alarm.com Flex IO® sensor report alarms to a monitoring station when opened?
GoSafer Security Knowledge Base
This operational reference is organized for GoSafer Security customers and staff. Alarm.com product names are retained where required for technical accuracy.
Overview
No. The Alarm.com Flex IO® sensor is designed for property awareness only and cannot forward signals to a monitoring station.
Platform
General / Device
Content type
How-to / Configuration
Source last updated
2022-01-21
Procedure
No. The Alarm.com Flex IO® sensor is designed for property awareness only and cannot forward signals to a monitoring station.
To self-monitor the Alarm.com Flex IO® sensor, set up sensor activity monitoring notifications for sensor openings. For more information about setting up notifications, see Create a notification for an Alarm.com Flex IO® sensor.
If the customer also has video cameras, an automation rule can be created to trigger a recording when the Alarm.com Flex IO® sensor is opened. For more information about setting up video recording rules, see Create a video clip recording rule for an Alarm.com Flex IO® sensor.
Always verify safety, installation, compatibility, and current UI details against the original manufacturer documentation before operational use.
Cellular Sensor
What are the battery power options and requirements for an Alarm.com Flex IO® sensor?
GoSafer Security Knowledge Base
This operational reference is organized for GoSafer Security customers and staff. Alarm.com product names are retained where required for technical accuracy.
Overview
The Alarm.com Flex IO® sensor uses four 1.5V AA lithium batteries. These batteries are included in the box. Under normal conditions, battery life is expected to be 2 years.
Caution: Alkaline batteries or any battery greater than 1.5 V (e.g., the Saft 3.6 V) should not be used.
The Alarm.com Flex IO® sensor device will only be awake when there is activity on the Alarm.com Flex IO® sensor contact sensor. The Alarm.com Flex IO® sensor only communicates sensor status updates one-way to the Alarm.com cloud, and does not receive any commands.
Platform
General / Device
Content type
How-to / Configuration
Source last updated
2023-11-15
Procedure
The Alarm.com Flex IO® sensor uses four 1.5V AA lithium batteries. These batteries are included in the box. Under normal conditions, battery life is expected to be 2 years.
Caution: Alkaline batteries or any battery greater than 1.5 V (e.g., the Saft 3.6 V) should not be used.
The Alarm.com Flex IO® sensor device will only be awake when there is activity on the Alarm.com Flex IO® sensor contact sensor. The Alarm.com Flex IO® sensor only communicates sensor status updates one-way to the Alarm.com cloud, and does not receive any commands.
Note: If batteries are not installed, a Low Battery trouble condition appears.
For more information about installation, see Alarm.com Flex IO® sensor - Installation Guide.
Always verify safety, installation, compatibility, and current UI details against the original manufacturer documentation before operational use.
Cellular Sensor
What is a battery tamper and mounting tamper?
GoSafer Security Knowledge Base
This operational reference is organized for GoSafer Security customers and staff. Alarm.com product names are retained where required for technical accuracy.
Overview
The Alarm.com Flex IO® sensor has two tamper switches-a battery tamper and a mounting tamper.
The following table outlines how each tamper is triggered, resolved, and what LEDs flash locally to report it.
Alarm.com Flex IO® sensor tampers can be enabled/disabled during the Flex DIY Wizard Installation process. For more information, see Alarm.com Flex IO® sensor - Installation Guide.
Platform
General / Device
Content type
How-to / Configuration
Source last updated
2023-11-15
Procedure
Step-by-step guide: Screenshots and videos are placed with the instruction they illustrate.
The Alarm.com Flex IO® sensor has two tamper switches-a battery tamper and a mounting tamper.
The following table outlines how each tamper is triggered, resolved, and what LEDs flash locally to report it.
Tamper type
How it's triggered
How to resolve
LED report
Battery tamper
Triggers anytime the battery door is open
The battery door must be fully screwed down
1 red blink every 2 seconds
Mounting tamper
Triggers if the device is moved from its mounted location
Note: The tamper is located on the back of the device
The tamper button must be fully pressed (until a clicking sound is heard)
Always verify safety, installation, compatibility, and current UI details against the original manufacturer documentation before operational use.
Cellular Sensor
What is the Cat-M cellular network?
GoSafer Security Knowledge Base
This operational reference is organized for GoSafer Security customers and staff. Alarm.com product names are retained where required for technical accuracy.
Overview
The Cat-M network is a portion of the LTE cellular network, dedicated to low-power Internet of Things (IoT) devices. Compared to traditional (Cat-1) LTE, it has a smaller bandwidth and slower upload speeds but is capable of handling significantly more devices through its unique way of controlling traffic on the cell towers.
One of the primary advantages of Cat-M is that it utilizes flexible power-saving modes to drastically increase the battery life of devices. For example, Cat-M devices like Alarm.com Flex IO® sensors communicate over the cellular network when needed (for example, when the sensor is opened or closed, tampered with, or has a low battery) and conserve power when the device is idle.
Note: Alarm.com Flex IO® sensors are currently only available on CAT-M Verizon and CAT-M AT&T.
Platform
General / Device
Content type
FAQ / Explanation
Source last updated
2023-11-15
Procedure
The Cat-M network is a portion of the LTE cellular network, dedicated to low-power Internet of Things (IoT) devices. Compared to traditional (Cat-1) LTE, it has a smaller bandwidth and slower upload speeds but is capable of handling significantly more devices through its unique way of controlling traffic on the cell towers.
One of the primary advantages of Cat-M is that it utilizes flexible power-saving modes to drastically increase the battery life of devices. For example, Cat-M devices like Alarm.com Flex IO® sensors communicate over the cellular network when needed (for example, when the sensor is opened or closed, tampered with, or has a low battery) and conserve power when the device is idle.
Note: Alarm.com Flex IO® sensors are currently only available on CAT-M Verizon and CAT-M AT&T.
Always verify safety, installation, compatibility, and current UI details against the original manufacturer documentation before operational use.
Commercial
GoSafer Security procedures and references for Commercial.
Commercial
Commercial
GoSafer Security Knowledge Base
This operational reference is organized for GoSafer Security customers and staff. Alarm.com product names are retained where required for technical accuracy.
Overview
This GoSafer Security section brings together resources for Commercial, including setup, configuration, everyday use, and troubleshooting. Choose the related page that matches your device, feature, or task, and follow the current manufacturer guidance linked on that page.
Platform
Customer Website
Content type
Troubleshooting
Source last updated
2024-10-18
Procedure
Browse the related pages in this chapter to open the specific procedure, configuration guide, or troubleshooting article you need.
Always verify safety, installation, compatibility, and current UI details against the original manufacturer documentation before operational use.
Commercial
Access Control
GoSafer Security Knowledge Base
This operational reference is organized for GoSafer Security customers and staff. Alarm.com product names are retained where required for technical accuracy.
Overview
This GoSafer Security section brings together resources for Access Control, including setup, configuration, everyday use, and troubleshooting. Choose the related page that matches your device, feature, or task, and follow the current manufacturer guidance linked on that page.
Platform
App + Web
Content type
Troubleshooting
Source last updated
2023-04-05
Procedure
Browse the related pages in this chapter to open the specific procedure, configuration guide, or troubleshooting article you need.
Always verify safety, installation, compatibility, and current UI details against the original manufacturer documentation before operational use.
Commercial
Access Control Mobile Credentials
GoSafer Security Knowledge Base
This operational reference is organized for GoSafer Security customers and staff. Alarm.com product names are retained where required for technical accuracy.
Overview
Smarter Access Control supports mobile credentials, enabling you to use your smartphone to access doors instead of carrying a separate badge or key fob. Using mobile credentials saves time, money, and eliminates the need to manage separate physical credentials, which are easier to misplace or steal. Mobile credentials are exclusively supported by Alarm.com Access Control readers.
Platform
App + Web
Content type
How-to / Configuration
Source last updated
2025-06-04
Procedure
Step-by-step guide: Screenshots and videos are placed with the instruction they illustrate.
Smarter Access Control supports mobile credentials, enabling you to use your smartphone to access doors instead of carrying a separate badge or key fob. Using mobile credentials saves time, money, and eliminates the need to manage separate physical credentials, which are easier to misplace or steal. Mobile credentials are exclusively supported by Alarm.com Access Control readers.
Requirements
An Access Control account with Alarm.com will require the Mobile Credentials service plan add-on
Up to 2,500 mobile credentials maximum per account
An Alarm.com Access Control Reader
The Alarm.com app downloaded on the user's device
Note: A Mobile Credential user is not required to have a login or be logged into the Alarm.com app.
Assign a mobile credential
Mobile credentials can be assigned using the Alarm.com app or website.
Expand all
To assign a mobile credential to a user using the app:Icn Chevron Down
Note: When adding new user credentials, allow 2 minutes after the last user credential change is made for changes to go into effect. When revoking a user's access, the change goes into effect immediately after saving.
Log in to the app.
Tap Icn Menu .
Tap User Access.
Tap Icn Chevron Down next to Access Plans.
Tap Users.
Add a new user or edit an existing one.
To add a new user, tap Add.
To edit an existing user, tap Icn More H, then tap Icn Edit.
Tap Add Credential.
Note: If there are already credentials associated with the user, click Add.
In More Options, tap Mobile Credential to set the user's required credentials.
Select either an email or SMS text invitation.
Note: If the user does not have a valid email or phone number, follow the steps to add contact information to the user.
Select the Access Plans the user will be a part of from this page. Alternatively, a user can be added to the desired plan on the Access Plans page.
Once an invite has been sent, you will see a banner displaying the status of the mobile credential. You can also select Resend if needed.
To assign a mobile credential to a user using the website:Icn Chevron Down
Note: When adding new user credentials, allow 2 minutes after the last user credential change is made for changes to go into effect. When revoking a user's access, the change goes into effect immediately after saving.
Log in to the website.
Click User Access.
Click Users.
Add a new user or edit an existing one.
To add a new user, click Add User.
To edit an existing user, click Icn More H, then click Icn Edit.
Click Add Credential.
Note: If there are already credentials associated with the user, click Add.
Click Mobile Credential to start the Mobile Credential invitation process.
Select either an email or SMS text invitation.
Note: If the user does not have a valid email or phone number, follow the steps to add contact information to the user.
Select the Access Plans the user will be a part of from this page. Alternatively, a user can be added to the desired plan on the Access Plans page.
Once an invite has been sent, you will see a banner displaying the status of the mobile credential. You can also select Resend if needed.
Accept a mobile credential invitation and begin using the mobile credential
A mobile credential invitation and Alarm.com app can be used to begin using a mobile credential.
To accept a mobile credential invitation and begin using the mobile credential:Icn Chevron Down
When the invitation is received, follow the instructions in the invite to download and install the Alarm.com app.
Email invitation
Once the app is installed and the invite is accepted, a mobile credential screen or a Wallet menu (if the user is logged in to a system) will become available.
Using your badge
After accepting the mobile credential invitation, allow 2 minutes for access plan processing before attempting to use it on an Access Control door.
Refer to the examples below as there may be a minimum distance requirement depending on the operating system used by your mobile device (i.e., Android or iOS):
Android NFC:
NFCLockedNFCUnlocked
iOS Bluetooth:
BluetoothLockedBluetooth Unlocked
Delete a mobile credential
Mobile credentials can be deleted using the Alarm.com app or website.
To delete a mobile credential to a user using the app:Icn Chevron Down
Log in to the app.
Tap Icn Menu .
Tap User Access.
Tap Icn Chevron Down next to Access Plans.
Tap Users.
Select the desired user.
Tap Mobile Credential.
In More Options, tap Delete.
To delete a mobile credential to a user using the website:Icn Chevron Down
Log in to the website.
Click User Access.
Click Users.
Select the desired user.
Click Mobile Credential.
Click Delete.
Frequently asked questions
General Questions
Can I add or remove Mobile Credentials using Bulk User Management?Icn Chevron Down
Yes. Mobile Credentials can be added or removed using Bulk User Management.
Mobile credentials enable you to use your mobile device to gain entry to an Access Control door with a supported Alarm.com reader.
How do I use my mobile credentials?Icn Chevron Down
After accepting the mobile credential invitation, your Android or iOS device can be used by tapping it on the reader just like a physical badge. Make sure NFC (for Android devices) or Bluetooth (for iOS devices) is enabled on your device. For more information about iOS devices, see For iOS. For more information about Android devices, see For Android.
When can I start using my mobile credential?Icn Chevron Down
After accepting the mobile credential invitation, allow 2 minutes for access plan processing before attempting to use it with an Access Control door.
Can I use my mobile credential to trigger a double swipe rule?Icn Chevron Down
No. A mobile credential cannot trigger a double swipe rule.
Can I use my mobile credential in place of a badge for a reader with a Badge + Pin requirement?Icn Chevron Down
Yes. A mobile credential can be used in place of a badge for a Badge + Pin requirement.
Note: A mobile credential essentially acts as a card, so you will not be able to use a mobile credential in place of a pin code.
Will my mobile credential still work if I delete and reinstall the Alarm.com app?Icn Chevron Down
No. Deleting the app will remove the mobile credential from your phone. If the app gets deleted after a mobile credential has been accepted, the administrator will need to delete the user's mobile credential on the website and then resend a new mobile credential invitation.
What happens if I change phones?Icn Chevron Down
If a user change phones, their mobile credential will no longer work. The administrator will need to delete the user's mobile credential on the website and then resend a new mobile credential invitation.
For iOS
Do I need to open the Alarm.com app to use my mobile credential?Icn Chevron Down
No. You do not need to open the app when using your mobile credential. However, the app must be running in the background on your device.
Do I need to unlock the phone to use my mobile credential?Icn Chevron Down
No. You do not need to unlock your phone to use your mobile credential as long as the app is running in the background.
How do I enable Bluetooth?Icn Chevron Down
Tap the Settings icon.
Tap Privacy.
Tap Bluetooth.
Tap the toggle switch next to the app to enable Bluetooth.
What version of iOS is needed to support mobile credentials?Icn Chevron Down
Any version of iOS as long as the device supports Bluetooth.
For Android
Do I need to open the Alarm.com app to use my mobile credential?Icn Chevron Down
No. You do not need to open the app to use your mobile credential. Your mobile credential will continue to work even if you close the app.
Do I need to unlock my phone to use my mobile credential?Icn Chevron Down
No. You do not need to unlock your phone to use your mobile credential. However, if you have Secure NFC enabled, you may need the screen to be turned on for your mobile credential to work.
Why am I not able to use my mobile credential when my screen is off?Icn Chevron Down
Certain phone models with Android 10 or higher have a Secure NFC setting which requires the screen to be on for NFC to work.
What version of Android is needed to support mobile credentials?Icn Chevron Down
Any version of Android as long as the device supports either Bluetooth or NFC.
What if my Android phone does not have NFC?Icn Chevron Down
You can still use your mobile credential if your device supports Bluetooth.
Always verify safety, installation, compatibility, and current UI details against the original manufacturer documentation before operational use.
Commercial
Access Control System Overview
GoSafer Security Knowledge Base
This operational reference is organized for GoSafer Security customers and staff. Alarm.com product names are retained where required for technical accuracy.
Overview
Smarter Access Control is a powerful, cloud-based access solution designed for small and medium-sized businesses. Businesses can now take advantage of powerful user management software, remote door control, and scan-to-add card serial detection all from the user-friendly GoSafer Security customer portal (powered by Alarm.com) and Alarm.com app.
Smarter Access Control can be installed as a standalone system or as an integrated solution with other intrusion and video offerings. With easy-to-create access plans and simple user management, you can automate your system using rules to reduce hassle and set up notifications so you always know who comes in and when.
Platform
App + Web
Content type
Reference
Source last updated
2025-06-19
Procedure
Step-by-step guide: Screenshots and videos are placed with the instruction they illustrate.
Smarter Access Control is a powerful, cloud-based access solution designed for small and medium-sized businesses. Businesses can now take advantage of powerful user management software, remote door control, and scan-to-add card serial detection all from the user-friendly GoSafer Security customer portal (powered by Alarm.com) and Alarm.com app.
Smarter Access Control can be installed as a standalone system or as an integrated solution with other intrusion and video offerings. With easy-to-create access plans and simple user management, you can automate your system using rules to reduce hassle and set up notifications so you always know who comes in and when.
System Overview
The most commonly used Access Control features are available on the Home page and User Access tab of the GoSafer Security customer portal (powered by Alarm.com) and Alarm.com app.
Home page
The Home page provides quick access to real-time door control, Scenes, and account activity.
Home page (Customer Site)
Real-time door control allows you to lock, unlock, and temporarily buzz open doors. Navigate to the Access Points (called Doors in standalone Access Control systems) card on the home screen to control your doors.
Select a door
View current status
User Access tab
The User Access tab is where the configuration of the system takes place. Sub-tabs are available for Access Plans, Users, Access Points, and Manage Logins.
Always verify safety, installation, compatibility, and current UI details against the original manufacturer documentation before operational use.
Commercial
Access Control door status displays as "Unknown" on the website and app
GoSafer Security Knowledge Base
This operational reference is organized for GoSafer Security customers and staff. Alarm.com product names are retained where required for technical accuracy.
Overview
The door status will display as Unknown if the door has been unable to communicate with its parent controller. This could be due to a network interruption or an issue with the controller's configuration.
[Unknown Door Status]
Platform
Customer Website
Content type
How-to / Configuration
Source last updated
2023-10-30
Procedure
Step-by-step guide: Screenshots and videos are placed with the instruction they illustrate.
The door status will display as Unknown if the door has been unable to communicate with its parent controller. This could be due to a network interruption or an issue with the controller's configuration.
Unknown door status
How to resolve:
If the door does not come back online by itself, contact your service provider. The controller may need to be reset or reconfigured.
Always verify safety, installation, compatibility, and current UI details against the original manufacturer documentation before operational use.
Commercial
Assign an Access Control card, fob, or PIN to a user
GoSafer Security Knowledge Base
This operational reference is organized for GoSafer Security customers and staff. Alarm.com product names are retained where required for technical accuracy.
Overview
A card or PIN code can be assigned to a user using the app or website.
Platform
App + Web
Content type
How-to / Configuration
Source last updated
2025-06-04
Procedure
To assign a card, fob, or PIN to a user using the Alarm.com app
Note: When adding new user credentials, changes made to new or existing users go into effect 2 minutes after the last user credential change is made. When revoking a user's access, the change goes into effect immediately after saving.
Log in to the Alarm.com app.
Tap [Menu].
Tap User Access.
Tap [Down] next to Access Plans.
Tap Users.
Tap Add or tap [More Options] followed by [Edit] next to edit an existing user.
Tap Add Credential, then tap Access Badge or PIN to set the user's required credentials. A badge can be assigned by manually entering the badge number or by scanning it. A PIN can be assigned by entering the desired code.
Note: If there are already credentials associated with the user, tap [Add] to add more.
In Access Plans, tap Manage Access to select the desired Access Plans the user will be a part of. Alternatively, you can navigate back to the Access Plans page and add the user to the desired plan.
To assign a card, fob, or PIN to a user using the GoSafer Security customer portal (powered by Alarm.com)
Note: When adding new user credentials, changes made to new or existing users go into effect 2 minutes after the last user credential change is made. When revoking a user's access, the change goes into effect immediately after saving.
Log in to the GoSafer Security customer portal (powered by Alarm.com)
Click User Access.
Click Users.
Click Add User or click [More Options] followed by [Edit] next to edit an existing user.
Click Add Credential followed by Access Badge or PIN to set the user's required credentials. A badge can be assigned by manually entering the badge number or by scanning it. A PIN can be assigned by entering the desired code.
Note: If there are already credentials associated with the user, click [Add] to add more.
In Access Plans, click Manage Access to select the desired Access Plans the user will be a part of. Alternatively, you can navigate back to the Access Plans page and add the user to the desired plan.
Always verify safety, installation, compatibility, and current UI details against the original manufacturer documentation before operational use.
Commercial
Can I create a login that only has permissions to specific Access Control doors?
GoSafer Security Knowledge Base
This operational reference is organized for GoSafer Security customers and staff. Alarm.com product names are retained where required for technical accuracy.
Overview
Yes. Secondary user logins can be created for the Alarm.com app or GoSafer Security customer portal (powered by Alarm.com) that are only allowed to control specific Access Control doors or Access Control features.
Note: New user logins can only be created using the GoSafer Security customer portal (powered by Alarm.com).
Platform
App + Web
Content type
How-to / Configuration
Source last updated
2025-06-04
Procedure
Step-by-step guide: Screenshots and videos are placed with the instruction they illustrate.
Yes. Secondary user logins can be created for the Alarm.com app or GoSafer Security customer portal (powered by Alarm.com) that are only allowed to control specific Access Control doors or Access Control features.
Note: New user logins can only be created using the GoSafer Security customer portal (powered by Alarm.com).
Features
The Limited Device Access permission allows you to configure a secondary login to only have Alarm.com app or GoSafer Security customer portal (powered by Alarm.com) access to specific Access Control doors with the following functionality:
Access Control Real-Time Control
Full Control - Logins can only buzz open the selected Access Control doors.
Access Control Door Control
Read Only - Logins can view the current status of the selected access control doors and schedules.
Full Control - Logins can unlock, lock, and buzz open the selected access control doors. Logins with this Full Control option can also create and edit access control door schedules.
Note: Users with this Full Control permission are restricted from editing or saving rules. Additionally, users with Full Control are not able to view or edit schedules and rules from the Alarm.com app.
Limited Device Access
To create a login with Access Control only permissions:
Log in to the GoSafer Security customer portal (powered by Alarm.com).
Click User Access.
Click Manage Logins.
Click Add a Login.
In the Email Address field, enter the new user's email address.
In the Login Name field, enter the new user's desired login name.
Note: The user creating the login needs to contact the new user and tell them their login name, as this information is not included in the email for security reasons.
Using the Language Preference dropdown menu, select the new user's language preference.
Click Save.
On the Manage Login Permissions page, click to select Limited Device Access to create a login with limited permissions.
See Feature Details above for the specific functionality of each permission option.
Click Access Control.
Select the desired permission for the user.
Select Access Door Real-Time Control to allow the user to buzz open Access Control doors.
Using the Access Door Real-Time Control dropdown menu, select the doors the user has real-time permission to control.
Select Access Control Door Control to either restrict or provide additional access to the Access Control doors.
Using the Access Control Door Control dropdown menu, select either:
Read Only to allow the user to only view the current status of Access Control doors and schedules.
Full Control to allow the user to unlock, lock, and buzz open Access Control doors, and also create/edit Access Control door rules/schedules.
Note: Users with Full Control permission are restricted from editing or saving rules. Additionally, users with Full Control are not able to view or edit schedules and rules from the Alarm.com app.
Using the second Access Control Door Control dropdown menu, select the doors the user has permission to further control.
Click Save.
To edit an existing GoSafer Security customer portal (powered by Alarm.com) login to have Access Control only permissions:
Note: The primary login's permissions cannot be edited.
Log in to the GoSafer Security customer portal (powered by Alarm.com).
Click User Access.
Click Manage Logins.
Click to select the secondary login to edit.
On the Manage Login Permissions page, click to select Limited Device Access to create a login with limited permissions.
See Feature Details above for the specific functionality of each permission option.
Click Access Control.
Select the desired permission for the user.
Select Access Door Real-Time Control to allow the user to buzz open Access Control doors.
Using the Access Door Real-Time Control dropdown menu, select the doors the user has real-time permission to control.
Select Access Control Door Control to either restrict or provide additional access to the Access Control doors.
Using the Access Control Door Control dropdown menu, select either:
Read Only to allow the user to only view the current status of Access Control doors and schedules.
Full Control to allow the user to unlock, lock, and buzz open Access Control doors, and also create/edit Access Control door rules/schedules.
Note: Users with Full Control permission are restricted from editing or saving rules. Additionally, users with Full Control are not able to view or edit schedules and rules from the Alarm.com app.
Using the second Access Control Door Control dropdown menu, select the doors the user has permission to further control.
Always verify safety, installation, compatibility, and current UI details against the original manufacturer documentation before operational use.
Commercial
Can I create multiple daily time frames for an Access Control credential?
GoSafer Security Knowledge Base
This operational reference is organized for GoSafer Security customers and staff. Alarm.com product names are retained where required for technical accuracy.
Overview
Yes. Time frames for users to use their credentials can be set up using a rule and a schedule. Multiple time frames can be set up by creating an additional rule and schedule for each time frame.
For more information about access plans, see Manage Access Plans.
Platform
Customer Website
Content type
How-to / Configuration
Source last updated
2025-06-04
Procedure
Set up a time frame
A time frame can be set up by creating an Access Control rule to allow a user to access a door and then creating a schedule for the door to automatically lock if it is unlocked. A time frame can be set up using the GoSafer Security customer portal (powered by Alarm.com).
To set up a time frame
Log in to the GoSafer Security customer portal (powered by Alarm.com).
Create a rule.
Click Automation.
Click Add New Rule.
If there are various rule types available, click Event-triggered Rule.
In the Name of rule field, enter the desired name for the rule.
In Automate My, select Doors.
In When this event occurs, select Someone Accesses a Door.
Using the dropdown menu, select the desired users to have access.
In Select Devices, select the desired door(s).
In During these time frames, select Only during the following times.
Select the desired time frame for the user to have access.
Note: A separate rule must be created for each time daily time frame.
Click Save.
Create a schedule.
Click Automation.
Click Schedules.
Click Add New Schedule.
If there are various rule types available, click Lock/Unlock Schedule.
In the Schedule Name field, enter the desired name for the schedule.
In Select Doors, select the desired door(s).
In Choose Schedule Type, select Create a customer schedule.
In On These Days, select the desired days for the schedule.
Using the First dropdown menu, select Lock.
Select the desired time for the door(s) to lock.
Note: A separate schedule must be created to have the schedule run at multiple times during a day.
Using the Then dropdown menu, select Leave Locked.
Always verify safety, installation, compatibility, and current UI details against the original manufacturer documentation before operational use.
Commercial
Can I schedule panel or Z-Wave lock codes on an Access Control account?
GoSafer Security Knowledge Base
This operational reference is organized for GoSafer Security customers and staff. Alarm.com product names are retained where required for technical accuracy.
Overview
Yes. However, this is only possible when the panel or Z-Wave lock's PIN code is managed through a Personal Access Plan.
When using a standard Access Plan to manage multiple users, panel and Z-Wave pin codes cannot be scheduled and will allow 24/7 access. This occurs regardless of what the standard Access Plan schedule says due to scheduling incompatibilities between Z-Wave locks, panels, and Access Control doors.
For more information about personal access plans, see What is a Personal Access Plan?.
Platform
General / Device
Content type
FAQ / Explanation
Source last updated
2023-04-10
Procedure
Yes. However, this is only possible when the panel or Z-Wave lock's PIN code is managed through a Personal Access Plan.
When using a standard Access Plan to manage multiple users, panel and Z-Wave pin codes cannot be scheduled and will allow 24/7 access. This occurs regardless of what the standard Access Plan schedule says due to scheduling incompatibilities between Z-Wave locks, panels, and Access Control doors.
For more information about personal access plans, see What is a Personal Access Plan?.
Always verify safety, installation, compatibility, and current UI details against the original manufacturer documentation before operational use.
Commercial
Create an Access Control holiday schedule
GoSafer Security Knowledge Base
This operational reference is organized for GoSafer Security customers and staff. Alarm.com product names are retained where required for technical accuracy.
Overview
The Holiday Schedules feature allows users to pause specific Access Plans to prevent specific users entry to specific doors on the selected dates.
Platform
App + Web
Content type
How-to / Configuration
Source last updated
2026-04-22
Procedure
To create an Access Control holiday schedule using the Alarm.com app
Log in to the Alarm.com app.
Tap [Menu].
Tap User Access.
Tap Actions.
In Actions, tap Manage Holidays.
Tap Add.
In the Name field, enter the desired name for the holiday.
In Date, select the date of the holiday.
Tap Save.
In Access Plans to Pause, tap to select either option for any Access Plans
Active for plans to still have access during holidays.
Paused for plans that should not have access on holidays.
Tap Save.
To create an Access Control holiday schedule using the GoSafer Security customer portal (powered by Alarm.com)
Log in to the GoSafer Security customer portal (powered by Alarm.com).
Click User Access.
Click Access Plans.
Click Actions, then click Manage Holidays.
Click Add.
In the Name field, enter the desired name for the holiday.
Click [Date Picker], then select the date of the holiday.
Click Save.
In Access Plans to Pause, click to select either option for any Access Plans
Active for plans to still have access during holidays.
Paused for plans that should not have access on holidays.
Always verify safety, installation, compatibility, and current UI details against the original manufacturer documentation before operational use.
Commercial
Create an Arm Panel to Lock or Disarm to Unlock Access Control Doors rule
GoSafer Security Knowledge Base
This operational reference is organized for GoSafer Security customers and staff. Alarm.com product names are retained where required for technical accuracy.
Overview
The Arm Panel to Lock Access Control Doors rule allows you to automatically trigger selected Access Control doors to lock or unlock when the panel is armed/disarmed, saving time and providing peace of mind when closing the business each day.
It is recommended to have a double swipe to lock rule at every lock to ensure that the employee can still lock the doors locally if a controller is offline and the rule cannot run. For more information about creating these rules, see Create a Double Swipe to Lock/Unlock rule.
Important: The controller must be online for this rule to run.
Platform
App + Web
Content type
How-to / Configuration
Source last updated
2025-06-04
Procedure
To create an Arm Panel to Lock or Disarm to Unlock Access Control Doors rule using the Alarm.com app
Log in to the Alarm.com app.
Tap [Menu].
Tap Automation.
Tap [Add] to create a new rule.
Next to when, tap Select.
Tap Security Panel, then tap Next.
In Select Status, select Disarm, Armed Stay, or Armed Away, then tap Done.
Next to then, tap Select.
Tap Door, then tap Next.
Select the desired door(s) and action, then tap Done.
Enter the desired name for the rule.
If desired, next to Run at all times, tap Select to edit when the rule will run.
Tap to select At All Times for the rule will be carried out any time of day.
Tap to select Only during the following times to determine the specific days and times the rule will be carried out.
Tap to select the days the rule will be active.
Using the Starting at dropdown menu, tap the start time for this rule.
Using the Ending at dropdown menu, tap the end time for this rule.
After selecting times for the rule to run, tap Done.
Verify the rule is configured with the correct settings.
Tap Save.
To create an Arm Panel to Lock or Disarm to Unlock Access Control Doors rule using the GoSafer Security customer portal (powered by Alarm.com):
Log in to the GoSafer Security customer portal (powered by Alarm.com).
Click Automation.
In Rules, click Add New Rule.
Click when to select the trigger device and action.
Click Security Panel, then click Next.
In Select Status, select Disarm, Armed Stay, or Armed Away, then click Done.
Click then to select the automation device and trigger.
Click Door, then click Next.
Select the desired door(s) and action, then click Done.
Enter the desired name for the rule.
If desired, click Run at All Times to edit when the rule will run.
Click to select At All Times for the rule will be carried out any time of day.
Click to select Only during the following times to determine the specific days and times the rule will be carried out.
Click to select the days the rule will be active.
Using the Starting at dropdown menu, select the start time for this rule.
Using the Ending at dropdown menu, select the end time for this rule.
After selecting times for the rule to run, click Done.
Verify the rule is configured with the correct settings.
Always verify safety, installation, compatibility, and current UI details against the original manufacturer documentation before operational use.
Commercial
Create delayed or temporary Access Control credentials
GoSafer Security Knowledge Base
This operational reference is organized for GoSafer Security customers and staff. Alarm.com product names are retained where required for technical accuracy.
Overview
Access Control users have the ability to set Access Control credentials to apply between a specific date range, to end on a specific date for temporary users, or to create users with a set start date.
Platform
Customer Website
Content type
How-to / Configuration
Source last updated
2025-06-04
Procedure
To create delayed or temporary Access Control credentials
Log in to the GoSafer Security customer portal (powered by Alarm.com).
Click User Access.
Click Users.
Click Add User or click [More Options] followed by [Edit] to edit an existing user.
Enter the user's name and language preference (if required).
Click Add Credential.
Select Access Badge, PIN, or Mobile Credential.
Note: If Mobile Credential is not available, contact your service provider for additional assistance. For more information, see Access Control Mobile Credentials.
Click Access Period to set if and when the credentials will start and expire.
Click to deselect Credentials Never Expire.
Using the adjacent dropdown menu, select Select start and end date, Select start date only, or Select end date only.
Use the date pickers to select the desired dates.
Click Save.
Click User Group to select whether the desired user group.
Click Language Preference to adjust the user's notification language preference (default language is English).
Toggle the Extended Door Unlock feature on if the user requires a longer unlock time when they badge in.
Note: To modify the Extended Door Unlock timing, contact your service provider.
Click Add Contact to add the user's email or mobile contact information.
In Access Plans, click to select which Access Plan the user should be associated with.
Once the delayed or temporary credentials have been created, it is recommended to create a User Access Start/Expire notification. For more information, see Create User Access Start/Expire notifications.
Always verify safety, installation, compatibility, and current UI details against the original manufacturer documentation before operational use.
Commercial
Generate a User Summary Report for Access Control
GoSafer Security Knowledge Base
This operational reference is organized for GoSafer Security customers and staff. Alarm.com product names are retained where required for technical accuracy.
Overview
The User Summary Report for Access Control provides a list of all users alongside relevant information such as credentials, credential start date, credential end date (where applicable), Access Group,…
Platform
Customer Website
Content type
How-to / Configuration
Source last updated
2026-06-15
Procedure
To generate a User Summary Report for Access Control
Log in to the GoSafer Security customer portal (powered by Alarm.com).
Click Activity.
Click Reports.
Click New Report.
Click to select User Summary Report.
In the Report Name field, enter the desired name for the report.
In Include User Credentials, select Yes or No.
In Timeframe, select Yesterday, Last 7 Days, or Previous Month.
In Delivery Schedule, click to select Include a CSV version of the report if desired.
In Recipients, click Add to choose who will receive the report.
Click the entries in Address Book to be notified, or click New to add a new Address Book entry.
Click Close.
Verify the report is configured with the correct settings.
Always verify safety, installation, compatibility, and current UI details against the original manufacturer documentation before operational use.
Commercial
Generate an Access History Report
GoSafer Security Knowledge Base
This operational reference is organized for GoSafer Security customers and staff. Alarm.com product names are retained where required for technical accuracy.
Overview
An Access History Report provides expanded search and reporting parameters to make it easy for business managers to identify any door, area, or floor accessed by an employee.
Platform
App + Web
Content type
How-to / Configuration
Source last updated
2026-06-26
Procedure
To generate an Access History Report using the Alarm.com app
Log in to the Alarm.com app.
Tap [Menu].
Tap Reports.
Tap [Add].
Tap to select Access History Report.
In the Report Name field, enter the desired name for the report.
In Locations to include in the report, select All locations or Only the following locations.
In Include the following events in the report, select which events to include (e.g., Door Accessed, Door Held Open, etc.).
In Include User Information in CSV, tap Yes.
In Timeframe, select Yesterday, Last 7 Days, or Previous Month.
In Attachments, tap to select if you want the report to be delivered as a Web Link Only, PDF, or CSV file.
In Recipients, select who should receive the report.
Verify the report is configured with the correct settings.
Click Save.
To generate an Access History Report using the GoSafer Security customer portal (powered by Alarm.com)
Log in to the GoSafer Security customer portal (powered by Alarm.com).
Click Activity.
Click Reports.
Click New Report.
Click to select Access History Report.
In the Report Name field, enter the desired name for the report.
In Locations to include in the report, select All locations or Only the following locations.
In Include the following events in the report, select which events to include (e.g., Door Accessed, Door Held Open, etc.).
In Include User Information in CSV, click Yes.
In Timeframe, select Yesterday, Last 7 Days, or Previous Month.
In Attachments, click to select if you want the report to be delivered as a Web Link Only, PDF, or CSV file.
In Recipients, click Add to select who will receive the report.
Click the entries in Address Book to be notified, or click New to add a new Address Book entry.
Click Close.
Verify the report is configured with the correct settings.
Always verify safety, installation, compatibility, and current UI details against the original manufacturer documentation before operational use.
Commercial
Getting started with configuring Access Control User Access
GoSafer Security Knowledge Base
This operational reference is organized for GoSafer Security customers and staff. Alarm.com product names are retained where required for technical accuracy.
Overview
An Access Control account can be configured on the GoSafer Security customer portal (powered by Alarm.com) or Alarm.com app by following the guides below.
Note: For information about installing Access Control hardware, contact your service provider.
Platform
App + Web
Content type
Troubleshooting
Source last updated
2022-10-07
Procedure
Step-by-step guide: Screenshots and videos are placed with the instruction they illustrate.
An Access Control account can be configured on the GoSafer Security customer portal (powered by Alarm.com) or Alarm.com app by following the guides below.
Note: For information about installing Access Control hardware, contact your service provider.
Expand all
Access Control System Overview Icn Dropdown Arrow
Smarter Access Control is a powerful, cloud-based access solution designed for small and medium-sized businesses. Businesses can now take advantage of powerful user management software, remote door control, and scan-to-add card serial detection all from the user-friendly GoSafer Security customer portal (powered by Alarm.com) and Alarm.com app.
Smarter Access Control can be installed as a standalone system or as an integrated solution with other intrusion and video offerings. With easy-to-create access plans and simple user management, you can automate your system using rules to reduce hassle and set up notifications so you always know who comes in and when.
System Overview
The most commonly used Access Control features are available on the Home page and User Access tab of the GoSafer Security customer portal (powered by Alarm.com) and Alarm.com app.
Home page
The Home page provides quick access to real-time door control, Scenes, and account activity.
Home page (Customer Site)
Real-time door control allows you to lock, unlock, and temporarily buzz open doors. Navigate to the Access Points (called Doors in standalone Access Control systems) card on the home screen to control your doors.
Select a door
View current status
User Access tab
The User Access tab is where the configuration of the system takes place. Sub-tabs are available for Access Plans, Users, Access Points, and Manage Logins.
User Access tab (Customer site)
Add an Access Control Access Plan Icn Dropdown Arrow
Access Plans allow users to have access to specific doors at specific times. Access Plans can be managed using the Alarm.com app and GoSafer Security customer portal (powered by Alarm.com). For more information, see Add an Access Plan.
Advanced filters can be used to locate a specific user or subset of users. For more information, see Search for users with filters.
Note: Changes to User Access will be sent to the system after 2 minutes of inactivity on the page.
Access Plans Updated
Note: To view a list of all Access Plans, click List using the GoSafer Security customer portal (powered by Alarm.com) or tap Actions, then List Layout using the Alarm.com app.
Access Plan
An Access Plan consists of the following:
Timetable
Select the times the users in the plan can be granted entry to an access control door.
Note: Timetables can contain a maximum of 12 time blocks.
Users
Select which users will be allowed access to which access points and when.
Access Points
Select which doors will be part of the Access Plan. Panel, partition, and Z-Wave locks access can also be selected.
Note: Panel and Z-Wave lock access do not follow the timetable, and users will be able to use either 24/7.
Access Points
Schedules
Each day can have the same timetable or a unique schedule. Begin creating timetables by selecting one day of the week – the Edit Time Block window will appear. Choose the start and stop times, then schedules can be copied across other days using the Edit Time Block window if desired.
Note: Although you have the option of extending a timetable beyond a 24-hour period, it is a best practice to set the time block for the same day.
Managing holidays
Plans can also be paused on days when the business will not be open or employees do not need to access the business.
Navigate to the User Access page.
Click Manage Holidays.
Name the holiday, select its date from the calendar, then click Save.
Select which Access Plans you would like to pause on that date, then click Save.
Best practices
Identify Access Points and access credentials (badges or pin codes) before adding users and Access Plans to the account.
Quickly add new badges by scanning at a card reader using the Alarm.com app.
Focus each Access Plan on a common theme, such as employee type, door (access point), or schedule.
Each user must have the correct credential type for all Access Points in the plans they are added to. Before creating an Access Plan, verify that each user has the correct access credentials.
Add an Access Plan
Access Plans can be created from the User Access section of the Alarm.com app or GoSafer Security customer portal (powered by Alarm.com).
Expand all
To add an Access Plan using the Alarm.com app:Icn Chevron Down
Note: These instructions apply to single-system Access Plans. For information about Enterprise Access Plans, see What is an Enterprise Access Plan?.
Log in to the Alarm.com app.
Tap Icn Menu.
Tap User Access.
Tap Actions, then select Add New Plan.
Select an icon and enter a name for the Access Plan, then tap Next.
Tap Add Users.
Select which users to add to the plan, then tap Save.
Tap Add Access Points.
Select which Access Points to include in the plan, then tap Save.
Tap Add Schedule.
Select a schedule to apply to the plan, then tap Save.
Review the finalized Access Plan, then tap Save.
To add an Access Plan using the GoSafer Security customer portal (powered by Alarm.com):Icn Chevron Down
Note: These instructions apply to single-system Access Plans. For information about Enterprise Access Plans, see What is an Enterprise Access Plan?.
Log in to the GoSafer Security customer portal (powered by Alarm.com).
Click User Access.
Click Add New Plan.
Select an icon and enter a name for the Access Plan, then click Next.
Click Add Users.
Select which users to add to the plan, then click Save.
Click Add Access Points.
Select which Access Points to include in the plan, then click Save.
Click Add Schedule.
Select a schedule to apply to the plan, then click Save.
Review the finalized Access Plan, then click Save.
Search for users with filters
Filters can be used to search for a specific user or subset of users using the Alarm.com app or GoSafer Security customer portal (powered by Alarm.com).
The following advanced search filters are available to locate users:
Credentials
Search for users that have a badge, pin, or mobile credential.
Search by card credential number in the search bar to locate the card owner.
Contact Information
Search for users that have a mobile number or email address.
Access Periods
Search for users that have an expired credential or a future credential start date.
User Statuses
Search for users that are paused.
Search for users that use the extended unlock time feature.
Search for users that are Anti-Passback exempt.
Search for users that are a Mobile Credential user.
Access Points
Search for users that have access to the selected Access Point (i.e., Access Control door, panel partition, or Z-Wave lock).
User Groups
Search for users that are part of a specific User Group.
Access Plans
Search for users that are part of a specific Access Plan.
User Information
Search for users that have specific user information.
To search for users with filters using the Alarm.com app:Icn Chevron Up
Log in to the Alarm.com app.
Tap Icn Menu.
Tap User Access.
Tap Access Plans.
Tap Users.
Tap Icn Chevron Down.
Select the desired filters.
Once the desired filters are selected, tap out of the current dropdown to update the list.
To search for users with filters using the GoSafer Security customer portal (powered by Alarm.com):Icn Chevron Up
Log in to the GoSafer Security customer portal (powered by Alarm.com).
Click User Access.
Click Users.
Click Filter.
Select the desired filters.
Once the desired filters are selected, click out of the current dropdown to update the list.
Assign an Access Control card or PIN to a user Icn Dropdown Arrow
A card, fob, or PIN code can be assigned to a user using the Alarm.com app or GoSafer Security customer portal (powered by Alarm.com).
Important: Access Control hardware must be programmed and doors added to the account before cards, fobs, or pins can be added to users. For more information, contact your service provider.
To assign a card, fob, or PIN to a user using the Alarm.com app:Icn Chevron Up
Note: When adding new user credentials, changes made to new or existing users go into effect 2 minutes after the last user credential change is made. When revoking a user's access, the change goes into effect immediately after saving.
Log in to the Alarm.com app.
Tap Icn Menu.
Tap User Access.
Tap Down next to Access Plans.
Tap Users.
Tap Add or tap More options followed by Icn Edit next to edit an existing user.
Tap Add Credential, then tap Access Badge or PIN to set the user's required credentials. A badge can be assigned by manually entering the badge number or by scanning it. A PIN can be assigned by entering the desired code.
Note: If there are already credentials associated with the user, tap Add to add more.
In Access Plans, tap Manage Access to select the desired Access Plans the user will be a part of. Alternatively, you can navigate back to the Access Plans page and add the user to the desired plan.
To assign a card, fob, or PIN to a user using the GoSafer Security customer portal (powered by Alarm.com):Icn Chevron Up
Note: When adding new user credentials, changes made to new or existing users go into effect 2 minutes after the last user credential change is made. When revoking a user's access, the change goes into effect immediately after saving.
Log in to the GoSafer Security customer portal (powered by Alarm.com)
Click User Access.
Click Users.
Click Add User or click More options followed by Icn Edit next to edit an existing user.
Click Add Credential followed by Access Badge or PIN to set the user's required credentials. A badge can be assigned by manually entering the badge number or by scanning it. A PIN can be assigned by entering the desired code.
Note: If there are already credentials associated with the user, click Add to add more.
In Access Plans, click Manage Access to select the desired Access Plans the user will be a part of. Alternatively, you can navigate back to the Access Plans page and add the user to the desired plan.
Add Access Control users in bulk (optional) Icn Dropdown Arrow
Access Control users have the ability to upload users in bulk using a CSV file with appropriate column headers.
Important: Access Plan User Management must be enabled on the account to download users in bulk. If you are missing this option or would like more information, contact your service provider.
The default supported column headers are:
First Name
Last Name
Email (optional)
PIN Code (optional)
Access Card 1 (optional)
Access Card 2 (optional)
User Group (optional)
Access Start Date (MM/DD/YYYY) (optional)
Access End Date (MM/DD/YYYY) (optional)
Mobile Credential (optional)
Action (Create, Edit, or Delete) - (optional)
Note: The default action is Create.
If any users have one or more of the additional user information listed below, the Bulk User Download Template and Download Users CSV file will be updated to include a column for that user information.
Department
Desk number
Employee ID
Extension number
Hire Date
Job title
Location (i.e., HQ, Boston Office, Remote)
Hot stamp (i.e., the unique identifier printed on the Access Control credential)
Time type (i.e., Full time, Part time, contractor)
Office number
Company name
Termination date
Note: If updating an existing user using the Bulk Enrollment process, this will not overwrite or remove that user's current card credentials. Instead, it will add the new credential to the user alongside the previous, meaning both will be associated with that user's profile.
To add Access Control users in bulk:
Note: Due to the way Microsoft Excel handles values, any PIN code or card number starting with 0 will not display that leading zero by default. For more information about what this means and how to get around this issue, see Why does the Bulk User CSV file show a 3-digit PIN code?.
Log in to the GoSafer Security customer portal (powered by Alarm.com).
Click User Access.
Click Users.
Click to expand More.
Click Bulk User Management.
Once a CSV file has been created that matches the required file format, click Browse.
Select the CSV file.
Click Submit.
Note: Depending on how many users are included in the spreadsheet, it may take some time for them to appear on the GoSafer Security customer portal (powered by Alarm.com) and Alarm.com app.
Access Control File Format
How does the Mobile Credentials feature work with Bulk User Management?
When using Mobile Credentials on an Access Control account, a new column will be added to the Bulk User Management form.
For users with Yes in the Mobile Credential column, a valid email in the CSV, and no mobile credential currently assigned:
A Mobile Credential invite will be sent to the user's email.
For users with Yes in the Mobile Credential column and are already assigned a Mobile Credential:
No action is taken.
For users with Yes in the Mobile Credential column and an invalid email or no email in the CSV:
A warning is displayed that an invite will not be sent.
For users with No in the Mobile Credential column and are already assigned a Mobile Credential:
Their Mobile Credential will be deleted.
For users with No in the Mobile Credential column and no Mobile Credential assigned:
No action is taken.
Frequently asked questions
What can prevent users from being uploaded in bulk?
There are various factors that can prevent users from being uploaded in bulk:
Attempting to create a user that already exists
Attempting to delete a user that does not exist
Attempting to edit a user that does not exist
Uploading a file that contains exact first/last name duplication
The .csv file contains duplicate credentials or PINs
The upload is trying to create a user with a credential or pin that is already owned by an existing user at the same level
The upload edits a credential or PIN of an existing user to match another user on the same level
The headers are configured or spelled incorrectly
Note: A .csv template can be downloaded at the top of the Bulk User Management page.
Data exists outside of the supported columns
Create rules and automation schedules Icn Dropdown Arrow
The Smarter Access Control solution offers Access Plans, rules based on card swipes and other situations, schedules, and automation based on other devices.
Access Plans
Access Plans allow you to schedule when and which users can access specific Access Control doors. You can also select which users have panel or Z-Wave lock access. For more information about configuring an Access Plan, see Add an Access Control Access Plan.
Note: Security system and Z-Wave access cannot be scheduled on an Access Control account. Access Plans will continue to be followed while the door controller is without network connectivity.
Rules
Disarm on card swipe or PIN entry
Important: The account must be using an LTE module to use this rule.
Disarm on card swipe or PIN entry is a rule that disarms your security system when valid credentials are presented at the door of your choice. This rule can be configured to work on specific days of the week and times or can be set to function at all times. For information about configuring this rule, see How can I have my panel disarm when I scan my Access Control keycard or enter my PIN?.
Important: The disarm on card swipe or PIN entry rule will not function if the door controller is without network connectivity.
First card unlocks door
First card unlocks door is a rule that can be used to unlock any door indefinitely when valid credentials are presented at the door of your choice. The selected door then remains unlocked until a locking schedule occurs or someone triggers the door to lock. This rule can be configured to work on specific days of the week and times or can be set to function at all times. For information about configuring this rule, see Create a First Card Unlock rule.
Note: The first card unlocks door rule will continue to function while the door controller is without network connectivity.
Arm on double card swipe
Note: This rule is only available on accounts where an LTE module is being used. Certain readers may have a built-in delay when double swiping cards. This is to help prevent false double card swipes.
Arm on double card swipe is a rule that arms your security system when valid credentials are presented at the door of your choice. This rule can be configured to work on specific days of the week and times or can be set to function at all times. For more information about configuring this rule, see How can I have my panel arm when I scan my Access Control keycard?.
Important: The arm or disarm on double card swipe rule will not function if the door controller is without network connectivity.
Lock or unlock on double card swipe
Lock or Unlock on double card swipe is a rule that arms the locks or unlocks a specific access control door when valid credentials are presented. This rule can be configured to work on specific days of the week and times or can be set to function at any time. For information on configuring this rule, see Create a Double Swipe to Lock/Unlock rule.
Note: The lock or unlock on double card swipe rule will continue to function while the access controller is without network connectivity.
First person in
The First person in rule can be used to unlock any door indefinitely when valid credentials are presented at a selected door. The selected door then remains unlocked until a locking schedule occurs or someone triggers the door to lock. This rule can be configured to work on specific days of the week and times or can be set to function at any time. For information on configuring this rule, see Create a First Person In rule.
Note: The first person in rule will continue to function while the door controller is without network connectivity.
Arm panel to lock or disarm to unlock Access Control doors
The Arm Panel to Lock or Disarm to Unlocks Access Control Doors rule allows customers to automatically trigger selected Access Control doors to lock or unlock when the panel is armed/disarmed, saving time and providing peace of mind when closing the business each day. For information about configuring this rule, see Create an Arm Panel to Lock or Disarm to Unlock Access Control Doors rule.
Important: The arm panel to lock or disarm to unlock Access Control doors rule will not function if the access controller is without network connectivity.
Schedules
Note: If the option to set business hours is not available, contact your service provider.
Lock/Unlock schedules allow users to configure doors to lock or unlock on specific days of the week and times, or can be set to follow the business hours previously set up on the account.
For information about how to configure Holiday Schedules that will pause locking/unlocking schedules and specific Access Plans, see Create an Access Control holiday schedule.
Note: The lock or unlock schedules will continue to function while the door controller is without network connectivity.
Scenes
Access Control doors can be added to any new or existing scene. This allows you to create unique scenes to open or close your business that triggers your security system, doors, locks, lights, and thermostats. For information about configuring scenes, see Can I add Access Control doors to a scene?.
Important: Scenes that include door actions will not function if the door controller is without network connectivity.
Video
The following are the Access Control event-triggered rules and SVR event markers:
Door is accessed by allows users to create recording rules to capture videos of a user’s activity and specific doors.
Door denies access allows users to create recording rules to capture videos of failed access events and specific doors.
Door is forced open allows users to create recording rules to capture videos of specific doors that report as being forced open.
Door is held open allows users to create recording rules to capture videos of specific doors that report as being held open.
Important: Video rules triggered by door actions will not function if the door controller is without network connectivity.
Doorbell
Access Control doors can be locked, unlocked, and buzzed open using the doorbell live view interface.
Access Control Doorbell Interaction
Create an Access Control holiday schedule Icn Dropdown Arrow
The Holiday Schedules feature allows users to pause all automation rules and lock/unlock schedules for Access Control doors on selected dates. By configuring Holiday Schedules, customers can choose to pause specific Access Plans within their account to prevent user entry on holidays.
Features
This feature is available for single system accounts.
When an Access Plan is set to Paused on the Manage Holidays page, the paused plans will not grant access on holidays.
For security panels or Z-Wave locks, access will remain active even if the Access Plan is paused on a holiday.
Note: Access plans will remain active on the holiday unless paused.
Holiday Schedules only affect automation rules limited to Access Control doors, such as First Person In, First Card Unlock, Double Swipe to Lock/Unlock, and scheduled door locking/unlocking. Automation rules involving other device types (e.g., Swipe to Disarm for alarm panels) will not be paused for holidays.
Create an Access Control holiday schedule
Access Control holiday schedules can be created using the Alarm.com app and GoSafer Security customer portal (powered by Alarm.com).
Note: For locations within an Enterprise group, holiday schedules can only be created at the single system level.
Expand all
To create an Access Control holiday schedule using the Alarm.com app:Icn Chevron Down
Log in to the Alarm.com app.
Tap Menu.
Tap User Access.
Tap Actions.
In Actions, tap Manage Holidays.
Tap Add.
In the Name field, enter the desired name for the holiday.
In Date, select the date of the holiday.
Tap Save.
In Access Plans to Pause, tap to select either option for any Access Plans:
Active for plans to still have access during holidays.
Paused for plans that should not have access on holidays.
Tap Save.
To create an Access Control holiday schedule using the GoSafer Security customer portal (powered by Alarm.com):Icn Chevron Down
Log in to the GoSafer Security customer portal (powered by Alarm.com).
Click User Access.
Click Access Plans.
Click Actions, then click Manage Holidays.
Click Add.
In the Name field, enter the desired name for the holiday.
Click Date, then select the date of the holiday.
Click Save.
In Access Plans to Pause, click to select either option for any Access Plans:
Active for plans to still have access during holidays.
Paused for plans that should not have access on holidays.
Click Save.
Create Access Control notifications Icn Dropdown Arrow
Standard and commercial notifications are available to create for Access Control.
System Event notifications
This notification can alert customers for two event types:
Malfunction (loss of communication)
This will alert users when the controller is unable to communicate with Alarm.com.
Tamper
This will alert users when the access controller reports a tamper.
To create malfunction and/or tamper notifications using the GoSafer Security customer portal (powered by Alarm.com):
Log in to the GoSafer Security customer portal (powered by Alarm.com).
Click Notifications.
Click New Notification.
Click System Event.
Enter a name for the notification.
Click to select the events to be notified for.
For malfunction notifications, click to select the A device is in malfunction checkbox.
For tamper notifications, click to select the Someone tries to tamper with a device checkbox.
Click Add, then select the recipients to be notified.
Click Save.
Access notifications
This will send a notification when specific people enter an access-controlled door during a specified timeframe.
To create Access notifications using the GoSafer Security customer portal (powered by Alarm.com):
Log in to the GoSafer Security customer portal (powered by Alarm.com).
Click Notifications.
Click New Notification.
Click Business.
Click Access.
Enter a name for the notification.
In When, click to select which doors will trigger the notification.
In Is Accessed by, click to select which users will trigger the notification.
In During this time frame, click to select the time frame the notification will be active.
In Recipients, click Add to select the desired recipients to be notified, then click Close.
Click Save.
Unauthorized Access Attempt notifications
This will send a notification when somebody tries to use a badge with an inactive card.
To create Unauthorized Access Attempt notifications using the GoSafer Security customer portal (powered by Alarm.com):
Log in to the GoSafer Security customer portal (powered by Alarm.com).
Click Notifications.
Click New Notification.
Click Business.
Click Unauthorized Access Attempt.
Enter a name for the notification.
In Send a notification when somebody tries to badge in with an inactive card at the following doors, click to select which doors will trigger the notification.
In During this time frame, click to select the time frame the notification will be active.
In Recipients, click Add to select the desired recipients to be notified, then click Close.
Click Save.
Door Forced Open notifications
This will send a notification when a door has been opened without badging in or triggering a request-to-exit device.
Note: This notification will only appear for accounts where an access door has been programmed to use a door sensor.
To create Door Forced Open notifications using the GoSafer Security customer portal (powered by Alarm.com):
Log in to the GoSafer Security customer portal (powered by Alarm.com).
Click Notifications.
Click New Notification.
Click Business.
Click Door Forced Open.
Enter a name for the notification.
In When, click to select which doors will trigger the notification.
In During this time frame, click to select the time frame the notification will be active.
In Recipients, click Add to select the desired recipients to be notified, then click Close.
Click Save.
Door Held Open notifications
This will send a notification when a door has been propped open.
Note: This notification will only appear for accounts where an access door has been programmed to use a door sensor.
To create Door Held Open notifications using the GoSafer Security customer portal (powered by Alarm.com):
Log in to the GoSafer Security customer portal (powered by Alarm.com).
Click Notifications.
Click New Notification.
Click Business.
Click Door Held Open.
Enter a name for the notification.
In When, click to select which doors will trigger the notification.
In During this time frame, click to select the time frame the notification will be active.
In Recipients, click Add to select the desired recipients to be notified, then click Close.
Click Save.
Door Left Unlocked notifications
This will send a notification when any door is left unlocked at a specified time.
Note: This notification will only appear for accounts where an access door has been programmed to use a door sensor.
To create Door Left Unlocked notifications using the GoSafer Security customer portal (powered by Alarm.com):
Log in to the GoSafer Security customer portal (powered by Alarm.com).
Click Notifications.
Click New Notification.
Click Business.
Click Door Left Unlocked.
Enter a name for the notification.
In When any of these doors, click to select which doors will trigger the notification.
Using the Are not locked at dropdowns, click to select the time when the doors should be locked.
In During this time frame, click to select the time frame the notification will be active.
In Recipients, click Add to select the desired recipients to be notified, then click Close.
Click Save.
Door Activity notifications
This will send a notification when any door is locked or unlocked.
Note: This notification will only appear for accounts where an access door has been programmed to use a door sensor.
To create Door Activity notifications using the GoSafer Security customer portal (powered by Alarm.com):
Log in to the GoSafer Security customer portal (powered by Alarm.com).
Click Notifications.
Click New Notification.
Click Business.
Click Door Activity.
Enter a name for the notification.
In When, click to select which doors will trigger the notification.
In Is, click to select whether the door being locked or unlocked will trigger the notificatoin.
In During this time frame, click to select the time frame the notification will be active.
In Recipients, click Add to select the desired recipients to be notified, then click Close.
Click Save.
User Access Start/Expire notifications
This will send a notification when a user's access credentials are about to start or expire with the option to manage access.
To create User Access Start/Expire notifications using the GoSafer Security customer portal (powered by Alarm.com):
Log in to the GoSafer Security customer portal (powered by Alarm.com).
Click Notifications.
Click New Notification.
Click Business.
Click User Access Start/Expire.
Enter a name for the notification.
In When a user's access is about to, click to select either Start or Expire.
Using the Notify dropdown menu, select when to notify the user 1 day before, 2 days before, or 3 days before.
In Recipients, click Add to select the desired recipients to be notified, then click Close.
Click Save.
Generate a User Summary Report for Access Control Icn Dropdown Arrow
The User Summary Report for Access Control provides a list of all users alongside relevant information such as credentials, credential start date, credential end date (where applicable), user information, Access Group, and Access Plans. The report can be delivered on a daily, weekly, or monthly basis.
Note: This report is available on all accounts with Access Control, at least one Access Plan with users and doors added, and the Commercial Reports service package add-on. For more information, contact your service provider.
To generate a User Summary Report for Access Control:
Log in to the GoSafer Security customer portal (powered by Alarm.com).
Click Activity.
Click Reports.
Click New Report.
Click to select User Summary Report.
In the Report Name field, enter the desired name for the report.
In Include User Credentials, select Yes or No.
In Timeframe, select Yesterday, Last 7 Days, or Previous Month.
In Delivery Schedule, click to select Include a CSV version of the report if desired.
In Recipients, click Add to choose who will receive the report.
Click the entries in Address Book to be notified, or click New to add a new Address Book entry.
Click Close.
Verify the report is configured with the correct settings.
Click Save.
Knowledge Base resources Icn Dropdown Arrow
For more Knowledge Base articles about Access Control, including the ones presented in this guide, see Access Control.
Always verify safety, installation, compatibility, and current UI details against the original manufacturer documentation before operational use.
Commercial
How can I have my panel arm when I scan my Access Control keycard?
GoSafer Security Knowledge Base
This operational reference is organized for GoSafer Security customers and staff. Alarm.com product names are retained where required for technical accuracy.
Overview
An Access Control panel can be set up to arm upon a double card swipe using the Alarm.com app or website.
Important: The option to arm the panel upon a successful double card swipe is only available to panels using an LTE or Dual-Path module.
Platform
App + Web
Content type
How-to / Configuration
Source last updated
2025-06-04
Procedure
To add a rule to arm a security panel upon double card swipes using the Alarm.com app
Log in to the app.
Tap [Menu].
Tap Automation.
Tap [Add] to create a new rule.
Next to when, tap Select.
Tap Door, then tap Next.
In Door, selected the desired door.
In Select Status, select Door Accessed with Double Swipe.
In Select Security Level, use the dropdown menu to select the desired User Group that will be eligible to trigger the rule.
Note: For information about how to designate a user to a specific user group, see Can Access Control automation rules be configured to only work with specific users?.
Tap Done.
Tap then to select the automation device and trigger.
Tap Security Panel, then tap Next.
In Select Action, select Arm Stay or Arm Away, then tap Done.
Note: To avoid arming level conflicts, the option to create both a double swipe to arm stay rule and a double swipe to arm away rule for the same door is not possible.
Enter the desired name for the rule.
If desired, next to Run at all times, tap Select to edit when the rule will run.
Tap to select At All Times for the rule will be carried out any time of day.
Tap to select Only during the following times to determine the specific days and times the rule will be carried out.
Tap to select the days the rule will be active.
Using the Starting at dropdown menu, tap the start time for this rule.
Using the Ending at dropdown menu, tap the end time for this rule.
After selecting times for the rule to run, tap Done.
Verify the rule is configured with the correct settings.
Tap Save.
To add a rule to arm a security panel upon double card swipes using the GoSafer Security customer portal (powered by Alarm.com):
Log in to the website.
Click Automation.
In Rules, click Add New Rule.
Click when to select the trigger device and action.
Click Door, then click Next.
In Door, selected the desired door.
In Select Status, select Door Accessed with Double Swipe.
In Select Security Level, use the dropdown menu to select the desired User Group that will be eligible to trigger the rule.
Note: For information about how to designate a user to a specific user group, see Can Access Control automation rules be configured to only work with specific users?.
Click Done.
Click then to select the automation device and trigger.
Click Security Panel, then click Next.
In Select Action, select Arm Stay or Arm Away, then click Done.
Note: To avoid arming level conflicts, the option to create both a double swipe to arm stay rule and a double swipe to arm away rule for the same door is not possible.
Enter the desired name for the rule.
If desired, click Run at All Times to edit when the rule will run.
Click to select At All Times for the rule will be carried out any time of day.
Click to select Only during the following times to determine the specific days and times the rule will be carried out.
Click to select the days the rule will be active.
Using the Starting at dropdown menu, select the start time for this rule.
Using the Ending at dropdown menu, select the end time for this rule.
After selecting times for the rule to run, click Done.
Verify the rule is configured with the correct settings.
Always verify safety, installation, compatibility, and current UI details against the original manufacturer documentation before operational use.
Commercial
How can I have my panel disarm when I scan my Access Control keycard or enter my PIN?
GoSafer Security Knowledge Base
This operational reference is organized for GoSafer Security customers and staff. Alarm.com product names are retained where required for technical accuracy.
Overview
An Access Control panel can be set up to disarm upon a single or double card swipe using the Alarm.com app and website. A single PIN entry can also be entered as a valid credential to disarm the panel.
Important: The option to disarm the panel upon the successful card swipe or single PIN entry is only available to panels using an LTE or Dual-Path module.
Platform
App + Web
Content type
How-to / Configuration
Source last updated
2025-06-04
Procedure
To add a rule to disarm a security panel upon card swipe using the Alarm.com app
Log in to the app.
Tap [Menu].
Tap Automation.
Tap [Add].
Tap when to select the trigger device and action.
Tap Door, then tap Next.
In Select Status, select either accessed, or Door Accessed with Double Swipe.
Select accessed to require a single card swipe or single PIN entry to trigger the disarm.
Select Door accessed with Double Swipe to require a double card swipe to trigger the disarm.
Note: Certain readers are capable of entering a PIN twice to trigger the disarm. For more information, contact your service provider.
In Select Security Level, use the dropdown menu to select the desired User Group that will be eligible to trigger the rule.
Note: For information about how to designate a user to a specific user group, see Can Access Control automation rules be configured to only work with specific users?.
Tap Done.
Tap then to select the trigger device and action.
In Select Feature, tap Security Panel, then tap Next.
In Select Action, tap Disarmed, then tap Done.
Enter the desired name for the rule.
If desired, click Run at All Times to edit when the rule will run.
Click to select At All Times __ for the rule will be carried out any time of day.
Click to select Only during the following times to determine the specific days and times the rule will be carried out.
Tap to select the days the rule will be active.
Using the Starting at dropdown menu, select the start time for this rule.
Using the Ending at dropdown menu, select the end time for this rule.
After selecting times for the rule to run, click Done.
Verify the rule is configured with the correct settings.
Click Save.
To add a rule to disarm a security panel upon card swipe using the Alarm.com website
Log in to the website.
Click Automation.
In Rules, click Add New Rule.
Click when to select the trigger device and action.
Click Door, then click Next.
In Select Status, select either accessed, or Door Accessed with Double Swipe.
Select accessed to require a single card swipe or single PIN entry to trigger the disarm.
Select Door accessed with Double Swipe to require a double card swipe to trigger the disarm.
Note: Certain readers are capable of entering a PIN twice to trigger the disarm. For more information, contact your service provider.
In Select Security Level, use the dropdown menu to select the desired User Group that will be eligible to trigger the rule.
Note: For information about how to designate a user to a specific user group, see Can Access Control automation rules be configured to only work with specific users?.
Click Done.
Click then to select the trigger device and action.
In Select Feature, click Security Panel, then click Next.
In Select Action, click Disarmed, then click Done.
Enter the desired name for the rule.
If desired, click Run at all times to edit when the rule will run.
Click to select At All Times for the rule will be carried out any time of day.
Click to select Only during the following times to determine the specific days and times the rule will be carried out.
Click to select the days the rule will be active.
Using the Starting at dropdown menu, click the start time for this rule.
Using the Ending at dropdown menu, click the end time for this rule.
After selecting times for the rule to run, click Done.
Verify the rule is configured with the correct settings.
Always verify safety, installation, compatibility, and current UI details against the original manufacturer documentation before operational use.
Commercial
How do I configure a siren to buzz if a door was held or forced open?
GoSafer Security Knowledge Base
This operational reference is organized for GoSafer Security customers and staff. Alarm.com product names are retained where required for technical accuracy.
Overview
An input can be configured to trigger one or multiple Access Control doors with an Event-Triggered Rule using the GoSafer Security customer portal (powered by Alarm.com).
Platform
Customer Website
Content type
How-to / Configuration
Source last updated
2025-06-04
Procedure
To configure an Event-Triggered Rule for the siren when an Access Control door is held or forced open
Important: The Access Control door for the siren rule must have a door sensor programmed. Without a door sensor configured, the held open and forced open trigger actions will not be available.
Log in to the GoSafer Security customer portal (powered by Alarm.com).
Click Automation.
Click Rules.
Click Add New Rule and select Event-Triggered Rule (if applicable).
Enter the desired name for the rule.
In Automate My, select Switches.
In When this event occurs, select Door Activity.
Select the door that will trigger the siren and select is held open or is forced open.
Note: The held open event trigger time is set in the Add Door installation wizard or the Edit Door Sensor settings page for a door on the Partner Portal or Partner MobileTech app. Door held open events are not generated when the door is unlocked.
In Perform this action, select Turn ON when [door name] is held (or forced) open; Turn OFF when [door name] is closed.
In Select Devices, select which siren(s) the rule should apply to.
In During these time frames, select the desired time frames for the rule to operate.
Always verify safety, installation, compatibility, and current UI details against the original manufacturer documentation before operational use.
Commercial
How do I configure an input to trigger one or multiple Access Control doors?
GoSafer Security Knowledge Base
This operational reference is organized for GoSafer Security customers and staff. Alarm.com product names are retained where required for technical accuracy.
Overview
An input can be configured to trigger one or multiple Access Control doors with an Event-Triggered Rule using the GoSafer Security customer portal (powered by Alarm.com).
Platform
Customer Website
Content type
How-to / Configuration
Source last updated
2025-06-04
Procedure
To configure an Event-Triggered Rule to trigger Access Control doors
Log in to the GoSafer Security customer portal (powered by Alarm.com).
Click Automation.
Click Rules.
Click Add New Rule and select Event-Triggered Rule (if applicable).
Enter the desired name for the rule.
In Automate My, select Doors.
In When this event occurs, select Input Activity.
Select which input and input action should trigger the doors.
In Perform this action, select the desired gate function.
In Select Devices, select which doors the rule should apply to.
In During these time frames, select the desired time frames for the rule to operate.
Always verify safety, installation, compatibility, and current UI details against the original manufacturer documentation before operational use.
Commercial
How do I schedule an auxiliary REX device to only function at a scheduled time?
GoSafer Security Knowledge Base
This operational reference is organized for GoSafer Security customers and staff. Alarm.com product names are retained where required for technical accuracy.
Overview
An auxiliary REX device can be scheduled to only function at a scheduled time with an Event-Triggered Rule using the GoSafer Security customer portal (powered by Alarm.com).
Platform
Customer Website
Content type
How-to / Configuration
Source last updated
2025-06-04
Procedure
To configure an Event-Triggered Rule for an auxiliary REX device to only trigger an Access Control door at a scheduled time:
Log in to the GoSafer Security customer portal (powered by Alarm.com).
Click Automation.
Click Rules.
Click Add New Rule and select Event-Triggered Rule (if applicable).
Enter the desired name for the rule.
In Automate My, select Doors.
In When this event occurs, select Input Activity.
Select which custom REX input and input action should trigger the doors.
In Perform this action, select the desired function.
In Select Devices, select which doors this rule should apply to.
In During these time frames, select the appropriate time frames for when the custom REX input device should trigger the previously selected doors.
Always verify safety, installation, compatibility, and current UI details against the original manufacturer documentation before operational use.
Commercial
Manage Access Plans
GoSafer Security Knowledge Base
This operational reference is organized for GoSafer Security customers and staff. Alarm.com product names are retained where required for technical accuracy.
Overview
Access Plans allow users to have access to specific doors at specific times. Access Plans can be managed using the Alarm.com app and GoSafer Security customer portal (powered by Alarm.com). For more information, see Add an Access Plan.
Advanced filters can be used to locate a specific user or subset of users. For more information, see Search for users with filters.
Note: Changes to User Access will be sent to the system after 2 minutes of inactivity on the page.
Platform
App + Web
Content type
How-to / Configuration
Source last updated
2025-06-04
Procedure
Step-by-step guide: Screenshots and videos are placed with the instruction they illustrate.
Access Plans allow users to have access to specific doors at specific times. Access Plans can be managed using the Alarm.com app and GoSafer Security customer portal (powered by Alarm.com). For more information, see Add an Access Plan.
Advanced filters can be used to locate a specific user or subset of users. For more information, see Search for users with filters.
Note: Changes to User Access will be sent to the system after 2 minutes of inactivity on the page.
Access Plans Updated
Note: To view a list of all Access Plans, click List using the GoSafer Security customer portal (powered by Alarm.com) or tap Actions, then List Layout using the Alarm.com app.
Access Plan
An Access Plan consists of the following:
Timetable
Select the times the users in the plan can be granted entry to an access control door.
Note: Timetables can contain a maximum of 12 time blocks.
Users
Select which users will be allowed access to which access points and when.
Access Points
Select which doors will be part of the Access Plan. Panel, partition, and Z-Wave locks access can also be selected.
Note: Panel and Z-Wave lock access do not follow the timetable, and users will be able to use either 24/7.
Access Points
Schedules
Each day can have the same timetable or a unique schedule. Begin creating timetables by selecting one day of the week – the Edit Time Block window will appear. Choose the start and stop times, then schedules can be copied across other days using the Edit Time Block window if desired.
Note: Although you have the option of extending a timetable beyond a 24-hour period, it is a best practice to set the time block for the same day.
Managing holidays
Plans can also be paused on days when the business will not be open or employees do not need to access the business.
Navigate to the User Access page.
Click Manage Holidays.
Name the holiday, select its date from the calendar, then click Save.
Select which Access Plans you would like to pause on that date, then click Save.
Best practices
Identify Access Points and access credentials (badges or pin codes) before adding users and Access Plans to the account.
Quickly add new badges by scanning at a card reader using the Alarm.com app.
Focus each Access Plan on a common theme, such as employee type, door (access point), or schedule.
Each user must have the correct credential type for all Access Points in the plans they are added to. Before creating an Access Plan, verify that each user has the correct access credentials.
Add an Access Plan
Access Plans can be created from the User Access section of the Alarm.com app or GoSafer Security customer portal (powered by Alarm.com).
Expand all
To add an Access Plan using the Alarm.com app:Icn Chevron Down
Note: These instructions apply to single-system Access Plans. For information about Enterprise Access Plans, see What is an Enterprise Access Plan?.
Log in to the Alarm.com app.
Tap Icn Menu.
Tap User Access.
Tap Actions, then select Add New Plan.
Select an icon and enter a name for the Access Plan, then tap Next.
Tap Add Users.
Select which users to add to the plan, then tap Save.
Tap Add Access Points.
Select which Access Points to include in the plan, then tap Save.
Tap Add Schedule.
Select a schedule to apply to the plan, then tap Save.
Review the finalized Access Plan, then tap Save.
To add an Access Plan using the GoSafer Security customer portal (powered by Alarm.com):Icn Chevron Down
Note: These instructions apply to single-system Access Plans. For information about Enterprise Access Plans, see What is an Enterprise Access Plan?.
Log in to the GoSafer Security customer portal (powered by Alarm.com).
Click User Access.
Click Add New Plan.
Select an icon and enter a name for the Access Plan, then click Next.
Click Add Users.
Select which users to add to the plan, then click Save.
Click Add Access Points.
Select which Access Points to include in the plan, then click Save.
Click Add Schedule.
Select a schedule to apply to the plan, then click Save.
Review the finalized Access Plan, then click Save.
Search for users with filters
Filters can be used to search for a specific user or subset of users using the Alarm.com app or GoSafer Security customer portal (powered by Alarm.com).
The following advanced search filters are available to locate users:
Credentials
Search for users that have a badge, pin, or mobile credential.
Search by card credential number in the search bar to locate the card owner.
Contact Information
Search for users that have a mobile number or email address.
Access Periods
Search for users that have an expired credential or a future credential start date.
User Statuses
Search for users that are paused.
Search for users that use the extended unlock time feature.
Search for users that are Anti-Passback exempt.
Search for users that are a Mobile Credential user.
Access Points
Search for users that have access to the selected Access Point (i.e., Access Control door, panel partition, or Z-Wave lock).
User Groups
Search for users that are part of a specific User Group.
Access Plans
Search for users that are part of a specific Access Plan.
User Information
Search for users that have specific user information.
To search for users with filters using the Alarm.com app:Icn Chevron Up
Log in to the Alarm.com app.
Tap Icn Menu.
Tap User Access.
Tap Access Plans.
Tap Users.
Tap Icn Chevron Down.
Select the desired filters.
Once the desired filters are selected, tap out of the current dropdown to update the list.
To search for users with filters using the GoSafer Security customer portal (powered by Alarm.com):Icn Chevron Up
Log in to the GoSafer Security customer portal (powered by Alarm.com).
Click User Access.
Click Users.
Click Filter.
Select the desired filters.
Once the desired filters are selected, click out of the current dropdown to update the list.
Always verify safety, installation, compatibility, and current UI details against the original manufacturer documentation before operational use.
Commercial
Temporary Access Plans
GoSafer Security Knowledge Base
This operational reference is organized for GoSafer Security customers and staff. Alarm.com product names are retained where required for technical accuracy.
Overview
Temporary Access Plans allow users with administrator permission to create and manage access control plans that start and expire automatically.
For more information about creating temporary or delayed Access Control credentials, see Create delayed or temporary Access Control credentials.
Platform
App + Web
Content type
How-to / Configuration
Source last updated
2026-06-29
Procedure
To create Temporary Access Plans using the Alarm.com app
Log in to the Alarm.com app.
Tap More.
Tap User Access.
Tap [Down], then tap Access Plans.
Tap Actions.
In Actions, tap Add New Plan.
Enter a name for the Access Plan, then tap Next.
Tap Add Schedule.
Tap Temporary Access.
Configure the schedule as desired, then tap Save.
Configure the Users and Access points as desired.
Tap Save.
To create Temporary Access Plans using the GoSafer Security customer portal (powered by Alarm.com)
Log in to the GoSafer Security customer portal (powered by Alarm.com).
Click User Access.
Click Access Plans.
Click Add New Plan.
Enter a name for the Access Plan, then click Next.
Click Add Schedule.
Click Temporary Access.
Configure the schedule as desired, then click Save.
Always verify safety, installation, compatibility, and current UI details against the original manufacturer documentation before operational use.
Commercial
What is a Personal Access Plan?
GoSafer Security Knowledge Base
This operational reference is organized for GoSafer Security customers and staff. Alarm.com product names are retained where required for technical accuracy.
Overview
A Personal Access Plan applies to a single user and can be used to give a user scheduled Z-Wave lock and panel access. These devices cannot be scheduled using standard access plans due to scheduling incompatibilities between Z-Wave locks, panels, and Access Control doors.
It is not possible to use Personal Access Plans for accounts with only Access Control doors securing all perimeter entrances, as they would become difficult to manage, and the Access Control schedules will naturally limit when users can access interior Z-Wave locks and the panel.
Note: A user has one Personal Access Plan and they cannot be deleted.
Platform
App + Web
Content type
How-to / Configuration
Source last updated
2026-05-07
Procedure
To manage a Personal Access Plan using the Alarm.com app
Log in to the Alarm.com app.
Tap [Menu].
Tap User Access.
Tap [Down], then tap Users.
Tap [More Options] next to the desired user, then tap [Edit].
Important: A PIN is required before a Personal Access Plan can be configured. To add a PIN, click Add Credential, then click PIN.
In Access Plans, tap Manage Access.
Tap Edit next to the desired user to manage their Personal Access Plan.
Note: If the Personal Access Plan has not been configured, the user will proceed to the initial configuration process. If the Personal Access Plan has already been configured, the options Access Points, Schedule, and Clear Plan will be available.
Tap Add Access Points to select the desired access points, then tap Save.
Tap Add Schedule to select the desired access times, then tap Save.
Tap Clear Plan to clear the user's Personal Access Plan.
Tap Save.
To manage a Personal Access Plan using the GoSafer Security customer portal (powered by Alarm.com)
Log in to the GoSafer Security customer portal (powered by Alarm.com).
Click User Access.
Click Users.
Click [More Options] next to the desired user, then click [Edit].
Important: A PIN is required before a Personal Access Plan can be configured. To add a PIN, tap Add Credential, then tap PIN.
In Access Plans, click Manage Access.
Click Edit next to the desired user to manage their Personal Access Plan.
Note: If the Personal Access Plan has not been configured, the user will proceed to the initial configuration process. If the Personal Access Plan has already been configured, the options Access Points, Schedule, and Clear Plan will be available.
Click Access Points to select the desired access points, then click Save.
Click Schedule to select the desired access times, then click Save.
Click Clear Plan to clear the user's Personal Access Plan.
Always verify safety, installation, compatibility, and current UI details against the original manufacturer documentation before operational use.
Commercial
What rules and automation does Alarm.com’s Smarter Access Control offer?
GoSafer Security Knowledge Base
This operational reference is organized for GoSafer Security customers and staff. Alarm.com product names are retained where required for technical accuracy.
Overview
The Smarter Access Control solution offers Access Plans, rules based on card swipes and other situations, schedules, and automation based on other devices.
Platform
General / Device
Content type
Troubleshooting
Source last updated
2025-10-28
Procedure
Step-by-step guide: Screenshots and videos are placed with the instruction they illustrate.
The Smarter Access Control solution offers Access Plans, rules based on card swipes and other situations, schedules, and automation based on other devices.
Access Plans
Access Plans allow you to schedule when and which users can access specific Access Control doors. You can also select which users have panel or Z-Wave lock access. For more information about configuring an Access Plan, see Add an Access Control Access Plan.
Note: Security system and Z-Wave access cannot be scheduled on an Access Control account. Access Plans will continue to be followed while the door controller is without network connectivity.
Rules
Disarm on card swipe or PIN entry
Important: The account must be using an LTE module to use this rule.
Disarm on card swipe or PIN entry is a rule that disarms your security system when valid credentials are presented at the door of your choice. This rule can be configured to work on specific days of the week and times or can be set to function at all times. For information about configuring this rule, see How can I have my panel disarm when I scan my Access Control keycard or enter my PIN?.
Important: The disarm on card swipe or PIN entry rule will not function if the door controller is without network connectivity.
First card unlocks door
First card unlocks door is a rule that can be used to unlock any door indefinitely when valid credentials are presented at the door of your choice. The selected door then remains unlocked until a locking schedule occurs or someone triggers the door to lock. This rule can be configured to work on specific days of the week and times or can be set to function at all times. For information about configuring this rule, see Create a First Card Unlock rule.
Note: The first card unlocks door rule will continue to function while the door controller is without network connectivity.
Arm on double card swipe
Note: This rule is only available on accounts where an LTE module is being used. Certain readers may have a built-in delay when double swiping cards. This is to help prevent false double card swipes.
Arm on double card swipe is a rule that arms your security system when valid credentials are presented at the door of your choice. This rule can be configured to work on specific days of the week and times or can be set to function at all times. For more information about configuring this rule, see How can I have my panel arm when I scan my Access Control keycard?.
Important: The arm or disarm on double card swipe rule will not function if the door controller is without network connectivity.
Lock or unlock on double card swipe
Lock or Unlock on double card swipe is a rule that arms the locks or unlocks a specific access control door when valid credentials are presented. This rule can be configured to work on specific days of the week and times or can be set to function at any time. For information on configuring this rule, see Create a Double Swipe to Lock/Unlock rule.
Note: The lock or unlock on double card swipe rule will continue to function while the access controller is without network connectivity.
First person in
The First person in rule can be used to unlock any door indefinitely when valid credentials are presented at a selected door. The selected door then remains unlocked until a locking schedule occurs or someone triggers the door to lock. This rule can be configured to work on specific days of the week and times or can be set to function at any time. For information on configuring this rule, see Create a First Person In rule.
Note: The first person in rule will continue to function while the door controller is without network connectivity.
Arm panel to lock or disarm to unlock Access Control doors
The Arm Panel to Lock or Disarm to Unlocks Access Control Doors rule allows customers to automatically trigger selected Access Control doors to lock or unlock when the panel is armed/disarmed, saving time and providing peace of mind when closing the business each day. For information about configuring this rule, see Create an Arm Panel to Lock or Disarm to Unlock Access Control Doors rule.
Important: The arm panel to lock or disarm to unlock Access Control doors rule will not function if the access controller is without network connectivity.
Schedules
Note: If the option to set business hours is not available, contact your service provider.
Lock/Unlock schedules allow users to configure doors to lock or unlock on specific days of the week and times, or can be set to follow the business hours previously set up on the account.
For information about how to configure Holiday Schedules that will pause locking/unlocking schedules and specific Access Plans, see Create an Access Control holiday schedule.
Note: The lock or unlock schedules will continue to function while the door controller is without network connectivity.
Scenes
Access Control doors can be added to any new or existing scene. This allows you to create unique scenes to open or close your business that triggers your security system, doors, locks, lights, and thermostats. For information about configuring scenes, see Can I add Access Control doors to a scene?.
Important: Scenes that include door actions will not function if the door controller is without network connectivity.
Video
The following are the Access Control event-triggered rules and SVR event markers:
Door is accessed by allows users to create recording rules to capture videos of a user’s activity and specific doors.
Door denies access allows users to create recording rules to capture videos of failed access events and specific doors.
Door is forced open allows users to create recording rules to capture videos of specific doors that report as being forced open.
Door is held open allows users to create recording rules to capture videos of specific doors that report as being held open.
Important: Video rules triggered by door actions will not function if the door controller is without network connectivity.
Doorbell
Access Control doors can be locked, unlocked, and buzzed open using the doorbell live view interface.
Always verify safety, installation, compatibility, and current UI details against the original manufacturer documentation before operational use.
Commercial
Which Access Control card formats are supported?
GoSafer Security Knowledge Base
This operational reference is organized for GoSafer Security customers and staff. Alarm.com product names are retained where required for technical accuracy.
Overview
Alarm.com’s Access Control solution supports a wide range of credential card formats used across commercial and enterprise access systems.
Platform
General / Device
Content type
Reference
Source last updated
2026-03-06
Procedure
Alarm.com's Access Control solution supports the following card formats
Always verify safety, installation, compatibility, and current UI details against the original manufacturer documentation before operational use.
Commercial
Which notifications are available for Access Control?
GoSafer Security Knowledge Base
This operational reference is organized for GoSafer Security customers and staff. Alarm.com product names are retained where required for technical accuracy.
Overview
Standard and commercial notifications are available to create for Access Control.
Platform
Customer Website
Content type
How-to / Configuration
Source last updated
2025-06-04
Procedure
System Event notifications
This notification can alert customers for two event types
Malfunction (loss of communication)
This will alert users when the controller is unable to communicate with Alarm.com.
Tamper
This will alert users when the access controller reports a tamper.
To create malfunction and/or tamper notifications using the GoSafer Security customer portal (powered by Alarm.com)
Log in to the GoSafer Security customer portal (powered by Alarm.com).
Click Notifications.
Click New Notification.
Click System Event.
Enter a name for the notification.
Click to select the events to be notified for.
For malfunction notifications, click to select the A device is in malfunction checkbox.
For tamper notifications, click to select the Someone tries to tamper with a device checkbox.
Click Add, then select the recipients to be notified.
Click Save.
Access notifications
This will send a notification when specific people enter an access-controlled door during a specified timeframe.
To create Access notifications using the GoSafer Security customer portal (powered by Alarm.com)
Log in to the GoSafer Security customer portal (powered by Alarm.com).
Click Notifications.
Click New Notification.
Click Business.
Click Access.
Enter a name for the notification.
In When, click to select which doors will trigger the notification.
In Is Accessed by, click to select which users will trigger the notification.
In During this time frame, click to select the time frame the notification will be active.
In Recipients, click Add to select the desired recipients to be notified, then click Close.
Click Save.
Unauthorized Access Attempt notifications
This will send a notification when somebody tries to use a badge with an inactive card.
To create Unauthorized Access Attempt notifications using the GoSafer Security customer portal (powered by Alarm.com)
Log in to the GoSafer Security customer portal (powered by Alarm.com).
Click Notifications.
Click New Notification.
Click Business.
Click Unauthorized Access Attempt.
Enter a name for the notification.
In Send a notification when somebody tries to badge in with an inactive card at the following doors, click to select which doors will trigger the notification.
In During this time frame, click to select the time frame the notification will be active.
In Recipients, click Add to select the desired recipients to be notified, then click Close.
Click Save.
Door Forced Open notifications
This will send a notification when a door has been opened without badging in or triggering a request-to-exit device.
Note: This notification will only appear for accounts where an access door has been programmed to use a door sensor.
To create Door Forced Open notifications using the GoSafer Security customer portal (powered by Alarm.com)
Log in to the GoSafer Security customer portal (powered by Alarm.com).
Click Notifications.
Click New Notification.
Click Business.
Click Door Forced Open.
Enter a name for the notification.
In When, click to select which doors will trigger the notification.
In During this time frame, click to select the time frame the notification will be active.
In Recipients, click Add to select the desired recipients to be notified, then click Close.
Click Save.
Door Held Open notifications
This will send a notification when a door has been propped open.
Note: This notification will only appear for accounts where an access door has been programmed to use a door sensor.
To create Door Held Open notifications using the GoSafer Security customer portal (powered by Alarm.com)
Log in to the GoSafer Security customer portal (powered by Alarm.com).
Click Notifications.
Click New Notification.
Click Business.
Click Door Held Open.
Enter a name for the notification.
In When, click to select which doors will trigger the notification.
In During this time frame, click to select the time frame the notification will be active.
In Recipients, click Add to select the desired recipients to be notified, then click Close.
Click Save.
Door Left Unlocked notifications
This will send a notification when any door is left unlocked at a specified time.
Note: This notification will only appear for accounts where an access door has been programmed to use a door sensor.
To create Door Left Unlocked notifications using the GoSafer Security customer portal (powered by Alarm.com)
Log in to the GoSafer Security customer portal (powered by Alarm.com).
Click Notifications.
Click New Notification.
Click Business.
Click Door Left Unlocked.
Enter a name for the notification.
In When any of these doors, click to select which doors will trigger the notification.
Using the Are not locked at dropdowns, click to select the time when the doors should be locked.
In During this time frame, click to select the time frame the notification will be active.
In Recipients, click Add to select the desired recipients to be notified, then click Close.
Click Save.
Door Activity notifications
This will send a notification when any door is locked or unlocked.
Note: This notification will only appear for accounts where an access door has been programmed to use a door sensor.
To create Door Activity notifications using the GoSafer Security customer portal (powered by Alarm.com)
Log in to the GoSafer Security customer portal (powered by Alarm.com).
Click Notifications.
Click New Notification.
Click Business.
Click Door Activity.
Enter a name for the notification.
In When, click to select which doors will trigger the notification.
In Is, click to select whether the door being locked or unlocked will trigger the notificatoin.
In During this time frame, click to select the time frame the notification will be active.
In Recipients, click Add to select the desired recipients to be notified, then click Close.
Click Save.
User Access Start/Expire notifications
This will send a notification when a user's access credentials are about to start or expire with the option to manage access.
To create User Access Start/Expire notifications using the GoSafer Security customer portal (powered by Alarm.com)
Log in to the GoSafer Security customer portal (powered by Alarm.com).
Click Notifications.
Click New Notification.
Click Business.
Click User Access Start/Expire.
Enter a name for the notification.
In When a user's access is about to, click to select either Start or Expire.
Using the Notify dropdown menu, select when to notify the user 1 day before, 2 days before, or 3 days before.
In Recipients, click Add to select the desired recipients to be notified, then click Close.
Always verify safety, installation, compatibility, and current UI details against the original manufacturer documentation before operational use.
Commercial
Why does the Activity show "Failed Access" when scanning an Access Control card?
GoSafer Security Knowledge Base
This operational reference is organized for GoSafer Security customers and staff. Alarm.com product names are retained where required for technical accuracy.
Overview
This message indicates that a known user's card or pin has attempted to access the listed door and failed, or the credential used is not associated with a user.
Complete the following troubleshooting if the Activity shows Failed Access.
Platform
App + Web
Content type
Troubleshooting
Source last updated
2025-06-04
Procedure
Step-by-step guide: Screenshots and videos are placed with the instruction they illustrate.
This message indicates that a known user's card or pin has attempted to access the listed door and failed, or the credential used is not associated with a user.
Complete the following troubleshooting if the Activity shows Failed Access.
Verify the credential being used is associated with a user
Expand all
To verify the credential using the GoSafer Security customer portal (powered by Alarm.com):Icn Chevron Down
Log in to the GoSafer Security customer portal (powered by Alarm.com).
Click User Access.
Click Users.
Click More options next to the user in question.
Verify the credential (Badge or Pin Number) displays on the User Profile.
To verify the credential using the Alarm.com app:Icn Chevron Down
Log in to the Alarm.com app.
Tap Menu.
Tap User Access.
Tap Down next to Access Plans.
Tap Users.
Tap More options next to the user in question.
Verify the credential (Badge or Pin Number) displays on the User Profile.
Always verify safety, installation, compatibility, and current UI details against the original manufacturer documentation before operational use.
Commercial
Why does the reader continuously beep when the door is buzzed open?
GoSafer Security Knowledge Base
This operational reference is organized for GoSafer Security customers and staff. Alarm.com product names are retained where required for technical accuracy.
Overview
If the reader continuously beeps when the door is buzzed open, it likely is caused by incorrect wiring.
Platform
General / Device
Content type
FAQ / Explanation
Source last updated
2026-03-26
Procedure
If the reader continuously beeps when the door is buzzed open, it likely is caused by incorrect wiring.
Verify the LED and BZR (buzzer/beeper) wiring from the proximity reader to the controller or expansion terminals are correct. It is likely these wires have been swapped and need to be reversed.
If the wiring is verified and correct, contact your service provider or manufacturer of the proximity reader.
Always verify safety, installation, compatibility, and current UI details against the original manufacturer documentation before operational use.
Commercial
Commercial Management
GoSafer Security Knowledge Base
This operational reference is organized for GoSafer Security customers and staff. Alarm.com product names are retained where required for technical accuracy.
Overview
This GoSafer Security section brings together resources for Commercial Management, including setup, configuration, everyday use, and troubleshooting. Choose the related page that matches your device, feature, or task, and follow the current manufacturer guidance linked on that page.
Platform
General / Device
Content type
Troubleshooting
Source last updated
2023-03-16
Procedure
Browse the related pages in this chapter to open the specific procedure, configuration guide, or troubleshooting article you need.
Always verify safety, installation, compatibility, and current UI details against the original manufacturer documentation before operational use.
Commercial
Commercial report does not have a PDF attachment
GoSafer Security Knowledge Base
This operational reference is organized for GoSafer Security customers and staff. Alarm.com product names are retained where required for technical accuracy.
Overview
Commercial reports can be viewed as a web version using a browser or as a downloadable PDF file. However, as of October 13, 2022, reports that were not created or modified since June 22, 2020 have had their PDF email attachments removed.
If a customer is no longer receiving a PDF attachment with their report and they want to be receiving the PDF, they can edit the report and reattach the PDF using the GoSafer Security customer portal (powered by Alarm.com) or Alarm.com app.
Platform
App + Web
Content type
How-to / Configuration
Source last updated
2025-06-04
Procedure
To attach a PDF using the GoSafer Security customer portal (powered by Alarm.com)
Log in to the GoSafer Security customer portal (powered by Alarm.com).
Click Activity.
Click Reports.
Select the desired report.
Using the Attachments dropdown menu, select Attach PDF.
Click Save.
To attach a PDF using the Alarm.com app
Log in to the Alarm.com app.
Tap [Menu].
Tap Reports.
Tap [Edit] next to the desired report.
Using the Attachments dropdown menu, select Attach PDF.
Always verify safety, installation, compatibility, and current UI details against the original manufacturer documentation before operational use.
Commercial
Create an auto re-arming rule
GoSafer Security Knowledge Base
This operational reference is organized for GoSafer Security customers and staff. Alarm.com product names are retained where required for technical accuracy.
Overview
Automated System Re-Arming is a feature that lets you program your security system to automatically switch to an Armed state if specific criteria are met.
Platform
Customer Website
Content type
How-to / Configuration
Source last updated
2025-06-04
Procedure
To create an Auto Re-Arming rule
Rules can only be created and updated using the GoSafer Security customer portal (powered by Alarm.com).
Note: If an Auto Re-Arming schedule needs to be adjusted, click Delete for the current schedule that needs adjustments, and then create a new Auto Re-Arming Schedule with the adjustment.
Log in to the GoSafer Security customer portal (powered by Alarm.com).
Click Automation.
Click Auto Re-Arming.
Note: If business hours are set up, you can choose to Use business hours in Choose Schedule Type to auto re-arm the system after a specified timeframe of inactivity outside of business operating hours.
In Create Auto Re-Arming Schedule, use the dropdown menus to select the automated system action and the desired duration of inactivity.
If business hours are not used for the Auto Re-Arming schedule, use the dropdown menus to select what days and hours of the day the re-arming schedule is active.
Verify the Auto Re-Arming schedule is configured as desired.
Click Save.
Frequently asked questions
Can Auto Re-Arming be used with a partitioned system?
Yes. Auto Re-Arming supports partitioned systems. You can choose to automatically re-arm an individual partition or all partitions when creating an Auto Re-Arming schedule.
What is considered as no system activity?
Auto Re-Arming takes into consideration every security sensor on the system when it is looking for no activity on the system. The system looks for no activity on all the sensors before auto re-arming the partition.
Only security sensors affect auto re-arming system activity. Activity on other types of equipment (e.g., Z-Wave lights turning on/off, door locks locking/unlocking, etc.) are not considered as system activity for Auto Re-Arming.
Can more than one Auto Re-Arming schedule be set up?
Yes. Multiple Auto Re-Arming schedules can be set up for various times throughout the day.
Note: Schedules can also be set up to start in the evening and end in the morning of the following day.
Always verify safety, installation, compatibility, and current UI details against the original manufacturer documentation before operational use.
Commercial
Enable/configure business hours
GoSafer Security Knowledge Base
This operational reference is organized for GoSafer Security customers and staff. Alarm.com product names are retained where required for technical accuracy.
Overview
Business hours make it easier to setup and manage commercial features like reporting, arming schedules, auto re-arming and notifications.
Platform
Customer Website
Content type
How-to / Configuration
Source last updated
2025-06-04
Procedure
Step-by-step guide: Screenshots and videos are placed with the instruction they illustrate.
Add new locations to an existing group to manage and make changes across multiple properties at once. There is no limit to the number of locations that can be added to an Enterprise group.
Note: The accounts must be with the same dealer to be added to the same group. For accounts with different dealers, Cross-Dealer Enterprise Groups are supported in some cases. For more information, see Cross-Dealer Groups.
To add a new location to a group:
Note: The login used must have Administrator permissions in the group where the new location will be added.
Log in to the GoSafer Security customer portal (powered by Alarm.com).
Verify the Enterprise name is selected, and not a location name. When the Enterprise group is selected, a Locations option shows in the menu instead of Home.
If a location is selected, use the dropdown menu to select the Enterprise group. Enterprise groups have Group Property next to the Enterprise name, whereas locations will have Icn Enterprise Open for commercial accounts or Single Property for residential accounts next to the location name.
If the option to select an Enterprise group is not showing, verify the login being used has access to the Enterprise group.
Click Manage Groups.
Click Add next to the desired group.
Enter an Administrator login name and password for the location.
Add Location1
Note: The login used must have Administrator permissions in the group where the new location will be added.
Always verify safety, installation, compatibility, and current UI details against the original manufacturer documentation before operational use.
Commercial
Getting started with a Commercial account
GoSafer Security Knowledge Base
This operational reference is organized for GoSafer Security customers and staff. Alarm.com product names are retained where required for technical accuracy.
Overview
This video walks through some of the basic features associated with an Alarm.com Commercial account.
Platform
General / Device
Content type
How-to / Configuration
Source last updated
2026-03-06
Procedure
Step-by-step guide: Screenshots and videos are placed with the instruction they illustrate.
For additional information about how to manage specific aspects of a commercial account, see Commercial Management.
Always verify safety, installation, compatibility, and current UI details against the original manufacturer documentation before operational use.
Commercial
How can I opt-into or out of 24/7 Managed Access?
GoSafer Security Knowledge Base
This operational reference is organized for GoSafer Security customers and staff. Alarm.com product names are retained where required for technical accuracy.
Overview
Save time and money while preserving your business's security by allowing your service provider to manage your system for you.
Using 24/7 Managed Access, you will remain in control of your account, including the ability to determine the security categories your service provider manages (e.g., Arming & Disarming, View Live Video and Images, User Code Management, Login Management), while maintaining the ability to update or revoke your service provider's access at any time.
Platform
Customer Website
Content type
FAQ / Explanation
Source last updated
2025-06-04
Procedure
Step-by-step guide: Screenshots and videos are placed with the instruction they illustrate.
Save time and money while preserving your business's security by allowing your service provider to manage your system for you.
Using 24/7 Managed Access, you will remain in control of your account, including the ability to determine the security categories your service provider manages (e.g., Arming & Disarming, View Live Video and Images, User Code Management, Login Management), while maintaining the ability to update or revoke your service provider's access at any time.
When they request access to your business accounts or Community management accounts, you will receive an email with a link to log in and approve access.
Once logged in, agree to the terms and conditions.
Customer Managed Access agreement
To manage access settings:
Log in to the GoSafer Security customer portal (powered by Alarm.com).
Click Settings.
Click 24/7 Managed Access Settings.
Click Opt-Out of Managed Access or select which specific features should be excluded.
Always verify safety, installation, compatibility, and current UI details against the original manufacturer documentation before operational use.
Commercial
Commercial Notifications
GoSafer Security Knowledge Base
This operational reference is organized for GoSafer Security customers and staff. Alarm.com product names are retained where required for technical accuracy.
Overview
This GoSafer Security section brings together resources for Commercial Notifications, including setup, configuration, everyday use, and troubleshooting. Choose the related page that matches your device, feature, or task, and follow the current manufacturer guidance linked on that page.
Platform
General / Device
Content type
How-to / Configuration
Source last updated
2024-07-24
Procedure
Browse the related pages in this chapter to open the specific procedure, configuration guide, or troubleshooting article you need.
Always verify safety, installation, compatibility, and current UI details against the original manufacturer documentation before operational use.
Commercial
Create/edit a Door was left open notification
GoSafer Security Knowledge Base
This operational reference is organized for GoSafer Security customers and staff. Alarm.com product names are retained where required for technical accuracy.
Overview
A door was left open notification can notify users of a door/window that has been left open for a specified time period, or if specific users leave the premises while the sensor is open.
Platform
App + Web
Content type
How-to / Configuration
Source last updated
2025-06-04
Procedure
To create/edit a Door was left open notification using the Alarm.com app
Log in to the Alarm.com app.
Tap [Menu].
Tap Notifications.
Tap [Settings].
To edit the notification, tap to select the Door was left open notification.
If the notification has not been created
Tap [Add].
Tap Use A Template.
In Business, tap Door was left open.
Name the new notification.
In When any of these sensors, select the sensors to be notified about.
In Is Left Open, select either
For this duration to select the amount of time the sensor must remain open before sending the notification.
When select people cross a Geo-Fence to select when specific users enter or exit a location.
In During this timeframe, select either of the following
At All Times to be notified at all times.
Only during the following times to select specific days and times to be notified.
In Recipients, tap Add.
Tap the entries in Address Book to be notified or tap Add Contact to add a new Address Book entry.
Tap Close.
Verify the notification is configured with the correct settings.
Tap Save.
To create/edit a Door was left open notification using the GoSafer Security customer portal (powered by Alarm.com)
Log in to the GoSafer Security customer portal (powered by Alarm.com).
Click Notifications.
To edit the notification, click [Edit] next to the Door was left open notification.
If the notification has not been created
Click New Notification.
Click Business.
Click Door was left open.
Name the notification rule.
In When any of these sensors, select the sensors to be notified about.
In Is Left Open, select either of the following
For this duration to select how long a door is left open.
When select people cross a Geo-Fence to select when specific users enter or exit a location.
In During this timeframe, select either of the following
At All Times to be notified at all times.
Only during the following times to select specific days and times to be notified.
In Recipients, click Add to choose notification recipients.
Click the entries in Address Book to be notified, or click New to add a new Address Book entry.
Click Close.
Verify the notification is configured with the correct settings.
Always verify safety, installation, compatibility, and current UI details against the original manufacturer documentation before operational use.
Commercial
Create/edit a Not closed on time notification
GoSafer Security Knowledge Base
This operational reference is organized for GoSafer Security customers and staff. Alarm.com product names are retained where required for technical accuracy.
Overview
A not closed on time notification can notify users if the system was not armed during the closing hours specified.
Platform
App + Web
Content type
How-to / Configuration
Source last updated
2025-06-04
Procedure
Create/edit a Not closed on time notification
Not closed on time notifications can be created and edited using the Alarm.com app and GoSafer Security customer portal (powered by Alarm.com).
To create/edit a Not closed on time notification using the Alarm.com app
Log in to the Alarm.com app.
Tap [Menu].
Tap Notifications.
Tap [Settings].
To edit the notification, tap to select the not closed on time notification.
If the notification has not been created
Tap [Create%2F%2Fedit a not closed on time notification] [Add].
Tap to expand Use A Template.
In Business, tap More.
Tap Not closed on time.
Enter the desired name for the notification rule.
In When the selected events occur, select Not Closed on Time.
In Recipients, tap Add to select notification recipients.
Tap the entries in Address Book to be notified, or tap Add Contact to add a new Address Book entry.
Tap Close.
Verify the notification is configured with the correct settings.
Tap Save.
To create/edit a Not closed on time notification using the GoSafer Security customer portal (powered by Alarm.com)
Log in to the GoSafer Security customer portal (powered by Alarm.com).
Click Notifications.
To edit the notification, click [Edit] for the Not closed on time notification.
If the notification has not been created
Click New Notification.
Click to select Business.
Click Not closed on time.
Enter the desired name for the notification rule.
In When the selected events occur, select Not Closed on Time.
In Recipients, click Add to select notification recipients.
Click the entries in Address Book to be notified, or click New to add a new Address Book entry.
Click Close.
Verify the notification is configured with the correct settings.
Always verify safety, installation, compatibility, and current UI details against the original manufacturer documentation before operational use.
Commercial
Create/edit a Not open on time notification
GoSafer Security Knowledge Base
This operational reference is organized for GoSafer Security customers and staff. Alarm.com product names are retained where required for technical accuracy.
Overview
A not open on time notification can notify users if the system was not disarmed during the arrival hours specified.
Platform
App + Web
Content type
How-to / Configuration
Source last updated
2025-06-04
Procedure
Create/edit a Not open on time notification
A Not open on time notification can be created and edited using the Alarm.com app and GoSafer Security customer portal (powered by Alarm.com).
To create/edit a Not open on time notification using the Alarm.com app
Log in to the Alarm.com app.
Tap [Menu].
Tap Notifications.
Tap [Settings].
To edit the notification, tap to select the not open on time notification.
If the notification has not been created
Tap [Add].
Tap to expand Use A Template.
In Business, tap More.
Tap Not open on time.
Enter the desired name for the notification.
In When the selected events occur, select Not Opened on Time.
In Recipients, tap Add to select notification recipients.
Tap the entries in Address Book to be notified, or tap Add Contact to add a new Address Book entry.
Tap Close.
Verify the notification is configured with the correct settings.
Tap Save.
To create/edit a Not open on time notification using the GoSafer Security customer portal (powered by Alarm.com)
Log in to the GoSafer Security customer portal (powered by Alarm.com).
Click Notifications.
To edit the notification, click [Edit] for the not open on time notification.
If the notification has not been created
Click New Notification.
Click to select Business.
Click Not open on time.
Enter the desired name for the notification rule.
In When the selected events occur, select Not Opened on Time.
In Recipients, click Add to select notification recipients.
Click the entries in Address Book to be notified, or click New to add a new Address Book entry.
Click Close.
Verify the notification is configured with the correct settings.
Always verify safety, installation, compatibility, and current UI details against the original manufacturer documentation before operational use.
Commercial
Create/edit a Silent alarm reported notification
GoSafer Security Knowledge Base
This operational reference is organized for GoSafer Security customers and staff. Alarm.com product names are retained where required for technical accuracy.
Overview
A silent alarm reported notification can notify users if a silent alarm has been reported by an employee.
Platform
App + Web
Content type
How-to / Configuration
Source last updated
2025-06-04
Procedure
To create/edit a Silent alarm reported notification using the Alarm.com app
Log in to the Alarm.com app.
Tap [Menu].
Tap Notifications.
Tap [Settings].
To edit the notification, tap to select the silent alarm reported notification.
If the notification has not been created
Tap [Add].
Tap Use A Template.
In Business, tap More.
Tap Silent alarm reported.
Name the notification rule.
In When Alarm of type, select Audible, Silent, or both.
In Is reported by, select Any Sensor unless a specific sensor is to be monitored.
Caution: Do not choose to send a Duress Panic SMS or push notification to a potential Duress Code user.
Tap Add.
Tap the entries in Address Book to be notified, or tap Add Contact to add a new Address Book entry.
Tap Close.
Verify the notification is configured with the correct settings.
Press Save.
To create/edit a Silent alarm reported notification using the GoSafer Security customer portal (powered by Alarm.com)
Log in to the GoSafer Security customer portal (powered by Alarm.com).
Click Notifications.
To edit the notification, click [Edit] for the silent alarm reported notification.
If the notification has not been created
Click New Notification.
Click to select Business.
Click Silent alarm reported.
Name the notification rule.
In When Alarm of type, click Silent.
In Is reported by, select Any Sensor unless a specific sensor is to be monitored.
Caution: Do not choose to send a Duress Panic SMS or push notification to a potential Duress Code user.
To choose notification recipients, click Add.
Click the entries in Address Book to be notified, or click New to add a new Address Book entry.
Click Close.
Verify the notification is configured with the correct settings.
Always verify safety, installation, compatibility, and current UI details against the original manufacturer documentation before operational use.
Commercial
Create/edit a disarming supervision notification
GoSafer Security Knowledge Base
This operational reference is organized for GoSafer Security customers and staff. Alarm.com product names are retained where required for technical accuracy.
Overview
A disarming supervision notification can notify users if the system has not been disarmed by a certain time.
Platform
App + Web
Content type
How-to / Configuration
Source last updated
2025-06-04
Procedure
To create/edit a disarming supervision notification using the Alarm.com app
Log in to the Alarm.com app.
Tap [Menu].
Tap Notifications.
Tap [Settings].
To edit the notification, tap to select the disarming supervision notification.
If the notification has not been created
Tap [Add].
Tap to expand Create Your Own.
Tap Disarming Supervision.
Name the notification.
In Send an Arming Reminder if the system is NOT Disarmed, select either
At a specific time to enter the desired time.
When selected people cross a Geo-Fence to select the users and whether to notify when they enter or exit. Additionally, select which Geo-Fence should be the trigger and the times the rule should be in effect.
In When the system has not been disarmed by, select the desired time.
In On the selected days, select either At all times or Only during the following times to choose when the rule should be in effect.
In Recipients, tap Add.
In Address Book, tap on the recipient you would like to receive the notification.
Tap Close.
Verify the notification is configured with the correct settings.
Tap Save.
To create/edit a disarming supervision notification using the GoSafer Security customer portal (powered by Alarm.com)
Log in to the GoSafer Security customer portal (powered by Alarm.com).
Click Notifications.
To edit the notification, click [Edit] for the disarming supervision notification.
If the notification has not been created
Click New Notification.
Click Disarming Supervision.
Name the notification rule.
In Send an Arming Reminder if the system is NOT disarmed, select either
At a specific time to select a specific time the system should be disarmed by.
When selected people cross a Geo-Fence to select the users and whether to notify when they enter or exit. Additionally, select which Geo-Fence should be the trigger and the times the rule should be in effect.
In On the selected days, select either At all times or Only during the following times to choose when the rule should be in effect.
In Recipients, click Add to select who will receive this notification.
Click the entries in the Address Book that are to be notified, or click New to add a new Address Book entry.
Click Close.
Verify the notification is configured with the correct settings.
Always verify safety, installation, compatibility, and current UI details against the original manufacturer documentation before operational use.
Commercial
Create/edit an Alarm reported notification
GoSafer Security Knowledge Base
This operational reference is organized for GoSafer Security customers and staff. Alarm.com product names are retained where required for technical accuracy.
Overview
An alarm reported notification can notify users if there has been an alarm event at the property.
Platform
App + Web
Content type
How-to / Configuration
Source last updated
2025-06-04
Procedure
To create/edit an Alarm reported notification using the Alarm.com app
Log in to the Alarm.com app.
Tap [Menu].
Tap Notifications.
Tap [Settings].
To edit the notification, tap to select the Alarm reported notification.
If the notification has not been created
Tap [Add].
Tap Use A Template.
In Business, tap Alarm reported.
Name the notification rule.
In When Alarm of type, select Audible, Silent, or both.
In Is reported by, select Any Sensor unless a specific sensor is to be monitored.
Caution: Do not choose to send a Duress Panic SMS or push notification to a potential Duress Code user.
Tap Add.
Tap the entries in Address Book to be notified, or tap Add Contact to add a new Address Book entry.
Tap Close.
Verify the notification is configured with the correct settings.
Tap Save.
To create/edit an Alarm reported notification using the GoSafer Security customer portal (powered by Alarm.com)
Log in to the GoSafer Security customer portal (powered by Alarm.com).
Click Notifications.
To edit the notification, click [Edit] for the alarm reported notification.
If the notification has not been created
Click New Notification.
Click to select Business.
Click Alarm reported.
Name the notification rule.
In When Alarm of type, select the alarm types to receive notifications about.
In Is reported by, select Any Sensor unless a specific sensor is to be monitored.
Caution: Do not choose to send a Duress Panic SMS or push notification to a potential Duress Code user.
To choose notification recipients, click Add.
Click the entries in Address Book to be notified, or click +New to add a new Address Book entry.
Click Close.
Verify the notification is configured with the correct settings.
Always verify safety, installation, compatibility, and current UI details against the original manufacturer documentation before operational use.
Commercial
Create/edit an Employee arming activity notification
GoSafer Security Knowledge Base
This operational reference is organized for GoSafer Security customers and staff. Alarm.com product names are retained where required for technical accuracy.
Overview
An employee arming activity notification can notify users when and who is opening up for the day and closing down for the night.
Platform
App + Web
Content type
How-to / Configuration
Source last updated
2025-06-04
Procedure
To create/edit an Employee arming activity notification using the Alarm.com app
Log in to the Alarm.com app.
Tap [Menu].
Tap Notifications.
Tap [Settings].
To edit the notification, tap to select the employee arming activity notification.
If the notification has not been created
Tap [Add].
Tap Use A Template.
In Business, tap More.
Tap Employee arming activity.
Name the notification rule.
In When, select Any User or Keyfob or select Select Users and Keyfobs for specific users.
In Performs any of these system actions, select any of the following
Disarm notifies when the panel is disarmed.
Arm Stay notifies when the panel is set to Arm Stay.
Arm Away notifies when the panel is set to Arm Away.
In During this time frame, select one of the following
At All Times to allow notifications at all times.
Only During the Following Times to specify specific dates and times to allow notifications.
In Notification Filtering, select any desired filtering options
Do not send notifications that occur within a certain timeframe of the last notification.
Do not send notifications when any of the following Geo-Devices are inside the selected Geo-Fence.
To choose notification recipients, tap Add.
Tap the entries in Address Book to be notified, or tap Add Contact to add a new Address Book entry.
Tap Close.
Verify the notification is configured with the correct settings.
Tap Save.
To create/edit an Employee arming activity notification using the GoSafer Security customer portal (powered by Alarm.com):
Log in to the GoSafer Security customer portal (powered by Alarm.com).
Click Notifications.
To edit the notification, click [Edit] for the employee arming activity notification.
If the notification has not been created
Click New Notification.
Click to select Business.
Click Employee arming activity.
Name the notification rule.
In When, select Any User or Keyfob or select Select Users and Keyfobs for specific users.
In During this time frame, select either of the following
At all times to allow notifications at all times.
Only during the following times to specific dates and times to allow notifications.
In Notification Filtering, select any desired filtering options
Do not send notifications that occur within a certain timeframe of the last notification.
Do not send notifications when any of the following Geo-Devices are inside the selected Geo-Fence.
To choose notification recipients, click Add.
Click the entries in Address Book to be notified, or click New to add a new Address Book entry.
Click Close.
Verify the notification is configured with the correct settings.
Always verify safety, installation, compatibility, and current UI details against the original manufacturer documentation before operational use.
Commercial
Create/edit an Opened Unexpectedly notification
GoSafer Security Knowledge Base
This operational reference is organized for GoSafer Security customers and staff. Alarm.com product names are retained where required for technical accuracy.
Overview
An Opened Unexpectedly notification can notify users if the system was disarmed after closing hours and before arrival hours.
Platform
App + Web
Content type
How-to / Configuration
Source last updated
2025-06-04
Procedure
To create/edit an Opened Unexpectedly notification using the Alarm.com app
Log in to the Alarm.com app.
Tap [Menu].
Tap Notifications.
Tap [Settings].
To edit the notification, tap Opened Unexpectedly.
If the notification has not been created
Tap [Add].
Tap Use A Template.
In Business, tap Opened Unexpectedly.
Name the notification rule.
In When the selected events occur, select the events to receive notifications about.
To choose notification recipients, tap Add.
Tap the entries in Address Book to be notified, or tap Add Contact to add a new Address Book entry.
Tap Close.
Verify the notification is configured with the correct settings.
Tap Save.
To create/edit an Opened Unexpectedly notification using the GoSafer Security customer portal (powered by Alarm.com)
Log in to the GoSafer Security customer portal (powered by Alarm.com).
Click Notifications.
To edit the notification, click [Edit] for the Opened Unexpectedly notification.
If the notification has not been created
Click New Notification.
Click to select Business.
Click Opened Unexpectedly.
Name the notification rule.
Select Opened Unexpectedly.
To choose notification recipients, click Add.
Click the entries in Address Book to be notified, or click New to add a new Address Book entry.
Click Close.
Verify the notification is configured with the correct settings.
Always verify safety, installation, compatibility, and current UI details against the original manufacturer documentation before operational use.
Commercial
Create/edit an arming supervision notification
GoSafer Security Knowledge Base
This operational reference is organized for GoSafer Security customers and staff. Alarm.com product names are retained where required for technical accuracy.
Overview
An arming supervision notification can notify users if the system has not been armed by a certain time.
Platform
App + Web
Content type
How-to / Configuration
Source last updated
2025-06-04
Procedure
To create an arming supervision notification using the Alarm.com app
Log in to the Alarm.com app.
Tap [Menu].
Tap Notifications.
Tap [Settings].
Tap [Add].
Tap Create Your Own.
Tap Arming Supervision.
Name the new notification rule.
In Send an Arming Reminder if the system is NOT armed, select one of the following
At a specific time to enter a desired time.
When selected people cross a Geo-Fence to select the desired Geo-Devices.
In On the selected days, tap to select either At All Times or Only During the Following Times to define specific times.
Tap Add.
Tap to select the entries in the address book to be notified.
If a contact is not listed
Tap Add Contact to add a new address book entry.
Enter the new contact's information, then tap Add Contact.
Tap Close.
Note: To remove recipients, tap [Close] to remove the desired notification recipient.
Verify the notification is configured with the correct settings.
Tap Save.
To create an arming supervision notification using the GoSafer Security customer portal (powered by Alarm.com)
Log in to the GoSafer Security customer portal (powered by Alarm.com).
Click Notifications.
Click New Notification.
Click Arming Supervision.
Name the new notification rule.
In Send an Arming Reminder if the system is NOT armed, select one of the following
At a specific time to enter a desired time.
When selected people cross a Geo-Fence to select the desired Geo-Devices.
In On the selected days, click to select either At All Times or Only During the Following Times to define specific times.
To choose notification recipients, click Add.
Click to select the entries in the address book to be notified.
If a contact is not listed
Click New to add a new address book entry.
Enter the new contact's information, then click Add Contact.
Click Close.
Note: To remove recipients, tap [Close] to remove the desired notification recipient.
Verify the notification is configured with the correct settings.
Always verify safety, installation, compatibility, and current UI details against the original manufacturer documentation before operational use.
Commercial
Add a Location to an Enterprise Group - Video
GoSafer Security Knowledge Base
This operational reference is organized for GoSafer Security customers and staff. Alarm.com product names are retained where required for technical accuracy.
Overview
Locations can be added to an Enterprise Group.
Platform
General / Device
Content type
How-to / Configuration
Source last updated
2023-02-20
Procedure
Step-by-step guide: Screenshots and videos are placed with the instruction they illustrate.
Always verify safety, installation, compatibility, and current UI details against the original manufacturer documentation before operational use.
Commercial
Add a Location to be managed in a Multi-Level Group
GoSafer Security Knowledge Base
This operational reference is organized for GoSafer Security customers and staff. Alarm.com product names are retained where required for technical accuracy.
Overview
Locations can be added and managed in a Multi-Level Group.
Platform
Customer Website
Content type
How-to / Configuration
Source last updated
2025-06-04
Procedure
The Subgroup has not been created
Before a location can be added to a Multi-Level Group, it must be added to a Subgroup.
To create a Subgroup
Log in to the GoSafer Security customer portal (powered by Alarm.com).
Click Manage Groups.
Click [Add] Subgroup.
Enter a name for the Subgroup.
Click Save.
After the Subgroup has been created, a location can be added to a Multi-Level Group. For more information, see The Subgroup has been created.
The Subgroup has been created
After the Subgroup has been created, locations can be added to the Multi-Level Group.
To add a location to a Multi-Level Group
Log in to the GoSafer Security customer portal (powered by Alarm.com).
Click Manage Groups.
In the desired Subgroup, click [Add].
Enter the location's Administrator login name and password to add.
Always verify safety, installation, compatibility, and current UI details against the original manufacturer documentation before operational use.
Commercial
Add a Login to Multiple Locations - Video
GoSafer Security Knowledge Base
This operational reference is organized for GoSafer Security customers and staff. Alarm.com product names are retained where required for technical accuracy.
Overview
Logins can be added to multiple locations within an Enterprise Group.
Platform
General / Device
Content type
How-to / Configuration
Source last updated
2023-02-20
Procedure
Step-by-step guide: Screenshots and videos are placed with the instruction they illustrate.
Always verify safety, installation, compatibility, and current UI details against the original manufacturer documentation before operational use.
Commercial
Add a User Code to multiple locations - Video
GoSafer Security Knowledge Base
This operational reference is organized for GoSafer Security customers and staff. Alarm.com product names are retained where required for technical accuracy.
Overview
User Codes can be added to multiple locations.
Platform
General / Device
Content type
How-to / Configuration
Source last updated
2023-02-20
Procedure
Step-by-step guide: Screenshots and videos are placed with the instruction they illustrate.
Always verify safety, installation, compatibility, and current UI details against the original manufacturer documentation before operational use.
Commercial
Add a location to an Enterprise system
GoSafer Security Knowledge Base
This operational reference is organized for GoSafer Security customers and staff. Alarm.com product names are retained where required for technical accuracy.
Overview
Locations can either be added to an Enterprise group during account creation so the new system is part of one of the Enterprise groups on first log-in or after the account has been created using the GoSafer Security customer portal (powered by Alarm.com).
There is no limit to the number of locations that can be added to an Enterprise group.
Note: To add a location, the location must use a supported service package. For more information, contact your service provider. It is also recommended to use the primary login of the account when adding a location to the Enterprise group.
Platform
Customer Website
Content type
How-to / Configuration
Source last updated
2025-08-07
Procedure
Add locations to an Enterprise system
To add locations to an Enterprise system using the GoSafer Security customer portal (powered by Alarm.com)
Important: The login used must have Administrator permissions in the group where the new location will be added.
Log in to the GoSafer Security customer portal (powered by Alarm.com).
Verify the Enterprise name is selected, and not a location name. When the Enterprise group is selected, a Locations option shows in the menu instead of Home.
If a location is selected, use the dropdown menu to select the Enterprise group. Enterprise groups have [Group Property] next to the Enterprise name, whereas locations will have [Enterprise Open] for commercial accounts or [Single Property] for residential accounts next to the location name.
If the option to select an Enterprise group is not showing, verify the login being used has access to the Enterprise group.
Always verify safety, installation, compatibility, and current UI details against the original manufacturer documentation before operational use.
Commercial
Add a new location to a group
GoSafer Security Knowledge Base
This operational reference is organized for GoSafer Security customers and staff. Alarm.com product names are retained where required for technical accuracy.
Overview
Add new locations to an existing group to manage and make changes across multiple properties at once.
Platform
Customer Website
Content type
How-to / Configuration
Source last updated
2026-05-28
Procedure
Step-by-step guide: Screenshots and videos are placed with the instruction they illustrate.
Add new locations to an existing group to manage and make changes across multiple properties at once. There is no limit to the number of locations that can be added to an Enterprise group.
Note: The accounts must be with the same dealer to be added to the same group. For accounts with different dealers, Cross-Dealer Enterprise Groups are supported in some cases. For more information, see Cross-Dealer Groups.
To add a new location to a group:
Note: The login used must have Administrator permissions in the group where the new location will be added.
Log in to the GoSafer Security customer portal (powered by Alarm.com).
Verify the Enterprise name is selected, and not a location name. When the Enterprise group is selected, a Locations option shows in the menu instead of Home.
If a location is selected, use the dropdown menu to select the Enterprise group. Enterprise groups have Group Property next to the Enterprise name, whereas locations will have Icn Enterprise Open for commercial accounts or Single Property for residential accounts next to the location name.
If the option to select an Enterprise group is not showing, verify the login being used has access to the Enterprise group.
Click Manage Groups.
Click Add next to the desired group.
Enter an Administrator login name and password for the location.
Add Location1
Note: The login used must have Administrator permissions in the group where the new location will be added.
Always verify safety, installation, compatibility, and current UI details against the original manufacturer documentation before operational use.
Commercial
Add an existing login to an Enterprise Group
GoSafer Security Knowledge Base
This operational reference is organized for GoSafer Security customers and staff. Alarm.com product names are retained where required for technical accuracy.
Overview
Existing logins can be added to a location management group using the website.
Platform
Customer Website
Content type
How-to / Configuration
Source last updated
2025-06-04
Procedure
To add an existing login to an Enterprise Group using the GoSafer Security customer portal (powered by Alarm.com)
Log in to the GoSafer Security customer portal (powered by Alarm.com).
Using the locations dropdown menu, select the desired group.
Click Users.
Click Manage Logins.
Click Add Group Login.
Click Associate Login to enter the login name and email of an existing login to allow it access to the group.
In Login Name, enter the login name for the existing login.
In Email Address, enter the email address for the existing login.
Using the Role dropdown menu, select the desired role for the login.
Select the desired permissions for the login.
Click Save.
For more information about adding logins to a group, see Create a new group login.
Always verify safety, installation, compatibility, and current UI details against the original manufacturer documentation before operational use.
Commercial
Can single system user codes be replaced with Enterprise user codes?
GoSafer Security Knowledge Base
This operational reference is organized for GoSafer Security customers and staff. Alarm.com product names are retained where required for technical accuracy.
Overview
No. Single system user codes cannot be replaced with Enterprise user codes. To replace a single system user with an Enterprise equivalent, the user for the single system user must be deleted and then recreated at the Enterprise level using the GoSafer Security customer portal (powered by Alarm.com).
Platform
Customer Website
Content type
Troubleshooting
Source last updated
2026-06-15
Procedure
To delete a single system user
Before you begin, export the current panel slot numbers as a backup reference. This report shows all users and their assigned slot numbers across all systems in the group. If users need to be manually restored after an error, this file will be the only reference. PIN codes are not included in the export. For more information, see Export panel slot numbers for a group.
Log in to the GoSafer Security customer portal (powered by Alarm.com).
Use the dropdown menu to select the single system location.
Note: Enterprise groups have [Group Property] next to the Enterprise name, whereas locations will have [Enterprise Open] for commercial accounts or [Single Property] for residential accounts next to the location name.
Click Users.
Click [More Options] next to the desired user, then click Delete.
Create and update users at the Enterprise level
Users can be created and existing users can be updated using the GoSafer Security customer portal (powered by Alarm.com).
To create a user at the Enterprise level
Log in to the GoSafer Security customer portal (powered by Alarm.com).
Use the dropdown menu to select the Enterprise group.
Note: Enterprise groups have [Group Property] next to the Enterprise name, whereas locations will have [Enterprise Open] for commercial accounts or [Single Property] for residential accounts next to the location name.
Click Users.
Click Add User.
Enter the desired name for the user, then click Create.
In Set Access Code, enter the desired code or click Generate Code, then click Save and Continue.
In Set Access Period, select the schedule or time frame the user will have access for, then click Save and Continue. For more information about scheduled or temporary panel users, see Configure Scheduled and Temporary panel user codes.
In Access Type, select the desired access type.
Select Existing + Future to grant access to all devices in all locations across all groups and automatically grant access to future devices, locations, and groups.
Select All Existing Devices to grant the user access to all currently existing devices, locations, and groups.
Select Set By Location to select the desired access based on location.
Select No Device Access to restrict access to all devices on all locations within any group.
Click Save. The user code is sent to the panels at the selected locations to allow the user access. It takes a few minutes for the user code to download to the panel at each site.
Important: Do not make changes to the panel or send other remote commands during this time as this could result in codes not syncing properly.
Wait 5 minutes before testing the code at the panel. The duration it takes to push codes to the panel depends on the number of locations that need to be updated.
To edit an existing user at the Enterprise level
Log in to the GoSafer Security customer portal (powered by Alarm.com).
Use the dropdown menu to select the Enterprise group.
Note: Enterprise groups have [Group Property] next to the Enterprise name, whereas locations will have [Enterprise Open] for commercial accounts or [Single Property] for residential accounts next to the location name.
Click Users.
Click [More Options] next to the desired user, then click Edit.
In Access Information, click Access Code.
In Set Access Code, enter the desired code or click Generate Code, then click Save and Continue.
In Access Information, click Access Period.
In Set Access Period, select the schedule or time frame the user will have access for, then click Save and Continue. For more information about scheduled or temporary panel users, see Configure Scheduled and Temporary panel user codes.
In Access Information, click Access Type.
In Access Type, select the desired access type.
Select Existing + Future to grant access to all devices in all locations across all groups and automatically grant access to future devices, locations, and groups.
Select All Existing Devices to grant the user access to all currently existing devices, locations, and groups.
Select Set By Location to select the desired access based on location.
Select No Device Access to restrict access to all devices on all locations within any group.
Important: Do not make changes to the panel or send other remote commands during this time as this could result in codes not syncing properly.
Wait 5 minutes before testing the code at the panel. The duration it takes to push codes to the panel depends on the number of locations that need to be updated.
Always verify safety, installation, compatibility, and current UI details against the original manufacturer documentation before operational use.
Commercial
Change the name of an Enterprise group
GoSafer Security Knowledge Base
This operational reference is organized for GoSafer Security customers and staff. Alarm.com product names are retained where required for technical accuracy.
Overview
Location management group names can be changed using the website.
Platform
Customer Website
Content type
How-to / Configuration
Source last updated
2025-06-04
Procedure
To change the name of an Enterprise group using the GoSafer Security customer portal (powered by Alarm.com)
Log in to the GoSafer Security customer portal (powered by Alarm.com).
Verify the Enterprise name is selected, and not a location name. When the Enterprise group is selected, a Locations option shows in the menu instead of Home.
If a location is selected, use the dropdown menu to select the Enterprise group. Enterprise groups have [Group Property] next to the Enterprise name, whereas locations will have [Enterprise Open] for commercial accounts or [Single Property] for residential accounts next to the location name.
If the option to select an Enterprise group is not showing, verify the login being used has access to the Enterprise group.
Click Manage Groups.
Click [Edit] next to the desired Enterprise group.
Always verify safety, installation, compatibility, and current UI details against the original manufacturer documentation before operational use.
Commercial
Create Enterprise Notifications - Video
GoSafer Security Knowledge Base
This operational reference is organized for GoSafer Security customers and staff. Alarm.com product names are retained where required for technical accuracy.
Overview
Enterprise notifications allow recipients to receive notifications for all locations in an Enterprise group and can be managed using the {{customersite}}.
Platform
General / Device
Content type
How-to / Configuration
Source last updated
2023-02-20
Procedure
Step-by-step guide: Screenshots and videos are placed with the instruction they illustrate.
Always verify safety, installation, compatibility, and current UI details against the original manufacturer documentation before operational use.
Commercial
Create a Business Hours Template
GoSafer Security Knowledge Base
This operational reference is organized for GoSafer Security customers and staff. Alarm.com product names are retained where required for technical accuracy.
Overview
Business hours make it easier to configure and manage commercial features like reporting, arming schedules, auto re-arming, and notifications.
Platform
Customer Website
Content type
How-to / Configuration
Source last updated
2025-06-04
Procedure
Step-by-step guide: Screenshots and videos are placed with the instruction they illustrate.
Business hours make it easier to configure and manage commercial features like reporting, arming schedules, auto re-arming, and notifications. Business hours can be managed using the GoSafer Security customer portal (powered by Alarm.com).
To create a Business Hours Templates:
Log in to the GoSafer Security customer portal (powered by Alarm.com).
Verify the Enterprise name is selected, and not a location name. When the Enterprise group is selected, a Locations option shows in the menu instead of Home.
If a location is selected, use the dropdown menu to select the Enterprise group. Enterprise groups have Group Property next to the Enterprise name, whereas locations will have Icn Enterprise Open for commercial accounts or Single Property for residential accounts next to the location name.
If the option to select an Enterprise group is not showing, verify the login has access to the Enterprise group.
Click Settings.
Click Business Hours.
Click Create New Template.
Note: Business hours will only be applied to the primary partition of each location that uses the template. This can be changed in the location's settings.
You are able to name the template, select the day of the week, define hours the location should be open, and set windows when employees should be arriving and departing.
By clicking on Copy, you can select multiple days of the week to apply these selections to. You can also define whether this template will apply to All Locations, or click on Partial Locations to select from a list of all locations included in the Enterprise.
Always verify safety, installation, compatibility, and current UI details against the original manufacturer documentation before operational use.
Commercial
Create a Smarter Business Report - Video
GoSafer Security Knowledge Base
This operational reference is organized for GoSafer Security customers and staff. Alarm.com product names are retained where required for technical accuracy.
Overview
Smarter Business Reports provide comprehensive insights into the activity of a location or business.
Platform
General / Device
Content type
How-to / Configuration
Source last updated
2023-02-20
Procedure
Step-by-step guide: Screenshots and videos are placed with the instruction they illustrate.
Always verify safety, installation, compatibility, and current UI details against the original manufacturer documentation before operational use.
Commercial
Create a User Activity Report
GoSafer Security Knowledge Base
This operational reference is organized for GoSafer Security customers and staff. Alarm.com product names are retained where required for technical accuracy.
Overview
With User Activity Reports, you can gain added visibility into employee access to your Access Control doors. Compare expected in-office days against real employee activity to get an enhanced line of sight into workforce trends and make more informed business decisions.
Platform
App + Web
Content type
How-to / Configuration
Source last updated
2026-04-23
Procedure
To create a User Activity Report using the Alarm.com app
Log in to the Alarm.com app.
If applicable, select the desired Enterprise location or group.
Tap [More Options].
Tap Reports.
Tap [Add].
Tap User Activity Report.
Configure the report.
Using the Attachments dropdown menu, select the desired report attachment type.
In Recipients, tap Select recipients to select existing recipients, or tap Create Recipient to create a new one.
Tap Save.
To create a User Activity Report using the GoSafer Security customer portal (powered by Alarm.com)
Log in to the GoSafer Security customer portal (powered by Alarm.com).
If applicable, select the desired Enterprise location or group.
Click Activity.
Click Reports.
Click Add.
Click User Activity Report.
Configure the report.
Using the Attachments dropdown menu, select the desired report attachment type.
In Recipients, click Select recipients to select existing recipients, or click Create Recipient to create a new one.
Always verify safety, installation, compatibility, and current UI details against the original manufacturer documentation before operational use.
Commercial
Create a group Alarm Reported notification
GoSafer Security Knowledge Base
This operational reference is organized for GoSafer Security customers and staff. Alarm.com product names are retained where required for technical accuracy.
Overview
An alarm reported notification can notify users if there has been an alarm event at any of the properties in the group.
Platform
Customer Website
Content type
How-to / Configuration
Source last updated
2025-06-04
Procedure
To create a group Alarm Reported notification using the GoSafer Security customer portal (powered by Alarm.com)
Log in to the GoSafer Security customer portal (powered by Alarm.com).
Select the desired group from the locations dropdown menu.
Click Notifications.
Click New Notification.
Click Business.
Click Alarm Reported.
Name the new notification rule.
In When Alarm of type, select the types of alarms to report.
In Is reported by, select either
Any Sensor to be notified about alarms on any sensor.
Specific Sensor to be notified about alarms on specific sensors you select.
To choose notification recipients, click Add.
Click the entries in the Address Book that are to be notified, or click the New button to add a new address book entry.
Click Close.
Verify the notification is configured with the correct settings.
Note: Do not choose to send a Duress Panic SMS or push notification to a potential Duress Code user.
Always verify safety, installation, compatibility, and current UI details against the original manufacturer documentation before operational use.
Commercial
Create a new Enterprise group
GoSafer Security Knowledge Base
This operational reference is organized for GoSafer Security customers and staff. Alarm.com product names are retained where required for technical accuracy.
Overview
A new Enterprise group can be created if your account is not yet associated to a group.
Platform
Customer Website
Content type
How-to / Configuration
Source last updated
2023-05-12
Procedure
Step-by-step guide: Screenshots and videos are placed with the instruction they illustrate.
Caution: This process cannot be automatically reversed. Once a user is deleted from the single system level, they must be manually recreated if something goes wrong. There is no rollback option. Before proceeding, export your panel slot numbers as a reference record. For more information, see Set up an Enterprise user.
Enterprise groups allows you to manage security, automation, and business intelligence across two or more locations. You can also conveniently view the status and recent activity for multiple systems on one page.
Note: Depending on your service package, additional tools may be available to help with larger user migrations. The Promote users feature can automatically move users from the single system level to the Enterprise level and detect duplicate users across locations. This feature requires the Access Plan User Management (APUM) add-on, which is not included by default. Contact your service provider to find out if this option is available on your account. For more information, see Promote users.
Prepare Enterprise information
Prior to creating an Enterprise group, it is recommended to prepare the following information:
A naming convention for group names (e.g., region, manager’s name, store number, etc.).
A list of all the locations to be added to each group.
A list of Enterprise users vs. Single-System users.
A list of Enterprise users that will be added to each group.
A list of the locations each user can access.
If applicable, list the specific times users can access the locations (e.g., employee’s panel/lock code will work from 7:00 AM - 8:00 PM M-F). This feature is available on all compatible locks and select security panels.
Determine the types of notifications (e.g., open/close, alarms, etc.) to use and who should receive them.
List the business hours for each location. A template can be made to apply to locations that have the same business hours.
Determine which account is the primary login (e.g., corporate office, headquarters, etc.). Create the first Enterprise Group under this account. The primary login for the first system will be the default administrator login for the Enterprise group.
Note: The default administrator login can be changed a later time. For more information see To create a new group login.
Expand all
Configure an Enterprise groupIcn Chevron Down
Locations may be put into at most one Enterprise group. This can be done using the GoSafer Security customer portal (powered by Alarm.com).
Note: The accounts must be with the same dealer to be added to the same group. For accounts with different dealers, Cross-Dealer Enterprise Groups are supported in some cases. For more information, see Cross-Dealer Groups.
To allow user access to the panel locally on-site, create a new group user to add new user codes locally to the system. Creating a group user code does not give the user remote access to the GoSafer Security customer portal (powered by Alarm.com) and Alarm.com app for the system. For more information about adding group users, see Create a new group user.
To allow user remote access to the system using the Alarm.com app and GoSafer Security customer portal (powered by Alarm.com), create a new group login for the system. Creating a group login does not give the user a local code for on-site access to the panel. For more information about adding a group login, see Create a new group login.
Some best practices for setting up Enterprise users:
Before you begin, export the current panel slot numbers as a backup reference. This report shows all users and their assigned slot numbers across all systems in the group. If users need to be manually restored after an error, this file will be the only reference. PIN codes are not included in the export. For more information, see Export panel slot numbers for a group.
Determine which account will be the primary login (e.g., corporate office, headquarters). Create the first Enterprise group under this account. The primary login will have administrator rights to manage the Enterprise group.
An Enterprise user can be granted access to multiple locations within a group of locations. An Enterprise Administrator can configure permissions for Enterprise Users so that they have access to all locations, some locations, or no locations within a group. One possible reason to set up an Enterprise User without access to any locations would be for them to receive notifications but not be able to disarm a system.
Enterprise users with location access need a user code. Once added through the Alarm.com GoSafer Security customer portal (powered by Alarm.com), this user code is pushed to the alarm panel for each location where they will be granted access to panels, keypads, or smart locks.
Add an email and/or phone number of the Enterprise user so they can receive email/text notifications (e.g., alarms, open/close emails).
If applicable, add cards and PIN codes to allow Access Control users to gain access to doors with card readers or keypads.
If you have existing User codes on the Single System level that you would like span across multiple locations, the users must be deleted from individual locations and recreated on the Enterprise Group level.
Removing users from a single system and adding to Enterprise:
If the user is currently receiving text or push notifications, please make note of their mobile carrier and other details that will need to be entered again when the user is recreated.
For Concord and Neo panels must be disarmed when adding or removing users.
Once a user is added to Enterprise, do not arm, enter programming, send other remote commands, or power cycle the panel for 5 to 10 minutes after adding a user.
After a user is deleted, select the refresh icon on the top right corner of the webpage. If this is not done, the GoSafer Security customer portal (powered by Alarm.com) may display a warning message saying the code is already in use when you try to recreate the user in the Enterprise.
Add business hoursIcn Chevron Down
Business hours make it easier to configure and manage commercial features like reporting, arming schedules, auto re-arming, and notifications.
Smarter Business Reports allow further awareness of what is happening at each location. For information about enabling reports, see Enable Smarter Business Reports.
Add notificationsIcn Chevron Down
By setting up notifications, you will have constant awareness of what is happening at your business, even when you are not there. For more information about creating and editing notifications, see Create/edit Enterprise Notifications.
For more information about the different types of notifications that can be created, see Enterprise Location Management.
Enterprise group best practicesIcn Chevron Down
There are various ways to set up Enterprise groups and get the most from them depending on the customer's situation.
Scenario 1
Various managers can be given different levels of access to specific locations.
Example: The customer has 8 restaurants and each restaurant has its own manager
and staff. There are also 2 regional managers. The customer wants the owner and regional manager to to oversee and control access to all locations while allowing each individual manager to control access and staffing for their specific location.
For this example, it is recommended that the owner and regional managers be given
logins to the Enterprise group and have their user profiles created at the Enterprise
level. Their Enterprise login will allow them to manage each of the properties based
on the login permissions and their Enterprise user profiles can be given access to
any device that exists in the group from the Enterprise level.
The owner or regional manager can then give individual store managers login access to their specific location so they can manage their staff at the single system level. The Enterprise logins can still make changes if needed, and any access granted to the Enterprise Users
cannot be overridden by a single system login.
Scenario 2
Employee access may vary or change frequently.
Example: The customer manages eight warehouses with minimal local staffing but has a network of 30 drivers that may need access to one or multiple sites at any given
time.
For this example, it is recommended to create the majority of the user profiles on
the Enterprise level. The drivers may need access to multiple sites at a time, so managing them at the Enterprise level would allow the customer to grant a specific driver access to multiple properties using a few clicks. It is recommended to limit the number of single system users to avoid duplicate users and credentials from being created by accident. For this type of setup, it is not uncommon for only the default master user to exist on most of the properties.
Video tutorialsIcn Chevron Down
Create an Enterprise Group
Add a Location to an Enterprise Group
Move a location between Enterprise Groups
Add a User Code to multiple locations
Add a Login to Multiple Locations
Using the Location Summary Page
All locations in a group can be viewed using the GoSafer Security customer portal (powered by Alarm.com). For more information, see View group Locations.
Always verify safety, installation, compatibility, and current UI details against the original manufacturer documentation before operational use.
Commercial
Create a new group thermostat schedule
GoSafer Security Knowledge Base
This operational reference is organized for GoSafer Security customers and staff. Alarm.com product names are retained where required for technical accuracy.
Overview
Group thermostat schedules allow you to manage thermostats across locations at once.
Platform
Customer Website
Content type
How-to / Configuration
Source last updated
2025-06-04
Procedure
To create a new group thermostat schedule using the GoSafer Security customer portal (powered by Alarm.com)
Log in to the GoSafer Security customer portal (powered by Alarm.com).
Select the desired group from the locations dropdown menu.
Click Settings.
Click Thermostat Schedules.
Click Create New Template.
In the Schedule Name field, enter the desired name for the schedule.
Click Heat for a heat schedule or Cool for cool schedule.
Make the desired changes to the thermostat template.
In Location Selection, click to select which locations the template will apply to.
Note: If desired, click Apply this schedule by default to any locations added to the group to any location added to the group.
Always verify safety, installation, compatibility, and current UI details against the original manufacturer documentation before operational use.
Commercial
Create a new group user
GoSafer Security Knowledge Base
This operational reference is organized for GoSafer Security customers and staff. Alarm.com product names are retained where required for technical accuracy.
Overview
Creating individual user codes for each person in your group help keep your system secure.
Platform
App + Web
Content type
How-to / Configuration
Source last updated
2025-06-04
Procedure
Step-by-step guide: Screenshots and videos are placed with the instruction they illustrate.
Creating individual user codes for each person in your group help keep your system secure.
Create a new group user
New group users can be created using the Alarm.com app or GoSafer Security customer portal (powered by Alarm.com).
Expand all
To create a new group user using the Alarm.com app:Icn Chevron Down
Log in to the Alarm.com app.
Tap Menu.
Select the group from the locationsdropdown menu.
Tap Users.
Tap Add.
Enter the user's first and last name, then tap Create.
In Set Access Code, enter the desired code or tap Generate Code, then click Save and Continue.
In Set Access Period, select the access type (i.e., At All Times, Restricted Schedule, or Temporary Access), then tap Save and Continue.
In Access Type, select the desired type of access for the user:
Select Existing + Future to grant access to all devices in all locations across all groups and automatically grant access to future devices, locations, and groups.
Select All Existing Devices to grant the user access to all currently existing devices, locations, and groups.
Select Set By Location to select the desired access based on location.
Select No Device Access to restrict access to all devices on all locations within any group.
Tap Save. The user code is sent to the panels at the selected locations to allow the user access. It takes a few minutes for the user code to download to the panel at each site.
Important: Do not make changes to the panel or send other remote commands during this time as this could result in codes not syncing properly.
Wait 5 minutes before testing the code at the panel. The duration it takes to push codes to the panel depends on the number of locations that need to be updated.
To create a new group user using the GoSafer Security customer portal (powered by Alarm.com):Icn Chevron Down
Log in to the GoSafer Security customer portal (powered by Alarm.com).
Select the group from the locationsdropdown menu.
Click Users.
Click Add User.
Enter the user's first and last name, then click Create.
In Access Code, enter the desired code or click Generate Code, then click Save and Continue.
In Set Access Period, select the access type (i.e., At All Times, Restricted Schedule, or Temporary Access), then click Save and Continue.
In Access Type, select the desired type of access for the user:
Select Existing + Future to grant access to all devices in all locations across all groups and automatically grant access to future devices, locations, and groups.
Select All Existing Devices to grant the user access to all currently existing devices, locations, and groups.
Select Set By Location to select the desired access based on location.
Select No Device Access to grant the user no access to any devices on any locations within any group.
Click Save. The user code is sent to the panels at the selected locations to allow the user access. It takes a few minutes for the user code to download to the panel at each site.
Important: Do not make changes to the panel or send other remote commands during this time as this could result in codes not syncing properly.
Wait 5 minutes before testing the code at the panel. The duration it takes to push codes to the panel depends on the number of locations that need to be updated.
Always verify safety, installation, compatibility, and current UI details against the original manufacturer documentation before operational use.
Commercial
Create an Enterprise Group - Video
GoSafer Security Knowledge Base
This operational reference is organized for GoSafer Security customers and staff. Alarm.com product names are retained where required for technical accuracy.
Overview
Enterprise Groups can be created using the GoSafer Security customer portal.
Platform
General / Device
Content type
How-to / Configuration
Source last updated
2023-02-20
Procedure
Step-by-step guide: Screenshots and videos are placed with the instruction they illustrate.
Always verify safety, installation, compatibility, and current UI details against the original manufacturer documentation before operational use.
Commercial
Create an Enterprise Water Meter Configuration template
GoSafer Security Knowledge Base
This operational reference is organized for GoSafer Security customers and staff. Alarm.com product names are retained where required for technical accuracy.
Overview
Setting up a Water Meter Configuration template for an Enterprise group allows for consistent behavior across locations in the Enterprise group.
Platform
Customer Website
Content type
How-to / Configuration
Source last updated
2025-06-04
Procedure
To create a new water meter template using GoSafer Security customer portal (powered by Alarm.com)
Note: Multiple templates can be created to serve different portions of a given group.
Log in to the GoSafer Security customer portal (powered by Alarm.com) with an Enterprise login.
Click Settings.
Click Water Settings.
Click Water Meter Configuration.
In Water Meter Configuration, click
[Add] Template - Create a new Water Meter Configuration template
[Edit] - Edit the corresponding existing Water Meter Configuration template
[Delete] - Delete the corresponding existing Water Meter Configuration template
Enter a name for the template.
Select the desired Flow Threshold, Flow Timer, Flow Shut Valve, and Flow Sound Buzzer parameters for High, Medium, and Low flows for the template.
In Location Selection, select which locations the template should be applied to.
All Locations - This will apply the template to all existing locations.
Partial Locations - This will allow the template to only be applied to selected locations.
No Locations - This template will not be applied to any locations.
If any new property should have the settings applied to it, click to select Apply this Template by default to any location(s) added to the group.
Always verify safety, installation, compatibility, and current UI details against the original manufacturer documentation before operational use.
Commercial
Create and manage Multi-Level Enterprise Groups
GoSafer Security Knowledge Base
This operational reference is organized for GoSafer Security customers and staff. Alarm.com product names are retained where required for technical accuracy.
Overview
Multi-Level Enterprise Groups are higher-level groups that allow users with Multi-Level Enterprise Groups to view and access individual Enterprise groups and the locations within each group.
To help with understanding this page, note the following terms:
Platform
Customer Website
Content type
How-to / Configuration
Source last updated
2025-06-04
Procedure
Step-by-step guide: Screenshots and videos are placed with the instruction they illustrate.
Multi-Level Enterprise Groups are higher-level groups that allow users with Multi-Level Enterprise Groups to view and access individual Enterprise groups and the locations within each group.
To help with understanding this page, note the following terms:
Enterprise group - Any group of one or more properties created in Alarm.com.
Multi-Level Enterprise Group - A higher-level group created in Alarm.com that contains multiple groups within it.
Subgroup - An Enterprise group contained within a Multi-Level Enterprise Group.
Standalone group - An Enterprise group not contained within a Multi-Level Enterprise Group.
Location - A single property.
Administrator login - A login with all permissions active.
Parent login - A login that has visibility to all Enterprise groups in the Multi-Level Enterprise Group.
Create a Multi-Level Enterprise Group
Multi-Level Enterprise Groups can be created by adding multiple groups into one higher-level view or by subdividing the current group into easy-to-manage subgroups. Multi-Level Enterprise Groups can be created using the GoSafer Security customer portal (powered by Alarm.com).
Expand all
Add multiple groups into one higher-level viewIcn Chevron Down
Adding multiple groups into one higher-level view is useful if there are multiple groups in the multi-system access dropdown menu. These groups can be added to a new Multi-Level Enterprise Group.
To create a Multi-Level Enterprise Group by adding multiple groups into one higher-level view:
Log in to the GoSafer Security customer portal (powered by Alarm.com).
Verify the Enterprise name is selected, and not a location name. When the Enterprise group is selected, a Locations option shows in the menu instead of Home.
If a location is selected, use the dropdown menu to select the Enterprise group. Enterprise groups have Group Property next to the Enterprise name, whereas locations will have Icn Enterprise Open for commercial accounts or Single Property for residential accounts next to the location name.
If the option to select an Enterprise group is not showing, verify the login being used has access to the Enterprise group.
Click Manage Groups.
Click + Enterprise Group.
In the New Enterprise Group field, enter a name for the new Multi-Level Enterprise Group.
In Group Type, select Group containing other groups to contain other groups, then select the groups to be added.
Click Save.
In Elevate Additional Child Group Logins, click to select any other Administrator logins that you want to elevate to parent logins.
Click Move.
Note: This action can be changed, and logins can always be promoted to the Multi-Level Enterprise Group manually later.
The process is complete. The Multi-Level Enterprise Group will be listed In the upper-left dropdown, and the list of subgroups will be listed below.
Note: There may be a delay between creating the new Multi-Level Enterprise Group Enterprise and when it appears on the Partner Portal. Refresh the information through the Partner Portal to check for updates.
When the Multi-Level Enterprise Group creation is successful, a list of subgroups contained within the Multi-Level Enterprise Group will appear. Click to expand Down to the left of the group name to display the list of systems within that subgroup.
Subdivide the current group into easy-to-manage subgroupsIcn Chevron Down
Subdividing the current group into easy-to-manage subgroups is useful when the user has one group that is very large.
To create a Multi-Level Enterprise Group by subdividing the current group:
Log in to the GoSafer Security customer portal (powered by Alarm.com).
Verify the Enterprise name is selected, and not a location name. When the Enterprise group is selected, a Locations option shows in the menu instead of Home.
If a location is selected, use the dropdown menu to select the Enterprise group. Enterprise groups have Group Property next to the Enterprise name, whereas locations will have Icn Enterprise Open for commercial accounts or Single Property for residential accounts next to the location name.
If the option to select an Enterprise group is not showing, verify the login being used has access to the Enterprise group.
Click Manage Groups.
Click + Subgroup.
Note: The current group will be elevated and become a Multi-Level Enterprise Group.
Enter a name for the subgroup, then click Save.
Note: Click More options to create additional subgroups and split up the one large group into multiple subgroups. For instructions on creating additional subgroups, see the video below.
Create a Multi-Level Enterprise Group with few locationsIcn Chevron Down
Creating a Multi-Level Enterprise Group by adding multiple groups into one higher-level view or by subdividing the current group into easy-to-manage subgroups is helpful when there are many groups and locations. For accounts that have few locations, a Multi-Level Enterprise Group can be created separately.
To create a Multi-Level Enterprise Group with few locations:
Log in to the GoSafer Security customer portal (powered by Alarm.com).
Verify the Enterprise name is selected, and not a location name. When the Enterprise group is selected, a Locations option shows in the menu instead of Home.
If a location is selected, use the dropdown menu to select the Enterprise group. Enterprise groups have Group Property next to the Enterprise name, whereas locations will have Icn Enterprise Open for commercial accounts or Single Property for residential accounts next to the location name.
If the option to select an Enterprise group is not showing, verify the login being used has access to the Enterprise group.
Click Manage Groups.
Click + Enterprise Group.
In the New Enterprise Group field, enter a name for the new Multi-Level Enterprise Group.
In Group Type, select Group containing other groups, then select the existing Enterprise Group.
Click Save.
In Elevate Additional Child Group Logins, click to select any other Administrator logins that you want to elevate to parent logins.
Click Move.
Note: This action can be changed, and logins can always be promoted to the Multi-Level Enterprise Group manually later.
The process is complete. The first subgroup will be listed below.
Note: There may be a delay between creating the new Multi-Level Enterprise Group Enterprise and when it appears on the Partner Portal. Refresh the information through the Partner Portal to check for updates.
When the Multi-Level Enterprise Group creation is successful, a list of subgroups contained within the Multi-Level Enterprise Group will appear. Click to expand Down to the left of the group name to display the list of systems within that subgroup.
Move an existing standalone group into an existing Multi-Level Enterprise Group
To move an existing standalone group into an existing Multi-Level Enterprise Group, the Multi-Level Enterprise Group Administrator login must first be granted access to the standalone group.
To grant the Multi-Level Enterprise Group Administrator login access to the standalone group:
Log in to the GoSafer Security customer portal (powered by Alarm.com) with an Administrator login for the existing standalone group.
Click Users.
Click Manage Logins.
Click Add Group Login.
Click to select Enter login and email of an existing login, and enter the login name and email address of the Administrator login for the Multi-Level Enterprise Group.
To add a standalone group to a Multi-Level Enterprise Group:
Login to the GoSafer Security customer portal (powered by Alarm.com) using the Administrator login for the Multi-Level Enterprise Group.
Using the dropdown menu, select the standalone group.
Click Manage Groups.
Click More options.
Click Move.
Select the Multi-Level Enterprise Group. This will grant them access to all of the other subgroups in the Multi-Level Enterprise Group.
Important: The login must have access to at least one Multi-Level Enterprise Group for anything to display.
Click Next.
Select which logins to elevate to Multi-Level Enterprise Group Logins.
Click Move.
The standalone group will now be a subgroup of the Multi-Level Enterprise Group.
Always verify safety, installation, compatibility, and current UI details against the original manufacturer documentation before operational use.
Commercial
Create/edit a group Employee arming activity notification
GoSafer Security Knowledge Base
This operational reference is organized for GoSafer Security customers and staff. Alarm.com product names are retained where required for technical accuracy.
Overview
An employee arming activity notification can notify users when and who is opening up for the day and closing down for the night at any of the properties in the group.
Platform
Customer Website
Content type
How-to / Configuration
Source last updated
2025-06-04
Procedure
To create/edit a group Employee arming activity notification using the GoSafer Security customer portal (powered by Alarm.com):
Log in to the GoSafer Security customer portal (powered by Alarm.com).
Using the Locations dropdown menu, select the desired group.
Click Notifications.
To edit the notification, click [Edit] for the employee arming activity notification.
If the notification has not been created
Click New Notification.
Click to select Business.
Click Employee arming activity.
Enter the desired name the notification rule.
Using the When dropdown menu, select either of the following
Any User or Keyfob to be notified about any user arming/disarming.
Select Users and Keyfobs to be notified about specific users.
In During this time frame, select either
At All Times to always receive notifications.
Only During the Following Times to only receive notifications during a specified time.
In Notification Filtering, select desired settings to limit notifications that are sent.
To choose notification recipients, click Add.
Click the entries in the Address Book that are to be notified, or click New to add a new address book entry.
Click Close.
Verify the notification is configured with the correct settings.
Always verify safety, installation, compatibility, and current UI details against the original manufacturer documentation before operational use.
Commercial
Create/edit a group Not open on time notification
GoSafer Security Knowledge Base
This operational reference is organized for GoSafer Security customers and staff. Alarm.com product names are retained where required for technical accuracy.
Overview
A not open on time notification can notify users if the system was not disarmed during the arrival hours specified at any of the properties in the group.
Platform
Customer Website
Content type
How-to / Configuration
Source last updated
2025-06-04
Procedure
To create/edit a group Not open on time notification using the GoSafer Security customer portal (powered by Alarm.com)
Log in to the GoSafer Security customer portal (powered by Alarm.com).
Using the Locations dropdown menu, select the desired group.
Click Notifications.
To edit the notification, click [Edit] for the not open on time notification.
If the notification has not been created
Click New Notification.
Click Business.
Click Not open on time.
Enter the desired name for the notification rule.
Click to select Not Opened on Time.
In Recipients, click Add to add notification recipients.
Select the entries in the Address Book that are to be notified, or click New to add a new address book entry.
Click Close.
Verify the notification is configured with the correct settings.
Always verify safety, installation, compatibility, and current UI details against the original manufacturer documentation before operational use.
Commercial
Create/edit a group Opened Unexpectedly notification
GoSafer Security Knowledge Base
This operational reference is organized for GoSafer Security customers and staff. Alarm.com product names are retained where required for technical accuracy.
Overview
An Opened Unexpectedly notification can notify users if the system was disarmed after closing hours and before arrival hours at any of the properties in the group.
Platform
Customer Website
Content type
How-to / Configuration
Source last updated
2025-06-04
Procedure
To create/edit a group Opened Unexpectedly notification
Log in to the GoSafer Security customer portal (powered by Alarm.com).
Using the Locations dropdown menu, select the desired group.
Click Notifications.
If the notification has already been created, click [Edit] on the Opened Unexpectedly notification to edit the notification.
If the notification has not been created
Click New Notification.
Click Business.
Click Opened Unexpectedly.
In the Notification name field, enter the desired name for the notification rule.
In When the selected events occur, click to select Opened Unexpectedly.
In Recipients, click Add to choose notification recipients.
Click to select the entries in the Address Book that are to be notified, or click New to add a new address book entry.
Click Close.
Verify the notification is configured with the correct settings.
Always verify safety, installation, compatibility, and current UI details against the original manufacturer documentation before operational use.
Commercial
Create/edit a group silent alarm reported notification
GoSafer Security Knowledge Base
This operational reference is organized for GoSafer Security customers and staff. Alarm.com product names are retained where required for technical accuracy.
Overview
A silent alarm reported notification can notify users if a silent alarm has been reported by an employee at any of the properties in the group.
Platform
Customer Website
Content type
How-to / Configuration
Source last updated
2025-06-04
Procedure
To create/edit a group silent alarm reported using the GoSafer Security customer portal (powered by Alarm.com)
Log in to the GoSafer Security customer portal (powered by Alarm.com).
Using the Locations dropdown menu, select the desired group.
Click Notifications.
To edit the notification, click [Edit] for the silent alarm reported notification.
If the notification has not been created
Click New Notification.
Click Business.
Click Silent alarm reported.
Enter the desired name for the notification rule.
In When Alarm of type, click to select Silent.
Using the Is reported by dropdown menu, select Any Sensor or Specific Sensor to receive reports from a specific sensor.
Note: Do not choose to send a Duress Panic SMS or push notification to a potential Duress Code user.
In Recipients, click Add to choose notification recipients.
Click the entries in the Address Book that are to be notified, or click New to add a new address book entry.
Click Close.
Verify the notification is configured with the correct settings.
Always verify safety, installation, compatibility, and current UI details against the original manufacturer documentation before operational use.
Commercial
Cross-Dealer Groups
GoSafer Security Knowledge Base
This operational reference is organized for GoSafer Security customers and staff. Alarm.com product names are retained where required for technical accuracy.
Overview
Cross-Dealer Enterprise Groups allow businesses to manage locations owned by multiple Alarm.com dealers within a single Enterprise Group.
Platform
App + Web
Content type
How-to / Configuration
Source last updated
2025-09-24
Procedure
Features
Consistent user interface for customers after joining a Cross-Dealer Group. The only visible difference is the Dealer branding.
All standard Enterprise Group features remain available except 24/7 Managed Access.
To create a Multi-Dealer Enterprise Group
Important: All dealers of the group must support Cross-Dealer Enterprise Groups for this feature to work properly. A dealer that does not support Cross-Dealer Groups cannot have the locations added to a Cross-Dealer Group.
In most cases, creating a Multi-Dealer Group should be initiated using a customer login. This can be done the same as creating any other group. There are various ways including adding a location to an Enterprise system, creating a new Enterprise group, adding multiple groups into one higher-level view, or moving a location between groups.
For more information about adding a location to an Enterprise system, see Add a location to an Enterprise system.
For more information about creating a new Enterprise group, see Create a new Enterprise group.
For more information about adding multiple groups into one higher-level view, see Create and manage Multi-Level Enterprise Groups.
For more information about moving a location between groups, see Move a location between Enterprise Groups Video.
Frequently asked questions
How will I know which dealer to ask for support?
Dealer information can be found for a location specific location using the Alarm.com app or GoSafer Security customer portal (powered by Alarm.com).
To find dealer information using the Alarm.com app
Log in to the Alarm.com app.
Using the location dropdown, select the desired location.
Tap Support.
In Support, view the dealer's contact information or submit a support ticket.
To find dealer information using the GoSafer Security customer portal (powered by Alarm.com)
Log in to the GoSafer Security customer portal (powered by Alarm.com).
Using the location dropdown, select the desired location.
Click Support.
In Support, view the dealer's contact information or submit a support ticket.
Always verify safety, installation, compatibility, and current UI details against the original manufacturer documentation before operational use.
Commercial
Delete an Enterprise group
GoSafer Security Knowledge Base
This operational reference is organized for GoSafer Security customers and staff. Alarm.com product names are retained where required for technical accuracy.
Overview
Enterprise groups can be deleted using the website. When a group is deleted, all of the logins/systems associated with each other through the deleted group will no longer be associated with each …
Platform
Customer Website
Content type
How-to / Configuration
Source last updated
2026-03-11
Procedure
Step-by-step guide: Screenshots and videos are placed with the instruction they illustrate.
Enterprise groups can be deleted using the GoSafer Security customer portal (powered by Alarm.com). When a group is deleted, all of the logins/systems associated with each other through the deleted group will no longer be associated with each other.
Important: A login with Administrator permissions is required to delete an Enterprise group. If the Enterprise login being used is also the primary login for an account in that group, it will not be able to remove its own location or delete the Enterprise group.
To delete an Enterprise group:
Log in to the GoSafer Security customer portal (powered by Alarm.com).
Verify the Enterprise name is selected, and not a location name. When the Enterprise group is selected, a Locations option shows in the menu instead of Home.
If a location is selected, use the dropdown menu to select the Enterprise group. Enterprise groups have Group Property next to the Enterprise name, whereas locations will have Icn Enterprise Open for commercial accounts or Single Property for residential accounts next to the location name.
If the option to select an Enterprise group is not showing, verify the login being used has access to the Enterprise group.
Click Manage Groups.
Click More options, then click Delete.
In the popup, click to select the deletion verification.
Click Remove.
Note: Enterprise groups can also be deleted when removing the last location in the group. If you remove the final location in a group, you will see the following prompt which will allow you to delete the group.
Always verify safety, installation, compatibility, and current UI details against the original manufacturer documentation before operational use.
Commercial
Enable or edit Smarter Business Reports
GoSafer Security Knowledge Base
This operational reference is organized for GoSafer Security customers and staff. Alarm.com product names are retained where required for technical accuracy.
Overview
Smarter Business Reports can be enabled using the website.
Platform
App + Web
Content type
Troubleshooting
Source last updated
2025-06-04
Procedure
Step-by-step guide: Screenshots and videos are placed with the instruction they illustrate.
Smarter Business Reports can be enabled and edited using the Alarm.com app and GoSafer Security customer portal (powered by Alarm.com). For more information about how to generate a Smarter Business Report, see Generate a Smarter Business Report.
Enable or edit Smarter Business Reports
Expand all
To enable or edit Smarter Business Reports using the Alarm.com app:Icn Chevron Down
Log in to the Alarm.com app.
Tap Menu.
Tap Reports.
Create a new report or edit an existing one.
To create a new report, tap Add, then select the type of report to be generated.
The following reports are recommended for optimum awareness of any issues, trends, and peak activity times at your business:
To edit an existing report, tap More options next to the desired report, then tap Edit.
Note: To delete an existing report, tap More options next to the desired report, then tap Delete.
Enter the desired name for the report.
Configure the notification.
In Locations to include in the report, select All Locations to have the report apply to all locations or Only the following locations to select the desired locations.
Report
Note: Selecting locations to include in a report is only available with Business Activity Analytics reports (i.e., Occupancy + People Counting, Crowd Gathering, and Queue Monitoring) or with specific reports (i.e., Location Summary, Sensor Activity, SBTM Temperature History, Arming Disarming, Access History, Alarms Issues, Location Open/Close,and Video Health). For more information, contact your service provider.
In Recipients, click Add to select report recipients in the Address Book or click New to add a new Address Book entry.
Click Save.
Note: For reports that include all locations, recipients will receive notifications from all locations in the group. If a recipient only wants notifications from one location in the group, the notification needs to be created at the single system level. For more information about how to create a notification for a single system or location, see Configure notification recipients.
Configure the report, then tap Save.
To enable or edit Smarter Business Reports using the GoSafer Security customer portal (powered by Alarm.com):Icn Chevron Down
Log in to the GoSafer Security customer portal (powered by Alarm.com).
Click Activity.
Click Reports.
Create a new report or edit an existing one.
To create a new report, click Add, then select the type of report to be generated.
The following reports are recommended for optimum awareness of any issues, trends, and peak activity times at your business:
Add reports 2
To edit an existing report, click Edit next to the desired report.
Note: To delete an existing report, click Delete next to the desired report.
Enter the desired name for the report.
Configure the notification.
In Locations to include in the report, select All Locations to have the report apply to all locations or Only the following locations to select the desired locations.
Report
Note: Selecting locations to include in a report is only available with Business Activity Analytics reports (i.e., Occupancy + People Counting, Crowd Gathering, and Queue Monitoring) or with specific reports (i.e., Location Summary, Sensor Activity, SBTM Temperature History, Arming Disarming, Access History, Alarms Issues, Location Open/Close,and Video Health). For more information, contact your service provider.
In Recipients, click Add to select report recipients in the Address Book or click New to add a new Address Book entry.
Click Save.
Note: For reports that include all locations, recipients will receive notifications from all locations in the group. If a recipient only wants notifications from one location in the group, the notification needs to be created at the single system level. For more information about how to create a notification for a single system or location, see Configure notification recipients.
Always verify safety, installation, compatibility, and current UI details against the original manufacturer documentation before operational use.
Commercial
Enterprise Camera Groups - Video
GoSafer Security Knowledge Base
This operational reference is organized for GoSafer Security customers and staff. Alarm.com product names are retained where required for technical accuracy.
Overview
Enterprise Camera Groups are a way for users to organize their video streams on the Live Video page.
Platform
General / Device
Content type
Reference
Source last updated
2023-02-20
Procedure
Step-by-step guide: Screenshots and videos are placed with the instruction they illustrate.
Always verify safety, installation, compatibility, and current UI details against the original manufacturer documentation before operational use.
Commercial
Enterprise groups - Getting Started
GoSafer Security Knowledge Base
This operational reference is organized for GoSafer Security customers and staff. Alarm.com product names are retained where required for technical accuracy.
Overview
Enterprise groups allows you to manage security, automation, and business intelligence across two or more locations. You can also conveniently view the status and recent activity for multiple systems on one page.
For more information about Enterprise groups, see What is an Enterprise group?.
Platform
App + Web
Content type
Troubleshooting
Source last updated
2026-06-15
Procedure
Step-by-step guide: Screenshots and videos are placed with the instruction they illustrate.
Caution: This process cannot be automatically reversed. Once a user is deleted from the single system level, they must be manually recreated if something goes wrong. There is no rollback option. Before proceeding, export your panel slot numbers as a reference record. For more information, see Set up an Enterprise user.
Enterprise groups allows you to manage security, automation, and business intelligence across two or more locations. You can also conveniently view the status and recent activity for multiple systems on one page.
Note: Depending on your service package, additional tools may be available to help with larger user migrations. The Promote users feature can automatically move users from the single system level to the Enterprise level and detect duplicate users across locations. This feature requires the Access Plan User Management (APUM) add-on, which is not included by default. Contact your service provider to find out if this option is available on your account. For more information, see Promote users.
Prepare Enterprise information
Prior to creating an Enterprise group, it is recommended to prepare the following information:
A naming convention for group names (e.g., region, manager’s name, store number, etc.).
A list of all the locations to be added to each group.
A list of Enterprise users vs. Single-System users.
A list of Enterprise users that will be added to each group.
A list of the locations each user can access.
If applicable, list the specific times users can access the locations (e.g., employee’s panel/lock code will work from 7:00 AM - 8:00 PM M-F). This feature is available on all compatible locks and select security panels.
Determine the types of notifications (e.g., open/close, alarms, etc.) to use and who should receive them.
List the business hours for each location. A template can be made to apply to locations that have the same business hours.
Determine which account is the primary login (e.g., corporate office, headquarters, etc.). Create the first Enterprise Group under this account. The primary login for the first system will be the default administrator login for the Enterprise group.
Note: The default administrator login can be changed a later time. For more information see To create a new group login.
Expand all
Configure an Enterprise groupIcn Chevron Down
Locations may be put into at most one Enterprise group. This can be done using the GoSafer Security customer portal (powered by Alarm.com).
Note: The accounts must be with the same dealer to be added to the same group. For accounts with different dealers, Cross-Dealer Enterprise Groups are supported in some cases. For more information, see Cross-Dealer Groups.
To allow user access to the panel locally on-site, create a new group user to add new user codes locally to the system. Creating a group user code does not give the user remote access to the GoSafer Security customer portal (powered by Alarm.com) and Alarm.com app for the system. For more information about adding group users, see Create a new group user.
To allow user remote access to the system using the Alarm.com app and GoSafer Security customer portal (powered by Alarm.com), create a new group login for the system. Creating a group login does not give the user a local code for on-site access to the panel. For more information about adding a group login, see Create a new group login.
Some best practices for setting up Enterprise users:
Before you begin, export the current panel slot numbers as a backup reference. This report shows all users and their assigned slot numbers across all systems in the group. If users need to be manually restored after an error, this file will be the only reference. PIN codes are not included in the export. For more information, see Export panel slot numbers for a group.
Determine which account will be the primary login (e.g., corporate office, headquarters). Create the first Enterprise group under this account. The primary login will have administrator rights to manage the Enterprise group.
An Enterprise user can be granted access to multiple locations within a group of locations. An Enterprise Administrator can configure permissions for Enterprise Users so that they have access to all locations, some locations, or no locations within a group. One possible reason to set up an Enterprise User without access to any locations would be for them to receive notifications but not be able to disarm a system.
Enterprise users with location access need a user code. Once added through the Alarm.com GoSafer Security customer portal (powered by Alarm.com), this user code is pushed to the alarm panel for each location where they will be granted access to panels, keypads, or smart locks.
Add an email and/or phone number of the Enterprise user so they can receive email/text notifications (e.g., alarms, open/close emails).
If applicable, add cards and PIN codes to allow Access Control users to gain access to doors with card readers or keypads.
If you have existing User codes on the Single System level that you would like span across multiple locations, the users must be deleted from individual locations and recreated on the Enterprise Group level.
Removing users from a single system and adding to Enterprise:
If the user is currently receiving text or push notifications, please make note of their mobile carrier and other details that will need to be entered again when the user is recreated.
For Concord and Neo panels must be disarmed when adding or removing users.
Once a user is added to Enterprise, do not arm, enter programming, send other remote commands, or power cycle the panel for 5 to 10 minutes after adding a user.
After a user is deleted, select the refresh icon on the top right corner of the webpage. If this is not done, the GoSafer Security customer portal (powered by Alarm.com) may display a warning message saying the code is already in use when you try to recreate the user in the Enterprise.
Add business hoursIcn Chevron Down
Business hours make it easier to configure and manage commercial features like reporting, arming schedules, auto re-arming, and notifications.
Smarter Business Reports allow further awareness of what is happening at each location. For information about enabling reports, see Enable Smarter Business Reports.
Add notificationsIcn Chevron Down
By setting up notifications, you will have constant awareness of what is happening at your business, even when you are not there. For more information about creating and editing notifications, see Create/edit Enterprise Notifications.
For more information about the different types of notifications that can be created, see Enterprise Location Management.
Enterprise group best practicesIcn Chevron Down
There are various ways to set up Enterprise groups and get the most from them depending on the customer's situation.
Scenario 1
Various managers can be given different levels of access to specific locations.
Example: The customer has 8 restaurants and each restaurant has its own manager
and staff. There are also 2 regional managers. The customer wants the owner and regional manager to to oversee and control access to all locations while allowing each individual manager to control access and staffing for their specific location.
For this example, it is recommended that the owner and regional managers be given
logins to the Enterprise group and have their user profiles created at the Enterprise
level. Their Enterprise login will allow them to manage each of the properties based
on the login permissions and their Enterprise user profiles can be given access to
any device that exists in the group from the Enterprise level.
The owner or regional manager can then give individual store managers login access to their specific location so they can manage their staff at the single system level. The Enterprise logins can still make changes if needed, and any access granted to the Enterprise Users
cannot be overridden by a single system login.
Scenario 2
Employee access may vary or change frequently.
Example: The customer manages eight warehouses with minimal local staffing but has a network of 30 drivers that may need access to one or multiple sites at any given
time.
For this example, it is recommended to create the majority of the user profiles on
the Enterprise level. The drivers may need access to multiple sites at a time, so managing them at the Enterprise level would allow the customer to grant a specific driver access to multiple properties using a few clicks. It is recommended to limit the number of single system users to avoid duplicate users and credentials from being created by accident. For this type of setup, it is not uncommon for only the default master user to exist on most of the properties.
Video tutorialsIcn Chevron Down
Create an Enterprise Group
Add a Location to an Enterprise Group
Move a location between Enterprise Groups
Add a User Code to multiple locations
Add a Login to Multiple Locations
Using the Location Summary Page
All locations in a group can be viewed using the GoSafer Security customer portal (powered by Alarm.com). For more information, see View group Locations.
Always verify safety, installation, compatibility, and current UI details against the original manufacturer documentation before operational use.
Commercial
Export panel slot numbers for a group
GoSafer Security Knowledge Base
This operational reference is organized for GoSafer Security customers and staff. Alarm.com product names are retained where required for technical accuracy.
Overview
The panel slot numbers report shows all users and user codes associated with any system in the group.
Platform
Customer Website
Content type
Reference
Source last updated
2025-06-04
Procedure
To export panel slot numbers using the GoSafer Security customer portal (powered by Alarm.com)
Log in to the GoSafer Security customer portal (powered by Alarm.com).
Select the desired group from the locations dropdown menu.
Always verify safety, installation, compatibility, and current UI details against the original manufacturer documentation before operational use.
Commercial
Move a location between Enterprise Groups - Video
GoSafer Security Knowledge Base
This operational reference is organized for GoSafer Security customers and staff. Alarm.com product names are retained where required for technical accuracy.
Overview
Locations can be moved between Enterprise Groups.
Platform
General / Device
Content type
Reference
Source last updated
2023-02-20
Procedure
Step-by-step guide: Screenshots and videos are placed with the instruction they illustrate.
Always verify safety, installation, compatibility, and current UI details against the original manufacturer documentation before operational use.
Commercial
Move/remove a location from a group
GoSafer Security Knowledge Base
This operational reference is organized for GoSafer Security customers and staff. Alarm.com product names are retained where required for technical accuracy.
Overview
Locations can be moved between groups or removed from a group using the website.
Platform
Customer Website
Content type
How-to / Configuration
Source last updated
2025-06-04
Procedure
Step-by-step guide: Screenshots and videos are placed with the instruction they illustrate.
Enterprise locations can be moved between groups or removed from a group using the GoSafer Security customer portal (powered by Alarm.com).
Note: A location retains information associated with it (e.g., reports, notifications, users, etc.) when it is moved between groups.
To move a location between groups:
Log in to the GoSafer Security customer portal (powered by Alarm.com).
Verify the Enterprise name is selected, and not a location name. When the Enterprise group is selected, a Locations option shows in the menu instead of Home.
If a location is selected, use the dropdown menu to select the Enterprise group. Enterprise groups have Group Property next to the Enterprise name, whereas locations will have Icn Enterprise Open for commercial accounts or Single Property for residential accounts next to the location name.
If the option to select an Enterprise group is not showing, verify the login has access to the Enterprise group.
Click Manage Groups.
Select the desired locations to move.
Click Move.
Select the group to move the locations to.
Click Next.
Click to select whether or not users associated with the moving location should retain access to the location.
Note: Only group-level users can be selected to retain access to a location.
Click Move.
To remove a location from a group:
Log in to the GoSafer Security customer portal (powered by Alarm.com).
Verify the Enterprise name is selected, and not a location name. When the Enterprise group is selected, a Locations option shows in the menu instead of Home.
If a location is selected, use the dropdown menu to select the Enterprise group. Enterprise groups have Group Property next to the Enterprise name, whereas locations will have Icn Enterprise Open for commercial accounts or Single Property for residential accounts next to the location name.
If the option to select an Enterprise group is not showing, verify the login has access to the Enterprise group.
Click Manage Groups.
Select the desired locations to remove.
Click Remove.
Click to select whether or not users associated with the moving location should retain access to the location.
Note: Only group-level users can be selected to retain access to a location.
Always verify safety, installation, compatibility, and current UI details against the original manufacturer documentation before operational use.
Commercial
Multi-Level Enterprise Groups on Mobile
GoSafer Security Knowledge Base
This operational reference is organized for GoSafer Security customers and staff. Alarm.com product names are retained where required for technical accuracy.
Overview
Multi-Level Enterprise Groups are available using the Alarm.com app enabling customers to view organizational hierarchy, manage users, and have a unified platform for their multi-location business. This ensures access and location management are effectively and seamlessly managed in one place by a single person or group of administrators.
For more information about creating Enterprise Groups, see Create and manage Multi-Level Enterprise Groups.
To help with understanding this page, note the following terms:
Platform
App + Web
Content type
How-to / Configuration
Source last updated
2025-06-04
Procedure
How it works
Customers can assign a three-tiered organization on the GoSafer Security customer portal (powered by Alarm.com) and view their Multi-Level Enterprise Groups on their mobile device. A new hierarchy of dropdown menus will appear on the Alarm.com app, which includes an overview of each subgroup and individual location. The mobile navigation menu will be manageable across large groups and display business status, alarm panels, and access points for each location. Now, customers will have a single unified platform, with the added convenience of mobile view.
Features
See all Locations across all Subgroups displayed on a single page of the Alarm.com for Business platform
Display business status, alarm panels, and access points for each Location within each Subgroup
Create and manage Access Plans and assign as needed to the Parent Group, Subgroup(s), or Location(s)
Select and deploy User Access by Parent Group, Subgroup, Location, or device
To access Multi-Level Enterprise Groups using the Alarm.com Alarm.com app
Log in to the Alarm.com Alarm.com app.
Verify the Enterprise name is selected, and not a location name. When the Enterprise group is selected, a Locations option shows in the menu instead of Home.
If a location is selected, use the dropdown menu to select the Enterprise group. Enterprise groups have [Group Property] next to the Enterprise name, whereas locations will have [Enterprise Open] for commercial accounts or [Single Property] for residential accounts next to the location name.
If the option to select an Enterprise group is not showing, verify the login being used has access to the Enterprise group.
Always verify safety, installation, compatibility, and current UI details against the original manufacturer documentation before operational use.
Commercial
Multi-Location Management
GoSafer Security Knowledge Base
This operational reference is organized for GoSafer Security customers and staff. Alarm.com product names are retained where required for technical accuracy.
Overview
This GoSafer Security section brings together resources for Multi-Location Management, including setup, configuration, everyday use, and troubleshooting. Choose the related page that matches your device, feature, or task, and follow the current manufacturer guidance linked on that page.
Platform
Customer Website
Content type
How-to / Configuration
Source last updated
2026-03-06
Procedure
Browse the related pages in this chapter to open the specific procedure, configuration guide, or troubleshooting article you need.
Always verify safety, installation, compatibility, and current UI details against the original manufacturer documentation before operational use.
Commercial
Multi-location Activity on Mobile
GoSafer Security Knowledge Base
This operational reference is organized for GoSafer Security customers and staff. Alarm.com product names are retained where required for technical accuracy.
Overview
Multi-Location Activity on Mobile allows customers to monitor recent activity across all group locations in one place.
Insights on sensors, opening/closing times, video analytics, and more can be accessed at-a-glance instantly allowing you complete visibility and command over their business operations from the Alarm.com Alarm.com app.
Platform
App + Web
Content type
Troubleshooting
Source last updated
2025-12-03
Procedure
Features
View all system events at a glance and chronologically, along with any associated images and video thumbnails
Apply multiple filters to quickly locate specific activity
Select time zone settings that best align with each location
To access Multi-Location Activity
Log in to the Alarm.com app.
If a location is selected, use the dropdown menu to select the Enterprise group. Enterprise groups have [Group Property] next to the Enterprise name, whereas locations will have [Enterprise Open] for commercial accounts or [Single Property] for residential accounts next to the location name.
Tap Activity to view the Multi-Location activity.
Tap [Filter] to filter the activity. For more information, see Event filters.
Note: Tap [Schedule] to adjust the timezones for the activity.
Event filters
The following activity can be viewed across locations
Always verify safety, installation, compatibility, and current UI details against the original manufacturer documentation before operational use.
Commercial
Promote users
GoSafer Security Knowledge Base
This operational reference is organized for GoSafer Security customers and staff. Alarm.com product names are retained where required for technical accuracy.
Overview
Promoting a user moves them from a lower level to the group level. It also finds duplicate users and merges them together.
Platform
General / Device
Content type
How-to / Configuration
Source last updated
2025-06-04
Procedure
Are there any users that would not have the option to be promoted?
Yes. Certain users will not have the option to be promoted. This includes the Master user, a duress code user, any users who are already Enterprise users, and any users that are part of a user group on a single system level.
How are duplicates detected?
Duplicates are detected by looking for an exact credential and last name match. The users must have the same name and the same credentials at different sites to be detected as a duplicate.
Note: If two users have the same name, but have different credentials at different locations, they will not be detected as duplicates.
What happens when a user is promoted?
When a user is promoted, the name and history of the user who was originally selected will be retained. All other users will be merged into the original user.
The merged user will maintain device access by staying in the lower-level Access Plan and can be edited from the immediate next-level group. The merged users will be removed from reports and notification subscriptions.
Always verify safety, installation, compatibility, and current UI details against the original manufacturer documentation before operational use.
Commercial
Push Notifications for Enterprise Groups
GoSafer Security Knowledge Base
This operational reference is organized for GoSafer Security customers and staff. Alarm.com product names are retained where required for technical accuracy.
Overview
Push notifications for Enterprise Groups can be enabled to deliver real-time alerts directly to mobile devices. Push notification recipients can be customized based on their group level (e.g., region, specific location, etc.) ensuring the right teams receive critical updates. By integrating push notifications into the app, customers can streamline group communications, reduce reliance on SMS and email, and enjoy an enhanced in-app experience.
Platform
App + Web
Content type
How-to / Configuration
Source last updated
2026-04-22
Procedure
To rename or delete a Push Device using the Alarm.com app
Log in to the Alarm.com app.
Select the specific group-level.
Tap [More Options].
Tap Users or Users Access.
Tap [Options] next to the desired Push Device, then tap [Edit].
To rename the Push Device
Tap [Edit] next the to the device name.
Enter the desired first and last names for the device, then tap Save.
To delete the Push Device, tap Delete User.
To rename or delete a Push Device using the GoSafer Security customer portal (powered by Alarm.com)
Log in to the GoSafer Security customer portal (powered by Alarm.com).
Select the specific group-level.
Click Users or Users Access.
Click [Options] next to the desired Push Device, then click [Edit].
To rename the Push Device
Click [Edit] next the to the device name.
Enter the desired first and last names for the device, then click Save.
Always verify safety, installation, compatibility, and current UI details against the original manufacturer documentation before operational use.
Commercial
Using the Location Summary Page - Video
GoSafer Security Knowledge Base
This operational reference is organized for GoSafer Security customers and staff. Alarm.com product names are retained where required for technical accuracy.
Overview
All locations in a group can be viewed using the GoSafer Security customer portal (powered by Alarm.com). For more information, see View group Locations.
Platform
Customer Website
Content type
Reference
Source last updated
2023-02-20
Procedure
Step-by-step guide: Screenshots and videos are placed with the instruction they illustrate.
All locations in a group can be viewed using the GoSafer Security customer portal (powered by Alarm.com). For more information, see View group Locations.
Always verify safety, installation, compatibility, and current UI details against the original manufacturer documentation before operational use.
Commercial
View group Locations
GoSafer Security Knowledge Base
This operational reference is organized for GoSafer Security customers and staff. Alarm.com product names are retained where required for technical accuracy.
Overview
You can view and sort all locations in a group by security or thermostat status.
Platform
Customer Website
Content type
Reference
Source last updated
2025-06-04
Procedure
To view group locations
Log in to the GoSafer Security customer portal (powered by Alarm.com).
Click Locations.
Use the filters to filter locations by status or condition.
Enter a search term in the Search field to search locations by name.
Click Summary to view the business status of each location.
Click Thermostats to view the thermostat status of each location.
Click Temperatures to view the temperature status of each location.
Click Video to view the video status of each location.
Always verify safety, installation, compatibility, and current UI details against the original manufacturer documentation before operational use.
Commercial
What Enterprise Group management options are available?
GoSafer Security Knowledge Base
This operational reference is organized for GoSafer Security customers and staff. Alarm.com product names are retained where required for technical accuracy.
Overview
There are various Enterprise Group management options available using the GoSafer Security customer portal (powered by Alarm.com).
For more information about Enterprise Group management, see Create and manage Multi-Level Enterprise Groups.
Platform
General / Device
Content type
How-to / Configuration
Source last updated
2024-05-24
Procedure
Actions on locations
Create an Enterprise Group by adding locations to it
Add a location to an existing group
Remove a location from a group
Move locations between groups
Group management
Rename a group
Delete a group
Create an empty group
Group movement
Create a Parent Group by adding Subgroups
Add a group to an existing group
Create a Parent Group by adding a Subgroup to a Standalone Group
Always verify safety, installation, compatibility, and current UI details against the original manufacturer documentation before operational use.
Commercial
Why do the location selections disappear on Enterprise Business Hours?
GoSafer Security Knowledge Base
This operational reference is organized for GoSafer Security customers and staff. Alarm.com product names are retained where required for technical accuracy.
Overview
Enterprise Business hours are templates. Once they are sent out to the location, the location can edit them and resave them. To make a change to a location, the template must be sent out again. Upon navigating to the Enterprise Business Hours Template, locations must be re-selected to be sent out.
Platform
General / Device
Content type
How-to / Configuration
Source last updated
2022-11-02
Procedure
Enterprise Business hours are templates. Once they are sent out to the location, the location can edit them and resave them. To make a change to a location, the template must be sent out again. Upon navigating to the Enterprise Business Hours Template, locations must be re-selected to be sent out.
Always verify safety, installation, compatibility, and current UI details against the original manufacturer documentation before operational use.
Energy Monitoring
GoSafer Security procedures and references for Energy Monitoring.
Energy Monitoring
Energy Monitoring
GoSafer Security Knowledge Base
This operational reference is organized for GoSafer Security customers and staff. Alarm.com product names are retained where required for technical accuracy.
Overview
This GoSafer Security section brings together resources for Energy Monitoring, including setup, configuration, everyday use, and troubleshooting. Choose the related page that matches your device, feature, or task, and follow the current manufacturer guidance linked on that page.
Platform
General / Device
Content type
How-to / Configuration
Source last updated
2024-07-23
Procedure
Browse the related pages in this chapter to open the specific procedure, configuration guide, or troubleshooting article you need.
Always verify safety, installation, compatibility, and current UI details against the original manufacturer documentation before operational use.
Energy Monitoring
Change parent meter settings for an energy monitoring device
GoSafer Security Knowledge Base
This operational reference is organized for GoSafer Security customers and staff. Alarm.com product names are retained where required for technical accuracy.
Overview
Select a parent meter a device is included in the measurements from one of your other metering devices.
Platform
Customer Website
Content type
How-to / Configuration
Source last updated
2025-06-04
Procedure
To change parent meter settings
Log in to the GoSafer Security customer portal (powered by Alarm.com).
Click Activity.
Click Energy Usage.
Click Settings & Bill Information.
Click Manage Energy Devices.
Click the energy monitoring device to be edited.
Using the Parent Meter dropdown menu, select the parent device.
Always verify safety, installation, compatibility, and current UI details against the original manufacturer documentation before operational use.
Energy Monitoring
Change the name of an energy monitoring device
GoSafer Security Knowledge Base
This operational reference is organized for GoSafer Security customers and staff. Alarm.com product names are retained where required for technical accuracy.
Overview
Systems with multiple energy devices can be more easily managed with customized device names.
Platform
Customer Website
Content type
How-to / Configuration
Source last updated
2025-06-04
Procedure
Change the name of an energy monitoring device
Log in to the GoSafer Security customer portal (powered by Alarm.com).
Click Activity.
Click Energy Usage.
Click Settings & Bill Information.
Click Manage Energy Devices.
Click the energy monitoring device to be edited.
In the Device Name field, enter the desired name for the device.
Always verify safety, installation, compatibility, and current UI details against the original manufacturer documentation before operational use.
Energy Monitoring
Download or upload Green Button data
GoSafer Security Knowledge Base
This operational reference is organized for GoSafer Security customers and staff. Alarm.com product names are retained where required for technical accuracy.
Overview
Green Button is an industry-led effort that responds to a White House call-to-action to provide consumers with easy-to-understand data about their household energy usage.
Platform
Customer Website
Content type
Reference
Source last updated
2025-06-04
Procedure
To download Green Button data
Log in to the GoSafer Security customer portal (powered by Alarm.com).
Click Activity.
Click Energy Usage.
Click Settings & Billing Information.
Click to expand Green Button Data.
Click Download your Green Button data from your electricity provider.
Note: This link redirects to your electricity provider's website. For more information about downloading Green Button data, contact your electricity provider.
To upload Green Button data
Log in to the GoSafer Security customer portal (powered by Alarm.com).
Click Activity.
Click Energy Usage.
Click Settings & Billing Information.
Click Green Button Data.
Click Choose File to select the desired file.
Click Upload.
Note: To set a monthly reminder to upload Green Button data, select Every Month from the dropdown menu and then click Save.
Always verify safety, installation, compatibility, and current UI details against the original manufacturer documentation before operational use.
Energy Monitoring
Energy Monitoring Settings
GoSafer Security Knowledge Base
This operational reference is organized for GoSafer Security customers and staff. Alarm.com product names are retained where required for technical accuracy.
Overview
This GoSafer Security section brings together resources for Energy Monitoring Settings, including setup, configuration, everyday use, and troubleshooting. Choose the related page that matches your device, feature, or task, and follow the current manufacturer guidance linked on that page.
Platform
General / Device
Content type
How-to / Configuration
Source last updated
2024-07-24
Procedure
Browse the related pages in this chapter to open the specific procedure, configuration guide, or troubleshooting article you need.
Always verify safety, installation, compatibility, and current UI details against the original manufacturer documentation before operational use.
Energy Monitoring
Update electricity provider settings
GoSafer Security Knowledge Base
This operational reference is organized for GoSafer Security customers and staff. Alarm.com product names are retained where required for technical accuracy.
Overview
Based on the information you entered in the Electricity Provider Settings section about your electricity provider, rate plan and billing period, combined with the energy consumption data reported by …
Platform
Customer Website
Content type
How-to / Configuration
Source last updated
2025-06-04
Procedure
To update electricity provider settings
Log in to the GoSafer Security customer portal (powered by Alarm.com).
Click Activity.
Click Energy Usage.
Click Settings & Bill Information.
Click Electricity Provider Settings.
Using the Electricity Provider dropdown menu, select your electricity provider.
Using the Service Package dropdown menu, select your service package.
In Most Recent Bill, enter the Last Date on Bill and Approximate Bill Amount.
Always verify safety, installation, compatibility, and current UI details against the original manufacturer documentation before operational use.
Energy Monitoring
Energy Monitoring Usage
GoSafer Security Knowledge Base
This operational reference is organized for GoSafer Security customers and staff. Alarm.com product names are retained where required for technical accuracy.
Overview
This GoSafer Security section brings together resources for Energy Monitoring Usage, including setup, configuration, everyday use, and troubleshooting. Choose the related page that matches your device, feature, or task, and follow the current manufacturer guidance linked on that page.
Platform
Customer Website
Content type
How-to / Configuration
Source last updated
2024-07-24
Procedure
Browse the related pages in this chapter to open the specific procedure, configuration guide, or troubleshooting article you need.
Always verify safety, installation, compatibility, and current UI details against the original manufacturer documentation before operational use.
Energy Monitoring
Get an energy usage reading
GoSafer Security Knowledge Base
This operational reference is organized for GoSafer Security customers and staff. Alarm.com product names are retained where required for technical accuracy.
Overview
Visit the GoSafer Security customer portal to request an on demand energy reading from an energy monitoring device.
Platform
Customer Website
Content type
Reference
Source last updated
2025-06-04
Procedure
To get an energy usage reading using the GoSafer Security customer portal (powered by Alarm.com)
Log in to the GoSafer Security customer portal (powered by Alarm.com).
Always verify safety, installation, compatibility, and current UI details against the original manufacturer documentation before operational use.
Energy Monitoring
Set/edit an energy usage goal
GoSafer Security Knowledge Base
This operational reference is organized for GoSafer Security customers and staff. Alarm.com product names are retained where required for technical accuracy.
Overview
Set energy usage goals for each monitoring device.
Platform
Customer Website
Content type
How-to / Configuration
Source last updated
2025-06-04
Procedure
To set an energy usage goal using the GoSafer Security customer portal (powered by Alarm.com)
Log in to the GoSafer Security customer portal (powered by Alarm.com).
Click Activity.
Click Energy Usage.
Click Goals.
Using the Device dropdown menu, select a monitoring device.
In Projected Usage, drag [Set Goal] horizontally to lower or raise the goal budget.
Always verify safety, installation, compatibility, and current UI details against the original manufacturer documentation before operational use.
Energy Monitoring
View energy usage
GoSafer Security Knowledge Base
This operational reference is organized for GoSafer Security customers and staff. Alarm.com product names are retained where required for technical accuracy.
Overview
View daily, weekly or monthly energy usage by specific devices or whole home.
Platform
App + Web
Content type
Reference
Source last updated
2025-06-04
Procedure
Step-by-step guide: Screenshots and videos are placed with the instruction they illustrate.
View daily, weekly, or monthly energy usage by specific devices or whole home on the Alarm.com app or GoSafer Security customer portal (powered by Alarm.com).
To view energy usage using the Alarm.com app:
Log in to the Alarm.com app.
Tap Energy.
Tap the name of the device to be viewed.
To change the view:
Tap 24 hours, 7 days, or 21 days to change the time period.
Tap Compare to compare current usage with previous time periods.
Swipe left or right to view different time periods.
To view energy usage using the GoSafer Security customer portal (powered by Alarm.com):
Log in to the GoSafer Security customer portal (powered by Alarm.com).
Click Activity.
Click Energy Usage.
Click Usage.
Using the Device dropdown menu, select a monitoring device.
To change the view:
To view usage in Kilowatt hours, click Show usage in kWh to show usage in kWh.
To view usage in dollars, click Show usage in dolllars to show usage in dollars .
To adjust the time period of the usage chart, click View more days to view more days or click View less days to view less days.
To view energy usage by specific billing period, click to select Fit to Billing Cycle.
Always verify safety, installation, compatibility, and current UI details against the original manufacturer documentation before operational use.
General Website and Apps Information
GoSafer Security procedures and references for General Website and Apps Information.
General Website and Apps Information
General Website and Apps Information
GoSafer Security Knowledge Base
This operational reference is organized for GoSafer Security customers and staff. Alarm.com product names are retained where required for technical accuracy.
Overview
This GoSafer Security section brings together resources for General Website and Apps Information, including setup, configuration, everyday use, and troubleshooting. Choose the related page that matches your device, feature, or task, and follow the current manufacturer guidance linked on that page.
Platform
Customer Website
Content type
Reference
Source last updated
2026-06-05
Procedure
Browse the related pages in this chapter to open the specific procedure, configuration guide, or troubleshooting article you need.
Always verify safety, installation, compatibility, and current UI details against the original manufacturer documentation before operational use.
General Website and Apps Information
Top Recommendations Card on Mobile
GoSafer Security Knowledge Base
This operational reference is organized for GoSafer Security customers and staff. Alarm.com product names are retained where required for technical accuracy.
Overview
This GoSafer Security section brings together resources for Top Recommendations Card on Mobile, including setup, configuration, everyday use, and troubleshooting. Choose the related page that matches your device, feature, or task, and follow the current manufacturer guidance linked on that page.
Platform
Mobile App
Content type
Reference
Source last updated
2026-06-09
Procedure
Step-by-step guide: Screenshots and videos are placed with the instruction they illustrate.
Top Recommendations is a Dashboard card on the Alarm.com app Home screen that brings important messages into one place. Top Recommendations provides a unified, top-of-mind place that highlights what is most important at the moment including things like appointment reminders, power outages, emergency event message, relevant product suggestion, and more all in one convenient location.
Requirements
The Alarm.com Alarm.com app version 5.13.8+ for iOS or 5.10.7+ for Android
Features
Establishes one prominent, easy-to-find location on the dashboard where all essential messages, alerts, and recommendations are centralized for maximum visibility and impact
Ensures you receive the most important alerts, reminders, and opportunities at the right time
Gives you a convenient place to:
Check out relevant Upsell offers to expand and upgrade your system
See time-sensitive alerts for appointment reminders, power outages, emergency events, and more
Receive other important messages from their service provider such as messages prompting users who are enrolled in Mover or Builder programs
Time-sensitive messages and recommendations are displayed in order of importance/priority
Message types are tiered into priority levels - Emergency events, power outages, and appointment reminders take top priority, followed by Upsell offers and promotional content that appear after higher-priority messages have been dismissed
Access Top Recommendations
The Top Recommendations card can be accessed using the Alarm.com app and will appear when a related event has taken place.
To access Top Recommendations:
Log in to the Alarm.com app.
View the Top Recommendations card.
Note: The Top Recommendations card will only appear on the Alarm.com app Home screen when there is a key message, alert, or Upsell offer available. Otherwise, it will not display on the dashboard.
Swipe left and right when multiple recommendations are shown.
Note: Up to three recommendations can be displayed at once.
Tap Learn More for more information about the recommendation.
Tap Dismiss to clear the recommendation from the dashboard.
Always verify safety, installation, compatibility, and current UI details against the original manufacturer documentation before operational use.
Home Automation
GoSafer Security procedures and references for Home Automation.
Home Automation
Home Automation
GoSafer Security Knowledge Base
This operational reference is organized for GoSafer Security customers and staff. Alarm.com product names are retained where required for technical accuracy.
Overview
This GoSafer Security section brings together resources for Home Automation, including setup, configuration, everyday use, and troubleshooting. Choose the related page that matches your device, feature, or task, and follow the current manufacturer guidance linked on that page.
Platform
Customer Website
Content type
Troubleshooting
Source last updated
2024-07-23
Procedure
Browse the related pages in this chapter to open the specific procedure, configuration guide, or troubleshooting article you need.
Always verify safety, installation, compatibility, and current UI details against the original manufacturer documentation before operational use.
Home Automation
Add new equipment to Amazon Alexa
GoSafer Security Knowledge Base
This operational reference is organized for GoSafer Security customers and staff. Alarm.com product names are retained where required for technical accuracy.
Overview
Before new system devices can be added to Amazon Alexa, it is required to add an Alarm.com powered light or thermostat to your Alarm.com account. See the installation instructions that came with the device or contact your dealer for support for more information about how to add an Alarm.com powered light or thermostat to your Alarm.com account.
Platform
Mobile App
Content type
How-to / Configuration
Source last updated
2026-01-07
Procedure
To add a device to the Smart Home skill
Open the Amazon Alexa app.
Tap [Amazon Devices].
Tap [Add].
Tap Add Device.
Tap Other.
Tap Z-Wave.
Tap Discover Devices.
Alternatively, ask Alexa by saying, "Alexa, discover my devices."
You should now be able to control your newly named device. If commands are not triggering a device action, check the Your Devices section of the Alexa app to confirm the device is listed.
Always verify safety, installation, compatibility, and current UI details against the original manufacturer documentation before operational use.
Home Automation
Alexa app displays, “Discovery could not be completed. All of your Alexa devices are offline.”
GoSafer Security Knowledge Base
This operational reference is organized for GoSafer Security customers and staff. Alarm.com product names are retained where required for technical accuracy.
Overview
This is primarily a video or reference page. Open the original article link below for the current content.
Platform
Mobile App
Content type
Troubleshooting
Source last updated
2026-01-07
Procedure
If this error message appears
"...All Alexa devices are offline"
When all Alexa devices are offline, the Alarm.com Smart Home devices cannot be discovered.
Plug in the Amazon Alexa devices or power cycle them.
Interact with the Alexa device. If that does not work, verify the status of the Amazon Alexa devices.
"...One Alexa device is offline"
The Alarm.com Smart Home devices were discovered.
Tap Echo & Alexa in Devices the Alexa app to confirm.
Verify the status of the Amazon Alexa devices.
To verify the status of the Amazon Alexa devices
Open the Amazon Alexa app.
Tap [Amazon Devices].
If a device is offline, it will display Offline below the name of the device.
Always verify safety, installation, compatibility, and current UI details against the original manufacturer documentation before operational use.
Home Automation
Amazon Alexa Smart Home Skill
GoSafer Security Knowledge Base
This operational reference is organized for GoSafer Security customers and staff. Alarm.com product names are retained where required for technical accuracy.
Overview
This GoSafer Security section brings together resources for Amazon Alexa Smart Home Skill, including setup, configuration, everyday use, and troubleshooting. Choose the related page that matches your device, feature, or task, and follow the current manufacturer guidance linked on that page.
Platform
General / Device
Content type
Troubleshooting
Source last updated
2022-08-11
Procedure
Data sheets
No data sheets are listed in the current Alarm.com source.
Always verify safety, installation, compatibility, and current UI details against the original manufacturer documentation before operational use.
Home Automation
Amazon Alexa does not understand the names of the devices
GoSafer Security Knowledge Base
This operational reference is organized for GoSafer Security customers and staff. Alarm.com product names are retained where required for technical accuracy.
Overview
Amazon Alexa does not understand the names of the devices
Platform
General / Device
Content type
Troubleshooting
Source last updated
2026-03-26
Procedure
If Alexa is having trouble understanding the names of the devices
Do not use special characters (e.g., *(&%’#_) in the device names.
Avoid typos or grammatical errors.
Do not use conjunctions (e.g., and, or, etc.)
Avoid using device names that are homophones of each other (e.g., Aaron’s Lights and Erin’s lights, etc.).
For more information on changing device names, see Change a device name in Amazon Alexa.
Always verify safety, installation, compatibility, and current UI details against the original manufacturer documentation before operational use.
Home Automation
Amazon Alexa says, “I found several devices matching that name.”
GoSafer Security Knowledge Base
This operational reference is organized for GoSafer Security customers and staff. Alarm.com product names are retained where required for technical accuracy.
Overview
This is primarily a video or reference page. Open the original article link below for the current content.
Platform
General / Device
Content type
How-to / Configuration
Source last updated
2026-03-26
Procedure
If Alexa says, "I found several devices matching that name"
Try saying the name of the device more clearly.
If you are trying to control multiple devices using a general command (e.g., "turn off all the lights”), create a group name for the devices (e.g.,The Lights) and include all of the devices you would like to control.
For more information about how to create a group, see Smart Home Skill - Create a group of Amazon Alexa Smart Home devices.
Note: Unlike the Alarm.com skill, the Alarm.com Smart Home skill does not support general light commands.
Verify that your device name follows the naming guidelines. For more information, see Amazon Alexa does not understand the names of the devices.
Always verify safety, installation, compatibility, and current UI details against the original manufacturer documentation before operational use.
Home Automation
Amazon Alexa says, “Sorry, I couldn’t find a device or group name on the account.”
GoSafer Security Knowledge Base
This operational reference is organized for GoSafer Security customers and staff. Alarm.com product names are retained where required for technical accuracy.
Overview
If the name is correct and meets the naming guidelines, try your command again. For more information about the naming guidelines, see Alexa does not understand the names of the devices.
If the command did not trigger a device action, and the device follows the naming guidelines, check the Alexa app to confirm Alexa heard your request correctly.
Platform
Mobile App
Content type
Reference
Source last updated
2026-01-07
Procedure
To verify the device name using the Alexa app
Open the Amazon Alexa app.
Tap Devices.
Tap All Devices.
To view what Alexa heard using the Alexa app
Open the Amazon Alexa app.
Tap [Alexa Icon].
Tap Activity History.
Identify the command on the list to view what Alexa heard.
If Alexa did not hear the command correctly, retry the command.
If Alexa did hear the command correctly but spelled the device name differently than how the user has it spelled, change the device name to match the spelling of what Alexa hears. For more information about changing the device name, see Smart Home Skill - Change a device name in Amazon Alexa.
Always verify safety, installation, compatibility, and current UI details against the original manufacturer documentation before operational use.
Home Automation
Amazon Alexa says, “Sorry, the device appears to be malfunctioning.”
GoSafer Security Knowledge Base
This operational reference is organized for GoSafer Security customers and staff. Alarm.com product names are retained where required for technical accuracy.
Overview
When Alexa says, “Sorry, the device appears to be malfunctioning”, the Alarm.com device is currently in a malfunctioning state.
Platform
App + Web
Content type
Reference
Source last updated
2022-11-16
Procedure
If lights are malfunctioning
To confirm the devices are malfunctioning, verify on the GoSafer Security customer portal (powered by Alarm.com). The light bulb symbol should display the malfunction icon. For more information about verifying the status, see View the status of Z-Wave lights.
The most common cause of a malfunction is a loss of power due to turning off a switch or unplugging a lamp. After confirming the light is plugged in, send a command through the GoSafer Security customer portal (powered by Alarm.com) or Alarm.com app to confirm that it is now working. If the light is now working, try the Alexa command again.
If the light continues to stay in malfunction, see Light device is in malfunction.
If thermostats are malfunctioning
The most common cause of a malfunction is a loss of power due to low or dead batteries.
To change the batteries
Turn off the Heat/AC and all power to the thermostat using your breaker box.
Replace the batteries in your thermostat.
Restore power to the thermostat.
Send a remote command to your thermostat from the GoSafer Security customer portal (powered by Alarm.com) or Alarm.com app to confirm that it is now working.
If the thermostat continues to stay in malfunction, see Thermostat is in malfunction.
Always verify safety, installation, compatibility, and current UI details against the original manufacturer documentation before operational use.
Home Automation
Smart Home Skill - Change a device name in Amazon Alexa
GoSafer Security Knowledge Base
This operational reference is organized for GoSafer Security customers and staff. Alarm.com product names are retained where required for technical accuracy.
Overview
This is primarily a video or reference page. Open the original article link below for the current content.
Platform
Mobile App
Content type
How-to / Configuration
Source last updated
2026-01-07
Procedure
To change the device name on the Amazon Alexa app
Note: Updating a name within the Amazon Alexa app does not update the device name on Alarm.com.
Open the Amazon Alexa app.
Tap [Amazon Devices].
Tap the device you would like the rename.
Tap Edit Name.
Enter a new name.
Tap Return or Done on the keyboard or tap a different area of the screen to save the changes.
Always verify safety, installation, compatibility, and current UI details against the original manufacturer documentation before operational use.
Home Automation
Smart Home Skill - Disable Alarm.com in Amazon Alexa
GoSafer Security Knowledge Base
This operational reference is organized for GoSafer Security customers and staff. Alarm.com product names are retained where required for technical accuracy.
Overview
There are two ways to disable the Alarm.com Smart Home skill in the Amazon Alexa app.
Platform
Mobile App
Content type
How-to / Configuration
Source last updated
2026-01-07
Procedure
To disable the skill in Alarm.com Smart Home
Open the Amazon Alexa app.
Tap [Alexa Icon].
Tap Skills & Games.
In the search field, enter Alarm.com, then tap Search.
Tap Alarm.com Smart Home.
Tap Disable Skill.
Tap Disable Skill again in the pop-up window.
The Alarm.com Smart Home skill is disabled and does not appear under the Your Smart Home Skills header.
To disable the skill in Your Skills
Open the Amazon Alexa app.
Tap [Alexa Icon].
Tap Skills & Games.
Flick to the bottom, then tap Your Skills.
In Your Skills, tap Alarm.com Smart Home.
Tap Disable Skill.
Tap Disable in the pop-up window. The Alarm.com Smart Home skill will be disabled and will no longer appear in your list of skills.
Note: Removing the skill from your Amazon Alexa account does not remove the devices listed under All Devices in the [Amazon Devices] section of the app. To remove the devices, see Remove equipment from Amazon Alexa.
Always verify safety, installation, compatibility, and current UI details against the original manufacturer documentation before operational use.
Home Automation
Smart Home Skill - Interact with lights through Amazon Alexa
GoSafer Security Knowledge Base
This operational reference is organized for GoSafer Security customers and staff. Alarm.com product names are retained where required for technical accuracy.
Overview
Lights synced with the Amazon Alexa app can be controlled using many different commands. Below are some example commands for a light with the name Office Light.
Platform
General / Device
Content type
Reference
Source last updated
2025-08-13
Procedure
Example commands
To request the status of a light
"Alexa, is my Living Room Light on?"
To turn the light on or off
“Alexa, turn off the Office Light.”
“Alexa, switch on the Office Light.”
“Alexa, flip off the Office Light.”
To control a dimmable light in addition to on/off commands
“Alexa, dim the Office Light to 25 percent.”
“Alexa, increase the Office Light by 50 percent.”
“Alexa, make the Office Light 25 percent brighter.”
Frequently asked questions
How do I control a specific light?
To control lights using the Smart Home skill, you must use the exact name of the light or group name as defined by Amazon Smart Home. This is different from the Alarm.com skill where you can give commands without mentioning a specific light.
For more information on group interactions, see Smart Home Skill - Group devices together in Amazon Alexa.
Always verify safety, installation, compatibility, and current UI details against the original manufacturer documentation before operational use.
Home Automation
Smart Home Skill - Interact with thermostats through Amazon Alexa
GoSafer Security Knowledge Base
This operational reference is organized for GoSafer Security customers and staff. Alarm.com product names are retained where required for technical accuracy.
Overview
Thermostats synced with the Amazon Alexa app can be controlled using many different commands. The following are some example commands for a thermostat with the name Living Room.
Platform
General / Device
Content type
FAQ / Explanation
Source last updated
2025-08-13
Procedure
Example commands
To request the status of a thermostat
"Alexa, what is the Living Room temperature?"
To set the thermostat to a specific temperature
“Alexa, set the Living Room to 76 degrees.”
“Alexa, decrease the Living Room to 68 degrees.”
“Alexa, adjust the Living Room temperature to 72 degrees.”
To increase or decrease the temperature by a specific amount
“Alexa, increase the Living Room by 3 degrees.”
“Alexa, cool down the Living Room by 2 degrees.”
“Alexa, heat up the Living Room by 3 degrees.”
To adjust the temperature to a more comfortable level
“Alexa, turn the Living Room heat up.”
“Alexa, make the Living Room colder.”
“Alexa, heat my Living Room.”
Note: These commands will adjust the temperature up or down by two degrees Fahrenheit (one degree Celsius).
Thermostat mode
The thermostat mode can impact how your commands adjust the thermostat.
AC or Heat
The temperature will be set to the requested value.
The requested temperature will become the new midpoint for the AC and Heat setpoints.
Example: If the AC (high setpoint) is set to 78 degrees and the heat (low setpoint) is set to 68 degrees, the midpoint is 73 degrees. If you request that the temperature be changed to 75 degrees, Alexa will adjust the AC (high setpoint) to 80 degrees and the heat (low setpoint) to 70 degrees.
Off
Temperature adjustment commands will not work.
Frequently asked questions
What commands are not supported?
The Alarm.com Smart Home skill does not support commands to adjust thermostat fan settings.
You cannot change your thermostat’s mode using the Smart Home skill. To check the temperature or change the thermostat mode, use the Alarm.com skill.
How do I control a specific thermostat?
To control thermostats using the Smart Home skill, you must use the exact name of the thermostat or group name as defined by Amazon Smart Home. This is different from the Alarm.com skill where you can give commands without mentioning a specific thermostat.
For more information on group interactions, see Smart Home Skill - Group devices together in Amazon Alexa.
Always verify safety, installation, compatibility, and current UI details against the original manufacturer documentation before operational use.
Home Automation
Smart Home Skill - Remove equipment from Amazon Alexa
GoSafer Security Knowledge Base
This operational reference is organized for GoSafer Security customers and staff. Alarm.com product names are retained where required for technical accuracy.
Overview
This is primarily a video or reference page. Open the original article link below for the current content.
Platform
Mobile App
Content type
How-to / Configuration
Source last updated
2026-01-07
Procedure
To remove a Smart Home device
Open the Amazon Alexa app.
Tap [Amazon Devices].
Tap the device desired to be removed.
Tap [Delete].
For some Z-Wave devices, tap [Settings] and then [Delete].
Always verify safety, installation, compatibility, and current UI details against the original manufacturer documentation before operational use.
Home Automation
Smart Home Skill - Set up Alarm.com with the Amazon Alexa app
GoSafer Security Knowledge Base
This operational reference is organized for GoSafer Security customers and staff. Alarm.com product names are retained where required for technical accuracy.
Overview
This is primarily a video or reference page. Open the original article link below for the current content.
Platform
App + Web
Content type
How-to / Configuration
Source last updated
2026-01-07
Procedure
Requirements
Note: Using the Alexa Smart Home Skill with Alarm.com is only available in the US.
In order to use Alarm.com with Amazon Alexa, you must have
An account powered by Alarm.com.
Lights and/or thermostats powered by Alarm.com.
An Amazon Alexa device and associated Amazon customer account. These include
Echo
Echo Dot
Echo Show
Tap
FireTV Voice Remote
To connect the Alexa Smart Home Skill to an Alarm.com account
Open the Amazon Alexa app on your mobile device.
Tap [Alexa Icon].
Tap Skills & Games.
In the search field, enter Alarm.com, then tap Search.
Tap Alarm.com Smart Home.
Tap Enable To Use.
In the Username and Password fields, enter the Alarm.com account credentials.
Tap Allow.
Tap Done to leave the confirmation screen.
Now that you have turned on the skill, you need to discover your thermostats and lights. There are three ways to do this:
When you tap [Close] on the confirmation screen, a pop-up window will appear. Tap Discover Devices.
Add devices from the home page. For more information, see Add new equipment to Amazon Alexa.
Ask Alexa. Say "Alexa, discover my devices".
Note: If a light or thermostat does not appear, verify the device is plugged in and has an OK status on the GoSafer Security customer portal (powered by Alarm.com).
After the discovery is complete, the devices will appear in Your Devices.
For additional information and example commands, see Amazon Alexa Smart Home Skill.
Always verify safety, installation, compatibility, and current UI details against the original manufacturer documentation before operational use.
Home Automation
Car Connector (ADC-3035L) - Installation Guide
GoSafer Security Knowledge Base
This operational reference is organized for GoSafer Security customers and staff. Alarm.com product names are retained where required for technical accuracy.
Overview
This article contains steps for the installation of the Alarm.com Car Connector 3035L as well as an LED Guide to assist with troubleshooting the device.
Platform
App + Web
Content type
Troubleshooting
Source last updated
2026-04-09
Procedure
Step-by-step guide: Screenshots and videos are placed with the instruction they illustrate.
Extend security and awareness outside your home or business with Alarm.com’s Connected Car. Track your vehicle’s location, view engine status, and analyze fuel efficiency – right from the Alarm.com app.
Enjoy peace of mind with driver safety alerts, diagnostic alerts, and more. Use this guide to quickly and easily install the Car Connector, a device that plugs into a vehicle’s OBD-II port, connecting the vehicle to the Alarm.com platform.
Installation precautions Icn Warning
Use an Alarm.com Authorized Service Provider to install or remove the Car Connector.
If you choose not to use an Alarm.com Authorized Service Provider to install or remove the Car Connector, please carefully follow these instructions.
Choose a safe location before installing, removing, or reconnecting the Car Connector.
The Car Connector should never be plugged into or unplugged from the vehicle’s OBD-II port while the vehicle’s ignition is ON or in ACC/ACCESSORY mode, as this may cause issues such as dashboard lights to come on, but that should not affect the operation of the vehicle itself. Please ensure that the ignition is completely OFF before plugging in or unplugging the Car Connector. Should dashboard lights come on, they can usually be cleared by turning off the ignition and unplugging the Car Connector.
When the Car Connector is plugged in, ensure it is installed securely and cannot easily be removed or come loose. If necessary, make use of cable ties to ensure a secure connection.
Do not install the Car Connector in a manner that could obstruct the driver’s ability to safely operate the vehicle. If necessary, make use of an OBD-II extender cable to re-locate the position of the Car Connector.
The Car Connector cannot share the Vehicle Bus (its internal communication network) with other devices that are also connected to the Vehicle Bus. Do not use the Car Connector in vehicles with devices such as wheelchair lifts or OnStar® that also communicate on the Vehicle Bus, or with a Y-cable to connect multiple devices to the OBD-II port at the same time. For any questions on whether a device in your vehicle is connected to the Vehicle Bus, please contact your Alarm.com Authorized Service Provider.
The Car Connector uses a small amount of power from the vehicle battery while the ignition is off. If the vehicle’s ignition will be off for more than a week, it is recommended to unplug the Car Connector to prevent the possibility of draining the vehicle battery.
Pre-installation checklist
Car Connector (included)
Vehicle with an OBD-II port (standard on vehicles manufactured in 1996 or later). Hybrid and electric vehicles are not currently supported.
The vehicle should not be in an underground garage or in an area where cellular coverage may not be available.
A smartphone or tablet with an Internet connection
Add the Car Connector to an account
Before the Car Connector can send a vehicle's information to Alarm.com, it must be added to an account.
To add the Car Connector to an account using the GoSafer Security customer portal (powered by Alarm.com):
Using a web browser, visit www.alarm.com/addcarconnector. You will need your username and password to log in to the account.
Follow the on-screen instructions to install the Car Connector and add it to the account.
Drive the vehicle for at least 10 minutes to calibrate the Car Connector. The first trip displayed in the Alarm.com app may have incorrect information before calibration is complete.
To add the Car Connector to an account using the Add Device Portal:
Log in to the Alarm.com app. You will need your username and password to log in to the account.
Tap Menu.
Tap Add Device.
Tap Car Connector.
Follow the on-screen instructions to install the Car Connector and add it to the account.
Drive the vehicle for at least 10 minutes to calibrate the Car Connector. The first trip displayed in the Alarm.com app may have incorrect information before calibration is complete.
To add the Car Connector by scanning the QR code:
Scan the QR code below. You will need your username and password to log in to the account.
Addcarconnector New
Follow the on-screen instructions to install the Car Connector and add it to the account.
Drive the vehicle for at least 10 minutes to calibrate the Car Connector. The first trip displayed in the Alarm.com app may have incorrect information before calibration is complete.
Installation
Verify the vehicle’s ignition is OFF.
Locate the vehicle’s OBD-II port. It is usually under the steering wheel or in the glove box. If necessary, please refer to the vehicle’s owner’s manual to help locate the OBD-II port.
High res dashboard
LED guide
Car Connector LED callout (smaller)
Ignition state
LED pattern
Description
Red Off
Ignition is off or vehicle has not been detected
Red solid
Ignition is on
Communication
LED pattern
Description
Orange Off
Modem is off
Orange solid
Connected to Alarm.com
Orange flashing
Searching for cellular network
Orange rapid flash
Connected to the cellular network but not to Alarm.com
GPS
LED pattern
Description
Green Off
GPS is off
Green solid
GPS is on and the current location has been determined
Green flashing
GPS is on, searching for a location
Green rapid flash
Requesting time from the GPS satellites
Troubleshooting
Car Connector is showing as not responding in the Alarm.com app or GoSafer Security customer portal (powered by Alarm.com)
Alarm.com has not heard from the Car Connector in more than 24 hours. Ensure the Car Connector is firmly plugged into the vehicle’s OBD-II port and that it is in an area with cellular coverage.
Unplugged or plugged in events or notifications are received when the Car Connector was never unplugged
The Car Connector may have a loose connection to the OBD-II port. Ensure that it is firmly plugged in and use an extension cable if necessary.
The Alarm.com app status shows engine on when the vehicle is off
The Car Connector may have lost cellular connectivity and cannot send an engine-off message. This is common when the vehicle is parked in an area where cellular coverage may not be available, such as an underground garage. The message will be sent when connectivity is restored.
The car never appeared on the Cars card in the Alarm.com app
If the orange LED is not solid, park and turn off the car, then try unplugging the Car Connector and plugging it back in or moving the vehicle to an area with better cellular coverage. Try the installation again. Follow the Installation Precautions and directions above.
If the orange LED is solid and the red LED is off, park and turn off the car, then try unplugging the Car Connector and plugging it back in. Try the installation again. Follow the Installation Precautions and directions above. If the vehicle is a pre-2008 model year, ensure the Car Connector has been plugged into the OBD-II port with the ignition on for 30 minutes before attempting a fix.
Each trip is displayed as multiple smaller trips in the Alarm.com app
Your vehicle may have stop-start technology, which means the engine shuts off to save fuel when the vehicle is idling. Go to the Car Settings page in the Alarm.com app or GoSafer Security customer portal (powered by Alarm.com) and turn on the Stop-Start Technology setting. If the vehicle is idling for long periods of time, it may still cause trips to be broken up.
Frequently asked questions
How many Car Connectors can be added to an account?
Up to five Car Connectors can be used simultaneously on a single account.
Does the Car Connector need to be deleted and re-added when installed in a new vehicle?
No. The new car should detect the Car Connector once it is plugged in and the ignition is started. Once calibration is complete after the first trip or so, the device name should update automatically to the make and model of the new car.
What if the device obstructs normal driving operation when plugged in?
The Car Connector can be connected to an OBD-II extension cable for installation in a better location in the vehicle. Never use the device in a way that could potentially interfere with your ability to safely operate the vehicle.
Why is the fuel level not displaying for my vehicle?
Reading of the fuel level is not supported on your vehicle. The fuel level can only be displayed when the vehicle reports a value through the OBD-II port and the Car Connector is able to read it.
What is the Hibernating status?
If your car’s engine has been off for a week, the Car Connector will enter a deep sleep mode to prevent draining the car’s battery. The Car Connector will stop communicating information until the engine is started again.
Why did I not get a notification when the low fuel indicator on the vehicle dashboard turned on?
The low fuel notification is sent when the fuel level drops below the user-defined threshold in the Car Settings page in the Alarm.com app or GoSafer Security customer portal (powered by Alarm.com) that may be different from when the vehicle reports low fuel.
When will I get notifications for excessive speed, sudden acceleration, or hard braking?
Thresholds for these alerts can be configured by going to the Car Settings page in the Alarm.com app or the GoSafer Security customer portal (powered by Alarm.com).
How accurate is the Car Connector's location?
The Car Connector uses integrated GPS, which allows for accuracy of around 2 meters. GPS signals are more accurate when the Car Connector has a clear and unobstructed view of the sky and will be degraded by some factors (e.g., proximity to tall structures, driving under a tunnel, etc).
Questions?
Browse additional Connected Car articles in the Knowledge Base or contact your Alarm.com Authorized Service Provider.
Notices
Federal Communication Commission interference statement
This device complies with part 15 of the FCC Rules. Operation is subject to the following two conditions:
(1) This device may not cause harmful interference, and
(2) this device must accept any interference received, including interference that may cause undesired operation.
This equipment has been tested and found to comply with the limits for a Class B digital device, pursuant to Part 15 of the FCC Rules. These limits are designed to provide reasonable protection against harmful interference in a residential installation. This equipment generates, uses and can radiate radio frequency energy and, if not installed and used in accordance with the instructions, may cause harmful interference to radio communications. However, there is no guarantee that interference will not occur in a particular installation. If this equipment does cause harmful interference to radio or television reception, which can be determined by turning the equipment off and on, the user is encouraged to try to correct the interference by one of the following measures:
Reorient or relocate the receiving antenna.
Increase the separation between the equipment and receiver.
Connect the equipment into an outlet on a circuit different from that to which the receiver is connected.
Consult the dealer or an experienced radio/TV technician for help.
Any changes or modifications not expressly approved by the party responsible for compliance could void the user’s authority to operate this equipment.
IC Statement
This device complies with Industry Canada license-exempt RSS standard(s). Operation is subject to the following two conditions:
(1) This device may not cause interference, and
(2) this device must accept any interference, including interference that may cause undesired operation of the device.
Le présent appareil est conforme aux CNR d’Industrie Canada applicables aux appareils radio exempts de licence. L’exploitation est autorisée aux deux conditions suivantes:
(1) L’appareil ne doit pas produire de brouillage, et
(2) l’utilisateur de l’appareil doit accepter tout brouillage radioélectrique subi, même si le brouillage est susceptible d’en compromettre le fonctionnement.
RADIATION EXPOSURE STATEMENT
The device has been found to be compliant to the requirements set forth in CFR 47 Sections 2.1091 and Industry Canada RSS-102 for an uncontrolled environment. The antenna(s) used for this transmitter must be installed to provide a separation distance of at least 20 cm from all persons and must not be co-located or operating in conjunction with any other antenna or transmitter.
Le dispositif a été jugé conforme aux exigences énoncées dans les articles 47 CFR 2.1091 et Industrie Canada RSS-102 pour un environnement non contrôle’. L’antenne(s) utilisée pour ce transmetteur doit etre installé pour fournir une distance de séparation d’au moins 20 cm de toutes les personnes et ne doit pas être co-localisés ou fonctionner en conjunction avec une autre antenne ou transmetteur.
Always verify safety, installation, compatibility, and current UI details against the original manufacturer documentation before operational use.
Home Automation
Connected Car
GoSafer Security Knowledge Base
This operational reference is organized for GoSafer Security customers and staff. Alarm.com product names are retained where required for technical accuracy.
Overview
This GoSafer Security section brings together resources for Connected Car, including setup, configuration, everyday use, and troubleshooting. Choose the related page that matches your device, feature, or task, and follow the current manufacturer guidance linked on that page.
Platform
General / Device
Content type
Troubleshooting
Source last updated
2024-07-24
Procedure
Browse the related pages in this chapter to open the specific procedure, configuration guide, or troubleshooting article you need.
Always verify safety, installation, compatibility, and current UI details against the original manufacturer documentation before operational use.
Home Automation
Connected Car is in malfunction
GoSafer Security Knowledge Base
This operational reference is organized for GoSafer Security customers and staff. Alarm.com product names are retained where required for technical accuracy.
Overview
The Malfunction trouble condition indicates the Connected Car device has been unable to communicate for over 24 hours.
Platform
General / Device
Content type
Troubleshooting
Source last updated
2023-10-02
Procedure
If a Connected Car device is in malfunction
Verify that the Connected Car device is plugged into the car's OBD-II port.
Verify that the Connected Car is located in an area with cellular coverage.
Verify that the orange LED on the device is a solid light. If the orange LED is flashing, the device is not connected to the cellular network.
Note: The device will go into hibernate after extended time (about 7 days) of not driving. Once in hibernate, it will no longer wake up to send any communications. 24 hours after it enters hibernate, the device will go offline. To resolve this, start the car to resume communication.
Always verify safety, installation, compatibility, and current UI details against the original manufacturer documentation before operational use.
Home Automation
Create a Car Event Alert notification
GoSafer Security Knowledge Base
This operational reference is organized for GoSafer Security customers and staff. Alarm.com product names are retained where required for technical accuracy.
Overview
This notification alerts users of important concerns, such as diagnostic issues, low car battery, and malfunction alerts.
Platform
App + Web
Content type
Troubleshooting
Source last updated
2025-06-04
Procedure
To create a Car Event Alert notification using the Alarm.com app
Log in to the Alarm.com app.
Tap [Menu].
Tap Notifications.
Tap [Settings].
Tap [Add].
Tap to expand Use A Template.
In Cars, tap to select Car Event Alert.
Enter the desired name for the new notification rule.
In When these cars, click to select if Any Car or a Specific Car should trigger the notification.
Tap to select which events should be reported. Events include:
Low car battery
Car Connector is not responding
Car Connector is hibernating
Car Connector was unplugged
Car Connector was plugged in
Diagnostic issue reported
Low fuel
In Recipients, tap Add to choose notification recipients.
Tap the entries in the Address book to be notified, or tap Add Contact to add a new Address Book entry.
Tap Close.
Verify the notification is configured with the correct settings.
Tap Save.
To create a Car Event Alert notification using the GoSafer Security customer portal (powered by Alarm.com)
Log in to the GoSafer Security customer portal (powered by Alarm.com).
Click Notifications.
Click New Notification.
Click Cars.
Click Car Event Alert.
Enter the desired name for the new notification rule.
In When these cars, click to select if Any Car or a Specific Car should trigger the notification.
Click to select which events should be reported. Events include:
Low car battery
Car Connector is not responding
Car Connector is hibernating
Car Connector was unplugged
Car Connector was plugged in
Diagnostic issue reported
Low fuel
In Recipients, click Add to choose notification recipients.
Select the entries in the Address book to be notified, or click New to add a new Address Book entry.
Click Close.
Verify the notification is configured with the correct settings.
Always verify safety, installation, compatibility, and current UI details against the original manufacturer documentation before operational use.
Home Automation
Create a Car Unexpected Movement Alarm notification
GoSafer Security Knowledge Base
This operational reference is organized for GoSafer Security customers and staff. Alarm.com product names are retained where required for technical accuracy.
Overview
This notification alerts users when the car is moved while the engine is off.
Platform
App + Web
Content type
How-to / Configuration
Source last updated
2025-06-04
Procedure
To create a Car Unexpected Movement Alarm notification using the Alarm.com app
Log in to the Alarm.com app.
Tap [Menu].
Tap Notifications.
Tap [Settings].
Tap [Add].
Tap to expand Use A Template.
In Cars, tap to select Car Unexpected Movement Alarm.
Enter the desired name for the notification rule.
In When unexpected movement is reported by, tap to select if Any Car or a Specific Car should trigger the notification.
In Recipients, tap Add to choose notification recipients.
Tap the entries in the Address book that are to be notified, or tap Add Contact to add a new Address Book entry.
Tap Close.
Verify the notification is configured with the correct settings.
Tap Save.
To create a Car Unexpected Movement Alarm notification using the GoSafer Security customer portal (powered by Alarm.com):
Log in to the GoSafer Security customer portal (powered by Alarm.com).
Click Notifications.
Click New Notification.
Click Cars.
Click Car Unexpected Movement Alarm.
Enter the desired name for the notification rule.
In When unexpected movement is reported by, click to select if Any Car or a Specific Car should trigger the notification.
In Recipients, click Add to choose notification recipients.
Click the entries in the Address book that are to be notified, or click New to add a new Address Book entry.
Click Close.
Verify the notification is configured with the correct settings.
Always verify safety, installation, compatibility, and current UI details against the original manufacturer documentation before operational use.
Home Automation
Create a Driver Behavior Alerts notification
GoSafer Security Knowledge Base
This operational reference is organized for GoSafer Security customers and staff. Alarm.com product names are retained where required for technical accuracy.
Overview
This notification alerts users of excessive speed, sudden acceleration, or hard braking.
Platform
App + Web
Content type
How-to / Configuration
Source last updated
2025-06-04
Procedure
To create a Driver Behavior Alerts notification using the Alarm.com app
Log in to the Alarm.com app.
Tap [Menu].
Tap Notifications.
Tap [Settings].
Tap [Add].
Tap to expand Use A Template.
In Cars, tap to select Driver Behavior Alerts.
Enter the desired name for the notification rule.
In When these cars, tap to select which car should trigger the notification.
Tap to select which events should be reported. Events include:
Excessive Speed
Sudden Acceleration
Hard Braking
In During this time frame, tap to select either
At all times to receive a notification every time the selected sensors are opened or activated.
Only during the following times to specify a specific time to receive notifications when the selected sensors are opened or activated.
In Notification Filtering, either leave both boxes uncheck to prevent filtering or tap to configure the following
Do not send notifications that occur within [a specified amount of time] since the last notification
Do not send notifications with any of the following Geo-Devices are inside the selected Geo-Fence
In Recipients, tap Add to choose notification recipients.
Tap the entries in the Address book that are to be notified, or tap Add Contact to add a new Address Book entry.
Tap Close.
Verify the notification is configured with the correct settings.
Tap Save.
To create a Driver Behavior Alerts notification using the GoSafer Security customer portal (powered by Alarm.com)
Log in to the GoSafer Security customer portal (powered by Alarm.com).
Click Notifications.
Click New Notification.
Click Cars.
Click Driver Behavior Alerts.
Enter the desired name for the notification rule.
In When these cars, click to select which car should trigger the notification.
Click to select which events should be reported. Events include:
Excessive Speed
Sudden Acceleration
Hard Braking
In During this time frame, click to select either
At all times to receive a notification every time a selected event is reported.
Only during the following times to specify a specific time to receive notifications when the selected events are reported.
In Notification Filtering, either leave both boxes uncheck to prevent filtering or click to configure the following
Do not send notifications that occur within a specified amount of time since the last notification
Do not send notifications with any of the following Geo-Devices are inside the selected Geo-Fence
In Recipients, click Add to choose notification recipients.
Click the entries in the Address book that are to be notified, or click New to add a new Address Book entry.
Click Close.
Verify the notification is configured with the correct settings.
Always verify safety, installation, compatibility, and current UI details against the original manufacturer documentation before operational use.
Home Automation
Create a Trip Started/Ended Alert notification
GoSafer Security Knowledge Base
This operational reference is organized for GoSafer Security customers and staff. Alarm.com product names are retained where required for technical accuracy.
Overview
This notification alerts users when the car's engine is turned on/off.
Platform
App + Web
Content type
How-to / Configuration
Source last updated
2025-07-08
Procedure
To create a Trip Started/Ended Alert notification using the Alarm.com app
Log in to the Alarm.com app.
Tap [Menu].
Tap Notifications.
Tap [Settings].
Tap [Add].
Tap to expand Use A Template.
In Cars, tap More.
Tap to select Trip Started/Ended Alert.
Enter the desired name for the notification rule.
In When these cars, tap to select which car should trigger the notification.
In Report any of the following events, select the desired events to report (i.e., Trip Started, Trip Ended).
In During this time frame, tap to select either
At all times to receive a notification every time the car is turned on/off.
Only during the following times to specify a specific time to receive notifications when the car is turned on/off.
In Recipients, tap Add to choose notification recipients.
Tap the entries in the Address book that are to be notified, or tap Add Contact to add a new Address Book entry.
Tap Close.
Verify the notification is configured with the correct settings.
Tap Save.
To create a Trip Started/Ended Alert notification using the GoSafer Security customer portal (powered by Alarm.com)
Log in to the GoSafer Security customer portal (powered by Alarm.com).
Click Notifications.
Click New Notification.
Click Cars.
Click Trip Started/Ended Alert.
Enter the desired name for the notification rule.
In When these cars, click to select which car should trigger the notification.
In Report any of the following events, select the desired events to report (i.e., Trip Started, Trip Ended).
In During this time frame, click to select either
At all times to receive a notification every time the trip is started/ended.
Only during the following times to specify a specific time to receive notifications when the car is turned on/off.
In Recipients, click Add to choose notification recipients.
Click the entries in the Address book that are to be notified, or click New to add a new Address Book entry.
Click Close.
Verify the notification is configured with the correct settings.
Always verify safety, installation, compatibility, and current UI details against the original manufacturer documentation before operational use.
Home Automation
What features are available with Connected Car on Alarm.com?
GoSafer Security Knowledge Base
This operational reference is organized for GoSafer Security customers and staff. Alarm.com product names are retained where required for technical accuracy.
Overview
Connected Car allows you to track your vehicle’s location, monitor its diagnostic health, and receive alerts for speeding, towing, and more—all from the Alarm.com Customer app.
Platform
App + Web
Content type
How-to / Configuration
Source last updated
2024-12-11
Procedure
Step-by-step guide: Screenshots and videos are placed with the instruction they illustrate.
The following features are available with Connected Car on Alarm.com.
Overview video
Connected Car allows you to track your vehicle’s location, monitor its diagnostic health, and receive alerts for speeding, towing, and more—all from the Alarm.com app. Plus, because the Car Connector uses a dedicated cellular connection and has a backup battery, you get 24/7 awareness, even when the car is parked and the engine is off.
Self-Installation
Ready to use Alarm.com’s Connected Car? Follow this step-by-step guide that will walk you through how to install the Car Connector. Once the Car Connector is calibrated, you can track the vehicle’s location, view engine status, and analyze fuel efficiency – right from the Alarm.com mobile app.
Connected Car allows you to automate smart home settings based on the location of your vehicle. Save time and money by enabling Location Services to automatically adjust lights and thermostats, pause video recordings, and send alerts when you’ve forgotten to close the garage or lock the front door.
When the Car Connector is added to the account, it is automatically added as a Geo-Device.
Note: Connected Car uses GPS accuracy, which allows for smaller Geo-Fences.
Connected Car allows you to monitor your vehicle’s location, diagnostics, and behavior. When you configure notifications, you’ll receive alerts about vehicle maintenance, unexpected movement, and more! Connected Car provides constant awareness and helpful insights, even when the car is parked with the engine off!
When adding a new notification, there is a new section for Cars. For more information about creating notifications, see Create/configure a notification.
Cars notifications
Thresholds for these alerts can be configured by going to the Car Settings page using the website or app. For more information about configuring settings, seeConfigure Connected Car Settings.
View real-time data
Maintenance alerts and real-time data in the mobile app help keep vehicles in good working order.
Icn Car Checkengine Check Engine
Icn Car Lowbattery Low Battery
Icn Car Lowfuel Low Fuel
Icn Car Location Pin Car Location and Trips
The following images display the Cars section on the app:
Always verify safety, installation, compatibility, and current UI details against the original manufacturer documentation before operational use.
Home Automation
Add a new LiftMaster garage door device
GoSafer Security Knowledge Base
This operational reference is organized for GoSafer Security customers and staff. Alarm.com product names are retained where required for technical accuracy.
Overview
LiftMaster devices can be added through the website.
Platform
Customer Website
Content type
How-to / Configuration
Source last updated
2025-06-04
Procedure
To add a LiftMaster device using the GoSafer Security customer portal (powered by Alarm.com)
Log in to the GoSafer Security customer portal (powered by Alarm.com).
Click Settings.
Click Manage Devices.
Click Add Device.
Click Garage Door.
Select the desired LiftMaster device.
Note: If you do not see the LiftMaster option, contact your service provider.
Click Next.
Follow the on-screen instructions to complete the device installation.
Note: To remove LiftMaster garage door devices from your account, contact your service provider.
Always verify safety, installation, compatibility, and current UI details against the original manufacturer documentation before operational use.
Home Automation
Add/remove a Nice Linear Wi-Fi Garage Door Opener
GoSafer Security Knowledge Base
This operational reference is organized for GoSafer Security customers and staff. Alarm.com product names are retained where required for technical accuracy.
Overview
The Nice Linear Wi-Fi Garage Door Openers can be added or removed through the customer app or GoSafer Security customer portal.
Platform
App + Web
Content type
How-to / Configuration
Source last updated
2025-06-04
Procedure
To add a Nice Linear Wi-Fi Garage Door Opener device using the Alarm.com app
Log in to the Alarm.com app
Tap [More Options].
Tap Add Device.
Tap Garage Door.
Tap Nice Garage Door Controller.
Tap Next.
Enter the email address and password associated with the Nice G.O. account, then tap Sign In.
Note: It may take several minutes before the device(s) appear on the account.
To add a Nice Linear Wi-Fi Garage Door Opener device using the GoSafer Security customer portal (powered by Alarm.com)
Log in to the GoSafer Security customer portal (powered by Alarm.com).
Click Settings.
Click Manage Devices.
Click Add Device.
Click Garage Door.
Click Nice Garage Door Controller.
Click Next.
Follow the on-screen instructions to complete the device installation.
To remove a Nice Linear Wi-Fi Garage Door Opener device using the Alarm.com app
Log in to the Alarm.com app.
Tap [More Options].
Tap Manage Devices.
Tap [Options] next to the device.
Tap Device Settings.
Tap Unlink Account.
To remove a Nice Linear Wi-Fi Garage Door Opener device using the GoSafer Security customer portal (powered by Alarm.com):
Log in to the GoSafer Security customer portal (powered by Alarm.com).
Always verify safety, installation, compatibility, and current UI details against the original manufacturer documentation before operational use.
Home Automation
Can I mute the beeping sound made by the garage door operator when closing?
GoSafer Security Knowledge Base
This operational reference is organized for GoSafer Security customers and staff. Alarm.com product names are retained where required for technical accuracy.
Overview
No. The beeping sound from the garage door operator is an alert for persons near the garage door to stay away from the garage door while it closes. This safety standard is required by UL 325 for unattended control of a garage door. The beeping cannot be turned off and its volume cannot be controlled.
UL 325 was revised in 2009 allowing unattended operation features.
Platform
General / Device
Content type
FAQ / Explanation
Source last updated
2024-07-24
Procedure
Several key provisions must be met for such operation
The feature must be utilized only on an operator equipped with a secondary entrapment protection system such as a photoelectric sensor.
The feature must be activated only when the operator is installed on a sectional door.
The operator must be equipped with an audible and visual warning system indicating a pending motion for five seconds before the door starts moving.
Always verify safety, installation, compatibility, and current UI details against the original manufacturer documentation before operational use.
Home Automation
Can I view garage door state and open or close the garage door from the security panel?
GoSafer Security Knowledge Base
This operational reference is organized for GoSafer Security customers and staff. Alarm.com product names are retained where required for technical accuracy.
Overview
The ability to see, open, and close the garage door from a security panel depends on the type of garage door control solution and security panel you have.
Platform
General / Device
Content type
FAQ / Explanation
Source last updated
2026-06-16
Procedure
Linear
If you have a Linear Z-Wave garage door opener (GDO), then it is possible to control the GDO from the following security panel types:
2GIG GoControl 1 or 2
2GIG GC3
DSC Touch
Interlogix Simon XTi-5i
Qolsys IQ panels (all panel variants are compatible)
LiftMaster, Genie, and Overhead Door
If you have a LiftMaster MyQ Internet Gateway or MyQ Smart Garage Hub, then it is possible to control the garage door from the following security panels:
IQ Panel 2 on panel software version 2.4.0+
IQ Hub
IQ Panel 4
IQ4 Hub
IQ Panel 5 / IQ5 Hub
IQ panels using an IQ Remote keypad
Note: MyQ Gate Openers are not currently supported for viewing or controlling status on the Qolsys security panels.
Always verify safety, installation, compatibility, and current UI details against the original manufacturer documentation before operational use.
Home Automation
Can user codes on the garage door keypad by synchronized with my system?
GoSafer Security Knowledge Base
This operational reference is organized for GoSafer Security customers and staff. Alarm.com product names are retained where required for technical accuracy.
Overview
No. Garage door operator user codes cannot be synchronized with an online account at this time.
Platform
General / Device
Content type
Reference
Source last updated
2024-07-24
Procedure
No. Garage door operator user codes cannot be synchronized with an online account at this time.
Always verify safety, installation, compatibility, and current UI details against the original manufacturer documentation before operational use.
Home Automation
Create/edit a Garage Left Open notification
GoSafer Security Knowledge Base
This operational reference is organized for GoSafer Security customers and staff. Alarm.com product names are retained where required for technical accuracy.
Overview
A Garage Left Open notification can notify users if the garage door is left open for a specified duration or if a specified Geo-Device leaves the area.
Platform
App + Web
Content type
How-to / Configuration
Source last updated
2025-06-04
Procedure
To create/edit a Garage Left Open notification using the Alarm.com app
Log in to the Alarm.com app.
Tap [Menu].
Tap Notifications.
Tap [Settings].
To edit the notification, tap to select the Garage Left Open notification.
If the notification has not been created, tap [Add], and then tap Garage Left Open.
Rename the rule.
In When any of these doors, tap to select the garage doors to be notified about.
In Is Left Open, select any of the following options
Using the For this duration dropdown menu, select the number of minutes the door must be left open to receive a notification.
There is also the option to receive a notification based on geographical location in When selected people cross a Geo-Fence by selecting the Geo-Devices and crossing preferences.
In During this time frame, specify when to receive notifications.
At All Times sends a notification anytime the garage is left open.
Only during the following times specifies the days and times that the notifications is sent.
To add notification recipients, tap Add.
Tap to select the desired recipients from the Address Book, or add an unlisted recipient by tapping Add Contact.
Tap Close.
Verify the notification is configured with the correct settings.
Tap Save.
To create/edit a Garage Left Open notification using the GoSafer Security customer portal (powered by Alarm.com)
Log in to the GoSafer Security customer portal (powered by Alarm.com).
Click Notifications.
To edit the notification, click [Edit] for the Garage Left Open notification.
If the notification has not been created, click New Notification, and then click to select Garage Left Open.
Name the notification rule.
Select the names of the garage doors to receive notifications from.
Using the For this duration dropdown menu, select the number of minutes the door must be left open to send a notification.
There is also the option to receive a notification based on geographical location in When selected people cross a Geo-Fence by selecting the Geo-Devices and crossing preferences.
In During this time frame, select the times to receive notifications
At All Times sends a notification anytime the garage is left open.
Only during the following times specifies the days and times that the notifications is sent.
To add notification recipients, click Add.
Click to select the desired recipients from the Address Book, or add an unlisted recipient by clicking New.
Click Close.
Verify the notification is configured with the correct settings.
Always verify safety, installation, compatibility, and current UI details against the original manufacturer documentation before operational use.
Home Automation
Create/edit a Garage Open or Garage Close notification
GoSafer Security Knowledge Base
This operational reference is organized for GoSafer Security customers and staff. Alarm.com product names are retained where required for technical accuracy.
Overview
A Garage Opened/Closed notification can notify users if the garage door is opened or closed.
Platform
App + Web
Content type
How-to / Configuration
Source last updated
2025-06-04
Procedure
To create/edit a Garage Open or Close notification using the Alarm.com app
Log in to the Alarm.com app.
Tap [Menu].
Tap Notifications.
Tap [Settings].
To edit the notification, tap to select the Garage notification.
If the notification has not been created, tap [Add], and then tap Garage.
Rename the rule.
In When, tap to select the names of the of the garage doors to be notified about.
In Is, tap to select the garage door actions to be notified about.
In During this time frame, tap to specify when to receive notifications.
At All Times will send a notification anytime of day if the garage status changes.
Only during the following times specifies the days and times that the notifications will be sent.
In Notification Filtering, there is the option to receive notifications based on Geo-Device rules.
Tap to select Do not send notifications that occur within and use the dropdown menu to limit the number of notifications sent.
There is also the option to receive a notification based on geographical location in When selected people cross a Geo-Fence by selecting the Geo-Devices and crossing preferences.
To add notification recipients, tap Add.
Tap to select the desired recipients from the Address Book, or add an unlisted recipient by tapping Add Contact.
Tap Close.
Verify the notification is configured with the correct settings.
Tap Save.
To create/edit a Garage Open or Close notification using the GoSafer Security customer portal (powered by Alarm.com)
Log in to the GoSafer Security customer portal (powered by Alarm.com).
Click Notifications.
To edit the notification, click [Edit] for the Garage notification.
If the notification has not been created, click New Notification, and then click to select Garage.
Name the notification.
In When, click to select the names of the garage doors to be notified about.
In Is, click to select the garage door actions to be notified about.
In During this time frame, click to specify when to receive notifications.
At All Times will send a notification anytime of day if the garage status changes.
Only during the following times specifies the days and times that the notifications will be sent.
In Notification Filtering, there is the option to receive notifications based on Geo-Device rules.
Click to select Do not send notifications that occur within and use the dropdown menu to limit the number of notifications sent.
There is also the option to receive a notification based on geographical location in When selected people cross a Geo-Fence by selecting the Geo-Devices and crossing preferences.
To add notification recipients, click Add.
Click to select the desired recipients from the Address Book, or add an unlisted recipient by clicking New.
Click Close.
Verify the notification is configured with the correct settings.
Always verify safety, installation, compatibility, and current UI details against the original manufacturer documentation before operational use.
Home Automation
Create/edit a Gate Left Open notification
GoSafer Security Knowledge Base
This operational reference is organized for GoSafer Security customers and staff. Alarm.com product names are retained where required for technical accuracy.
Overview
A Gate Left Open notification can notify users if the gate is left open for a specified duration or if a specified Geo-Device leaves the area.
Platform
App + Web
Content type
How-to / Configuration
Source last updated
2025-06-04
Procedure
To create/edit a Gate Left Open notification using the Alarm.com app
Log in to the Alarm.com app.
Tap [Menu].
Tap Notifications.
Tap [Settings].
Create a new Gate Left Open notification or edit an existing one.
If the notification has not been created, tap [Add], and then tap Gate Left Open.
To edit an existing notification, tap to select the Gate Left Open notification.
Rename the rule.
In When any of these gates, tap to select the gates to be notified about.
In Is Left Open, select any of the following options
Using the For this duration dropdown menu, select the number of minutes the gate must be left open to receive a notification.
There is also the option to receive a notification based on geographical location in When selected people cross a Geo-Fence by selecting the Geo-Devices and crossing preferences.
In During this time frame, specify when to receive notifications.
At All Times sends a notification anytime the gate is left open.
Only during the following times specifies the days and times that the notifications is sent.
To add notification recipients, tap Add.
Tap to select the desired recipients from the Address Book, or add an unlisted recipient by tapping Add Contact.
Tap Close.
Verify the notification is configured with the correct settings.
Tap Save.
To create/edit a Gate Left Open notification using the GoSafer Security customer portal (powered by Alarm.com)
Log in to the GoSafer Security customer portal (powered by Alarm.com).
Click Notifications.
Create a new Gate Left Open notification or edit an existing one.
If the notification has not been created, click New Notification, and then click to select Gate Left Open.
To edit an existing notification, click [Edit] for the Gate Left Open notification.
Name the notification rule.
Select the names of the gates to receive notifications from.
Using the For this duration dropdown menu, select the number of minutes the gate must be left open to send a notification.
There is also the option to receive a notification based on geographical location in When selected people cross a Geo-Fence by selecting the Geo-Devices and crossing preferences.
In During this time frame, select the times to receive notifications
At All Times sends a notification anytime the gate is left open.
Only during the following times specifies the days and times that the notifications is sent.
To add notification recipients, click Add.
Click to select the desired recipients from the Address Book, or add an unlisted recipient by clicking New.
Click Close.
Verify the notification is configured with the correct settings.
Always verify safety, installation, compatibility, and current UI details against the original manufacturer documentation before operational use.
Home Automation
Create/edit a Gate Open or Gate Close notification
GoSafer Security Knowledge Base
This operational reference is organized for GoSafer Security customers and staff. Alarm.com product names are retained where required for technical accuracy.
Overview
A Gate Opened/Closed notification can notify users if the gate is opened or closed.
Platform
App + Web
Content type
How-to / Configuration
Source last updated
2025-06-04
Procedure
To create/edit a Gate Open/Close notification using the Alarm.com app
Log in to the Alarm.com app.
Tap [Menu].
Tap Notifications.
Tap [Settings].
Create a new Gate Open/Close notification or edit an existing one.
If the notification has not been created, tap [Add], and then tap Gate Open/Close.
To edit the notification, tap to select the Gate notification.
Rename the rule.
In When, tap to select the names of the of the gates to be notified about.
In Is, tap to select the gate actions to be notified about.
In During this time frame, tap to specify when to receive notifications.
At All Times will send a notification anytime of day if the Gate status changes.
Only during the following times specifies the days and times that the notifications will be sent.
In Notification Filtering, there is the option to receive notifications based on Geo-Device rules.
Tap to select Do not send notifications that occur within and use the dropdown menu to limit the number of notifications sent.
There is also the option to receive a notification based on geographical location in When selected people cross a Geo-Fence by selecting the Geo-Devices and crossing preferences.
To add notification recipients, tap Add.
Tap to select the desired recipients from the Address Book, or add an unlisted recipient by tapping Add Contact.
Tap Close.
Verify the notification is configured with the correct settings.
Tap Save.
To create/edit a Gate Open/Close notification using the GoSafer Security customer portal (powered by Alarm.com)
Log in to the GoSafer Security customer portal (powered by Alarm.com).
Click Notifications.
Create a new Gate Open/Close notification or edit an existing one.
If the notification has not been created, click New Notification, and then click to select Gate Open/Close.
To edit an existing notification, click [Edit] for the Gate Open/Close notification.
Name the notification.
In When, click to select the names of the gates to be notified about.
In Is, click to select the gate actions to be notified about.
In During this time frame, click to specify when to receive notifications.
At All Times will send a notification anytime of day if the Gate status changes.
Only during the following times specifies the days and times that the notifications will be sent.
In Notification Filtering, there is the option to receive notifications based on Geo-Device rules.
Click to select Do not send notifications that occur within and use the dropdown menu to limit the number of notifications sent.
There is also the option to receive a notification based on geographical location in When selected people cross a Geo-Fence by selecting the Geo-Devices and crossing preferences.
To add notification recipients, click Add.
Click to select the desired recipients from the Address Book, or add an unlisted recipient by clicking New.
Click Close.
Verify the notification is configured with the correct settings.
Always verify safety, installation, compatibility, and current UI details against the original manufacturer documentation before operational use.
Home Automation
Garage Doors
GoSafer Security Knowledge Base
This operational reference is organized for GoSafer Security customers and staff. Alarm.com product names are retained where required for technical accuracy.
Overview
This GoSafer Security section brings together resources for Garage Doors, including setup, configuration, everyday use, and troubleshooting. Choose the related page that matches your device, feature, or task, and follow the current manufacturer guidance linked on that page.
Platform
Customer Website
Content type
Troubleshooting
Source last updated
2024-07-24
Procedure
Browse the related pages in this chapter to open the specific procedure, configuration guide, or troubleshooting article you need.
Always verify safety, installation, compatibility, and current UI details against the original manufacturer documentation before operational use.
Home Automation
Garage door opener is in malfunction
GoSafer Security Knowledge Base
This operational reference is organized for GoSafer Security customers and staff. Alarm.com product names are retained where required for technical accuracy.
Overview
The Malfunction trouble condition indicates a device is unable to properly communicate.
Platform
App + Web
Content type
Troubleshooting
Source last updated
2023-11-28
Procedure
If a garage door opener is in malfunction or offline
Open and close the door from the garage door opener's wall control.
Request an update on the equipment status using the Alarm.com app or GoSafer Security customer portal (powered by Alarm.com).
To update the equipment status on the Alarm.com app, tap on the Garage Door status in the Garage Doors card, then tap Reconnect.
To update the equipment status on the GoSafer Security customer portal (powered by Alarm.com) click [Details] on the garage card, then click [Refresh].
Verify the garage door opener is within communication range of the router or panel.
If using a Wi-Fi (e.g., LiftMaster, Genie, Overhead Door) garage door opener, verify the internet connection it is associated with is active.
If using a Z-Wave garage door opener, verify the device is within range of the Z-Wave network.
Verify the garage door or wall controller has power.
If it is still in malfunction or offline, contact your service provider.
Always verify safety, installation, compatibility, and current UI details against the original manufacturer documentation before operational use.
Home Automation
Gate control device is in malfunction
GoSafer Security Knowledge Base
This operational reference is organized for GoSafer Security customers and staff. Alarm.com product names are retained where required for technical accuracy.
Overview
The Malfunction trouble condition indicates a device is unable to properly communicate.
Platform
App + Web
Content type
Troubleshooting
Source last updated
2026-02-06
Procedure
If a gate control device is in malfunction or offline
Alarm.com Flex IO® sensor
Check the batteries and replace if necessary.
Check the red and yellow LEDs for more information about the device trouble.
For LiftMaster gates
Open and close the gate from the wall control.
Request an update on the equipment status using the Alarm.com app or GoSafer Security customer portal (powered by Alarm.com).
To update the equipment status on the Alarm.com app, tap on the Gate status in the Garage Doors card, then tap Reconnect.
To update the equipment status on the GoSafer Security customer portal (powered by Alarm.com) click [Details] on the garage card, then click [Refresh].
Verify the gate is within communication range of the router.
Verify the internet connection it is associated with is active.
Verify the gate control device has power.
If the gate control device is still in malfunction or offline, contact your service provider.
Always verify safety, installation, compatibility, and current UI details against the original manufacturer documentation before operational use.
Home Automation
Open/close a Garage Door
GoSafer Security Knowledge Base
This operational reference is organized for GoSafer Security customers and staff. Alarm.com product names are retained where required for technical accuracy.
Overview
Garage doors can be opened or closed from the website or the app.
Platform
App + Web
Content type
Reference
Source last updated
2025-06-04
Procedure
To open or close a garage door using the Alarm.com app
Log in to Alarm.com app.
Tap Garage Doors.
Tap Open to open the garage door.
Tap Close to close the garage door.
Tap Send to confirm your command.
To open or close a garage door using GoSafer Security customer portal (powered by Alarm.com)
Log in to the GoSafer Security customer portal (powered by Alarm.com).
On the garage card, click [Garage Open] or [Garage Closed].
Always verify safety, installation, compatibility, and current UI details against the original manufacturer documentation before operational use.
Home Automation
Open/close a Gate
GoSafer Security Knowledge Base
This operational reference is organized for GoSafer Security customers and staff. Alarm.com product names are retained where required for technical accuracy.
Overview
Gates can be opened or closed from the Customer app or GoSafer Security customer portal.
Platform
App + Web
Content type
Reference
Source last updated
2025-06-04
Procedure
To open or close a gate using the Alarm.com app
Log in to the Alarm.com app.
Tap Gates.
Tap Open to open the gate.
Tap Close to close the gate.
Tap Send to confirm the command.
To open or close a gate using the GoSafer Security customer portal (powered by Alarm.com)
Log in to the GoSafer Security customer portal (powered by Alarm.com).
In the Gates card, click [Gate Open] or [Gate Closed].
Always verify safety, installation, compatibility, and current UI details against the original manufacturer documentation before operational use.
Home Automation
Reconnect a Wi-Fi-enabled garage device to a new router or wireless network
GoSafer Security Knowledge Base
This operational reference is organized for GoSafer Security customers and staff. Alarm.com product names are retained where required for technical accuracy.
Overview
Reconnect a Wi-Fi-enabled garage device to a new router or wireless network
Platform
App + Web
Content type
Troubleshooting
Source last updated
2026-06-16
Procedure
To reconnect a disconnected LiftMaster MyQ Hub (821LM, 821LMB, 821LMC-SCM, MyQ-G0301, MyQ-G0401-ES)
Clear the Wi-Fi information from the hub
Clear the Wi-Fi settings on the hub by pressing and holding the [Settings] button on the Wi-Fi Hub for roughly 6 seconds until the blue light flashes.
Power cycle the Wi-Fi Hub by disconnecting the power supply and reconnecting after 30 seconds.
Set up the new Wi-Fi information on the hub using one of the following methods.
Set up new Wi-Fi information
Note: If the following steps are unsuccessful, a factory reset of the Wi-Fi hub may be necessary. Contact your service provider for further assistance.
To connect using an internet-connected device
Verify the Internet-connected device’s (e.g. smartphone, laptop, etc.) Wi-Fi settings are on.
On the Internet-connected device, locate the list of available Wi-Fi networks and select the MyQ-nnn network. The nnn in the Wi-Fi name is the last three digits of the hub’s serial number.
Android typically shows internet not available after selecting the MyQ-nnn network. This is expected, and if it gives the option to Ignore or Cancel, click Ignore.
Once the phone is connected to the MyQ-nnn network, the blue light on the hub goes from blinking blue to a solid blue LED.
Once the device is connected to the MyQ-nnn network, open a web browser on the device (e.g. Edge, Safari, Google Chrome, etc.) and enter setup.myqdevice.com into the address bar.
This address navigates to a MyQ® Wi-Fi Setup page. If it does not navigate to the MyQ® Wi-Fi Setup page, try using a different web browser on the device.
Note: Always type in the full URL address, do not let it auto-complete, and do not type www or Https before the web address.
Follow the steps on the MyQ® Wi-Fi Setup page to complete the setup. The user's Wi-Fi name and password for their network are required during setup.
Important: When prompted, do not install the MyQ® Garage app.
The LED light on the hub goes solid green once it establishes a Wi-Fi connection. Once the LED is solid green, close the web browser.
If the LED does not turn solid green, verify the Wi-Fi information is correct, and try again or try a different connection method.
To connect using WPS with the router
Note: Not every router supports or has WPS enabled by default
Plug in the hub into an outlet. The blue LED blinks to indicate that Wi-Fi is not set up.
Press and release the hub’s [Settings] button. The blue LED changes to a solid blue to indicate the hub is in WPS mode.
Within one minute of pressing the hub's WPS button, press and release the WPS button on the router. Usually, a light starts flashing on the router to indicate the router is in WPS mode. If no light flashes, try holding the WPS button on the router for 2 to 5 seconds.
Within a few minutes, the hub should connect to the network. The LED light on the hub goes solid green once it establishes a Wi-Fi connection.
If the LED does not turn solid green, power cycle the hub, and try the WPS method again or try a different connection method.
To connect using Bluetooth with an iPhone or iPad
Important: This method is only available on an iPhone or iPad.
Plug in the hub into an outlet. The blue LED blinks to indicate that Wi-Fi is not set up.
Connect the Apple mobile device to the user's Wi-Fi network
Tap to open the device's Settings application.
Tap Wi-Fi.
Verify the Apple device is connected to the user's Wi-Fi network.
Connect the Apple mobile device to the hub using Bluetooth
Tap to open the device's Settings application.
Tap Bluetooth.
Tap the Bluetooth toggle switch to enable Bluetooth (if it was not previously on).
In My Devices, find the Bluetooth MyQ-nnn device and tap to select MyQ-nnn device to pair the Wi-Fi information. The nnn in the Bluetooth name is the last three digits of the hub’s serial number.
If the iPhone or iPad believes the hub is not connected to the internet, try forgetting the device before pairing. To do this, tap the blue information icon to the right of the device, then tap Forget This Device. The MyQ-nnn device reappears for pairing in few seconds.
When prompted, tap to allow the device to share the Wi-Fi network settings with the hub. It may take a minute to connect. The LED light on the hub goes solid green once it establishes a Wi-Fi connection.
If the LED does not turn solid green, power cycle the hub, and try the WPS method again or try a different connection method.
To connect using an internet-connected device
Verify the Internet-connected device’s (e.g. smartphone, laptop, etc.) Wi-Fi settings are on.
On the Internet-connected device, locate the list of available Wi-Fi networks and select the MyQ-nnn network. The nnn in the Wi-Fi name is the last three digits of the hub’s serial number.
Android typically shows internet not available after selecting the MyQ-nnn network. This is expected, and if it gives the option to Ignore or Cancel, click Ignore.
Once the phone is connected to the MyQ-nnn network, the blue light on the hub goes from blinking blue to a solid blue LED.
Once the device is connected to the MyQ-nnn network, open a web browser on the device (e.g. Edge, Safari, Google Chrome, etc.) and enter setup.myqdevice.com into the address bar.
This address navigates to a MyQ® Wi-Fi Setup page. If it does not navigate to the MyQ® Wi-Fi Setup page, try using a different web browser on the device.
Note: Always type in the full URL address, do not let it auto-complete, and do not type www or Https before the web address.
Follow the steps on the MyQ® Wi-Fi Setup page to complete the setup. The user's Wi-Fi name and password for their network are required during setup.
Important: When prompted, do not install the MyQ® Garage app.
The LED light on the hub goes solid green once it establishes a Wi-Fi connection. Once the LED is solid green, close the web browser.
If the LED does not turn solid green, verify the Wi-Fi information is correct, and try again or try a different connection method.
To connect using WPS with the router
Note: Not every router supports or has WPS enabled by default
Plug in the hub into an outlet. The blue LED blinks to indicate that Wi-Fi is not set up.
Press and release the hub’s [Settings] button. The blue LED changes to a solid blue to indicate the hub is in WPS mode.
Within one minute of pressing the hub's WPS button, press and release the WPS button on the router. Usually, a light starts flashing on the router to indicate the router is in WPS mode. If no light flashes, try holding the WPS button on the router for 2 to 5 seconds.
Within a few minutes, the hub should connect to the network. The LED light on the hub goes solid green once it establishes a Wi-Fi connection.
If the LED does not turn solid green, power cycle the hub, and try the WPS method again or try a different connection method.
To connect using Bluetooth with an iPhone or iPad
Important: This method is only available on an iPhone or iPad.
Plug in the hub into an outlet. The blue LED blinks to indicate that Wi-Fi is not set up.
Connect the Apple mobile device to the user's Wi-Fi network
Tap to open the device's Settings application.
Tap Wi-Fi.
Verify the Apple device is connected to the user's Wi-Fi network.
Connect the Apple mobile device to the hub using Bluetooth
Tap to open the device's Settings application.
Tap Bluetooth.
Tap the Bluetooth toggle switch to enable Bluetooth (if it was not previously on).
In My Devices, find the Bluetooth MyQ-nnn device and tap to select MyQ-nnn device to pair the Wi-Fi information. The nnn in the Bluetooth name is the last three digits of the hub’s serial number.
If the iPhone or iPad believes the hub is not connected to the internet, try forgetting the device before pairing. To do this, tap the blue information icon to the right of the device, then tap Forget This Device. The MyQ-nnn device reappears for pairing in few seconds.
When prompted, tap to allow the device to share the Wi-Fi network settings with the hub. It may take a minute to connect. The LED light on the hub goes solid green once it establishes a Wi-Fi connection.
If the LED does not turn solid green, power cycle the hub, and try the WPS method again or try a different connection method.
To reconnect a disconnected LiftMaster, Chamberlain, Craftsman, or Raynor Wi-Fi Garage Door Opener
Put the garage door opener into Wi-Fi Setup mode by pressing and releasing the yellow Learn button on the garage door opener (i.e., motor) two-three times. The garage door opener beeps once, and a blue light flashes. You have 20 minutes to complete the connection process.
On a mobile device or laptop, connect to the Wi-Fi Network with the “MyQ-“ prefix.
Launch the web browser on that device and go to setup.myqdevice.com.
Follow the prompts on the website and select Erase Wi-Fi.
Follow the on-screen prompts to connect the garage door opener to your new Wi-Fi network.
To reconnect a disconnected Nice Linear Wi-Fi Garage Door Opener
Nice Linear Wi-Fi Garage Door Openers are integrated with Alarm.com via the Nice G.O. app and use the Nice G.O. app for Wi-Fi setup.
On the Nice G.O. app, tap [Settings] on the card for the desired garage door.
Tap Wi-Fi Network.
Follow the on-screen instructions. For further troubleshooting, refer to the manufacturer.
If troubleshooting connection with Alarm.com, see
Nice Linear Wi-Fi Garage Door Opener - Integration Guide
Nice Linear Wi-Fi Garage Door Opener - Troubleshooting Guide
Always verify safety, installation, compatibility, and current UI details against the original manufacturer documentation before operational use.
Home Automation
Remote commands are not opening or closing the garage door
GoSafer Security Knowledge Base
This operational reference is organized for GoSafer Security customers and staff. Alarm.com product names are retained where required for technical accuracy.
Overview
This is primarily a video or reference page. Open the original article link below for the current content.
Platform
App + Web
Content type
Troubleshooting
Source last updated
2025-06-04
Procedure
If the garage door does not open or close remotely
Verify the device sending the command has Internet access
To verify the device has Internet access, open a web browser (e.g., Edge, Google Chrome, etc.) and navigate to a website (e.g., www.alarm.com). If the website opens, the device has Internet access. If the website is unable to open, the device needs to be reconnected to the Internet in the device's settings.
Test whether the garage door can open or close at all
Use the garage door's wall button to verify that it can open and close manually. If the garage door does not function at all, contact the garage door manufacturer for assistance.
After opening or closing the garage door, log in to the Alarm.com app or GoSafer Security customer portal (powered by Alarm.com) and verify that the garage door is reporting the correct status.
For LiftMaster MyQ Accessories, verify that the device's location has a consistent Internet connection. LiftMaster MyQ Accessories (i.e., MyQ Smart Garage Hub and MyQ Internet Gateway) rely on Internet access for it to be successfully controlled using the Alarm.com app. A solid green LED light on the LiftMaster MyQ Accessories indicates that it has an active Internet connection.
If the garage door can open remotely but not close remotely
If remote commands open the garage door but are unable to close the garage door, verify that the garage door operator's safety sensors are aligned and not blocked.
Note: Safety sensors are required for all garage doors that are compatible with Alarm.com. These sensors ensure the safety of anyone that may be in the path of the garage door when it is closing. If the sensors are misaligned or blocked, the garage door cannot close.
Additional assistance
If the garage door displays with a Malfunction or Offline status, refer to the troubleshooting information in Garage door opener is in malfunction.
For further troubleshooting, contact your service provider.
Always verify safety, installation, compatibility, and current UI details against the original manufacturer documentation before operational use.
Home Automation
What rules and notifications are available for garage devices and gates?
GoSafer Security Knowledge Base
This operational reference is organized for GoSafer Security customers and staff. Alarm.com product names are retained where required for technical accuracy.
Overview
Garage devices and gates have the ability to set rules that, when triggered, perform specific actions and send notifications when a rule is triggered.
Platform
App + Web
Content type
How-to / Configuration
Source last updated
2024-07-24
Procedure
Triggers and resulting actions
Garage door or gate opens/closes
This trigger can result in the following actions
Turn on/off light
Send notifications (available for open/close)
Initiate video recording
Garage door or gate left open
This trigger can be set for when the garage door opener or gate is left open for a set amount of time and/or is left open when a Geo-Device leaves a Geo-Fence.
This trigger can result in the following action
Send notification
Arm stay/away
Note: This trigger cannot be set up with a delay. It triggers regardless of whether the system is armed from the panel, keyfob, another rule, or from the Alarm.com app or GoSafer Security customer portal (powered by Alarm.com).
This trigger can result in the following action
Close garage door or gate
Disarm
Note: This trigger cannot be set up with a delay. It triggers regardless of whether the system is armed from the panel, keyfob, another rule, or from the Alarm.com app or GoSafer Security customer portal (powered by Alarm.com).
Always verify safety, installation, compatibility, and current UI details against the original manufacturer documentation before operational use.
Home Automation
Will garage door control through the website and app interfere with existing garage remotes?
GoSafer Security Knowledge Base
This operational reference is organized for GoSafer Security customers and staff. Alarm.com product names are retained where required for technical accuracy.
Overview
No. Garage door solutions offered by your service provider should not have any effect on control from existing garage keypads or car remotes.
Platform
Customer Website
Content type
Reference
Source last updated
2024-07-24
Procedure
No. Garage door solutions offered by your service provider should not have any effect on control from existing garage keypads or car remotes.
Always verify safety, installation, compatibility, and current UI details against the original manufacturer documentation before operational use.
Home Automation
Google Assistant Sunset
GoSafer Security Knowledge Base
This operational reference is organized for GoSafer Security customers and staff. Alarm.com product names are retained where required for technical accuracy.
Overview
Google ended support of conversational actions for Google Home and Google Assistant users on June 13, 2023. This change ended Alarm.com's support of voice commands for home automation actions using the Google Assistant feature and Google Home device.
For more information, refer to Google's Conversational Actions sunset overview.
For more information about voice control alternatives, see Set up Siri custom voice shortcuts and Alarm.com Skill - Connect Amazon Alexa with Alarm.com.
Platform
General / Device
Content type
How-to / Configuration
Source last updated
2025-05-13
Procedure
Google ended support of conversational actions for Google Home and Google Assistant users on June 13, 2023. This change ended Alarm.com's support of voice commands for home automation actions using the Google Assistant feature and Google Home device.
For more information, refer to Google's Conversational Actions sunset overview.
For more information about voice control alternatives, see Set up Siri custom voice shortcuts and Alarm.com Skill - Connect Amazon Alexa with Alarm.com.
Always verify safety, installation, compatibility, and current UI details against the original manufacturer documentation before operational use.
Home Automation
Google Home
GoSafer Security Knowledge Base
This operational reference is organized for GoSafer Security customers and staff. Alarm.com product names are retained where required for technical accuracy.
Overview
This GoSafer Security section brings together resources for Google Home, including setup, configuration, everyday use, and troubleshooting. Choose the related page that matches your device, feature, or task, and follow the current manufacturer guidance linked on that page.
Platform
General / Device
Content type
Reference
Source last updated
2023-06-12
Procedure
Browse the related pages in this chapter to open the specific procedure, configuration guide, or troubleshooting article you need.
Always verify safety, installation, compatibility, and current UI details against the original manufacturer documentation before operational use.
Home Automation
Change the name of a light
GoSafer Security Knowledge Base
This operational reference is organized for GoSafer Security customers and staff. Alarm.com product names are retained where required for technical accuracy.
Overview
Customized light names can help with system management and usage.
Platform
App + Web
Content type
How-to / Configuration
Source last updated
2025-06-04
Procedure
To change the name of a light using the Alarm.com app
Log in to the Alarm.com app.
Tap [Menu].
Tap Manage Devices.
In Lights, tap [More Options] next to the desired device.
Tap [Edit].
Enter the desired name for the device.
Tap Ok.
To change the name of a light using the GoSafer Security customer portal (powered by Alarm.com)
Log in to the GoSafer Security customer portal (powered by Alarm.com).
Click Settings
Click Manage Devices.
In Lights, click [More Options] next to the desired device.
Always verify safety, installation, compatibility, and current UI details against the original manufacturer documentation before operational use.
Home Automation
Create/edit a group of lights
GoSafer Security Knowledge Base
This operational reference is organized for GoSafer Security customers and staff. Alarm.com product names are retained where required for technical accuracy.
Overview
Light devices can be grouped so multiple devices can be managed at the same time.
Platform
Customer Website
Content type
How-to / Configuration
Source last updated
2025-06-04
Procedure
Step-by-step guide: Screenshots and videos are placed with the instruction they illustrate.
The GoSafer Security customer portal (powered by Alarm.com) can be used to create and manage light groups. Light devices can be grouped so multiple devices can be managed at the same time. Lights that are in a group have the option for All On,All Off, or can be toggled on or off individually.
To create a group of lights:
Log in to the GoSafer Security customer portal (powered by Alarm.com).
In the Lights card, click Details.
Click Add Group.
In Group Name, enter the name for the light group.
Click to select the lights to include in the group.
Click Add Group to create the group.
To manage a group of lights:
Log in to the GoSafer Security customer portal (powered by Alarm.com).
Click Settings for the desired group.
In Manage Group:
In Group Name, enter the desired group name.
Click to select the lights to be included within the group.
Click Save.
To delete a group of lights:
Log in to the GoSafer Security customer portal (powered by Alarm.com).
Always verify safety, installation, compatibility, and current UI details against the original manufacturer documentation before operational use.
Home Automation
Create/edit a light automation schedule
GoSafer Security Knowledge Base
This operational reference is organized for GoSafer Security customers and staff. Alarm.com product names are retained where required for technical accuracy.
Overview
Light automation schedules turn your lights on and off based on set times.
Platform
App + Web
Content type
How-to / Configuration
Source last updated
2025-08-15
Procedure
To create a light automation schedule using the Alarm.com app
To create a light automation schedule using the Alarm.com app
Log in to the Alarm.com app.
Tap [More Options].
Tap Automation.
Tap [Add].
Tap New Schedule.
In Type Schedule Name Here, enter a name for the schedule.
Tap When to select the time the schedule should run.
In Time, tap to select an available time for the scheduled action to run (e.g., Specific Time, Sunrise, Sunset).
In Occurrence, tap to select one of the following options
Always will occur every day.
Specific Days will occur on the selected days of the week.
Verify the selection, then tap Next.
Tap Then to select the devices and action.
Select the Light/Switch as the device type to schedule.
Select the specific device.
In Status, select the action that will occur.
Turn On - This will turn on the selected lights at the desired time.
Turn Off- This will turn off the selected lights at the desired time.
Dim - This will dim the compatible selected lights to the selected percentage at the desired time.
Use the slider to select the desired dimness level for this option.
Note: This option will only apply to lights with a dimming feature.
Color - This will display the selected color for compatible selected lights at the desired time.
Use the color selector to select the desired color for this option.
Note: This option will only apply to multi-color lights.
Verify the selection, then tap Next.
If time adjustments are desired
Tap the second condition card for exact or approximate time selection. (e.g., Run At Exact Times, Exactly At Sunrise, etc.).
If Specific Time was selected for When, tap Run at approximate times to give or take about 45 minutes to the entire schedule.
If Sunrise or Sunset was selected for When, use the Time Offset dropdown menu to select the amount of time before or after sunset or sunrise.
Tap Done.
If a second action is desired
Tap Add Follow Up Action.
In Time, select when the follow-up action should occur and then tap Next.
Verify the schedule is configured with the correct settings.
Tap Save.
To create a light automation schedule using the GoSafer Security customer portal (powered by Alarm.com)
Log in to the GoSafer Security customer portal (powered by Alarm.com), or Log In With Access to the customer's account on the Partner Portal.
Click Automation.
Click Schedules.
Click Add New Schedule.
If prompted, click New Schedule Builder.
In Type Schedule Name Here, enter a name for the schedule.
Click When to select the time the schedule should run.
In Time, click to select an available time for the scheduled action to run (e.g., Specific Time, Sunrise, Sunset).
In Occurrence, click to select one of the following options
Always will occur every day.
Specific Days will occur on the selected days of the week.
Verify the selection, then click Next.
Click Then to select the devices and action.
Select the Light/Switch as the device type to schedule.
Select the specific device.
In Status, select the action that will occur.
Turn On - This will turn on the selected lights at the desired time.
Turn Off- This will turn off the selected lights at the desired time.
Dim - This will dim the compatible selected lights to the selected percentage at the desired time.
Use the slider to select the desired dimness level for this option.
Note: This option will only apply to lights with a dimming feature.
Color - This will display the selected color for compatible selected lights at the desired time.
Use the color selector to select the desired color for this option.
Note: This option will only apply to multi-color lights.
Verify the selection, then click Next.
If time adjustments are desired
Click the second condition card for exact or approximate time selection. (e.g., Run At Exact Times, Exactly At Sunrise, etc.).
If Specific Time was selected for When, click Run at approximate times to give or take about 45 minutes to the entire schedule.
If Sunrise or Sunset was selected for When, use the Time Offset dropdown menu to select the amount of time before or after sunset or sunrise.
Click Done.
If a second action is desired
Click Add Follow Up Action.
In Time, select when the follow-up action should occur and then click Next.
Verify the schedule is configured with the correct settings.
Always verify safety, installation, compatibility, and current UI details against the original manufacturer documentation before operational use.
Home Automation
Dim a light
GoSafer Security Knowledge Base
This operational reference is organized for GoSafer Security customers and staff. Alarm.com product names are retained where required for technical accuracy.
Overview
Compatible devices can be dimmed to user specified levels.
Platform
App + Web
Content type
Reference
Source last updated
2025-06-04
Procedure
To dim a light using the Alarm.com app
Log in to the Alarm.com app.
Tap Lights.
Use the Light Dimmer slider to adjust the brightness level and dim the light.
To dim a light using the GoSafer Security customer portal (powered by Alarm.com)
Log in to the GoSafer Security customer portal (powered by Alarm.com).
In the Lights card, click to select the light to be dimmed.
Use the Light Dimmer slider to adjust the brightness level and dim the light.
Always verify safety, installation, compatibility, and current UI details against the original manufacturer documentation before operational use.
Home Automation
Enable or disable remote commands for lights or switches
GoSafer Security Knowledge Base
This operational reference is organized for GoSafer Security customers and staff. Alarm.com product names are retained where required for technical accuracy.
Overview
Remote commands for lights and switches are automatically enabled when enrolled, but can be disabled.
Platform
App + Web
Content type
How-to / Configuration
Source last updated
2025-10-14
Procedure
To enable/disable remote commands using the Alarm.com app
Log in to the Alarm.com app.
Tap [Menu].
Tap Manage Devices.
In Lights and Switches, tap [More Options] for the desired device to manage.
Tap Device Settings.
In Settings, tap Remote Commands Enabled to toggle on or off.
Tap Save.
To enable/disable remote commands using the GoSafer Security customer portal (powered by Alarm.com)
Log in to the GoSafer Security customer portal (powered by Alarm.com).
Click Settings.
Click Manage Devices.
In Lights and Switches, click [More Options] for the desired device to manage.
Click Device Settings.
In Settings, click Remote Commands Enabled to toggle on or off.
Always verify safety, installation, compatibility, and current UI details against the original manufacturer documentation before operational use.
Home Automation
Light device is in malfunction
GoSafer Security Knowledge Base
This operational reference is organized for GoSafer Security customers and staff. Alarm.com product names are retained where required for technical accuracy.
Overview
The Malfunction trouble condition indicates a device is unable to properly communicate with the panel. This can occur for a few different reasons, and many of them can be addressed with the following troubleshooting steps.
Many different types of devices can be categorized as lights in the Alarm.com interface, including appliance modules, smart light bulbs, and in-wall outlets.
Platform
General / Device
Content type
Troubleshooting
Source last updated
2023-11-01
Procedure
If a Z-Wave light device is in malfunction or offline
Verify the device is plugged in and powered on.
Verify the device is within range of the Z-Wave network. Try moving the light device closer to the panel, if possible.
Power off the device, if possible. Wait a couple of minutes, and then power the device back on.
Trigger the light device by turning it on and off manually.
If the device is still in malfunction or offline, contact your service provider.
Always verify safety, installation, compatibility, and current UI details against the original manufacturer documentation before operational use.
Home Automation
Lights
GoSafer Security Knowledge Base
This operational reference is organized for GoSafer Security customers and staff. Alarm.com product names are retained where required for technical accuracy.
Overview
This GoSafer Security section brings together resources for Lights, including setup, configuration, everyday use, and troubleshooting. Choose the related page that matches your device, feature, or task, and follow the current manufacturer guidance linked on that page.
Platform
Customer Website
Content type
Troubleshooting
Source last updated
2024-07-25
Procedure
Browse the related pages in this chapter to open the specific procedure, configuration guide, or troubleshooting article you need.
Always verify safety, installation, compatibility, and current UI details against the original manufacturer documentation before operational use.
Home Automation
Turn a light on/off
GoSafer Security Knowledge Base
This operational reference is organized for GoSafer Security customers and staff. Alarm.com product names are retained where required for technical accuracy.
Overview
Light devices can be turned on and off from the website and the app.
Platform
App + Web
Content type
Reference
Source last updated
2025-06-04
Procedure
To turn a light on or off using the Alarm.com app
Log in to the Alarm.com app.
In the Lights card, tap [Light Off] to turn the light off or tap [Light On] to turn the light on.
To turn a light on or off using the GoSafer Security customer portal (powered by Alarm.com)
Log in to the GoSafer Security customer portal (powered by Alarm.com).
In the Lights card, click to select the light to be turned on or off.
Always verify safety, installation, compatibility, and current UI details against the original manufacturer documentation before operational use.
Home Automation
View the status of Z-Wave lights
GoSafer Security Knowledge Base
This operational reference is organized for GoSafer Security customers and staff. Alarm.com product names are retained where required for technical accuracy.
Overview
Light status of compatible Z-Wave devices can be viewed using the website or the app.
Platform
App + Web
Content type
Reference
Source last updated
2025-06-04
Procedure
Step-by-step guide: Screenshots and videos are placed with the instruction they illustrate.
The light status of compatible Z-Wave devices can be viewed using the Alarm.com app and GoSafer Security customer portal (powered by Alarm.com).
Important: To view Z-Wave light devices, the Lights add-on must be selected on your service package. If you do not see your Z-Wave light devices on your account, contact your service provider.
View the light status
Expand all
To view the light status using the Alarm.com app:Icn Chevron Down
Log in to the Alarm.com app.
Tap Lights.
On the Lights page:
The light is on if Light On is highlighted as shown in the following image.
Light on in app
The light is off if Light Off is highlighted as shown in the following image.
Light off in app
If the light on and light off buttons are greyed out, the light device may be in malfunction.
To view the light status using the GoSafer Security customer portal (powered by Alarm.com):Icn Chevron Down
Log in to the GoSafer Security customer portal (powered by Alarm.com).
On the Lights card, click Details.
On the Lights page, each light has its own status and states if the device is On or Off.
Light On indicates the light is on.
Light Off indicates the light is off.
Light Unknown indicates the light device may be in malfunction.
Groups of lights
Using the GoSafer Security customer portal (powered by Alarm.com), it is possible to create groups of lights to view and control at the same time. When light groups are being used, the light status for each device in the group will appear as the following:
Some Z-Wave light devices require periodic polling. If there are more than 10 of these types of devices enrolled, you will need to manually designate which of those devices will display their status. By default, light status is enabled for the first 10 polling light devices. Light status can be enabled or disabled for specific devices after more than 10 polling light devices are enrolled to the system.
Note: There is no limit to the number of non-polling light devices that will display their status. These devices will not have the option to manage their status.
To manage a light device status display:
Log in to the GoSafer Security customer portal (powered by Alarm.com).
Always verify safety, installation, compatibility, and current UI details against the original manufacturer documentation before operational use.
Home Automation
Add/delete door lock user codes
GoSafer Security Knowledge Base
This operational reference is organized for GoSafer Security customers and staff. Alarm.com product names are retained where required for technical accuracy.
Overview
Once created, user codes can be added to or deleted from a door lock using the app and website.
Platform
App + Web
Content type
How-to / Configuration
Source last updated
2025-06-04
Procedure
To add or delete door lock user codes using the Alarm.com app
Log in to the Alarm.com app.
Tap [Menu].
Tap Users.
Tap to select the user to manage lock access.
If the user has not yet been created, tap [Add].
Tap [Access Code].
In Access Code, enter the user's desired code.
Tap to toggle which devices to grant access to.
Tap Save. Allow a few minutes for the changes to send to the lock.
If the user should only have access to the devices during specific times, tap Time to select the user's access period to the device. Once the desired access period is selected, tap Save.
To add or delete door lock user codes using the GoSafer Security customer portal (powered by Alarm.com)
Log in to the GoSafer Security customer portal (powered by Alarm.com).
Click Users.
Click [More Options] on the desired user.
Click [Edit] to edit user information.
Click [Access Code].
In Access Code, enter the desired user code.
A new access code can also be generated by clicking Generate Code.
Click to select which devices and features the user will have access to.
Click Save to send the changes to the system. Allow a few minutes for the changes to send to the lock.
Always verify safety, installation, compatibility, and current UI details against the original manufacturer documentation before operational use.
Home Automation
Create/edit a Lock Activity notification
GoSafer Security Knowledge Base
This operational reference is organized for GoSafer Security customers and staff. Alarm.com product names are retained where required for technical accuracy.
Overview
A Lock Activity notification can notify users when a door lock is locked or unlocked.
Platform
App + Web
Content type
How-to / Configuration
Source last updated
2025-06-04
Procedure
To create a Lock Activity notification using the Alarm.com app
Log in to the Alarm.com app.
Tap [Menu].
Tap Notifications.
Tap [Settings].
Tap [Add].
Tap Lock Activity.
Rename the rule.
In When, tap to select the locks to be notified about.
In Is, tap to select the lock action to be notified about.
Note: The notification will include the name of the lock that performed the desired action. If unlocked by a user code, the name of the user will also be included. For remote actions, the login name that performed the action on the lock will be included in the notification.
In During this time frame, tap to select when to receive notifications.
At All Times will send a notification any time of day if the lock status changes.
Only during the following times will specify specific days and times that the notifications will be sent.
To add notification recipients, tap the Add.
Tap to select the desired recipients from the Address Book, or add an unlisted recipient by clicking Add Contact.
Tap Close.
Verify the notification is configured with the correct settings.
Tap Save.
To create a Lock Activity notification using the GoSafer Security customer portal (powered by Alarm.com)
Log in to the GoSafer Security customer portal (powered by Alarm.com).
Click Notifications.
Click New Notification.
Click Lock Activity.
Name the notification.
In When, click to select the locks to be notified about.
In Is, click to select the lock action to be notified about.
Note: The notification will include the name of the lock that performed the desired action. If unlocked by a user code, the name of the user will also be included. For remote actions, the login name that performed the action on the lock will be included in the notification.
In During this time frame, click to select when to receive notifications.
At All Times will send a notification any time of day if the lock status changes.
Only during the following times will specify specific days and times that the notifications will be sent.
To add notification recipients, click Add.
Click to select the desired recipients from the Address Book, or add an unlisted recipient by clicking New.
Click Close.
Verify the notification is configured with the correct settings.
Always verify safety, installation, compatibility, and current UI details against the original manufacturer documentation before operational use.
Home Automation
Create/edit a door lock low battery notification
GoSafer Security Knowledge Base
This operational reference is organized for GoSafer Security customers and staff. Alarm.com product names are retained where required for technical accuracy.
Overview
A Door Lock Low Battery Notification can notify users if a door lock reports a low battery.
Platform
App + Web
Content type
How-to / Configuration
Source last updated
2025-06-04
Procedure
To create a door lock low battery notification using the Alarm.com app
Log in to the Alarm.com app.
Tap [Menu].
Tap Notifications.
Tap [Settings].
Tap [Add].
Tap System Event.
Enter the desired name for the new notification rule.
In Important, select A device has low battery.
In Recipients, tap Add to add notification recipients.
Tap to select your desired recipients from the Address Book, or add an unlisted recipient by tapping Add Contact.
Tap Close.
Verify the notification is configured with the correct settings.
Tap Save.
To create a door lock low battery notification using the GoSafer Security customer portal (powered by Alarm.com)
Log in to the GoSafer Security customer portal (powered by Alarm.com).
Click Notifications.
Click New Notification.
Click System Event.
Enter the desired name for the new notification rule.
In Important, select A device has low battery.
In Recipients, click Add to add notification recipients.
Click to select your desired recipients from the Address Book, or add an unlisted recipient by clicking New.
Click Close.
Verify the notification is configured with the correct settings.
Click Save.
To edit a door lock low battery notification using the Alarm.com app
Log in to the Alarm.com app.
Tap [Menu].
Tap Notifications.
Tap [Settings].
Tap the desired notification.
Make the desired changes.
Tap Save.
To edit a door lock low battery notification using the GoSafer Security customer portal (powered by Alarm.com)
Log in to the GoSafer Security customer portal (powered by Alarm.com).
Always verify safety, installation, compatibility, and current UI details against the original manufacturer documentation before operational use.
Home Automation
Create/edit a lock left unlocked notification
GoSafer Security Knowledge Base
This operational reference is organized for GoSafer Security customers and staff. Alarm.com product names are retained where required for technical accuracy.
Overview
A Lock Left Unlocked notification can notify users if a lock is left unlocked for a specified duration.
Platform
App + Web
Content type
How-to / Configuration
Source last updated
2025-06-04
Procedure
To create a lock left unlocked notification using the Alarm.com app
Log in to the Alarm.com app.
Tap [Menu].
Tap Notifications.
Tap [Settings].
Tap [Add].
Tap Lock Left Unlocked.
Enter the desired name for the new notification.
In When any of these locks, tap to select the locks to be notified about.
In Is Left Unlocked, select either of the following
For this duration to select the number of minutes the door must be left open to receive the notification.
When select people cross a Geo-Fence to select when specific users enter or exit a location.
In During this time frame, select either of the following
At All Times will send a notification any time of day if the lock is left unlocked.
Only during the following times to select specific days and times that the notifications will be sent.
In Recipients, tap Add to add notification recipients.
Tap to select the desired recipients from the Address Book, or add an unlisted recipient by tapping New.
Tap Close.
Verify the notification is configured with the correct settings.
Tap Save.
To create a lock left unlocked notification using the GoSafer Security customer portal (powered by Alarm.com)
Log in to the GoSafer Security customer portal (powered by Alarm.com).
Click Notifications.
Click New Notification.
Click Lock Left Unlocked.
Enter the desired name for the new notification.
Click to select the locks of which devices to be notified about.
In the Is Left Unlocked, select either of the following
For this duration to select the number of minutes the door must be left open to receive the notification.
When select people cross a Geo-Fence to select when specific users enter or exit a location.
In During this time frame, select either of the following
At All Times will send a notification any time of day if the lock is left unlocked.
Only during the following times to select specific days and times that the notifications will be sent.
In Recipients, click Add to add notification recipients.
Click to select the desired recipients from the Address Book, or add an unlisted recipient by clicking New.
Click Close.
Verify the notification is configured with the correct settings.
Always verify safety, installation, compatibility, and current UI details against the original manufacturer documentation before operational use.
Home Automation
Lock is in malfunction
GoSafer Security Knowledge Base
This operational reference is organized for GoSafer Security customers and staff. Alarm.com product names are retained where required for technical accuracy.
Overview
The Malfunction trouble condition indicates a device is unable to properly communicate.
Platform
General / Device
Content type
Troubleshooting
Source last updated
2023-12-08
Procedure
If a Z-Wave lock is in malfunction or offline
Verify the device is powered on.
Verify the device is within range of the Z-Wave network.
Power off the device, if possible. Wait a couple of minutes, and then power the device back on.
Trigger the lock by manually locking and unlocking it.
If the device is still in malfunction or offline, contact your service provider.
Always verify safety, installation, compatibility, and current UI details against the original manufacturer documentation before operational use.
Home Automation
Lock/unlock a door lock
GoSafer Security Knowledge Base
This operational reference is organized for GoSafer Security customers and staff. Alarm.com product names are retained where required for technical accuracy.
Overview
Door locks can be locked and unlocked from the website and the app.
Platform
App + Web
Content type
Reference
Source last updated
2025-06-04
Procedure
To lock or unlock a door lock using the Alarm.com app
Log in to the Alarm.com app.
In the Locks card, tap the desired lock or tap [Details] for a list of locks.
Tap [Locked] Lock or [Lock Unlocked] Unlock to toggle the state of the selected lock.
To lock or unlock a door lock using the GoSafer Security customer portal (powered by Alarm.com)
Log in to the GoSafer Security customer portal (powered by Alarm.com).
In the Locks card, click the desired lock or click [Details] for a list of locks.
Click [Locked] Lock or [Lock Unlocked] Unlock to toggle the state of the selected lock.
Always verify safety, installation, compatibility, and current UI details against the original manufacturer documentation before operational use.
Home Automation
Locks
GoSafer Security Knowledge Base
This operational reference is organized for GoSafer Security customers and staff. Alarm.com product names are retained where required for technical accuracy.
Overview
This GoSafer Security section brings together resources for Locks, including setup, configuration, everyday use, and troubleshooting. Choose the related page that matches your device, feature, or task, and follow the current manufacturer guidance linked on that page.
Platform
App + Web
Content type
Troubleshooting
Source last updated
2024-07-25
Procedure
Browse the related pages in this chapter to open the specific procedure, configuration guide, or troubleshooting article you need.
Always verify safety, installation, compatibility, and current UI details against the original manufacturer documentation before operational use.
Home Automation
View a door lock's battery status
GoSafer Security Knowledge Base
This operational reference is organized for GoSafer Security customers and staff. Alarm.com product names are retained where required for technical accuracy.
Overview
The battery status of a door lock can be viewed from the website.
Platform
Customer Website
Content type
Troubleshooting
Source last updated
2025-06-04
Procedure
To view a door lock's battery status using the GoSafer Security customer portal (powered by Alarm.com)
Log in to the GoSafer Security customer portal (powered by Alarm.com).
In the Locks card, click [Details].
[Lock Card With Details Icon Outlined]
Mouse over [Battery Level Icon] for the remaining battery life percentage.
[Locks Page Battery Icon]
Note: Low Battery displays when the lock's battery percentage is below 30-40% (depending on lock model).
If the Low Battery status does not clear once the batteries are changed, click [Refresh] to request an updated battery life percentage.
If you have a low battery or the lock is showing as malfunction/offline, contact your service provider.
Always verify safety, installation, compatibility, and current UI details against the original manufacturer documentation before operational use.
Home Automation
What do I do if lock user codes are not working?
GoSafer Security Knowledge Base
This operational reference is organized for GoSafer Security customers and staff. Alarm.com product names are retained where required for technical accuracy.
Overview
If user codes assigned to a lock are not working when entered into the lock, verify that lock access is enabled for the specific user attempting to unlock the lock.
Platform
App + Web
Content type
Troubleshooting
Source last updated
2025-06-04
Procedure
To remove and re-enable a lock user code using the Alarm.com app
Log in to the Alarm.com app.
Tap [Menu].
Tap Users.
Tap [More Options] on the desired user.
Tap [Edit].
Tap Locks.
In Locks, tap the toggle switch to disable the user's access code for the selected lock.
Tap Save.
Tap [More Options] on the same user.
Tap [Edit].
Tap Locks.
In Locks, tap the toggle switch to enable the user's access code for the selected lock.
Tap Save. This resends the user code access command to the lock. Allow a few minutes for the commands to be acknowledged and processed by the lock before attempting to use the code.
To remove and re-enable a lock user code using the GoSafer Security customer portal (powered by Alarm.com)
Log in to the GoSafer Security customer portal (powered by Alarm.com).
Click Users.
Click [More Options] on the desired user.
Click [Edit].
Click Locks.
In Locks, click the toggle switch to disable the user's access code for the selected lock.
Click Save.
Click [More Options] on the same user.
Click [Edit].
Click Locks.
In Locks, click the toggle switch to enable the user's access code for the selected lock.
Click Save. This resends the user code access command to the lock. Allow a few minutes for the commands to be acknowledged and processed by the lock before attempting to use the code.
Always verify safety, installation, compatibility, and current UI details against the original manufacturer documentation before operational use.
Home Automation
Create a fire-triggered unlocking automation rule
GoSafer Security Knowledge Base
This operational reference is organized for GoSafer Security customers and staff. Alarm.com product names are retained where required for technical accuracy.
Overview
A fire-triggered unlocking rule helps you safely exit your home in an emergency and gives first responders immediate access to the property.
Platform
App + Web
Content type
How-to / Configuration
Source last updated
2025-09-17
Procedure
To create a fire-triggered lock rule using the Alarm.com app
Log in to the Alarm.com app.
Tap [Menu].
Tap Automation.
Tap [Add].
Tap New Rule.
Tap When to select devices to trigger the rule.
Tap to select Alarm.
Tap to select Any Fire, Smoke, or CO Device, then tap Done.
Tap Then to select devices to be triggered.
Tap to select Lock.
Tap to select the desired locks and Unlock, then tap Done.
Important: Make sure auto-relock has been disabled for the lock. Auto-relock automatically locks the lock shortly after it is unlocked. If the lock has this setting enabled, it may auto-relock before exiting or when emergency personnel arrive.
In Type Rule Name Here, enter a name for the rule.
If desired, configure when the rule will run
Tap Run at All Times to edit when the rule will run.
Select one of the following options:
At All Times for the rule will be carried out any time of day.
Only during the following times to determine the specific days and times the rule will be carried out.
Tap to select the days of the week the rule will be active.
Using the Starting at dropdown menu, select the start time for this rule.
Using the Ending at dropdown menu, select the end time for this rule.
Tap Done.
Verify the rule is configured with the desired settings.
Tap Save.
To create a fire-triggered lock rule using the GoSafer Security customer portal (powered by Alarm.com)
Log in to the GoSafer Security customer portal (powered by Alarm.com).
Click Automation.
Click Add New Rule.
Click New Rules Builder.
Click When to select devices to trigger the rule.
Click to select Alarm.
Click to select Any Fire, Smoke, or CO Device, then click Done.
Click Then to select devices to be triggered.
Click to select Lock.
Click to select the desired locks and Unlock, then click Done.
Important: Make sure auto-relock has been disabled for the lock. Auto-relock automatically locks the lock shortly after it is unlocked. If the lock has this setting enabled, it may auto-relock before exiting or when emergency personnel arrive.
In Type Rule Name Here, enter a name for the rule.
If desired, configure when the rule will run
Click Run at All Times to edit when the rule will run.
Select one of the following options:
Click to select At All Times for the rule will be carried out any time of day.
Click to select Only during the following times to determine the specific days and times the rule will be carried out.
Click to select the days of the week the rule will be active.
Using the Starting at dropdown menu, select the start time for this rule.
Using the Ending at dropdown menu, select the end time for this rule.
Click Done.
Verify the rule is configured with the desired settings.
Always verify safety, installation, compatibility, and current UI details against the original manufacturer documentation before operational use.
Home Automation
Create an event-triggered garage door or gate automation rule
GoSafer Security Knowledge Base
This operational reference is organized for GoSafer Security customers and staff. Alarm.com product names are retained where required for technical accuracy.
Overview
Event Triggered Garage Door rules allow you to automate a garage door to open or close based on the status of the security system.
Platform
Customer Website
Content type
How-to / Configuration
Source last updated
2025-06-04
Procedure
To create an event-triggered garage door or gate automation rule using the GoSafer Security customer portal (powered by Alarm.com):
Log in to the GoSafer Security customer portal (powered by Alarm.com).
Click Automation.
Click Add New Rule.
Click Event-triggered Rule.
In the Name of rule field, enter the name of the new rule.
In Automate My, click to select Garage Door or Gate.
In When this event occurs, click to select the action that triggers the Garage Door or Gate rule, then use the dropdown menu to specify the conditions of the action.
In Select Devices, click to select the garage doors or gates that follow the rule.
In During this time frame, click to select when you would like the rule to be active.
At All Times means the rule is carried out any time of day.
Only during the following times allows you to choose specific days and times that selected devices are automated by the rule.
Verify the rule is configured with the correct settings.
Always verify safety, installation, compatibility, and current UI details against the original manufacturer documentation before operational use.
Home Automation
Create an event-triggered security system automation rule
GoSafer Security Knowledge Base
This operational reference is organized for GoSafer Security customers and staff. Alarm.com product names are retained where required for technical accuracy.
Overview
Event Triggered Security System rules allow you to automatically arm or disarm your security system based on lock activity.
Platform
App + Web
Content type
How-to / Configuration
Source last updated
2025-09-17
Procedure
To create an event-triggered security system automation rule using the Alarm.com app
Log in to the Alarm.com app.
Tap [Menu].
Tap Automation.
Tap [Add].
Tap New Rule.
Tap When to select devices to trigger the rule.
Tap to select Lock.
Tap to select the trigger devices and status (i.e., Locked or Unlocked), then tap Done.
Tap Then to select devices to be triggered.
Tap to select Security Panel.
Tap to select the partition (if applicable) and action (i.e., Arm Stay, Arm Away, Disarmed), then tap Done.
Note: When selecting Disarmed as the action to be performed for this rule, anyone with access to the selected lock will be able to disarm the security system simply by unlocking the lock locally with a user code, regardless of whether the user has been given security panel access.
In Type Rule Name Here, enter a name for the rule.
If desired, configure when the rule will run
Tap Run at All Times to edit when the rule will run.
Select one of the following options:
At All Times for the rule will be carried out any time of day.
Only during the following times to determine the specific days and times the rule will be carried out.
Tap to select the days of the week the rule will be active.
Using the Starting at dropdown menu, select the start time for this rule.
Using the Ending at dropdown menu, select the end time for this rule.
Tap Done.
Verify the rule is configured with the desired settings.
Tap Save.
To create an event-triggered security system automation rule using the GoSafer Security customer portal (powered by Alarm.com):
Log in to the GoSafer Security customer portal (powered by Alarm.com).
Click Automation.
Click Add New Rule.
Click New Rules Builder.
Click When to select devices to trigger the rule.
Click to select Lock.
Click to select the trigger devices and status (i.e., Locked or Unlocked), then click Done.
Click Then to select devices to be triggered.
Click to select Security Panel.
Click to select the the partition (if applicable) and action (i.e., Arm Stay, Arm Away, Disarmed), then click Done.
Note: When selecting Disarmed as the action to be performed for this rule, anyone with access to the selected lock will be able to disarm the security system simply by unlocking the lock locally with a user code, regardless of whether the user has been given security panel access.
In Type Rule Name Here, enter a name for the rule.
If desired, configure when the rule will run
Click Run at All Times to edit when the rule will run.
Select one of the following options:
Click to select At All Times for the rule will be carried out any time of day.
Click to select Only during the following times to determine the specific days and times the rule will be carried out.
Click to select the days of the week the rule will be active.
Using the Starting at dropdown menu, select the start time for this rule.
Using the Ending at dropdown menu, select the end time for this rule.
Click Done.
Verify the rule is configured with the desired settings.
Always verify safety, installation, compatibility, and current UI details against the original manufacturer documentation before operational use.
Home Automation
Create an event-triggered water valve automation rule
GoSafer Security Knowledge Base
This operational reference is organized for GoSafer Security customers and staff. Alarm.com product names are retained where required for technical accuracy.
Overview
Event Triggered Water Valve rules allow you to automate a Z-wave Water Valve to open or close based on security panel or sensor activity status.
Platform
Customer Website
Content type
How-to / Configuration
Source last updated
2025-06-04
Procedure
To create an event triggered water valve automation rule using the GoSafer Security customer portal (powered by Alarm.com):
Important: When selecting Open as the action to be performed for this rule, the rule will still run in the event of a water shut-off event. This may result in water damage to your home. Please consider this carefully before creating a rule that may involve opening a water valve.
Log in to the GoSafer Security customer portal (powered by Alarm.com).
Click Automation.
Click Add New Rule.
Click Event-triggered Rule.
In the Name of rule field, enter the desired rule for the name.
In Automate My, click to select Water Valves.
In When this event occurs, click to select the device that will trigger the Water Valve rule and use the dropdown menus to specify the conditions of the action.
In the Perform this action, use the dropdown menu to specify what the water valve will do when triggered and select a time constraint.
In Select Devices, click to select the water valves that will follow the rule.
In During these time frames, click to select when the rule will be active.
Select At All Times to have the rule be carried out at any time of day.
Select Only during the following times to choose specific days and times that selected devices are automated by the rule.
Verify the rule is configured with the correct settings.
Click Save.
To edit an event-triggered water valve automation rule using the GoSafer Security customer portal (powered by Alarm.com):
Log in to the GoSafer Security customer portal (powered by Alarm.com).
Click Automation.
Click [Edit] for the automation rule to be edited.
Update the event-triggered water valve automation rule as desired.
Verify the rule is configured with the correct settings.
Always verify safety, installation, compatibility, and current UI details against the original manufacturer documentation before operational use.
Home Automation
Create/edit an event-triggered automation rule
GoSafer Security Knowledge Base
This operational reference is organized for GoSafer Security customers and staff. Alarm.com product names are retained where required for technical accuracy.
Overview
Event Triggered Automation rules can automate specific devices based on system events.
Platform
Customer Website
Content type
How-to / Configuration
Source last updated
2025-09-17
Procedure
To create or edit an event-triggered automation rule
Log in to the GoSafer Security customer portal (powered by Alarm.com).
Click Automation.
Click Add New Rule, or click [Edit] on the automation rule to be updated.
Click Event-triggered Rule.
In the Name of rule field, enter the name of the rule.
In Automate My, select the device to be automated.
In When this event occurs, click to select the device that will trigger the rule and use the dropdown menus to specify the conditions of the action.
In Perform this action, use the dropdown menus to specify the automated action to be completed.
In Select Devices, click to select the devices that will follow the rule.
In During these time frames, click to select when the rule will be active.
At All Times means the rule will be carried out any time of day.
Only during the following times allows you to choose specific days and times that selected devices are automated by the rule.
Only after Sunset (if applicable) means the rule will be carried out only after sunset time until sunrise time.
Note: Sunset and sunrise are determined by the system's installation address.
Verify the rule is configured with the correct settings.
Always verify safety, installation, compatibility, and current UI details against the original manufacturer documentation before operational use.
Home Automation
Create/edit an event-triggered light automation rule
GoSafer Security Knowledge Base
This operational reference is organized for GoSafer Security customers and staff. Alarm.com product names are retained where required for technical accuracy.
Overview
Event Triggered Light rules allow you to automatically turn your lights on and off based on the status of your security system, sensor state, or by crossing a Geo-Fence.
Platform
App + Web
Content type
How-to / Configuration
Source last updated
2025-09-17
Procedure
To create or edit a light rule using the Alarm.com app
Note: Automation rules using a Geo-Fence can only be created as an Event-Triggered Rule using the GoSafer Security customer portal (powered by Alarm.com).
Log in to the Alarm.com app.
Tap [Menu].
Tap Automation.
Tap [Add].
Tap New Rule.
Tap When to select devices to trigger the rule.
Tap to select the device type (e.g., Alarm).
Tap to select the trigger devices and status, then tap Done.
Tap Then to select devices to be triggered.
Tap to select the device type (e.g., Light/Switch).
Tap to select the devices and action, then tap Done.
In Type Rule Name Here, enter a name for the rule.
If desired, configure when the rule will run
Tap Run at All Times to edit when the rule will run.
Select one of the following options:
At All Times for the rule will be carried out any time of day.
Only during the following times to determine the specific days and times the rule will be carried out.
Tap to select the days of the week the rule will be active.
Using the Starting at dropdown menu, select the start time for this rule.
Using the Ending at dropdown menu, select the end time for this rule.
Only after Sunset for the rule to be carried out based on when sunset occurs for the account's timezone.
Tap Done.
Verify the rule is configured with the desired settings.
Tap Save.
To create or edit a light rule using the GoSafer Security customer portal (powered by Alarm.com)
Log in to the GoSafer Security customer portal (powered by Alarm.com).
Click Automation.
Click Add New Rule.
Click New Rules Builder.
Note: Automation rules using a Geo-Fence cannot be created using the New Rules Builder. Click Event-Triggered Rule to create an automation rule using a Geo-Fence.
Click When to select devices to trigger the rule.
Click to select the device type (e.g., Alarm).
Click to select the trigger devices and status, then click Done.
Click Then to select devices to be triggered.
Click to select the device type (e.g., Light/Switch).
Click to select the devices and action, then click Done.
In Type Rule Name Here, enter a name for the rule.
If desired, configure when the rule will run
Click Run at All Times to edit when the rule will run.
Select one of the following options:
Click to select At All Times for the rule will be carried out any time of day.
Click to select Only during the following times to determine the specific days and times the rule will be carried out.
Click to select the days of the week the rule will be active.
Using the Starting at dropdown menu, select the start time for this rule.
Using the Ending at dropdown menu, select the end time for this rule.
Click to select Only after Sunset for the rule to be carried out based on when sunset occurs for the account's timezone.
Click Done.
Verify the rule is configured with the desired settings.
Always verify safety, installation, compatibility, and current UI details against the original manufacturer documentation before operational use.
Home Automation
Create/edit an event-triggered lock automation rule
GoSafer Security Knowledge Base
This operational reference is organized for GoSafer Security customers and staff. Alarm.com product names are retained where required for technical accuracy.
Overview
Event Triggered Lock rules allow you to automatically lock or unlock your doors based on the status of your security system or additional locks.
Platform
App + Web
Content type
How-to / Configuration
Source last updated
2025-09-17
Procedure
To create or edit a lock rule using the Alarm.com app
Log in to the Alarm.com app.
Tap [Menu].
Tap Automation.
Tap [Add].
Tap New Rule.
Tap When to select devices to trigger the rule.
Tap to select the device type (e.g., Contact Sensor, Security Panel).
Tap to select the trigger devices and status, then tap Done.
Tap Then to select devices to be triggered.
Tap to select the device type (e.g., Lock).
Tap to select the devices and action, then tap Done.
In Type Rule Name Here, enter a name for the rule.
If desired, configure when the rule will run
Tap Run at All Times to edit when the rule will run.
Select one of the following options:
At All Times for the rule will be carried out any time of day.
Only during the following times to determine the specific days and times the rule will be carried out.
Tap to select the days of the week the rule will be active.
Using the Starting at dropdown menu, select the start time for this rule.
Using the Ending at dropdown menu, select the end time for this rule.
Tap Done.
Verify the rule is configured with the desired settings.
Tap Save.
To create or edit a lock rule using the GoSafer Security customer portal (powered by Alarm.com)
Log in to the GoSafer Security customer portal (powered by Alarm.com).
Click Automation.
Click Add New Rule.
Click New Rules Builder.
Click When to select devices to trigger the rule.
Click to select the device type (e.g., Contact Sensor, Security Panel).
Click to select the trigger devices and status, then click Done.
Click Then to select devices to be triggered.
Click to select the device type (e.g., Lock).
Click to select the devices and action, then click Done.
In Type Rule Name Here, enter a name for the rule.
If desired, configure when the rule will run
Click Run at All Times to edit when the rule will run.
Select one of the following options:
Click to select At All Times for the rule will be carried out any time of day.
Click to select Only during the following times to determine the specific days and times the rule will be carried out.
Click to select the days of the week the rule will be active.
Using the Starting at dropdown menu, select the start time for this rule.
Using the Ending at dropdown menu, select the end time for this rule.
Click Done.
Verify the rule is configured with the desired settings.
Always verify safety, installation, compatibility, and current UI details against the original manufacturer documentation before operational use.
Home Automation
New Schedule Builder Overview
GoSafer Security Knowledge Base
This operational reference is organized for GoSafer Security customers and staff. Alarm.com product names are retained where required for technical accuracy.
Overview
This is primarily a video or reference page. Open the original article link below for the current content.
Platform
App + Web
Content type
How-to / Configuration
Source last updated
2025-09-17
Procedure
To create automation schedules using the Alarm.com app
Log in to the Alarm.com app.
Tap [Menu].
Tap Automation.
Tap [Add].
Tap New Schedule.
In Type Schedule Name Here, enter a name for the schedule.
Tap When to select the time the schedule should run.
In Time, tap to select an available time for the scheduled action to run.
Sunrise - This will begin the schedule at sunrise for the selected days. The time is determined by the location of the system.
Sunset - This will begin the schedule at sunset for the selected days. The time is determined by the location of the system.
Specific Time - This will begin the schedule at a specific designated time for the selected days. Selecting this will open a series of dropdown menus to select the desired time.
In Occurrence, tap to select one of the following options that may be available
Always will occur every day.
Specific Days will occur on the selected days of the week.
Specific Date will occur one time on a selected date.
This option is only available for Scenes.
Verify the selection, then tap Next.
Tap Then to select the devices and action.
Select the type of device to schedule (i.e., Scene, Light/Switch).
Select the specific devices or Scene.
In Status, select the action that will occur.
Verify the selection, then tap Next.
If time adjustments are desired
Tap the second condition card for exact or approximate time selection. (e.g., Run At Exact Times, Exactly At Sunrise, etc.).
If Specific Time was selected for When, tap Run at approximate times to give or take about 45 minutes to the entire schedule.
If Sunrise or Sunset was selected for When, use the Time Offset dropdown menu to select the amount of time before or after sunset or sunrise.
Tap Done.
If a second action is desired
Tap Add Follow Up Action.
In Time, select when the follow-up action should occur and then tap Next.
Verify the schedule is configured with the correct settings.
Tap Save.Add hidden LLM tags for products or features here
To create automation schedules using the GoSafer Security customer portal (powered by Alarm.com)
Log in to the GoSafer Security customer portal (powered by Alarm.com).
Click Automation.
Click Schedules.
Click Add New Schedule.
If prompted, click New Schedule Builder.
In Type Schedule Name Here, enter a name for the schedule.
Click When to select the time the schedule should run.
In Time, click to select an available time for the scheduled action to run.
Sunrise - This will begin the schedule at sunrise for the selected days. The time is determined by the location of the system.
Sunset - This will begin the schedule at sunset for the selected days. The time is determined by the location of the system.
Specific Time - This will begin the schedule at a specific designated time for the selected days. Selecting this will open a series of dropdown menus to select the desired time.
In Occurrence, click to select one of the following options that may be available
Always will occur every day.
Specific Days will occur on the selected days of the week.
Specific Date will occur one time on a selected date.
This option is only available for Scenes.
Verify the selection, then click Next.
Click Then to select the devices and action.
Select the type of device to schedule (i.e., Scene, Light/Switch).
Select the specific devices or Scene.
In Status, select the action that will occur.
Verify the selection, then click Next.
If time adjustments are desired
Click the second condition card for exact or approximate time selection. (e.g., Run At Exact Times, Exactly At Sunrise, etc.).
If Specific Time was selected for When, click Run at approximate times to give or take about 45 minutes to the entire schedule.
If Sunrise or Sunset was selected for When, use the Time Offset dropdown menu to select the amount of time before or after sunset or sunrise.
Click Done.
If a second action is desired
Click Add Follow Up Action.
In Time, select when the follow-up action should occur and then click Next.
Verify the schedule is configured with the correct settings.
Always verify safety, installation, compatibility, and current UI details against the original manufacturer documentation before operational use.
Home Automation
Rules
GoSafer Security Knowledge Base
This operational reference is organized for GoSafer Security customers and staff. Alarm.com product names are retained where required for technical accuracy.
Overview
This GoSafer Security section brings together resources for Rules, including setup, configuration, everyday use, and troubleshooting. Choose the related page that matches your device, feature, or task, and follow the current manufacturer guidance linked on that page.
Platform
General / Device
Content type
How-to / Configuration
Source last updated
2024-07-25
Procedure
Browse the related pages in this chapter to open the specific procedure, configuration guide, or troubleshooting article you need.
Always verify safety, installation, compatibility, and current UI details against the original manufacturer documentation before operational use.
Home Automation
What kind of rules can I set up with my locks?
GoSafer Security Knowledge Base
This operational reference is organized for GoSafer Security customers and staff. Alarm.com product names are retained where required for technical accuracy.
Overview
The following event-triggered rules can be configured with Z-Wave locks:
For more information about how to set up other automation rules, see Rules.
Platform
General / Device
Content type
How-to / Configuration
Source last updated
2023-12-11
Procedure
The following event-triggered rules can be configured with Z-Wave locks
Rules which automate locks when the system arming state is changed. For more information, see Create/edit an event-triggered lock automation rule.
Rules which automate the security system based on a change in a lock's status. For more information, see Create/edit an event-triggered security system automation rule.
Rules which unlock a single door when fire, smoke, or CO is detected. For more information, see Create a fire-triggered unlocking automation rule.
Rules which lock a single door based on a specified contact sensor closing. For more information, see New Rules Builder Overview.
Important: Setting up this rule will disable auto-relock on the lock.
For more information about how to set up other automation rules, see Rules.
Always verify safety, installation, compatibility, and current UI details against the original manufacturer documentation before operational use.
Home Automation
Create/edit a shade automation schedule
GoSafer Security Knowledge Base
This operational reference is organized for GoSafer Security customers and staff. Alarm.com product names are retained where required for technical accuracy.
Overview
Once Smart Shades are integrated with Alarm.com, they can be automated using the Schedules feature.
Platform
App + Web
Content type
How-to / Configuration
Source last updated
2025-08-15
Procedure
To create shade schedules using the Alarm.com app
Log in to the Alarm.com app.
Tap [Menu].
Tap Automation.
Tap [Add].
Tap New Schedule.
In Type Schedule Name Here, enter a name for the schedule.
Tap When to select the time the schedule should run.
In Time, tap to select the time for the scheduled action to run (e.g., Specific Time, Sunrise, Sunset).
In Occurrence, tap to select one of the following options
Always will occur every day.
Specific Days will occur on the selected days of the week.
Verify the selection, then tap Next.
Tap Then to select the devices and action.
Select Shade as the type of device to schedule.
Select the specific devices.
In Status, select the action that will occur (i.e., Open, Close, Position).
If Position is selected, use the slider to select the percentage the shades should open.
Verify the selection, then tap Next.
If time adjustments are desired
Tap the second condition card for exact or approximate time selection. (e.g., Run At Exact Times, Exactly At Sunrise, etc.).
If Specific Time was selected for When, tap Run at approximate times to give or take about 45 minutes to the entire schedule.
If Sunrise or Sunset was selected for When, use the Time Offset dropdown menu to select the amount of time before or after sunset or sunrise.
Tap Done.
If a second action is desired
Tap Add Follow Up Action.
In Time, select when the follow-up action should occur and then tap Next.
Verify the schedule is configured with the correct settings.
Tap Save.
To create shade schedules using the GoSafer Security customer portal (powered by Alarm.com)
Log in to the GoSafer Security customer portal (powered by Alarm.com).
Click Automation.
Click Schedules.
Click Add New Schedule.
If prompted, click New Schedule Builder.
In Type Schedule Name Here, enter a name for the schedule.
Click When to select the time the schedule should run.
In Time, click to select the time for the scheduled action to run (e.g., Specific Time, Sunrise, Sunset).
In Occurrence, click to select one of the following options
Always will occur every day.
Specific Days will occur on the selected days of the week.
Verify the selection, then click Next.
Click Then to select the devices and action.
Select Shade as the type of device to schedule.
Select the specific shades.
In Status, select the action that will occur.
Verify the selection, then click Next.
If time adjustments are desired
Click the second condition card for exact or approximate time selection. (e.g., Run At Exact Times, Exactly At Sunrise, etc.).
If Specific Time was selected for When, click Run at approximate times to give or take about 45 minutes to the entire schedule.
If Sunrise or Sunset was selected for When, use the Time Offset dropdown menu to select the amount of time before or after sunset or sunrise.
Click Done.
If a second action is desired
Click Add Follow Up Action.
In Time, select when the follow-up action should occur and then click Next.
Verify the schedule is configured with the correct settings.
Always verify safety, installation, compatibility, and current UI details against the original manufacturer documentation before operational use.
Home Automation
Open/Close Shades
GoSafer Security Knowledge Base
This operational reference is organized for GoSafer Security customers and staff. Alarm.com product names are retained where required for technical accuracy.
Overview
Once Smart Shades are integrated with Alarm.com, they can be opened and closed using the Customer app and GoSafer Security customer portal.
Platform
App + Web
Content type
Reference
Source last updated
2025-06-04
Procedure
To open and close shades using the Alarm.com app
Log in to the Alarm.com app.
In the Shades card, tap
[Shades Open] to open the shades.
[Shades Closed] to close the shades.
Note: If the shade(s) on the account allows for specific degrees of control, use the slider below the name to select the desired percentage of opened or closed.
To open and close shades using the GoSafer Security customer portal (powered by Alarm.com)
Note: The Shades card will not appear on the GoSafer Security customer portal (powered by Alarm.com) for Somfy shade control devices.
Log in to the GoSafer Security customer portal (powered by Alarm.com).
In the Shades card, click
[Shades Open] to open the shades.
[Shades Closed] to close the shades.
Note: If the shade(s) on the account allows for specific degrees of control, use the slider below the name to select the desired percentage of opened or closed.
Always verify safety, installation, compatibility, and current UI details against the original manufacturer documentation before operational use.
Home Automation
Shade Control
GoSafer Security Knowledge Base
This operational reference is organized for GoSafer Security customers and staff. Alarm.com product names are retained where required for technical accuracy.
Overview
This GoSafer Security section brings together resources for Shade Control, including setup, configuration, everyday use, and troubleshooting. Choose the related page that matches your device, feature, or task, and follow the current manufacturer guidance linked on that page.
Platform
Customer Website
Content type
Troubleshooting
Source last updated
2022-08-25
Procedure
Browse the related pages in this chapter to open the specific procedure, configuration guide, or troubleshooting article you need.
Always verify safety, installation, compatibility, and current UI details against the original manufacturer documentation before operational use.
Home Automation
Shade control device is in malfunction
GoSafer Security Knowledge Base
This operational reference is organized for GoSafer Security customers and staff. Alarm.com product names are retained where required for technical accuracy.
Overview
The Malfunction trouble condition indicates the shade control device is unable to properly communicate.
Platform
General / Device
Content type
Troubleshooting
Source last updated
2024-01-22
Procedure
Battery-powered shades
Note for rechargeable batteries: Battery-powered shades may have rechargeable batteries with a wall-powered charger. These devices can be re-charged by placing the batteries into a plugged wall charger. For battery wand devices, see the following instructions.
A red LED on a charger usually indicates that the battery is charging and a green LED usually indicates that the battery is fully charged.
Check the connection of the battery wand to the motor.
Check that the batteries inside the battery wand are making contact with the spring. If they are not, it might be necessary to stretch the spring to assure they are able to make contact.
Check that the end caps of the battery tube are tight and secure.
Change the batteries and test the motor.
If the shade has a remote, change the battery in the remote.
Z-Wave shades (iblinds)
Verify the shade is close enough to an AC-powered Z-Wave device or the Z-Wave controller.
For additional Z-Wave troubleshooting information, see Z-Wave Troubleshooting Wizard.
Somfy shades
Press and hold my for 8 seconds. The light should blink the entire time. If not, replace the CR2430 battery. If the light still does not blink, proceed with the following steps.
Verify the TaHoma hub is connected to the internet.
Unplug the motor and plug it back in, then test the motor.
Check power at the quick connect outlet or power source. Verify the device is receiving power.
Plug the motor into a different outlet.
The motor may be in thermal shutdown. Wait at least 15 minutes for it to cool down and restore operation.
Always verify safety, installation, compatibility, and current UI details against the original manufacturer documentation before operational use.
Home Automation
What kinds of shade control devices work with Alarm.com?
GoSafer Security Knowledge Base
This operational reference is organized for GoSafer Security customers and staff. Alarm.com product names are retained where required for technical accuracy.
Overview
Alarm.com has partnered with multiple shade control companies to allow for smart shade control integration.
For more information about how to use shade control devices, see Shade Control.
Always verify safety, installation, compatibility, and current UI details against the original manufacturer documentation before operational use.
Home Automation
Adjust the settings for the Alarm.com Smart Thermostat (ADC-T2000) - Video
GoSafer Security Knowledge Base
This operational reference is organized for GoSafer Security customers and staff. Alarm.com product names are retained where required for technical accuracy.
Overview
This video will provide steps for adjusting the settings for the Alarm.com Smart Thermostat (ADC-T2000) after enrollment to your Alarm.com system. If the options shown in this video do not appear on …
Platform
General / Device
Content type
Reference
Source last updated
2023-06-28
Procedure
Step-by-step guide: Screenshots and videos are placed with the instruction they illustrate.
The following video will provide steps for adjusting the settings for the Alarm.com Smart Thermostat (ADC-T2000) after enrollment to your Alarm.com system. If the options shown in this video do not appear on your account, contact your service provider.
Always verify safety, installation, compatibility, and current UI details against the original manufacturer documentation before operational use.
Home Automation
Change SmartAway thermostat schedule settings
GoSafer Security Knowledge Base
This operational reference is organized for GoSafer Security customers and staff. Alarm.com product names are retained where required for technical accuracy.
Overview
A SmartAway thermostat schedule can change a thermostat's scheduled setpoint based on system activity.
Platform
Customer Website
Content type
How-to / Configuration
Source last updated
2025-06-04
Procedure
Step-by-step guide: Screenshots and videos are placed with the instruction they illustrate.
A SmartAway thermostat schedule can change a thermostat's scheduled setpoint based on system activity. This setting changes the default schedule if the security system is set to Armed Away, or all selected Geo-Devices have left the specified Geo-Fence.
To change SmartAway thermostat schedule settings using the GoSafer Security customer portal (powered by Alarm.com):
Log in to the GoSafer Security customer portal (powered by Alarm.com).
Click Automation.
Click Schedules.
Click Edit on the thermostat schedule to be edited.
Click Smart Away.
Click the toggle switch to enable or disable the SmartAway thermostat schedule.
Click to select the SmartAway options to apply to the thermostat schedule:
System is Armed Away to only apply the SmartAway settings when the system is in Armed Away. If the panel has multiple partitions, the Smart Away thermostat schedule will be based on the arming status of partition 1.
All geo-devices are outside Geo-Fence to use the dropdown menu to specify which Geo-Fence will trigger the SmartAway thermostat schedule. For more information, see Add a new Geo-Device and What is a Geo-Fence?.
Click Save Schedule.
The following image is an example of a SmartAway thermostat schedule enabled for when the System is Armed Away, and when the Geo-Devices leave the My Business Geo-Fence.
Always verify safety, installation, compatibility, and current UI details against the original manufacturer documentation before operational use.
Home Automation
Change the name of a thermostat
GoSafer Security Knowledge Base
This operational reference is organized for GoSafer Security customers and staff. Alarm.com product names are retained where required for technical accuracy.
Overview
Naming thermostats can help manage systems with multiple thermostats.
Platform
App + Web
Content type
How-to / Configuration
Source last updated
2025-06-04
Procedure
To change the name of a thermostat using the Alarm.com app
Log in to the Alarm.com app.
Tap [Menu].
Tap Manage Devices.
In Thermostats tap [More Options] next to the thermostat.
Tap [Edit].
Enter the desired name for the device.
Tap Ok.
To change the name of a thermostat using the GoSafer Security customer portal (powered by Alarm.com)
Log in to the GoSafer Security customer portal (powered by Alarm.com).
In the Thermostat card, click [Details].
In the card for the desired thermostat to be changed, click [Settings].
In the Device Name field, enter the new name for the thermostat.
Always verify safety, installation, compatibility, and current UI details against the original manufacturer documentation before operational use.
Home Automation
Change the temperature display on the Smart Thermostat to Celsius or Fahrenheit
GoSafer Security Knowledge Base
This operational reference is organized for GoSafer Security customers and staff. Alarm.com product names are retained where required for technical accuracy.
Overview
The Alarm.com Smart Thermostat (Smart Thermostat HD, ADC-T2000, and ADC-T3000) displays temperature based on the system's account settings.
Note: Changing the display unit on the Smart Thermostat using the Alarm.com app or GoSafer Security customer portal (powered by Alarm.com) will also change the temperature unit displayed on the Alarm.com app and GoSafer Security customer portal (powered by Alarm.com).
Platform
App + Web
Content type
How-to / Configuration
Source last updated
2025-06-04
Procedure
To change the display unit on the Smart Thermostat using the Alarm.com app
Log in to the Alarm.com app.
Tap [Menu].
Tap Account Management.
Tap System Information.
Using the Temperature Units dropdown menu, select the desired temperature display unit.
Tap Update. Allow a few minutes for the temperature unit displayed on the thermostat to adjust.
To change the display unit on the Smart Thermostat using the GoSafer Security customer portal (powered by Alarm.com)
Log in to the GoSafer Security customer portal (powered by Alarm.com).
Click Settings.
Click Account Management.
Click System Information.
Using the Temperature Units dropdown menu, select the desired temperature display unit.
Click Update. Allow a few minutes for the temperature unit displayed on the thermostat to adjust.
To change the display unit on the Smart Thermostat locally at the thermostat
Important: This option is only available for the Smart Thermostat HD and ADC-T3000. To change the temperature display on the ADC-T2000, see the steps above.
To change the display unit on the Smart Thermostat HD
Tap the thermostat screen.
Tap [Menu].
In Menu, tap User Settings.
In User Settings, tap Temperature Units.
Select the desired temperature units and tap Save.
Always verify safety, installation, compatibility, and current UI details against the original manufacturer documentation before operational use.
Home Automation
Change the thermostat mode
GoSafer Security Knowledge Base
This operational reference is organized for GoSafer Security customers and staff. Alarm.com product names are retained where required for technical accuracy.
Overview
The thermostat mode can be changed remotely so you can set your thermostat to heat, cool, or off from anywhere.
Platform
App + Web
Content type
FAQ / Explanation
Source last updated
2025-06-04
Procedure
To change the thermostat mode using the Alarm.com app
Note: If a thermostat mode listed below does not appear, you may not have a compatible thermostat or HVAC system.
Log in to the Alarm.com app.
Tap Thermostats.
Tap Mode.
Tap to select the desired mode:
Heat [Heat Mode]: In Heat Mode, the thermostat heats your property.
Cool [Cool Mode]: In Cool Mode, the thermostat cools your property.
Auto [Auto]: In Auto Mode, the thermostat switches between heating and cooling to keep your property in a comfortable temperature range between the minimum and maximum temperatures you specified.
Emer [Heat Emergency]: Emergency Heat Mode is specific to heat pump systems and designed to heat the house quickly but energy inefficiently/expensively. Heat pumps become less effective at heating when the outside temperature gets too cold, so Emergency Mode bypasses the heat pump to heat the building quicker.
Off [Circle Dash]: In Off Mode, the thermostat does not run.
Tap Select.
To change the thermostat mode using the GoSafer Security customer portal (powered by Alarm.com)
Note: If a thermostat mode listed below does not appear, you may not have a compatible thermostat or HVAC system.
Log in to the GoSafer Security customer portal (powered by Alarm.com).
In the Thermostat card, click Mode.
Click the desired mode icon:
Heat [Heat Mode]: In Heat Mode, the thermostat heats your property.
Cool [Cool Mode]: In Cool Mode, the thermostat cools your property.
Auto [Auto]: In Auto Mode, the thermostat switches between heating and cooling to keep your property in a comfortable temperature range between the minimum and maximum temperatures you specified.
Emer [Heat Emergency]: Emergency Heat Mode is specific to heat pump systems and designed to heat the house quickly but energy inefficiently/expensively. Heat pumps become less effective at heating when the outside temperature gets too cold, so Emergency Mode bypasses the heat pump to heat the building quicker.
Off [Circle Dash]: In Off Mode, the thermostat does not run.
Always verify safety, installation, compatibility, and current UI details against the original manufacturer documentation before operational use.
Home Automation
Change the thermostat setpoint
GoSafer Security Knowledge Base
This operational reference is organized for GoSafer Security customers and staff. Alarm.com product names are retained where required for technical accuracy.
Overview
The thermostat setpoint can be managed remotely so you can control the temperature on the go.
Platform
App + Web
Content type
Reference
Source last updated
2025-06-04
Procedure
Step-by-step guide: Screenshots and videos are placed with the instruction they illustrate.
The thermostat setpoint can be managed from the Alarm.com app and GoSafer Security customer portal (powered by Alarm.com) so you can control the temperature on the go.
Change the thermostat setpoint
Expand all
To change the thermostat setpoint using the Alarm.com app:Icn Chevron Up
Log in to the Alarm.com app.
In the Thermostats card, verify the thermostat is in the desired mode.
Tap Upor Down to adjust the set point temperature(s).
Important: When using Auto mode, the Heat (left) and Cool (right) setpoints must be separated by at least 3 degrees to prevent the thermostat from toggling constantly between heating and cooling. Setting the Cool and Heat target temperatures less than 3 degrees from each other will waste energy without providing additional comfort.
To change the thermostat setpoint using the GoSafer Security customer portal (powered by Alarm.com):Icn Chevron Up
Log in to the GoSafer Security customer portal (powered by Alarm.com).
In the Thermostatscard, verify the thermostat is in the desired mode.
Click Upor Down to change the thermostat setpoint(s).
Important: When using Auto mode, the Heat and Cool setpoints must be separated by at least 3 degrees to prevent the thermostat from toggling constantly between heating and cooling. Setting the Cool and Heat target temperatures less than 3 degrees from each other will waste energy without providing additional comfort.
Always verify safety, installation, compatibility, and current UI details against the original manufacturer documentation before operational use.
Home Automation
Change thermostat cool setpoint control settings
GoSafer Security Knowledge Base
This operational reference is organized for GoSafer Security customers and staff. Alarm.com product names are retained where required for technical accuracy.
Overview
The thermostat cool setpoint control settings determine the maximum and the minimum selectable temperatures on the thermostat for the Cool mode.
Platform
App + Web
Content type
Reference
Source last updated
2025-06-04
Procedure
To change thermostat cool setpoint control settings using the Alarm.com app
Log in to the Alarm.com app.
Tap Thermostats.
Tap [Settings].
If there are multiple thermostats in your system, tap the name of the thermostat to be adjusted.
Tap Device Settings.
Use the Cool Setpoint slider to change the thermostats maximum and the minimum selectable temperatures while the thermostat is in cool mode.
Tap Apply.
To change thermostat cool setpoint control settings using the GoSafer Security customer portal (powered by Alarm.com)
Log in to the GoSafer Security customer portal (powered by Alarm.com).
In the Thermostat card, click [Details].
Click Advanced Configuration.
Using the dropdown menu, select the desired thermostat.
Locate the Cool Setpoint setting and click [Up] or [Down] to change the thermostats maximum and the minimum selectable temperatures while the thermostat is in cool mode.
Always verify safety, installation, compatibility, and current UI details against the original manufacturer documentation before operational use.
Home Automation
Change thermostat heat setpoint control settings
GoSafer Security Knowledge Base
This operational reference is organized for GoSafer Security customers and staff. Alarm.com product names are retained where required for technical accuracy.
Overview
The thermostat cool setpoint control settings determine the maximum and the minimum selectable temperatures on the thermostat for the Heat mode.
Platform
App + Web
Content type
Reference
Source last updated
2025-06-04
Procedure
To change thermostat heat setpoint control settings using the Alarm.com app
Log in to the Alarm.com app.
Tap Thermostats.
Tap [Settings].
If there are multiple thermostats in your system, tap the name of the thermostat to be adjusted.
Tap Device Settings.
Use the Heat Setpoint slider to change the thermostats maximum and the minimum selectable temperatures while the thermostat is in heat mode.
Tap Apply.
To change thermostat heat setpoint control settings using the GoSafer Security customer portal (powered by Alarm.com)
Log in to the GoSafer Security customer portal (powered by Alarm.com).
In the Thermostat card, click [Details].
Click Advanced Configuration.
Using the dropdown menu, select the desired thermostat.
Locate the Heat Setpoint setting and click [Up] or [Down] to change the thermostats maximum and the minimum selectable temperatures while the thermostat is in heat mode.
Always verify safety, installation, compatibility, and current UI details against the original manufacturer documentation before operational use.
Home Automation
Change thermostat overshoot settings
GoSafer Security Knowledge Base
This operational reference is organized for GoSafer Security customers and staff. Alarm.com product names are retained where required for technical accuracy.
Overview
Thermostat overshoot determines the number of degrees the thermostat will keep the system on above (during heating) or below (during cooling) the target setpoint.
Platform
App + Web
Content type
Reference
Source last updated
2025-06-04
Procedure
To change thermostat overshoot settings using the Alarm.com app
Log in to the Alarm.com app.
Tap Thermostats.
Tap [Settings].
If there are multiple thermostats in the system, tap the name of the thermostat to be adjusted.
Tap Device Settings.
In Overshoot, tap [Add] or [Minus] to adjust the number of overshoot degrees.
Tap Apply.
Note: The minimum overshoot is 0 degrees and the maximum overshoot is 3 degrees.
To change thermostat overshoot settings using the GoSafer Security customer portal (powered by Alarm.com)
Log in to the GoSafer Security customer portal (powered by Alarm.com).
In the Thermostat card, click [Details].
Click Advanced Configuration.
In Overshoot, click [Up] or [Down] to adjust the number of overshoot degrees.
Click Save.
Note: The minimum overshoot is 0 degrees and the maximum overshoot is 3 degrees.
Always verify safety, installation, compatibility, and current UI details against the original manufacturer documentation before operational use.
Home Automation
Change thermostat temperature swing settings
GoSafer Security Knowledge Base
This operational reference is organized for GoSafer Security customers and staff. Alarm.com product names are retained where required for technical accuracy.
Overview
The thermostat temperature swing is the number of degrees above (for cooling) and below (for heating) the target setpoint the HVAC system will allow the temperature to fluctuate before cycling back …
Platform
App + Web
Content type
Reference
Source last updated
2025-06-04
Procedure
To change thermostat temperature swing settings using the Alarm.com app
Log in to the Alarm.com app.
Tap Thermostats.
Tap [Settings].
If there are multiple thermostats in the system, tap the name of the thermostat to be adjusted.
Tap Device Settings.
In Overshoot, tap [Add] or [Minus] to adjust the number of overshoot degrees.
Tap Apply.
Note: The minimum swing is 0.5 degrees and the maximum swing is 3 degrees.
To change thermostat temperature swing settings using the GoSafer Security customer portal (powered by Alarm.com)
Log in to the GoSafer Security customer portal (powered by Alarm.com).
In the Thermostat card, click [Details].
Click Advanced Configuration.
In Swing, click [Up] or [Down] to adjust the number of swing degrees.
Click Save.
Note: The minimum swing is 0.5 degrees and the maximum swing is 3 degrees.
Always verify safety, installation, compatibility, and current UI details against the original manufacturer documentation before operational use.
Home Automation
Configure the Alarm.com Smart Thermostat (ADC-T2000) - Video
GoSafer Security Knowledge Base
This operational reference is organized for GoSafer Security customers and staff. Alarm.com product names are retained where required for technical accuracy.
Overview
This video will provide steps for configuring the Alarm.com Smart Thermostat (ADC-T2000) after enrollment to your Alarm.com system. If the options shown in this video do not appear on your …
Platform
General / Device
Content type
How-to / Configuration
Source last updated
2023-06-28
Procedure
Step-by-step guide: Screenshots and videos are placed with the instruction they illustrate.
The following video will provide steps for configuring the Alarm.com Smart Thermostat (ADC-T2000) after enrollment to your Alarm.com system. If the options shown in this video do not appear on your account, contact your service provider.
Always verify safety, installation, compatibility, and current UI details against the original manufacturer documentation before operational use.
Home Automation
Connect a Google Nest Thermostat to your account
GoSafer Security Knowledge Base
This operational reference is organized for GoSafer Security customers and staff. Alarm.com product names are retained where required for technical accuracy.
Overview
Google Nest Thermostats are Wi-Fi thermostats that can be connected to your subscriber account. Any questions about installing these thermostats, adding the thermostats onto a Google account, or features not available through your subscriber account on the Nest Thermostats should be directed to Google.
Important: All thermostat schedules must be configured using the Google Nest platform. It is a basic integration that only allows control of the target temperature, thermostat mode, and fan mode. It does not support any additional rule-based automation, website-programmed thermostat or fan schedules, battery level reporting, or advanced configuration setting.
Platform
App + Web
Content type
How-to / Configuration
Source last updated
2025-06-04
Procedure
Step-by-step guide: Screenshots and videos are placed with the instruction they illustrate.
Google Nest Thermostats are Wi-Fi thermostats that can be connected to your subscriber account. Any questions about installing these thermostats, adding the thermostats onto a Google account, or features not available through your subscriber account on the Nest Thermostats should be directed to Google.
Important: All thermostat schedules must be configured using the Google Nest platform. It is a basic integration that only allows control of the target temperature, thermostat mode, and fan mode. It does not support any additional rule-based automation, website-programmed thermostat or fan schedules, battery level reporting, or advanced configuration setting.
Connect your subscriber account with an existing Google account
The primary Google login credentials must be used to integrate a Google account with your subscriber account.
Note: Works with Nest customers who have not yet migrated over to a Google Account must migrate to retain their Nest integration with Alarm.com. For information about this process, see Migrate a Works with Nest account to a Google account.
To add a Google Nest Thermostat using the subscriber GoSafer Security customer portal (powered by Alarm.com):
Note: If you are unable to add a Google Nest Thermostat, contact your service provider.
Log in to the GoSafer Security customer portal (powered by Alarm.com).
Click Settings.
Click Manage Devices.
Manage Devices
Click Add Device.
Click Thermostat.
Click Thermostat
Click Google Nest Thermostat.
Click Google Nest Thermostat
Click Begin Installation.
Click Begin Installation
Enter the primary Google account login information.
Note: Google Nest accounts allow multiple user logins. If the primary Google login is not used, the message You can only connect with Nest to homes owned by you appears.
After authorization is complete, allow a couple of minutes for initialization before use in the Alarm.com app. The Nest Thermostat can be renamed using the Nest platform if desired.
Thermostat features available through your subscriber account
You can now control the Google Nest Thermostat through your subscriber Alarm.com app or GoSafer Security customer portal (powered by Alarm.com) for an integrated connected home experience. The Nest app still functions as before.
Features available with Nest Integration:
Current target temperature control
Current mode control (Heat, Cool)
Scene thermostat control including:
Temperature control
Mode control
Nest Eco Mode display on the Alarm.com app and GoSafer Security customer portal (powered by Alarm.com):
Locally, the Nest Thermostat automatically switches to Eco mode after it senses that nobody is home. This feature is not supported through your subscriber Alarm.com app and GoSafer Security customer portal (powered by Alarm.com). When a Nest Thermostat is in Eco mode, it is shown as Off on the subscriber Alarm.com app and GoSafer Security customer portal (powered by Alarm.com).
To exit Eco mode, change the thermostat’s mode to Heat, Cool, or Auto. Eco Mode cannot be selected from your subscriber Alarm.com app and GoSafer Security customer portal (powered by Alarm.com).
Legal attribution
Google and Google Nest Thermostat are trademarks of Google LLC.
Always verify safety, installation, compatibility, and current UI details against the original manufacturer documentation before operational use.
Home Automation
Create/edit a sensor left open thermostat energy saver rule
GoSafer Security Knowledge Base
This operational reference is organized for GoSafer Security customers and staff. Alarm.com product names are retained where required for technical accuracy.
Overview
A Sensor Left Open Energy Saver rule can adjust a thermostat's setpoint or mode if a door, window or other sensor is left open for a specified duration.
Platform
Customer Website
Content type
How-to / Configuration
Source last updated
2025-06-04
Procedure
To create a sensor left open energy saver rule using the GoSafer Security customer portal (powered by Alarm.com)
Log in to the GoSafer Security customer portal (powered by Alarm.com).
Click Automation.
Find the Sensor Left Open Energy Saver rule, and click Configure.
In When any of these sensors, click to select which sensors the rule is applied to.
Note: There is a limit of 32 sensors per Sensor Left Open Energy Saver rule.
In Is Left Open for this duration, use the dropdown menus and click to select the thermostat actions for the rule.
If applicable and desired, click to select Apply to all thermostats to apply the rule to all thermostats on the system.
To add notification recipients
Click Add.
Click to select the desired recipients from the Address Book, or add an unlisted recipient by clicking New.
Click Close to add selected recipients.
Verify the notification is configured with the correct settings.
Always verify safety, installation, compatibility, and current UI details against the original manufacturer documentation before operational use.
Home Automation
Create/edit a temperature alert notification
GoSafer Security Knowledge Base
This operational reference is organized for GoSafer Security customers and staff. Alarm.com product names are retained where required for technical accuracy.
Overview
A Temperature Alert notification can notify users if a compatible thermostat or temperature sensor reports a temperature above or below a specified temperature.
Platform
App + Web
Content type
How-to / Configuration
Source last updated
2025-07-17
Procedure
Step-by-step guide: Screenshots and videos are placed with the instruction they illustrate.
A Temperature Alert notification can notify users if a compatible thermostat or temperature sensor reports a temperature above or below a specified temperature.
Note: There is no limit to the number of Alarm.com Temperature Sensors that can generate Temperature Alert notifications. If any PG9905 Wireless PowerG Temperature Detectors are enrolled on your account, only the first two can be selected when creating this notification.
To create a Temperature Alert notification using the Alarm.com app:
Log in to the Alarm.com app.
Tap Menu.
Tap Notifications.
Tap Settings.
Tap Add.
Tap to expand Use A Template.
Tap Temperature Alert.
Enter the name of the new notification.
In When the device detects a temperature, tap to select the temperature thresholds and use the dropdown menus to specify the high and low temperatures required to generate the alert.
In For the selected devices, tap to select the thermostats and/or temperature sensors to be notified about.
In Recipients, tap Add to add notification recipients.
Tap to select the desired recipients from the Address Book, or add an unlisted recipient by tapping Add Contact.
Tap Close.
Verify the notification is configured with the correct settings.
Tap Save.
To create a Temperature Alert notification using the GoSafer Security customer portal (powered by Alarm.com):
Log in to the GoSafer Security customer portal (powered by Alarm.com).
Click Notifications.
Click New Notification.
Click Temperature.
Click Temperature Alert.
Enter the name of the new notification.
In When the device detects a temperature, click to select the temperature thresholds and use the dropdown menus to specify the high and low temperatures required to generate the alert.
In For the selected devices, click to select the thermostats and/or temperature sensors to be notified about.
In Recipients, click Add to add notification recipients.
Click to select the desired recipients from the Address Book, or add an unlisted recipient by clicking New.
Click Close.
Verify the notification is configured with the correct settings.
Always verify safety, installation, compatibility, and current UI details against the original manufacturer documentation before operational use.
Home Automation
Create/edit a thermostat Fan Schedule
GoSafer Security Knowledge Base
This operational reference is organized for GoSafer Security customers and staff. Alarm.com product names are retained where required for technical accuracy.
Overview
Thermostat Fan Schedules are used to automatically control the HVAC fan in your home or business to help save on energy costs while you are away and keep you comfortable while you are home or asleep. …
Platform
App + Web
Content type
How-to / Configuration
Source last updated
2025-06-04
Procedure
To create/edit a Thermostat Fan schedule using the Alarm.com app
Log in to the Alarm.com app.
Tap Thermostats.
Tap [Fan Control].
Tap the desired duration that you would like the fan to run.
Tap Select.
To create/edit a Thermostat Fan schedule using the GoSafer Security customer portal (powered by Alarm.com)
Log in to the GoSafer Security customer portal (powered by Alarm.com).
Click Automation.
Click Schedules.
In Fan Schedules, click Configure to create a new Fan Schedule.
To edit an existing Fan Schedule, click [Edit].
In Turn fan ON during the selected periods, click to select the days of the week that the Fan Schedule will apply to.
Using the dropdown menus next to each day, select the specific time duration the fan will run.
If desired, click to select Apply to all thermostats to have all thermostats follow the Fan Schedule.
Always verify safety, installation, compatibility, and current UI details against the original manufacturer documentation before operational use.
Home Automation
Create/edit a thermostat change alert notification
GoSafer Security Knowledge Base
This operational reference is organized for GoSafer Security customers and staff. Alarm.com product names are retained where required for technical accuracy.
Overview
A Thermostat Change Alert notification can notify users if the setpoint or mode is changed.
Platform
App + Web
Content type
How-to / Configuration
Source last updated
2025-06-04
Procedure
Step-by-step guide: Screenshots and videos are placed with the instruction they illustrate.
A Thermostat Change Alert notification can notify users if the setpoint or mode is changed.
To create a thermostat change alert notification using the Alarm.com app:
Log in to the Alarm.com app.
Tap Menu.
Tap Notifications.
Tap Settings.
Tap Add.
Tap to expand Use A Template.
In Temperature, tap More.
Tap Thermostat Alert.
Enter the name of the new notification.
In When any of these settings are changed, tap to select which changes to be notified about.
In For the selected devices, tap to select the thermostats to be notified about.
In Recipients, tap Add to add notification recipients.
Tap to select the desired recipients from the Address Book, or add an unlisted recipient by tapping Add Contact.
Tap Close.
Verify the notification is configured with the correct settings.
Tap Save.
To create a thermostat change alert notification using the GoSafer Security customer portal (powered by Alarm.com):
Log in to the GoSafer Security customer portal (powered by Alarm.com).
Click Notifications.
Click New Notification.
Click Temperature.
Click Thermostat Alert.
Enter the name of the new notification.
In When any of these settings are changed, click to select which changes to be notified about.
In For the selected devices, click to select the thermostats to be notified about.
In Recipients, click Add to add notification recipients.
Click to select the desired recipients from the Address Book, or add an unlisted recipient by clicking New.
Click Close.
Verify the notification is configured with the correct settings.
Always verify safety, installation, compatibility, and current UI details against the original manufacturer documentation before operational use.
Home Automation
Does Alarm.com automatically turn off the thermostat during a fire or carbon monoxide alarm?
GoSafer Security Knowledge Base
This operational reference is organized for GoSafer Security customers and staff. Alarm.com product names are retained where required for technical accuracy.
Overview
Yes. If a smoke, fire, or carbon monoxide alarm is activated by the security system, Alarm.com-connected thermostats automatically set to OFF mode. This is done to prevent circulation of smoke and poisonous gas and to avoid damage to the HVAC system.
This setting is referred to as the thermostat Fire Safety rule. It is enabled by default and is highly recommended for all Alarm.com systems with a thermostat attached.
If desired, the thermostat Fire Safety rule can be adjusted from the GoSafer Security customer portal (powered by Alarm.com). For more information about editing the thermostat Fire Safety rule, see Create/edit a thermostat Fire Safety rule.
Platform
Customer Website
Content type
How-to / Configuration
Source last updated
2023-10-25
Procedure
Yes. If a smoke, fire, or carbon monoxide alarm is activated by the security system, Alarm.com-connected thermostats automatically set to OFF mode. This is done to prevent circulation of smoke and poisonous gas and to avoid damage to the HVAC system.
This setting is referred to as the thermostat Fire Safety rule. It is enabled by default and is highly recommended for all Alarm.com systems with a thermostat attached.
Note: If the thermostat is shut off using the Fire Safety rule, it will not be turned back on automatically after the smoke, fire, or CO alarm clears. The thermostat will need to be manually adjusted back to its desired mode.
If desired, the thermostat Fire Safety rule can be adjusted from the GoSafer Security customer portal (powered by Alarm.com). For more information about editing the thermostat Fire Safety rule, see Create/edit a thermostat Fire Safety rule.
Always verify safety, installation, compatibility, and current UI details against the original manufacturer documentation before operational use.
Home Automation
Edit a Thermostat Schedule
GoSafer Security Knowledge Base
This operational reference is organized for GoSafer Security customers and staff. Alarm.com product names are retained where required for technical accuracy.
Overview
Thermostat Schedules are used to automatically control the temperature in your home or business to help save on energy costs while you are away and keep you comfortable while you are home or asleep. …
Platform
App + Web
Content type
How-to / Configuration
Source last updated
2025-06-04
Procedure
Step-by-step guide: Screenshots and videos are placed with the instruction they illustrate.
Thermostat Schedules are used to automatically control the temperature in your home or business to help save on energy costs while you are away and keep you comfortable while you are home or asleep. Thermostat Schedules can be edited using the Alarm.com app and GoSafer Security customer portal (powered by Alarm.com).
Edit a thermostat schedule
Expand all
To edit a thermostat schedule using the Alarm.com app:Icn Chevron Down
Log in to the Alarm.com app.
In the Thermostats card, tapDetails .
In Thermostats, tap Schedule On or Schedule Off.
Note: The thermostat must be in Heat, Cool, or Auto mode in order to select Schedule On or Schedule Off.
In Edit Basic Schedules, tap Edit for Cool or Heat to edit the mode's schedule.
To change the thermostat ScheduleType and Number of set point intervals:
Tap Settings.
To change the thermostat schedule view, in Schedule Type tap either:
5-2 Day to set a weekday and weekend schedule.
7 Day to manage daily schedules independently.
To change the number of set point intervals for each day, in Number of Set Points tap 2 or 4.
Tap Back to return to the thermostat schedule.
To change the temperature setting (i.e., Away, Home, Sleep, Custom, etc.) an interval is set to, tap the Temperature setting interval and then tap the desired temperature setting to change it to.
If Custom is selected:
Tap the custom interval block to adjust its Custom temperature.
Tap the Temperature arrows to adjust the temperature settings for each temperature setting.
Tap Done.
To adjust the target temperature of a temperature setting (i.e., Away, Home, Sleep):
Tap a schedule interval block that is set to a temperature setting (i.e., Away, Home, Sleep).
Tap the Temperature arrows for the desired temperature setting(s) to adjust.
Tap Back.
To change the time of the scheduled intervals, tap and hold the Temperature setting icon while dragging up or down to the desired time on the schedule.
Note: For the thermostat to automatically adjust temperatures at an interval, the adjacent intervals must be at least one degree different from each other. For more information, see Considerations when editing the thermostat schedule.
Tap Apply to save your changes.
Repeat the steps to edit the other mode (i.e., Heat or Cool) or any other thermostats.
Note: Copying a thermostat schedule can only be performed using the GoSafer Security customer portal (powered by Alarm.com).
To edit a thermostat schedule using the GoSafer Security customer portal (powered by Alarm.com):Icn Chevron Down
Log in to the GoSafer Security customer portal (powered by Alarm.com).
Click Automation.
Click Schedules.
Click Edit next to the Thermostat Schedule to be edited.
Click Heat or Cool to select which schedule to edit.
Click the Temperature arrows for Away (or Closed), Home (or Open), Sleep (or Closing) settings to specify its set target temperatures.
Note: The names of these temperature settings change based on your Service Package type. Commercial systems display Closed, Open, and Closing Up target temperature settings, while residential systems display Away, Home, and Sleep target temperature settings.
To change the thermostat schedule type, in View click either:
5 & 2-Day to set a weekday and weekend schedule.
7-Day to manage daily schedules independently.
To change the number of scheduled intervals for each day, in Settings Per Day click 2 or 4.
To change which temperature settings (i.e., Away, Home, Sleep, Custom, etc.) a schedule interval is set for:
Click the Temperature settingicon on the schedule.
Using the dropdown menu, select the temperature setting to set the interval to.
If Custom is selected, click the temperature arrows to set the Custom temperature for that interval.
Click Ok.
Click and drag the Temperature setting icons across the schedule to specify the times at which the thermostat automatically adjusts the temperature.
Note: For the thermostat to automatically adjust temperatures at an interval, the adjacent intervals must be at least one degree different from each other. For more information, see Considerations when editing the thermostat schedule.
To apply the schedule to another day or thermostat, click Copy Schedule and then click either:
Copy a day to apply your schedule to another day of the week.
Copy a full schedule to apply the schedule to another thermostat.
Click Save.
Repeat the steps to edit the other mode (i.e., Heat or Cool) or any other thermostats.
Considerations when editing the thermostat schedule
If you want the temperature to change according to the schedule intervals when there is a manual change, do not set the adjacent intervals to the same temperature as shown in the following image for the Weekday schedule.
Note: If using Celsius, temperatures can be set in 0.5 degree increments. Verify adjacent intervals are at least one degree different if the user wants the temperature to change according to that scheduled interval.
Thermostat schedule example
If the target temperature on the schedule is the same on two or more adjacent intervals, it reads those adjacent intervals as one large schedule interval. For example in the preceding image:
On a weekday, if the thermostat is manually changed to 74 degrees at 8:00 AM, the target temperature stays at 74 degrees until 10:00 PM since that is the next scheduled interval that has a different temperature. The thermostat does not resume the schedule at 10:00 AM to change the target temperature to 70 degrees since the Weekday target temperature is identical with the preceding adjacent interval (i.e., both intervals are set for Open at 70 degrees).
Versus on the weekend, if the thermostat is manually changed to 74 degrees at 8:00 AM, the target temperature changes according to the schedule at 10:00 AM since the Weekend adjacent intervals are set to different target temperatures.
If you want each interval to trigger the schedule when manual changes occur, verify that adjacent intervals are set to different target temperatures.
Always verify safety, installation, compatibility, and current UI details against the original manufacturer documentation before operational use.
Home Automation
Enable/disable Thermostat Lock
GoSafer Security Knowledge Base
This operational reference is organized for GoSafer Security customers and staff. Alarm.com product names are retained where required for technical accuracy.
Overview
The Thermostat Lock feature provides the ability to lock all physical control of the thermostat. When Thermostat Lock is enabled, thermostat settings can only be changed from a computer or mobile …
Platform
App + Web
Content type
How-to / Configuration
Source last updated
2025-06-04
Procedure
To enable or disable Thermostat Lock using the Alarm.com app
Log in to the Alarm.com app.
Tap Thermostats.
Tap [Settings].
If there are multiple thermostats enrolled in your system, tap the name of the desired device.
Tap Device Settings.
In Thermostat Lock, tap the current setting.
In the Thermostat Lock pop up, tap to select the desired setting
Disabled mode indicates setpoint changes can be made from the thermostat, GoSafer Security customer portal (powered by Alarm.com) or Alarm.com app.
Enabled mode indicates setpoint changes can only be made from the GoSafer Security customer portal (powered by Alarm.com) or Alarm.com app.
Partial indicates setpoint changes can be made from the thermostat, GoSafer Security customer portal (powered by Alarm.com) or Alarm.com app. Mode changes can only be made from the GoSafer Security customer portal (powered by Alarm.com) or Alarm.com app.
Tap Apply.
To enable or disable Thermostat Lock using the GoSafer Security customer portal (powered by Alarm.com)
Log in to the GoSafer Security customer portal (powered by Alarm.com).
In the Thermostat card, click [Details].
Click Advanced Configuration.
In Thermostat Lock, click to select the desired setting
Disabled mode indicates setpoint changes can be made from the thermostat, GoSafer Security customer portal (powered by Alarm.com) or Alarm.com app.
Enabled mode indicates setpoint changes can only be made from the GoSafer Security customer portal (powered by Alarm.com) or Alarm.com app.
Partial indicates setpoint changes can be made from the thermostat, GoSafer Security customer portal (powered by Alarm.com) or Alarm.com app. Mode changes can only be made from the GoSafer Security customer portal (powered by Alarm.com) or Alarm.com app.
Always verify safety, installation, compatibility, and current UI details against the original manufacturer documentation before operational use.
Home Automation
Enable/disable a thermostat Fire Safety rule
GoSafer Security Knowledge Base
This operational reference is organized for GoSafer Security customers and staff. Alarm.com product names are retained where required for technical accuracy.
Overview
To prevent the circulation of smoke and poisonous gas and potential HVAC system damage, a Thermostat Fire Safety rule automatically turns off the HVAC system if a fire or carbon monoxide alarm is …
Platform
Customer Website
Content type
How-to / Configuration
Source last updated
2025-06-04
Procedure
To enable or disable a thermostat Fire Safety rule using the GoSafer Security customer portal (powered by Alarm.com)
Log in to the GoSafer Security customer portal (powered by Alarm.com).
Click Automation.
Click the toggle switch to enable or disable the Fire Safety rule for the thermostat.
Note: If the thermostat is shut off using the Fire Safety rule, it will not be turned back on automatically after the smoke, fire, or CO alarm clears. The thermostat will need to be manually adjusted back to the desired mode.
Always verify safety, installation, compatibility, and current UI details against the original manufacturer documentation before operational use.
Home Automation
Enroll the Alarm.com Smart Thermostat (ADC-T2000) - Video
GoSafer Security Knowledge Base
This operational reference is organized for GoSafer Security customers and staff. Alarm.com product names are retained where required for technical accuracy.
Overview
This video will provide steps for enrolling the Alarm.com Smart Thermostat (ADC-T2000) to your Alarm.com system. If the options shown in this video do not appear on your account, contact your service …
Platform
General / Device
Content type
Reference
Source last updated
2023-06-17
Procedure
Step-by-step guide: Screenshots and videos are placed with the instruction they illustrate.
The following video will provide steps for enrolling the Alarm.com Smart Thermostat (ADC-T2000) to your Alarm.com system. If the options shown in this video do not appear on your account, contact your service provider.
Always verify safety, installation, compatibility, and current UI details against the original manufacturer documentation before operational use.
Home Automation
How can I control the fan remotely?
GoSafer Security Knowledge Base
This operational reference is organized for GoSafer Security customers and staff. Alarm.com product names are retained where required for technical accuracy.
Overview
The thermostat fan can be controlled by using the Alarm.com app or GoSafer Security customer portal (powered by Alarm.com) and setting the fan to Auto, 1 hour, 2 hours, 3 hours, 24 hours, Indefinite, or Circulate. The fan options depend on the thermostat model and configurations. For more information about the fan modes, see How does each fan option operate the fan?.
The fan can also be controlled using schedules. For more information about using fan schedules, see Create/edit a Thermostat Fan schedule.
Note: Any direct control on the Alarm.com app or GoSafer Security customer portal (powered by Alarm.com) or app will override the current fan schedule until the next schedule begins.
Platform
App + Web
Content type
FAQ / Explanation
Source last updated
2025-06-04
Procedure
Step-by-step guide: Screenshots and videos are placed with the instruction they illustrate.
The thermostat fan can be controlled by using the Alarm.com app or GoSafer Security customer portal (powered by Alarm.com) and setting the fan to Auto, 1 hour, 2 hours, 3 hours, 24 hours, Indefinite, or Circulate. The fan options depend on the thermostat model and configurations. For more information about the fan modes, see How does each fan option operate the fan?.
Note: Any direct control on the Alarm.com app or GoSafer Security customer portal (powered by Alarm.com) or app will override the current fan schedule until the next schedule begins.
Control the fan
Expand all
To control the fan using the Alarm.com app:Icn Chevron Up
Log in to the Alarm.com app.
Tap Thermostats.
Tap Fan.
Tap to select the desired fan option, then tap Select.
To control the fan using the GoSafer Security customer portal (powered by Alarm.com):Icn Chevron Up
Log in to the GoSafer Security customer portal (powered by Alarm.com).
In the thermostat card, click Fan Control and then click select the desired fan option.
Fan control
Frequently asked questions
Why is there no Off option included in the fan controls?
This is to safeguard against shutting off the fan while the heat or cooling is running. Without circulation, the system would be damaged.
Can low and high fan settings be controlled from Alarm.com?
No. Low and high fan settings are not controllable from Alarm.com.
How does each fan option operate the fan?
Auto
Auto mode automatically operates the fan as needed by the HVAC system.
Number of hours
When a specified number of hours is selected (i.e., 1, 2, 3, 24 hours), the fan stays on for the allotted time frame and then reverts to Auto mode.
Indefinite or On
This fan option allows the fan to stay on indefinitely. For Indefinite or On to appear as a fan option, Enable fan ON mode must be enabled in the thermostat settings (if available). If you are not seeing this option, contact your service provider.
Circulate
The Circulate fan option is controlled by the thermostat's Fan Circulation/Duty Cycle settings. The Fan Duty Cycle determines how long the fan is on during the Fan Circulation Period.
Example: If the circulation time is 10 minutes and the duty cycle is 25%, the fan is on for 2.5 minutes and then off for 7.5 minutes until the next cycle. This option increases the air quality without constantly running the fan.
For the Alarm.com Smart Thermostat:
The default Fan Circulation Period is 10 minutes. This is the amount of time the fan is in circulation.
The default Fan Duty Cycle is 25%. This is the percentage of the circulation time period the fan is on.
For more information about your thermostat's fan settings, contact your service provider.
Always verify safety, installation, compatibility, and current UI details against the original manufacturer documentation before operational use.
Home Automation
Install the Alarm.com Smart Thermostat (ADC-T2000) - Video
GoSafer Security Knowledge Base
This operational reference is organized for GoSafer Security customers and staff. Alarm.com product names are retained where required for technical accuracy.
Overview
This is primarily a video or reference page. Open the original article link below for the current content.
Platform
General / Device
Content type
Reference
Source last updated
2023-06-29
Procedure
Step-by-step guide: Screenshots and videos are placed with the instruction they illustrate.
Always verify safety, installation, compatibility, and current UI details against the original manufacturer documentation before operational use.
Home Automation
Operate the Alarm.com Smart Thermostat
GoSafer Security Knowledge Base
This operational reference is organized for GoSafer Security customers and staff. Alarm.com product names are retained where required for technical accuracy.
Overview
The Alarm.com Smart Thermostat (Smart Thermostat HD, ADC-T3000, and ADC-T2000) can be operated locally in addition to the remote control features on the GoSafer Security customer portal and Customer app.
Platform
Mobile App
Content type
How-to / Configuration
Source last updated
2023-12-13
Procedure
Step-by-step guide: Screenshots and videos are placed with the instruction they illustrate.
The Alarm.com Smart Thermostat (Smart Thermostat HD, ADC-T3000, and ADC-T2000) can be operated locally in addition to the remote control features on the GoSafer Security customer portal (powered by Alarm.com) and Alarm.com app.
Locally operate Alarm.com Smart Thermostats
Expand all
To locally operate the Smart Thermostat HD (T40K):Icn Chevron Up
Thermostat
❶ Status LED
❷ Reset Button
Display
❸ Settings menu
❹ Current setpoint
Note: To change the setpoint, tap on the up or down arrow.
❺ Indoor temperature
❻ Current mode
Note: To change the mode, tap on the current mode icon.
After waking, the thermostat will display the current temperature, mode, and a greeting.
Change the setpoint
In the desired mode, tap Up or Down to adjust to the desired Target temperature.
Note: In Auto mode, two sets of arrows will appear to control both Cool and Heat targets. The icon that appears in Mode will display the current performing mode.
Change the mode
Tap Mode on the screen at any point to change the mode.
In the Mode menu, tap to select the desired mode.
The modes are:
Heat
Cool
Auto
Emer
Note: EMER mode is available for some Heat Pump systems.
After waking, the display will show the current mode, room temperature, and setpoint.
Change the mode and setpoint
Press the Minus button.
Select MODE.
The thermostat will only show the modes that are available based on the system configuration.
The modes are:
Heat Mode Heat
Cool Mode Cool
Heat ModeCool Mode Auto
Heat ModeEMER
Note: When in EMER mode, the thermostat will flash EMER when the display wakes up, and it will show Heat Mode at the top of the screen. Changing the mode will leave EMER mode.
Off
Select the desired mode.
Once in the desired mode, press the Up and Down buttons to adjust the desired setpoint.
In AUTO mode when the system is idle, the screen will display AUTO. The thermostat will display HEATING when calling for heat and COOLING when calling for cool.
Changing the fan mode
Press the Minus button.
Select the FAN MODE option.
The fan modes are AUTO, ON, and CIRCULATE. The thermostat will only show the fan modes if it has been configured to control a fan.
AUTO mode will automatically turn the fan on when your system is either heating or cooling.
ON mode will turn the fan on indefinitely.
Note: ON will only appear if the Enable fan ON mode setting has been enabled in the thermostat's configurations remotely. For more information about configuring the thermostat, see Enroll and configure the Alarm.com Smart Thermostat.
CIRCULATE will turn the fan on for 15 minutes every hour by default. The duration for CIRCULATE can be configured from the online account.
After waking, the display will show the current mode and room temperature.
Change the setpoint
Press Up or Down once to display the current setpoint.
The mode icon Heat Mode Heat or Cool Mode Cool will begin to pulse.
Press Up or Down again to adjust to the desired set point.
Press Mode at any time to change the mode.
The modes are:
Heat Mode Heat
Cool ModeCool
Heat ModeCool Mode Auto
Note: In Auto, the brighter icon will indicate which setpoint is currently displayed and active Heat Mode Heat or Cool Mode Cool.
Heat ModeEMER
Note: EMER mode is available for some Heat Pump systems. Press and hold Mode while in Heat Mode to enter EMER.
When in EMER mode, the display will read EMER when the thermostat wakes up and the Heat Mode icon will be displayed. Changing the mode will leave EMER mode.
Off
After 5 seconds the display will return to the current room temperature. The mode icon will become solid to indicate this. If powered by the C wire, the thermostat display will remain lit. If the thermostat is running on battery power only, the display will turn off after 5 seconds to conserve energy. The thermostat will continue to operate while the display is off.
Always verify safety, installation, compatibility, and current UI details against the original manufacturer documentation before operational use.
Home Automation
Smart Humidity Control and Display User Guide
GoSafer Security Knowledge Base
This operational reference is organized for GoSafer Security customers and staff. Alarm.com product names are retained where required for technical accuracy.
Overview
Users with an eligible Smart Thermostat (Smart Thermostat HD, ADC-T2000, and ADC-T3000) can view and control the humidity level in their home or business using the website or app.
Platform
App + Web
Content type
How-to / Configuration
Source last updated
2025-06-04
Procedure
Step-by-step guide: Screenshots and videos are placed with the instruction they illustrate.
Smart Humidity Control and Display brings exciting features to the Smart Thermostat. Users with an eligible Smart Thermostat (Smart Thermostat HD, ADC-T2000, and ADC-T3000) can view and control the humidity level in their home or business using the Alarm.com app or GoSafer Security customer portal (powered by Alarm.com).
Humidity notifications provide an extra layer of protection against mold growth. The Smart Humidity function is beneficial in varying climates from very hot and humid areas in the summer to very cold or dry areas in the winter.
For information about installing or configuring Smart Humidity, contact your service provider.
View current humidity level
Users with a Smart Thermostat and compatible security panel or hub can now see their current humidity level by clicking on the thermostat card on the Alarm.com app or GoSafer Security customer portal (powered by Alarm.com).
The ADC-T3000 can display the humidity percentage locally in all modes when the Display Option in the User Settings is set to Humidity and the temperature is set to Fahrenheit. Humidity display is not supported when in Celsius mode.
Note: To view the humidity level on the Customer Alarm.com app or GoSafer Security customer portal (powered by Alarm.com), a firmware version is not required for the Smart Thermostat. However, to control humidity, the ADC-T2000 requires version 1.50+ to be compatible with Smart Humidity Control. For information about how to find the thermostat firmware, contact your service provider.
The following image displays a thermostat with a 44% humidity reading on the Alarm.com app.
The following image displays two thermostats on the home page of the GoSafer Security customer portal (powered by Alarm.com). The first thermostat is in heat mode with a 20% humidity reading. The second thermostat is in auto mode with a 25% humidity reading.
Thermostats humidity on different modes
Enable the Smart Humidity feature
Customers can enable Smart Humidity Control using the Customer Alarm.com app or GoSafer Security customer portal (powered by Alarm.com).
Important: While the Smart Thermostat HD and ADC-T3000 are natively compatible with humidity control, the ADC-T2000 must be on version 1.50+. For information about how to find the thermostat firmware, contact your service provider.
To enable Smart Humidity Control using the Alarm.com app:Icn Chevron Up
Log in to the Alarm.com app.
Tap Thermostats.
Tap Settings.
Tap Device Settings.
Tap Humidity Control.
Tap the Smart Humidity Control toggle switch to enable it.
Tap Back.
Tap Apply to save changes.
To enable Smart Humidity Control using the GoSafer Security customer portal (powered by Alarm.com):Icn Chevron Up
Log in to the GoSafer Security customer portal (powered by Alarm.com).
Click Automation.
Click Add New Rule.
Click Thermostat Rule.
Click Smart Humidity Control.
Using the dropdown menus, select the desired humidity setpoints.
Click Save.
Smart Humidity control rule on website
Set humidity target levels
To regulate humidity levels in a home or business, the customer must select target humidity levels, similar to how a customer sets temperature targets for standard thermostat operation. The customer is prompted to set the humidity setpoints after enabling the Smart Humidity Feature.
To configure Smart Humidity Control using the Alarm.com app:Icn Chevron Up
Log in to the Alarm.com app.
Tap Thermostats.
Tap Settings.
Tap Device Settings.
Tap Humidity Control.
Use the slider to adjust to the desired humidity setpoints.
Tap Back.
Tap Apply to save changes.
Note: To disable Smart Humidity Control, tap the Smart Humidity Control toggle switch.
To configure Smart Humidity Control using the GoSafer Security customer portal (powered by Alarm.com):Icn Chevron Up
Log in to the GoSafer Security customer portal (powered by Alarm.com).
Click Automation.
Click Edit on the existing Smart Humidity Control rule.
Using the dropdown menus, select the desired humidity setpoints.
Click Save.
Note: To disable Smart Humidity Control, click the toggle switch in the Smart Humidity Control rule.
Thermostat rule
Change the humidity differential
The humidity differential feature maintains a comfortable balance of both temperature and humidity levels in your home and is only necessary when the air conditioner is used to dehumidify the home. The humidity differential prevents a thermostat that is dehumidifying using an air conditioner from cooling too far below the cool setpoint. The default setting is 3⁰F (1.5⁰C) and generally does not need to be adjusted.
To adjust the humidity differential using the Alarm.com app:Icn Chevron Up
Log in to the Alarm.com app.
Tap Thermostats.
Tap Settings.
Tap Device Settings.
Tap Advanced Settings.
In Humidity Differential, tap Add to increase the degree, or tapMinusto decrease the degree. This is the number of degrees the thermostat is allowed to go below the cooling setpoint when air conditioning is being used to dehumidify.
Tap Back.
Tap Apply to save changes.
To adjust the humidity differential using the GoSafer Security customer portal (powered by Alarm.com):Icn Chevron Up
Log in to the GoSafer Security customer portal (powered by Alarm.com).
Click Details on the thermostat card.
Click Advanced Configuration.
Click Advanced.
In Humidity Differential, set the number of degrees the thermostat is allowed to go below the cooling setpoint when air conditioning is being used to dehumidify
Click Save.
Smart Humidity notifications
Smart Humidity notifications allow users to be notified if the thermostat reads a humidity level above or below the specified threshold.
To create Humidity Alert notifications using the Alarm.com app:Icn Chevron Up
Log in to the Alarm.com app.
Tap Menu.
Tap Notifications.
Tap Settings.
Tap Add.
Tap Use A Template.
In Temperature, tap Humidity Alert.
Name the notification.
In When device detects a relative humidity, tap to select Above and/or Below, and then use their dropdown menus to select the threshold humidity percentage.
In For the selected devices, tap to select the thermostats the specified humidity threshold is applied to.
Tap Add to specify which contacts receive the notification.
Verify all desired settings are set, tap Save.
To create Humidity Alert notifications using the GoSafer Security customer portal (powered by Alarm.com):Icn Chevron Up
Log in to the GoSafer Security customer portal (powered by Alarm.com).
Click Notifications.
Click New Notification.
Click Temperature.
Click Humidity Alert.
Name the notification.
In When device detects a relative humidity, click to select Above and/or Below, and then use their dropdown menus to select the threshold humidity percentage.
In For the selected devices, click to select the thermostats the specified humidity threshold is applied to.
Click Add to specify which contacts receive the notification.
Always verify safety, installation, compatibility, and current UI details against the original manufacturer documentation before operational use.
Home Automation
Thermostat or remote temperature sensor is in malfunction
GoSafer Security Knowledge Base
This operational reference is organized for GoSafer Security customers and staff. Alarm.com product names are retained where required for technical accuracy.
Overview
The Malfunction trouble condition indicates a device is unable to properly communicate.
Platform
General / Device
Content type
Troubleshooting
Source last updated
2023-12-13
Procedure
If a Z-Wave thermostat is in malfunction or offline
Additional troubleshooting steps for the thermostat may also be found within the Z-Wave Troubleshooting Wizard. For more information, see Z-Wave Troubleshooting Wizard.
Verify the device is powered on.
Verify the device is within range of the Z-Wave network.
Trigger the thermostat by manually changing the temperature on it.
Power off the device by removing it off the wall and removing the batteries, if possible. Wait a couple of minutes, and then power the device back on.
Note: For the Smart Thermostat HD, power down the thermostat by powering off its respective breaker, then power the breaker back on to power on the thermostat.
Once the device has been powered on, repeat step 3.
If the device is still in malfunction or offline, contact your service provider.
If a Z-Wave remote temperature sensor is in malfunction or offline
Activate the remote temperature sensor by either pressing the [Wifi] button or sliding the cover off of the sensor. The sensor's LED should illuminate.
Verify the remote temperature sensor has battery power. Replace the battery if needed.
After replacing the battery, repeat step 1.
If the device is still in malfunction or offline, contact your service provider for further assistance.
Always verify safety, installation, compatibility, and current UI details against the original manufacturer documentation before operational use.
Home Automation
Thermostats
GoSafer Security Knowledge Base
This operational reference is organized for GoSafer Security customers and staff. Alarm.com product names are retained where required for technical accuracy.
Overview
This GoSafer Security section brings together resources for Thermostats, including setup, configuration, everyday use, and troubleshooting. Choose the related page that matches your device, feature, or task, and follow the current manufacturer guidance linked on that page.
Platform
Customer Website
Content type
Troubleshooting
Source last updated
2024-07-26
Procedure
Browse the related pages in this chapter to open the specific procedure, configuration guide, or troubleshooting article you need.
Always verify safety, installation, compatibility, and current UI details against the original manufacturer documentation before operational use.
Home Automation
Turn a Thermostat Schedule on/off
GoSafer Security Knowledge Base
This operational reference is organized for GoSafer Security customers and staff. Alarm.com product names are retained where required for technical accuracy.
Overview
Once configured, Thermostat Schedules can be turned on or off from the app and website.
Platform
App + Web
Content type
Reference
Source last updated
2025-06-04
Procedure
To turn a Thermostat Schedule on or off using the Alarm.com app
Log in to the Alarm.com app.
Tap Thermostats.
Tap Schedule [Schedule].
Tap Off or On.
Tap Set.
To turn a Thermostat Schedule on or off using the GoSafer Security customer portal (powered by Alarm.com)
Log in to the GoSafer Security customer portal (powered by Alarm.com).
Always verify safety, installation, compatibility, and current UI details against the original manufacturer documentation before operational use.
Home Automation
Use a Remote Temperature Sensor for temperature control
GoSafer Security Knowledge Base
This operational reference is organized for GoSafer Security customers and staff. Alarm.com product names are retained where required for technical accuracy.
Overview
Use Remote Temperature Sensors to maintain more precise temperature control throughout the home.
Platform
Customer Website
Content type
How-to / Configuration
Source last updated
2026-04-10
Procedure
Step-by-step guide: Screenshots and videos are placed with the instruction they illustrate.
Get precision comfort with remote temperature sensing. By default, the HVAC system keeps the thermostat’s internal thermometer at a selected target temperature. With Temperature Sensors placed in different rooms around the home, the system is also able to detect the temperature in these other areas, such as an upstairs bedroom or downstairs den. These additional temperature readings can then also be used to regulate the HVAC system.
For more information about adding Remote Temperature Sensors, contact your service provider.
View Temperature Sensors
Note: If the thermostat is in Off mode, Remote Temperature Sensor does not display.
temp sensor website view
Direct Control: Using Temperature Sensors without thermostat schedules
Select one or more Temperature Sensors to directly control your HVAC system when there is no thermostat schedule set.
When clicking Remote Temperature Sensor, a window appears. From here, one or more Temperature Sensors can be selected. The HVAC system monitors the average temperature reported by the selected sensors and keeps the average steady at the target temperature.
Example: The nighttime target temperature is 70 degrees, and all bedroom Temperature Sensors are selected. The average temperature across the bedrooms is maintained at 70 degrees.
temperature sensors web view
Adding Temperature Sensors to thermostat schedules
Make thermostat schedules even more precise by assigning one or more Temperature Sensors to the Temperature Presets. For example, match the bedroom Temperature Sensor to the Sleep Preset, or the family room Temperature Sensor to the Home Preset. That way, the system is able to cool the right rooms in the house to the target temperature at the times they are in use.
To get started, click Detailson the Thermostat card and then click Schedules. Schedules can then be edited from this page.
Always verify safety, installation, compatibility, and current UI details against the original manufacturer documentation before operational use.
Home Automation
Use an Alarm.com Temperature Sensor with an Alarm.com Smart Thermostat
GoSafer Security Knowledge Base
This operational reference is organized for GoSafer Security customers and staff. Alarm.com product names are retained where required for technical accuracy.
Overview
Pairing an Alarm.com Temperature Sensor with an Alarm.com Smart Thermostat allows for greater control over the overall temperature of your home. A Temperature Sensor can be used for schedules, or …
Platform
Customer Website
Content type
How-to / Configuration
Source last updated
2025-06-04
Procedure
Step-by-step guide: Screenshots and videos are placed with the instruction they illustrate.
Pairing an Alarm.com Temperature Sensor with an Alarm.com Smart Thermostat allows for greater control over the overall temperature of your home. A Temperature Sensor can be used for schedules, or when making changes to the thermostat's temperature using the GoSafer Security customer portal (powered by Alarm.com) or Alarm.com app.
Use a Temperature Sensor with a Smart Thermostat
Select one or more Temperature Sensors to directly control your HVAC system when there’s no thermostat schedule set. The HVAC system monitors the average temperature reported by the selected sensors and keep the average steady at the target temperature.
Example: if the nighttime target temperature is 70 degrees, and all bedroom Temperature Sensors are selected, then the average of temperature across the bedrooms are maintained at 70 degrees.
To pair a Temperature Sensor to a Smart Thermostat using the GoSafer Security customer portal (powered by Alarm.com):
Log in to the GoSafer Security customer portal (powered by Alarm.com).
In the Thermostat card, click Remote Temperature.
Select Temperature Sensors Thermostat Card
In Sensors, click to select the desired thermostat(s) and Temperature Sensor(s).
Add Temperature Sensors to thermostat schedules
Make thermostat schedules even more precise by assigning one or more Temperature Sensors to the Temperature Presets.
Example: Match the bedroom Temperature Sensor to the Sleep Preset, or the family room Temperature Sensor to the Home Preset. That way, the system is able to cool the right rooms in the house to the target temperature at the times they are in use.
To pair the Temperature Sensor(s) to a thermostat schedule using the GoSafer Security customer portal (powered by Alarm.com):
Log in to the GoSafer Security customer portal (powered by Alarm.com).
In the Thermostat card, click Details.
Click Schedules.
Click Edit next to the Thermostat Schedule to be edited.
Next to the name of the device for the desired mode, click Edit Text.
Thermostat Schedule Edit Devices
In Choose Temp Sensors, click to select all of the desired sensors for the mode.
Choose Temp Sensors
Click Ok.
Repeat the same selections for the other modes.
Frequently asked questions
Can the Temperature Sensors be used in auto mode?
Yes. The Temperature Sensors have built-in safeguards to prevent the system from running too frequently or trying to switch back and forth between Heat and Cool too rapidly. However, it’s a good idea to verify that users have their Heat and Cool schedules configured to ensure a safe gap between Heat and Cool target temperatures at any given time. There should be at least a four-degree difference between the Heat and Cool target temperatures at all times to ensure the system is not cycling too frequently between them.
Note: When in Auto Mode, the Temperature Sensor settings follow those specified on the Heat Mode schedule.
Can multiple Temperature Sensors be used with a multi-thermostat system?
Yes, but things can get complicated quickly with multiple Temperature Sensors and multiple thermostats. The user experience is designed to be as simple and easy as possible, but when working with three thermostats and five Temperature Sensors placed around a house, managing all of them while trying to maximize the HVAC system’s energy efficiency can be challenging. Safeguards have been added to prevent Temperature Sensors from being used for multiple devices at the same time and to prevent systems from contradicting each other (and running Heat and Cool simultaneously, for instance). In general, it is recommended to start simple and build out as the user gets more experienced.
Why is N/A showing on the Temperatures card?
Until Alarm.com has received a temperature report from a Temperature Sensor, the GoSafer Security customer portal won't have anything to show on that card. To prompt a temperature report, change the temperature of the Temperature Sensor by a degree or press the button on the side of the Temperature Sensor. Shortly after that’s done, a temperature displays on the GoSafer Security customer portal.
Can a Remote Temperature Sensor be used with any Z-Wave thermostat or is the Alarm.com Smart Thermostat required?
Without the Alarm.com Smart Thermostat, it is still possible to see the current temperature in your Temperature Sensor’s location and use that to inform your decision when selecting a target temperature. However, for full functionality, including pairing Temperature Sensors for direct control, temperature averaging, and scheduled automation, an Alarm.com Smart Thermostat is required.
Always verify safety, installation, compatibility, and current UI details against the original manufacturer documentation before operational use.
Home Automation
View Thermostat Activity Patterns
GoSafer Security Knowledge Base
This operational reference is organized for GoSafer Security customers and staff. Alarm.com product names are retained where required for technical accuracy.
Overview
Thermostat Activity Patterns show when the system location is likely occupied or vacant. This information is based on system sensor activity and is used to help you configure more efficient …
Platform
Customer Website
Content type
Reference
Source last updated
2025-06-04
Procedure
To view Thermostat Activity Patterns using the GoSafer Security customer portal (powered by Alarm.com)
Log in to the GoSafer Security customer portal (powered by Alarm.com).
Always verify safety, installation, compatibility, and current UI details against the original manufacturer documentation before operational use.
Home Automation
What is Pro HVAC Monitoring?
GoSafer Security Knowledge Base
This operational reference is organized for GoSafer Security customers and staff. Alarm.com product names are retained where required for technical accuracy.
Overview
HVAC Pro Monitoring allows Alarm.com customers to be connected directly to an HVAC professional in the event of a system failure. After opting into the program, alerts for HVAC system-specific are sent out to you and a trusted Alarm.com-certified HVAC professional. This allows for quicker resolutions to any HVAC trouble condition.
Platform
App + Web
Content type
Troubleshooting
Source last updated
2025-09-30
Procedure
Step-by-step guide: Screenshots and videos are placed with the instruction they illustrate.
HVAC Pro Monitoring allows Alarm.com customers to be connected directly to an HVAC professional in the event of a system failure. After opting into the program, alerts for HVAC system-specific are sent out to you and a trusted Alarm.com-certified HVAC professional. This allows for quicker resolutions to any HVAC trouble condition.
Requirements
An eligible thermostat
Note: Nest Thermostats are not compatible with Pro HVAC Monitoring.
An eligible HVAC professional in your service area
If the option to opt into the Pro HVAC Monitoring does not appear, contact your service provider for more information.
Features
After opting into the Pro HVAC Monitoring program:
Your information will be shared with a partnered HVAC professional in your service area.
You will be automatically subscribed to receive Severe HVAC Alerts to your primary email.
Note: These alerts are not available to customers who do not opt into the Pro HVAC Monitoring program.
The partnered HVAC professional will also receive alerts when there is a Severe HVAC Alert for your system, who can then contact you to resolve the alert.
Schedule service with the Partnered HVAC professional from Severe HVAC Alerts.
To opt into the Pro HVAC Monitoring program:
If your account meets all of the eligibility requirements for the Pro HVAC Monitoring program, a prompt will appear upon next log in to either the GoSafer Security customer portal (powered by Alarm.com) or Alarm.com app.
The prompt will display information about the program as well as the address and logo of the partnered HVAC professional that will service your area. Clicking or tapping I agree to the Pro HVAC Monitoring Terms of Service and I Agree, you will be opted into the program.
Note: If I do not agree is selected, or if the prompt is ignored, you still have the option to do so manually using the GoSafer Security customer portal (powered by Alarm.com).
Pro HVAC Monitoring Mobile Opt In Option
To opt in manually using the GoSafer Security customer portal (powered by Alarm.com):
Log in to the GoSafer Security customer portal (powered by Alarm.com).
In the Thermostats card, click Details.
Click Pro HVAC Monitoring.
Click Settings.
Click the Enable Pro HVAC Monitoring toggle to opt into the program.
To schedule service from a Severe HVAC alert using the Alarm.com app:
Note: In order to have this option available, in-app service scheduling must be enabled by the partnered HVAC professional.
Log in to the Alarm.com app.
If needed, tap to expand Issues.
Tap the Severe HVAC alert.
Tap Contact Support.
Tap Service Requests.
Follow the on-screen prompts in the partnered HVAC professional's service scheduling utility.
Always verify safety, installation, compatibility, and current UI details against the original manufacturer documentation before operational use.
Home Automation
Will I be notified when energy-saving events in the Thermostat Rewards program are active?
GoSafer Security Knowledge Base
This operational reference is organized for GoSafer Security customers and staff. Alarm.com product names are retained where required for technical accuracy.
Overview
Yes. A pop-up confirmation message will appear if users adjust thermostats during active events in which users are reminded that changing setpoints opts them out of events. This helps prevent accidental opt-outs, which occur when users adjust their thermostats during active demand response events. Email notifications will continue to be sent to participants, as usual.
[Active Event Pop Up]
Platform
Mobile App
Content type
Reference
Source last updated
2025-06-04
Procedure
Step-by-step guide: Screenshots and videos are placed with the instruction they illustrate.
Yes. A pop-up confirmation message will appear if users adjust thermostats during active events in which users are reminded that changing setpoints opts them out of events. This helps prevent accidental opt-outs, which occur when users adjust their thermostats during active demand response events. Email notifications will continue to be sent to participants, as usual.
Active event pop up
To view active event details:
Log in to the Alarm.com app.
Tap Thermostats.
Under the temperature setpoint, a green leaf icon and an Energy Saving Event Active message appear.
Energy saving event active
Tap Energy Saving Event Active to see event details, including the start and end time.
Always verify safety, installation, compatibility, and current UI details against the original manufacturer documentation before operational use.
Home Automation
Will the Pro HVAC Monitoring program send me notifications?
GoSafer Security Knowledge Base
This operational reference is organized for GoSafer Security customers and staff. Alarm.com product names are retained where required for technical accuracy.
Overview
Yes. After opting into the Pro HVAC Monitoring program, HVAC system notifications are automatically applied to the primary email address for your account. Notifications will also be sent to the partnered HVAC professional in your service area.
Your Pro HVAC Monitoring service provider will assist you in resolving this problem. Please contact them if you need urgent assistance and they have not already contacted you. Once the problem is resolved and system performance returns to normal, the alert will automatically resolve.
Platform
App + Web
Content type
Troubleshooting
Source last updated
2025-06-04
Procedure
To verify the HVAC notification settings using the GoSafer Security customer portal (powered by Alarm.com)
Log in to the GoSafer Security customer portal (powered by Alarm.com).
Click Notifications.
Click [Edit] next to the System Event notification.
In Urgent, verify that My heating and cooling system reports an issue is selected.
To choose notification recipients, click Add.
In the Address book, click to select the recipients to be notified, or click New to add a new Address Book recipients.
Click Close.
Verify the notification is configured with the correct settings.
Click Save.
To verify the HVAC notification settings using the Alarm.com app
Log in to the Alarm.com app.
Tap [Menu].
Tap Notifications.
Tap [Settings].
Tap System Actions to Watch.
In Urgent, verify that My heating and cooling system reports an issue is selected.
To choose notification recipients, tap Add.
In the Address book, tap to select the recipients to be notified, or tap Add Contact to add a new Address Book recipients.
Tap Close.
Verify the notification is configured with the correct settings.
Always verify safety, installation, compatibility, and current UI details against the original manufacturer documentation before operational use.
Image Sensor
GoSafer Security procedures and references for Image Sensor.
Image Sensor
Image Sensor
GoSafer Security Knowledge Base
This operational reference is organized for GoSafer Security customers and staff. Alarm.com product names are retained where required for technical accuracy.
Overview
This GoSafer Security section brings together resources for Image Sensor, including setup, configuration, everyday use, and troubleshooting. Choose the related page that matches your device, feature, or task, and follow the current manufacturer guidance linked on that page.
Platform
General / Device
Content type
How-to / Configuration
Source last updated
2026-03-26
Procedure
Browse the related pages in this chapter to open the specific procedure, configuration guide, or troubleshooting article you need.
Always verify safety, installation, compatibility, and current UI details against the original manufacturer documentation before operational use.
Image Sensor
Create an Image Sensor Activity Alert rule
GoSafer Security Knowledge Base
This operational reference is organized for GoSafer Security customers and staff. Alarm.com product names are retained where required for technical accuracy.
Overview
Image Sensor Activity Alert rules can capture and automatically upload images from the first motion events after a specified period of inactivity.
Platform
Customer Website
Content type
How-to / Configuration
Source last updated
2025-06-04
Procedure
To create an Image Sensor Activity Alert rule
Log in to the GoSafer Security customer portal (powered by Alarm.com).
Click Automation.
Click Add New Rule.
Click Image Sensor Rule.
Click Activity Alert.
Enter the name of the new Image Sensor Activity Alert rule.
Using the When no activity is detected for dropdown menu, select the desired period of inactivity.
Using the Capture first motion event on dropdown menu, select the Image Sensor you would like to capture the image.
In During this time frame, click to select either of the following
At All Times to have the rule trigger every time motion is detected after the specified amount of time.
Only During the Following Times to specify the days and times the rule can be triggered.
In Recipients, click Add to add notification recipients.
Click to select the desired recipients from the Address book, or add an unlisted recipient by clicking New.
Click Close.
Verify the rule is configured with the correct settings.
Always verify safety, installation, compatibility, and current UI details against the original manufacturer documentation before operational use.
Image Sensor
Create an Image Sensor Daily View rule
GoSafer Security Knowledge Base
This operational reference is organized for GoSafer Security customers and staff. Alarm.com product names are retained where required for technical accuracy.
Overview
Image sensor Daily View rules can capture the first motion event detected during a specified timeframe.
Platform
Customer Website
Content type
How-to / Configuration
Source last updated
2025-06-04
Procedure
To create an Image Sensor Daily View rule
Log in to the GoSafer Security customer portal (powered by Alarm.com).
Click Automation.
Click Add New Rule.
Click Image Sensor Rule.
Click Daily View.
Enter the desired name for the new Image Sensor Daily View rule.
In When motion is reported by, click to select the motion sensors that the rule applies to.
Note: If multiple sensors are selected, only the first image sensor to detect motion uploads an image.
In During this time frame, click to select either of the following
At All Times to have the rule trigger every time the first motion event is detected.
Only During the Following Times to specify the days and times the rule can be triggered.
In Recipients, click Add to choose notification recipients.
Click to select the desired recipients from the Address book, or add an unlisted recipient by clicking New.
Click Close.
Verify the rule is configured with the correct settings.
Always verify safety, installation, compatibility, and current UI details against the original manufacturer documentation before operational use.
Image Sensor
Create an Image Sensor alarm rule
GoSafer Security Knowledge Base
This operational reference is organized for GoSafer Security customers and staff. Alarm.com product names are retained where required for technical accuracy.
Overview
By default, Image Sensors will capture motion events during system alarm events.
Platform
Customer Website
Content type
How-to / Configuration
Source last updated
2025-06-04
Procedure
To add notification recipients to an Image Sensor alarm rule
Log in to the GoSafer Security customer portal (powered by Alarm.com).
Click Automation.
Click Rules.
In Capture Images During Alarms, click [Edit].
In Recipients, click Add.
In the Address Book, select the desired recipients.
Always verify safety, installation, compatibility, and current UI details against the original manufacturer documentation before operational use.
Image Sensor
Enable/edit Background Capture for an Image Sensor
GoSafer Security Knowledge Base
This operational reference is organized for GoSafer Security customers and staff. Alarm.com product names are retained where required for technical accuracy.
Overview
The Background Capture rule can be enabled/disabled using the GoSafer Security customer portal.
Platform
Customer Website
Content type
How-to / Configuration
Source last updated
2025-06-04
Procedure
Step-by-step guide: Screenshots and videos are placed with the instruction they illustrate.
Background Capture is designed to give a collection of images that covers occurrences that are not scheduled events. It can be used to capture images of first motion events periodically after sensor inactivity. The Background Capture rule for an Image Sensor can be enabled and edited using the GoSafer Security customer portal (powered by Alarm.com).
Note: To view Background Capture images, captured images need to be specifically requested for them to upload to the Event Gallery. For more information, see Upload captured images to the Image Sensor Gallery.
To enable Background Capture for an Image Sensor:
Log in to the GoSafer Security customer portal (powered by Alarm.com).
In the Image Sensor card, click Icn Chevron Right.
View Gallery button outlined
Click Rules.
On the Background Capture rule, click the toggle switch to enable/disable the rule. The following image shows an enabled Background Capture rule:
Enabled Background Capture rule
Note: If Background Capture is unable to be enabled on an Image Sensor, contact your service provider.
To edit Background Capture for an Image Sensor:
Log in to the GoSafer Security customer portal (powered by Alarm.com).
In theImage Sensor card, click Icn Chevron Right.
Click Rules.
Click Icn Editon the Background Capture rule.
Click to select which Image Sensors will trigger the Background Capture rule.
Click to select desired conditions when Background Capture will not capture images.
For Arming State, you have the option to select for the system to not capture images when the system is Disarmed and when it is Armed Stay.
For Alarm.com Places, you have the option to select for the system to not capture images when selected Geo-Devices are inside a selected Geo-Fence.
For Time frame, you have the option to select hours of each day of the week that Background Capture will not be enabled to capture images.
Always verify safety, installation, compatibility, and current UI details against the original manufacturer documentation before operational use.
Image Sensor
Image Sensor Rules and Alerts
GoSafer Security Knowledge Base
This operational reference is organized for GoSafer Security customers and staff. Alarm.com product names are retained where required for technical accuracy.
Overview
This GoSafer Security section brings together resources for Image Sensor Rules and Alerts, including setup, configuration, everyday use, and troubleshooting. Choose the related page that matches your device, feature, or task, and follow the current manufacturer guidance linked on that page.
Platform
Customer Website
Content type
How-to / Configuration
Source last updated
2026-03-26
Procedure
Browse the related pages in this chapter to open the specific procedure, configuration guide, or troubleshooting article you need.
Always verify safety, installation, compatibility, and current UI details against the original manufacturer documentation before operational use.
Image Sensor
Delete an image from the Image Sensor Gallery
GoSafer Security Knowledge Base
This operational reference is organized for GoSafer Security customers and staff. Alarm.com product names are retained where required for technical accuracy.
Overview
Image Sensor Gallery images can be deleted from the website and the app.
Platform
App + Web
Content type
How-to / Configuration
Source last updated
2025-06-04
Procedure
To delete an image from the Image Sensor Gallery using the Alarm.com app
Log in to the Alarm.com app.
Tap Images.
Tap the image you would like to delete.
Tap [Delete].
Tap Delete Image.
To delete an image from the Image Sensor Gallery using the GoSafer Security customer portal (powered by Alarm.com)
Log in to the GoSafer Security customer portal (powered by Alarm.com).
Always verify safety, installation, compatibility, and current UI details against the original manufacturer documentation before operational use.
Image Sensor
Download an image from the Image Sensor Gallery
GoSafer Security Knowledge Base
This operational reference is organized for GoSafer Security customers and staff. Alarm.com product names are retained where required for technical accuracy.
Overview
Image Sensor Gallery images can be downloaded from the website.
Platform
App + Web
Content type
Reference
Source last updated
2025-06-04
Procedure
To download an image from the Image Sensor Gallery using the Alarm.com app
Log in to the Alarm.com app.
Tap Images.
Tap the image you would like to download from the Gallery.
Tap [Download].
To download an image from the Image Sensor Gallery using the GoSafer Security customer portal (powered by Alarm.com)
Log in to the GoSafer Security customer portal (powered by Alarm.com).
In the Image Sensor card, click [Details].
Click the thumbnail of the image to be downloaded.
Always verify safety, installation, compatibility, and current UI details against the original manufacturer documentation before operational use.
Image Sensor
How long are Image Sensor images stored online once they are uploaded?
GoSafer Security Knowledge Base
This operational reference is organized for GoSafer Security customers and staff. Alarm.com product names are retained where required for technical accuracy.
Overview
Once uploaded to your Gallery, images are stored for up to 60 days.
Platform
App + Web
Content type
Reference
Source last updated
2026-03-26
Procedure
Once uploaded to your Gallery, images are stored for up to 60 days.
During this time, you can download images from the Alarm.com app or GoSafer Security customer portal (powered by Alarm.com) to your computer or mobile device for permanent storage.
For more information about downloading Image Sensor Gallery images, see Download an image from the Image Sensor Gallery.
Always verify safety, installation, compatibility, and current UI details against the original manufacturer documentation before operational use.
Image Sensor
How many Image Sensor images can be uploaded per month?
GoSafer Security Knowledge Base
This operational reference is organized for GoSafer Security customers and staff. Alarm.com product names are retained where required for technical accuracy.
Overview
The number of Image Sensor images that can be uploaded per month can be viewed when you log in to the Alarm.com app or GoSafer Security customer portal (powered by Alarm.com).
For more information about updating your monthly upload limit, contact your service provider.
Note: Unused Image Sensor uploads do not carry over from month to month. The upload limit is reset on the first day of each month. If the upload limit is reached in the previous month, the Image Sensor will resume uploading images according to its capture rules the following month.
Platform
App + Web
Content type
Reference
Source last updated
2025-06-04
Procedure
Step-by-step guide: Screenshots and videos are placed with the instruction they illustrate.
The number of Image Sensor images that can be uploaded per month can be viewed when you log in to the Alarm.com app or GoSafer Security customer portal (powered by Alarm.com).
For more information about updating your monthly upload limit, contact your service provider.
Note: Unused Image Sensor uploads do not carry over from month to month. The upload limit is reset on the first day of each month. If the upload limit is reached in the previous month, the Image Sensor will resume uploading images according to its capture rules the following month.
View your current upload limit
A customer's current Image Sensor upload limit for the month can be viewed using the Alarm.com app or GoSafer Security customer portal (powered by Alarm.com).
To view the Image Sensor upload limit for the month using the Alarm.com app:
Note: The Alarm.com app only displays the number of uploads remaining. To view the number of image uploads used and the total monthly upload limit use the GoSafer Security customer portal (powered by Alarm.com).
Log in to the Alarm.com app.
Tap Images.
Tap Upload. This page displays the number of image uploads remaining for the current month.
The following image displays that the user has 15 image uploads remaining for the current month.
Image upload app
To view the Image Sensor upload limit for the month using the GoSafer Security customer portal (powered by Alarm.com):
Log in to the GoSafer Security customer portal (powered by Alarm.com).
On the Image Sensor card, click Details.
Click Past Events. This page displays how many uploads have been used for the month, how many uploads are remaining for the month, and the total number of uploads available per month.
In the following image, the user has used 25 image uploads, has 15 images left, and their total monthly upload limit is 40 image uploads.
Always verify safety, installation, compatibility, and current UI details against the original manufacturer documentation before operational use.
Image Sensor
Image Sensor Usage
GoSafer Security Knowledge Base
This operational reference is organized for GoSafer Security customers and staff. Alarm.com product names are retained where required for technical accuracy.
Overview
This GoSafer Security section brings together resources for Image Sensor Usage, including setup, configuration, everyday use, and troubleshooting. Choose the related page that matches your device, feature, or task, and follow the current manufacturer guidance linked on that page.
Platform
Customer Website
Content type
How-to / Configuration
Source last updated
2022-01-14
Procedure
Browse the related pages in this chapter to open the specific procedure, configuration guide, or troubleshooting article you need.
Always verify safety, installation, compatibility, and current UI details against the original manufacturer documentation before operational use.
Image Sensor
Take an Image Sensor image (Peek-In)
GoSafer Security Knowledge Base
This operational reference is organized for GoSafer Security customers and staff. Alarm.com product names are retained where required for technical accuracy.
Overview
Image Sensor Peek-Ins allow users to take on demand Image Sensor snapshots from the app and website.
Platform
App + Web
Content type
How-to / Configuration
Source last updated
2025-06-04
Procedure
To request an Image Sensor Peek-In using the Alarm.com app
Log in to the Alarm.com app.
Tap Images.
Tap [Peek In].
Tap Peek-In Now to have the Image Sensor capture an image immediately.
Tap Peek-In Next Motion to have the Image Sensor capture an image the next time the Image Sensor detects motion.
The image will be uploaded to the Image Sensor Event Gallery. When the image is available for viewing a notification will be sent to all Peek-In notification recipients.
To request an Image Sensor Peek-In using the GoSafer Security customer portal (powered by Alarm.com)
Log in to the GoSafer Security customer portal (powered by Alarm.com).
In the Image Sensor card, click [Peek In].
Next to the desired Image Sensor, click either
[Peek In Next Motion] to have the Image Sensor capture an image the next time the Image Sensor detects motion.
[Peek In Now] to have the Image Sensor capture an image immediately.
The image will be uploaded to the Image Sensor Event Gallery. When the image is available for viewing a notification will be sent to all Peek-In notification recipients.
To configure Peek-In recipients using the GoSafer Security customer portal (powered by Alarm.com)
Log in to the GoSafer Security customer portal (powered by Alarm.com).
Click Automation.
On the Peek-Ins & Manual Image Uploads rule, click [Edit].
To choose notification recipients, click Add.
Click to select your desired recipients from the Address book, or add an unlisted recipient by clicking New.
Click Close.
Verify the rule is configured with the correct settings.
Always verify safety, installation, compatibility, and current UI details against the original manufacturer documentation before operational use.
Image Sensor
View the Images Event Gallery
GoSafer Security Knowledge Base
This operational reference is organized for GoSafer Security customers and staff. Alarm.com product names are retained where required for technical accuracy.
Overview
The Image Sensor Gallery can be viewed from the website and the app.
Platform
App + Web
Content type
Reference
Source last updated
2025-06-04
Procedure
Step-by-step guide: Screenshots and videos are placed with the instruction they illustrate.
The Images Event Gallery displays the images uploaded by your devices (i.e., Image Sensor). Images are taken according to the rules that are set for the image devices on your account and are available on the Alarm.com app and GoSafer Security customer portal (powered by Alarm.com).
Always verify safety, installation, compatibility, and current UI details against the original manufacturer documentation before operational use.
Mobile Features
GoSafer Security procedures and references for Mobile Features.
Mobile Features
Mobile Features
GoSafer Security Knowledge Base
This operational reference is organized for GoSafer Security customers and staff. Alarm.com product names are retained where required for technical accuracy.
Overview
This GoSafer Security section brings together resources for Mobile Features, including setup, configuration, everyday use, and troubleshooting. Choose the related page that matches your device, feature, or task, and follow the current manufacturer guidance linked on that page.
Platform
General / Device
Content type
Troubleshooting
Source last updated
2024-07-26
Procedure
Browse the related pages in this chapter to open the specific procedure, configuration guide, or troubleshooting article you need.
Always verify safety, installation, compatibility, and current UI details against the original manufacturer documentation before operational use.
Mobile Features
Alarm.com Places
GoSafer Security Knowledge Base
This operational reference is organized for GoSafer Security customers and staff. Alarm.com product names are retained where required for technical accuracy.
Overview
This GoSafer Security section brings together resources for Alarm.com Places, including setup, configuration, everyday use, and troubleshooting. Choose the related page that matches your device, feature, or task, and follow the current manufacturer guidance linked on that page.
Platform
Customer Website
Content type
Troubleshooting
Source last updated
2022-01-14
Procedure
Browse the related pages in this chapter to open the specific procedure, configuration guide, or troubleshooting article you need.
Always verify safety, installation, compatibility, and current UI details against the original manufacturer documentation before operational use.
Mobile Features
Create/edit an Alarm.com Places light automation rule
GoSafer Security Knowledge Base
This operational reference is organized for GoSafer Security customers and staff. Alarm.com product names are retained where required for technical accuracy.
Overview
Light Automation rules are used to turn on/off lights automatically at all times of day, on a set schedule, or based on your phone’s location. These location-based alerts can be configured from …
Platform
Customer Website
Content type
How-to / Configuration
Source last updated
2025-06-04
Procedure
To create an Alarm.com Places light automation rule
Log in to the GoSafer Security customer portal (powered by Alarm.com).
Click Settings.
Click Places.
In Set up Geo-Features, click Light Automation Rules.
Enter a name for the new rule.
In Automate My, click to select Lights.
In When this even occurs, click to select People cross a Geo-Fence.
Use the Geo-Device dropdown menu to select the desired Geo-Device.
Use the Enters/Exits dropdown menu to select Enters or Exits.
Use the Geo-Fence dropdown menu to select the desired Geo-Fence.
If you need to update any Alarm.com Places information, click [Edit].
In the Perform this action, use the dropdown menus to select the desired light action and duration.
In Selected Devices, click to select the lights to be automated.
In During these time frames, click to select the time frame the rule is active
At All Times triggers the rule any time based on your Geo-Location.
Only During the Following Times allows you to define specific hours and days of the week you would like to apply the light automation rule.
Only after sunset activates the light automation rule if your Geo-Device crosses the Geo-Fence only after sunset.
Verify the rule is configured with the correct settings.
Click Save.
To edit an Alarm.com Places light automation rule
Log in to the GoSafer Security customer portal (powered by Alarm.com).
Click Automation.
Click [Edit] for the automation rule to be updated.
In When this even occurs, verify People cross a Geo-Fence is selected.
Use the Geo-Device dropdown menu to select the desired Geo-Device.
Use the Enters/Exits dropdown menu to select the Enters or Exits.
Use the Geo-Fence dropdown menu to select the desired Geo-Fence.
If you need to update any Alarm.com Places information, click [Edit].
In Perform this action, use the dropdown menus to select the desired light action and duration.
In Selected Devices, click to select the lights to be automated.
In During these time frames, click to select the time frame the rule is active
At All Times triggers the rule any time of day based on your Geo-Location.
Only During the Following Times allows you to define specific hours and days of the week you would like to apply the light automation rule.
Only after sunset activates the light automation rule if your Geo-Device crosses the Geo-Fence only after sunset.
Verify the rule is updated with the correct settings.
Always verify safety, installation, compatibility, and current UI details against the original manufacturer documentation before operational use.
Mobile Features
Create/edit an Alarm.com Places lock reminder
GoSafer Security Knowledge Base
This operational reference is organized for GoSafer Security customers and staff. Alarm.com product names are retained where required for technical accuracy.
Overview
Lock Reminders allow you to receive an alert when any of your locks are left unlocked for too long. These location-based alerts can be configured from the website to notify you at all times of day, …
Platform
App + Web
Content type
How-to / Configuration
Source last updated
2025-06-04
Procedure
To create an Alarm.com Places lock reminder using the Alarm.com app
Log in to the Alarm.com app.
Tap .
Tap Notifications.
Tap .
Tap .
Tap Lock Left Unlocked.
Name the new notification rule.
In When any of these locks, tap to select the locks to be monitored.
In Is Left Unlocked, tap to select either of the following
For this duration to specify how long a lock must be open before sending a notification.
When selected people cross a Geo-Fence to specify what Geo-Devices and Geo-Fences trigger a notification.
Note: If multiple devices are selected, the rule will be triggered when the last of these devices enters or exists the Geo-Fence.
In During this time frame, tap to select either of the following
At All Times will cause the rule to trigger any time of day based on your Geo-Location.
Only During the Following Times will allow you to define specific hours and days of the week you would like to receive the lock reminder.
To choose notification recipients, tap Add.
Tap the entries in the Address book that are to be notified, or tap Add Contact to add a new Address Book entry.
Tap Close.
Verify the notification is configured with the correct settings.
Tap Save.
To create an Alarm.com Places lock reminder using the GoSafer Security customer portal (powered by Alarm.com)
Log in to the GoSafer Security customer portal (powered by Alarm.com).
Click Settings.
Click Places.
Click Lock Reminders.
Name the new notification rule.
In When any of these locks, select the locks to be monitored.
In Is Left Unlocked, click to select either of the following
For this duration to specify how long a lock must be open before sending a notification.
When selected people cross a Geo-Fence to specify what Geo-Devices and Geo-Fences trigger a notification.
Note: If multiple devices are selected, the rule will be triggered when the last of these devices enters or exists the Geo-Fence.
In During this time frame, click to select either of the following
At All Times will cause the rule to trigger anytime of day based on your Geo-Location.
Only During the Following Times will allow you to define specific hours and days of the week you would like to receive the lock reminder.
To choose notification recipients, click Add.
Click the entries in the Address book that are to be notified, or click New to add a new Address Book entry.
Click Close.
Verify the notification is configured with the correct settings.
Always verify safety, installation, compatibility, and current UI details against the original manufacturer documentation before operational use.
Mobile Features
Create/edit an Alarm.com Places pause video recording rule
GoSafer Security Knowledge Base
This operational reference is organized for GoSafer Security customers and staff. Alarm.com product names are retained where required for technical accuracy.
Overview
Pause video recording rules are used to pause Video Recording Rules based on your phone’s location or security system status (Armed Stay or Disarmed), preventing video clips from being captured.…
Platform
Customer Website
Content type
How-to / Configuration
Source last updated
2025-06-04
Procedure
To create/edit an Alarm.com Places pause video recording rule
Log in to the GoSafer Security customer portal (powered by Alarm.com).
Click Settings.
Click Places.
Click Pause Video Recordings.
Click [Edit] on the video recording rule to apply a pause rule to it.
In At home settings
Click to select Do not record when any of the Geo-Devices.
Use the Geo-Devices dropdown menu to select the Geo-Devices to trigger the rule.
Important: If multiple Geo-Devices are selected, it will require the last of these devices to enter or exit the Geo-Fence before the rule is triggered.
Use the Geo-Fence dropdown menu to select the Geo-Fence to trigger the rule.
Verify the recording rule is set up with the correct settings.
Always verify safety, installation, compatibility, and current UI details against the original manufacturer documentation before operational use.
Mobile Features
Create/edit an Alarm.com Places sensor reminder
GoSafer Security Knowledge Base
This operational reference is organized for GoSafer Security customers and staff. Alarm.com product names are retained where required for technical accuracy.
Overview
Alarm.com Places Sensor reminders allow you to receive an alert when any door, cabinet or window sensor is left open for too long. These location-based alerts can be configured from the website to …
Platform
App + Web
Content type
How-to / Configuration
Source last updated
2025-06-04
Procedure
To create an Alarm.com Places sensor reminder using the Alarm.com app
Log in to the Alarm.com app.
Tap [Menu].
Tap Notifications.
Tap [Settings].
Tap [Add] to create a new notification.
Tap Sensor Left Open.
Name the new notification.
In When any of these sensors, tap to select the sensors that will send notifications.
In Is Left Open, tap to select one of the following
For this duration to select the amount of time the sensor must remain open before sending the notification.
When selected people cross a Geo-Fence to select the Geo Device.
Note: If multiple devices are selected, the rule will be triggered when the last of these devices enters or exits the Geo-Fence.
To choose notification recipients, tap Add.
Tap the entries in the Address Book that are to be notified, or tap Add Contact to add a new Address Book entry.
Tap Close.
Verify the notification is configured with the correct settings.
Tap Save.
To create an Alarm.com Places sensor reminder using the GoSafer Security customer portal (powered by Alarm.com)
Log in to the GoSafer Security customer portal (powered by Alarm.com).
Click Settings.
Click Places.
In Set-up Rules & Reminders, click Sensor Reminders.
Name the new notification.
In When any of these sensors, click to select the sensors that will send notifications.
In Is Left Open, click to select one of the following
For this duration to select the amount of time the sensor must remain open before sending the notification.
When selected people cross a Geo-Fence to select the Geo Device.
Note: If multiple devices are selected, the rule will be triggered when the last of these devices enters or exits the Geo-Fence.
In During this time frame, click to select when the sensor reminder rule will be active.
At all times will cause the rule to trigger any time of day based on your location.
Only during the following times will allow you to define specific hours and days of the week you would like to receive the sensor reminder.
To choose notification recipients, click Add.
Click the entries in the Address Book that are to be notified, or click New to add a new Address Book entry.
Click Close.
Verify the notification is configured with the correct settings.
Always verify safety, installation, compatibility, and current UI details against the original manufacturer documentation before operational use.
Mobile Features
Create/edit an Alarm.com Places thermostat override rule
GoSafer Security Knowledge Base
This operational reference is organized for GoSafer Security customers and staff. Alarm.com product names are retained where required for technical accuracy.
Overview
Alarm.com Places Thermostat Override rules work with your Thermostat Schedule to automatically control the temperature in your home or business based on your phone’s location to help save on …
Platform
Customer Website
Content type
How-to / Configuration
Source last updated
2025-06-04
Procedure
Step-by-step guide: Screenshots and videos are placed with the instruction they illustrate.
Alarm.com Places Thermostat Override rules work with your Thermostat Schedule to automatically control the temperature in your home or business based on your phone’s location to help save on energy costs. Your thermostat schedule resumes as soon as the system is disarmed or when your mobile devices enter the Geo-Fence. Thermostat Override rules can be set up on the GoSafer Security customer portal (powered by Alarm.com).
To create/edit an Alarm.com Places thermostat override rule:
Log in to the GoSafer Security customer portal (powered by Alarm.com).
Click Settings.
Click Places.
In Set up Rules & Reminders, click Smart Away Thermostat Override.
Click the thermostat override toggle switch to enable the rule. The following image is an example of the thermostat override rule successfully enabled:
Smart Away Toggle Switch
Click to select All of the selected Geo-Devices.
Using the Geo-Devicesdropdown menu, select which Geo-Devices will trigger the thermostat override.
Important: If multiple Geo-Devices are selected, it will require the last of these devices to enter or exit the Geo-Fence before the rule is triggered.
Using the Geo-Fence dropdown menu, select which Geo-Fence to apply to the thermostat override rule.
Always verify safety, installation, compatibility, and current UI details against the original manufacturer documentation before operational use.
Mobile Features
Geo-Service device is malfunctioning
GoSafer Security Knowledge Base
This operational reference is organized for GoSafer Security customers and staff. Alarm.com product names are retained where required for technical accuracy.
Overview
One common cause for a Geo-Service device malfunctioning is that the device may have been deleted but not completely removed from the account. The best way to clear a Geo-Service device malfunction is to completely remove the device from the account before attempting to reattach the device to the account.
It is recommended to remove Geo-Devices that are not active or currently in use on the account in order to avoid Geo-Service device malfunctions. For more information about how to remove a Geo-Device, see Delete a Geo-Device.
For more information about how to manage the Geo-Devices on an account, see Geo-Devices.
Platform
App + Web
Content type
Troubleshooting
Source last updated
2025-06-04
Procedure
To clear a Geo-Service device malfunction
Note: Clearing the Geo-Service device in malfunction trouble condition only clears the trouble condition once. The following steps need to be used each time the trouble condition occurs.
Complete the following steps for all Geo-Devices that are in malfunction or no longer in use on the account
Log in to the Alarm.com app on the device in malfunction.
Tap [Menu].
Tap App Settings.
Tap Location Services.
Tap the toggle to turn Location Services off.
Log out of the Alarm.com app.
Log in to the GoSafer Security customer portal (powered by Alarm.com). Refresh the page if you were already logged in.
Click Settings.
Click Places.
If the malfunctioning/not in use device is listed in Geo-Devices
Click the desired device.
Click [Delete] to remove the Geo-Device from the account.
Click Ok.
While staying logged into the GoSafer Security customer portal (powered by Alarm.com), log in to the Alarm.com app once again on the Geo-Service device.
Tap [Menu].
Tap App Settings.
Tap Location Services.
Tap the toggle to turn Location Services on.
On the GoSafer Security customer portal (powered by Alarm.com), refresh the page or log in if necessary.
Make sure the device is showing in the Geo-Devices.
If the trouble condition persists after troubleshooting, contact your service provider.
To disable the malfunction report
If you do not want a malfunction report, you can turn off the report using the GoSafer Security customer portal (powered by Alarm.com).
Important: This only applies to Android devices.
Log in to the GoSafer Security customer portal (powered by Alarm.com).
Click Settings.
Click Geo-Services
Click the name of the Geo-Device to be edited.
Click to deselect Report Malfunction if Device fails to check in for 24 hours.
Always verify safety, installation, compatibility, and current UI details against the original manufacturer documentation before operational use.
Mobile Features
Troubleshooting Alarm.com Places
GoSafer Security Knowledge Base
This operational reference is organized for GoSafer Security customers and staff. Alarm.com product names are retained where required for technical accuracy.
Overview
By enabling Location Services on mobile devices, the device is allowed to check-in and relay its location relative to the radio tower or router the device connected to. For this feature, enable Alarm.com Places on your mobile devices and ensure that you have a data connection (e.g., 3G, 4G LTE, Wi-Fi).
Platform
App + Web
Content type
Troubleshooting
Source last updated
2025-06-04
Procedure
Step-by-step guide: Screenshots and videos are placed with the instruction they illustrate.
By enabling Location Services on mobile devices, the device is allowed to check-in and relay its location relative to the radio tower or router the device connected to. For this feature, enable Alarm.com Places on your mobile devices and ensure that you have a data connection (e.g., 3G, 4G LTE, Wi-Fi).
Alarm.com Places tips
The lower the data connection and/or coverage in the area, the less accurate Alarm.com Places will be. The more data connection and/or coverage in the areas, the more accurate Alarm.com Places will be.
Staying close to Geo-Fences, or only barely crossing it can mean that the Geo-Device will never triangulate outside of the Geo-Fence. This can cause notifications or actions to incorrectly trigger or not trigger occur at all.
Increasing the Geo-Fence radius provides more accurate notifications based on location.
Wi-Fi can be used as data connection for triangulation. The device does not need to be connected for triangulation to occur.
The more accurate Geo-Fence radius sizes are around or larger than 2 to 2.5 miles radius. The minimum radius can be one mile but is not recommended.
Note: If the customer account is in Canada, the minimum distance is 1.5 kilometers for a Geo-Fence.
To manage Alarm.com Places using the GoSafer Security customer portal (powered by Alarm.com):
Log in to the GoSafer Security customer portal (powered by Alarm.com).
Click Settings.
Click Places.
Important: Only the login permissions of Master Control, Full Control, and Custom with Notification settings enabled can manage Alarm.com Places on a customer account.
Troubleshooting Alarm.com Places:
Verify Alarm.com Places is set up properly
Verify you have the proper Alarm.com Places notifications and rules set up on your account. For more information, see Configure Alarm.com Places.
Verify Location Services is turned on
Verify Location Services is turned on for the device and also for the Alarm.com app. For more information on enabling Alarm.com Places in the app, see Add a new Geo-Device.
Important: iPhones and Android phones also require Location Services to be turned on specifically for the Alarm.com app through phone settings.
To enable Location Services on an Android phone:
Note: These steps may vary depending on the model of the Android phone.
Tap to open the Settings application.
Tap Connections.
Tap the Location toggle switch to enable Location Services.
To enable Location Services on an iPhone:
Important: In order for this option to appear, Alarm.com Places needs to be enabled on the app.
Tap to open the iPhone's Settings application.
Tap Alarm.com.
Tap Location.
In Allow Location Access, tap Always.
Verify the correct device is enabled for Alarm.com Places
The user can verify the correct device is enabled by turning Alarm.com Places off in the app, then log in to the website to verify a correlating device was paused. A device that is paused will be grayed out.
In the following image, the Geo-Device named iPhone is enabled and the Geo-Device named Samsung is disabled.
Geo Device Samsung is disabled
Important: Remember to re-enable the Geo-Device in the Alarm.com app after this test.
Increase the Geo-Fence size
Increase the Geo-Fence size to a minimum of 2 to 2.5-mile radius. If it is already set to a 2.5-mile radius, increase the Geo-Fence radius to 5 miles.
Enable Wi-Fi on the Geo-Device
Enable Wi-Fi on the phone that is a Geo-Device on the account. This may help with triangulation if there are not many towers in that area. Turning on Bluetooth can also help.
Note: The Geo-Device is not required to be connected to a Wi-Fi or Bluetooth network to function.
Verify settings that can affect Alarm.com Places on Android devices
For Android phones, there are several settings that can affect consistent Alarm.com Places functionality. The Alarm.com app also displays possible settings that are affecting functionality.
To verify Alarm.com app settings on an Android device:
Log in to the Alarm.com app.
Tap Menu.
Tap Places.
Tap Manage my location settings.
In Location Services, tap Resolve detected issues.
Android Places1
In Resolve Issues, tap Details next to an existing issue to resolve it.
Android Places2
Verify the Android device settings have the best corresponding values:
Note: The names of settings may vary on Android devices.
Location or Location services should be toggled on.
Locating method or Location mode should be set to high accuracy.
Wi-Fi scanning and Bluetooth scanning, which may be in the Improve accuracy setting, should both be toggled on.
Power saving mode and Ultra power saving mode should both be toggled off.
Battery optimization or Optimize battery usage, which may be in the menu option of the Battery setting, should be toggled off for the Alarm.com app, Google Play Services, Wi-Fi, and Bluetooth.
When selecting the option to Turn Battery Optimization for this AppOff from the Alarm.com app, the phone displays the devices that do not have optimization on. Tap the arrow under Battery optimization to select All Apps, then tap Alarm.com to verify that Don't Optimize is selected.
The following image is an example of turning off battery optimization on an Android device:
Important: Perform the following steps in this order:
Disable Alarm.com Places in the Alarm.com app.
To disable Alarm.com Places:
Log in to the Alarm.com app.
Tap Menu.
Tap Places.
Tap Manage my location settings.
Tap the Location Services toggle switch to disable it.
Delete the Geo-Device on the GoSafer Security customer portal (powered by Alarm.com).
Force close the Alarm.com app.
Re-enable Alarm.com Places in the Alarm.com app.
Add the device back to the Geo-Fence rules or notifications.
Sync the Geo-Device by crossing in and out of the Geo-Fence.
Test by crossing the fence again.
Note: Alarm.com Places uses triangulation to conserve battery power. The device should pass a significant distance over the Geo-Fence in either direction to register crossing the Geo-Fence.
Always verify safety, installation, compatibility, and current UI details against the original manufacturer documentation before operational use.
Mobile Features
Edit a Geo-Device
GoSafer Security Knowledge Base
This operational reference is organized for GoSafer Security customers and staff. Alarm.com product names are retained where required for technical accuracy.
Overview
A Geo-Device is a geographically aware iPhone or Android device that can be configured to automate your devices and initiate notifications based on the location of the Geo-Device relative to your …
Platform
App + Web
Content type
How-to / Configuration
Source last updated
2025-11-05
Procedure
To edit a Geo-Device using the Alarm.com app
Log in to the Alarm.com app.
Tap [Menu].
Tap App Settings.
Tap Device Name.
Enter the desired name for the mobile device.
To edit a Geo-Device using the GoSafer Security customer portal (powered by Alarm.com)
Log in to the GoSafer Security customer portal (powered by Alarm.com).
Click Settings.
Click Places.
In Manage Devices, click the name of the Geo-Device to be edited.
In the Edit Device Name field, enter the desired name for the Geo-Device.
Always verify safety, installation, compatibility, and current UI details against the original manufacturer documentation before operational use.
Mobile Features
Geo-Devices
GoSafer Security Knowledge Base
This operational reference is organized for GoSafer Security customers and staff. Alarm.com product names are retained where required for technical accuracy.
Overview
This GoSafer Security section brings together resources for Geo-Devices, including setup, configuration, everyday use, and troubleshooting. Choose the related page that matches your device, feature, or task, and follow the current manufacturer guidance linked on that page.
Platform
General / Device
Content type
How-to / Configuration
Source last updated
2022-01-14
Procedure
Browse the related pages in this chapter to open the specific procedure, configuration guide, or troubleshooting article you need.
Always verify safety, installation, compatibility, and current UI details against the original manufacturer documentation before operational use.
Mobile Features
What login permissions does a secondary user login need to use Alarm.com Places?
GoSafer Security Knowledge Base
This operational reference is organized for GoSafer Security customers and staff. Alarm.com product names are retained where required for technical accuracy.
Overview
By default, Master Control and Full Control permissions have Alarm.com Places capability enabled.
Platform
General / Device
Content type
How-to / Configuration
Source last updated
2023-02-15
Procedure
For Custom permissions, the Notification Settings feature must be selected to enable Alarm.com Places capability.
Full Control allows the user to enable Alarm.com Places and also make changes to the account's notifications.
Read Only allows the user to enable Alarm.com Places on their app, but they are not able to make changes to notifications.
For Read Only or Limited Device Access permissions, the user is able to view Alarm.com Places but is not capable of enabling it on their mobile device.
For more information about how to configure permissions for a secondary user, see Manage login permissions for secondary logins.
Always verify safety, installation, compatibility, and current UI details against the original manufacturer documentation before operational use.
Mobile Features
Create/edit a Geo-Fence
GoSafer Security Knowledge Base
This operational reference is organized for GoSafer Security customers and staff. Alarm.com product names are retained where required for technical accuracy.
Overview
A Geo-Fence is a virtual geographic boundary that by default, is set up around your installation address and lets you create location-based alerts and rules based on the location of one or more …
Platform
App + Web
Content type
How-to / Configuration
Source last updated
2025-06-04
Procedure
Step-by-step guide: Screenshots and videos are placed with the instruction they illustrate.
A Geo-Fence is a virtual geographic boundary that by default, is set up around your installation address and lets you create location-based alerts and rules. Geo-Fence alerts and rules are based on the location of one or more mobile devices, also known as Geo-Devices. Using the GoSafer Security customer portal (powered by Alarm.com), you can edit the Geo-Fence location, name, and radius.
The center of the fence defaults to the system's installation address. To move the fence location, perform either of the following:
Tap and drag the map to move the location marker.
Enter a specific address.
To adjust the radius, either pinch the Geo-Fence, enter the desired radius in the Adjust Radius field (in miles), or tap AddorMinus to adjust the distance.
Note: The minimum Geo-Fence radius is 1 mile (1.6 kilometers), and the maximum is 100 miles (160 kilometers). If the account is in Canada, the minimum radius is 1.5 kilometers and the maximum is 150 kilometers.
In the Name field, enter a name for the Geo-Fence.
Tap Save.
To create a Geo-Fence using the GoSafer Security customer portal (powered by Alarm.com):
Log in to the GoSafer Security customer portal (powered by Alarm.com).
Click Settings.
Click Places.
In Manage Places, click Add a Fence.
The center of the fence defaults to the system's installation address. To move the fence location, perform either of the following:
Click and drag the location marker on the map.
Enter a specific address in the Move fence location to field and click Geofence enter.
In the Fence Name field, enter a name for the Geo-Fence.
To adjust the radius, either click and drag the Geo-Fence anchors on the map overlay, or enter the desired radius in the Geo-Fence Radius field (in miles).
Note: The minimum Geo-Fence radius is 1 mile (1.6 kilometers), and the maximum is 100 miles (160 kilometers). If the account is in Canada, the minimum radius is 1.5 kilometers and the maximum is 150 kilometers.
Click Save.
Edit a Geo-FenceIcn Chevron Up
To edit a Geo-Fence using the Alarm.com app:
Log in to the Alarm.com app.
Tap Menu.
Tap Places.
In Places, tap the desired Geo-Fence to edit.
Tap Edit Place.
To move the fence location, perform either of the following:
Tap and drag the map to move the location marker.
Enter a specific address.
To adjust the radius, either pinch the Geo-Fence, enter the desired radius in the Adjust Radius field (in miles), or tap AddorMinus to adjust the distance.
Note: The minimum Geo-Fence radius is 1 mile (1.6 kilometers), and the maximum is 100 miles (160 kilometers). If the account is in Canada, the minimum radius is 1.5 kilometers and the maximum is 150 kilometers.
In the Name field, enter a name for the Geo-Fence.
Note: The default Geo-Fence cannot be renamed or deleted.
Click Save.
To edit a Geo-Fence using the GoSafer Security customer portal (powered by Alarm.com):
Log in to the GoSafer Security customer portal (powered by Alarm.com).
Click Settings.
Click Places.
In Manage Places, click the desired Geo-Fence to edit.
To move the fence location, perform either of the following:
Click and drag the location marker on the map.
Enter a specific address in the Move fence location to field and click Geofence enter.
In the Fence Name field, enter a name for the Geo-Fence.
To adjust the radius, either click and drag the Geo-Fence anchors on the map overlay, or enter the desired radius in the Geo-FenceRadius field (in miles).
Note: The minimum Geo-Fence radius is 1 mile (1.6 kilometers), and the maximum is 100 miles (160 kilometers). If the account is in Canada, the minimum radius is 1.5 kilometers and the maximum is 150 kilometers.
Click Save.
The following image is an example of the map that appears to edit the Geo-Fence:
Geo Fence Edit
Delete a Geo-FenceIcn Chevron Up
To delete a Geo-Fence using the Alarm.com app:
Note: The default Geo-Fence cannot be renamed or deleted.
Log in to the Alarm.com app.
Tap Menu.
Tap Places.
In Places, tap the desired Geo-Fence.
Tap Edit Place.
Tap Delete Place.
Tap Delete Place when prompted to confirm that you want to delete the Geo-Fence.
To delete a Geo-Fence using the GoSafer Security customer portal (powered by Alarm.com):
Note: The default Geo-Fence can be edited, but not deleted.
Log in to the GoSafer Security customer portal (powered by Alarm.com).
Click Settings.
Click Places.
In Manage Places, click thename of the Geo-Fence to be deleted.
Click Delete.
Click Ok when prompted to confirm that you want to delete the Geo-Fence.
Always verify safety, installation, compatibility, and current UI details against the original manufacturer documentation before operational use.
Mobile Features
Delete a Geo-Fence
GoSafer Security Knowledge Base
This operational reference is organized for GoSafer Security customers and staff. Alarm.com product names are retained where required for technical accuracy.
Overview
Geo-Fences can be managed or deleted from the website.
Platform
App + Web
Content type
How-to / Configuration
Source last updated
2025-06-04
Procedure
Step-by-step guide: Screenshots and videos are placed with the instruction they illustrate.
A Geo-Fence is a virtual geographic boundary that by default, is set up around your installation address. This feature allows you to create location-based alerts and rules based on the location of one or more phones (Geo-Devices). A Geo-Fence can only be deleted using the GoSafer Security customer portal (powered by Alarm.com).
Always verify safety, installation, compatibility, and current UI details against the original manufacturer documentation before operational use.
Mobile Features
Geo-Fences
GoSafer Security Knowledge Base
This operational reference is organized for GoSafer Security customers and staff. Alarm.com product names are retained where required for technical accuracy.
Overview
This GoSafer Security section brings together resources for Geo-Fences, including setup, configuration, everyday use, and troubleshooting. Choose the related page that matches your device, feature, or task, and follow the current manufacturer guidance linked on that page.
Platform
Customer Website
Content type
How-to / Configuration
Source last updated
2022-01-14
Procedure
Browse the related pages in this chapter to open the specific procedure, configuration guide, or troubleshooting article you need.
Always verify safety, installation, compatibility, and current UI details against the original manufacturer documentation before operational use.
Mobile Features
What is a Geo-Fence?
GoSafer Security Knowledge Base
This operational reference is organized for GoSafer Security customers and staff. Alarm.com product names are retained where required for technical accuracy.
Overview
A Geo-Fence is a circular area defined by the user. This area is used as a reference to determine if a Geo-Device (e.g., a mobile device associated with the account) is inside or outside this area. Based on this, it is possible to create automation rules, reminders, and notifications.
For example, a thermostat can be set to specific temperatures based on whether the Geo-Device is inside or outside the radius of the Geo-Fence.
[Geo Fence]
Platform
General / Device
Content type
How-to / Configuration
Source last updated
2023-10-31
Procedure
Step-by-step guide: Screenshots and videos are placed with the instruction they illustrate.
A Geo-Fence is a virtual geographic boundary that by default, is set up around your installation address. This feature allows you to create location-based alerts and rules based on the location of one or more phones (Geo-Devices). A Geo-Fence can only be deleted using the GoSafer Security customer portal (powered by Alarm.com).
Always verify safety, installation, compatibility, and current UI details against the original manufacturer documentation before operational use.
Mobile Features
What is the minimum and maximum size of a Geo-Fence?
GoSafer Security Knowledge Base
This operational reference is organized for GoSafer Security customers and staff. Alarm.com product names are retained where required for technical accuracy.
Overview
The size of a Geo-Fence refers to its radius. The minimum radius is 1.6 kilometers (or one mile), and the maximum radius is 160 kilometers (or 100 miles). However, it is not recommended to use an excessively wide radius.
Note: If using an account in Canada, the minimum distance is 1.5 kilometers for a Geo-Fence.
Platform
General / Device
Content type
FAQ / Explanation
Source last updated
2022-07-11
Procedure
The size of a Geo-Fence refers to its radius. The minimum radius is 1.6 kilometers (or one mile), and the maximum radius is 160 kilometers (or 100 miles). However, it is not recommended to use an excessively wide radius.
Note: If using an account in Canada, the minimum distance is 1.5 kilometers for a Geo-Fence.
Always verify safety, installation, compatibility, and current UI details against the original manufacturer documentation before operational use.
System Management
GoSafer Security procedures and references for System Management.
System Management
System Management
GoSafer Security Knowledge Base
This operational reference is organized for GoSafer Security customers and staff. Alarm.com product names are retained where required for technical accuracy.
Overview
This GoSafer Security section brings together resources for System Management, including setup, configuration, everyday use, and troubleshooting. Choose the related page that matches your device, feature, or task, and follow the current manufacturer guidance linked on that page.
Platform
App + Web
Content type
Troubleshooting
Source last updated
2021-10-22
Procedure
Browse the related pages in this chapter to open the specific procedure, configuration guide, or troubleshooting article you need.
Always verify safety, installation, compatibility, and current UI details against the original manufacturer documentation before operational use.
System Management
Can I be alerted when a user code is changed?
GoSafer Security Knowledge Base
This operational reference is organized for GoSafer Security customers and staff. Alarm.com product names are retained where required for technical accuracy.
Overview
Yes. When a user code is changed remotely, a notification is sent to the email of the primary user on the account. This email notification is triggered automatically and cannot be turned off.
To change who receives the user code change notification email, update the email address of the primary user. For more information about how to configure the email address of the primary user of an account, see Change an email address.
Platform
General / Device
Content type
How-to / Configuration
Source last updated
2025-09-16
Procedure
Yes. When a user code is changed remotely, a notification is sent to the email of the primary user on the account. This email notification is triggered automatically and cannot be turned off.
To change who receives the user code change notification email, update the email address of the primary user. For more information about how to configure the email address of the primary user of an account, see Change an email address.
Always verify safety, installation, compatibility, and current UI details against the original manufacturer documentation before operational use.
System Management
Can I create text (SMS) notifications if my cell carrier is not an option?
GoSafer Security Knowledge Base
This operational reference is organized for GoSafer Security customers and staff. Alarm.com product names are retained where required for technical accuracy.
Overview
Yes. If the desired carrier is not listed when adding a cell phone number for text notifications, you can use the phone’s email address (SMS/SMTP format, i.e., 1234567890@vtext.com) so the recipient can be configured for email notifications that they will receive to their phone as a text message.
Note: This feature may not be available based on the carrier. Contact your cellular provider for additional assistance.
For most mobile carriers' SMS email addresses, refer to NotePage's SMTP Email Delivery address formats. Alternatively, you can send a text message from that phone to an email address and use the from address on the email.
Platform
App + Web
Content type
How-to / Configuration
Source last updated
2025-06-04
Procedure
Step-by-step guide: Screenshots and videos are placed with the instruction they illustrate.
Yes. If the desired carrier is not listed when adding a cell phone number for text notifications, you can use the phone’s email address (SMS/SMTP format, i.e., 1234567890@vtext.com) so the recipient can be configured for email notifications that they will receive to their phone as a text message.
Note: This feature may not be available based on the carrier. Contact your cellular provider for additional assistance.
For most mobile carriers' SMS email addresses, refer to NotePage's SMTP Email Delivery address formats. Alternatively, you can send a text message from that phone to an email address and use the from address on the email.
Note: SMS (text notifications) is only available in the United States and Canada. It is recommended to use push notifications for accounts outside the United States and Canada.
Add the mobile carrier SMS email address as contact information
A mobile carrier SMS email address can be added as contact information using the Alarm.com app or GoSafer Security customer portal (powered by Alarm.com).
Expand all
To add the mobile carrier SMS email address as contact information using the Alarm.com app:Icn Chevron Down
Log in to the Alarm.com app.
Tap Menu.
Tap Users.
Tap to select the user to edit. If the user is not created yet, tap Add to create a new user.
Tap Add Contact.
Tap Email Address to add the mobile carrier SMS email address for the user's phone.
In Email Address,enter the user's mobile carrier SMS email address (i.e., 1234567890@vtext.com).
Using the Email Format dropdown menu, select the format the user would like to receive notifications.
It is recommended to select Plain Textsince the notification is being sent to a phone as a text message.
Verify all user information is correct.
Tap Save to update the user's information. Then add the new contact information to the notifications the user wants to receive.
To add the mobile carrier SMS email address as contact information using the GoSafer Security customer portal (powered by Alarm.com):Icn Chevron Down
Log in to the GoSafer Security customer portal (powered by Alarm.com).
Click Users.
Click Edit for the user to edit. If the user is not created yet, then click Add to create a new user.
In Contact Information, click Add.
Click Email Address to add the mobile carrier SMS email address for the user's phone.
In Email Address enter the user's mobile carrier SMS email address (i.e., 1234567890@vtext.com).
Using the Email Format dropdown menu, select the format the user would like to receive notifications.
It is recommended to select Plain Textsince the notification is being sent to a phone as a text message.
Verify all user information is correct.
Click Save to update the user's information. Then add the new contact information to the notifications the user wants to receive.
Add the mobile carrier SMS email address as a notification recipient
A mobile carrier SMS email address can be added as a notification recipient using the Alarm.com app or GoSafer Security customer portal (powered by Alarm.com).
To add the mobile carrier SMS email address as a notification recipient using the Alarm.com app:Icn Chevron Down
Log in to the Alarm.com app.
Tap Menu.
Tap Notifications.
Tap Settings.
Tap the notification the user would like to receive text notifications for (e.g., Arming Event).
In Recipients, tap Add.
In the Address Book, tap to select the mobile carrier SMS email address for the user. The following image is an example where only the mobile carrier SMS email address is selected as a recipient:
Example Address book
Tap Close to exit out of the Address Book.
Tap Save.
To add the mobile carrier SMS email address as a notification recipient using the Alarm.com app:Icn Chevron Down
Log in to the GoSafer Security customer portal (powered by Alarm.com).
Click Notifications.
Click Edit to configure the notification the user would like to receive text notifications for (e.g., Arming Event).
In Recipients, click Add.
In the Address Book, click to select the mobile carrier SMS email address for the user. The following image is an example where only the mobile carrier SMS email address is selected as a recipient:
Always verify safety, installation, compatibility, and current UI details against the original manufacturer documentation before operational use.
System Management
Configure Email Format
GoSafer Security Knowledge Base
This operational reference is organized for GoSafer Security customers and staff. Alarm.com product names are retained where required for technical accuracy.
Overview
The format of emails sent to you can be configured to send as plain text or HTML. Plain text can be configured if you experience difficulty viewing the content within an email using HTML format.
Platform
App + Web
Content type
How-to / Configuration
Source last updated
2025-06-04
Procedure
To configure Email Format using the Alarm.com app
Log in to the Alarm.com app.
Tap [Menu].
Tap Users.
Tap to select the user to edit.
In Contact Information, click Email.
Verify the email address for the selected user is correct.
Using the Email Format dropdown menu, select either Plain Text or HTML.
Tap Save.
To configure Email Format using the GoSafer Security customer portal (powered by Alarm.com)
Log in to the GoSafer Security customer portal (powered by Alarm.com).
Click Users.
Click to select the user to edit.
In Contact Information, click Email.
Verify the email address for the selected user is correct.
Using the Email Format dropdown menu, select either Plain Text or HTML.
Always verify safety, installation, compatibility, and current UI details against the original manufacturer documentation before operational use.
System Management
Configure notification recipients
GoSafer Security Knowledge Base
This operational reference is organized for GoSafer Security customers and staff. Alarm.com product names are retained where required for technical accuracy.
Overview
Notice: For Canadian Dealers, text based notifications to Bell subscribers will be degraded on December 31, 2025, due to changes in how Bell handles messaging. For phones with Bell, it is recommended to set up Push Notifications. For more information about configuring push devices and notifications, see Configure mobile push notification devices. For more information about the Bell SMS/MMS notification sunset, see Bell text messaging notification sunset.
Recipients must be added to each notification the user wants to receive. There is no limit to the number of recipients that can be added to receive a notification.
Platform
App + Web
Content type
How-to / Configuration
Source last updated
2025-11-24
Procedure
To configure notification recipients using the Alarm.com app
Log in to the Alarm.com app.
Tap [Menu].
Tap Notifications.
Tap [Settings].
Tap [Add] to create a new notification, or tap an existing notification to update.
To choose notification recipients, tap Add.
Tap to select the entries in the Address Book to be notified, or tap Add Contact to add a new Address Book entry.
Note: If a notification recipient does not have the desired method of communication listed (e.g., phone, email, SMS), it can be added to their user profile.
Once all desired recipients are selected, tap Close.
Verify all recipients are correct.
Tap Save.
To configure notification recipients using the GoSafer Security customer portal (powered by Alarm.com)
Log in to the GoSafer Security customer portal (powered by Alarm.com).
Click Notifications.
Click New Notification to create a new notification, or click [Edit] for an existing notification to update.
To choose notification recipients, click Add.
Click to select the entries in the Address Book to be notified, or click New to add a new Address Book entry.
Note: If a notification recipient does not have the desired method of communication listed (e.g., phone, email, SMS), it can be added to their user profile. For more information, see Add a mobile phone number to receive SMS notifications.
Once all desired recipients are selected, click Close.
Verify all recipients are correct.
Click Save.
To remove recipients from a notification using the Alarm.com app
Log in to the Alarm.com app.
Tap [Menu].
Tap Notifications.
Tap [Settings].
Tap to select the notification to edit.
In Recipients, tap [Delete] to remove the desired notification recipient.
Tap Save.
To remove recipients from a notification using the GoSafer Security customer portal (powered by Alarm.com)
Log in to the GoSafer Security customer portal (powered by Alarm.com).
Click Notifications.
Click [Edit] on the notification to edit.
In Recipients, click [Delete] to remove the desired notification recipient.
Always verify safety, installation, compatibility, and current UI details against the original manufacturer documentation before operational use.
System Management
Create a No-Show Alert notification
GoSafer Security Knowledge Base
This operational reference is organized for GoSafer Security customers and staff. Alarm.com product names are retained where required for technical accuracy.
Overview
A no-show alert notification can notify users if a given user code was not used to disarm the system within a specified time frame.
Platform
App + Web
Content type
How-to / Configuration
Source last updated
2025-06-04
Procedure
To create a No-Show Alert notification using the Alarm.com app
Log in to the Alarm.com app.
Tap [Menu].
Tap Notifications.
Tap [Settings].
Create a new No-Show Alert notification or edit an existing one.
If the notification has not been created, tap [Add], tap to expand Create Your Own, then tap No-Show Alert.
To edit an existing notification, tap to select the No-Show Alert notification.
Name the new notification rule.
Using the If the system is NOT disarmed by dropdown menu, select a specific user.
In During this time frame, configure the days and times the user should disarm the system.
Note: If the system is already disarmed and the user doesn't need to disarm the system a No-Show Alert will still be sent.
To choose notification recipients, tap Add.
Tap the entries in the Address book that are to be notified, or tap Add Contact to add a new Address Book entry.
Tap Close.
Verify the notification is configured with the correct settings.
Tap Save.
To create a No-Show Alert notification using the GoSafer Security customer portal (powered by Alarm.com)
Log in to the GoSafer Security customer portal (powered by Alarm.com).
Click Notifications.
Create a new No-Show Alert notification or edit an existing one.
If the notification has not been created, click New Notification, then click to select No-Show Alert.
To edit an existing notification, click [Edit] for the No-Show Alert notification.
Name the new notification rule.
Using the If the system is NOT disarmed by dropdown menu, select a specific user.
In During this time frame, configure the days and times the user should disarm the system.
Note: If the system is already disarmed and the user doesn't need to disarm the system a No-Show Alert will still be sent.
To choose notification recipients, click Add.
Click the entries in the Address book that are to be notified, or click New to add a new Address Book entry.
Click Close.
Verify the notification is configured with the correct settings.
Always verify safety, installation, compatibility, and current UI details against the original manufacturer documentation before operational use.
System Management
Create a sensor activity notification
GoSafer Security Knowledge Base
This operational reference is organized for GoSafer Security customers and staff. Alarm.com product names are retained where required for technical accuracy.
Overview
A sensor activity notification can notify users if a contact sensor is opened or a motion sensor is activated.
Platform
App + Web
Content type
How-to / Configuration
Source last updated
2025-06-04
Procedure
Step-by-step guide: Screenshots and videos are placed with the instruction they illustrate.
Sensor activity monitoring (SAM) allows users to view the current status of the system's sensors.
Once SAM is enabled for sensors, sensor activity notifications can be configured to receive direct notifications about a sensor's activity by email, text message, or push notification. For more information about setting up sensor activity notifications, see Create a sensor activity notification.
To turn sensor activity monitoring on/off:
This setting can only be updated using the GoSafer Security customer portal (powered by Alarm.com). For further assistance, contact your service provider.
Log in to the GoSafer Security customer portal (powered by Alarm.com).
Click Settings.
Click Manage Devices.
Click More optionsnext to the device to update.
Click Device Settings.
In the Monitoring column, click to select the sensors that should have sensor activity monitoring. Alternatively, click to uncheck to remove activity monitoring.
Note: In the following example, sensors 1 and 3 have SAM enabled, sensor 2 has SAM disabled, and SAM is not available for the fixed panic keypad.
Always verify safety, installation, compatibility, and current UI details against the original manufacturer documentation before operational use.
System Management
Create a sensor left open notification
GoSafer Security Knowledge Base
This operational reference is organized for GoSafer Security customers and staff. Alarm.com product names are retained where required for technical accuracy.
Overview
A Sensor Left Open notification can notify users if a door, window or other sensor is left open for a specified duration.
Platform
App + Web
Content type
How-to / Configuration
Source last updated
2025-06-04
Procedure
To create a sensor left open notification using the Alarm.com app
Log in to the Alarm.com app.
Tap [Menu].
Tap Notifications.
Tap [Settings].
Tap [Add].
In Create Your Own, tap Sensor Left Open.
Name the new notification rule.
In When any of these sensors, tap to select any of the sensors to be notified about.
In Is Left Open, tap to select either of the following
For this duration and then use the dropdown menu to select the required duration.
When selected people cross a Geo-Fence to select a user and Geo-Fence.
To choose notification recipients, tap Add.
Tap the entries in the Address book that are to be notified, or tap Add Contact to add a new Address Book entry.
Tap Close.
Verify the notification is configured with the correct settings.
Tap Save.
To create a Sensor Left Open notification using the GoSafer Security customer portal (powered by Alarm.com)
Log in to the GoSafer Security customer portal (powered by Alarm.com).
Click Notifications.
Click New Notification.
In Standard, click Sensor Left Open.
Name the new notification rule.
In When any of these sensors, click to select any of the sensors to be notified about.
In Is Left Open, click to select either of the following
For this duration and then use the dropdown menu to select the required duration.
When selected people cross a Geo-Fence to select a user and Geo-Fence.
In During this time frame, click to select either of the following
At All Times to receive a notification at any time.
Only During the Following Times to select specific times for the sensors to be monitored.
To choose notification recipients, click Add.
Click the entries in the Address book that are to be notified, or click New to add a new Address Book entry.
Click Close.
Verify the notification is configured with the correct settings.
Always verify safety, installation, compatibility, and current UI details against the original manufacturer documentation before operational use.
System Management
Create an alarm notification
GoSafer Security Knowledge Base
This operational reference is organized for GoSafer Security customers and staff. Alarm.com product names are retained where required for technical accuracy.
Overview
An alarm notification can notify users if there has been an alarm event at the property.
Platform
App + Web
Content type
How-to / Configuration
Source last updated
2025-06-04
Procedure
To create an alarm notification using the Alarm.com app
Log in to the Alarm.com app.
Tap [Menu].
Tap Notifications.
Tap [Settings].
Tap [Add].
Tap Alarm.
Name the new notification rule.
Under When Alarm of type, tap to select the alarm types to be notified about.
In the Is reported by dropdown menu, tap to select which sensors are to be monitored.
To choose notification recipients, tap Add.
Tap the entries in the Address book that are to be notified, or tap Add Contact to add a new Address Book entry.
Note: Do not choose to send a Duress Panic SMS or push notification to a potential Duress Code user.
Tap Close.
Verify the notification is configured with the correct settings.
Tap Save.
To create an alarm notification using the GoSafer Security customer portal (powered by Alarm.com)
Log in to the GoSafer Security customer portal (powered by Alarm.com).
Click Notifications.
Click New Notification.
Click Alarm.
Name the new notification rule.
In When Alarm of type, click to select the alarm types to be notified about.
Using the Is reported by dropdown menu, select either
Any Sensor to be notified about any sensor alarms.
Specific Sensor to only be notified about specific sensors you select.
To choose notification recipients, click Add.
Click the entries in the Address book that are to be notified, or click New to add a new Address Book entry.
Note: Do not choose to send a Duress Panic SMS or push notification to a potential Duress Code user.
Click Close.
Verify the notification is configured with the correct settings.
Always verify safety, installation, compatibility, and current UI details against the original manufacturer documentation before operational use.
System Management
Create an arming event notification
GoSafer Security Knowledge Base
This operational reference is organized for GoSafer Security customers and staff. Alarm.com product names are retained where required for technical accuracy.
Overview
An arming event notification can notify users when and who is arming and disarming the system.
Platform
App + Web
Content type
How-to / Configuration
Source last updated
2025-06-04
Procedure
To create an arming event notification using the Alarm.com app
Log in to the Alarm.com app.
Tap [Menu].
Tap Notifications.
Tap [Settings].
Tap [Add].
Tap to expand Create Your Own.
Tap Arming Event.
Name the new notification rule.
Using the When dropdown menu, select either of the following
Any User or Keyfob to be notified about any user arming/disarming.
Select Users and Keyfobs for specific users.
In Perform and of these system actions, tap to select any of the following
Disarm to notify you when the panel is disarmed.
Arm Stay to notify you when the panel is set to Arm Stay.
Arm Away to notify you when the panel is set to Arm Away.
In During this time frame, tap to select either of the following
At All Times to receive a notification anytime an arming event occurs.
Only during the Following Times to configure specific days and times to receive notifications.
In Notification Filtering, tap to select the desired notification filtering.
To choose notification recipients, tap Add.
Tap the entries in the Address book that are to be notified, or tap Add Contact to add a new Address Book entry.
Tap Close.
Verify the notification is configured with the correct settings.
Tap Save.
To create an arming event notification using the GoSafer Security customer portal (powered by Alarm.com)
Log in to the GoSafer Security customer portal (powered by Alarm.com).
Click Notifications.
Click New Notification.
Click Business.
Click Employee arming activity.
Name the new notification rule.
Using the When dropdown menu, select either of the following
Any User or Keyfob to be notified about any user arming/disarming.
Select Users and Keyfobs for specific users.
In Perform and of these system actions, click to select any of the following
Disarm to notify you when the panel is disarmed.
Arm Stay to notify you when the panel is set to Arm Stay.
Arm Away to notify you when the panel is set to Arm Away.
In During this time frame, click to select either of the following
At All Times to receive a notification anytime an arming event occurs.
Only during the Following Times to configure specific days and times to receive notifications.
In Notification Filtering, click to select the desired notification filtering.
To choose notification recipients, click Add.
Click the entries in the Address book that are to be notified, or click New to add a new Address Book entry.
Click Close.
Verify the notification is configured with the correct settings.
Always verify safety, installation, compatibility, and current UI details against the original manufacturer documentation before operational use.
System Management
Create an arming reminder notification
GoSafer Security Knowledge Base
This operational reference is organized for GoSafer Security customers and staff. Alarm.com product names are retained where required for technical accuracy.
Overview
An arming reminder notification can notify users if the system has not been armed by a certain time.
Platform
App + Web
Content type
How-to / Configuration
Source last updated
2025-06-04
Procedure
Step-by-step guide: Screenshots and videos are placed with the instruction they illustrate.
An arming reminder notification can notify users if the system has not been armed by a certain time.
Note: It is possible that arming reminders may have a 3-minute delay based on how arming updates are received from the panel.
Create an arming reminder notification
Expand all
To create an arming reminder notification using the Alarm.com app:Icn Chevron Down
Log in to the Alarm.com app.
Tap Icn Menu.
Tap Notifications.
Tap Settings.
Tap Add.
Tap Arming Reminder.
Name the new notification rule.
In Send an Arming Reminder if the system is NOT armed,select one of the following:
At a specific time to enter a desired time.
When selected people cross a Geo-Fence to select the desired Geo-Devices.
Important: If multiple Geo-Devices are selected, it will require the last of these devices to enter or exit the Geo-Fence before the notification is sent.
In During this time frame, select one of the following:
At All Times to notify you every day if the system has not been armed by a certain time.
Only During the Following Times to set up notifications to only take place during certain days.
In Recipients, tap Add.
Tap the entries in the Address book that are to be notified, or tap Add Contact to add a new Address Book entry.
Tap Close.
Verify the notification is configured with the correct settings.
Tap Save.
To create an arming reminder notification using the GoSafer Security customer portal (powered by Alarm.com):Icn Chevron Down
Log in to the GoSafer Security customer portal (powered by Alarm.com).
Click Notifications.
Click New Notification.
Click Arming Reminder.
Name the new notification rule.
In Send an Arming Reminder if the system is NOT armed,select one of the following:
At a specific time to enter the desired time.
When selected people cross a Geo-Fence to select the desired Geo-Devices.
Important: If multiple Geo-Devices are selected, it will require the last of these devices to enter or exit the Geo-Fence before the notification is sent.
In During this time frame, select one of the following:
At All Times to notify you every day if the system has not been armed by a certain time.
Only During the Following Times to set up notifications to only take place during certain days.
To choose notification recipients, click Add.
Click the entries in the Address book that are to be notified, or click New to add a new Address Book entry.
Click Close.
Verify the notification is configured with the correct settings.
Always verify safety, installation, compatibility, and current UI details against the original manufacturer documentation before operational use.
System Management
How can I opt out of in-app notifications?
GoSafer Security Knowledge Base
This operational reference is organized for GoSafer Security customers and staff. Alarm.com product names are retained where required for technical accuracy.
Overview
You can opt-out from promotional in-app notifications (e.g., Upsell Offers, etc.) using the Alarm.com app or GoSafer Security customer portal (powered by Alarm.com).
Platform
App + Web
Content type
FAQ / Explanation
Source last updated
2025-06-04
Procedure
To opt-out of in-app notifications using the Alarm.com app
Log in to the Alarm.com app.
Tap [More Options].
Tap Login Information.
Tap Communication Preferences.
Use the toggle switch to disable the desired notifications.
Tap Save.
To opt-out of in-app notifications using the GoSafer Security customer portal (powered by Alarm.com)
Log in to the GoSafer Security customer portal (powered by Alarm.com).
Click Settings.
Click Login Information.
Click Communication Preferences.
Use the toggle switch to disable the desired notifications.
Always verify safety, installation, compatibility, and current UI details against the original manufacturer documentation before operational use.
System Management
How can I update the carrier for a mobile contact?
GoSafer Security Knowledge Base
This operational reference is organized for GoSafer Security customers and staff. Alarm.com product names are retained where required for technical accuracy.
Overview
You can update the carrier for a mobile contact using the Alarm.com app or GoSafer Security customer portal (powered by Alarm.com).
Platform
App + Web
Content type
How-to / Configuration
Source last updated
2026-02-26
Procedure
To update the carrier for a mobile contact using the Alarm.com app
Log in to the Alarm.com app.
Tap [More Options].
Tap Users or User Access.
Tap [Options] next to the desired user, then tap [Edit].
In Contact Information, tap Mobile.
Using the Carrier dropdown, select the desired carrier.
Tap Save.
To update the carrier for a mobile contact using the GoSafer Security customer portal (powered by Alarm.com)
Log in to the GoSafer Security customer portal (powered by Alarm.com).
Click Users or User Access.
Click [Options] next to the desired user, then click [Edit].
In Contact Information, click Mobile.
Using the Carrier dropdown, select the desired carrier.
Always verify safety, installation, compatibility, and current UI details against the original manufacturer documentation before operational use.
System Management
How can the language of notifications be changed?
GoSafer Security Knowledge Base
This operational reference is organized for GoSafer Security customers and staff. Alarm.com product names are retained where required for technical accuracy.
Overview
If there is a preferred language that notifications would like to be received in, this can be changed on either the Alarm.com app or GoSafer Security customer portal (powered by Alarm.com). To do so for all notifications, you will need to utilize both.
Platform
App + Web
Content type
How-to / Configuration
Source last updated
2025-06-04
Procedure
To change the language of SMS or email notifications using the Alarm.com app
Log in to the Alarm.com app.
Tap [Menu].
Tap Users.
Tap the desired user name to edit.
Tap Language Preference.
Tap to select the desired language for notifications.
Tap Save.
To change the language of SMS or email notifications using the GoSafer Security customer portal (powered by Alarm.com)
Log in to the GoSafer Security customer portal (powered by Alarm.com).
Click Users.
Click the desired user name to edit.
Click Language Preference.
Click to select the desired language for notifications.
Always verify safety, installation, compatibility, and current UI details against the original manufacturer documentation before operational use.
System Management
How many notifications can you add to an account?
GoSafer Security Knowledge Base
This operational reference is organized for GoSafer Security customers and staff. Alarm.com product names are retained where required for technical accuracy.
Overview
There is no limit to the number of notifications that can be added to an account. The types of notifications that can be added depend on which features are available on your account.
Platform
General / Device
Content type
How-to / Configuration
Source last updated
2026-03-06
Procedure
There is no limit to the number of notifications that can be added to an account. The types of notifications that can be added depend on which features are available on your account.
Always verify safety, installation, compatibility, and current UI details against the original manufacturer documentation before operational use.
System Management
Invalid Contact Information
GoSafer Security Knowledge Base
This operational reference is organized for GoSafer Security customers and staff. Alarm.com product names are retained where required for technical accuracy.
Overview
Invalid Contact Information indicates that an email or text recipient is not receiving automated notifications.
Platform
App + Web
Content type
How-to / Configuration
Source last updated
2026-04-10
Procedure
Step-by-step guide: Screenshots and videos are placed with the instruction they illustrate.
Invalid Contact Information indicates that an email or text recipient is not receiving automated notifications. For more information about troubleshooting email or text notifications, see Additional troubleshooting.
Note: It is recommended to use push notifications as they provide a more reliable notification experience. For more information about setting up push notifications, see How can a device start receiving Push Notifications?.
Invalid Contact Information examples
Email
The following is an example of an Invalid Contact Information email a user will receive when their email information is invalid.
Email
Text (SMS)
The following is an example of an Invalid Contact Information email a user will receive when their SMS information is invalid.
General SMS
Resolve an email or text recipient with Invalid Contact Information
An email or text recipient with Invalid Contact Information can be resolved using the Alarm.com app or GoSafer Security customer portal (powered by Alarm.com).
To resolve an email or text recipient with Invalid Contact Information using the Alarm.com app:Icn Chevron Up
Navigate to the Alarm.com app.
Tap Users.
Tap the user with the email address or phone number that was listed in the Invalid Contact Information notification.
Tap the email address or phone number.
Verify the email address or phone number is entered correctly and the email domain or cell provider is accurate.
Verify the toggle switch is set to Enabled.
Tap Save.
To resolve an email or text recipient with Invalid Contact Information using the GoSafer Security customer portal (powered by Alarm.com):Icn Chevron Up
Navigate to the GoSafer Security customer portal (powered by Alarm.com).
Click Users.
Click the user with the email address or phone number that was listed in the Invalid Contact Information notification.
Click the email address or phone number.
Verify the email address or phone number is entered correctly and the email domain or cell provider is accurate.
Verify the toggle switch is set to Enabled.
Click Save.
Additional troubleshooting
Text notifications
Restart the device and confirm it has a reliable cellular connection.
If the device has only opted into video notifications with thumbnails, set the notifications to text-only. Notifications with thumbnails are sent as MMS notifications which may have more limitations that would need further troubleshooting from the cellular provider.
Contact the cellular provider to ensure shortcode and email-to-text messages are enabled on the cellular service package.
Note: If there is difficulty receiving SMS/MMS notifications and the device is using Sprint or T-Mobile as a cellular provider, it is recommended to opt into push notifications as an alternative due to email-to-text restrictions with these providers that interfere with the delivery of notifications. For more information about setting up push notifications, see How can a device start receiving Push Notifications?.
Email notifications
Verify there are no rules or filters that could block incoming emails.
Verify the inbox has not reached its capacity.
Verify there are no firewalls or security add-ins to the email inbox that may be blocking notifications. If a private email domain is being used (e.g., work email), contact an IT professional.
If the preceding steps do not resolve the behavior, contact the email domain's support team.
Always verify safety, installation, compatibility, and current UI details against the original manufacturer documentation before operational use.
System Management
Notifications
GoSafer Security Knowledge Base
This operational reference is organized for GoSafer Security customers and staff. Alarm.com product names are retained where required for technical accuracy.
Overview
This GoSafer Security section brings together resources for Notifications, including setup, configuration, everyday use, and troubleshooting. Choose the related page that matches your device, feature, or task, and follow the current manufacturer guidance linked on that page.
Platform
General / Device
Content type
Troubleshooting
Source last updated
2025-11-24
Procedure
Browse the related pages in this chapter to open the specific procedure, configuration guide, or troubleshooting article you need.
Always verify safety, installation, compatibility, and current UI details against the original manufacturer documentation before operational use.
System Management
User Access Summary Email
GoSafer Security Knowledge Base
This operational reference is organized for GoSafer Security customers and staff. Alarm.com product names are retained where required for technical accuracy.
Overview
You can receive User Access Summary emails that summarize login and user code access at-a-glance, every 3 months. Regular review and management of system access is a security best practice that protects customers from intrusion and gives them increased peace of mind.
Note: Accounts with a residential property type and commercial service package that are not part of an Enterprise group will have this report by default. In these cases, the report can be paused but it cannot be edited or deleted.
Platform
General / Device
Content type
Reference
Source last updated
2023-05-17
Procedure
Step-by-step guide: Screenshots and videos are placed with the instruction they illustrate.
You can receive User Access Summary emails that summarize login and user code access at-a-glance, every 3 months. Regular review and management of system access is a security best practice that protects customers from intrusion and gives them increased peace of mind.
Note:Accounts with a residential property type and commercial service package that are not part of an Enterprise group will have this report by default. In these cases, the report can be paused but it cannot be edited or deleted.
Features
Email reminders to regularly review and limit users with login, smart lock, and panel access
Includes the total number of users with login and user code access to their system with links to their account settings for more details
Emails are sent to the Primary Login's email address
By default, email frequency will occur every 90 days
Customers can opt-out by clicking Manage Reports in the footer of the email
Use cases
Revoke access when a roommate moves out, as well as when access is no longer needed for a dog walker, service technician, childcare worker, and more.
Reminder to limit access for your weekly cleaning person from Monday through Friday to Tuesdays and Thursdays only.
ExampleUser Access Summaryemails
The following are examples of User Access Summary emails you may receive.
Note: Accounts that are a part of an Enterprise group are excluded from receiving the Logins and User Codes section of the email.
Always verify safety, installation, compatibility, and current UI details against the original manufacturer documentation before operational use.
System Management
Voice Notifications User Guide
GoSafer Security Knowledge Base
This operational reference is organized for GoSafer Security customers and staff. Alarm.com product names are retained where required for technical accuracy.
Overview
Voice Notifications is a feature that allows you to receive a phone call for notifications.
There are two types of Voice Notifications:
If there is an alarm, there is a prompt to disarm. If there is a non-alarm event, a notification update is sent.
Platform
App + Web
Content type
How-to / Configuration
Source last updated
2026-01-29
Procedure
To add Voice Notifications using the Alarm.com app
Log in to the Alarm.com app.
Tap [Menu].
Tap Users.
Tap [More Options], then [Edit] for the user to receive voice notifications.
In Contact Information, tap Add Contact.
Tap Phone Number.
In the Phone Number field, enter the phone number that will receive the notifications.
Using the Type dropdown menu, select the type of phone that will receive the notifications.
Tap Save.
Tap [Back].
Tap [Menu].
Tap Notifications.
Tap [Settings].
Tap [Details] on the notification to add voice notifications.
Tap Add.
Tap on users with a Voice number, then tap Close.
For Alarm notifications, all recipients added using the Alarm.com app will have the notification order position set to 1ST by default. Notification order position for recipients (i.e., 1ST, 2ND, and 3RD) can be adjusted using the GoSafer Security customer portal (powered by Alarm.com).
Note: Up to three voice notification numbers can be added to an Alarm notification. Once the Voice Notification successfully connects with a recipient, it will not perform additional notification attempts.
Verify the recipients are set up correctly, then tap Save.
To add Voice Notifications using the GoSafer Security customer portal (powered by Alarm.com)
Log in to the GoSafer Security customer portal (powered by Alarm.com).
Click Users.
Click [More Options], then [Edit] for the user to receive voice notifications.
In Contact Information, click Add Contact.
Click Phone Number.
In the Phone Number field, enter the phone number that will receive the notifications.
Using the Type dropdown menu, select the type of phone that will receive the notifications.
Click Save.
Click Notifications.
Click [Edit] on the notification to add voice notifications.
Click Add.
Click on users with a Voice number, then click Close.
For Alarm notifications, select a notification order position for recipients (i.e., 1ST, 2ND, and 3RD). Each selection represents a notification attempt and recipients can be selected for multiple attempts. Any recipient that has 1ST selected will receive the first notification attempt and if the alarm is not canceled after an attempt, the next attempt will be made about 90 seconds later.
Note: Up to three voice notification numbers can be added to an Alarm notification and a notification order position must be selected for the recipients of Alarm notifications. Once the Voice Notification successfully connects with a recipient, it will not perform additional notification attempts.
Verify the recipients are set up correctly, then click Save.
Always verify safety, installation, compatibility, and current UI details against the original manufacturer documentation before operational use.
System Management
What are actionable notifications?
GoSafer Security Knowledge Base
This operational reference is organized for GoSafer Security customers and staff. Alarm.com product names are retained where required for technical accuracy.
Overview
Actionable notifications allow you to perform certain actions directly from the notification (e.g., arming the system, locking a door, etc.).
For more information about the types of notifications, see What are the differences between push, text, and email notifications?.
Platform
General / Device
Content type
FAQ / Explanation
Source last updated
2024-10-14
Procedure
Step-by-step guide: Screenshots and videos are placed with the instruction they illustrate.
Notice: Text-based notifications to AT&T subscribers were degraded on August 15, 2025, due to changes in how AT&T handles messaging. For phones with AT&T, it is recommended to set up Push Notifications. For more information about configuring push devices and notifications, see Configure mobile push notification devices.
For Canadian customers, text based notifications to Bell subscribers will be degraded on December 31, 2025, due to changes in how Bell handles messaging. For phones with Bell, it is recommended to set up Push Notifications. For more information about configuring push devices and notifications, see Configure mobile push notification devices.
Notification method performance can vary based on factors such as the device in use (e.g., iOS, Android, etc.) or your network provider.
Note: It is recommended to use push notifications over other notification types (i.e., text and email) as push notifications offer several benefits. For more information about configuring push notifications, see Configure mobile push notification devices.
Push notifications are sent from the Alarm.com server directly to the Alarm.com app. As long as your device has a strong and consistent internet connection, push notifications should arrive within a few seconds after being sent.
Push Notification
Note: A thumbnail image will only display in a push notification if the user is logged into the Alarm.com app.
Benefits
Benefit
Description
Push notifications are actionable
Since push notifications are received using the Internet, they can be actionable. This means you can tap on the notification to be instantly brought within the Alarm.com app, or send commands directly from certain notifications (e.g., closing a garage door that was left open, answering the doorbell, etc.).
Note: On iOS, actions may require a long press to be visible.
The following is an image of a garage door push notification:
Push Notification iOS
The following is an image of a video doorbell push notification:
Push Notification Doorbell iOS
It is clear where the notification came from
Push notifications come directly from the app, so the app logo and name are prominently displayed. This provides an extra layer of trust, knowing the information is coming directly from the app, and is not a spam notification.
Push notifications allow for Critical Alerts (iOS)
Critical Alerts are special notifications that are sent even if the customer's phone is on Do Not Disturb. For more information, see Configure Critical Alert notifications.
For Android, customers are able to choose to override Do Not Distrurb within the App's Notification settings.
Video notifications are better with Push
Push notifications can be set up to send either plain text or thumbnail images for certain notifications (e.g., video clips).
Links within push notifications will bring you to a specific place within the app. If the notification indicates that motion has been detected, the link will redirect to the camera's live view. If the notification indicates that a clip has been uploaded, the link will redirect you directly to the saved clip.
Push notifications have customizable sounds (Android)
While text notifications may be susceptible to low signal or carrier messaging delays, push notifications only rely on a data connection. Whether the connection is on cellular data or a local wifi network, push notifications arrive quickly.
Push notifications can be sent to all of your devices
Push notifications allow you to stay connected across all your devices, including tablets and smart watches.
Pause notifications
Allows you to pause push notifications directly from the notification.
Continuous enhancements
Allows continuous enhancements as iOS and Android functionality evolves.
Note: It is recommended to use push notifications.
Text messages can be sent two ways depending on the type of event that triggers it. Text messages are sent from the Alarm.com server to a phone number using a non-data portion of the cellular network (i.e., SMS) and a low-level data network (i.e., MMS). These messages should arrive within seconds of being sent out.
Note: Limitations with your cellular carrier's infrastructure can cause inconsistencies, delays, or possibly prevent delivery entirely.
Text messages are not actionable and therefore are not compatible with Unexpected Activity notifications. For more information about Unexpected Activity Alerts, see Configure Unexpected Activity Alert notifications.
Cellular provider service plan conflicts can occur with T-Mobile customers, Canadian cellular plans, and less common cellular carriers. It is also possible to block the From address in your phone, which prevents delivery of these notifications. This process changes based on the device in use and it is recommended to contact the cellular provider for assistance.
Note: The alert sound for text notifications may be customizable if this is a feature the phone's operating software supports.
SMS (Short Message Service)
SMS is limited by the length of the message and can only contain plain text. Since the file size is very small for these messages, these can be received with only a connection to the cellular carrier voice network (no data access required). This type of notification is recommended if you have inconsistent access to Cellular data connections.
SMS
MMS (Multi-Media Service)
Note: T-Mobile and Verizon users cannot receive multimedia attachments (i.e., video clips and thumbnail images) and instead receive SMS messages with links to the same content. These links are only available to Verizon and T-Mobile users for 72 hours. If the link expires, use the Alarm.com app to view the video clip. It is recommended to use push notifications. For more information, see Push Notification Benefits.
MMS can contain media in the form of video and pictures (e.g., thumbnails, video clips, etc.) and therefore requires a connection to a data section of their cellular carrier. MMS notifications are sent to your Email to SMS address which is based on your cellular provider.
Important: A data connection is required to receive all contents of an MMS notification and send times can be inconsistent due to file size, processing time, the Cellular Provider, or potential SPF conflicts.
MMS
Note: Some carriers may have restrictions that prevent Alarm.com from delivering SMS notifications or limit the ability to attach video clips to messages. The use of video features may also incur data charges by your cellular provider. For more information about SMS limitation see Customer is not receiving notifications.
Email notifications
Note: It is recommended to use push notifications.
Email notifications are delivered from the Alarm.com server directly to your email inbox using an internet connection. Since they are sent to an email inbox, they can be viewed from any device with an internet connection and access to the inbox.
Email apps/clients may provide the ability to receive a push notification when a new email arrives. However, these push notifications will redirect you to the email in your inbox instead of Alarm.com.
Depending on your email provider, you may have different experiences with potential spam and junk filters. Email notifications can accidentally go to a spam or junk folder based on personal filters and email-provided filters that have been created. For more information, see What can I do if someone is not receiving notifications?.
The alert sound for email notifications may be customizable if the device being used to view the notifications supports this ability. Alert sounds for email notifications may vary based on the device in use.
Example: The Gmail application will have different alert sound options for computers and mobile devices.
Always verify safety, installation, compatibility, and current UI details against the original manufacturer documentation before operational use.
System Management
What are the differences between push, text, and email notifications?
GoSafer Security Knowledge Base
This operational reference is organized for GoSafer Security customers and staff. Alarm.com product names are retained where required for technical accuracy.
Overview
Notice: Text-based notifications to AT&T subscribers were degraded on August 15, 2025, due to changes in how AT&T handles messaging. For phones with AT&T, it is recommended to set up Push Notifications. For more information about configuring push devices and notifications, see Configure mobile push notification devices.
For Canadian customers, text based notifications to Bell subscribers will be degraded on December 31, 2025, due to changes in how Bell handles messaging. For phones with Bell, it is recommended to set up Push Notifications. For more information about configuring push devices and notifications, see Configure mobile push notification devices.
Notification method performance can vary based on factors such as the device in use (e.g., iOS, Android, etc.) or your network provider.
For more information about configuring notifications, see Configure notification recipients.
Platform
Mobile App
Content type
Troubleshooting
Source last updated
2025-11-24
Procedure
Step-by-step guide: Screenshots and videos are placed with the instruction they illustrate.
Notice: Text-based notifications to AT&T subscribers were degraded on August 15, 2025, due to changes in how AT&T handles messaging. For phones with AT&T, it is recommended to set up Push Notifications. For more information about configuring push devices and notifications, see Configure mobile push notification devices.
For Canadian customers, text based notifications to Bell subscribers will be degraded on December 31, 2025, due to changes in how Bell handles messaging. For phones with Bell, it is recommended to set up Push Notifications. For more information about configuring push devices and notifications, see Configure mobile push notification devices.
Notification method performance can vary based on factors such as the device in use (e.g., iOS, Android, etc.) or your network provider.
Note: It is recommended to use push notifications over other notification types (i.e., text and email) as push notifications offer several benefits. For more information about configuring push notifications, see Configure mobile push notification devices.
Push notifications are sent from the Alarm.com server directly to the Alarm.com app. As long as your device has a strong and consistent internet connection, push notifications should arrive within a few seconds after being sent.
Push Notification
Note: A thumbnail image will only display in a push notification if the user is logged into the Alarm.com app.
Benefits
Benefit
Description
Push notifications are actionable
Since push notifications are received using the Internet, they can be actionable. This means you can tap on the notification to be instantly brought within the Alarm.com app, or send commands directly from certain notifications (e.g., closing a garage door that was left open, answering the doorbell, etc.).
Note: On iOS, actions may require a long press to be visible.
The following is an image of a garage door push notification:
Push Notification iOS
The following is an image of a video doorbell push notification:
Push Notification Doorbell iOS
It is clear where the notification came from
Push notifications come directly from the app, so the app logo and name are prominently displayed. This provides an extra layer of trust, knowing the information is coming directly from the app, and is not a spam notification.
Push notifications allow for Critical Alerts (iOS)
Critical Alerts are special notifications that are sent even if the customer's phone is on Do Not Disturb. For more information, see Configure Critical Alert notifications.
For Android, customers are able to choose to override Do Not Distrurb within the App's Notification settings.
Video notifications are better with Push
Push notifications can be set up to send either plain text or thumbnail images for certain notifications (e.g., video clips).
Links within push notifications will bring you to a specific place within the app. If the notification indicates that motion has been detected, the link will redirect to the camera's live view. If the notification indicates that a clip has been uploaded, the link will redirect you directly to the saved clip.
Push notifications have customizable sounds (Android)
While text notifications may be susceptible to low signal or carrier messaging delays, push notifications only rely on a data connection. Whether the connection is on cellular data or a local wifi network, push notifications arrive quickly.
Push notifications can be sent to all of your devices
Push notifications allow you to stay connected across all your devices, including tablets and smart watches.
Pause notifications
Allows you to pause push notifications directly from the notification.
Continuous enhancements
Allows continuous enhancements as iOS and Android functionality evolves.
Note: It is recommended to use push notifications.
Text messages can be sent two ways depending on the type of event that triggers it. Text messages are sent from the Alarm.com server to a phone number using a non-data portion of the cellular network (i.e., SMS) and a low-level data network (i.e., MMS). These messages should arrive within seconds of being sent out.
Note: Limitations with your cellular carrier's infrastructure can cause inconsistencies, delays, or possibly prevent delivery entirely.
Text messages are not actionable and therefore are not compatible with Unexpected Activity notifications. For more information about Unexpected Activity Alerts, see Configure Unexpected Activity Alert notifications.
Cellular provider service plan conflicts can occur with T-Mobile customers, Canadian cellular plans, and less common cellular carriers. It is also possible to block the From address in your phone, which prevents delivery of these notifications. This process changes based on the device in use and it is recommended to contact the cellular provider for assistance.
Note: The alert sound for text notifications may be customizable if this is a feature the phone's operating software supports.
SMS (Short Message Service)
SMS is limited by the length of the message and can only contain plain text. Since the file size is very small for these messages, these can be received with only a connection to the cellular carrier voice network (no data access required). This type of notification is recommended if you have inconsistent access to Cellular data connections.
SMS
MMS (Multi-Media Service)
Note: T-Mobile and Verizon users cannot receive multimedia attachments (i.e., video clips and thumbnail images) and instead receive SMS messages with links to the same content. These links are only available to Verizon and T-Mobile users for 72 hours. If the link expires, use the Alarm.com app to view the video clip. It is recommended to use push notifications. For more information, see Push Notification Benefits.
MMS can contain media in the form of video and pictures (e.g., thumbnails, video clips, etc.) and therefore requires a connection to a data section of their cellular carrier. MMS notifications are sent to your Email to SMS address which is based on your cellular provider.
Important: A data connection is required to receive all contents of an MMS notification and send times can be inconsistent due to file size, processing time, the Cellular Provider, or potential SPF conflicts.
MMS
Note: Some carriers may have restrictions that prevent Alarm.com from delivering SMS notifications or limit the ability to attach video clips to messages. The use of video features may also incur data charges by your cellular provider. For more information about SMS limitation see Customer is not receiving notifications.
Email notifications
Note: It is recommended to use push notifications.
Email notifications are delivered from the Alarm.com server directly to your email inbox using an internet connection. Since they are sent to an email inbox, they can be viewed from any device with an internet connection and access to the inbox.
Email apps/clients may provide the ability to receive a push notification when a new email arrives. However, these push notifications will redirect you to the email in your inbox instead of Alarm.com.
Depending on your email provider, you may have different experiences with potential spam and junk filters. Email notifications can accidentally go to a spam or junk folder based on personal filters and email-provided filters that have been created. For more information, see What can I do if someone is not receiving notifications?.
The alert sound for email notifications may be customizable if the device being used to view the notifications supports this ability. Alert sounds for email notifications may vary based on the device in use.
Example: The Gmail application will have different alert sound options for computers and mobile devices.
Always verify safety, installation, compatibility, and current UI details against the original manufacturer documentation before operational use.
System Management
What can I do if mobile push notifications do not play sound?
GoSafer Security Knowledge Base
This operational reference is organized for GoSafer Security customers and staff. Alarm.com product names are retained where required for technical accuracy.
Overview
If there is no sound played when a push notification is received, perform the following troubleshooting:
Platform
Mobile App
Content type
Troubleshooting
Source last updated
2023-10-31
Procedure
Verify mobile device notification settings
Verify that the media volume on the mobile device is not muted.
Verify that the mobile device does not have any Do Not Disturb settings enabled or select Do Not Disturb override options in the device's settings.
Verify that the mobile device allows push notifications to both play sounds and wake the screen.
Verify that the Alarm.com app has access to notifications sounds in the mobile device’s settings.
Verify the mobile device speaker function
Test other applications on the mobile device for audio functionality.
Listen for sound out of the mobile device’s speaker as well as with headphones to determine if the issue is related to one of these.
Note: Some mobile device cases can muffle sounds.
Verify the mobile device launcher settings
If using a launcher app on an Android phone, turn the launcher app off and see if notifications are affected in the same way.
Apps that manage notifications are known to affect both the sounds of notifications and are known to hide notifications in some cases.
Additional troubleshooting
For more information about how to configure mobile push notifications, see How can a device start receiving Push Notifications?.
For more information about how to troubleshoot mobile push notifications, see What can I do if someone is not receiving push notifications?.
Depending on the device the user has, the instructions to verify settings may vary. For device-specific instructions about how to verify these settings, refer to Apple Support or Android Help.
Always verify safety, installation, compatibility, and current UI details against the original manufacturer documentation before operational use.
System Management
What can I do if someone is not receiving SMS text notifications?
GoSafer Security Knowledge Base
This operational reference is organized for GoSafer Security customers and staff. Alarm.com product names are retained where required for technical accuracy.
Overview
Note: T-Mobile & Verizon users cannot receive multimedia attachments (i.e., video clips and thumbnail images) and instead receive SMS messages with links to the same content. It is recommended to use push notifications. For more information, see Push Notification Benefits.
Missing notifications are typically explained by the contact having incorrect information or having their notifications paused on the account.
Note: If a Resolve button prompt is present next to a notification on the GoSafer Security customer portal (powered by Alarm.com), this means the notification is currently enabled but does not have any recipients. Click Resolve and follow the prompts to add notification recipients.
Platform
App + Web
Content type
Troubleshooting
Source last updated
2025-08-15
Procedure
If someone is not receiving text (SMS) notifications
Verify that the phone number and cellular provider/carrier are correct
Using the Alarm.com app
Log in to the Alarm.com app.
Tap [Menu].
Tap Users.
Tap the affected user.
Tap Mobile.
Make any corrections needed. If your provider is not listed, see How can I create text (SMS) notifications if my cell carrier is not an option?.
Using the GoSafer Security customer portal (powered by Alarm.com)
Log in to the GoSafer Security customer portal (powered by Alarm.com).
Click Users.
Click the affected user.
Click Mobile.
Make any corrections needed. If your provider is not listed, see How can I create text (SMS) notifications if my cell carrier is not an option?.
Verify that the notifications for the number are enabled
Using the Alarm.com app
Log in to the Alarm.com app.
Tap [Menu].
Tap Users.
Tap the affected user.
Tap Mobile.
Tap the Enable toggle switch to enable notifications.
Using the GoSafer Security customer portal (powered by Alarm.com)
Log in to the GoSafer Security customer portal (powered by Alarm.com).
Click Users.
Click the affected user.
Click Mobile.
Click the Enable toggle switch to enable notifications.
Verify that the triggering event happened using the Activity page
Using the Alarm.com app
Log in to the Alarm.com app.
Tap [Activity History].
Verify that the event that should have triggered the notification happened. If the event did not happen as expected, contact your service provider for further assistance.
Using the GoSafer Security customer portal (powered by Alarm.com)
Log in to the GoSafer Security customer portal (powered by Alarm.com).
Click Activity.
Verify that the event that should have triggered the notification happened. If the event did not happen as expected, contact your service provider for further assistance.
Additional troubleshooting steps
If everything else appears normal, the cell phone may not be receiving text messages properly.
Restarting the phone and ensuring it has a good cellular connection can help resolve this. Otherwise, it may be necessary to contact the cellular provider to explore additional troubleshooting options.
If the notification is from a video recording rule, verify that the notification is text only. The other options send MMS notifications which may behave differently from SMS and need additional troubleshooting from the cellular provider. To verify the notification is text only:
Log in to the GoSafer Security customer portal (powered by Alarm.com).
Click Video
Click Recording Rules.
Click [Edit].
Using the notification dropdown menu, select Text Only.
If you use T-Mobile, and your text notifications have been paused, please contact T-Mobile in regards to your personal phone and request that shortcode messages be allowed on your account.
Always verify safety, installation, compatibility, and current UI details against the original manufacturer documentation before operational use.
System Management
What can I do if someone is not receiving email notifications?
GoSafer Security Knowledge Base
This operational reference is organized for GoSafer Security customers and staff. Alarm.com product names are retained where required for technical accuracy.
Overview
If someone is not receiving email notifications, verify the following information.
Note: If a Resolve button prompt is present next to a notification, this means the notification is currently enabled but does not have any recipients. Click Resolve and follow the prompts to add notification recipients.
Platform
App + Web
Content type
Troubleshooting
Source last updated
2025-06-04
Procedure
Step-by-step guide: Screenshots and videos are placed with the instruction they illustrate.
If someone is not receiving email notifications, verify the following information.
Note: If a Resolve button prompt is present next to a notification, this means the notification is currently enabled but does not have any recipients. Click Resolve and follow the prompts to add notification recipients.
Email notification is correct and enabled
Verify the notification and the email address you are using is enabled on the account. The notification and email recipients can be verified using the Alarm.com app or GoSafer Security customer portal (powered by Alarm.com).
To verify the email notification is enabled using the Alarm.com app:Icn Chevron Up
Log in to the Alarm.com app.
Tap Menu.
Tap Notifications.
Tap Settings.
Tap the notification you are expecting to receive.
Verify the notification is turned on.
If the notification is disabled, tap the toggle switch to enable it. The following image displays a toggle switch that is enabled:
Notification toggle switch enabled on Customer app
In Recipients, verify your email address is listed as a recipient and spelled correctly.
If your email address is listed as a recipient:
Verify you are not paused. Paused users are grayed out. In the following image, the email is active, and the mobile device is paused.
Recipients enabled and disabled example on Customer app
Note: To verify if a user is paused, tap on the recipient and a message appears as shown in the following image:
Recipient paused on Customer app
If your email address is not listed as a recipient:
In Recipients, tap Add.
Tap the recipients to select.
Once all desired recipients are selected in the Address Book, then click Close.
If the desired recipient is not listed in the Address Book:
Tap Add Contact to add a new recipient address.
Enter the contact's information.
Tap Add Contact.
Verify all desired recipients are selected for the notification, then click Save.
To verify the email notification is enabled using the GoSafer Security customer portal (powered by Alarm.com):Icn Chevron Up
Log in to the GoSafer Security customer portal (powered by Alarm.com).
Click Notifications.
Click Edit on the notification you are expecting to receive.
Verify the notification is turned on.
If the notification is disabled, click the toggle switch to enable it.
Under Recipients, verify your email address is listed as a recipient and spelled correctly.
If your email address is listed as a recipient:
Mouse over the address to verify that it's not paused. The following image is an example of what appears if the address is paused:
Paused notification email
If your email address is not listed as a recipient:
Click Add.
Click the recipients to select. Selected recipients in the Address Book have a Check next to their address.
If the address to add is not listed in the Address Book:
Click New to add a new recipient address.
Enter the contact's information.
Click Add Contact.
Verify all desired recipients are selected in the Address Book, then click Close.
Click Save.
The email address needs to be updated
If the email address is incorrect or disabled, the email address can be updated using the Alarm.com app or GoSafer Security customer portal (powered by Alarm.com).
To update an email address using the Alarm.com app:Icn Chevron Up
Log in to the Alarm.com app.
Tap Menu.
Tap Users.
Tap the user to update.
Tap Email.
Update the user:
If the user's email address is incorrect, enter the correct email address under the Email Address text field.
If the user's email address is correct but disabled, click the toggle switch to enable the email address. The following image is an example of an email address that is enabled on the website:
Edit email address (app)
Click Save.
To update an email address using the GoSafer Security customer portal (powered by Alarm.com):Icn Chevron Up
Log in to the GoSafer Security customer portal (powered by Alarm.com).
Click Users.
On the user to update, click Edit.
Update the user:
If the user's email address is incorrect, enter the correct email address under the Email Address text field.
If the user's email address is correct but disabled, click the toggle switch to enable the email address. The following image is an example of an email address that is enabled on the website:
Update User page email
Click Save.
Email troubleshooting
Verify the email address is correct
Verify the email address is entered correctly and there are no spelling errors such as:
Misspellings or typos
Similar characters, (e.g., a capital i versus a lowercase l, the letter O versus the number 0, etc.)
Note: If similar characters may be an issue, copy and paste the address into a word processor and changing the font may help distinguish any differences.
Spam/junk folders
Check all folders (e.g., spam, receipts, junk, etc.) to verify the email was not marked as spam/junk. Run a search in the spam/junk folder separately, as these results do not populate during inbox searches. For email notifications search for key terms of the expected notification (e.g., Alarm, arm, disarm, panel, etc.).
If the email was marked as spam/junk, add the From Address to the safe senders list.
Email filters and rules
Verify the email was not placed into another folder via filters/rules. Users should be able to view the filter/rules created when on a web browser. This option may not be available when checking email on a mobile browser or mobile app (i.e., phone/tablet).
Method used to access email
Are you accessing email from an app, web browser, or desktop (e.g., Gmail app versus mail.google.com)?
Certain apps run their Inbox differently so filters cannot be checked, and emails may be more difficult to locate. For best results, move to a desktop version of the email service.
Blocked senders list
If the From Address is on your blocked senders list, remove the domain from the blocked senders list and add the domain to the safe senders list.
Inbox storage capacity
If the inbox has reached its storage capacity, the email address may not be able to receive emails. You may need to delete old emails, or set up a new email address to receive emails.
Private email address
Is your email address a private email address instead of a public email, like Hotmail or Gmail?
If you have a private email address, there may be a firewall or email filtering that may be beyond your control. If this is the case, contact your IT professionals. To verify this is the cause, change your account's email address to a popular email service (e.g., Hotmail, Gmail, or Yahoo, etc.), and then trigger a notification to send.
Missing email troubleshooting provided by their email service provider
If the preceding steps do not resolve the behavior, you can contact their email service provider to attempt missing email troubleshooting.
Always verify safety, installation, compatibility, and current UI details against the original manufacturer documentation before operational use.
System Management
What can I do if someone is not receiving notifications?
GoSafer Security Knowledge Base
This operational reference is organized for GoSafer Security customers and staff. Alarm.com product names are retained where required for technical accuracy.
Overview
There are a few possible reasons someone may not receive notifications. The causes vary depending on what type of notification should be sent. Select any of the following links to see recommended troubleshooting for receiving each type of notification:
Platform
App + Web
Content type
Troubleshooting
Source last updated
2021-12-06
Procedure
Step-by-step guide: Screenshots and videos are placed with the instruction they illustrate.
Yes. If the desired carrier is not listed when adding a cell phone number for text notifications, you can use the phone’s email address (SMS/SMTP format, i.e., 1234567890@vtext.com) so the recipient can be configured for email notifications that they will receive to their phone as a text message.
Note: This feature may not be available based on the carrier. Contact your cellular provider for additional assistance.
For most mobile carriers' SMS email addresses, refer to NotePage's SMTP Email Delivery address formats. Alternatively, you can send a text message from that phone to an email address and use the from address on the email.
Note: SMS (text notifications) is only available in the United States and Canada. It is recommended to use push notifications for accounts outside the United States and Canada.
Add the mobile carrier SMS email address as contact information
A mobile carrier SMS email address can be added as contact information using the Alarm.com app or GoSafer Security customer portal (powered by Alarm.com).
Expand all
To add the mobile carrier SMS email address as contact information using the Alarm.com app:Icn Chevron Down
Log in to the Alarm.com app.
Tap Menu.
Tap Users.
Tap to select the user to edit. If the user is not created yet, tap Add to create a new user.
Tap Add Contact.
Tap Email Address to add the mobile carrier SMS email address for the user's phone.
In Email Address,enter the user's mobile carrier SMS email address (i.e., 1234567890@vtext.com).
Using the Email Format dropdown menu, select the format the user would like to receive notifications.
It is recommended to select Plain Textsince the notification is being sent to a phone as a text message.
Verify all user information is correct.
Tap Save to update the user's information. Then add the new contact information to the notifications the user wants to receive.
To add the mobile carrier SMS email address as contact information using the GoSafer Security customer portal (powered by Alarm.com):Icn Chevron Down
Log in to the GoSafer Security customer portal (powered by Alarm.com).
Click Users.
Click Edit for the user to edit. If the user is not created yet, then click Add to create a new user.
In Contact Information, click Add.
Click Email Address to add the mobile carrier SMS email address for the user's phone.
In Email Address enter the user's mobile carrier SMS email address (i.e., 1234567890@vtext.com).
Using the Email Format dropdown menu, select the format the user would like to receive notifications.
It is recommended to select Plain Textsince the notification is being sent to a phone as a text message.
Verify all user information is correct.
Click Save to update the user's information. Then add the new contact information to the notifications the user wants to receive.
Add the mobile carrier SMS email address as a notification recipient
A mobile carrier SMS email address can be added as a notification recipient using the Alarm.com app or GoSafer Security customer portal (powered by Alarm.com).
To add the mobile carrier SMS email address as a notification recipient using the Alarm.com app:Icn Chevron Down
Log in to the Alarm.com app.
Tap Menu.
Tap Notifications.
Tap Settings.
Tap the notification the user would like to receive text notifications for (e.g., Arming Event).
In Recipients, tap Add.
In the Address Book, tap to select the mobile carrier SMS email address for the user. The following image is an example where only the mobile carrier SMS email address is selected as a recipient:
Example Address book
Tap Close to exit out of the Address Book.
Tap Save.
To add the mobile carrier SMS email address as a notification recipient using the Alarm.com app:Icn Chevron Down
Log in to the GoSafer Security customer portal (powered by Alarm.com).
Click Notifications.
Click Edit to configure the notification the user would like to receive text notifications for (e.g., Arming Event).
In Recipients, click Add.
In the Address Book, click to select the mobile carrier SMS email address for the user. The following image is an example where only the mobile carrier SMS email address is selected as a recipient:
Always verify safety, installation, compatibility, and current UI details against the original manufacturer documentation before operational use.
System Management
What can I do if someone is not receiving push notifications?
GoSafer Security Knowledge Base
This operational reference is organized for GoSafer Security customers and staff. Alarm.com product names are retained where required for technical accuracy.
Overview
If push notifications are not being received on a smartphone or tablet, try the following troubleshooting steps.
Note: If a Resolve button prompt is present next to a notification, this means the notification is currently enabled but does not have any recipients. Click Resolve and follow the prompts to add notification recipients.
Platform
App + Web
Content type
Troubleshooting
Source last updated
2025-10-03
Procedure
To verify notifications are enabled using the Alarm.com app
Log in to the Alarm.com app.
Tap [Menu].
Tap Notifications.
Tap [Settings].
Tap the desired notification to verify.
Verify the notification toggle switch is toggled ON.
If the notification is toggled off, click the toggle switch to enable the notification. Allow a few minutes for it to save, and then test the notification.
Flick to scroll to verify desired push devices are shown under Recipients.
If desired push devices are not showing
In Recipients, tap Add.
Tap to select the desired push devices.
Tap Close.
Tap Save to save any changes made. Allow a few minutes for it to save, and then test the notification.
To verify notifications are enabled using the GoSafer Security customer portal (powered by Alarm.com)
Log in to the GoSafer Security customer portal (powered by Alarm.com).
Click Notifications.
Verify the desired notification is toggled on.
If the notification is toggled off, click the toggle switch to enable the notification. Allow a few minutes for it to save, and then test the notification.
Click [Edit] for the desired notification to verify.
In Recipients, verify desired push devices are shown.
If desired push devices are not showing
In Recipients, click Add.
Click to select the desired push devices.
Click Close.
Click Save. Allow a few minutes for it to save, and then test the notification.
To verify events are reporting using the Alarm.com app
Log in to the Alarm.com app.
Tap [Date Picker].
Verify the events that you want push notifications for (e.g., Arming reminder, system armed away, sensor opened/closed, etc.) are appearing in the History.
Flick down to refresh the history.
To verify events are reporting using the GoSafer Security customer portal (powered by Alarm.com)
Log in to the GoSafer Security customer portal (powered by Alarm.com).
Click Activity.
Verify the events that you want push notifications for (e.g., Arming reminder, system armed away, sensor opened/closed, etc.) are appearing on the Activity page.
Always verify safety, installation, compatibility, and current UI details against the original manufacturer documentation before operational use.
System Management
Why did I receive an e-mail notification for high activity by a login?
GoSafer Security Knowledge Base
This operational reference is organized for GoSafer Security customers and staff. Alarm.com product names are retained where required for technical accuracy.
Overview
Alarm.com will send an email notification when a login is observed to have an unusual amount of high activity relative to a typical user. The email is sent to the e-mail address associated with the login in question, as well as the e-mail of the account owner (the primary login).
The purpose of the high activity notification is to alert users to ensure account security and to prevent unauthorized access or potentially malicious activity.
The following is an example of the high activity email notification.
Platform
General / Device
Content type
FAQ / Explanation
Source last updated
2024-01-16
Procedure
Step-by-step guide: Screenshots and videos are placed with the instruction they illustrate.
Alarm.com will send an email notification when a login is observed to have an unusual amount of high activity relative to a typical user. The email is sent to the e-mail address associated with the login in question, as well as the e-mail of the account owner (the primary login).
The purpose of the high activity notification is to alert users to ensure account security and to prevent unauthorized access or potentially malicious activity.
The following is an example of the high activity email notification.
Always verify safety, installation, compatibility, and current UI details against the original manufacturer documentation before operational use.
System Management
Will the Arming Event notification include the name of the user who armed or disarmed the system?
GoSafer Security Knowledge Base
This operational reference is organized for GoSafer Security customers and staff. Alarm.com product names are retained where required for technical accuracy.
Overview
This is primarily a video or reference page. Open the original article link below for the current content.
Platform
App + Web
Content type
How-to / Configuration
Source last updated
2022-11-03
Procedure
Using the panel
When the system is locally armed or disarmed using a code, the name of the user associated with the user code is included in the notification. User code information can be managed using the website. For more information about user code management, see Change a system user code.
Note: The panel must be configured to be armed by a user code to include a name. If a panel has Quick Arm enabled or Secure Arm disabled, the user that armed the system is unknown so the notification does not include a name.
Using a key fob
If a key fob is used and the panel programmed accordingly with a specific user code, the name of the associated user code is included in the notification.
If the key fob used is not associated with a specific user code, then a name is not included in the notification.
Using the Alarm.com app or GoSafer Security customer portal (powered by Alarm.com)
If the system is armed or disarmed using the GoSafer Security customer portal (powered by Alarm.com) or Alarm.com app, the notification includes the login name of the user that performed the command.
For more information about creating a new login, see Create a new login.
For more information about viewing who sent remote commands, see View which user sent remote commands to a system.
Always verify safety, installation, compatibility, and current UI details against the original manufacturer documentation before operational use.
System Management
AI Activity Filters
GoSafer Security Knowledge Base
This operational reference is organized for GoSafer Security customers and staff. Alarm.com product names are retained where required for technical accuracy.
Overview
AI Activity Filters allows you to type or speak a question and get the answers you need in seconds. It searches across all your property’s system events, saving time and making it easy to stay in the know. AI Activity Filters is available using the Alarm.com app and GoSafer Security customer portal (powered by Alarm.com).
Platform
App + Web
Content type
How-to / Configuration
Source last updated
2026-07-16
Procedure
Step-by-step guide: Screenshots and videos are placed with the instruction they illustrate.
AI Activity Filters allows you to type or speak a question and get the answers you need in seconds. It searches across all your property’s system events, saving time and making it easy to stay in the know. AI Activity Filters is available using the Alarm.com app and GoSafer Security customer portal (powered by Alarm.com).
Requirements
A compatible service package (e.g., Interactive + Automation, Interactive Gold, Commercial Plus, etc.)
Note: This feature is available as a free AI Activity Filters add-on for most interactive service packages.
For the Alarm.com app, a mobile app version of 5.14+ for iOS or 5.11+ for Android is required
Features
Harness the power of large language models (LLMs) to quickly know what happened at your property
Get AI-powered assistance to intelligently filter your Activity feed so you can save time finding and monitoring relevant activity on the go
Zero in on specific events (e.g., alarms, door openings, package alerts, Video Analytics detection clips, etc.)
Quickly search for activity related to specific devices or device types (e.g., cameras, video doorbells, sensors, locks, etc.)
Narrow by a particular time frame (i.e., the last 24 hours, the past week, or a custom date range)
Keep tabs on user activity (e.g., who unlocked the door, who disarmed the system, etc.)
Get a filtered view of relevant system activity and events in seconds
View top results, ranked by most recent in the Activity history feed
See the total number of applied filters at a glance
Use Quick Filters to create and save custom quick filters based on your question
Additional information
Prompts and questions are limited to 200 characters.
An error message will appear if a question is unclear or not related to activity search or if there is a technical issue, service error, or no internet connectivity.
Currently, previous questions and prompts are not remembered. Each new query produces a new Activity search.
For customers with AI Video Event Search, AI Activity Filters can also surface relevant video clips directly within the activity timeline when users search visual keywords such as blue SUV or man with a baseball hat. Matching clips will appear under Top Video Results, creating a more unified search experience across both system activity and video events. For more information about how these features are related, see How are AI Activity Filters and AI Video Event Search related?.
Access AI Activity Filters
AI Activity Filters can be accessed using the Alarm.com app and GoSafer Security customer portal (powered by Alarm.com).
Expand all
To access AI Activity Filters using the Alarm.com app:Icn Chevron Up
Log in to the Alarm.com app.
Tap Activity.
Tap Ask About Activity.
Enter a question or tap Microphone to ask a question about system activity.
To access AI Activity Filters using the GoSafer Security customer portal (powered by Alarm.com):Icn Chevron Up
Log in to the GoSafer Security customer portal (powered by Alarm.com).
Click Activity.
Click Ask About Activity.
Enable or disable AI Activity Filters
AI Activity Filters can be enabled or disabled using the Alarm.com app or GoSafer Security customer portal (powered by Alarm.com).
To enable or disable AI Activity Filters using the Alarm.com app:Icn Chevron Up
Log in to the Alarm.com app.
If the account is included in an Enterprise group, verify the desired location is selected.
Tap More.
Tap AI Activity Filters.
Tap the Enable AI Activity Filtering toggle switch to enable or disable the feature.
To enable or disable AI Activity Filters using the GoSafer Security customer portal (powered by Alarm.com):Icn Chevron Up
Log in to the GoSafer Security customer portal (powered by Alarm.com).
If the account is included in an Enterprise group, verify the desired location is selected.
Click AI Activity Filters.
Click the Enable AI Activity Filtering toggle switch to enable or disable the feature.
Frequently asked questions
How are AI Activity Filters and AI Video Event Search related? Icn Chevron Up
AI Activity Filters and AI Video Event Search work together to provide a faster, more intuitive way to understand what’s happening at a property, but each feature serves a different purpose.
AI Activity Filters
AI Video Event Search
What It Is
A natural-language search tool that searches system-wide activity and standard video analytics only (i.e., locks, sensors, package alerts, garage door openings, Video Analytics detections, and user actions)
A natural-language search tool that scans saved video clips using identify visual details like people, vehicles, clothing, animals, or objects.
Purpose
Helps customers instantly answer what happened and when, by pulling relevant activity from the entire property without scrolling (e.g., “Who unlocked the door?” or “When was the garage opened?”).
Helps customers quickly find what the activity looked like by locating the exact video clip that matches a description or timeframe. Ideal for investigations and visual confirmation (e.g., “red truck yesterday” or “person in black hoodie last night").
Limitations
Does not remember previous prompts
Currently only available on mobile
Prompts limited to 200 characters
Searches clip thumbnails only, not full recordings
Always verify safety, installation, compatibility, and current UI details against the original manufacturer documentation before operational use.
System Management
Export the system activity history
GoSafer Security Knowledge Base
This operational reference is organized for GoSafer Security customers and staff. Alarm.com product names are retained where required for technical accuracy.
Overview
The system activity history can be exported from the website.
Platform
Customer Website
Content type
Reference
Source last updated
2025-06-04
Procedure
To export the system activity history
Log in to the GoSafer Security customer portal (powered by Alarm.com).
Click Activity.
Click to expand Filters.
Select any of the following filters to search with:
Using the Search bar to view activity matching specific keywords.
Using the Date Range to view activity within a specified timeframe.
Using the Users dropdown menu to view the activity of specified users.
Using the Event Type dropdown menu to view activity from specific events.
Using the Device Type dropdown menu to view activity from specific device types.
Using the Device Name dropdown menu to view activity from specific devices.
Click [Download], and then select to export the filtered system activity search as either a CSV or PDF file. The file is downloaded to your computer.
Always verify safety, installation, compatibility, and current UI details against the original manufacturer documentation before operational use.
System Management
System History
GoSafer Security Knowledge Base
This operational reference is organized for GoSafer Security customers and staff. Alarm.com product names are retained where required for technical accuracy.
Overview
This GoSafer Security section brings together resources for System History, including setup, configuration, everyday use, and troubleshooting. Choose the related page that matches your device, feature, or task, and follow the current manufacturer guidance linked on that page.
Platform
Customer Website
Content type
FAQ / Explanation
Source last updated
2026-03-19
Procedure
Browse the related pages in this chapter to open the specific procedure, configuration guide, or troubleshooting article you need.
Always verify safety, installation, compatibility, and current UI details against the original manufacturer documentation before operational use.
System Management
View the system activity history
GoSafer Security Knowledge Base
This operational reference is organized for GoSafer Security customers and staff. Alarm.com product names are retained where required for technical accuracy.
Overview
The system activity history shows system, website, and user activity.
Platform
App + Web
Content type
How-to / Configuration
Source last updated
2026-07-16
Procedure
To view the system activity history using the Alarm.com app
Log in to the Alarm.com app.
Tap Activity.
Specific system activity history can be searched for in various ways
In Quick Filters, tap to select a previously created filter.
To create a new Quick Filter, tap [Edit], then tap [Add].
To edit a Quick Filter, tap [Edit], then tap the desired filter to edit.
Tap [Filter] to apply basic filters such as:
In Timeframe, tap Recent Activity for recent events or tap Specific Date Range to select a specific time range.
In Video, tap to expand a specific video category, then select the desired filters.
In Features, tap to expand a specific device category, then select the desired filters.
Tap Apply once the desired filters are selected.
To view the system activity history using the GoSafer Security customer portal (powered by Alarm.com)
Note: Only 1,000 events can be displayed at a time. If a filtered search returns more than 1,000 events, then more filters need to be applied to narrow the search.
Log in to the GoSafer Security customer portal (powered by Alarm.com).
Click Activity.
Note: By default, the last 100 events are displayed on the first page and up to 10 pages of events can be accessed.
Specific system activity history can be searched for in various ways
Using the Search field, enter specific keywords to search for the desired activity.
Click Quick Filters to access previously created filters.
To create a new Quick Filter, click [Edit], then click [Add].
To edit a Quick Filter, click [Edit], then click [Edit] next to the desired filter to edit.
Click Filter to apply basic filters such as:
In Timeframe, select Recent Activity to view the recent activity or Specified Date Range to select a specific date or date range.
In Features, click to expand the desired device category, then select the desired filters.
Click + Quick Filter to create a customized filter. New Quick Filters can be found at the top of the Activity section.
Always verify safety, installation, compatibility, and current UI details against the original manufacturer documentation before operational use.
System Management
View which user sent remote commands to the system
GoSafer Security Knowledge Base
This operational reference is organized for GoSafer Security customers and staff. Alarm.com product names are retained where required for technical accuracy.
Overview
When a remote command (i.e., arming/disarming, etc.) is sent from the app or website, the user's login name that sent the command appears in the activity history.
Platform
App + Web
Content type
Reference
Source last updated
2025-11-07
Procedure
Step-by-step guide: Screenshots and videos are placed with the instruction they illustrate.
When a remote command (e.g., arming/disarming, etc.) is sent from the GoSafer Security customer portal (powered by Alarm.com) or Alarm.com app, the user's login name that sent the command appears in the activity history.
Note: Remote arming and disarming commands use the master user's code. Therefore, the activity history will display the remote command from the user's login name along with an arm or disarm event from the master user.
It is recommended to create a separate login for each user who is going to be sending remote commands to the system. For more information about creating logins, see Create a new login.
The following examples are of how arming/disarming appears in the activity history on the Alarm.com app and GoSafer Security customer portal (powered by Alarm.com) when it is armed/disarmed remotely versus locally.
Note: Remote commands can also be sent using voice integration (e.g., Siri voice shortcuts, Amazon Alexa, etc.) and an Apple Watch. In the Event History, Alexa commands will display as Voice [login name] command, Siri voice shortcuts will display as [login name] command, andApple Watch commands will display as Apple Watch [login name] command. For more information about voice commands, see Voice device feature comparisons.
Expand all
Example of activity on the Alarm.com appIcn Chevron Up
Remote arming
Locally arming
In the following example, the user's login name sending the remote command is exampleuser.
Panel Commands App
In the following example, the name associated with the user code disarming the system is exampleuser.
Panel Commands App Local
Example of activity on the GoSafer Security customer portal (powered by Alarm.com) Icn Chevron Up
Remote arming
Locally arming
In the following example, the user's login name sending the remote command is exampleuser.
Panel Commands
In the following example, the name associated with the user code disarming the system is exampleuser.
Always verify safety, installation, compatibility, and current UI details against the original manufacturer documentation before operational use.
System Management
Why are sensors sometimes combined as an open/closed event and sometimes separate in the activity history?
GoSafer Security Knowledge Base
This operational reference is organized for GoSafer Security customers and staff. Alarm.com product names are retained where required for technical accuracy.
Overview
A sensor's Open and Close events typically get combined into one line in the activity history when the events occur within a few minutes of each other.
If a sensor is opened and then not closed again for a longer period of time, there will be two separate events in the activity history: one for the sensor being opened and another for the sensor being closed.
For more information about configuring Sensor Activity Monitoring for sensors, see Turn sensor activity monitoring on/off.
Platform
General / Device
Content type
FAQ / Explanation
Source last updated
2023-11-15
Procedure
A sensor's Open and Close events typically get combined into one line in the activity history when the events occur within a few minutes of each other.
If a sensor is opened and then not closed again for a longer period of time, there will be two separate events in the activity history: one for the sensor being opened and another for the sensor being closed.
For more information about configuring Sensor Activity Monitoring for sensors, see Turn sensor activity monitoring on/off.
Always verify safety, installation, compatibility, and current UI details against the original manufacturer documentation before operational use.
System Management
Account setup - Initial login
GoSafer Security Knowledge Base
This operational reference is organized for GoSafer Security customers and staff. Alarm.com product names are retained where required for technical accuracy.
Overview
This article details steps for a new customer, starting by accessing the welcome letter, with a walkthrough for account access and set-up via the Alarm.com Customer app.
Platform
App + Web
Content type
How-to / Configuration
Source last updated
2024-12-06
Procedure
Step-by-step guide: Screenshots and videos are placed with the instruction they illustrate.
Note: Two Factor Authentication can be referred to as 2FA, Multi-Factor Authentication, or MFA.
Two Factor Authentication adds an extra layer of security to protect access to your system. This makes it harder for potential intruders to gain access to your system, so your system and your property are even more secure. Whenever you sign into your system from a new or untrusted device, you will have to enter both your password and a code sent to your mobile phone.
Enable or disable Two Factor Authentication
Two Factor Authentication can be enabled or disabled using the Alarm.com app and GoSafer Security customer portal (powered by Alarm.com).
Note: If Two Factor Authentication is enabled, all active sessions on the Alarm.com app and GoSafer Security customer portal (powered by Alarm.com) will end. Two Factor Authentication will be required to log back in.
Expand all
To enable or disable Two Factor Authentication for a login using the Alarm.com app:Icn Chevron Down
To disable Two Factor Authentication, tap Disable and then tap Confirm.
Note: Two Factor Authentication may be required or suggested by your service provider. For additional assistance, contact your service provider.
To enable Two Factor Authentication, select Text Message, Email, or Authentication app.
Note: It is recommended to set up Two Factor Authentication using multiple methods. If multiple methods cannot be enabled, contact your service provider
To enable Two Factor Authentication for text message:
Tap Text Message.
Tap Next.
Mobile Two Factor Authentication Enable
In Mobile Number, enter the mobile number to receive the Two Factor Authentication confirmation code.
Using the Country dropdown menu, select either USA or Canada.
Using the Provider dropdown menu, select the cellular carrier of the mobile phone number that will receive the Two Factor Authentication confirmation code.
Note: The Provider dropdown menu displays the full list of Two Factor Authentication compatible cellular carriers.
If the carrier is not listed, select Other.
Mobile Two Factor Authentication Phone Number
Note: This displays the full list of Two Factor Authentication compatible cellular carriers.
Tap Send to send the verification code to the mobile number entered.
In Verification Code, enter the code that is provided in a text message to the mobile number entered.
Mobile Two Factor Authentication Verification Code
Tap Verify.
To enable Two Factor Authentication for email:
Tap Email.
In Send Verification Code, verify the correct email is displayed. For more information about how to update the email address, see Change an email address.
Tap Send.
Mobile Two Factor Authentication Email
In Verification Code, enter the code that is provided in the received email.
Mobile Two Factor Authentication Email Code
Tap Verify.
To enable Two Factor Authentication using an authentication app:
Important: An authenticator app is required to complete this process and the steps may vary based on the authenticator app in use.
Tap Authentication App.
Generate an authentication code:
Note: The Duo authenticator app may experience unexpected behavior and it is recommended to use an alternative authenticator app.
Use an authenticator app to scan the QR code or manually enter the code provided on the Alarm.com app or GoSafer Security customer portal (powered by Alarm.com) into the authenticator app.
In the Enter Code field, enter the code that is generated on the authenticator app to verify the device.
Click Next.
In Device Name, enter the desired name for the device that will be trusted.
Mobile Two Factor Authentication Trust this Device
Tap Next.
In Linked Devices, tap Trust next to any additional devices that can be trusted.
Tap Done.
To enable or disable Two Factor Authentication for a login using the GoSafer Security customer portal (powered by Alarm.com):Icn Chevron Down
Log in to the GoSafer Security customer portal (powered by Alarm.com).
Click Settings.
Click Login Information.
Click Two Factor Authentication.
To disable Two Factor Authentication, click Disable.
Note: Two Factor Authentication may be required or suggested by your service provider. For additional assistance, contact your service provider.
To enable Two Factor Authentication, select Text Message, Email, or Authentication app.
Note: It is recommended to set up Two Factor Authentication using multiple methods. If multiple methods cannot be enabled, contact your service provider.
To enable Two Factor Authentication for text message:
Click Text Message.
Click Next.
Two Factor Authentication GoSafer Security customer portal
In Mobile Number, enter the mobile number to receive the Two Factor Authentication confirmation code.
Using the Country dropdown menu, select either USA or Canada.
Using the Provider dropdown menu, select the cellular carrier of the mobile phone number that will receive the Two Factor Authentication confirmation code.
Note: The Provider dropdown menu displays the full list of Two Factor Authentication compatible cellular carriers.
If the carrier is not listed, select Other.
Two Factor Authentication Phone Number
Click Send to send a verification code to the mobile number.
In Verification Code, enter the code that is provided in a text message to the mobile number.
Two Factor Authentication Verification Code
Click Verify.
To enable Two Factor Authentication for email:
Click Email.
In Send Verification Code, verify the correct email is displayed. For more information about how to update the email address, see Change an email address.
Click Send.
Two Factor Authentication Email Code
In Verification Code, enter the code that is provided in the received email.
Two Factor Authentication Email Code Sent
Click Verify.
To enable Two Factor Authentication using an authentication app:
Important: A mobile device with an authenticator app is required to complete this process and the steps may vary based on the authenticator app in use.
Click Authentication App.
Generate an authentication code:
Note: The Duo authenticator app may experience unexpected behavior and it is recommended to use an alternative authenticator app.
Use a mobile device with an authenticator app to scan the QR code or manually enter the code provided on the Alarm.com app or GoSafer Security customer portal (powered by Alarm.com) into the authenticator app.
In the Enter Code field, enter the code that is generated on the authenticator app to verify the device.
Click Next.
In Device Name, enter the desired name for the device that is accessing the account.
If the device is trusted, click to select Trust This Device.
Two Factor Authentication Trust Device
Click Next.
In Linked Devices, click Trust next to any additional devices that can be trusted.
Click Done.
Manage trusted devices
To manage trusted devices using the Alarm.com app:Icn Chevron Down
Log in to the Alarm.com app.
Tap Menu.
Tap Login Information.
Tap Two Factor Authentication.
Tap Detailsnext to the device name.
Make the desired changes:
To rename the device, enter the desired device name, then tap Save.
To delete the device, click Delete Trusted Device, then tap Confirm.
To manage trusted devices using the GoSafer Security customer portal (powered by Alarm.com):Icn Chevron Down
Log in to the GoSafer Security customer portal (powered by Alarm.com).
Click Settings.
Click Login Information.
Click Two Factor Authentication.
Click Detailsnext to the device name.
Make the desired changes:
To rename the device, enter the desired device name, then click Save.
To delete the device, click Delete Trusted Device, then click Confirm.
If you change your cell carrier or no longer have access to the phone number or authenticator app:
If you change your cell carrier or no longer have access to the phone number or authenticator app, Two-Factor Authentication can be reset using email. For more information, see Reset Two-Factor Customer.
If email Two Factor Authentication is set up and you no longer have access to your email address, contact your service provider for assistance with resetting your Two-Factor Authentication configuration.
Reset Two Factor Authentication
Two Factor Authentication can be reset using the Alarm.com app or GoSafer Security customer portal (powered by Alarm.com).
To reset Two Factor Authentication:Icn Chevron Down
Log in to the Alarm.com app or GoSafer Security customer portal (powered by Alarm.com).
In Enter Verification Code, click or tap Down next to Don't have access to your device?.
Select to reset Two-Factor Authentication or to contact your service provider:
If you have access to your email address associated with the login:
In Option 1: Reset Two-Factor Authentication, tap or click Reset 2FA to send a reset link to the email address associated with the login.
If you do not have access to your email address associated with the login:
In Option 2: Contact your Service Provider, use the contact information listed to contact your service provider.
Note: The ability to reset your own Two-Factor Authentication configuration is only available to users using SMS or an authenticator application.
Always verify safety, installation, compatibility, and current UI details against the original manufacturer documentation before operational use.
System Management
Alarm Mode
GoSafer Security Knowledge Base
This operational reference is organized for GoSafer Security customers and staff. Alarm.com product names are retained where required for technical accuracy.
Overview
Alarm Mode presents users with a streamlined, full-picture view of what is happening at their home or business during an alarm. With Alarm Mode, you can quickly assess the situation and take action by viewing video clip thumbnails, accessing live camera feeds, and reviewing recent system activity all in one place.
Additionally, property owners with Cancel/Verify can dismiss false alarms or confirm true alarms for expedited emergency response with the press of a button. For more information about Cancel/Verify, see Cancel or Verify Alarms using the app.
Platform
Mobile App
Content type
How-to / Configuration
Source last updated
2026-01-21
Procedure
Is Alarm Mode available with multiple partitions?
Yes. Alarm Mode is available for multiple partition security systems. Alarm Mode displays which partition(s) is in an alarm state and enables you to disarm all partition(s) to resolve the alarm(s).
Is Alarm Mode available for commercial accounts?
Yes. The Alarm Mode assessment card is viewable from the individual business location's system rather than at the Enterprise Group level for commerical accounts.
Does Alarm Mode work with all alarm types?
No. Alarm Mode is not available for duress alarms, Silent Police Panel Panics, or In-App Property Panics events.
What information about video clips is available?
The video clip thumbnail section shows any videos saved 5 minutes prior to the start of the alarm. New clips appear as they are captured during the alarm event and no refresh is required.
Users can scroll through video clip thumbnails when there are more than two clips.
Detection clips (i.e., people, vehicles, and animals) display the full-camera view and are shown first in the video clip thumbnail section. All other clips are ordered from newest to oldest.
The Recent Events section displays activity that occurred 5 minutes before the alarm. New events appear automatically as they occur. By default, a maximum of five events are displayed in the section, however, you can go to the tap Activity in the Alarm Mode card to view all event history.
Always verify safety, installation, compatibility, and current UI details against the original manufacturer documentation before operational use.
System Management
Arm the system remotely
GoSafer Security Knowledge Base
This operational reference is organized for GoSafer Security customers and staff. Alarm.com product names are retained where required for technical accuracy.
Overview
Arming the system sets the security sensors to an alarm state. The Armed Away status sets both contact sensors and motion sensor into an alarm state, while Armed Stay status only sets contact sensors …
Platform
App + Web
Content type
How-to / Configuration
Source last updated
2025-06-04
Procedure
Step-by-step guide: Screenshots and videos are placed with the instruction they illustrate.
Arming the system sets the security sensors to an alarm state. The Armed Away status sets both contact sensors and motion sensors into an alarm state, while Armed Stay status only sets contact sensors to an alarm state.
Arming commands
Note: If the system is not arming properly, check if any unbypassed sensors are open. If the system continues to be unable to arm remotely, contact your service provider.
Arming options
When arming using the Alarm.com app or GoSafer Security customer portal (powered by Alarm.com), some of the following options may be available for you to select. Options vary depending on your system's configuration.
Silent Arming - This allows you to arm the system without any noise. By default, the panel makes exit delay beeps when you arm your system.
No Entry Delay - This allows the system to bypass the entry delay once the system is armed. Entry delay is the time set to allow you to walk from an entry/exit zone to the location of your panel to disarm the panel.
Bypass Open Zones - This allows the system to bypass open zones while arming the system. This feature can be used to attempt to force the system to arm regardless of zones that may be open. Zones that are bypassed will not trigger an alarm on the system.
To arm the system using the Alarm.com app:
Log in to the Alarm.com app.
In the Security System card, tap Disarmed.
Select the desired arming options, if applicable.
Tapeither Arm (Stay) to arm the system to stay mode, or Arm (Away) to arm the system to away mode.
To arm the system using the GoSafer Security customer portal (powered by Alarm.com):
Log in to the GoSafer Security customer portal (powered by Alarm.com).
Click Disarmed in the Security card.
Select the desired arming options, if applicable.
Click either Stay to arm the system to stay mode, or Away to arm the system to away mode.
To arm the system using Scenes:
Scenes allow you to configure a button on the Alarm.com app and GoSafer Security customer portal (powered by Alarm.com) that triggers multiple actions across multiple devices at once. For more information about Scenes, see How do Scenes work?.
Log in to the Alarm.com app or GoSafer Security customer portal (powered by Alarm.com).
In Scenes, select the Scene you want to run that includes the arming command.
For more information about creating or editing Scenes, see Create/edit a Scene.
Confirm that you want to send the command to run that Scene.
Always verify safety, installation, compatibility, and current UI details against the original manufacturer documentation before operational use.
System Management
Cancel or Verify Alarms using the app
GoSafer Security Knowledge Base
This operational reference is organized for GoSafer Security customers and staff. Alarm.com product names are retained where required for technical accuracy.
Overview
Cancel/Verify Alarms gives the opportunity for you to respond to alarm events directly and to communicate to a monitoring station when the cause might be accidental or a real emergency.
Platform
Mobile App
Content type
FAQ / Explanation
Source last updated
2026-06-09
Procedure
Step-by-step guide: Screenshots and videos are placed with the instruction they illustrate.
Cancel/Verify Alarms allows you to respond to alarm events directly and to communicate to a monitoring station when the cause might be accidental or a real emergency. If you wish to opt-in to the Cancel/Verify feature, contact your service provider.
Important considerations:
Cancel/Verify only appears when the panel has registered that sensors have been tripped and the system is in a full alarm state.
When the panel is in pending alarm, the option to Disarm to Clear appears, or Clear Alarm appears if the panel is in disarm state.
When Cancel/Verify has been activated, only logins with Master level permissions on the account can interact with it. Any login with a permission level less than Master cannot view or use the feature.
Alarm Mode
To cancel or verify an alarm using the Alarm.com app:
Once the system is in alarm, log in to the app.
Cancel/Verify remains active in the app until 2 minutes past the alarm signal was sent.
During the 2-minute countdown, quickly review video cameras or communicate with those at home.
Press and hold Cancel Alarm or Verify Alarm until the alarm has been canceled or verified.
A confirmation screen pops up to let you know the signal has been canceled or verified.
Frequently asked questions
Why use Cancel/Verify?
The Cancel/Verify monitoring station-supported feature has the potential to help reduce the number of accidental alarm dispatches made each year. You can quickly resolve an alarm situation with the press of a button if the cause is known, accidental, or emergency.
Additionally, accidental dispatches can result in fines at all levels of accountability: you, service providers, and monitoring stations — not to mention distracting emergency personnel from potential real emergencies. With the press of a button and without needing to wait for a call from a monitoring station, an entire situation can be resolved saving time and money.
When can Cancel/Verify be used?
Whenever an alarm is triggered at the home location and the entry delay timer has elapsed, the alarm signal is sent to the monitoring station, and the Cancel/Verify card appears in the Alarm.com app. Cancel/Verify appears for all alarm events but does not appear in the Alarm.com app outside of an alarm event.
Who can use the feature once it is activated?
The Cancel/Verify feature is included with any type of interactive service package and once it is activated, only the primary login or users with Master Control on the account can interact with it. Any logins with permission levels less than Master cannot view or use the feature.
Can Cancel/Verify be used with Linked Logins?
No. Cancel/Verify is only available to individual accounts.
How long is Cancel/Verify active during an alarm?
Cancel/Verify remains active in the Alarm.com app until 2 minutes past the alarm signal was sent.
What does the two-minute counter represent?
The two minutes is the estimated amount of time for a monitoring station to receive, process, act on, and dispatch based on an alarm signal or event. Response times vary between monitoring stations so your signal may be sent after dispatch has occurred while still in the 2-minute Cancel/Verify window. Monitoring stations still receive the signal if sent before the time has elapsed and may adjust their response accordingly.
Are alarm signals held until a Cancel/Verify button is pressed?
No. All alarm signals still send as expected and no communications are inhibited in any way. You can interact with the Cancel/Verify buttons once the signal has been sent to and received by the monitoring station.
What happens when you press a button?
When you press and hold either False Alarm or Confirm Alarm, a signal is sent from the Alarm.com app through Alarm.com’s backend to the monitoring station and communicates the selection. Depending at what stage the monitoring station is at with handling the original alarm signal, the selection may resolve situational concerns or may help influence post-dispatch communications between the monitoring station and the emergency personnel.
The following are examples of what is shown when canceling or verifying an alarm using the Alarm.com app:
Cancel Confirmation
Verify Confirmation
When pressing False Alarm, a disarm signal is sent to the panel, similar to disarming directly at the panel.
The following is what is shown when submitting a Cancel response to an alarm event:
Cancel Confirmation Messaging
The following is the confirmation message that appears on the Alarm.com app home page after submitting a Cancel response to an alarm event:
Cancel Home Page
When pressing Verify Alarm, the alarm signal is verified and sent to the monitoring station.
The following is what is shown when submitting a Verify response to an alarm event:
Verify Confirmation Messaging
The following is the confirmation message that appears on the Alarm.com app home page after submitting a Verify response to an alarm event:
Verify Home Page
What if multiple users attempt to Cancel/Verify an alarm from different devices?
Only the first user to enter the Alarm.com app and respond with a Cancel or Verify has the corresponding event code forwarded to the monitoring station. Any other users attempting to submit a simultaneous response are presented with a Signal Already Sent Cancel or Signal Already Sent Verify message.
Signal Already Sent examples:
Signal Already Sent CancelSignal Already Sent Verify
Why is there a five-minute refresh period?
Alarms triggered within a five-minute period are likely linked to the same situation. Monitoring stations still receive all alarms as expected, the Cancel/Verify signal provides a contextual clue to the cause/urgency, and the reps can interpret the scenario based on the signal sent from you. The monitoring station may deem within its protocol to still call in any situation as a follow-up, as each monitoring station is individually consulted before providing support for the features.
How can I get Cancel/Verify?
Contact your service provider for more information about supported features. If your service provider does not support Cancel/Verify, ask whether the monitoring station supports it. Service providers can work directly with monitoring stations to determine which features are supported.
Always verify safety, installation, compatibility, and current UI details against the original manufacturer documentation before operational use.
System Management
Change a partition name
GoSafer Security Knowledge Base
This operational reference is organized for GoSafer Security customers and staff. Alarm.com product names are retained where required for technical accuracy.
Overview
Systems with multiple partitions can be more easily managed with customized partition names.
Platform
App + Web
Content type
How-to / Configuration
Source last updated
2025-06-04
Procedure
Step-by-step guide: Screenshots and videos are placed with the instruction they illustrate.
Systems with multiple partitions can be more easily managed with customized partition names. Partitions are ordered alphabetically in the app, so renaming a partition can help change a partition's position in a partition list.
To change a partition name:
Partition names can only be updated using the GoSafer Security customer portal (powered by Alarm.com). It cannot be updated using the Alarm.com app.
Log in to the GoSafer Security customer portal (powered by Alarm.com).
In the Security card, click Details as outlined in the following image:
Details Icon On Security Card
Click Settings for the partition to be edited.
Panel partition card
In Device Name, enter the new partition name.
Partition settings
Click Icn Close to close the Systems Settings window. This saves the changes automatically.
Always verify safety, installation, compatibility, and current UI details against the original manufacturer documentation before operational use.
System Management
Change a sensor name remotely
GoSafer Security Knowledge Base
This operational reference is organized for GoSafer Security customers and staff. Alarm.com product names are retained where required for technical accuracy.
Overview
Systems with multiple sensors can be more easily managed with customized sensor names.
Platform
App + Web
Content type
Reference
Source last updated
2025-06-04
Procedure
Step-by-step guide: Screenshots and videos are placed with the instruction they illustrate.
Sensor names can be managed remotely using the Alarm.com app or GoSafer Security customer portal (powered by Alarm.com).
To change a sensor name using the Alarm.com app:
Log in to the Alarm.com app.
Tap Menu.
Tap Manage Devices.
Tap More options next to the device to rename.
Tap Rename Device.
Enter the desired name for the sensor.
Tap OK.
To change a sensor name using the GoSafer Security customer portal (powered by Alarm.com):
Log in to the GoSafer Security customer portal (powered by Alarm.com).
Always verify safety, installation, compatibility, and current UI details against the original manufacturer documentation before operational use.
System Management
Change the monitoring station emergency contact information
GoSafer Security Knowledge Base
This operational reference is organized for GoSafer Security customers and staff. Alarm.com product names are retained where required for technical accuracy.
Overview
When a monitoring station contact list is outdated or incorrect, the monitoring station may call the wrong numbers to address an alarm event. The Emergency Contact Management integration puts this …
Platform
App + Web
Content type
How-to / Configuration
Source last updated
2025-10-07
Procedure
To change the emergency contact information using the Alarm.com app
Note: Up to three emergency contacts can be attached to an account by default. To add more than three emergency contacts, contact your service provider.
Log in to the Alarm.com app.
Tap [Menu].
Tap Monitoring Settings.
Tap Emergency Contacts.
In Emergency Contacts, tap Add Contact.
Tap either of the following to add contacts:
Add Manually to create a contact from scratch.
Add from Contacts to automatically add a contact from the device address book.
Tap Sort to arrange the contact list priority as desired.
Important: The monitoring station contacts the attached numbers in the order they appear in the list.
Tap and drag [Reorder] for each contact to rearrange the list.
To change the emergency contact information using the GoSafer Security customer portal (powered by Alarm.com)
Note: Up to three emergency contacts can be attached to an account by default. To add more than three emergency contacts, contact your service provider.
Log in to the GoSafer Security customer portal (powered by Alarm.com).
Click Settings.
Click Monitoring Station.
Click Emergency Contacts.
Click + Contact.
Enter the first and last name of the emergency contact.
Click + Phone Number.
Enter the desired phone numbers and select the Phone Type.
In Verbal Passcode, enter the desired verbal passcode for each contact.
Click Save.
The contact order is the order in which the monitoring station will attempt to contact the provided numbers (i.e., If 1 is chosen, that person is contacted first). For steps on re-ordering Emergency Contacts, proceed to Configure Emergency Contact lists using the GoSafer Security customer portal (powered by Alarm.com).
To edit the contact list order using the GoSafer Security customer portal (powered by Alarm.com)
Log in to the GoSafer Security customer portal (powered by Alarm.com).
Click Settings.
Click Monitoring Station.
Click Emergency Contacts.
Click [Reorder Mode].
Click and drag [Reorder] to reorder the contact list as desired.
Note: It is not possible to move contacts between lists with these steps. To move contacts between lists, proceed to To move existing contacts from one list to the other using the GoSafer Security customer portal (powered by Alarm.com).
Click Save.
To move existing contacts from one list to the other using the GoSafer Security customer portal (powered by Alarm.com)
Log in to the GoSafer Security customer portal (powered by Alarm.com).
Click Settings.
Click Monitoring Station.
Click Emergency Contacts.
Click [Down] for the desired contact.
Click Edit.
Click Move to After Dispatch or Move to Before Dispatch as applicable.
Click Save.
To change ECV emergency contact information using the Alarm.com app
Note: Up to three contacts can be attached for contact before and after law enforcement dispatch. To add more than three emergency contacts before and after dispatch, contact your service provider.
Log in to the Alarm.com app.
Tap [Menu].
Tap Monitoring Settings.
Tap Emergency Contacts.
In Prior to Dispatch, tap Add Contact to add contacts that will be notified before dispatch.
Tap either of the following to add contacts:
Add Manually to create a contact from scratch.
Add from Contacts to automatically add a contact from the device address book.
In After Dispatch, tap Add Contact to add contacts that will be notified after dispatch.
Tap either of the following to add contacts:
Add Manually to create a contact from scratch.
Add from Contacts to automatically add a contact from the device address book.
Tap Sort to arrange the contact list priority as desired.
Important: The monitoring station contacts the attached numbers in the order they appear in the list.
Tap and drag [Reorder] for each contact to rearrange the list.
To change ECV emergency contact information using the GoSafer Security customer portal (powered by Alarm.com)
Note: Up to three contacts can be attached for contact before and after law enforcement dispatch. To add more than three emergency contacts before and after dispatch, contact your service provider.
Log in to the GoSafer Security customer portal (powered by Alarm.com).
Click Settings.
Click Monitoring Station.
Click Emergency Contacts.
Click + Contact.
Using the When to Contact dropdown menu, select Before Dispatch or After Dispatch.
Enter the first and last name of the emergency contact.
Use the first dropdown menu to select the number of contacts to be called before dispatch.
Click + Phone Number.
Enter the desired phone numbers and select the Phone Type.
In Verbal Passcode, enter the desired verbal passcode for each contact.
Click Save.
The contact order is the order in which the monitoring station attempts to contact the provided numbers (i.e., If 1 is chosen, that person is contacted first). For steps on re-ordering Emergency Contacts, proceed to Configure Emergency Contact lists using the GoSafer Security customer portal (powered by Alarm.com).
Always verify safety, installation, compatibility, and current UI details against the original manufacturer documentation before operational use.
System Management
Change the monitoring station location phone number
GoSafer Security Knowledge Base
This operational reference is organized for GoSafer Security customers and staff. Alarm.com product names are retained where required for technical accuracy.
Overview
In the case of an emergency where you are unable to disarm the system, the monitoring station may call to verify the alarm. This typically involves contacting you at the location where the system is …
Platform
App + Web
Content type
How-to / Configuration
Source last updated
2025-06-04
Procedure
Step-by-step guide: Screenshots and videos are placed with the instruction they illustrate.
Depending on the type of alarm event, the location phone number may be contacted either before or after a dispatch to authorities has been made to verify the alarm.
Emergency contact information (e.g., Location [Premise] phone numbers, verbal passcodes, contact lists, and per-contact passcodes) can be modified using the website and app. For more information about how to change emergency contact information, see the following:
Always verify safety, installation, compatibility, and current UI details against the original manufacturer documentation before operational use.
System Management
Change the monitoring station verbal passcode
GoSafer Security Knowledge Base
This operational reference is organized for GoSafer Security customers and staff. Alarm.com product names are retained where required for technical accuracy.
Overview
When the monitoring station calls, you will be asked to provide their verbal passcode to verify their identity, confirm if the alarm is valid, and cancel it if it is a false alarm.
Platform
App + Web
Content type
How-to / Configuration
Source last updated
2025-06-04
Procedure
To change the verbal passcode using Alarm.com app
Log in to the Alarm.com app.
Tap [Menu].
Tap Monitoring Settings.
Tap Update Verbal Passcode.
Tap Confirm.
Enter the desired passcode in the Verbal Passcode field.
Re-enter the same password in the Confirm Verbal Passcode field. These must match in order to be saved.
Tap Done.
To change the verbal passcode using the GoSafer Security customer portal (powered by Alarm.com)
Log in to the GoSafer Security customer portal (powered by Alarm.com).
Click Settings.
Click Monitoring Station.
Click Location Settings.
Click Edit.
Enter the desired passcode in the Verbal Passcode field.
Re-enter the same password in the Confirm Verbal Passcode field. These must match in order to be saved.
Always verify safety, installation, compatibility, and current UI details against the original manufacturer documentation before operational use.
System Management
Clear a duress, panic, or smoke alarm
GoSafer Security Knowledge Base
This operational reference is organized for GoSafer Security customers and staff. Alarm.com product names are retained where required for technical accuracy.
Overview
A duress or smoke alarm message can only be cleared using the website. It cannot be cleared using the mobile app.
Platform
App + Web
Content type
Troubleshooting
Source last updated
2025-06-04
Procedure
Step-by-step guide: Screenshots and videos are placed with the instruction they illustrate.
A duress, panic, or smoke alarm message can only be cleared using the GoSafer Security customer portal (powered by Alarm.com). It cannot be cleared using the Alarm.com app.
The message will eventually disappear on its own after a few days. For duress alarms, the Alert message will also clear when the system is disarmed by a user code that is not the duress code. If the alarm is not clearing, contact your service provider.
Important: If an alarm is still active locally, you must acknowledge the alarm at the panel before the trouble can clear on the GoSafer Security customer portal (powered by Alarm.com) and Alarm.com app.
To clear a duress or smoke alarm alert:
Log in to the GoSafer Security customer portal (powered by Alarm.com).
In the Welcome card, click Details for Panel Duress, Panic,or Smoke Sensor Must Be Reset.
System in duress
You can also click View in the System in Alarm banner to navigate to the Alerts & Issues page.
If you do not see the Welcome card, you may have it hidden. For more information about locating and arranging the Welcome card, see Rearrange Home page of website or app.
In Alerts & Issues:
For a duress alert, click Stop Alarm and confirm to stop the alarm.
For a smoke sensor reset alert, click Remove Alert.
Once it's confirmed to stop or remove the alert, it acknowledges the alarm and clears the alert message from the GoSafer Security customer portal (powered by Alarm.com) and Alarm.com app.
Clear a duress or smoke
For more information about this feature, contact your service provider.
Always verify safety, installation, compatibility, and current UI details against the original manufacturer documentation before operational use.
System Management
Configure Qolsys panel camera image uploads for alarms and local disarms
GoSafer Security Knowledge Base
This operational reference is organized for GoSafer Security customers and staff. Alarm.com product names are retained where required for technical accuracy.
Overview
Qolsys panel camera images uploads for local disarms and alarms can be configured using the Alarm.com website and app.
Platform
Customer Website
Content type
How-to / Configuration
Source last updated
2025-06-04
Procedure
Step-by-step guide: Screenshots and videos are placed with the instruction they illustrate.
Qolsys panels with a panel camera (i.e., IQ Panel 2 and IQ Panel 4) can upload the panel camera images for local disarms and alarms. Panel camera images can be configured using the GoSafer Security customer portal (powered by Alarm.com).
Captured images are saved in the Images event gallery and count towards the monthly image upload limit. For more information about viewing the event gallery, see View the Images Gallery.
Important: The panel must be connected to Wi-Fi to upload panel images to the Alarm.com app and GoSafer Security customer portal (powered by Alarm.com).
To configure panel camera images:
This can only be configured using the GoSafer Security customer portal (powered by Alarm.com). If you are unable to see the option to configure panel camera images, contact your service provider.
Log in to the GoSafer Security customer portal (powered by Alarm.com).
Click Automation.
Click Rules,if not selected already.
To enable/disable panel camera disarm and/or alarm images, click the toggle switch for the Panel Camera Alarm Image Uploads and/or Panel Camera Disarm Image Uploads automation rules.
In the following example, alarm image uploads are enabled and disarm image uploads are disabled:
IQP2 panel camera rules
To configure recipient notifications:
Click Edit for the automation rule to configure.
Click Add.
Select any recipients to be notified from the Address Book dropdown. If the intended recipient is not listed, click New to add a new recipient address.
Once desired recipients are selected, click Close.
Always verify safety, installation, compatibility, and current UI details against the original manufacturer documentation before operational use.
System Management
Device is in malfunction
GoSafer Security Knowledge Base
This operational reference is organized for GoSafer Security customers and staff. Alarm.com product names are retained where required for technical accuracy.
Overview
The Malfunction trouble condition indicates a device is unable to properly communicate.
Platform
General / Device
Content type
Troubleshooting
Source last updated
2024-01-22
Procedure
If a device is in malfunction
Verify which device is in malfunction.
It is possible that the device in malfunction may be a Geo-Device. This is usually indicated by the name of the device that is in malfunction matching the name of a device that is serving as a Geo-Device. If the device appears to be a Geo-Device (e.g., smartphone), see Geo-Service device is in malfunction.
Verify that the device is still active and powered on.
Power cycle the device, if possible. If applicable, power off the device for a couple of minutes, and then power the device back on.
Verify there is nothing that could be interfering with communication, such as range or interfering devices. If possible, move the device closer to the main system.
Trigger the device, if possible (e.g., open and close a sensor). Verify if the status is able to update.
If the device is still in malfunction, contact your service provider for further assistance.
Troubleshooting by device type
Some device types have troubleshooting articles dedicated to that device type
Connected Car is in malfunction
Garage door is in malfunction
Geo-Service device is in malfunction
Light is in malfunction
Shade control device is in malfunction
Lock is in malfunction
Thermostat or remote temperature sensor is in malfunction
Always verify safety, installation, compatibility, and current UI details against the original manufacturer documentation before operational use.
System Management
Disarm the system remotely
GoSafer Security Knowledge Base
This operational reference is organized for GoSafer Security customers and staff. Alarm.com product names are retained where required for technical accuracy.
Overview
The system can be disarmed or put into a non-alarm state for when the system is occupied.
Platform
App + Web
Content type
How-to / Configuration
Source last updated
2025-06-04
Procedure
Step-by-step guide: Screenshots and videos are placed with the instruction they illustrate.
The system can be remotely disarmed using the Alarm.com app or GoSafer Security customer portal (powered by Alarm.com). Disarming the system puts it into a non-alarm state when the location is occupied.
Arming commands
To disarm the system using the Alarm.com app:
Log in to the Alarm.com app.
In the Security Systemcard, tap the shieldicon that indicates the current arming state.
Tap Disarm.
To disarm the system using the GoSafer Security customer portal (powered by Alarm.com):
Log in to the GoSafer Security customer portal (powered by Alarm.com).
In the Security card, click the shield icon that indicates the current arming state.
Click Disarm.
To disarm the system using Scenes:
Scenes allow users to configure a button on the Alarm.com app and GoSafer Security customer portal (powered by Alarm.com) that triggers multiple actions across multiple devices at once. For more information about Scenes, see How do Scenes work?.
Log in to the Alarm.com app or GoSafer Security customer portal (powered by Alarm.com).
In Scenes, select the Scene you want to run that includes the disarm command.
For more information about creating or editing Scenes, see Create/edit a Scene.
Always verify safety, installation, compatibility, and current UI details against the original manufacturer documentation before operational use.
System Management
Enable Smart Arming
GoSafer Security Knowledge Base
This operational reference is organized for GoSafer Security customers and staff. Alarm.com product names are retained where required for technical accuracy.
Overview
For residential customers, the Smart Arming feature automatically arms the customer's system Arm Stay when they go to bed and Disarm it when they wake up. Smart Arming can be activated at a set time or when sensors detect activity. Smart Arming ensures that the system is secure every night while preventing false alarms.
Use-Case Example: A family with a regular nighttime routine schedules Smart Arming to arm the panel at 10:00 PM each night. Because they have small children who may wake early and let the dog out, they auto-disarm when activity is detected between 6:00 AM and 9:00 AM.
Platform
App + Web
Content type
How-to / Configuration
Source last updated
2026-01-27
Procedure
Step-by-step guide: Screenshots and videos are placed with the instruction they illustrate.
For residential customers, the Smart Arming feature automatically arms the customer's system Arm Stay when they go to bed and Disarm it when they wake up. Smart Arming can be activated at a set time or when sensors detect activity. Smart Arming ensures that the system is secure every night while preventing false alarms.
Use-Case Example: A family with a regular nighttime routine schedules Smart Arming to arm the panel at 10:00 PM each night. Because they have small children who may wake early and let the dog out, they auto-disarm when activity is detected between 6:00 AM and 9:00 AM.
System considerations
Not all panels are compatible with Smart Arming. Contact your service provider for more information about if your panel is compatible.
Smart Arming will not activate if a system is in Arm Away
Smart Arming is only available for security systems with one partition
Sensor-based Arm Stay uses contact and motion sensors to detect activity; users select which sensors to include
Sensor-based Disarm uses motion sensors only so someone breaking in can not disarm the panel; users select which sensors to include
Smart Arming schedules that overlap may cause unexpected behavior. It is not recommended to set up overlapping schedules.
Note: Motion sensors with PIR cameras cannot be selected with Sensor-based Arm Stay or Sensor-based Disarm.
Enable Smart Arming
Smart Arming can be configured using the Alarm.com app or GoSafer Security customer portal (powered by Alarm.com).
Important: To manage the Smart Arming rule, the customer login must have Master Control, Full Control, or Custom with Remote Arming selected. Additionally, Limited Device Access with Remote Panel Control and Read Only logins are able to view existing Smart Arming settings, but not manage them. For more information about customer permissions, see Manage login permissions for secondary logins.
Expand all
To enable Smart Arming using the Alarm.com app: Icn Chevron Up
Important: Managing this feature on the Alarm.com app requires app version iOS 4.21.14+ and Android 4.21.12+. For custom schedules for each day of the week, iOS 5.13 and Android 5.10+ Alarm.com app version is required.
Log in to the Alarm.com app.
On the Security System card, tap Smart Arming for Smart Arming. Tap Smart Arming.
Tap + to create a Smart Arming schedule, or Edit on an existing schedule to configure it.
In Select Smart Arming Action, tap to select either Wake Up for disarming or Goodnight for arming stay.
In Name Schedule, enter a name for the schedule.
In Select Schedule Type, tap either:
Specified Time to run the schedule at a specific time. If this is selected:
In Configure Schedule, use the dropdown menus to select the Days and Starting at time for this rule to run.
Or, if available, Activity Detected to run the schedule based on compatible sensor activity. If this is selected:
For the Wake Up schedule, this option is available if the customer has motion sensors in compatible groups to disarm when activity is detected between specific times for selected sensors included in the rule.
Use the dropdown menus to select the Days, Starting at time, Ending at time, and Inactivity Period for this rule to run.
In Select Sensor(s), tap to select the sensors used to detect activity for this rule to activate.
Additional considerations:
This schedule only activates when the panel is armed stay.
When Disarm at X:XX even if no activity is detected is selected, the panel disarms at the end of the selected time frame if no motion is detected during the selected time period.
This rule is designed to disarm once during the selected time period. If the panel has disarmed once due to motion, it will not disarm again at the end of the selected time period.
Example: A user sets the Wake Up rule to disarm the panel due to no activity. The Wake Up rule is triggered to disarm the panel. Within the time frame, the user arms the panel remotely or locally. The Wake Up rule will no longer disarm the panel until the following day.
For the Goodnight schedule, this option is available if the customer has motion/contact sensors in compatible groups to arm stay between specific times when no activity has been detected for a specified duration for selected sensors included in the rule.
Use the dropdown menus to select the Days, Starting at time, Ending at time, and Inactivity Period for this rule to run.
In Select Sensor(s), tap to select the sensors used to detect activity for this rule to activate.
Additional considerations:
This rule can arm the panel multiple times in the selected time period.
Example: A user sets the Goodnight rule to arm stay after 30 minutes of inactivity. During the time frame, the Goodnight rule triggers to arm stay the panel and the user disarms the panel remotely or locally. Once the inactivity time period is reached again, the rule will trigger the panel to arm stay again.
Tap Save.
Smart Arming Schedule App
To enable Smart Arming using the GoSafer Security customer portal (powered by Alarm.com): Icn Chevron Up
Log in to the GoSafer Security customer portal (powered by Alarm.com).
On the Security System card, click Smart Arming.
Note: Smart Arming can also be accessed from the Automation page.
Click + Schedule to create a Smart Arming schedule, or Edit on an existing schedule to configure it.
In Select Smart Arming Action, click to select either Wake Up for disarming or Goodnight for arming stay.
In Name Schedule, enter a name for the schedule.
In Select Schedule Type, click either:
Specified Time to run the schedule at a specific time. If this is selected:
In Configure Schedule, use the dropdown menus to select the Days and Starting at time for this rule to be active.
Or, if available, Activity Detected to run the schedule based on compatible sensor activity. If this is selected:
For the Wake Up schedule, this option is available if the customer has motion sensors in compatible groups to disarm when activity is detected between specific times for selected sensors included in the rule.
Use the dropdown menus to select the Days, Starting at time, Ending at time, and Inactivity Period for this rule to activate.
In Select Sensor(s), click to select the sensors used to detect activity for this rule to activate.
Additional considerations:
This schedule only activates when the panel is armed stay.
When Disarm at X:XX even if no activity is detected is selected, the panel disarms at the end of the selected time frame if no motion is detected during the selected time period.
This rule is designed to disarm once during the selected time period. If the panel has disarmed once due to motion, it will not disarm again at the end of the selected time period.
Example: A user sets the Wake Up rule to disarm the panel due to no activity. The Wake Up rule is triggered to disarm the panel. Within the time frame, the user arms the panel remotely or locally. The Wake Up rule will no longer disarm the panel until the following day.
For the Goodnight schedule, this option is available if the customer has motion/contact sensors in compatible groups to arm stay between specific times when no activity has been detected for a specified duration for selected sensors included in the rule.
Use the dropdown menus to select the Days, Starting at time, Ending at time, and Inactivity Period for this rule to activate.
In Select Sensor(s), click to select the sensors used to detect activity for this rule to activate.
Additional considerations:
This rule can arm the panel multiple times in the selected time period.
Example: A user sets the Goodnight rule to arm stay after 30 minutes of inactivity. During the time frame, the Goodnight rule triggers to arm stay the panel and the user disarms the panel remotely or locally. Once the inactivity time period is reached again, the rule will trigger the panel to arm stay again.
Always verify safety, installation, compatibility, and current UI details against the original manufacturer documentation before operational use.
System Management
Export panel slot number for a system
GoSafer Security Knowledge Base
This operational reference is organized for GoSafer Security customers and staff. Alarm.com product names are retained where required for technical accuracy.
Overview
The panel slot numbers report is a downloadable.csv file that shows all users associated with the system. This is useful for keeping personal records of users in a system.
Platform
App + Web
Content type
Reference
Source last updated
2025-06-04
Procedure
To export panel slot numbers using the Alarm.com app
Log in to the Alarm.com app.
Tap [Menu].
Tap Account Management.
Tap User Slot Management.
Tap Export.
To export panel slot numbers using the GoSafer Security customer portal (powered by Alarm.com)
Log in to the GoSafer Security customer portal (powered by Alarm.com).
Always verify safety, installation, compatibility, and current UI details against the original manufacturer documentation before operational use.
System Management
Getting started with a Residential account
GoSafer Security Knowledge Base
This operational reference is organized for GoSafer Security customers and staff. Alarm.com product names are retained where required for technical accuracy.
Overview
This video walks through some of the basic features associated with an Alarm.com Residential account.
Platform
General / Device
Content type
How-to / Configuration
Source last updated
2026-03-06
Procedure
Step-by-step guide: Screenshots and videos are placed with the instruction they illustrate.
For more information about how to set up notifications, see Notifications.
For more information about how to set up scenes, see Scenes.
Always verify safety, installation, compatibility, and current UI details against the original manufacturer documentation before operational use.
System Management
How can I change the batteries in my device?
GoSafer Security Knowledge Base
This operational reference is organized for GoSafer Security customers and staff. Alarm.com product names are retained where required for technical accuracy.
Overview
If the batteries in a device need to be changed, a Device Low Battery trouble condition should appear in the Alarm.com app.
[Issues Card]
Platform
App + Web
Content type
Troubleshooting
Source last updated
2025-06-04
Procedure
Step-by-step guide: Screenshots and videos are placed with the instruction they illustrate.
If the batteries in a device need to be changed, a Device Low Battery trouble condition should appear in the Alarm.com app.
Issues card
To learn how to change the batteries in a device:
Log in to the Alarm.com app.
In Issues, tap the Device Low Battery trouble condition for the relevant device.
Tap Fix It.
Follow the instructions to change the batteries.
Caution: When removing and replacing batteries, always take precautions (e.g., ensuring the device is powered off, any panel-specific requirements, etc.).
Note: If instructions to replace the batteries are not available, refer to the installation guide packaged with the device or on the manufacturer's website, or contact your service provider for assistance.
Always verify safety, installation, compatibility, and current UI details against the original manufacturer documentation before operational use.
System Management
How can I know if there is a local power outage on the app?
GoSafer Security Knowledge Base
This operational reference is organized for GoSafer Security customers and staff. Alarm.com product names are retained where required for technical accuracy.
Overview
A real-time notification about local power outages only displays in the Alarm.com app during instances when there may be a power outage in your area.
Platform
Mobile App
Content type
FAQ / Explanation
Source last updated
2026-06-09
Procedure
Step-by-step guide: Screenshots and videos are placed with the instruction they illustrate.
A real-time notification about local power outages only displays in the Alarm.com app during instances when there may be a power outage in your area.
To view the power outage notification on the Alarm.com app:
Log in to the Alarm.com app.
In the Top Recommendations card, find the power outage notifications, then tap Learn More.
The following is an example of how an power outage notification appears in the Top Recommendations card in the Alarm.com app:
Always verify safety, installation, compatibility, and current UI details against the original manufacturer documentation before operational use.
System Management
How can I view legal agreements and documents?
GoSafer Security Knowledge Base
This operational reference is organized for GoSafer Security customers and staff. Alarm.com product names are retained where required for technical accuracy.
Overview
Alarm.com’s general legal agreements and documents are available at www.alarm.com/legal for reference at any time.
Platform
General / Device
Content type
FAQ / Explanation
Source last updated
2026-03-06
Procedure
General legal agreements and documents can be accessed anytime by visiting www.alarm.com/legal.
To view the specific legal agreements that you agreed to when you initially began service, contact your service provider.
Always verify safety, installation, compatibility, and current UI details against the original manufacturer documentation before operational use.
System Management
How do I change my time zone?
GoSafer Security Knowledge Base
This operational reference is organized for GoSafer Security customers and staff. Alarm.com product names are retained where required for technical accuracy.
Overview
The time zone for an account can be changed using the Alarm.com app or GoSafer Security customer portal (powered by Alarm.com).
Note: The system's time automatically adjusts for daylight savings based on the time zone that is selected.
Platform
App + Web
Content type
How-to / Configuration
Source last updated
2025-06-04
Procedure
To change the time zone using the Alarm.com app
Log in to the Alarm.com app.
Tap [Menu].
Tap Account Management.
Tap System Information.
Using the Time Zone dropdown menu, select the desired time zone.
Tap Update.
Note: If you are unable to access the Account Management page, or if the panel is showing the incorrect time, contact your service provider for assistance.
To change the time zone using the GoSafer Security customer portal (powered by Alarm.com)
Log in to the GoSafer Security customer portal (powered by Alarm.com).
Click Settings.
Click Account Management.
Click System Information.
Note: If using a mobile device web browser, tap [Menu], then tap System Information on the Account Management page.
Using the Time Zone dropdown menu, select the desired time zone.
Click Update.
Note: If you are unable to access the Account Management page, or if the panel is showing the incorrect time, contact your service provider for assistance.
Always verify safety, installation, compatibility, and current UI details against the original manufacturer documentation before operational use.
System Management
How do I control multiple partitions of a security panel?
GoSafer Security Knowledge Base
This operational reference is organized for GoSafer Security customers and staff. Alarm.com product names are retained where required for technical accuracy.
Overview
Secondary partitions become available on a customer account after the partition is enabled in the security panel and at least one sensor is assigned to it, with no additional service package cost …
Platform
App + Web
Content type
Reference
Source last updated
2026-03-06
Procedure
Step-by-step guide: Screenshots and videos are placed with the instruction they illustrate.
A secondary partition will appear on an account after the partition is enabled in the security panel and has at least one sensor associated with it. There are no additional service package costs to remotely control or use partitions on a customer account.
On the Alarm.com app, the arming level of a partition can be set to whatever is desired by checking the box next to the partition's current status and you can select multiple partitions at the same time. For example, eight partitions can be Armed Away at once.
On the GoSafer Security customer portal (powered by Alarm.com), the second partition will appear below the first partition under Current Arming States.
Note: Selecting multiple partitions can only be done using the Alarm.com app and only if those partitions are all disarmed or if they are all armed (either stay or away). You can also send different commands to different partitions as well (e.g., arm partitions 1 and 2 while leaving partitions 3 and 4 disarmed).
Control multiple partitions using the Alarm.com app:
To view and control secondary partitions individually from the app home screen, you can scroll through them on the Security System card by swiping left or right on the partition status and then tapping the partition to send commands to the individual partition.
Multiple partitions can be commanded at once by using the Security System menu. Tap the Security System card on the home screen and use the checkboxes to select multiple partitions to send commands to.
File
Control multiple partitions using the GoSafer Security customer portal (powered by Alarm.com):
Partitions can be controlled through the Security System page on the GoSafer Security customer portal (powered by Alarm.com). On this page, you can select any desired partition and send commands to individual partitions.
Always verify safety, installation, compatibility, and current UI details against the original manufacturer documentation before operational use.
System Management
How do I make sure my account is secure?
GoSafer Security Knowledge Base
This operational reference is organized for GoSafer Security customers and staff. Alarm.com product names are retained where required for technical accuracy.
Overview
This guide outlines best practices for improving the security of an Alarm.com account and monitored system.
Platform
App + Web
Content type
How-to / Configuration
Source last updated
2026-03-06
Procedure
Create unique user codes for each individual who needs access to the security system
If other people are going to have access to your property and will need to disarm the security system, give them each their own user code. This will ensure you always know who disarmed your system.
For more information, see: Create a system user code.
Create specific logins for each person who accesses the website and mobile applications
If other people are going to have regular access to your account, it is recommended to give them each their own secondary login. This will ensure you always know who logged in. Additionally, you can limit their access to specific devices within your system.
For more information, see
Create a login for the GoSafer Security customer portal (powered by Alarm.com)
Manage login permissions for secondary logins
Passwords
Regularly updating user passwords for Alarm.com app and GoSafer Security customer portal (powered by Alarm.com) users helps keep your account more secure. When creating new passwords, remember:
The new password cannot be the same as the previous password.
The new password must be at least 10 characters, including at least one letter, one number, and one special character.
It is recommended to only use passwords that are indicated as Strong by the password strength indicator.
It is recommended to make your password for your online account different from other passwords you use.
For more information, see Change or reset a password.
Two-factor authentication
Two-Factor Authentication adds an extra layer of security to protect access to your system. This makes it harder for unauthorized persons or potential intruders to gain access to your system, so your system and your property can be even more secure. Whenever you sign into your system from a new or untrusted device, you'll have to enter both your password and a one-time code sent to your mobile phone or email.
For more information, see Enable Two-Factor Authentication.
Push Notifications
Use push notifications for instant, reliable notifications about your account and system. To receive Push Notifications for an account, enable the feature for each mobile device that will receive push notifications.
For more information, see How can a device start receiving Push Notifications.
Successful and Unsuccessful Login Attempt notifications
You can use the System Event Notification to set up notifications for login attempts as well as other events so you are always aware of what is happening with your system.
For more information, see Create a system event notification.
User Code created or updated notifications
We automatically send System Awareness notifications to the primary email of a user's account when certain actions occur. These default notifications cannot be configured or disabled and are always sent whenever certain actions occur on a user's account.
For more information, see Default System Awareness Notifications.
Unexpected Activity Alerts (Events)
Our platform works in the background to analyze system data and learn the normal activity patterns of a property. The system can then send notifications whenever unusual activity occurs in a home or business. Unexpected Activity notifications are intended to provide information only.
For more information, see Configure Unexpected Activity Alert notifications.
Sensor and Arming Activity Notifications
You can customize which system activity events trigger notifications to be sent to you through the Alarm.com app and GoSafer Security customer portal (powered by Alarm.com).
For more information see
Create an arming event notification
Create a sensor activity notification
Create a system event notification
Create an alarm notification
Review system activity regularly
The system activity history shows system, GoSafer Security customer portal (powered by Alarm.com), and user activity that has occurred within the past 60 days. The system activity history is useful for accessing the information you need, storing key records, and gaining new insights for your system.
For more information, see View the system activity history.
Set up Touch ID or Face ID
This will require an additional step of verification before someone can access your account on your mobile device.
Always verify safety, installation, compatibility, and current UI details against the original manufacturer documentation before operational use.
System Management
How do I switch between my accounts?
GoSafer Security Knowledge Base
This operational reference is organized for GoSafer Security customers and staff. Alarm.com product names are retained where required for technical accuracy.
Overview
It is possible to switch between multiple Alarm.com accounts from the Alarm.com app or GoSafer Security customer portal (powered by Alarm.com) from the same login after a login name has been granted Linked Systems.
Note: If the following options do not appear, Linked Systems may not be activated for the login being used. For more information on how to activate Linked Systems, see How can I link multiple accounts together?.
Platform
App + Web
Content type
Reference
Source last updated
2023-10-27
Procedure
Step-by-step guide: Screenshots and videos are placed with the instruction they illustrate.
It is possible to switch between multiple Alarm.com accounts from the Alarm.com app or GoSafer Security customer portal (powered by Alarm.com) from the same login after a login name has been granted Linked Systems.
Note: If the following options do not appear, Linked Systems may not be activated for the login being used. For more information on how to activate Linked Systems, see How can I link multiple accounts together?.
Switch between accounts
Accounts can be switched between using the GoSafer Security customer portal (powered by Alarm.com) and Alarm.com app.
Expand all
To switch between accounts using the Alarm.com app:Icn Chevron Down
Log into the Alarm.com app.
Tap the system description.
Switch Systems
Select the desired system to access.
To switch between accounts on the GoSafer Security customer portal (powered by Alarm.com):Icn Chevron Down
Log into the GoSafer Security customer portal (powered by Alarm.com).
Always verify safety, installation, compatibility, and current UI details against the original manufacturer documentation before operational use.
System Management
How many sensors can be displayed in the app?
GoSafer Security Knowledge Base
This operational reference is organized for GoSafer Security customers and staff. Alarm.com product names are retained where required for technical accuracy.
Overview
The Alarm.com app can display all sensors that have Sensor Activity Monitoring enabled (e.g., door/window sensors, motion sensors, etc.). For more information about verifying if the sensor has Sensor Activity Monitoring available, see Turn sensor activity monitoring on/off.
For more information about verifying if the sensor has Sensor Activity Monitoring available, see Enable or disable Sensor Activity Monitoring.
Note: Sensors are listed in alphabetical order on the Alarm.com app. On the GoSafer Security customer portal (powered by Alarm.com), sensors are listed in order of their device ID.
Platform
App + Web
Content type
How-to / Configuration
Source last updated
2024-02-12
Procedure
The Alarm.com app can display all sensors that have Sensor Activity Monitoring enabled (e.g., door/window sensors, motion sensors, etc.). For more information about verifying if the sensor has Sensor Activity Monitoring available, see Turn sensor activity monitoring on/off.
Note: Certain sensor statuses may not display on the Alarm.com app, but most sensors, including glass break and life safety sensors, can be viewed from the Manage Devices page.
For more information about verifying if the sensor has Sensor Activity Monitoring available, see Enable or disable Sensor Activity Monitoring.
Note: Sensors are listed in alphabetical order on the Alarm.com app. On the GoSafer Security customer portal (powered by Alarm.com), sensors are listed in order of their device ID.
Sensors like smoke detectors, fire detectors, and carbon monoxide detectors put a panel into alarm regardless of the panel's current arming state (e.g., alarm sends even if disarmed). These types of sensors are ineligible for Sensor Activity Monitoring and do not appear in the Alarm.com app unless the sensor is in alarm or has a trouble condition. If these types of sensors are in alarm or report a trouble condition, the sensor alarm or alert appears in the Alarm.com app.
Note: There is no maximum limit to the number of sensors that can display on the app other than the number of sensors that can have Sensor Activity Monitoring enabled on the system.
For more information about eligibility for Sensor Activity Monitoring, see Why are some sensors, such as smoke detectors, not eligible for Sensor Activity Monitoring?.
Always verify safety, installation, compatibility, and current UI details against the original manufacturer documentation before operational use.
System Management
Is the Alarm.com app compatible with text to speech applications?
GoSafer Security Knowledge Base
This operational reference is organized for GoSafer Security customers and staff. Alarm.com product names are retained where required for technical accuracy.
Overview
An article about text to speech compatibility with Alarm.com.
Platform
Mobile App
Content type
How-to / Configuration
Source last updated
2024-12-11
Procedure
Yes. The Alarm.com app is compatible with text-to-speech applications (e.g., IOS VoiceOver, Android Talkback, etc.). To enable these applications, refer to the device manufacturer guides.
Always verify safety, installation, compatibility, and current UI details against the original manufacturer documentation before operational use.
System Management
Manage central station monitoring settings
GoSafer Security Knowledge Base
This operational reference is organized for GoSafer Security customers and staff. Alarm.com product names are retained where required for technical accuracy.
Overview
A Monitoring Station, also known as an Alarm Monitoring Center, Central Station, or Central Monitoring Station, takes the signals forwarded from Alarm.com and dispatches to the proper authorities.
Platform
App + Web
Content type
Reference
Source last updated
2025-06-04
Procedure
To manage monitoring station settings using the Alarm.com app
Log in to the Alarm.com app.
Tap [Menu].
Tap Monitoring Settings.
To manage monitoring station settings using the GoSafer Security customer portal (powered by Alarm.com)
Log in to the GoSafer Security customer portal (powered by Alarm.com).
Always verify safety, installation, compatibility, and current UI details against the original manufacturer documentation before operational use.
System Management
Put a system in test mode with the monitoring station
GoSafer Security Knowledge Base
This operational reference is organized for GoSafer Security customers and staff. Alarm.com product names are retained where required for technical accuracy.
Overview
When a system is in test mode with the monitoring station, the monitoring station is not going to respond to alarms (i.e., dispatch police) from the system during that time.
Platform
Mobile App
Content type
FAQ / Explanation
Source last updated
2025-07-18
Procedure
Step-by-step guide: Screenshots and videos are placed with the instruction they illustrate.
When a system is in test mode with the monitoring station, the monitoring station is not going to respond to alarms (i.e., dispatch police) from the system during that time. This allows tests and system maintenance to be performed without having to worry about the police being dispatched.
This is particularly useful for troubleshooting sensors without triggering false alarms.
How does it work?
The system will send a signal to the monitoring station platform to flag the account for testing and will initiate the process for the duration selected. Once the selected time elapses, the account will automatically exit test mode.
To put a system in test mode:
Important: Only the primary login and secondary logins with master permissions can put the system on test mode. If you are logged in to these logins and still do not see the option, contact your service provider.
Log in to the Alarm.com app.
Tap Menu.
Tap Monitoring Settings.
Tap System Test Mode.
image2019 5 7 13 49 48
Tap to select the test duration.
Duration Options (1 and 2 Hour)
Tap Start Test Mode.
Tap Confirm.
If test mode needs to be canceled before the duration expires, tap Stop Test Mode.
Always verify safety, installation, compatibility, and current UI details against the original manufacturer documentation before operational use.
System Management
Qolsys panel is disarming by itself
GoSafer Security Knowledge Base
This operational reference is organized for GoSafer Security customers and staff. Alarm.com product names are retained where required for technical accuracy.
Overview
If a Qolsys panel is disarming by itself, verify if you have Bluetooth disarming enabled. A compatible Qolsys panel has the ability to enable a Bluetooth device to disarm the system from an armed away state when it comes within range of the panel. Compatible Qolsys panels include Qolsys IQ Panel 2, IQ Hub, IQ Panel 4, and IQ4 Hub.
If the system is disarmed by a Bluetooth device, the name of the Bluetooth device displays as disarming the system in Activity as shown in the following example.
[Bluetooth Device Iqp2 Disarming Example]
Platform
App + Web
Content type
How-to / Configuration
Source last updated
2025-06-04
Procedure
Step-by-step guide: Screenshots and videos are placed with the instruction they illustrate.
If a Qolsys panel is disarming by itself, verify if you have Bluetooth disarming enabled. A compatible Qolsys panel has the ability to enable a Bluetooth device to disarm the system from an armed away state when it comes within range of the panel. Compatible Qolsys panels include Qolsys IQ Panel 2, IQ Hub, IQ Panel 4, and IQ4 Hub.
If the system is disarmed by a Bluetooth device, the name of the Bluetooth device displays as disarming the system in Activity as shown in the following example.
Bluetooth device IQP2 disarming example
To verify Bluetooth disarming devices using the GoSafer Security customer portal (powered by Alarm.com):
Log in to the GoSafer Security customer portal (powered by Alarm.com).
Click Settings.
Click Manage Devices.
In Security, Bluetooth disarming devices displaysimilar to a sensor.
Security with bluetooth device
Note: The panel must be used to disable Bluetooth disarming devices.
To verify Bluetooth disarming devices using the panel:
Flick to access the settings tray on the panel.
Tap Settings.
Tap Advanced Settings.
Enter your code.
Tap Bluetooth Devices.
Tap Edit Device.
Verify if the device disarming the system is listed as a Bluetooth device.
If you want to disable disarming for a Bluetooth device:
Tap Edit for the device to disable.
Using the Disarming dropdown menu, select Disable Disarming.
Tap Update.
Note: The Bluetooth Disarm Timeout setting is the amount of time the system waits until the Bluetooth device is able to disarm. This allows time for the Bluetooth device to get out of range of the panel so that the panel is not automatically disarmed.
Always verify safety, installation, compatibility, and current UI details against the original manufacturer documentation before operational use.
System Management
Remotely arm and disarm multiple partitions at once
GoSafer Security Knowledge Base
This operational reference is organized for GoSafer Security customers and staff. Alarm.com product names are retained where required for technical accuracy.
Overview
Users can remotely arm and disarm separate partitions individually using the website or app.
Platform
App + Web
Content type
Reference
Source last updated
2025-06-04
Procedure
Step-by-step guide: Screenshots and videos are placed with the instruction they illustrate.
If the system has multiple partitions, users can remotely arm and disarm separate partitions individually using the Alarm.com app or GoSafer Security customer portal (powered by Alarm.com). Partitions are listed in alphabetical order in the Alarm.com app to help organize systems with large amounts of partitions.
To arm/disarm multiple partitions using the Alarm.com app:
Log in to the Alarm.com app.
In the Security System card, swipe to navigate to the partition to adjust. Then tap to select the partition.
Always verify safety, installation, compatibility, and current UI details against the original manufacturer documentation before operational use.
System Management
Remotely change 2GIG GC3 panel settings
GoSafer Security Knowledge Base
This operational reference is organized for GoSafer Security customers and staff. Alarm.com product names are retained where required for technical accuracy.
Overview
Change some of your panel settings using the app including beeps, and temperature display units.
Platform
Mobile App
Content type
How-to / Configuration
Source last updated
2025-06-04
Procedure
Step-by-step guide: Screenshots and videos are placed with the instruction they illustrate.
Compatible panel settings can be changed using the Alarm.com app.
Note: If these options are not available, contact your service provider for more information.
To change panel settings:
Log in to the Alarm.com app.
Tap Security System.
Tap Settings.
Tap the setting to be configured.
Tap the desired value.
Tap Save.
Compatible panel settings:
Setting
Description
Temperature Display
Select if the temperature is displayed in Fahrenheit or Celsius
Always verify safety, installation, compatibility, and current UI details against the original manufacturer documentation before operational use.
System Management
Remotely change 2GIG GoControl panel settings
GoSafer Security Knowledge Base
This operational reference is organized for GoSafer Security customers and staff. Alarm.com product names are retained where required for technical accuracy.
Overview
Change some of your panel settings using the app including beeps, chimes, and temperature display format.
Platform
Mobile App
Content type
How-to / Configuration
Source last updated
2025-06-04
Procedure
Step-by-step guide: Screenshots and videos are placed with the instruction they illustrate.
Compatible panel settings can be changed using the Alarm.com app.
Note: If these options are not available, contact your service provider for more information.
To change panel settings:
Log in to the Alarm.com app.
Tap Security System.
Tap Settings.
Tap the setting to be configured.
Tap the desired value.
Tap Save.
Compatible panel settings:
Setting
Description
Silence Trouble Beeps at Night
If this feature is enabled then trouble conditions such as AC loss system low battery RF low battery fail to communicate cell radio faults will not be audible between the hour of 10 pm and 9 am. For UL 985 installations, this feature must be disabled.
Temperature Display
Select if the temperature is displayed in Fahrenheit or Celsius
Closing Acknowledgement Sound
Enable or disable the sound for an arming acknowledgment at the end of the exit delay
Always verify safety, installation, compatibility, and current UI details against the original manufacturer documentation before operational use.
System Management
Remotely change DSC iotega panel settings
GoSafer Security Knowledge Base
This operational reference is organized for GoSafer Security customers and staff. Alarm.com product names are retained where required for technical accuracy.
Overview
Change some of your panel settings using the app including beeps, and chimes.
Platform
Mobile App
Content type
How-to / Configuration
Source last updated
2025-06-04
Procedure
Step-by-step guide: Screenshots and videos are placed with the instruction they illustrate.
Compatible panel settings can be changed using the Alarm.com app.
Note: If these options are not available, contact your service provider for more information.
To change panel settings:
Log in to the Alarm.com app.
Tap Security System.
Tap Settings.
Tap the setting to be configured.
Tap the desired value.
Tap Save.
Compatible panel settings:
Setting name
Setting options
Description
Sound Settings
Chime on Zone Opening
Enable/Disable if the chime sounds each time an appropriately configured zone is opened.
Sound Settings
Chime on Zone Closing
Enable/Disable if the chime sounds each time an appropriately configured zone is closed.
Sound Settings
Panel Internal Siren
Enable/Disable the panel siren on the unit.
Sound Settings
Internal Buzzer
Enable/Disable the internal buzzer.
Sound Settings
Partition Chime
Enable/Disable the partition chime. Download only setting.
Always verify safety, installation, compatibility, and current UI details against the original manufacturer documentation before operational use.
System Management
Remotely change Interlogix Simon XT panel settings
GoSafer Security Knowledge Base
This operational reference is organized for GoSafer Security customers and staff. Alarm.com product names are retained where required for technical accuracy.
Overview
Change some of your panel settings using the app including beeps, chimes, and speaker volume.
Platform
Mobile App
Content type
Troubleshooting
Source last updated
2025-06-04
Procedure
Step-by-step guide: Screenshots and videos are placed with the instruction they illustrate.
Compatible panel settings can be changed using the Alarm.com app.
Note: If these options are not available, contact your service provider for more information.
To change settings using the Alarm.com app:
Log in to the Alarm.com app.
Tap Security System.
Tap Settings.
Tap the setting to be edited.
Tap the desired value.
Tap Save.
Compatible panel settings:
Setting name
Setting options
Description
Sounds Settings
Piezo Beeps
Determines whether the panel piezo produces beeps based on system activity
Sounds Settings
Chime Voice
Determines whether the panel announces the sensor name
Sound Settings
Chime Type
Determines the type of chime for the sensors that chime (i.e., voice, bell, soft bell, off)
Sound Settings
Speaker Volume
Determines the volume of voice messages from the panel speaker
Sound Settings
Status Beep Volume
Determines the panel piezo volume level for status sounds such as arming, trouble, and status beeps
Sound Settings
System Status Announcement
Determines whether the panel announces arming level changes
Sound Settings
Panel Piezo Alarm
Determines whether the panel piezo siren turns on for alarms
Trouble Beeps
Trouble Beeps
Turns on/off the beeps issued by the security system when there is an active trouble
24 Hour Clock
24 Hour Clock
Determines whether the system uses a 24 hour clock (enable) or a 12 hour clock (disable)
Always verify safety, installation, compatibility, and current UI details against the original manufacturer documentation before operational use.
System Management
Remotely change Interlogix Simon XTi panel settings
GoSafer Security Knowledge Base
This operational reference is organized for GoSafer Security customers and staff. Alarm.com product names are retained where required for technical accuracy.
Overview
Change some of your panel settings using the app including beeps, chimes, and speaker volume.
Platform
Mobile App
Content type
How-to / Configuration
Source last updated
2025-06-04
Procedure
Step-by-step guide: Screenshots and videos are placed with the instruction they illustrate.
Compatible panel settings can be changed using the Alarm.com app.
Note: If these options are not available, contact your service provider for more information.
To change panel settings:
Log in to the Alarm.com app.
Tap Security System.
Tap Settings.
Tap the setting to be configured.
Tap the desired value.
Tap Save.
Compatible panel settings:
Setting name
Setting options
Description
Sounds Settings
Piezo Beeps
Determines whether the panel piezo produces beeps based on system activity
Sounds Settings
Chime Voice
Determines whether the panel announces the sensor name
Sounds Settings
Chime Type
Determines the type of chime for the sensors that chime (i.e., voice, bell, soft bell, off)
Sounds Settings
Speaker Volume
Determines the volume of voice messages from the panel speaker
Sounds Settings
Status Beep Volume
Determines the panel piezo volume level for status sounds such as arming, trouble, and status beeps
Sounds Settings
System Status Announcement
Determines whether the panel announces arming level changes
Sounds Settings
Panel Piezo Alarm
Determines whether the panel piezo siren turns on for alarms
24 Hour Clock
System Options - 24 Hour Clock
Determines whether the system uses a 24 hour clock or a 12 hour clock
Always verify safety, installation, compatibility, and current UI details against the original manufacturer documentation before operational use.
System Management
Remotely change Qolsys IQ Panel 2 settings
GoSafer Security Knowledge Base
This operational reference is organized for GoSafer Security customers and staff. Alarm.com product names are retained where required for technical accuracy.
Overview
Change some of your panel settings using the app including beeps, chimes, and speaker volume.
Platform
Mobile App
Content type
How-to / Configuration
Source last updated
2025-06-04
Procedure
Step-by-step guide: Screenshots and videos are placed with the instruction they illustrate.
Compatible panel settings can be changed using the Alarm.com app.
Note: If these options are not available, contact your service provider for more information.
Always verify safety, installation, compatibility, and current UI details against the original manufacturer documentation before operational use.
System Management
Sensor is showing incorrect status on the website or app
GoSafer Security Knowledge Base
This operational reference is organized for GoSafer Security customers and staff. Alarm.com product names are retained where required for technical accuracy.
Overview
If a panel is reporting the correct sensor status but the Alarm.com app and GoSafer Security customer portal (powered by Alarm.com) are not, try the following steps.
Platform
App + Web
Content type
Troubleshooting
Source last updated
2023-11-15
Procedure
Verify sensor status
Trip the sensor, and verify the status is reporting properly at the panel.
Note: Allow a few minutes for the status to display on Alarm.com.
Refresh the equipment list page
To refresh the Alarm.com app, swipe down on the screen. A refreshing icon will become visible and will spin before refreshing the Alarm.com app.
To refresh the GoSafer Security customer portal (powered by Alarm.com), click [Refresh] on any page on the GoSafer Security customer portal (powered by Alarm.com).
Disable/enable Sensor Activity Monitoring
If the preceding steps have not corrected the status, refresh Sensor Activity Monitoring.
To refresh Sensor Activity Monitoring
Disable Sensor Activity Monitoring on the sensor. For instructions on enabling or disabling Sensor Activity Monitoring, see Turn sensor activity monitoring on/off.
It may take a few minutes for Sensor Activity Monitoring to disable. Refresh the Equipment List page to verify that Sensor Activity Monitoring is disabled.
Once disabled, re-enable Sensor Activity Monitoring again.
After a few minutes, refresh the equipment list page to verify that Sensor Activity monitoring is re-enabled.
Once enabled, verify the sensor is reporting the correct status.
Trip the sensor again to test that it is properly reporting its status.
Contact your service provider
For additional troubleshooting steps or information about sensor statuses, contact your service provider.
Always verify safety, installation, compatibility, and current UI details against the original manufacturer documentation before operational use.
System Management
Set up the app using setup wizards
GoSafer Security Knowledge Base
This operational reference is organized for GoSafer Security customers and staff. Alarm.com product names are retained where required for technical accuracy.
Overview
There are two setup wizards that can appear upon first logging into the Alarm.com app to assist you with getting the most out of your Alarm.com system right from the start.
Platform
App + Web
Content type
How-to / Configuration
Source last updated
2024-12-11
Procedure
Step-by-step guide: Screenshots and videos are placed with the instruction they illustrate.
There are two setup wizards (Mobile App Setup and App Settings Migration) that appear upon first logging into the Alarm.com app to assist you with getting the most out of your Alarm.com system right from the start.
Compatibility
The Mobile App Setup and App Settings Migration setup wizards are compatible with:
Android devices.
iOS devices.
Alarm.com Places is not supported on iPads.
Mobile App Setup wizard
The Mobile App Setup wizard guides Mobile Apps through the set up for the best practices in the Alarm.com app.
Note: The Mobile App Setup wizard only launches the very first time the user logs into the Alarm.com app. So, if you close the app after the wizard has launched, you are not able to return to the Mobile App Setup wizard.
Primary customer logins have immediate access to engaging app features. Using the Mobile App Setup wizard, primary customer logins are prompted to:
Turn on push notifications.
This allows the user to receive notifications through the Alarm.com app.
Create a location-based arming reminder.
This allows the user to receive a reminder to arm the system if the mobile device leaves the Geo-Fence.
Turn on Alarm.com Places.
This allows the user to automate their system based on the location of the mobile device.
Create their first Geo-Fence.
This allows the user to adjust the Geo-Fence's location and radius.
Subscribe the mobile device to notifications.
This allows the user to select which notifications they wish to receive.
The following is an example of the process the user goes through during the Mobile App Setup wizard:
New User Setup Wizard
Secondary customer logins are also connected to some of the features when they first login. Using the Mobile App Setup wizard, secondary customer logins are prompted to:
Turn on push notifications.
Turn on Alarm.com Places.
Subscribe the mobile device to notifications.
Note: If it is the very first time the user is logging into either the GoSafer Security customer portal (powered by Alarm.com) or app, the user also sees the Terms & Condition agreements to review and agree to.
App Settings Migration wizard
The Apps Settings Migration wizard allows users to transfer their app settings from an old mobile device to a new mobile device. In just a few steps, users with a new mobile device can seamlessly transfer their settings for push notifications, Alarm.com Places, and other specific notification types.
Using the App Settings Migration wizard, the user is prompted to select either:
Copy settings from another device - If the user selects to Copy settings from another device, the App Settings Migration wizard prompts the user to:
Select the old mobile device to copy settings (i.e., push notifications or Alarm.com Places) and notifications from to transfer the new mobile device.
Depending on which settings the old mobile device has, the wizard prompts the user to turn on push notifications and/or Alarm.com Places.
Choose to replace the old device (remove it from the account after the migration to the new device is complete), or add the new device to the notifications as an additional device on the account and the old device is kept active.
Set up as a new device - If the user selects to Set up as a new device, the App Settings Migration wizard prompts the user to set up the new device for push notifications, Alarm.com Places, and subscribe to notifications.
The following is an example of the process the user goes through when Copy settings from another device is selected during the App Settings Migration wizard:
Always verify safety, installation, compatibility, and current UI details against the original manufacturer documentation before operational use.
System Management
Smoke Sensor Not Reset
GoSafer Security Knowledge Base
This operational reference is organized for GoSafer Security customers and staff. Alarm.com product names are retained where required for technical accuracy.
Overview
The Smoke Sensor Not Reset trouble condition indicates a system smoke sensor was activated, but the condition has not yet cleared from the servers.
Platform
Customer Website
Content type
Troubleshooting
Source last updated
2025-06-04
Procedure
To remove this trouble condition
Log in to the GoSafer Security customer portal (powered by Alarm.com).
On the Home page, click Alerts and Issues.
In Alerts & Issues, locate Smoke Sensor Must Be Reset (Sensor Name), then click Remove Alert.
Always verify safety, installation, compatibility, and current UI details against the original manufacturer documentation before operational use.
System Management
System Usage
GoSafer Security Knowledge Base
This operational reference is organized for GoSafer Security customers and staff. Alarm.com product names are retained where required for technical accuracy.
Overview
This GoSafer Security section brings together resources for System Usage, including setup, configuration, everyday use, and troubleshooting. Choose the related page that matches your device, feature, or task, and follow the current manufacturer guidance linked on that page.
Platform
App + Web
Content type
Troubleshooting
Source last updated
2026-03-19
Procedure
Browse the related pages in this chapter to open the specific procedure, configuration guide, or troubleshooting article you need.
Always verify safety, installation, compatibility, and current UI details against the original manufacturer documentation before operational use.
System Management
Take a Peek-in from a Qolsys panel camera
GoSafer Security Knowledge Base
This operational reference is organized for GoSafer Security customers and staff. Alarm.com product names are retained where required for technical accuracy.
Overview
Peek-Ins allow users to take on demand snapshots from the Qolsys IQ Panel 2 panel camera using the Alarm.com website or app.
Platform
App + Web
Content type
How-to / Configuration
Source last updated
2025-06-04
Procedure
Requirements
A compatible Qolsys panel
Qolsys IQ Panel 2 on software version 2.3.0+.
Qolsys IQ Panel 4 on any software version.
The panel must be connected to Wi-Fi.
Note: If you do not see the following options, contact your service provider.
To request a Peek-In using the Alarm.com app
Log in to the Alarm.com app.
In Images card, tap [Peek In].
Tap Peek-In Now.
Tap Send to capture and upload an image immediately.
The image is uploaded to the Images event gallery. When the image is available for viewing, a notification is sent to all Peek-In notification recipients.
To request a Peek-In using the GoSafer Security customer portal (powered by Alarm.com)
Log in to the GoSafer Security customer portal (powered by Alarm.com).
Click [Peek In] on the Images card.
Click [Peek In] for the Panel Camera to capture and upload an image immediately.
The image is uploaded to the Images event gallery. When the image is available for viewing, a notification is sent to all Peek-In notification recipients.
To configure Peek-In recipients
Note: This can only be configured using the GoSafer Security customer portal (powered by Alarm.com).
Log in to the GoSafer Security customer portal (powered by Alarm.com).
Click Automation.
Click [Edit] for Peek-Ins & Manual Image Uploads.
To choose notification recipients, click Add.
Click to select the desired recipients from the Address book, to add an unlisted recipient click New. When a recipient has been selected, a checkmark appears next to their contact information.
Note: When a Peek-In is requested, an image of the capture is attached to the email or SMS message.
Click Close.
Verify the rule is configured with the correct settings.
Always verify safety, installation, compatibility, and current UI details against the original manufacturer documentation before operational use.
System Management
Trigger a panic using the app
GoSafer Security Knowledge Base
This operational reference is organized for GoSafer Security customers and staff. Alarm.com product names are retained where required for technical accuracy.
Overview
The In-App Panel Panic monitoring station supported feature can expedite the dispatch of emergency personnel when help is needed at home. When the panel is not in arm’s reach, and the keyfob is …
Platform
Mobile App
Content type
How-to / Configuration
Source last updated
2025-06-04
Procedure
Step-by-step guide: Screenshots and videos are placed with the instruction they illustrate.
The In-App Panel Panic and In-App Property Panic monitoring station supported features can expedite the dispatch of emergency personnel when help is needed at your account's location. If enabled on your account, In-App Panics are available on the home dashboard of the Alarm.com app.
Important: Sending a panic with the In-App Panic interface will act as if a panic is being sent from the account location. Emergency personnel will not arrive at your geographic location. They will only go to the address listed on your monitoring station account. It is encouraged to keep that information up-to-date.
Triggering a panic
This feature depends on if your account has a security panel. For more information about opting-in to the In-App Panic feature, contact your service provider.
Expand all
If your account has a security panel: Icn Chevron Up
Considerations:
Some panels send an audible alarm when Police, Fire, or Auxilary panics are sent.
If your account has Two-Way Voice enabled, Two-Way Voice is initiated through the panel when a Police Panic is sent.
To trigger a panel panic:
Log in to the Alarm.com app.
Important: To interact with In-App Panel Panic, a customer login with Master, Full Control, or Custom logins with the In-App Panel Panic permission must be used. Any other permission level cannot view or use the feature.
In the Security System card, tap Panic.
Press and hold the type of panic to be triggered.
In app Panel panic sending a Silent Police Panic
After a 3 second countdown in which the panic can be canceled or immediately sent, the panic is sent to the monitoring station and an audible alarm occurs at the panel, if applicable.
In app Panel panic Silent Police Panic sent
Tap Close to wait for assistance or Disarm to disarm the panel.
Tapping Disarm will negate the panic signal that was triggered.
If your account does not have a security panel:Icn Chevron Up
To trigger a property panic:
Log in to the Alarm.com app.
Only the primary login is able to interact with In-App Property Panic. Secondary logins cannot view or use the feature.
In the Panic card, tap and hold the type of panic to be triggered.
In App property Panic card Holding Police
A 3 second countdown screen appears. Tap Cancel to cancel the panic, or Send Now to immediately send the panic.
In App property Panic Countdown screen
After the 3 second countdown, tap Close to wait for assistance.
Always verify safety, installation, compatibility, and current UI details against the original manufacturer documentation before operational use.
System Management
Turn off system trouble beeps using the app
GoSafer Security Knowledge Base
This operational reference is organized for GoSafer Security customers and staff. Alarm.com product names are retained where required for technical accuracy.
Overview
System trouble beeps coming from the security panel can be turned off using the mobile app.
Platform
Mobile App
Content type
Troubleshooting
Source last updated
2025-06-04
Procedure
Step-by-step guide: Screenshots and videos are placed with the instruction they illustrate.
System trouble beeps coming from the security panel can be turned off using the Alarm.com app when an active trouble condition is reported. This feature disables trouble beeps for 7 days, but it can be re-enabled at any time.
System trouble beeps can only be turned off using the Alarm.com app. It cannot be turned off using the GoSafer Security customer portal (powered by Alarm.com). Turning off trouble beeps using the Alarm.com app disables beeps at the panel, but the trouble condition remains on the Alarm.com app and website until it is resolved.
Feature compatibility
This feature is supported on most Alarm.com compatible security panels.
Some panels require the system to be disarmed to successfully turn off the trouble beeps.
This feature functions differently on 2GIG panels since there is no way to indefinitely disable trouble beeps at all times.
If there is a smoke or carbon monoxide detector associated with the system, this feature is not available and will not appear in the Alarm.com app.
If this feature does not appear in the Alarm.com app when a trouble condition is present, contact your service provider for assistance.
Turn off System Trouble Beeps
You can access the Trouble Beeps page when there is an active trouble condition on the security system using one of the following methods:
By tapping Silence Trouble Beeps in the Issues card on the Home screen.
This option only appears if one of the following troubles is present:
Panel Power Failure
Device Low Battery
Panel Low Battery
Sensor Tamper
Dual-Path Communication Failure - Broadband
Dual-Path Communication Failure – Cellular
By accessing the Security System page.
If the system trouble beeps continue at the security panel after performing the following steps, verify the panel and module are communicating properly. If the panel and module are not communicating, trouble beeps cannot be turned off using remote commands. Contact your service provider for further assistance.
To turn off System Trouble Beeps from the Issues card:
Log in to the Alarm.com app.
Tap Silence Trouble Beeps in the Issues card on the Home screen when an active trouble condition is reported on the system.
Important: For 2GIG panels, the following message for Silence System Troubles displays. Tap Ok to disable all trouble beeps for currently active trouble conditions until there is a new trouble detected. This is the only step available to take for 2GIG panels.
2GIG Silence System Troubles message
Tap Trouble Beeps.
Trouble beeps page on app
Tap Turn Off to select it.
Trouble beeps turn on off options
Tap Turn Off to confirm the selection. This turns off the trouble beeps for any current or future issues that occur during the next 7 days, or until it is manually turned on again.
Turn off trouble beeps confirmation on app
To turn off System Trouble Beeps from the Security System card:
Note: 2GIG panels do not have this option.
Log in to the Alarm.com app.
Tap Security System.
Tap Settings to access the Trouble Beeps page.
If you do not see this option, your panel may not be compatible. For information about compatibility, seeFeature compatibility.
Tap Turn Off to select it.
Tap Turn Off to confirm the selection. This turns off the trouble beeps for any current or future issues that occur during the next 7 days, or until it is manually turned on again.
Note: If the system trouble beeps continue at the security panel after performing the preceding steps, contact your service provider.
Always verify safety, installation, compatibility, and current UI details against the original manufacturer documentation before operational use.
System Management
Turn sensor activity monitoring on/off
GoSafer Security Knowledge Base
This operational reference is organized for GoSafer Security customers and staff. Alarm.com product names are retained where required for technical accuracy.
Overview
Sensor Activity Monitoring allows users to view the current status of the system's sensors.
Platform
Customer Website
Content type
How-to / Configuration
Source last updated
2026-01-06
Procedure
Step-by-step guide: Screenshots and videos are placed with the instruction they illustrate.
Sensor activity monitoring (SAM) allows users to view the current status of the system's sensors.
Once SAM is enabled for sensors, sensor activity notifications can be configured to receive direct notifications about a sensor's activity by email, text message, or push notification. For more information about setting up sensor activity notifications, see Create a sensor activity notification.
To turn sensor activity monitoring on/off:
This setting can only be updated using the GoSafer Security customer portal (powered by Alarm.com). For further assistance, contact your service provider.
Log in to the GoSafer Security customer portal (powered by Alarm.com).
Click Settings.
Click Manage Devices.
Click More optionsnext to the device to update.
Click Device Settings.
In the Monitoring column, click to select the sensors that should have sensor activity monitoring. Alternatively, click to uncheck to remove activity monitoring.
Note: In the following example, sensors 1 and 3 have SAM enabled, sensor 2 has SAM disabled, and SAM is not available for the fixed panic keypad.
Always verify safety, installation, compatibility, and current UI details against the original manufacturer documentation before operational use.
System Management
View all system sensors
GoSafer Security Knowledge Base
This operational reference is organized for GoSafer Security customers and staff. Alarm.com product names are retained where required for technical accuracy.
Overview
A list of the all the system's sensors can be viewed from the GoSafer Security customer portal.
Platform
App + Web
Content type
How-to / Configuration
Source last updated
2025-06-04
Procedure
Step-by-step guide: Screenshots and videos are placed with the instruction they illustrate.
A list of all the system's sensors can be viewed using the Alarm.com app or GoSafer Security customer portal (powered by Alarm.com).
Sensors with Sensor Activity Monitoring (SAM) enabled can be viewed using the Alarm.com app and GoSafer Security customer portal (powered by Alarm.com). For more information about sensor statuses, see View current sensor activity.
To view all system sensors using the Alarm.com app:
Log in to the Alarm.com app.
Tap More options.
Tap Manage Devices.
Note: Sensor names and device settings can be updated by tapping More options.
To view all system sensors using the GoSafer Security customer portal (powered by Alarm.com):
Log in to the GoSafer Security customer portal (powered by Alarm.com).
Click Settings.
Click Manage Devices.
Note: Sensor names and device settings can be updated by clicking More options.
Always verify safety, installation, compatibility, and current UI details against the original manufacturer documentation before operational use.
System Management
View current sensor activity
GoSafer Security Knowledge Base
This operational reference is organized for GoSafer Security customers and staff. Alarm.com product names are retained where required for technical accuracy.
Overview
Sensors with Sensor Activity Monitoring enabled can have a variety of statuses.
Platform
App + Web
Content type
Troubleshooting
Source last updated
2025-06-04
Procedure
Step-by-step guide: Screenshots and videos are placed with the instruction they illustrate.
Sensors with Sensor Activity Monitoring (SAM) enabled can have a variety of statuses.
No alarm, error, or problem has been reported. If it is a door or window, it is closed. If it is a motion sensor, it has not been activated within the last 60 minutes.
All Sensors
Open
The door or window is currently open.
Door/Window Contacts
Activated
The motion sensor has detected activity within the last 60 minutes.
Motion Sensors
Idle
A motion sensor becomes idle when motion has not been detected for 60 minutes. The time shown is the time the motion last reported activity.
Motion Sensors
Alarm!
The sensor has been tripped and has set off an alarm.
Important: Hardwired smoke sensors need to be disarmed twice in order to reset.
All Sensors
Bypassed
A door/window sensor will be bypassed if it was open while the system was being armed (indirect bypass; usually occurs 4 minutes after the system arms). A user can directly bypass a sensor after the system is armed through the control panel. Refer to control panel operating instructions for information about bypassing sensors.
When a sensor is bypassed either directly or indirectly, it is not active and therefore will not trigger an alarm even though the system is armed. To remove the Bypassed status, close the sensor and re-arm the system.
All sensors except Fire and CO
Low Battery
The sensor is reporting a low battery. Carefully open the sensor cover, check the type of battery it uses, and replace the battery.
All Sensors
Tampering/ Malfunction
The sensor has been tampered with, or it has lost contact with the panel. If the status persists, contact your service provider.
All Sensors
N/A
The current state of the sensor is unknown. If this persists for more than a few hours, contact your service provider.
Always verify safety, installation, compatibility, and current UI details against the original manufacturer documentation before operational use.
System Management
Visual Verification device selection
GoSafer Security Knowledge Base
This operational reference is organized for GoSafer Security customers and staff. Alarm.com product names are retained where required for technical accuracy.
Overview
Visual Verification is a feature the monitoring station uses to verify a system that is in an alarm state.
The monitoring station operator can:
For accounts that have Visual Verification enabled, there is the option to select which devices the monitoring station uses for Visual Verification. If a device is deselected, monitoring station operators can no longer view any events from those devices or their live streams.
Platform
Customer Website
Content type
Reference
Source last updated
2025-06-04
Procedure
To select devices for Visual Verification using the GoSafer Security customer portal (powered by Alarm.com)
Log in to the GoSafer Security customer portal (powered by Alarm.com).
Click Settings.
Click Monitoring Station.
Click Video Monitoring Setting.
In Visual Verification, click to select the devices that allow Visual Verification.
Always verify safety, installation, compatibility, and current UI details against the original manufacturer documentation before operational use.
System Management
Vulnerability Disclosure Program
GoSafer Security Knowledge Base
This operational reference is organized for GoSafer Security customers and staff. Alarm.com product names are retained where required for technical accuracy.
Overview
Alarm.com is a leading platform solution for connected homes and businesses through cloud-based services, making this technology broadly accessible to millions of property owners. The multi-tenant …
Platform
General / Device
Content type
Reference
Source last updated
2026-03-06
Procedure
If you believe you have discovered a vulnerability in an Alarm.com product
Please contact privacy@alarm.com. This email address is continuously monitored, and you will receive a response no later than 5 business days.
Always verify safety, installation, compatibility, and current UI details against the original manufacturer documentation before operational use.
System Management
What does Radio Not Responding mean for broadband hubs?
GoSafer Security Knowledge Base
This operational reference is organized for GoSafer Security customers and staff. Alarm.com product names are retained where required for technical accuracy.
Overview
The “Radio Not Responding” trouble condition means the Building36 Hub or hub36 is not connected to the internet and cannot communicate with Alarm.com.
Platform
General / Device
Content type
FAQ / Explanation
Source last updated
2026-03-06
Procedure
If the Building36 Hub radio is not responding
Power down your Building36 Hub by removing its power cable. Leave it unplugged for now.
Power down your router by removing its power cable.
Leave your router powered down for 2 minutes. This 2 minute period is important, so do not power it up prematurely.
Wait for your router to completely boot up and for the router’s internet connection to be restored.
Reapply the power cable to your Building36 Hub. The indicator light on the hub will then cycle through orange, green, and white. It will then start flashing white.
Wait a few minutes for the indicator light to turn solid white. This indicates that the hub has established a connection with the internet.
Wait a few more minutes for the Building36 Hub to process any backed-up commands, then try controlling your thermostat remotely.
If the hub36 radio is not responding
Power down your hub36 by removing its power cable. Leave it unplugged for now.
Power down your router by removing its power cable.
Leave your router powered down for 2 minutes. This 2 minute period is important, so do not power it up prematurely.
Wait for your router to completely boot up and for the router’s internet connection to be restored.
Reapply the power cable to your hub36.
Wait a few minutes for the green indicator LED to turn solid green. This indicates that the hub has established a connection with the internet.
Wait a few more minutes for the hub36 to process any backed up commands, then try controlling your thermostat remotely.
Always verify safety, installation, compatibility, and current UI details against the original manufacturer documentation before operational use.
System Management
What happens when my system reports an alarm?
GoSafer Security Knowledge Base
This operational reference is organized for GoSafer Security customers and staff. Alarm.com product names are retained where required for technical accuracy.
Overview
This is primarily a video or reference page. Open the original article link below for the current content.
Platform
General / Device
Content type
Troubleshooting
Source last updated
2023-11-17
Procedure
When your system reports an alarm, the following happens
Your control panel transmits an alarm signal to Alarm.com.
Alarm.com immediately forwards the signal to the monitoring station.
The monitoring station then tries to verify the alarm and may notify fire, police, or emergency medical help. Because your system communicates wirelessly, alarms are forwarded to the monitoring station even if the phone line is cut or damaged.
If your system issues an alarm, the Operations Center will follow the Alarm Notification sequence defined for any Alarm Notifications (these updates are not synchronized with the monitoring station call list). At the same time, a live operator from your monitoring station will be trying to contact you to verify the alarm.
Always verify safety, installation, compatibility, and current UI details against the original manufacturer documentation before operational use.
System Management
What is the Emergency Message on the app?
GoSafer Security Knowledge Base
This operational reference is organized for GoSafer Security customers and staff. Alarm.com product names are retained where required for technical accuracy.
Overview
An Emergency Message only displays in the Alarm.com app during instances when there may be a severe weather event in your area.
Platform
Mobile App
Content type
FAQ / Explanation
Source last updated
2026-06-09
Procedure
Step-by-step guide: Screenshots and videos are placed with the instruction they illustrate.
An Emergency Message only displays in the Alarm.com app during instances when there may be a severe weather event in your area.
To view the Emergency Message on the Alarm.com app:
Log in to the Alarm.com app.
In Emergency Event Message in the Top Recommendations card, tap Learn More.
This opens the Emergency Message page. For further questions, contact your service provider at their provided phone number.
The following is an example of how an Emergency Message appears in the Top Recommendations card in the Alarm.com app:
Always verify safety, installation, compatibility, and current UI details against the original manufacturer documentation before operational use.
System Management
What security measures does Alarm.com use?
GoSafer Security Knowledge Base
This operational reference is organized for GoSafer Security customers and staff. Alarm.com product names are retained where required for technical accuracy.
Overview
Alarm.com uses a trusted third party for Secure Sockets Layer (SSL) connection between the customer and Alarm.com interfaces. The certificate requires that the user be authenticated. Secure cookies are used to store timeout and validation information about the session. All data passed through the Secure Sockets and all passwords are one-way encrypted.
Alarm.com has security measures in place to protect the loss, misuse, and alteration of customer information. We protect customer information through a unique username and password, and we protect certain sensitive communications with our website through server authentication and secure connections.
Alarm.com uses Thawte for our SSL. The details of the certificate are available when you click on the lock icon when going to https://www.alarm.com.
Platform
Customer Website
Content type
FAQ / Explanation
Source last updated
2022-12-12
Procedure
Alarm.com uses a trusted third party for Secure Sockets Layer (SSL) connection between the customer and Alarm.com interfaces. The certificate requires that the user be authenticated. Secure cookies are used to store timeout and validation information about the session. All data passed through the Secure Sockets and all passwords are one-way encrypted.
Alarm.com has security measures in place to protect the loss, misuse, and alteration of customer information. We protect customer information through a unique username and password, and we protect certain sensitive communications with our website through server authentication and secure connections.
Alarm.com uses Thawte for our SSL. The details of the certificate are available when you click on the lock icon when going to https://www.alarm.com.
Always verify safety, installation, compatibility, and current UI details against the original manufacturer documentation before operational use.
System Management
Where can I find a monitoring certificate?
GoSafer Security Knowledge Base
This operational reference is organized for GoSafer Security customers and staff. Alarm.com product names are retained where required for technical accuracy.
Overview
For more information about proof of monitoring certificates, contact your service provider.
Platform
General / Device
Content type
How-to / Configuration
Source last updated
2025-06-04
Procedure
Monitoring certificates are provided by the monitoring station associated with your account. For more information about obtaining proof of monitoring certificates, contact your service provider. For more information about how to contact your service provider, see Contact your service provider.
Always verify safety, installation, compatibility, and current UI details against the original manufacturer documentation before operational use.
System Management
Who should I contact about billing information?
GoSafer Security Knowledge Base
This operational reference is organized for GoSafer Security customers and staff. Alarm.com product names are retained where required for technical accuracy.
Overview
For information on billing and/or making payments, contact your service provider.
Platform
General / Device
Content type
Reference
Source last updated
2023-10-27
Procedure
For more information about billing and/or making payments for your system, contact your service provider.
Always verify safety, installation, compatibility, and current UI details against the original manufacturer documentation before operational use.
System Management
Z-Wave Troubleshooting Wizard
GoSafer Security Knowledge Base
This operational reference is organized for GoSafer Security customers and staff. Alarm.com product names are retained where required for technical accuracy.
Overview
The Z-Wave Troubleshooting Wizard provides users with step-by-step resolutions for a host of supported devices, including lights, thermostats, water devices, and more. The wizard is accessible through both Trouble Conditions Help, as well as from the Manage Devices section of the Alarm.com app and GoSafer Security customer portal (powered by Alarm.com).
Platform
App + Web
Content type
Troubleshooting
Source last updated
2025-06-04
Procedure
Step-by-step guide: Screenshots and videos are placed with the instruction they illustrate.
The Z-Wave Troubleshooting Wizard provides users with step-by-step resolutions for a host of supported devices, including lights, thermostats, water devices, and more. The wizard is accessible through both Trouble Conditions Help, as well as from the Manage Devices section of the Alarm.com app and GoSafer Security customer portal (powered by Alarm.com).
Common Z-Wave device issues may include:
Low battery alerts
Device range and network issues
Device tamper alerts
Device malfunctions
Note: This feature is not available for Z-Wave devices in sleep mode (i.e., a temperature sensor, etc.).
Access the Z-Wave Troubleshooting Wizard
The wizard can be accessed from both the Alarm.com app and GoSafer Security customer portal (powered by Alarm.com).
Expand all
To access the Z-Wave Troubleshooting Wizard using the Alarm.com app:Icn Chevron Up
To access the wizard from the Trouble Condition alert on the Alarm.com app:
Log in to the Alarm.com app.
Tap Detailsonthe Trouble Condition alert.
Tap Fix It.
Verify the device is connected to power and turned on.
If the device is powered on, tap Get Started. If the device will not power on, tap My Device Won't Turn On.
Z Wave Troubleshooting Intro Mobile App
The wizard will evaluate the device, troubleshoot or advise the next necessary steps.
Caution: Do not interact with the devices while troubleshooting is in progress.
To access the wizard from the Manage Devices page on the Alarm.com app:
Log in to the Alarm.com app.
Tap Menu.
Tap Manage Devices.
Tap More options on the desired device.
Tap Troubleshoot.
Verify the device is connected to power and turned on.
If the device is powered on, tap Get Started. If the device will not power on, tap My Device Won't Turn On.
Z Wave Troubleshooting Intro Mobile App
The wizard will evaluate the device, troubleshoot or advise the next necessary steps.
Caution: Do not interact with the devices while troubleshooting is in progress.
To access the Z-Wave Troubleshooting Wizard using the GoSafer Security customer portal (powered by Alarm.com):Icn Chevron Up
To access the wizard from the Trouble Condition alert on the GoSafer Security customer portal (powered by Alarm.com):
Log in to the GoSafer Security customer portal (powered by Alarm.com).
Click Fix It on the Trouble Condition alert.
Verify the device is connected to power and turned on.
If the device is powered on, click Get Started. If the device will not power on, click My Device Won't Turn On.
Z Wave Troubleshooting Intro Desktop
The wizard will evaluate the device, troubleshoot, or advise the next necessary steps.
To access the wizard from the Manage Devices page on the GoSafer Security customer portal (powered by Alarm.com):
Log in to the GoSafer Security customer portal (powered by Alarm.com).
Click Settings.
Click Manage Devices.
Click More options on the desired device.
Click Troubleshoot.
Verify the device is connected to power and turned on.
If the device is powered on, click Get Started. If the device will not power on, click My Device Won't Turn On.
Z Wave Troubleshooting Intro Desktop
The wizard will evaluate the device, troubleshoot, or advise the next necessary steps.
Caution: Do not interact with the devices while troubleshooting is in progress.
Always verify safety, installation, compatibility, and current UI details against the original manufacturer documentation before operational use.
System Management
Z-Wave sensor is in malfunction
GoSafer Security Knowledge Base
This operational reference is organized for GoSafer Security customers and staff. Alarm.com product names are retained where required for technical accuracy.
Overview
The Malfunction trouble condition indicates a device is unable to properly communicate. This article relates specifically to Z-Wave sensors. For alarm sensors, refer to your service provider for assistance.
Platform
General / Device
Content type
Troubleshooting
Source last updated
2024-03-05
Procedure
If a Z-Wave sensor is in malfunction or offline
Verify the Z-Wave sensor has sufficient battery power. Replace the battery if the device has a Low Battery trouble condition or the battery is dead.
Trigger the device to establish communication with the panel or hub. Depending on the sensor type, triggering the sensor may include:
Opening and closing a contact sensor
Activating a motion sensor
Pressing a side button on the sensor
Opening the battery compartment
If the behavior is still not resolved, contact your service provider for assistance.
Always verify safety, installation, compatibility, and current UI details against the original manufacturer documentation before operational use.
System Management
AC Power Failure
GoSafer Security Knowledge Base
This operational reference is organized for GoSafer Security customers and staff. Alarm.com product names are retained where required for technical accuracy.
Overview
AC Power Failure indicates that your security panel lost AC power. To ensure continued system functionality, your system needs to be plugged into the outlet.
Platform
General / Device
Content type
How-to / Configuration
Source last updated
2023-11-17
Procedure
How to resolve
Verify that the panel is plugged into an outlet and that the outlet has power.
If you need additional support, contact your service provider.
Always verify safety, installation, compatibility, and current UI details against the original manufacturer documentation before operational use.
System Management
Access the Knowledge Base
GoSafer Security Knowledge Base
This operational reference is organized for GoSafer Security customers and staff. Alarm.com product names are retained where required for technical accuracy.
Overview
The Knowledge Base contains useful user guides and documentation to help you get the most out of your system.
Platform
App + Web
Content type
Reference
Source last updated
2023-10-30
Procedure
To access the Knowledge Base using the Alarm.com app
Log into the Alarm.com app.
Tap [Menu].
Tap Support.
Tap Help Documentation.
To access the Knowledge Base using the GoSafer Security customer portal (powered by Alarm.com)
Log into the GoSafer Security customer portal (powered by Alarm.com).
Always verify safety, installation, compatibility, and current UI details against the original manufacturer documentation before operational use.
System Management
Access trouble condition help
GoSafer Security Knowledge Base
This operational reference is organized for GoSafer Security customers and staff. Alarm.com product names are retained where required for technical accuracy.
Overview
By simply tapping a trouble condition wherever it appears, you can access more information about the issue. The information provided may include basic troubleshooting steps, launching additional …
Platform
Mobile App
Content type
Troubleshooting
Source last updated
2025-06-04
Procedure
Step-by-step guide: Screenshots and videos are placed with the instruction they illustrate.
Some trouble conditions can be resolved without the need to involve your service provider. By simply tapping a trouble condition wherever it appears, you can access more information about the issue. The information provided may include basic troubleshooting steps, launching additional troubleshooting wizards, and your service provider info for further assistance.
Trouble condition explanations and help are available wherever trouble condition alerts appear:
The GoSafer Security customer portal (powered by Alarm.com)
The Alarm.com app
Trouble condition emails
To access trouble condition help:
Log in to the Alarm.com app.
In Issues, tap the trouble condition.
Issues screen
On this page, more information about what the trouble condition means and what caused it is found.
For trouble conditions with simple solutions (e.g., Sensor Bypassed), the page includes information about how to resolve the issue.
Sensor Bypassed
For common trouble conditions (e.g., Device Low Battery), a Watch Tutorial button is available to view videos for more information.
Device Low Battery
Some trouble conditions (e.g., Video Device Not Responding) include a Fix It button that launches any related troubleshooting wizards.
Fix It
Trouble condition help also contains a link to Contact Support, so you can receive additional guidance from your service provider if needed.
Example trouble condition explanations and help text
Front Door Sensor Bypassed: Indicates that your system is not actively monitoring this sensor, which is being ignored and will not trigger an alarm if it's activated. This can happen when a contact sensor is open when your security system is armed. Resolve this issue by disarming your system, closing the contact sensor, then rearming your system. If you need additional support, contact us.
Image SensorTamper: Indicates that this image sensor was moved, opened, or shaken. Image sensors have an accelerometer that senses when it is in motion or tilted. Any time your image sensor is moved or something causes it to vibrate (like a door closing hard), you will see this issue. Make sure your image sensor is upright and leave it motionless for at least 5 minutes. If this does not resolve the issue, contact us for support.
Panel Low Battery: Indicates that the backup battery in your security panel is drained, which typically happens after an AC power failure. To resolve the issue, let the battery recharge. If the battery cannot recharge, it may need to be replaced by support.
Thermostat Too Warm: Indicates that the temperature reported by your thermostat is higher than the threshold that you have specified in the Temperature Notification rule. Check your thermostat and rule settings. If you need additional support, contact us.
Always verify safety, installation, compatibility, and current UI details against the original manufacturer documentation before operational use.
System Management
Battery Absent Trouble
GoSafer Security Knowledge Base
This operational reference is organized for GoSafer Security customers and staff. Alarm.com product names are retained where required for technical accuracy.
Overview
Battery Absent Trouble indicates that the panel battery is or was missing.
Platform
General / Device
Content type
How-to / Configuration
Source last updated
2023-11-17
Procedure
How to resolve
Verify that the panel battery is securely in place.
If you need additional support, contact your service provider.
Always verify safety, installation, compatibility, and current UI details against the original manufacturer documentation before operational use.
System Management
Device Power Issue
GoSafer Security Knowledge Base
This operational reference is organized for GoSafer Security customers and staff. Alarm.com product names are retained where required for technical accuracy.
Overview
{companyname}} has detected that your device is not receiving sufficient power from the battery/bracket.
Platform
General / Device
Content type
Troubleshooting
Source last updated
2023-11-20
Procedure
How to resolve
Verify if your battery is depleted or if your device has become disconnected from the mounting bracket.
If you need additional support, contact your service provider.
Always verify safety, installation, compatibility, and current UI details against the original manufacturer documentation before operational use.
System Management
Dual-Path Communication Failure - Cellular
GoSafer Security Knowledge Base
This operational reference is organized for GoSafer Security customers and staff. Alarm.com product names are retained where required for technical accuracy.
Overview
Dual-Path Communication Failure - Cellular indicates that your panel is currently unable to communicate through the cellular network and is only communicating through broadband network/Wi-Fi. Until resolved, your panel is without back-up communication and will stop working if you lose power or you experience a broadband/WiFi outage.
Platform
General / Device
Content type
How-to / Configuration
Source last updated
2023-11-20
Procedure
How to resolve
If possible, move metal or electrical objects away from the panel to improve cellular network signaling.
If you need additional support, contact your service provider.
Always verify safety, installation, compatibility, and current UI details against the original manufacturer documentation before operational use.
System Management
Fire Sensor Trouble
GoSafer Security Knowledge Base
This operational reference is organized for GoSafer Security customers and staff. Alarm.com product names are retained where required for technical accuracy.
Overview
Fire Sensor Trouble indicates that your smoke detector may not be properly connected or installed correctly.
Always verify safety, installation, compatibility, and current UI details against the original manufacturer documentation before operational use.
System Management
Heat Or Probe Sensor Trouble
GoSafer Security Knowledge Base
This operational reference is organized for GoSafer Security customers and staff. Alarm.com product names are retained where required for technical accuracy.
Overview
Heat Or Probe Sensor Trouble indicates that a probe has been disconnected from a temperature sensor, and the temperature sensor may no longer be working properly.
Platform
General / Device
Content type
How-to / Configuration
Source last updated
2022-11-01
Procedure
How to resolve
Verify the probe is properly connected to the sensor.
If you need additional support, contact your service provider.
Always verify safety, installation, compatibility, and current UI details against the original manufacturer documentation before operational use.
System Management
Heating and Cooling Alert
GoSafer Security Knowledge Base
This operational reference is organized for GoSafer Security customers and staff. Alarm.com product names are retained where required for technical accuracy.
Overview
A Heating and Cooling Alert indicates that thermostat data shows the heating or cooling system is not performing as expected.
Platform
General / Device
Content type
How-to / Configuration
Source last updated
2026-03-25
Procedure
How to resolve
We recommend contacting a heating and cooling professional to make sure your system is properly maintained and your home stays comfortable.
If you need additional support, contact your service provider.
Always verify safety, installation, compatibility, and current UI details against the original manufacturer documentation before operational use.
System Management
Installer Reset Needed
GoSafer Security Knowledge Base
This operational reference is organized for GoSafer Security customers and staff. Alarm.com product names are retained where required for technical accuracy.
Overview
Installer Reset Needed indicates that your system is reporting an issue.
Always verify safety, installation, compatibility, and current UI details against the original manufacturer documentation before operational use.
System Management
Not Networked Trouble
GoSafer Security Knowledge Base
This operational reference is organized for GoSafer Security customers and staff. Alarm.com product names are retained where required for technical accuracy.
Overview
Not Networked Trouble indicates that a device (usually a door/window contact sensor or a motion sensor) is out of sync with the wireless network or was not synchronized with the network after it was enrolled into your security panel.
Always verify safety, installation, compatibility, and current UI details against the original manufacturer documentation before operational use.
System Management
RF Jam Trouble
GoSafer Security Knowledge Base
This operational reference is organized for GoSafer Security customers and staff. Alarm.com product names are retained where required for technical accuracy.
Overview
RF Jam Trouble indicates that the device is detecting radio frequency (RF) noise that could affect its ability to properly communicate signals to your control panel.
Always verify safety, installation, compatibility, and current UI details against the original manufacturer documentation before operational use.
System Management
Radio Not Responding
GoSafer Security Knowledge Base
This operational reference is organized for GoSafer Security customers and staff. Alarm.com product names are retained where required for technical accuracy.
Overview
Radio Not Responding indicates that your security panel is not able to communicate with the network and may not trigger an alarm or signal for help in an emergency.
Always verify safety, installation, compatibility, and current UI details against the original manufacturer documentation before operational use.
System Management
Sensor Tamper
GoSafer Security Knowledge Base
This operational reference is organized for GoSafer Security customers and staff. Alarm.com product names are retained where required for technical accuracy.
Overview
The Sensor Tamper trouble condition indicates a sensor on the system is reporting a tamper condition. Tamper reports are issued by the system for a device whose tamper switch is released.
Platform
General / Device
Content type
Troubleshooting
Source last updated
2023-11-20
Procedure
Step-by-step guide: Screenshots and videos are placed with the instruction they illustrate.
TheSensor Tamper trouble condition indicates a sensor on the system is reporting a tamper condition. Tamper reports are issued by the system for a device whose tamper switch is released.
How to resolve:
For wireless devices, verify the device's battery cover is tightly secured to ensure the tamper switch is closed. Securing the tamper switch varies for each device. For specific information about resolving the sensor's tamper locally, refer to the sensor's installation guide.
Access Control tampers
Tamper trouble conditions for Access Control controllers, expansions, and OSDP doors have additional troubleshooting steps that may help resolve the trouble condition.
To resolve an OSDP door tamper:
Verify the reader or keypad is OSDP capable and correctly configured to output OSDP.
Verify the reader or keypad is wired to the correct reader terminal on the controller or expansion.
Verify the reader or keypad wiring has not been severed or disconnected from the controller or expansion.
Verify the reader or keypad has not been removed from its wall mount and/or has been placed in a position other than its required upright position.
Verify the reader or keypad has not been damaged.
For more information about Access Control device tampers, see any of the following:
Always verify safety, installation, compatibility, and current UI details against the original manufacturer documentation before operational use.
System Management
Siren Tamper
GoSafer Security Knowledge Base
This operational reference is organized for GoSafer Security customers and staff. Alarm.com product names are retained where required for technical accuracy.
Overview
Siren Tamper indicates your system is reporting an issue.
Always verify safety, installation, compatibility, and current UI details against the original manufacturer documentation before operational use.
System Management
System Locked: Installer Verification Required
GoSafer Security Knowledge Base
This operational reference is organized for GoSafer Security customers and staff. Alarm.com product names are retained where required for technical accuracy.
Overview
System Locked: Installer Verification Required indicates your system is reporting an issue.
Always verify safety, installation, compatibility, and current UI details against the original manufacturer documentation before operational use.
System Management
Trouble Condition Help
GoSafer Security Knowledge Base
This operational reference is organized for GoSafer Security customers and staff. Alarm.com product names are retained where required for technical accuracy.
Overview
This GoSafer Security section brings together resources for Trouble Condition Help, including setup, configuration, everyday use, and troubleshooting. Choose the related page that matches your device, feature, or task, and follow the current manufacturer guidance linked on that page.
Platform
General / Device
Content type
Troubleshooting
Source last updated
2022-02-01
Procedure
Browse the related pages in this chapter to open the specific procedure, configuration guide, or troubleshooting article you need.
Always verify safety, installation, compatibility, and current UI details against the original manufacturer documentation before operational use.
User Management
GoSafer Security procedures and references for User Management.
User Management
User Management
GoSafer Security Knowledge Base
This operational reference is organized for GoSafer Security customers and staff. Alarm.com product names are retained where required for technical accuracy.
Overview
This GoSafer Security section brings together resources for User Management, including setup, configuration, everyday use, and troubleshooting. Choose the related page that matches your device, feature, or task, and follow the current manufacturer guidance linked on that page.
Platform
App + Web
Content type
How-to / Configuration
Source last updated
2022-01-24
Procedure
Browse the related pages in this chapter to open the specific procedure, configuration guide, or troubleshooting article you need.
Always verify safety, installation, compatibility, and current UI details against the original manufacturer documentation before operational use.
User Management
Can I add user codes through the customer mobile application?
GoSafer Security Knowledge Base
This operational reference is organized for GoSafer Security customers and staff. Alarm.com product names are retained where required for technical accuracy.
Overview
The article answers the question, 'Can I add user codes through the customer mobile application?' And provides the resource for doing so.
Platform
Mobile App
Content type
How-to / Configuration
Source last updated
2024-12-11
Procedure
For more information, see Create a system user code.
Always verify safety, installation, compatibility, and current UI details against the original manufacturer documentation before operational use.
User Management
Change a system user code
GoSafer Security Knowledge Base
This operational reference is organized for GoSafer Security customers and staff. Alarm.com product names are retained where required for technical accuracy.
Overview
Existing system user codes can be updated from the website or app.
Platform
App + Web
Content type
How-to / Configuration
Source last updated
2025-09-16
Procedure
To change a system user code using the Alarm.com app
Log in to the Alarm.com app.
Tap [Menu].
Tap Users.
Tap to select the user to update.
Tap [Access Code].
In Access Code, enter the new user code.
Tap Save.
To change a system user code using the GoSafer Security customer portal (powered by Alarm.com)
Log in to the GoSafer Security customer portal (powered by Alarm.com).
Click Users.
Click [More Options] on the desired user.
Click [Edit] to edit user information.
Click [Access Code].
In Access Code, enter the desired user code.
A new access code can also be generated by clicking Generate Code.
Click to select which devices and features the user will have access to.
Always verify safety, installation, compatibility, and current UI details against the original manufacturer documentation before operational use.
User Management
Create a system user code
GoSafer Security Knowledge Base
This operational reference is organized for GoSafer Security customers and staff. Alarm.com product names are retained where required for technical accuracy.
Overview
New system user codes can be created using the app or the website.
Platform
App + Web
Content type
How-to / Configuration
Source last updated
2025-06-04
Procedure
Step-by-step guide: Screenshots and videos are placed with the instruction they illustrate.
New system user codes can be created using the Alarm.com app or GoSafer Security customer portal (powered by Alarm.com).
Important: User codes cannot be edited while the security system is armed. Verify the security system is disarmed before attempting to edit a user code remotely.
Create new system user codes
The following processes will allow for user codes to be set with a manually entered user code. For more information about creating a randomly generated user code, see Generate and share system user codes.
To create new system user codes for single systems using the Alarm.com app:Icn Chevron Up
Log in to the Alarm.com app.
Tap Menu.
Tap Users.
Tap Add.
Enter the user's first and last name, and then tap Create.
In Access Code, enter the user's desired code.
Tap the toggle switch for the devices (i.e., panel partitions and locks) to enable/disable access for the user's code.
Tap Save. Allow a few minutes for the new user code to be active at the panel.
To add user contact information, tap Add Contact.
Then tap either:
Mobile Number. Enter the mobile number, and select the Country and Carrier using the dropdown menus.
Email Address. Enter the email address, and select the Email Format using the dropdown menu.
Tap Save to add the new contact information.
Allow a few minutes for new user codes to be active at the panel. If the new user code does not work at the panel or you have additional questions, contact your service provider.
To create new system user codes for single systems using the GoSafer Security customer portal (powered by Alarm.com):Icn Chevron Up
Log in to the GoSafer Security customer portal (powered by Alarm.com).
Click Users.
Click Add User.
Enter the user's first and last name, and then click Create.
In Access Code, enter the user's desired code.
Click the toggle switch for the devices (i.e., panel partitions and locks) to enable/disable access for the user's code.
Click Save. Allow a few minutes for the new user code to be active at the panel.
To add user contact information, click Add Contact.
Then click either:
Mobile Number to add a mobile number. Then enter the mobile number and select the Country and Carrier using the dropdown menus.
Email Address to add an email address. Then enter the email address and select the Email Format using the dropdown menu.
Click Save to add the new contact information.
Allow a few minutes for new user codes to be active at the panel. If the new user code does not work at the panel or you have additional questions, contact your service provider.
Always verify safety, installation, compatibility, and current UI details against the original manufacturer documentation before operational use.
User Management
Create/edit a duress code remotely
GoSafer Security Knowledge Base
This operational reference is organized for GoSafer Security customers and staff. Alarm.com product names are retained where required for technical accuracy.
Overview
Duress codes can be managed remotely using the website or app.
Platform
App + Web
Content type
How-to / Configuration
Source last updated
2025-06-04
Procedure
Create/edit duress codes remotely
Duress codes can be managed remotely using the Alarm.com app or GoSafer Security customer portal (powered by Alarm.com).
To create/edit duress codes using the Alarm.com app
Log in to the Alarm.com app.
Tap [Menu].
Tap Users.
Tap to expand More.
If there is not a current duress code
Tap Add Duress User in More Options.
In the Duress Code Name field, enter the name of the duress code.
Tap Create.
In Access Code, enter the desired duress code or tap Generate Code to generate a random code.
In Security Panels, select the panel partitions to apply the duress code to.
Tap Save.
If there is an existing duress code
Tap Edit Duress User in More Options.
Tap [Access Code].
In Access Code, update the duress code as desired.
In Security Panels, select the panel partitions to apply the duress code to.
Tap Save.
To create/edit duress codes using the GoSafer Security customer portal (powered by Alarm.com)
Log in to the GoSafer Security customer portal (powered by Alarm.com).
Click Users.
Click to expand More.
If there is not a current duress code
Click Add Duress User.
In Duress Code Name, enter a name for the duress code.
Click Create.
In Access Code, enter the desired user code.
A new access code can also be generated by clicking Generate Code.
Click to select which devices and features the user will have access to.
Click Save.
If there is an existing duress code
Click Edit Duress User in More Options.
Click [Access Code].
In Access Code, update the duress code as desired.
In Security Panels, select the panel partitions to apply the duress code to.
Always verify safety, installation, compatibility, and current UI details against the original manufacturer documentation before operational use.
User Management
Delete a system user code
GoSafer Security Knowledge Base
This operational reference is organized for GoSafer Security customers and staff. Alarm.com product names are retained where required for technical accuracy.
Overview
Deleting unused system user codes helps keep the system secure.
Platform
App + Web
Content type
How-to / Configuration
Source last updated
2025-06-04
Procedure
To delete a system user using the Alarm.com app
Log in to the Alarm.com app.
Tap [Menu].
Tap Users.
Tap [More Options] for the user to be deleted
Tap [Delete] Delete.
Tap Delete to confirm that you want to delete the user and all of the addresses associated with it.
To delete a system user using the GoSafer Security customer portal (powered by Alarm.com)
Log in to the GoSafer Security customer portal (powered by Alarm.com).
Click Users.
Click [More Options] for the user to be deleted
Click [Delete] Delete.
Click Delete User to confirm that you want to delete the user and all of the addresses associated with it.
To delete multiple system users using the GoSafer Security customer portal (powered by Alarm.com)
Important: This feature is only available for Commercial accounts.
Log in to the GoSafer Security customer portal (powered by Alarm.com).
Click Users.
Click More.
Click Bulk Actions.
Click to select the desired users to be deleted.
Click [Delete].
In Confirm Bulk User Deletion, click Delete.
To remove a user's security system access using the Alarm.com app
Log in to the Alarm.com app.
Tap [Menu].
Tap Users.
Tap [More Options] for the user to be deleted.
Tap [Edit] Edit.
Tap Panels.
On the Device Access page, tap the toggle switch to disable the access points that the user code should no longer have access to.
Tap Save.
To remove a user's security system access using the GoSafer Security customer portal (powered by Alarm.com)
Log in to the GoSafer Security customer portal (powered by Alarm.com).
Click Users.
Click [More Options] for the user to be deleted.
Click [Edit] Edit.
Click Panels.
On the Device Access page, click the toggle switch to disable the access points that the user code should no longer have access to.
Always verify safety, installation, compatibility, and current UI details against the original manufacturer documentation before operational use.
User Management
How can a user code be given access to specific security panel partitions?
GoSafer Security Knowledge Base
This operational reference is organized for GoSafer Security customers and staff. Alarm.com product names are retained where required for technical accuracy.
Overview
A user code can be given access to particular panel partitions of a single system if desired.
Platform
App + Web
Content type
How-to / Configuration
Source last updated
2025-06-04
Procedure
To give new users access to specific partitions using the Alarm.com app
Log in to the Alarm.com app.
Tap [Menu].
Tap Users.
Tap [Add].
Enter the user's first and last name, and then tap Create.
In Access Code, enter the user's desired code.
In Security Panels, tap to toggle the desired system partitions for access.
Tap Save. Allow a few minutes for the new user code to be active at the panel.
To add user contact information, tap Add Contact.
Then tap either
Mobile Number. Enter the mobile number, and select the Country and Carrier using the dropdown menus.
Email Address. Enter the email address, and select the Email Format using the dropdown menu.
Tap Save to add the new contact information.
To give new users access to specific partitions using the GoSafer Security customer portal (powered by Alarm.com)
Log in to the GoSafer Security customer portal (powered by Alarm.com)
Click Users.
Click Add User.
Enter the user's first and last name in the First Name and Last Name fields.
Click Create.
To update the language preference
Click Language Preference.
Click to select the user's language preference.
Click Save.
To add contact information, Click Add Contact. Then click to select either
Mobile Number to add the user's phone number. This allows the user to be set up with SMS text notifications to their phone.
In Mobile Number (SMS) enter the user's phone number.
Using the Country dropdown menu, select the country the mobile number is from.
Using the Carrier dropdown menu, select the cellular provider of the mobile number. If the provider is not listed but the user wants to receive SMS text notifications, see Create text (SMS) notifications when a cell carrier is not an option.
Click Save.
Note: SMS (text notifications) is only available in the United States and Canada. It is recommended to use push notifications for accounts outside the United States and Canada.
Email Address to add the user's email address. This allows the user to be set up with email notifications.
In Email Address enter the user's email address.
Using the Email Format dropdown menu, select the format the user would like to receive email notifications (i.e., HTML, Email Format, or Plain Text).
Click Save.
Click Panels.
In Security Panels, click to toggle the desired system partitions for access.
Click Save. The user code is sent only to the partitions the user has been given access to.
To give existing users access to specific partitions using the Alarm.com app
Log in to the Alarm.com app.
Tap [Menu].
Tap Users.
Tap to select the desired user.
Tap Panels.
In Security Panels, tap to toggle the desired system partitions for access.
Tap Save. The user code is sent only to the partitions that the user code has been given access.
To give existing users access to specific partitions using the GoSafer Security customer portal (powered by Alarm.com)
Log in to the GoSafer Security customer portal (powered by Alarm.com).
Click Users.
Click the desired user to be edited.
Click Panels.
In Security Panels, click to toggle the desired system partitions for access.
Click Save. The user code is sent only to the partitions the user has been given access to.
Always verify safety, installation, compatibility, and current UI details against the original manufacturer documentation before operational use.
User Management
How can a user code only be given access at certain times?
GoSafer Security Knowledge Base
This operational reference is organized for GoSafer Security customers and staff. Alarm.com product names are retained where required for technical accuracy.
Overview
Some systems allow for scheduled or temporary user access that will give specified users access to the system at certain times.
If you do not see the following options, your system may not be compatible with scheduled or temporary user codes. For further questions, contact your service provider.
Platform
App + Web
Content type
How-to / Configuration
Source last updated
2025-06-04
Procedure
Step-by-step guide: Screenshots and videos are placed with the instruction they illustrate.
Some systems allow for scheduled or temporary user access that will give specified users access to the system at certain times.
If you do not see the following options, your system may not be compatible with scheduled or temporary user codes. For further questions, contact your service provider.
Scheduled panel user code access
Scheduled user codes allow a user to have access to the system during a specified timeframe every week.
Example: A scheduled user code can be given access to the system for every Monday and Wednesday between 8:00 AM to 4:00 PM.
Restrict a user code to a specific time period
To restrict a user code to a specific time period using the Alarm.com app:Icn Chevron Up
Log in to the Alarm.com app.
Tap Menu.
Tap Users.
Tap to select the user to restrict.
Verify the user has Panel Access enabled, and a valid Access Code.
In Access Information, tap Access Period.
Tap Restricted schedule.
In Weekly Schedule, configure the days and time to restrict the user's access to the system.
weekly schedule
Tap Save.
To restrict a user code to a specific time period using the GoSafer Security customer portal (powered by Alarm.com):Icn Chevron Up
Log in to the GoSafer Security customer portal (powered by Alarm.com).
Click Users.
Click More options for the user that will be restricted.
Click Edit .
Verify the user has panel access enabled with a valid access code.
In Access Information, click Access Period.
Click Restricted Schedule.
In Weekly Schedule, configure the days and time to restrict the user's access to the system.
weekly schedule
Click Save.
Temporary panel user code access
Temporary user codes have access to the system during only a specified start and end time.
Example: A temporary user code can be given access to the system for January 7, 2019, from 8:00 AM until January 10, 2019, at 4:00 PM. The code can arm and disarm the system at any time between the specified time period.
Add a temporary user code
To add a temporary user code using the Alarm.com app:Icn Chevron Up
Log in to the Alarm.com app.
Tap Menu.
Tap Users.
Tap to select the user to restrict.
Verify the user has Panel Access enabled, and a valid Access Code.
In Access Information, tap Access Period.
Tap Temporary Access.
Select the start and end date/time that the user will have access to the system.
temporary schedule
Tap Save.
To add a temporary user code using the GoSafer Security customer portal (powered by Alarm.com):Icn Chevron Up
Log in to the GoSafer Security customer portal (powered by Alarm.com).
Click Users.
Click More options for the user that will be restricted.
Click Edit .
Verify the user has panel access enabled with a valid access code.
In Access Information, click Access Period.
Click Temporary Access.
Select the start and end date/time that the user will have access to the system.
Always verify safety, installation, compatibility, and current UI details against the original manufacturer documentation before operational use.
User Management
System Users
GoSafer Security Knowledge Base
This operational reference is organized for GoSafer Security customers and staff. Alarm.com product names are retained where required for technical accuracy.
Overview
This GoSafer Security section brings together resources for System Users, including setup, configuration, everyday use, and troubleshooting. Choose the related page that matches your device, feature, or task, and follow the current manufacturer guidance linked on that page.
Platform
App + Web
Content type
Troubleshooting
Source last updated
2022-01-24
Procedure
Browse the related pages in this chapter to open the specific procedure, configuration guide, or troubleshooting article you need.
Always verify safety, installation, compatibility, and current UI details against the original manufacturer documentation before operational use.
User Management
View user codes
GoSafer Security Knowledge Base
This operational reference is organized for GoSafer Security customers and staff. Alarm.com product names are retained where required for technical accuracy.
Overview
User codes for residential accounts can be viewed using the Customer app and GoSafer Security customer portal.
Platform
App + Web
Content type
Reference
Source last updated
2025-06-04
Procedure
View user codes using the Alarm.com app
Log in to the Alarm.com app.
Tap [Menu].
Tap Users.
If your account is using Access Control, tap User Access, then tap Users.
Tap More.
In More Options, tap Show user codes.
Note: To hide user codes, tap More, then tap Hide User Codes in More Options.
View user codes using the GoSafer Security customer portal (powered by Alarm.com)
Log in to the GoSafer Security customer portal (powered by Alarm.com).
Click Users.
If your account is using Access Control, click User Access, then click Users.
Click More, then click Show user codes.
Note: To hide user codes, click More, then click Hide user codes.
Always verify safety, installation, compatibility, and current UI details against the original manufacturer documentation before operational use.
User Management
Why is the website saying the user code is invalid?
GoSafer Security Knowledge Base
This operational reference is organized for GoSafer Security customers and staff. Alarm.com product names are retained where required for technical accuracy.
Overview
The user code is invalid error message is caused by an existing code that may be in conflict with a code you wish to add. The following are the typical causes of this conflict.
Platform
Customer Website
Content type
Troubleshooting
Source last updated
2022-01-25
Procedure
Step-by-step guide: Screenshots and videos are placed with the instruction they illustrate.
The user code is invalid error message is caused by an existing code that may be in conflict with a code you wish to add. The following are the typical causes of this conflict.
Duplicate code
duplicate code error
The preceding error appears when either:
A different user has the same exact user code, so a different one should be selected.
The panel’s duress code is the same as the user code being entered, so a different user code should be selected or the duress code should be changed.
Note: If the user does not have a preference, click Generate Code to generate a random available code for the user.
Five-button lock keypad
Five button keypad error
The preceding error appears when a Kwikset lock is attached to the system. Due to some Kwikset locks having two digits per button, there is an entry pattern limitation that decreases the number of possible codes on the system. For example, 1-3-5-7 has the same entry pattern as 2-4-6-8 so only one of these codes would be able to be used at a time. This limitation applies to all Kwikset locks regardless of physical button layout.
Note: This applies to all user codes on the account, not just user codes added to the lock.
Always verify safety, installation, compatibility, and current UI details against the original manufacturer documentation before operational use.
User Management
Add a mobile phone number to receive SMS notifications
GoSafer Security Knowledge Base
This operational reference is organized for GoSafer Security customers and staff. Alarm.com product names are retained where required for technical accuracy.
Overview
Mobile phone numbers can be added to a user's contact information so that they can receive SMS notifications.
Platform
Customer Website
Content type
How-to / Configuration
Source last updated
2025-06-04
Procedure
To add a mobile phone number to a user's contact information
Log in to the GoSafer Security customer portal (powered by Alarm.com).
Click Users.
Click [Edit] for the user to edit. If the user is not listed, click Add User to add a new user.
Verify User Information is correct.
In Contact Information, click Add.
Click Mobile Number (SMS).
Enter the user's phone number, select the country of the phone number, and select the phone's cellular provider.
Click Save.
Note: If you do not have the option to save, you may not have the required login permissions. If you are not seeing the preceding options to add a mobile number, contact your service provider.
For more information about how to configure notifications, see Notifications.
Always verify safety, installation, compatibility, and current UI details against the original manufacturer documentation before operational use.
User Management
Android Quick Access Device Controls
GoSafer Security Knowledge Base
This operational reference is organized for GoSafer Security customers and staff. Alarm.com product names are retained where required for technical accuracy.
Overview
Android Quick Access Device Controls provides Android users with seamless control of their smart devices from the Quick Settings panel.
Platform
Mobile App
Content type
How-to / Configuration
Source last updated
2025-06-04
Procedure
Can I control devices while my device is locked?
Yes. Android devices using version 13+ allow certain device types to be controlled without unlocking the device. The ability to control devices while the device is locked is enabled by default and allows non-secure actions to be controlled from the lock screen.
Caution: Enabling control for secure actions (e.g., controlling locks, garage doors, etc) may create security vulnerabilities for their property.
To enable or disable Device Controls from the lock screen
Log in to the Alarm.com app.
Tap [More Options].
Tap Device Controls.
Tap to select the desired linked system (if applicable).
Use the toggle switches to enable or disable control for the desired devices from the lock screen.
Can I use Quick Access Device Controls alongside linked systems or Enteprise systems?
Yes. Logins with access to multiple systems can enable Quick Acess Device Controls with up to five systems or up to 5 Enterprise systems.
Always verify safety, installation, compatibility, and current UI details against the original manufacturer documentation before operational use.
User Management
App settings transfer
GoSafer Security Knowledge Base
This operational reference is organized for GoSafer Security customers and staff. Alarm.com product names are retained where required for technical accuracy.
Overview
The Mobile App Settings Transfer Wizard allows users to maintain consistent service, even when changing over to a new device. Users can easily transfer existing notification and Alarm.com Places location settings to new mobile phones or tablets using the transfer wizard. The wizard also helps users properly remove old devices from their accounts, when applicable, to ensure a smooth transition.
Platform
App + Web
Content type
How-to / Configuration
Source last updated
2025-06-04
Procedure
Step-by-step guide: Screenshots and videos are placed with the instruction they illustrate.
The Mobile App Settings Transfer Wizard allows users to maintain consistent service, even when changing over to a new device. Users can easily transfer existing notification and Alarm.com Places location settings to new mobile phones or tablets using the transfer wizard. The wizard also helps users properly remove old devices from their accounts, when applicable, to ensure a smooth transition.
Considerations
The Passcode, Touch ID, Fingerprint, and Face ID will not transfer. To change these settings, tap Menu and then App Settings.
This wizard can be accessed by primary account logins and any secondary logins given Master Control permission by the primary login.
Transfer of Alarm.com Places location settings on iPads is not available.
The wizard works even if the user switches app stores (i.e., Android to iPhone or the other way around).
To transfer app settings to a new device:
Log in to the Alarm.com app on the new device. The Alarm.com app will trigger the Alarm.com app settings migration process.
Tap to select Copy settings from another device on iOSor Copy settings from an existing device on Android.
Copy settings
Tap Continue.
Tap the device you would like to copy.
Copy settings 2
Tap Continue. This process steps through turning on each option available for the device requested to copy settings from.
For each option, tap Turn On or No Thanks depending on preference.
If Turn On is selected, tap OK to allow the settings to take effect.
Stay connectedGeo services
Once copying the settings from the old device is completed, select either to remove the old device from the push notifications and Alarm.com Places or keep it active.
Note: If the device is no longer in use, it is recommended to remove the old device to avoid confusion. If the old instance is not deleted, it will still appear under Push Devices, notifications previously set up with the old push device, and as a Geo-Device.
To remove the device, select Remove my old device from this account after my settings have been copied.
To keep the device, select I want to keep using my old device in addition to the new device, then click Ok.
Keep old device active
Tap Continue.
Tap Finish.
Migration complete
Once the Apps Settings Migration is complete, the initial setup screen will appear.
Important: The Passcode, Touch ID, Fingerprint, and Face ID will not transfer. To change these settings, tap Menu and then App Settings.
Always verify safety, installation, compatibility, and current UI details against the original manufacturer documentation before operational use.
User Management
Best practices when changing phones
GoSafer Security Knowledge Base
This operational reference is organized for GoSafer Security customers and staff. Alarm.com product names are retained where required for technical accuracy.
Overview
When switching to a different phone for any reason, there are a few things to be aware of to ensure minimal disruption of your service. The following are suggestions for information and features that …
Platform
General / Device
Content type
Troubleshooting
Source last updated
2023-10-31
Procedure
Primary phone contact
When swapping to a different phone that was associated with the primary login, the primary phone contact on the account should be updated if the number is different. This ensures that the primary contact is up to date in case the primary contact needs to be reached for any reason.
For more information about how to update the primary phone contact, see Change a phone number.
Rules and notifications
The rules and notifications on the account should be updated to reflect any phone swaps that are performed. The new phone should be added to the contact recipients for any desired rules and notifications, and the old phone should be removed from any rules or notifications. This ensures minimal disruption in system usage and notifications.
For more information about how to configure notification recipients, see the following articles
Add/Configure notification recipients
How can a device start receiving Push Notifications?
How can I create text (SMS) notifications if my cell carrier isn't an option?
Alarm.com Places
When swapping to a different phone, update the list of Geo-Devices that are attached to the account. In this case, delete the old phone from the Geo-Devices list on the account and add the new phone to the list.
For more information about how to configure Alarm.com Places, see Configure Alarm.com Places.
For more information about how to delete a Geo-Device, see Troubleshooting Alarm.com Places.
Two Factor Authentication
When changing phones, the contact information associated with Two Factor Authentication needs to be updated if the feature is enabled for the user's account. To update the contact information that the Two Factor Authentication feature is associated with, disable and then re-enable the feature.
For more information about how to enable and disable Two Factor Authentication, see What is Two Factor Authentication?.
Always verify safety, installation, compatibility, and current UI details against the original manufacturer documentation before operational use.
User Management
Can I create multiple logins for my account?
GoSafer Security Knowledge Base
This operational reference is organized for GoSafer Security customers and staff. Alarm.com product names are retained where required for technical accuracy.
Overview
Yes. You can create multiple logins for your account using your GoSafer Security customer portal (powered by Alarm.com) login. There is no limit to the number of logins that can be created for an account.
For information about creating a new login, see Create a new login.
A system-generated password is sent to the email address that you assigned to the user. They are prompted to update the password upon their initial login to the GoSafer Security customer portal (powered by Alarm.com).
Platform
Customer Website
Content type
How-to / Configuration
Source last updated
2023-11-13
Procedure
Yes. You can create multiple logins for your account using your GoSafer Security customer portal (powered by Alarm.com) login. There is no limit to the number of logins that can be created for an account.
For information about creating a new login, see Create a new login.
A system-generated password is sent to the email address that you assigned to the user. They are prompted to update the password upon their initial login to the GoSafer Security customer portal (powered by Alarm.com).
Always verify safety, installation, compatibility, and current UI details against the original manufacturer documentation before operational use.
User Management
Can logins have access to only specific system partitions?
GoSafer Security Knowledge Base
This operational reference is organized for GoSafer Security customers and staff. Alarm.com product names are retained where required for technical accuracy.
Overview
Access to specific system partitions can be configured using the GoSafer Security customer portal (powered by Alarm.com). The permission to limit access to specific system partitions can be added to existing logins or when creating a new login.
Note: If a login is given access to a partition, it only gains control at the partition level. Full control at the system level (e.g., view History or User Code Management) must be granted with separate login permissions. For more information about managing login permissions, see Manage login permissions for secondary logins.
Platform
Customer Website
Content type
How-to / Configuration
Source last updated
2025-06-04
Procedure
To restrict system partition access for an existing system user
Log in to the GoSafer Security customer portal (powered by Alarm.com).
Click Users.
Click the desired user to be edited.
Click Panels.
In Security Panels, click to toggle the desired system partitions for access.
Click Save.
To restrict system partition access for an existing login
Log in to the GoSafer Security customer portal (powered by Alarm.com).
Click Users.
Click Manage Logins.
Click the login name to be edited.
Click to select Limited Device Access.
Click to select Remote Arming.
Using the Remote Arming dropdown menu, select the partitions to be controlled.
Always verify safety, installation, compatibility, and current UI details against the original manufacturer documentation before operational use.
User Management
Change a login name
GoSafer Security Knowledge Base
This operational reference is organized for GoSafer Security customers and staff. Alarm.com product names are retained where required for technical accuracy.
Overview
Login names can be changed on the website and app.
Platform
App + Web
Content type
Reference
Source last updated
2025-06-04
Procedure
To change a login name using the Alarm.com app
Note: The only login name that can be changed is for the login used to access the Alarm.com app.
Log in to the Alarm.com app.
Tap [Menu].
Tap Login Information.
Tap Login Name.
Enter the new login name in the Login Name field.
In the Current Password field, enter your current password.
Tap Save.
Note: If unable to change the login name, contact your service provider.
To change a login name using the GoSafer Security customer portal (powered by Alarm.com)
Note: The only login name that can be changed is for the login used to access the GoSafer Security customer portal (powered by Alarm.com).
Log in to the GoSafer Security customer portal (powered by Alarm.com).
Click Settings.
Click Login Information.
Click Login Name.
Enter the new login name in the Login Name field.
In the Current Password field, enter your current password.
Click Save.
Note: If unable to change the login name, contact your service provider.
Always verify safety, installation, compatibility, and current UI details against the original manufacturer documentation before operational use.
User Management
Change a phone number
GoSafer Security Knowledge Base
This operational reference is organized for GoSafer Security customers and staff. Alarm.com product names are retained where required for technical accuracy.
Overview
The primary phone number associated with the property location can be changed on the website.
Platform
App + Web
Content type
How-to / Configuration
Source last updated
2025-06-04
Procedure
To change the primary account phone number using the Alarm.com app
Log in to the Alarm.com app.
Tap [Menu].
Tap Account Management.
Tap Account Information.
Tap Edit.
Note: If unable to edit this information, contact your service provider.
Enter the new phone number in the Phone Number field.
Note: Updating the primary phone number from an international number requires the country code format and number to be entered before the number (e.g., +1 612-555-1234).
Tap Update.
To change the primary account phone number using the GoSafer Security customer portal (powered by Alarm.com)
Log in to the GoSafer Security customer portal (powered by Alarm.com).
Click Settings.
Click Account Management.
In Account Information, click Update Account Information.
Note: If unable to edit this information, contact your service provider.
Enter the new phone number in the Phone Number field.
Note: Updating the primary phone number from an international number requires the country code format and number to be entered before the number (e.g., +1 612-555-1234).
Always verify safety, installation, compatibility, and current UI details against the original manufacturer documentation before operational use.
User Management
Change an email address
GoSafer Security Knowledge Base
This operational reference is organized for GoSafer Security customers and staff. Alarm.com product names are retained where required for technical accuracy.
Overview
Keeping email addresses updated helps keep the system secure.
Platform
App + Web
Content type
Reference
Source last updated
2026-06-10
Procedure
To change the account primary email address using the Alarm.com app
Log in to the Alarm.com app using the primary login of the account.
Tap [Menu].
Tap Login Information.
Tap Email Address.
Enter the new email address in the Email Address field.
In the Current Password field, enter your current password.
Tap Save.
To change the account primary email address using the GoSafer Security customer portal (powered by Alarm.com)
Log in to the GoSafer Security customer portal (powered by Alarm.com) using the primary login of the account.
Click Settings.
Click Login Information.
In Login Information, click Email Address.
Enter the new email address in the Email Address field.
In the Current Password field, enter your current password.
Always verify safety, installation, compatibility, and current UI details against the original manufacturer documentation before operational use.
User Management
Change how the Welcome card appears on the website
GoSafer Security Knowledge Base
This operational reference is organized for GoSafer Security customers and staff. Alarm.com product names are retained where required for technical accuracy.
Overview
The Welcome card on the GoSafer Security customer portal (powered by Alarm.com) can be collapsed and expanded, but what appears on the card cannot be changed.
The following image is an example of how the Welcome card appears by default:
Note: If you have video devices, Today's Activity and the weather forecast are replaced by video clips.
Platform
App + Web
Content type
Reference
Source last updated
2025-06-04
Procedure
Step-by-step guide: Screenshots and videos are placed with the instruction they illustrate.
The Welcome card on the GoSafer Security customer portal (powered by Alarm.com) can be collapsed and expanded, but what appears on the card cannot be changed.
The following image is an example of how the Welcome card appears by default:
Note: If you have video devices, Today's Activity and the weather forecast are replaced by video clips.
Welcome card with weather
To collapse the Welcome card:
Log in to the GoSafer Security customer portal (powered by Alarm.com).
To hide Today's Activity or saved video clips on the Home page, click Collapse on the Welcome card to collapse the section. The system saves the selection for the user's login (e.g., if the user selects to collapse the Welcome card, it stays collapsed when the user logs out and logs back in to view the system).
Note: User logins are not affected by another user login's selection.
Always verify safety, installation, compatibility, and current UI details against the original manufacturer documentation before operational use.
User Management
Change language preference
GoSafer Security Knowledge Base
This operational reference is organized for GoSafer Security customers and staff. Alarm.com product names are retained where required for technical accuracy.
Overview
User language preferences change the language of the website and the user's notifications.
Platform
Customer Website
Content type
How-to / Configuration
Source last updated
2025-06-04
Procedure
To change the language preference for system users
Log in to the GoSafer Security customer portal (powered by Alarm.com).
Click Users.
Click the desired user name to edit.
Click Language Preference.
Click to select the desired language for notifications.
Click Save.
To change the language preference for a login
Log in to the GoSafer Security customer portal (powered by Alarm.com) with the login to be edited.
Click Settings.
Click Login Information.
Click Language Preference.
Use the dropdown menu to select the new language preference.
Always verify safety, installation, compatibility, and current UI details against the original manufacturer documentation before operational use.
User Management
Change or reset a password
GoSafer Security Knowledge Base
This operational reference is organized for GoSafer Security customers and staff. Alarm.com product names are retained where required for technical accuracy.
Overview
Updating user passwords for website and app users helps keep the system secure.
Platform
App + Web
Content type
Reference
Source last updated
2025-06-04
Procedure
To change your password while logged in using the Alarm.com app
Log in to the Alarm.com app.
Tap [Menu].
Tap Login Information.
Tap Password.
In the Current Password field, enter the current password.
In the New Password field, enter the new password.
In the Verify Password field, enter the new password again.
Tap to select Log out all devices if it is desired to log out all devices that are using the current password.
This option is useful when a password change is performed because of a device change or a lost/compromised device.
Tap Save.
To change your password while logged in using the GoSafer Security customer portal (powered by Alarm.com)
Log in to the GoSafer Security customer portal (powered by Alarm.com).
Click Settings.
Click Login Information.
Click Password.
In the Current Password field, enter the current password.
In the New Password field, enter the new password.
In the Verify Password field, enter the new password again.
Click to select Log out all devices if it is desired to log out all devices that are using the current password.
This option is useful when a password change is performed because of a device change or a lost/compromised device.
Click Save.
To reset your password using the Alarm.com app
Open the Alarm.com app.
Tap Forgot username or password.
In Help us recognize you, enter the email address or username associated with the account, then tap Next.
If the information entered is associated with an account, an email is sent with steps to reset your password, or remind you of your username.
Note: If you do not receive the password reset email, check the junk folder and verify that the email address was entered correctly.
Tap Reset Password.
Note: The password reset email will include any accounts associated with the email address and include the option to reset those account passwords. If there is only one account associated with the email address, the username will be displayed in the email.
Follow the prompts in the email to reset your password.
To reset your password using a web browser
Access the Login Help page.
In Forgot your password?, enter your username, then click Submit.
Note: If you do not know your username, enter your email address in Forgot your username?.
If the information entered is associated with an account, an email is sent with steps to reset your password, or remind you of your username.
Note: If the password reset email is not received, check the junk folder and verify the email address was entered corrected.Click Forgot username password enter your username.
Click Change Password.
Note: The password reset email will include any accounts associated with the email address and include the option to reset those account passwords. If there is only one account associated with the email address, the username will be displayed in the email.
Follow the prompts in the email to reset your password.
Always verify safety, installation, compatibility, and current UI details against the original manufacturer documentation before operational use.
User Management
Change security questions
GoSafer Security Knowledge Base
This operational reference is organized for GoSafer Security customers and staff. Alarm.com product names are retained where required for technical accuracy.
Overview
Updating security questions and their answers helps keep the system secure.
Platform
App + Web
Content type
How-to / Configuration
Source last updated
2025-06-04
Procedure
To update security questions using the Alarm.com app
Log in to the Alarm.com app.
Tap [Menu].
Tap Login Information.
Tap Security Question.
Using the Security Question dropdown menu, select the security question.
In Answer for Security Question, enter your answer for the selected security question.
In the Current Password field, enter your password.
Tap Save.
To update security questions using the GoSafer Security customer portal (powered by Alarm.com)
Log in to the GoSafer Security customer portal (powered by Alarm.com).
Click Settings.
Click Login Information.
Click Security Question.
Using the Security Question dropdown menu, select the security question.
In Answer for Security Question, enter your answer for the selected security question.
In the Current Password field, enter your password.
Always verify safety, installation, compatibility, and current UI details against the original manufacturer documentation before operational use.
User Management
Change the name of a mobile device
GoSafer Security Knowledge Base
This operational reference is organized for GoSafer Security customers and staff. Alarm.com product names are retained where required for technical accuracy.
Overview
The name of a mobile push notification device can be updated using the app or website.
Platform
App + Web
Content type
Reference
Source last updated
2025-11-05
Procedure
To change the name of a mobile device using the Alarm.com app
Log in to the Alarm.com app.
Tap [Menu].
Tap App Settings.
Tap Device Name.
Enter the desired name for the mobile device.
To change the name of a mobile device using the GoSafer Security customer portal (powered by Alarm.com)
Log in to the GoSafer Security customer portal (powered by Alarm.com).
Click Settings.
Click Manage Devices.
In Mobile Devices, click the desired mobile device.
Always verify safety, installation, compatibility, and current UI details against the original manufacturer documentation before operational use.
User Management
Configure a number passcode for the app
GoSafer Security Knowledge Base
This operational reference is organized for GoSafer Security customers and staff. Alarm.com product names are retained where required for technical accuracy.
Overview
You can set up an optional passcode lock in the settings of the Alarm.com app. Once enabled, there is a prompt asking for a four-digit code before accessing the Alarm.com app.
Note: Enabling the passcode option keeps you logged into the Alarm.com app, but prompts a passcode every time the Alarm.com app is opened.
Platform
Mobile App
Content type
Troubleshooting
Source last updated
2025-08-01
Procedure
Enable the passcode
The passcode for the Alarm.com app can be enabled using the Alarm.com app.
To enable the passcode
Log in to the Alarm.com app.
Tap [Menu].
Tap App Settings.
Tap Passcode.
Tap the Passcode Access toggle switch to enable the feature.
Note: If the Keep my logged in option is not enabled when logging in, there is a prompt to enter your password before enabling the desired passcode.
Enter in the desired four-digit passcode, and then re-enter the passcode to verify it.
Note: The passcode can be any four-digit number.
Passcode access is now enabled, so now any time the Alarm.com app is opened on the device, it prompts to enter the established four-digit passcode to access the Alarm.com app.
Note: The passcode can be updated by disabling it and then re-enabling it.
Disable the passcode
The passcode can be disabled using the Alarm.com app. It can be disabled using the passcode or without it.
Note: After five failed passcode attempts, the Alarm.com app disables Passcode Access on the device due to too many incorrect attempts and returns the user to the standard login page.
To disable the passcode using the passcode
Log in to the Alarm.com app.
Tap [Menu].
Tap App Settings.
Tap Passcode.
Tap the Passcode Access toggle switch to disable the feature.
Enter the current passcode to disable the feature.
To disable the passcode without the passcode
Tap to open the Alarm.com app.
On the Enter your passcode page, tap Cancel.
Tap Log Out to turn off Passcode Access on the device and return to the standard login page.
Always verify safety, installation, compatibility, and current UI details against the original manufacturer documentation before operational use.
User Management
Contact your service provider
GoSafer Security Knowledge Base
This operational reference is organized for GoSafer Security customers and staff. Alarm.com product names are retained where required for technical accuracy.
Overview
If you are unable to find an answer to your question in the Knowledge Base, you can contact your service provider for further assistance.
Platform
App + Web
Content type
Reference
Source last updated
2026-05-21
Procedure
To contact your service provider using the Alarm.com app
Log in to the Alarm.com app.
Tap [Menu].
Tap Support.
Select the desired way to contact your service provider:
Note: Depending on your service provider, all four options may not be available. If you are unable to contact your service provider, tap Help Documentation to access the Knowledge Base and enter a brief description of the device, its behavior, or identifying model number if applicable.
Tap Phone Number to view the contact information to contact your service provider.
Tap Email to send an email to your service provider.
Tap Support Website to visit your service provider's website.
Tap Support Ticket to provide the requested information in a ticket.
In the Name field, enter your name.
In the Email field, enter your email address.
In the Phone field, enter your phone number.
In the Subject field, enter a subject for the service request.
Using the Category dropdown menu, select the service request category.
Note: Selecting a category is not required, but it is recommended.
Tap Help Documentation to access a knowledge base for answers to common questions.
To contact your service provider using the GoSafer Security customer portal (powered by Alarm.com)
Log in to the GoSafer Security customer portal (powered by Alarm.com).
Click Support.
Select the desired way to contact your service provider:
Note: Depending on your service provider, all four options may not be available. If you are unable to contact your service provider, click Help Documentation to access the Knowledge Base and enter a brief description of the device, its behavior, or identifying model number if applicable.
Click Phone Number to view the contact information to contact your service provider.
Click Email to send an email to your service provider.
Click Support Website to visit your service provider's website.
Click Support Ticket to provide the requested information in a ticket.
In the Name field, enter your name.
In the Email field, enter your email address.
In the Phone field, enter your phone number.
In the Subject field, enter a subject for the service request.
Using the Category dropdown menu, select the service request category.
Note: Selecting a category is not required, but it is recommended.
In the Description field, provide details about the service request.
Always verify safety, installation, compatibility, and current UI details against the original manufacturer documentation before operational use.
User Management
Create a secondary login
GoSafer Security Knowledge Base
This operational reference is organized for GoSafer Security customers and staff. Alarm.com product names are retained where required for technical accuracy.
Overview
Individual logins for each website and app user can be created from the website.
Platform
App + Web
Content type
How-to / Configuration
Source last updated
2025-06-04
Procedure
Step-by-step guide: Screenshots and videos are placed with the instruction they illustrate.
Individual logins for GoSafer Security customer portal (powered by Alarm.com) and Alarm.com app users can only be created using the GoSafer Security customer portal (powered by Alarm.com). If the desired login name is not accepted, it may already be in use. For more information about login requirements, see What are the login name and password requirements?.
There is no limit to the number of logins that can be created. For information about creating a login for an Enterprise group, see Create a new group login.
Note: Only logins with Master Control permissions can create new logins. For further assistance, contact the account administrator.
To create a secondary login:
Log in to the GoSafer Security customer portal (powered by Alarm.com).
Click Users.
Click Manage Logins.
Click Add a Login.
In the Email Address field, enter the new login's email address.
In the Login Name field, enter the desired login name.
Using the Language Preference dropdown menu, select the desired language preference.
Click Save.
On the Manage Login Permissions page, select either Master Control, Full Control, Read Only, Limited Device Access, or Custom. This will give the login permission to access various website features. For a description of each permission, see Permissions.
If no permissions are selected and saved:
On the GoSafer Security customer portal (powered by Alarm.com), the login is able to view only the welcome card, sensors, and activity. The login is not able to perform any changes except to their Login Information.
On the Alarm.com app, the login is able to view only trouble alerts, weather, and history. The login is not able to perform any changes except to their App Settings.
Click Save.
Note: New logins receive an email containing their login name, a link to set up a new password, and a link to download the Alarm.com app. If this email is not being received, confirm the email address for the new login is entered correctly and/or have the user check their junk/spam folder. The email link is valid for 24 hours.
Permissions
Permission
Description
Master Control
Logins with Master Control will have all of the permissions of the primary account user, including the ability to manage website logins and change profile information such as the primary email address and phone number for the account.
Master Control logins will not receive certain types of account notifications that go only to the primary user (e.g., user code changes and invalid email addresses for secondary contacts).
Full Control
Logins with Full Control will have all of the Full Control permissions described in the Custom permissions sections, along with most of the GoSafer Security customer portal (powered by Alarm.com) and mobile app functionality available to the primary account user.
They will not have the ability to manage website logins, and they will not receive certain types of account notifications that go only to the primary user (e.g., user code changes and invalid email addresses for secondary contacts).
Read Only
Logins with Read Only permissions will be able to see most of the GoSafer Security customer portal (powered by Alarm.com) pages and settings for the account, including the User Codes and Live/Saved Video pages, but will not be able to make any changes to account settings, arming state, device status or view saved video. These logins cannot see the Manage Logins page.
Limited Device Access
Logins with limited device access will only be able to control and observe the specified devices.
Note: Access to view the account's activity (i.e., Activity, Reports, Wellness, etc.) is restricted on the GoSafer Security customer portal (powered by Alarm.com) and app when the Limited Device Access permission is chosen.
Custom
You can create a Custom role to fit your exact requirements for this login. Use the checkboxes below to include a specific type of permission, and then decide what level of control to provide the login (Read Only or Full Control). You can always come back and change this in the future.
Note: You will be able to view additional website and mobile content not listed in the Custom permissions, such as current system status, system history, their own password settings, and the system equipment list.
Always verify safety, installation, compatibility, and current UI details against the original manufacturer documentation before operational use.
User Management
Delete a login
GoSafer Security Knowledge Base
This operational reference is organized for GoSafer Security customers and staff. Alarm.com product names are retained where required for technical accuracy.
Overview
Deleting unused website and app logins helps keep the system secure.
Platform
Customer Website
Content type
How-to / Configuration
Source last updated
2025-06-04
Procedure
To delete a login
Note: Deleting a secondary login that was created through linked logins will remove access to the current account, but it will not delete the login. For more information on linked logins, see How can multiple account systems be linked?.
Log in to the GoSafer Security customer portal (powered by Alarm.com).
Click Users.
Click Manage Logins.
Click [Delete] for the login name to be deleted.
If the delete option does not display, your login may not have permissions for login management. Contact the user with access to the primary login to remove a login.
Note: The primary login cannot be deleted and deleted logins cannot be recovered. If the primary login name or email address needs to be updated, see Change a login name or Change an email address.
Always verify safety, installation, compatibility, and current UI details against the original manufacturer documentation before operational use.
User Management
Do the app and website update in real time?
GoSafer Security Knowledge Base
This operational reference is organized for GoSafer Security customers and staff. Alarm.com product names are retained where required for technical accuracy.
Overview
Yes. The Alarm.com app and GoSafer Security customer portal (powered by Alarm.com) will display updated statuses for various devices in real time (e.g., security panel arming state, access control doors, most energy and automation devices, etc.). The Alarm.com app and GoSafer Security customer portal (powered by Alarm.com) can also be manually refreshed to view updated statuses for other devices.
For more information about device types and events that update in real time, see Events that will update in real-time.
Note: If a system condition is still present after refreshing, it may still be active and may need to be resolved or dismissed. Contact your service provider for assistance. For help reaching your service provider, see Contact your service provider.
Platform
App + Web
Content type
How-to / Configuration
Source last updated
2023-11-09
Procedure
Step-by-step guide: Screenshots and videos are placed with the instruction they illustrate.
Yes. The Alarm.com app and GoSafer Security customer portal (powered by Alarm.com) will display updated statuses for various devices in real time (e.g., security panel arming state, access control doors, most energy and automation devices, etc.). The Alarm.com app and GoSafer Security customer portal (powered by Alarm.com) can also be manually refreshed to view updated statuses for other devices.
Important: The Alarm.com app requires a minimum version of 4.21.26 for Android and 4.21.28 for iOS to update statuses in real time.
Note: If a system condition is still present after refreshing, it may still be active and may need to be resolved or dismissed. Contact your service provider for assistance. For help reaching your service provider, see Contact your service provider.
Manually refresh the Alarm.com app or GoSafer Security customer portal (powered by Alarm.com)
Expand all
To manually refresh the Alarm.com app:Icn Chevron Down
Swipe down on the screen. A refreshing icon will become visible and will spin before refreshing the Alarm.com app.
To manually refresh the GoSafer Security customer portal (powered by Alarm.com):Icn Chevron Down
Click Icn Refresh on any page in the GoSafer Security customer portal (powered by Alarm.com).
Events that will update in real-time
The following device types and events will update in real time:
Always verify safety, installation, compatibility, and current UI details against the original manufacturer documentation before operational use.
User Management
Enable Two Factor Authentication
GoSafer Security Knowledge Base
This operational reference is organized for GoSafer Security customers and staff. Alarm.com product names are retained where required for technical accuracy.
Overview
Two Factor Authentication adds an extra layer of security to protect access to your system.
Platform
App + Web
Content type
How-to / Configuration
Source last updated
2025-06-04
Procedure
Step-by-step guide: Screenshots and videos are placed with the instruction they illustrate.
Note: Two Factor Authentication can be referred to as 2FA, Multi-Factor Authentication, or MFA.
Two Factor Authentication adds an extra layer of security to protect access to your system. This makes it harder for potential intruders to gain access to your system, so your system and your property are even more secure. Whenever you sign into your system from a new or untrusted device, you will have to enter both your password and a code sent to your mobile phone.
Enable or disable Two Factor Authentication
Two Factor Authentication can be enabled or disabled using the Alarm.com app and GoSafer Security customer portal (powered by Alarm.com).
Note: If Two Factor Authentication is enabled, all active sessions on the Alarm.com app and GoSafer Security customer portal (powered by Alarm.com) will end. Two Factor Authentication will be required to log back in.
Expand all
To enable or disable Two Factor Authentication for a login using the Alarm.com app:Icn Chevron Down
To disable Two Factor Authentication, tap Disable and then tap Confirm.
Note: Two Factor Authentication may be required or suggested by your service provider. For additional assistance, contact your service provider.
To enable Two Factor Authentication, select Text Message, Email, or Authentication app.
Note: It is recommended to set up Two Factor Authentication using multiple methods. If multiple methods cannot be enabled, contact your service provider
To enable Two Factor Authentication for text message:
Tap Text Message.
Tap Next.
Mobile Two Factor Authentication Enable
In Mobile Number, enter the mobile number to receive the Two Factor Authentication confirmation code.
Using the Country dropdown menu, select either USA or Canada.
Using the Provider dropdown menu, select the cellular carrier of the mobile phone number that will receive the Two Factor Authentication confirmation code.
Note: The Provider dropdown menu displays the full list of Two Factor Authentication compatible cellular carriers.
If the carrier is not listed, select Other.
Mobile Two Factor Authentication Phone Number
Note: This displays the full list of Two Factor Authentication compatible cellular carriers.
Tap Send to send the verification code to the mobile number entered.
In Verification Code, enter the code that is provided in a text message to the mobile number entered.
Mobile Two Factor Authentication Verification Code
Tap Verify.
To enable Two Factor Authentication for email:
Tap Email.
In Send Verification Code, verify the correct email is displayed. For more information about how to update the email address, see Change an email address.
Tap Send.
Mobile Two Factor Authentication Email
In Verification Code, enter the code that is provided in the received email.
Mobile Two Factor Authentication Email Code
Tap Verify.
To enable Two Factor Authentication using an authentication app:
Important: An authenticator app is required to complete this process and the steps may vary based on the authenticator app in use.
Tap Authentication App.
Generate an authentication code:
Note: The Duo authenticator app may experience unexpected behavior and it is recommended to use an alternative authenticator app.
Use an authenticator app to scan the QR code or manually enter the code provided on the Alarm.com app or GoSafer Security customer portal (powered by Alarm.com) into the authenticator app.
In the Enter Code field, enter the code that is generated on the authenticator app to verify the device.
Click Next.
In Device Name, enter the desired name for the device that will be trusted.
Mobile Two Factor Authentication Trust this Device
Tap Next.
In Linked Devices, tap Trust next to any additional devices that can be trusted.
Tap Done.
To enable or disable Two Factor Authentication for a login using the GoSafer Security customer portal (powered by Alarm.com):Icn Chevron Down
Log in to the GoSafer Security customer portal (powered by Alarm.com).
Click Settings.
Click Login Information.
Click Two Factor Authentication.
To disable Two Factor Authentication, click Disable.
Note: Two Factor Authentication may be required or suggested by your service provider. For additional assistance, contact your service provider.
To enable Two Factor Authentication, select Text Message, Email, or Authentication app.
Note: It is recommended to set up Two Factor Authentication using multiple methods. If multiple methods cannot be enabled, contact your service provider.
To enable Two Factor Authentication for text message:
Click Text Message.
Click Next.
Two Factor Authentication GoSafer Security customer portal
In Mobile Number, enter the mobile number to receive the Two Factor Authentication confirmation code.
Using the Country dropdown menu, select either USA or Canada.
Using the Provider dropdown menu, select the cellular carrier of the mobile phone number that will receive the Two Factor Authentication confirmation code.
Note: The Provider dropdown menu displays the full list of Two Factor Authentication compatible cellular carriers.
If the carrier is not listed, select Other.
Two Factor Authentication Phone Number
Click Send to send a verification code to the mobile number.
In Verification Code, enter the code that is provided in a text message to the mobile number.
Two Factor Authentication Verification Code
Click Verify.
To enable Two Factor Authentication for email:
Click Email.
In Send Verification Code, verify the correct email is displayed. For more information about how to update the email address, see Change an email address.
Click Send.
Two Factor Authentication Email Code
In Verification Code, enter the code that is provided in the received email.
Two Factor Authentication Email Code Sent
Click Verify.
To enable Two Factor Authentication using an authentication app:
Important: A mobile device with an authenticator app is required to complete this process and the steps may vary based on the authenticator app in use.
Click Authentication App.
Generate an authentication code:
Note: The Duo authenticator app may experience unexpected behavior and it is recommended to use an alternative authenticator app.
Use a mobile device with an authenticator app to scan the QR code or manually enter the code provided on the Alarm.com app or GoSafer Security customer portal (powered by Alarm.com) into the authenticator app.
In the Enter Code field, enter the code that is generated on the authenticator app to verify the device.
Click Next.
In Device Name, enter the desired name for the device that is accessing the account.
If the device is trusted, click to select Trust This Device.
Two Factor Authentication Trust Device
Click Next.
In Linked Devices, click Trust next to any additional devices that can be trusted.
Click Done.
Manage trusted devices
To manage trusted devices using the Alarm.com app:Icn Chevron Down
Log in to the Alarm.com app.
Tap Menu.
Tap Login Information.
Tap Two Factor Authentication.
Tap Detailsnext to the device name.
Make the desired changes:
To rename the device, enter the desired device name, then tap Save.
To delete the device, click Delete Trusted Device, then tap Confirm.
To manage trusted devices using the GoSafer Security customer portal (powered by Alarm.com):Icn Chevron Down
Log in to the GoSafer Security customer portal (powered by Alarm.com).
Click Settings.
Click Login Information.
Click Two Factor Authentication.
Click Detailsnext to the device name.
Make the desired changes:
To rename the device, enter the desired device name, then click Save.
To delete the device, click Delete Trusted Device, then click Confirm.
If you change your cell carrier or no longer have access to the phone number or authenticator app:
If you change your cell carrier or no longer have access to the phone number or authenticator app, Two-Factor Authentication can be reset using email. For more information, see Reset Two-Factor Customer.
If email Two Factor Authentication is set up and you no longer have access to your email address, contact your service provider for assistance with resetting your Two-Factor Authentication configuration.
Reset Two Factor Authentication
Two Factor Authentication can be reset using the Alarm.com app or GoSafer Security customer portal (powered by Alarm.com).
To reset Two Factor Authentication:Icn Chevron Down
Log in to the Alarm.com app or GoSafer Security customer portal (powered by Alarm.com).
In Enter Verification Code, click or tap Down next to Don't have access to your device?.
Select to reset Two-Factor Authentication or to contact your service provider:
If you have access to your email address associated with the login:
In Option 1: Reset Two-Factor Authentication, tap or click Reset 2FA to send a reset link to the email address associated with the login.
If you do not have access to your email address associated with the login:
In Option 2: Contact your Service Provider, use the contact information listed to contact your service provider.
Note: The ability to reset your own Two-Factor Authentication configuration is only available to users using SMS or an authenticator application.
Always verify safety, installation, compatibility, and current UI details against the original manufacturer documentation before operational use.
User Management
Export panel slot numbers for a single location
GoSafer Security Knowledge Base
This operational reference is organized for GoSafer Security customers and staff. Alarm.com product names are retained where required for technical accuracy.
Overview
The panel slot numbers report shows all users and user codes associated with the system at a single location.
Platform
Customer Website
Content type
Reference
Source last updated
2025-06-04
Procedure
To export panel slot numbers
Log in to the GoSafer Security customer portal (powered by Alarm.com).
If using an Enterprise group, select a specific location.
Click User Access.
Click Users.
Click to expand More.
Click Export Panel Slot Numbers. This downloads a list of all the users on the system as a.csv file to your computer.
Always verify safety, installation, compatibility, and current UI details against the original manufacturer documentation before operational use.
User Management
How can I set up Touch ID or Face ID for iOS?
GoSafer Security Knowledge Base
This operational reference is organized for GoSafer Security customers and staff. Alarm.com product names are retained where required for technical accuracy.
Overview
Touch ID is an alternative for passcode access to the Alarm.com app. This is another method to help with securing access to the Alarm.com app in case the device is lost or stolen.
Platform
Mobile App
Content type
Troubleshooting
Source last updated
2025-06-04
Procedure
Compatibility
Touch ID is compatible with the following iOS devices
iPhone 5s or later
iPad Air 2
iPad Mini 3 or later
Face ID is compatible with the following iOS devices
iPhone X or later
To enable the Touch ID or Face ID login feature for the Alarm.com app
Log in to the app.
Tap [Menu].
Tap App Settings.
Tap Touch ID & Passcode (or Face ID & Passcode, if available).
Tap the Touch ID (or Face ID, if available) toggle switch to enable the feature. This uses the Touch ID or Face ID that is already set up in the iOS device's settings.
If Touch ID or Face ID is not currently set up in the iOS device's settings
Exit out of the app, then tap to open the device's Settings application.
Tap Touch ID & Passcode (or Face ID & Passcode, if available).
Enter the passcode for your iOS device.
Add the fingerprint for Touch ID or face for Face ID, then navigate back to the app to complete the steps to enable Touch ID or Face ID.
Enter in the desired four-digit passcode as a backup if the alternate ID fails, and then re-enter the passcode to verify it.
Note: The passcode can be any four-digit number.
Tap OK.
Touch ID or Face ID access is now enabled, so now any time the app is opened on the device, it prompts to scan your finger or face. You must use one of the fingers that was used to set up Touch ID on the device itself.
Note: If Touch ID (or Face ID) is disabled through the iOS Settings and the app is opened, the app asks for the four-digit passcode that was set up as the backup.
To disable Touch ID or Face ID for the Alarm.com app
Log in to the app.
Tap [Menu].
Tap App Settings.
Tap Touch ID & Passcode (or Face ID & Passcode, if available).
Tap the Touch ID (or Face ID, if available) toggle switch to disable the feature.
If you also want to disable the passcode, tap the Passcode Access toggle switch and then enter the current passcode to disable it.
If the Touch ID of Face ID fails and you do not remember the passcode
Tap to open the app.
On the Enter your passcode page, tap Cancel.
Tap Log Out to turn off Passcode Access on the device and return to the standard login page.
Otherwise, after five failed passcode attempts, the app turns off Touch ID & Passcode Access on the device due to too many incorrect attempts and returns to the standard login page.
Always verify safety, installation, compatibility, and current UI details against the original manufacturer documentation before operational use.
User Management
How can I set up fingerprint scanning on Android?
GoSafer Security Knowledge Base
This operational reference is organized for GoSafer Security customers and staff. Alarm.com product names are retained where required for technical accuracy.
Overview
As of app version 4.0, the app now supports fingerprint scanning on Android as an alternative for passcode access. This is another method to help with securing access to the app in case the device is lost or stolen.
Platform
Mobile App
Content type
How-to / Configuration
Source last updated
2025-06-04
Procedure
Step-by-step guide: Screenshots and videos are placed with the instruction they illustrate.
As of app version 4.0, the app now supports fingerprint scanning on Android as an alternative for passcode access. This is another method to help with securing access to the app in case the device is lost or stolen.
Compatibility
Android fingerprint scanning is compatible with the following Android devices running Android OS version 6.0+ with the app version 4.0+:
Nexus 5X
Nexus 6P
Google Pixel
Samsung Galaxy S7 (all versions)
Android fingerprint scanning may be compatible with other Android phones that have a fingerprint scanner. It is likely that an Android phone that was launched on Android 6 (Marshmallow) would be able to support this feature.
The determining factor is whether or not the device's firmware allows the fingerprint scanner to be accessed by apps. The previously listed devices all allow the fingerprint scanner to be accessed by apps, but older devices may not. It's possible that a device that once did not allow the fingerprint scanner to be accessed by apps may start allowing the fingerprint scanner to be accessed by apps after an Android OS update.
To verify if the device meets these requirements, test the fingerprint scanning functionality or contact the device manufacturer.
To set up Fingerprint Scanning on the Alarm.com app:
Log in to the Alarm.com app.
Tap Icn Menu.
Tap AppSettings.
In App Settings, tap Passcode & Fingerprint.
Settings
InPasscode & Fingerprint, tap the fingerprint toggle to turn on Fingerprint Scanning.
Passcode Off No Fingerprint
Fingerprints can be added into Android phones by going to performing the following:
Navigate to the device's Settings.
Tap Security.
Tap Fingerprint. Swipe the button to the right to enable.
Enter in the desired four-digit passcode as a backup if the fingerprint fails, and then re-enter the passcode to verify it.
Note: The passcode can be any four-digit number.
Enter Passcode
Once passcode access is enabled and a fingerprint has been added to the phone, tap the fingerprint toggle to turn on Fingerprint Scanning.
Only Passcode On
To disable the feature, go back to the Passcode & Fingerprint page in the app and tap the fingerprint toggle to the left position. You will have to enter your passcode to disable the feature.
Always verify safety, installation, compatibility, and current UI details against the original manufacturer documentation before operational use.
User Management
How do I change the language of the customer app?
GoSafer Security Knowledge Base
This operational reference is organized for GoSafer Security customers and staff. Alarm.com product names are retained where required for technical accuracy.
Overview
The language of the Alarm.com app is determined by the system language setting of the mobile device.
Example: If the device is an iPhone with a system language of French, the Alarm.com app will display in French.
Platform
App + Web
Content type
How-to / Configuration
Source last updated
2025-07-28
Procedure
The following languages are available for the Alarm.com app
English
Spanish
Portuguese
French
Hebrew
Turkish
Icelandic
Dutch
Norwegian
Swedish
Japanese
Finnish
Danish
Italian
Thai
German
Polish
Arabic
Bahasa
For more information about changing the system language of the device, contact the device manufacturer.
For more information about how to change the language preferences of the GoSafer Security customer portal (powered by Alarm.com), see Change language preference.
For more information about how to change the language preferences for notifications, see How can the language of customer notifications be changed?.
Always verify safety, installation, compatibility, and current UI details against the original manufacturer documentation before operational use.
User Management
How do I change the language of the website?
GoSafer Security Knowledge Base
This operational reference is organized for GoSafer Security customers and staff. Alarm.com product names are retained where required for technical accuracy.
Overview
The language of the GoSafer Security customer portal (powered by Alarm.com) can be changed in your login information using the GoSafer Security customer portal (powered by Alarm.com).
Platform
Customer Website
Content type
Reference
Source last updated
2025-06-04
Procedure
Step-by-step guide: Screenshots and videos are placed with the instruction they illustrate.
The language of the GoSafer Security customer portal (powered by Alarm.com) can be changed in your login information using the GoSafer Security customer portal (powered by Alarm.com).
The following languages are available:
English
Danish
Spanish
French
Icelandic
Italian
Dutch
Norwegian
Portuguese
Finnish
Swedish
Turkish
Hebrew
Thai
Japanese
To change the language:
Log in to the GoSafer Security customer portal (powered by Alarm.com).
Click Settings.
Click Login Information.
In Login Information, click Language Preference.
Using the dropdown menu, select the desired language.
Always verify safety, installation, compatibility, and current UI details against the original manufacturer documentation before operational use.
User Management
How do I find mobile app version on my device?
GoSafer Security Knowledge Base
This operational reference is organized for GoSafer Security customers and staff. Alarm.com product names are retained where required for technical accuracy.
Overview
This is primarily a video or reference page. Open the original article link below for the current content.
Platform
Mobile App
Content type
Reference
Source last updated
2025-06-04
Procedure
Step-by-step guide: Screenshots and videos are placed with the instruction they illustrate.
Find the mobile app version
The mobile app version can be found on Android and iOS devices.
Always verify safety, installation, compatibility, and current UI details against the original manufacturer documentation before operational use.
User Management
Is the Alarm.com iOS Today View Widget a supported feature?
GoSafer Security Knowledge Base
This operational reference is organized for GoSafer Security customers and staff. Alarm.com product names are retained where required for technical accuracy.
Overview
No. With the release of iOS 18, legacy widgets such as the Alarm.com iOS Today View widget are no longer supported for both new and existing customers.
Available widgets include the Saved Clips, Safety Button, and iOS Alarm.com System Control widgets.
For more information about the Saved Clips widget, see Saved Clips widget for iOS.
Platform
General / Device
Content type
Reference
Source last updated
2024-10-14
Procedure
No. With the release of iOS 18, legacy widgets such as the Alarm.com iOS Today View widget are no longer supported for both new and existing customers.
Available widgets include the Saved Clips, Safety Button, and iOS Alarm.com System Control widgets.
For more information about the Saved Clips widget, see Saved Clips widget for iOS.
For more information about the Safety Button widget, see Safety Button widget.
For more information about the iOS Alarm.com System Control widget, see iOS Alarm.com System Control widget.
Always verify safety, installation, compatibility, and current UI details against the original manufacturer documentation before operational use.
User Management
Is there a limit to how many logins can be created for a customer account?
GoSafer Security Knowledge Base
This operational reference is organized for GoSafer Security customers and staff. Alarm.com product names are retained where required for technical accuracy.
Overview
There is no limit to how many logins you can create for your account to access the Customer app or GoSafer Security customer portal.
Platform
App + Web
Content type
How-to / Configuration
Source last updated
2022-01-26
Procedure
No. There is no limit to how many logins you can create for your account to access the Alarm.com app or GoSafer Security customer portal (powered by Alarm.com).
For more information about creating logins, see Create a new login.
Always verify safety, installation, compatibility, and current UI details against the original manufacturer documentation before operational use.
User Management
Launch the app or website tour
GoSafer Security Knowledge Base
This operational reference is organized for GoSafer Security customers and staff. Alarm.com product names are retained where required for technical accuracy.
Overview
If you would you like to learn more about how to navigate the website or app, you can launch the interactive tour.
Platform
App + Web
Content type
Reference
Source last updated
2025-06-04
Procedure
To launch the Alarm.com app tour
Log in to the Alarm.com app.
Tap [Menu].
Tap App Tour.
Swipe left to progress through the tour.
Tap Close to exit the Alarm.com app tour.
To launch the GoSafer Security customer portal (powered by Alarm.com) tour
Log in to the GoSafer Security customer portal (powered by Alarm.com).
Always verify safety, installation, compatibility, and current UI details against the original manufacturer documentation before operational use.
User Management
Log all devices out of the website and app
GoSafer Security Knowledge Base
This operational reference is organized for GoSafer Security customers and staff. Alarm.com product names are retained where required for technical accuracy.
Overview
Users who have lost their phone, or need to disable a login, can log out all devices so others can no longer access the app, including those who use the Keep me logged in feature without re-entering …
Platform
App + Web
Content type
Reference
Source last updated
2025-06-04
Procedure
To disable automatic login for a device using the Alarm.com app
Log in to the Alarm.com app.
Tap [Menu].
Tap Login Information.
Tap Lost Device.
Using the Disable Automatic Login to this Account for dropdown menu, select the login to be disabled.
Tap Save.
To disable automatic login for a device using the GoSafer Security customer portal (powered by Alarm.com)
Log in to the GoSafer Security customer portal (powered by Alarm.com).
Click Settings.
Click Login Information.
Click Lost Device.
Using the Disable Automatic Login to this Account for dropdown menu, select the login to be disabled.
Click Save.
To log out all devices using the Alarm.com app
Important: It is required to change your password for this method.
Log in to the Alarm.com app.
Tap [Menu].
Tap Login Information.
Tap Password.
Enter information in the Current Password, New Password, and Confirm Password fields.
Tap to select Log out all devices.
Tap Save.
To log out all devices using the GoSafer Security customer portal (powered by Alarm.com)
Important: It is required to change your password for this method.
Log in to the GoSafer Security customer portal (powered by Alarm.com).
Click Settings.
Click Login Information.
Click Password.
Enter information in the Current Password, New Password, and Confirm Password fields.
Always verify safety, installation, compatibility, and current UI details against the original manufacturer documentation before operational use.
User Management
Manage login permissions for secondary logins
GoSafer Security Knowledge Base
This operational reference is organized for GoSafer Security customers and staff. Alarm.com product names are retained where required for technical accuracy.
Overview
Login permissions for new or existing secondary accounts can be managed using the website.
Platform
App + Web
Content type
How-to / Configuration
Source last updated
2026-02-18
Procedure
Step-by-step guide: Screenshots and videos are placed with the instruction they illustrate.
Login permissions for new or existing secondary accounts can be managed using the GoSafer Security customer portal (powered by Alarm.com).
To manage login permissions for secondary logins:
Log in to the GoSafer Security customer portal (powered by Alarm.com).
Click Users.
Click Manage Logins.
In Login Name, click the desired login to change permissions for.
Note: Login names that are underlined can be edited.
Select which permission the login should be granted.
Click Save.
Permission
Description
Master Control
Users with Master Control will have all of the permissions of the primary account user, including the ability to manage website logins and change profile information such as the primary email address and phone number for the account.
Master Control users will not receive certain types of account notifications that go only to the primary user (e.g., user code changes and invalid email addresses for secondary contacts).
Full Control
Users with Full Control will have all of the Full Control permissions described in the Custom permissions sections, along with most of the website and mobile app functionality available to the primary account user.
Full Control users will not have the ability to manage website logins, and they will not receive certain types of account notifications that go only to the primary user (e.g., user code changes and invalid email addresses for secondary contacts).
Read Only
Users with Read Only permissions will be able to see most of the website pages and settings for the account, including the User Codes and Live/Saved Video pages, but will not be able to make any changes to account settings, arming state, or device status. Read Only users cannot view saved video or SVR Timeline footage, and are unable to see the Manage Logins page.
Limited Device Access
Users with limited device access will only be able to control and observe the specified devices.
Note: Access to view the account's activity (i.e., Activity, Reports, Wellness, etc.) is restricted on the website and app when the Limited Device Access permission is chosen.
Custom
Create a custom role to fit the exact requirements for the user. Use checkboxes to include a specific type of permission and then decide what level of control to provide the user (i.e., Read Only or Full Control). These settings can be adjusted after the login is created.
Note: Custom users are able to view additional website and mobile content not listed in the Custom permissions, such as current system status, system history, their own password settings, and the system equipment list.
Always verify safety, installation, compatibility, and current UI details against the original manufacturer documentation before operational use.
User Management
Rearrange Home page of website or app
GoSafer Security Knowledge Base
This operational reference is organized for GoSafer Security customers and staff. Alarm.com product names are retained where required for technical accuracy.
Overview
Cards displayed on the GoSafer Security customer portal and app, such as Panel, Sensors, and Recent Activity, can be rearranged based on your preferences.
Platform
App + Web
Content type
How-to / Configuration
Source last updated
2025-06-04
Procedure
Step-by-step guide: Screenshots and videos are placed with the instruction they illustrate.
Cards displayed on the Alarm.com app and GoSafer Security customer portal (powered by Alarm.com), such as Panel, Sensors, and Recent Activity, can be rearranged based on your preferences.
To rearrange cards on the Android app:
Log in to the Alarm.com app on an Android device.
In Home, flick to scroll to the bottom, then tap Edit Dashboard.
Tap Edit Home Screen.
Tap and drag Icn Reorder on the cards to move into the desired order.
Note: In Dashboard Cards, tap Icn Circle Dash to hide a card. In Hidden Cards, tap Icn Circle Add to add a card.
Tap Icn Check to apply all changes.
To rearrange cards on the iOS app:
Log in to the Alarm.com app on an iOS device.
In Home, flick to scroll to the bottom, then tap Edit Dashboard.
Tap Edit Home Screen.
Tap and drag Icn Reorder on the cards to move into the desired order.
Note: In Dashboard Cards, tap Icn Circle Dash to hide a card. In Hidden Cards, tap Icn Circle Add to add a card.
Tap Save to apply all changes.
To rearrange cards on the GoSafer Security customer portal (powered by Alarm.com):
Log in to the GoSafer Security customer portal (powered by Alarm.com).
In Home, click Settings.
Home Configure Icon (Customer Site)
Drag the cards into the desired order, or click Hide to hide a card from the Home page if applicable.
Customize cards (Customer site)
Click Save.
Note: If you do not see cards on your home page for devices you have, contact your service provider.
Always verify safety, installation, compatibility, and current UI details against the original manufacturer documentation before operational use.
User Management
Safety Button widget
GoSafer Security Knowledge Base
This operational reference is organized for GoSafer Security customers and staff. Alarm.com product names are retained where required for technical accuracy.
Overview
The Safety Button widget enables customers to press the Safety Button to connect to police, fire, or emergency medical help from their phones’ Home screen. Once activated, users will be connected directly to a trained operator who will promptly dispatch responders to their precise location.
For more information about the Safety Button feature, see Safety Button.
Platform
Mobile App
Content type
How-to / Configuration
Source last updated
2025-02-24
Procedure
Step-by-step guide: Screenshots and videos are placed with the instruction they illustrate.
The Safety Button widget enables customers to press the Safety Button to connect to police, fire, or emergency medical help from their phones’ Home screen. Once activated, users will be connected directly to a trained operator who will promptly dispatch responders to their precise location.
For more information about the Safety Button feature, see Safety Button.
Requirements
The In-App Safety Button service package add-on
Android:
Alarm.com Android app version 5.7.3+
iOS:
Alarm.com iOS app version 5.7.0+
iOS version 17+
Important: iOS 17+ is required for the widget to display in the Apple widget gallery.
Customers must use Keep Me Logged In to use the widget feature
Add the Safety Button widget to the Home screen
The Safety Button widget can be added to the Home screen for iOS and Android devices.
Expand all
To add the Safety Button widget to the Home screen for iOS devices:Icn Chevron Up
On the Home screen, press and hold an empty area until the apps begin to move.
Tap Add or Edit.
Select the Alarm.com widget.
Swipe to the Safety Button widget.
Tap Add Widget.
Tap and drag the widget to the desired location, then tap Done.
To add the Safety Button widget to the Home screen for Android devices:Icn Chevron Up
On the Home screen, press and hold an empty area until the modal appears.
Tap Widgets.
Find and select the Alarm.com widget.
Press and hold the Safety Button option to place the widget onto the Home Screen.
To use the Safety Button widget:
Locate the Safety Button widget on the Home screen.
Tap the Safety Button if you are in need of help.
The app will launch, allowing you to enter your PIN to cancel if desired.
Safey Button Widget
Frequently asked questions
Can I cancel a call for help placed through the Safety Button widget?Icn Chevron Up
Yes. Upon tapping the Safety Button, the app will launch, allowing you to enter your PIN within 10 seconds to cancel your call. You can also cancel by providing their PIN to the trained operator by text or phone call.
Can I use the Safety Button widget in conjunction with other widgets?Icn Chevron Up
Yes. Additional widgets are available on both Android and iOS and can be used in conjunction with the Safety Button widget.
iOS devices
iOS users can configure the System Control widget and Saved Clips widget alongside the Safety Button Widget.
Android users can configure widgets to trigger scenes. For more information on the Alarm.com widget for Android, see Add the Alarm.com widget for Android.
Can the widget be used in conjunction with iOS Face ID or Passcode lock for the Alarm.com app?Icn Chevron Up
Yes. The Safety Button widget is configurable when Face ID or Passcode protection has been enabled. Users are still required to confirm their identity via biometrics or passcode in order to cancel the alarm.
Always verify safety, installation, compatibility, and current UI details against the original manufacturer documentation before operational use.
User Management
Saved Clips widget for iOS
GoSafer Security Knowledge Base
This operational reference is organized for GoSafer Security customers and staff. Alarm.com product names are retained where required for technical accuracy.
Overview
iOS customers can now create a Saved Clips widget and keep tabs on the activity at home without having to open the Alarm.com app. From the Home or Today View screens of their iPhones or iPads, they can view four to 12 thumbnails of saved video, depending on the widget size they select. To view recorded footage, they can tap the thumbnail of interest.
Platform
Mobile App
Content type
How-to / Configuration
Source last updated
2024-12-11
Procedure
Will the widget show clips captured without video analytics?
No. Currently, the Saved Clips Widget is only able to display clips captured using video analytics.
Does the saved clips widget work with linked logins?
Yes. The Saved Clips widget displays clips from the logged-in user's default system by default. However, when editing the widget, the user can pick camera views from all systems their login has been added to.
Can multiple Saved Clips widgets be added to my Home screen or Today View?
Yes. You can add multiple Saved Clips widgets with different configurations to customize your experience.
Can the saved clips widget be used with other Alarm.com widgets?
Yes. The Saved Clips widget can be used alongside the Safety Button Widget and System Control Widget to place all desired actions within easy reach.
For more information about the Safety Button widget, see Safety Button widget.
For more information about the System Control widget, see iOS Alarm.com System Control widget.
Why do I see blank thumbnails on the widget?
If you see a blank thumbnail on your widget, it is possible the clip that would have populated in that location has been manually deleted. As more clips are recorded, the blank thumbnail will eventually filter out.
Can the widget be used in conjunction with Face ID or Passcode lock for the Alarm.com app?
No. As this setting helps protect unwanted access to the app, these widgets are not configurable when Face ID or Passcode protection has been enabled.
Always verify safety, installation, compatibility, and current UI details against the original manufacturer documentation before operational use.
User Management
Transfer app settings from a previously connected device to a new device
GoSafer Security Knowledge Base
This operational reference is organized for GoSafer Security customers and staff. Alarm.com product names are retained where required for technical accuracy.
Overview
App Settings Migration allows end users who have either switched phones or deleted and re-downloaded the mobile app to avoid creating multiple instances of the same device under the User - Push …
Platform
App + Web
Content type
How-to / Configuration
Source last updated
2025-06-04
Procedure
Step-by-step guide: Screenshots and videos are placed with the instruction they illustrate.
App Settings Migration allows users who have either switched phones or deleted and re-downloaded the Alarm.com app to avoid creating multiple instances of the same device for Push Devices or Geo-Devices listed on the GoSafer Security customer portal (powered by Alarm.com).
The process will trigger automatically when the Alarm.com app registers if it was previously downloaded in the Google Play Store or Apple App Store from your account.
Note: This will work even if you switch app stores (i.e., Android to iPhone or vice versa).
To transfer app settings from a device previously connected to the Alarm.com account to a new device:
Log in to the Alarm.com app.
Note: After logging in with your username and password, the app triggers the App Settings Migration process.
Tap Copy settings from another device on iOS,or Copy settings from an existing device on Android.
Copy settings
Tap Continue.
Tap the device you would like to copy.
Copy settings 2
Tap Continue. This process then takes you through turning on each option available for the device they requested to copy settings from.
For each option, tap Turn On or No Thanks depending on your preference.
Stay connectedGeo services
Once you have completed copying the settings from the old device, you can select to remove the old device from the push notifications and Alarm.com Places or keep it active.
Note: If the device is no longer in use, it is recommended to remove the old device to avoid confusion. If you choose not to delete the old device, it will still appear in your Usersprofile as a Push Device, with notifications previously set up with the old push device and Geo-Devices.
To remove the device, select Remove my old device from this account after my settings have been copied.
To keep the device, select I want to keep using my old device in addition to the new device, then click Ok.
Keep old device active
Tap Continue.
Tap Finish.
Migration complete
Once the Apps Settings Migration is complete, the initial setup screen will appear.
Important: The Passcode, Touch ID, Fingerprint, and Face ID do not transfer. On iOS, you are prompted to set these up. These settings can also be set up in App Settings through the Alarm.com app's menu.
Always verify safety, installation, compatibility, and current UI details against the original manufacturer documentation before operational use.
User Management
Unable to log in to the Customer Website or app
GoSafer Security Knowledge Base
This operational reference is organized for GoSafer Security customers and staff. Alarm.com product names are retained where required for technical accuracy.
Overview
If you are unable to log in to the GoSafer Security customer portal (powered by Alarm.com) or Alarm.com app, verify the username being used and reset the password.
Platform
App + Web
Content type
Reference
Source last updated
2025-06-24
Procedure
To verify the username using the GoSafer Security customer portal (powered by Alarm.com)
Go to the GoSafer Security customer portal (powered by Alarm.com) login page at www.alarm.com/login.
Click Login Help.
In Forgot your username?, enter the email address associated with the account.
Click Submit.
Check the email inbox (or other folders) for an email from Alarm.com containing the username associated with that email address.
To verify the username using the Alarm.com app
Go to the Alarm.com app.
Tap Forgot username or password.
In the Email or username field, enter the email address associated with the account.
Tap Next.
Check the email inbox (or other folders) for an email from Alarm.com containing the username associated with that email address.
To reset the password using the GoSafer Security customer portal (powered by Alarm.com)
Go to the GoSafer Security customer portal (powered by Alarm.com) login page at www.alarm.com/login.
Click Login Help.
In Forgot your password?, enter the username for the account.
Click Submit. A password reset link is emailed to the email address associated with the login.
To reset the password using the Alarm.com app
Go to the Alarm.com app.
Tap Forgot username or password.
In the Email or username field, enter the username or email address associated with the account.
Tap Next.
A password reset link is emailed to the email address associated with the login.
Always verify safety, installation, compatibility, and current UI details against the original manufacturer documentation before operational use.
User Management
View upcoming appointments
GoSafer Security Knowledge Base
This operational reference is organized for GoSafer Security customers and staff. Alarm.com product names are retained where required for technical accuracy.
Overview
After a service appointment is scheduled with your service provider, upcoming appointments can be viewed using the Alarm.com app or GoSafer Security customer portal (powered by Alarm.com).
Appointment details (e.g., date, time, estimated duration, etc.) can be viewed and your service provider's email address and phone number will be available in case the appointment needs to be adjusted or canceled.
An upcoming appointment reminder will also appear on the Home screen of the Alarm.com app and GoSafer Security customer portal (powered by Alarm.com).
Platform
App + Web
Content type
Reference
Source last updated
2026-06-09
Procedure
Step-by-step guide: Screenshots and videos are placed with the instruction they illustrate.
After a service appointment is scheduled with your service provider, upcoming appointments can be viewed using the Alarm.com app or GoSafer Security customer portal (powered by Alarm.com).
Appointment details (e.g., date, time, estimated duration, etc.) can be viewed and your service provider's email address and phone number will be available in case the appointment needs to be adjusted or canceled.
An upcoming appointment reminder will also appear on the Home screen of the Alarm.com app and GoSafer Security customer portal (powered by Alarm.com).
View an upcoming appointment
To view an upcoming appointment using the Alarm.com app:Icn Chevron Up
Important: An appointment must be within 3 days of the scheduled time to view details using the Alarm.com app. New appointments scheduled within the 3-day window may take a few hours to display the appointment details on the Alarm.com app.
Log in to the Alarm.com app.
In the Top Recommendations card, find the Appointment Reminder notification.
Tap Learn More.
Appointment Reminder Notifcation
To view upcoming appointments using the GoSafer Security customer portal (powered by Alarm.com):Icn Chevron Up
Log in to the GoSafer Security customer portal (powered by Alarm.com).
Click Support.
Click Upcoming Appointments.
View details of the appointment, including the start time, estimated duration, and location.
Always verify safety, installation, compatibility, and current UI details against the original manufacturer documentation before operational use.
User Management
Web/App Users
GoSafer Security Knowledge Base
This operational reference is organized for GoSafer Security customers and staff. Alarm.com product names are retained where required for technical accuracy.
Overview
Web/App Users Landing Page
Platform
App + Web
Content type
How-to / Configuration
Source last updated
2026-02-17
Procedure
User guides
Add a mobile phone number to receive SMS notificationsMobile phone numbers can be added to a user's contact information so that they can receive SMS notifications.Android Quick Access Device ControlsApp settings transferBest practices when changing phonesWhen switching to a different phone for any reason, there are a few things to be aware of to ensure minimal disruption of your service. The following are suggestions for information and features that should be verified when the swapping to a different phone.Change a login nameLogin names can be changed on the website and app.Change a phone numberThe primary phone number associated with the property location can be changed on the website.Change an email addressKeeping email addresses updated helps keep the system secure.Change how the Welcome card appears on the websiteChange language preferenceUser language preferences change the language of the website and the user's notifications.Change or reset a passwordUpdating user passwords for website and app users helps keep the system secure.Change security questionsUpdating security questions and their answers helps keep the system secure.Change the name of a mobile deviceThe name of a mobile push notification device can be updated using the app or website.Configure a number passcode for the appContact your service providerIf you are unable to find an answer to your question in the Knowledge Base, you can contact your service provider for further assistance.Create a secondary loginIndividual logins for each website and app user can be created from the website.Delete a loginDeleting unused website and app logins helps keep the system secure.Log all devices out of the website and appUsers who have lost their phone, or need to disable a login, can log out all devices so others can no longer access the app, including those who use the Keep me logged in feature without re-entering the password.Enable Two Factor AuthenticationTwo Factor Authentication adds an extra layer of security to protect access to your system.Export panel slot numbers for a single locationThe panel slot numbers report shows all users and user codes associated with the system at a single location.iOS Alarm.com System Control widgetiOS Live Activities for In-Progress Device CommandsiOS Quick ControlsiPhone's Home Screen Quick Actions feature for the Alarm.com appLaunch the app or website tourIf you would you like to learn more about how to navigate the website or app, you can launch the interactive tour.Manage login permissions for secondary loginsLogin permissions for new or existing secondary accounts can be managed using the website.Rearrange Home page of website or appCards displayed on the GoSafer Security customer portal and app, such as Panel, Sensors, and Recent Activity, can be rearranged based on your preferences.Safety Button widgetSaved Clips widget for iOSTransfer app settings from a previously connected device to a new deviceApp Settings Migration allows end users who have either switched phones or deleted and re-downloaded the mobile app to avoid creating multiple instances of the same device under the User - Push Devices as well as the Geo-Services Device list on the website.Unable to log in to the GoSafer Security customer portal or app
Frequently asked questions
Can I create multiple logins for my account?Can logins have access to only specific system partitions?Do the app and website update in real time?How can I set up fingerprint scanning on Android?How can I set up Touch ID or Face ID for iOS?How do I change the language of the customer app?How do I change the language of the website?How do I find mobile app version on my device?Is the Alarm.com iOS Today View Widget a supported feature?Is there a limit to how many logins can be created for a customer account?There is no limit to how many logins you can create for your account to access the Customer app or GoSafer Security customer portal.What are the login name and password requirements?There are various requirements when changing a login name or password.What can I do if I can't find the password reset email?What is Two Factor Authentication?
Always verify safety, installation, compatibility, and current UI details against the original manufacturer documentation before operational use.
User Management
What are the login name and password requirements?
GoSafer Security Knowledge Base
This operational reference is organized for GoSafer Security customers and staff. Alarm.com product names are retained where required for technical accuracy.
Overview
There are various requirements when changing a login name or password.
Platform
General / Device
Content type
FAQ / Explanation
Source last updated
2023-10-31
Procedure
Login name requirements
Login names must contain less than 50 alphanumeric characters and cannot be taken by another user. Login names are not case-sensitive.
Password requirements
New passwords must contain a minimum of 10 characters and must include at least one number, letter, and special character.
Always verify safety, installation, compatibility, and current UI details against the original manufacturer documentation before operational use.
User Management
What can I do if I can't find the password reset email?
GoSafer Security Knowledge Base
This operational reference is organized for GoSafer Security customers and staff. Alarm.com product names are retained where required for technical accuracy.
Overview
When resetting your password, a temporary password reset link will be emailed to the email address associated with the login.
For more information about how to reset your password, see Change or reset a password.
Platform
General / Device
Content type
Troubleshooting
Source last updated
2024-07-26
Procedure
If the password reset email cannot be found after resetting the password
Verify the correct login name is being used.
To do this, request the login name by entering the associated email address on the Login Help, then checking the Login Name recovery email.
Verify the correct email address is being used.
If your email address needs to be updated, contact your service provider.
Verify the email was not placed into a folder other than the inbox (e.g., spam, junk, promotions, receipts, etc.).
Perform a search in the spam/junk folder (as these results do not populate during inbox searches) for words like password, reset, or notifications@alarm.com (or service provider's custom from address).
Verify the email was not placed into another folder using a filter or rule.
Rules and filters may not be able to be viewed or managed using a mobile device. To avoid this issue, access the email account using a computer.
Verify the blocked sender list does not include the Alarm.com domain.
Verify the inbox is not full, and other emails can be received.
If the email account is a private email address (i.e., not public like Gmail or Yahoo), verify there is no firewall or email filtering.
For more information, contact the email host's IT professional. Additional tests can be conducted by changing the email address to a more popular email service like Hotmail, Gmail, Yahoo, etc., then requesting the password reset again.
Contact the email provider for more troubleshooting steps regarding missing emails.
Always verify safety, installation, compatibility, and current UI details against the original manufacturer documentation before operational use.
User Management
What is Two Factor Authentication?
GoSafer Security Knowledge Base
This operational reference is organized for GoSafer Security customers and staff. Alarm.com product names are retained where required for technical accuracy.
Overview
Two Factor Authentication is an optional security measure for an account that requires the entry of an additional code, received as an SMS text message or email, after logging into an account with a login name and password. The code can also be generated using an authenticator app.
Note: It is recommended to create separate logins for additional users as Two Factor Authentication associates a username with a specific phone number or email address. For more information, see Create a new login.
Platform
App + Web
Content type
How-to / Configuration
Source last updated
2025-06-04
Procedure
Step-by-step guide: Screenshots and videos are placed with the instruction they illustrate.
Note: Two Factor Authentication can be referred to as 2FA, Multi-Factor Authentication, or MFA.
Two Factor Authentication adds an extra layer of security to protect access to your system. This makes it harder for potential intruders to gain access to your system, so your system and your property are even more secure. Whenever you sign into your system from a new or untrusted device, you will have to enter both your password and a code sent to your mobile phone.
Enable or disable Two Factor Authentication
Two Factor Authentication can be enabled or disabled using the Alarm.com app and GoSafer Security customer portal (powered by Alarm.com).
Note: If Two Factor Authentication is enabled, all active sessions on the Alarm.com app and GoSafer Security customer portal (powered by Alarm.com) will end. Two Factor Authentication will be required to log back in.
Expand all
To enable or disable Two Factor Authentication for a login using the Alarm.com app:Icn Chevron Down
To disable Two Factor Authentication, tap Disable and then tap Confirm.
Note: Two Factor Authentication may be required or suggested by your service provider. For additional assistance, contact your service provider.
To enable Two Factor Authentication, select Text Message, Email, or Authentication app.
Note: It is recommended to set up Two Factor Authentication using multiple methods. If multiple methods cannot be enabled, contact your service provider
To enable Two Factor Authentication for text message:
Tap Text Message.
Tap Next.
Mobile Two Factor Authentication Enable
In Mobile Number, enter the mobile number to receive the Two Factor Authentication confirmation code.
Using the Country dropdown menu, select either USA or Canada.
Using the Provider dropdown menu, select the cellular carrier of the mobile phone number that will receive the Two Factor Authentication confirmation code.
Note: The Provider dropdown menu displays the full list of Two Factor Authentication compatible cellular carriers.
If the carrier is not listed, select Other.
Mobile Two Factor Authentication Phone Number
Note: This displays the full list of Two Factor Authentication compatible cellular carriers.
Tap Send to send the verification code to the mobile number entered.
In Verification Code, enter the code that is provided in a text message to the mobile number entered.
Mobile Two Factor Authentication Verification Code
Tap Verify.
To enable Two Factor Authentication for email:
Tap Email.
In Send Verification Code, verify the correct email is displayed. For more information about how to update the email address, see Change an email address.
Tap Send.
Mobile Two Factor Authentication Email
In Verification Code, enter the code that is provided in the received email.
Mobile Two Factor Authentication Email Code
Tap Verify.
To enable Two Factor Authentication using an authentication app:
Important: An authenticator app is required to complete this process and the steps may vary based on the authenticator app in use.
Tap Authentication App.
Generate an authentication code:
Note: The Duo authenticator app may experience unexpected behavior and it is recommended to use an alternative authenticator app.
Use an authenticator app to scan the QR code or manually enter the code provided on the Alarm.com app or GoSafer Security customer portal (powered by Alarm.com) into the authenticator app.
In the Enter Code field, enter the code that is generated on the authenticator app to verify the device.
Click Next.
In Device Name, enter the desired name for the device that will be trusted.
Mobile Two Factor Authentication Trust this Device
Tap Next.
In Linked Devices, tap Trust next to any additional devices that can be trusted.
Tap Done.
To enable or disable Two Factor Authentication for a login using the GoSafer Security customer portal (powered by Alarm.com):Icn Chevron Down
Log in to the GoSafer Security customer portal (powered by Alarm.com).
Click Settings.
Click Login Information.
Click Two Factor Authentication.
To disable Two Factor Authentication, click Disable.
Note: Two Factor Authentication may be required or suggested by your service provider. For additional assistance, contact your service provider.
To enable Two Factor Authentication, select Text Message, Email, or Authentication app.
Note: It is recommended to set up Two Factor Authentication using multiple methods. If multiple methods cannot be enabled, contact your service provider.
To enable Two Factor Authentication for text message:
Click Text Message.
Click Next.
Two Factor Authentication GoSafer Security customer portal
In Mobile Number, enter the mobile number to receive the Two Factor Authentication confirmation code.
Using the Country dropdown menu, select either USA or Canada.
Using the Provider dropdown menu, select the cellular carrier of the mobile phone number that will receive the Two Factor Authentication confirmation code.
Note: The Provider dropdown menu displays the full list of Two Factor Authentication compatible cellular carriers.
If the carrier is not listed, select Other.
Two Factor Authentication Phone Number
Click Send to send a verification code to the mobile number.
In Verification Code, enter the code that is provided in a text message to the mobile number.
Two Factor Authentication Verification Code
Click Verify.
To enable Two Factor Authentication for email:
Click Email.
In Send Verification Code, verify the correct email is displayed. For more information about how to update the email address, see Change an email address.
Click Send.
Two Factor Authentication Email Code
In Verification Code, enter the code that is provided in the received email.
Two Factor Authentication Email Code Sent
Click Verify.
To enable Two Factor Authentication using an authentication app:
Important: A mobile device with an authenticator app is required to complete this process and the steps may vary based on the authenticator app in use.
Click Authentication App.
Generate an authentication code:
Note: The Duo authenticator app may experience unexpected behavior and it is recommended to use an alternative authenticator app.
Use a mobile device with an authenticator app to scan the QR code or manually enter the code provided on the Alarm.com app or GoSafer Security customer portal (powered by Alarm.com) into the authenticator app.
In the Enter Code field, enter the code that is generated on the authenticator app to verify the device.
Click Next.
In Device Name, enter the desired name for the device that is accessing the account.
If the device is trusted, click to select Trust This Device.
Two Factor Authentication Trust Device
Click Next.
In Linked Devices, click Trust next to any additional devices that can be trusted.
Click Done.
Manage trusted devices
To manage trusted devices using the Alarm.com app:Icn Chevron Down
Log in to the Alarm.com app.
Tap Menu.
Tap Login Information.
Tap Two Factor Authentication.
Tap Detailsnext to the device name.
Make the desired changes:
To rename the device, enter the desired device name, then tap Save.
To delete the device, click Delete Trusted Device, then tap Confirm.
To manage trusted devices using the GoSafer Security customer portal (powered by Alarm.com):Icn Chevron Down
Log in to the GoSafer Security customer portal (powered by Alarm.com).
Click Settings.
Click Login Information.
Click Two Factor Authentication.
Click Detailsnext to the device name.
Make the desired changes:
To rename the device, enter the desired device name, then click Save.
To delete the device, click Delete Trusted Device, then click Confirm.
If you change your cell carrier or no longer have access to the phone number or authenticator app:
If you change your cell carrier or no longer have access to the phone number or authenticator app, Two-Factor Authentication can be reset using email. For more information, see Reset Two-Factor Customer.
If email Two Factor Authentication is set up and you no longer have access to your email address, contact your service provider for assistance with resetting your Two-Factor Authentication configuration.
Reset Two Factor Authentication
Two Factor Authentication can be reset using the Alarm.com app or GoSafer Security customer portal (powered by Alarm.com).
To reset Two Factor Authentication:Icn Chevron Down
Log in to the Alarm.com app or GoSafer Security customer portal (powered by Alarm.com).
In Enter Verification Code, click or tap Down next to Don't have access to your device?.
Select to reset Two-Factor Authentication or to contact your service provider:
If you have access to your email address associated with the login:
In Option 1: Reset Two-Factor Authentication, tap or click Reset 2FA to send a reset link to the email address associated with the login.
If you do not have access to your email address associated with the login:
In Option 2: Contact your Service Provider, use the contact information listed to contact your service provider.
Note: The ability to reset your own Two-Factor Authentication configuration is only available to users using SMS or an authenticator application.
Always verify safety, installation, compatibility, and current UI details against the original manufacturer documentation before operational use.
User Management
iOS Alarm.com System Control widget
GoSafer Security Knowledge Base
This operational reference is organized for GoSafer Security customers and staff. Alarm.com product names are retained where required for technical accuracy.
Overview
The Alarm.com System Control widget is customizable and provides quick access and one-touch commands for smart security systems.
Small or medium widget sizes can be placed on the Home screen or Today View enabling you to control your lights, locks, garage doors, gates, and security panels from anywhere. Additionally, Scenes can be activated for easy whole-home automation and the statuses of connected devices can be viewed at a glance.
Platform
Mobile App
Content type
How-to / Configuration
Source last updated
2025-06-04
Procedure
To add widgets to the Home Screen
On the Home screen, press and hold an empty area until the apps begin to move.
Tap [Add] or tap Edit.
Select the Alarm.com widget.
Select a widget and choose a widget size.
Tap Add Widget.
Tap and drag the widget to the desired location, then tap Done.
To add widgets to the Today View
Swipe right from the Home Screen or Lock Screen.
Press and hold an empty area in Today View until the apps begin to move.
Tap [Add] or Edit.
Scroll down to select a widget, then choose a widget size.
Tap Add Widget.
Tap and drag the widget to the desired location, then tap Done.
To edit widgets from the Home screen
Touch and hold a widget to open the quick actions menu.
Tap Edit Widget.
Make the desired changes, then tap outside of the widget to exit.
To edit widgets from Today View
Swipe right from the Home Screen or Lock Screen
Tap and hold a widget to open the quick actions menu.
Tap Edit Widget.
Make the desired changes, then tap outside of the widget to exit.
Are multiple systems supported with the widget?
Yes. The widget supports multi-system accounts. During configuration, all devices from all systems are listed, and customers can add devices from multiple systems to a single widget.
Note: System names are not included in the widget. Therefore it is recommended to create unique names for Scenes to indicate which system the command is used for.
Will all devices in a Scene be automated when using the widget?
Yes. Triggering a Scene using the widget allows any device in the Scene to be automated, even if it is not individually supported by the System Control widget (e.g., Alarm.com-supported smart thermostats).
If I delete the Alarm.com app, will the widget be removed?
Yes. If you delete the Alarm.com app from your device, the widget is also removed.
Does the System Control Widget refresh automatically?
No. The System Control Widget automatically updates every 30 minutes or manually updates when you open up the Alarm.com app. Due to this, commands sent to security devices may display as Sent until the app has been opened or an automated update occurs. It is recommended to use the System control widget in conjunction with push notifications to ensure a seamless experience.
Can the widget be used in conjunction with Face ID or Passcode lock for the Alarm.com app?
By default, the system control widget is not available when Face ID or Passcode protection has been enabled in order to protect from unwanted access to the Alarm.com app. However, this setting can be bypassed.
To bypass Face ID or Passcode authentication for widgets
Log in to the Alarm.com app.
Tap [More Options].
Tap App Settings.
Tap Widget Settings.
Tap to enable the Bypass Face ID to use widget toggle switch.
Always verify safety, installation, compatibility, and current UI details against the original manufacturer documentation before operational use.
User Management
iOS Live Activities for In-Progress Device Commands
GoSafer Security Knowledge Base
This operational reference is organized for GoSafer Security customers and staff. Alarm.com product names are retained where required for technical accuracy.
Overview
iOS Live Activities for In-Progress Device Commands provides frequent information updates that appear in locations such as the Lock Screen, Notification Center, Standby Mode, and Dynamic Island. Live Activities offers a more flexible way to keep you updated about live events, activities, or tasks on your system.
Requirements
Platform
Mobile App
Content type
How-to / Configuration
Source last updated
2025-01-14
Procedure
To enable or disable Live Activities on the iOS device
Note: The general setting for Live Activities is on by default.
On the iOS device, go to Settings.
Tap Face ID & Passcode.
In Allow Access When Locked, tap the Live Activities toggle switch to enable or disable the feature.
Enable or disable Alarm.com-supported Live Activities:
On the iOS device, go to Settings.
Tap Apps.
Tap Alarm.com.
Tap Live Activities.
Tap the Allow Live Activities toggle switch to enable or disable the feature.
Note: The first time Live Activities for the Alarm.com Alarm.com app is initiated, a prompt will appear for you to confirm permission to allow Live Activities.
To set up Live Activities to update more frequently
On the iOS device, go to Settings.
Tap Apps.
Tap Alarm.com.
Note: This setting can be adjusted other apps on the iOS device.
Tap Live Activities.
In Update Rate, tap the More Frequent Updates toggle switch to enable the feature.
Which actions will trigger a Live Activity?
An action conducted directly in the app (e.g., arming the panel, unlocking a lock, opening a garage door, etc.) triggers a Live Activity. Automation features such as rules, schedules, and Smart Arming will not trigger Live Activities since they are initiated without direct actions.
How many devices can be displayed at once?
Multiple devices can be displayed at once. If more than one device is polling at a given time, the Live Activities will stack on the lock screen similar to how notifications stack. On the Dynamic Island, up to two in-progress device command actions may be displayed at a given time. The time for completion varies from a few seconds to a few minutes depending on the device being used.
Is Live Activities supported on other devices?
Yes. It is also available and supported on iPad with OS17+ and Apple Watch with OS 11+.
Always verify safety, installation, compatibility, and current UI details against the original manufacturer documentation before operational use.
User Management
iPhone's Home Screen Quick Actions feature for the Alarm.com app
GoSafer Security Knowledge Base
This operational reference is organized for GoSafer Security customers and staff. Alarm.com product names are retained where required for technical accuracy.
Overview
The Alarm.com app takes advantage of Apple's Home Screen Quick Actions and gives you access to various Quick Actions right from the home screen.
Important: Home Screen Quick Actions are only available on iPhones with iOS version 13.0+.
Platform
Mobile App
Content type
How-to / Configuration
Source last updated
2025-06-04
Procedure
Step-by-step guide: Screenshots and videos are placed with the instruction they illustrate.
The Alarm.com app takes advantage of Apple's Home Screen Quick Actions and gives you access to various Quick Actions right from the home screen.
Important: Home Screen Quick Actions are only available on iPhones with iOS version 13.0+.
Quick Actions available
Arm Away
Arm Stay
Disarm
Lock or Unlock Locks
Open or Close Garage Doors
View Cameras
View Thermostats
View Lights
View Doorbells
How to configure Home Screen Quick Actions:
Note: Up to four items can be added to the Home Screen Quick Actions.
Log in to the Alarm.com app.
Tap Menu.
Tap App Settings.
Tap Home Screen Quick Actions.
Tap Edit.
A prompt to enter your password may appear if Keep me logged in was not selected at login. This is required for Home Screen Quick Actions features to work.
In More Items, perform any of the following:
Tap Add to add items to the Home Screen Quick Actions list.
Tap Remove to remove items from the Home Screen Quick Actions list.
Drag Menu on the right side of the Home Screen Quick Actions list to reorder items.
Note: To configure arming settings, tap Settings on the desired arming setting.
Home Screen Quick Actions
When finished, tap Done.
How to use Home Screen Quick Actions:
From the home screen, press and hold the Alarm.com app icon to reveal the Quick Actions.
Quick Action Menu
Tap the desired Quick Action.
There may be a prompt to enter an app PIN or provide a Touch ID, if applicable.
Important: The Thermostat, Light, Doorbells, and Camera Quick Actions will open the app to the corresponding view, where it is possible to view or control the desired item.
Always verify safety, installation, compatibility, and current UI details against the original manufacturer documentation before operational use.
Video
GoSafer Security procedures and references for Video.
Video
Video
GoSafer Security Knowledge Base
This operational reference is organized for GoSafer Security customers and staff. Alarm.com product names are retained where required for technical accuracy.
Overview
This GoSafer Security section brings together resources for Video, including setup, configuration, everyday use, and troubleshooting. Choose the related page that matches your device, feature, or task, and follow the current manufacturer guidance linked on that page.
Platform
Customer Website
Content type
Troubleshooting
Source last updated
2022-01-31
Procedure
Browse the related pages in this chapter to open the specific procedure, configuration guide, or troubleshooting article you need.
Always verify safety, installation, compatibility, and current UI details against the original manufacturer documentation before operational use.
Video
Can the pan/tilt cameras be set to do a guard tour (a continuous pan/tilt of the area)?
GoSafer Security Knowledge Base
This operational reference is organized for GoSafer Security customers and staff. Alarm.com product names are retained where required for technical accuracy.
Overview
Alarm.com cameras do not currently have guard tour functionality, but pan/tilt cameras do have the option to point the camera to a user-created angle when a specific event-triggered event takes place.
Example: If the front door is opened, the camera can be told to pan to the front door and record. For more information on creating or updating pan/tilt presets, see Change a pan/tilt camera's position presets.
Platform
Customer Website
Content type
How-to / Configuration
Source last updated
2025-06-04
Procedure
Step-by-step guide: Screenshots and videos are placed with the instruction they illustrate.
Alarm.com cameras do not currently have guard tour functionality, but pan/tilt cameras do have the option to point the camera to a user-created angle when a specific event-triggered event takes place.
Example: If the front door is opened, the camera can be told to pan to the front door and record. For more information on creating or updating pan/tilt presets, see Change a pan/tilt camera's position presets.
To create a rule for the camera to switch to a preset:
Log in to the GoSafer Security customer portal (powered by Alarm.com).
Click Video.
Click Recording Rules.
Click Add New Rule.
Click to select a supported rule from the New Video Recording Rule menu. Supported rules:
Sensor Opened or Closed
System Armed or Disarmed
Entry Delay
Lock Activity (for accounts with Z-Wave locks enrolled)
Enter a name for the new Recording Rule.
Customize the rule as desired.
Click to select the cameras that should record based on the Recording Rule.
Click to select Move To.
Pan select
Using the dropdown menu, select the desired preset.
If video clip recipients are desired, click Add to select the recipients to be notified when this recording rule is triggered.
Always verify safety, installation, compatibility, and current UI details against the original manufacturer documentation before operational use.
Video
Change the layout of the live video page
GoSafer Security Knowledge Base
This operational reference is organized for GoSafer Security customers and staff. Alarm.com product names are retained where required for technical accuracy.
Overview
The layout of the live video page can be reorganized to display four identically sized streams in a grid (2x2), or one large stream next to three small streams (1+3).
Platform
App + Web
Content type
Reference
Source last updated
2023-12-21
Procedure
To change the layout of the live video page when using the GoSafer Security customer portal (powered by Alarm.com)
Note: The live video streams will automatically resize to fit the screen.
Using the GoSafer Security customer portal (powered by Alarm.com), you can view up to 25 live video streams at a time.
[Auto] is the default live video stream layout. Click [Minus] or [Add] to decrease or increase the amount of cameras displayed up to a 5+5 layout.
To arrange live video streams with a preset layout, click [Down] and select the desired layout.
Click [view 3+1] to arrange streams in a 1+3 layout.
Click [view 1+5] to arrange streams in a 1+5 layout.
Click [view 1+7] to arrange streams in a 1+7 layout.
Click [view 2+8] to arrange streams in a 2+8 layout.
Click [view 4+2+4] to arrange streams in a 4+2+4 layout.
Note: Live video stream layouts will not display if you do not have enough cameras to fill it.
If you have more than 25 cameras, click [Collapse] or [Details] to view additional stream pages.
Using the Alarm.com app, the live video streams are arranged in a grid based on screen size.
Always verify safety, installation, compatibility, and current UI details against the original manufacturer documentation before operational use.
Video
How can I reorganize the video devices on the website and app?
GoSafer Security Knowledge Base
This operational reference is organized for GoSafer Security customers and staff. Alarm.com product names are retained where required for technical accuracy.
Overview
Alarm.com video devices are listed in alphabetical order by name by default, but users can customize which cameras appear on the Live Video page of the GoSafer Security customer portal.
Platform
Customer Website
Content type
How-to / Configuration
Source last updated
2026-03-24
Procedure
Alarm.com video devices are automatically organized by default in alphabetical order by name, but it is possible to customize which video cameras appear on the Live Video page on the GoSafer Security customer portal (powered by Alarm.com).
For more information about reorganizing video devices, see Create/edit a camera group.
Always verify safety, installation, compatibility, and current UI details against the original manufacturer documentation before operational use.
Video
How do I give a user access to only view live or saved video?
GoSafer Security Knowledge Base
This operational reference is organized for GoSafer Security customers and staff. Alarm.com product names are retained where required for technical accuracy.
Overview
Using custom permissions, logins can be restricted to only viewing live and saved video.
Note: A user with the View Live/Saved Video custom permission will have access to view all available cameras.
Platform
Customer Website
Content type
Reference
Source last updated
2025-06-04
Procedure
To restrict a login's access
Log in to the GoSafer Security customer portal (powered by Alarm.com).
Click Users.
Click Manage Logins.
Click the login name to be restricted.
In Permission, click to select Custom.
In Feature Permissions, click to select View Live/Saved Video.
Click Save.
For any questions or if this option is unavailable, contact your service provider.
Always verify safety, installation, compatibility, and current UI details against the original manufacturer documentation before operational use.
Video
Live Video
GoSafer Security Knowledge Base
This operational reference is organized for GoSafer Security customers and staff. Alarm.com product names are retained where required for technical accuracy.
Overview
This GoSafer Security section brings together resources for Live Video, including setup, configuration, everyday use, and troubleshooting. Choose the related page that matches your device, feature, or task, and follow the current manufacturer guidance linked on that page.
Platform
Customer Website
Content type
How-to / Configuration
Source last updated
2023-04-03
Procedure
Browse the related pages in this chapter to open the specific procedure, configuration guide, or troubleshooting article you need.
Always verify safety, installation, compatibility, and current UI details against the original manufacturer documentation before operational use.
Video
Live Video Door Controls
GoSafer Security Knowledge Base
This operational reference is organized for GoSafer Security customers and staff. Alarm.com product names are retained where required for technical accuracy.
Overview
Live Video Door Controls allows customers to connect Access Control doors and Z-Wave locks to nearby cameras, providing real-time visibility of entry points and enabling remote buzzing, locking, or unlocking all from a single interface. Live Video Door Controls showcases the powerful capabilities of the Alarm.com for Business unified platform, seamlessly combining video surveillance and Access Control to streamline security management.
Platform
App + Web
Content type
Reference
Source last updated
2025-06-04
Procedure
Features
Seamless integration of Access Control and Video
Observe activity at entry points while remotely granting access
Mitigate any door tailgating
How it works
When a door is locked, the customer will have the options to do the following
Unlock: Unlocking disengages the lock, allowing continuous access until it is locked again.
Buzz Open: Buzzing a door open is a brief, remote action where the lock disengages momentarily (i.e., 5 seconds by default), allowing a person to open it immediately. After a few seconds, the lock automatically re-engages, restoring security.
When a door is unlocked, the customer will have the option to do the following
Lock: The customer can lock the door. When this happens, its mechanism engages, keeping it closed and inaccessible without a key, keycard, or authorized electronic access.
Note: Z-Wave locks do not buzz open and can only lock/unlock. Access Control Doors can lock/unlock or buzz open.
Access Live Video Door Controls
Live Video Door Controls can be accessed using the Alarm.com app and GoSafer Security customer portal (powered by Alarm.com).
Important: Before Live Video Door Controls can be accessed, a continuously recording video device must be associated with a lock or Access Control door. For more information, see Associate a security device to a continuously recording camera.
To access Live Video Door Controls using the Alarm.com app
Log in to the Alarm.com app.
Tap Video.
Tap Live Video.
Tap [Live Video Door Controls Icon], then tap Buzz Open or Lock/Unlock.
To access Live Video Door Controls using the GoSafer Security customer portal (powered by Alarm.com)
Log in to the GoSafer Security customer portal (powered by Alarm.com).
Click Video.
Click Live Video.
Mouse over [Live Video Door Controls Icon], then click Buzz Open or Lock/Unlock.
Always verify safety, installation, compatibility, and current UI details against the original manufacturer documentation before operational use.
Video
Santa Security
GoSafer Security Knowledge Base
This operational reference is organized for GoSafer Security customers and staff. Alarm.com product names are retained where required for technical accuracy.
Overview
Catch Santa visiting your home this year with the Alarm.com Santa Security feature. For a limited time, you can take snapshots using compatible cameras, insert an image of Santa, and send the …
Platform
Mobile App
Content type
How-to / Configuration
Source last updated
2025-12-18
Procedure
Step-by-step guide: Screenshots and videos are placed with the instruction they illustrate.
Make holiday memories extra magical this year with Alarm.com's Santa Security feature. For a limited time, you can capture the wonder by snapping enchanting photos of Santa making a special visit to your home. Choose your favorite festive sticker from the expanded image gallery, move it around so it's just right, and share the evidence with your loved ones. Spread holiday cheer and boost engagement with this fun, interactive feature!
Between December 1–31, 2025 you will be able to:
Select a Live Video feed and tap the Santa icon to take a snapshot
Add a Santa, resizing or moving him as needed
Select from day (full color) or night version Santa options
Share the image with friends and family
Note: The first time you tap on a Live Video feed, a pop-up window will explain how to catch Santa on camera.
What is required to use Alarm.com Santa Security?
The Alarm.com Alarm.com app on app version 4.17+ for iOS or 4.15.1+ for Android.
A service package that supports Video Analytics other than Single Doorbell with Video Analytics.
One of the following compatible video devices installed on your account:
ADC-V515
ADC-V516
ADC-V520
ADC-V521IR
ADC-V522IR
ADC-V523/523X
ADC-V622
ADC-V622-WELL
ADC-VC726
ADC-VC736
ADC-VC826
ADC-VC836
ADC-V722W
ADC-V723/723X
ADC-V724/724X
ADC-V729/V729AC/VC729P
ADC-V730
ADC-VC827P
ADC-VC838PF
ADC-VC847PF
ADC-VC727P
ADC-VC728PF
All Sercomm cameras
ADC-VDB750*
ADC-VDB755P*
ADC-VDB770*
ADC-VDB775*
ADC-VDB780B*
*Important: Customer accounts with only Video Doorbells enrolled do not support Santa Security because the Video Card does not display on the Alarm.com app dashboard for those accounts. Video Doorbells are only compatible with Santa Security if the customer account has an additional video device other than a doorbell installed on the account.
How to use Santa Security
Santa Security interface example video
To catch Santa using the Alarm.com app:
Log in to the Alarm.com app.
Tap Video.
Select the Live Video feed of a compatible camera, and then tap the Santa icon to take a snapshot.
V3 Video Live
Note: A pop-up window will explain how to catch Santa on camera the first time you tap on a live video feed.
Select a Santa to add, and then resize and/or move him as needed. Santa options include day (full color) and night (black/white) versions.
santa security 2022
Share or download the image:
Tap Uploadto share the image using text, e-mail, or any other native sharing app on the mobile device (e.g., Facebook, Twitter, Slack, etc.).
Always verify safety, installation, compatibility, and current UI details against the original manufacturer documentation before operational use.
Video
Take a video recording
GoSafer Security Knowledge Base
This operational reference is organized for GoSafer Security customers and staff. Alarm.com product names are retained where required for technical accuracy.
Overview
Users can record on demand video clips from cameras and video device.
Platform
App + Web
Content type
Reference
Source last updated
2025-07-07
Procedure
To take a video recording using the Alarm.com app
Log in to the Alarm.com app.
Tap Video.
On the desired video device, tap [Play].
Tap [Record Video].
To take a video recording using the GoSafer Security customer portal (powered by Alarm.com)
Log in to the GoSafer Security customer portal (powered by Alarm.com).
Click Video.
Mouse over the desired video device view, then click [Request Recording].
Always verify safety, installation, compatibility, and current UI details against the original manufacturer documentation before operational use.
Video
Take a video snapshot
GoSafer Security Knowledge Base
This operational reference is organized for GoSafer Security customers and staff. Alarm.com product names are retained where required for technical accuracy.
Overview
Users can request on demand still snapshots from cameras and video device.
Platform
Customer Website
Content type
Reference
Source last updated
2025-06-04
Procedure
To request a video snapshot
Log in to the GoSafer Security customer portal (powered by Alarm.com).
Click Video.
Mouse over the desired video device, then click [Peek In] to take a snapshot.
Always verify safety, installation, compatibility, and current UI details against the original manufacturer documentation before operational use.
Video
Use Two-Way Audio for video cameras
GoSafer Security Knowledge Base
This operational reference is organized for GoSafer Security customers and staff. Alarm.com product names are retained where required for technical accuracy.
Overview
This is primarily a video or reference page. Open the original article link below for the current content.
Platform
App + Web
Content type
How-to / Configuration
Source last updated
2026-05-26
Procedure
To talk or listen using the Alarm.com app
Log in to the Alarm.com app.
Swipe to select the desired video device.
Tap [Play].
Press and hold [Microphone] to speak through the video device.
Note: For Full-Duplex devices, you do not need to hold the [Microphone] icon after pressing it.
Release [Microphone] to listen.
To talk or listen using the Alarm.com app while in full screen
Log in to the Alarm.com app.
Tap [Video].
Tap [Play] on the desired video device.
Tap [Fullscreen].
Press and hold [Microphone] to speak through the video device.
Note: For Full-Duplex devices, you do not need to hold the [Microphone] icon after pressing it.
Release [Microphone] to listen.
To talk or listen using the GoSafer Security customer portal (powered by Alarm.com)
Log in to the GoSafer Security customer portal (powered by Alarm.com).
Click Video.
Click Live View.
Click and hold [Microphone], or press and hold the spacebar.
Note: For Full-Duplex devices, you do not need to hold the [Microphone] icon after pressing it.
Release [Microphone] to listen.
Note: Two-way Audio is available through the GoSafer Security customer portal (powered by Alarm.com) in both Single Camera and Multi-Camera view.
To mute or unmute incoming audio using the Alarm.com app
Log in to the Alarm.com app.
Swipe to select the desired video device.
Tap [Play].
Tap [Sound Mute] / [Sound] to toggle audio.
To mute or unmute incoming audio using the GoSafer Security customer portal (powered by Alarm.com)
Log in to the GoSafer Security customer portal (powered by Alarm.com).
Click Video.
Mouse over the live video for the desired camera.
Tap [Sound Mute] / [Sound] to toggle audio.
To configure a camera's microphone and speaker using the Alarm.com app
Log in to the Alarm.com app.
Tap [Video].
Tap [Settings].
In Video Devices, select the desired camera.
In Settings, tap Audio.
In Audio Settings
Tap the Microphone / Speaker toggle switch to enable or disable the microphone and speaker for the selected camera. The camera cannot record audio while its microphone and speaker are disabled.
In Call Volume, tap or drag the slider to adjust the speaker's volume during Two-Way Audio calls.
Tap Save.
To configure a camera's microphone and speaker using the GoSafer Security customer portal (powered by Alarm.com)
Log in to the GoSafer Security customer portal (powered by Alarm.com).
Click Video.
Click Settings.
Select the desired camera.
Click Audio.
In Audio Settings
click the Microphone / Speaker toggle switch to enable or disable the microphone and speaker for the selected camera. The camera cannot record audio while its microphone and speaker are disabled.
In Call Volume, click or drag the slider to adjust the speaker's volume during Two-Way Audio calls.
Always verify safety, installation, compatibility, and current UI details against the original manufacturer documentation before operational use.
Video
View live video
GoSafer Security Knowledge Base
This operational reference is organized for GoSafer Security customers and staff. Alarm.com product names are retained where required for technical accuracy.
Overview
Live video from cameras and video devices can be viewed from the app and website.
Platform
App + Web
Content type
How-to / Configuration
Source last updated
2026-03-26
Procedure
Step-by-step guide: Screenshots and videos are placed with the instruction they illustrate.
Live video from cameras and video devices can be viewed using the Alarm.com app and GoSafer Security customer portal (powered by Alarm.com).
View live video
Alarm.com app
Log in to the Alarm.com app.
Tap Video.
Tap the desired video to start streaming.
GoSafer Security customer portal (powered by Alarm.com)
Log in to the GoSafer Security customer portal (powered by Alarm.com).
Click Video. The video starts streaming automatically.
Note: Live video from SkyBell Doorbell Cameras can only be viewed using the Alarm.com app.
Live video functionality
Mobile device compatibility
Streaming live video is available on the Alarm.com app. The Alarm.com app is available on iOS and Android.
Note: iPhones and iPads should use the Alarm.com app to display live video. Most mobile browser versions are not able to view live video.
Web browser compatibility on computers
{{companyname} video features are available on the most recent versions of Edge, Firefox, Safari, and Chrome on both Windows and Macintosh computers.
Note: For SkyBell Doorbell Cameras, live video can only be streamed using the Alarm.com app. Saved clips can be viewed using both the GoSafer Security customer portal (powered by Alarm.com) and Alarm.com app.
Device-specific considerations
ADC-V731B
If a user is viewing the live video stream for an ADC-V731B, the camera will not be able to trigger Video Analytics rules.
How video devices are listed
Cameras are listed alphabetically in the Alarm.com app and GoSafer Security customer portal (powered by Alarm.com).
Streaming methods and timeout expectations
WebRTC is one type of technology that Alarm.com uses to establish a connection between a camera and a customer device. It is supported by all major browsers and is widely used in real-time communication applications, including Google Meet and Microsoft Teams.
Compatibility requirements
WebRTC end-to-end streaming requires one of the following video devices with firmware 0.6.7.852+ when using the GoSafer Security customer portal (powered by Alarm.com), or firmware 0.6.6.770+ when using the Alarm.com app:
1080p Indoor Wi-Fi Camera (ADC-V516)
1080p Indoor Wi-Fi Camera (ADC-V523/523X)
4MP Indoor Wi-Fi camera with Integrated Spotlight (ADC-V530)
1080p Outdoor Wi-Fi Camera (ADC-V723/723X)
1080p Outdoor Wi-Fi Camera with Two-Way Audio (ADC-V724/724X)
4MP Outdoor Spotlight Camera (ADC-V730/VC730P)
1080p Mini-Bullet Camera (ADC-VC727P)
Pro Series 1080p Dome PoE Camera (ADC-VC827P)
Pro Series 4MP Bullet PoE Camera with Varifocal Lens (ADC-VC728PF)
Pro Series 4MP Varifocal Turret Camera (ADC-VC838PF)
Pro Series 1080p Dome PoE Camera with Varifocal Lens (ADC-VC847PF)
4MP Outdoor Camera Floodlight (ADC-V729/V729AC/VC729P)
Prism Series 8MP Varifocal Bullet PoE Camera (ADC-VC7398PA)
Prism Series 8MP Varifocal Dome PoE Camera (ADC-VC8498PA)
Prism Series 8MP Fixed Lens Dome PoE Camera (ADC-VC8498P)
Prism Series 5MP Fixed Lens Dome PoE Camera (ADC-VC8295P)
Alarm.com Premium Video Doorbell Camera (ADC-VDB775)
4MP Indoor/Outdoor Battery Camera with Two-Way Audio and Integrated Spotlight (ADC-V731B)
Note: To conserve battery, the ADC-V731B uses a Relayed connection that times out after 15 minutes regardless of the settings used.
WebRTC connection types
There are three different types of WebRTC connections used with Alarm.com devices, depending on the network conditions between the camera and the customer's device. The types of connection are as follows (in the order in which they are attempted):
WebRTC Direct connection
WebRTC Relayed connection
WebRTC Proxy connection
Each type of WebRTC connection provides a slightly different customer experience which is described in the following sections. Understanding how each connection type affects the customer experience is important.
Note: There are different icons for each streaming method in the GoSafer Security customer portal (powered by Alarm.com), and it may take a few minutes to configure the WebRTC live stream and for the icon to appear. The WebRTC streaming method icon does not appear when using Log In with Access without video access.
WebRTC Direct connection
WebRTC Direct connection is a peer-to-peer connection in which a direct connection has been established between a camera and a customer's viewing device (e.g., mobile phone or laptop).
Because the streams don't have to go through an intermediary server, this type of connection allows users to stream for an unlimited amount of time. In other words, the streams won't time out unless an adverse network condition occurs and the connection is interrupted. This type of connection is attempted first and is successful roughly 60-70% of the time. A Direct connection is most likely to succeed in simple network environments, such as residential homes.
When WebRTC Direct streaming is active, Combined Shape will appear on the camera live stream. Mouse over the icon to display the message: Continuous streaming connected.
WebRTC End to End continuous stream connected
Topology limitations
Connecting Alarm.com cameras downstream from a Stream Video Recorder (i.e., connected through the PoE ports or Camera port) may impact the ability to achieve a WebRTC Direct connection in certain configurations. If the cameras are connected upstream from the SVR (i.e., on the same network), they should be capable of maintaining a WebRTC Direct connection. To attempt to force a WebRTC Direct connection, proceed to To force a WebRTC Direct connection stream.
Compatible third-party cameras should be able to achieve WebRTC Direct streaming whether they are installed downstream or upstream from the Stream Video Recorder.
WebRTC Relayed connection
A WebRTC Relayed connection is used when a Direct connection between the camera and the customer's viewing device (e.g., mobile phone or laptop) cannot be established. This typically occurs due to network conditions such as firewalls, certain Network Address Translation (NAT) configurations, or other connectivity restrictions. To resolve this, WebRTC will relay the video and audio stream through an intermediary server on a public network. With this method, a time out period of 15 minutes is enforced for live view. This type of streaming is attempted second and makes up roughly 30% of total streams.
When WebRTC Relayed connection streaming is active, Schedule will appear on the camera live stream. Mouse over the icon to display the message, Stream will time out in 15 minutes.
WebRTC Relayed stream will time out in 15 minutes
WebRTC Proxy connection
WebRTC Proxy connection means that attempts to establish a Direct or Relayed connection have failed. Like a Relayed connection, a Proxy connection relays media through an intermediary server and has a time out period of 3 minutes. This type of connection accounts for roughly 5% of total streams.
Currently, customers do not have audio access to their camera while on a Proxy connection. However, Remote Video Monitoring (RVM) operators have audio access and can have Two-Way Audio conversations.
For cameras that support WebRTC Direct or Relayed connections but are streaming over WebRTC Proxy, Combined Shape Off will appear in the feed. Mouse over the icon to display the message, Unable to connect to continuous streaming.
Webrtc Proxy Unable To Connect To Continuous Streaming Icon
For cameras that do not support WebRTC Direct or Relayed connections, and can only stream over proxy, no icon will appear on the stream.
Webrtc Proxy Without Icon
Change connection types
In instances where a Direct connection is desired and was not initially successful, customers can attempt to force a Direct connection.
To force a WebRTC Direct connection stream:
Log in to the GoSafer Security customer portal (powered by Alarm.com).
Click Video.
On the Live Video or SVR Timeline pages, mouse over a camera live stream.
Click on the stream-type indicator icon Combined Shape Off or Schedule.
In Camera Connection, click Try Direct Connection.
Relayed connection popup
Proxy connection popup
Live video stream time out
In addition to the GoSafer Security customer portal (powered by Alarm.com) and Alarm.com app, continuous live-streaming video is available through these devices/platforms:
IQ Panel 4 and IQ4 Hub on firmware 4.6.1+ only for Two-Way Audio cameras
All Qolsys panels for cameras without Two-Way Audio
Important: Alarm.com video for TV setups and Qolsys panels must be connected to the same LAN as the camera with Speed up remote connection initiation disabled on the camera.
Speed Up Remote Connection Initiation
When Speed Up Remote Connection Initiation is enabled, the video loads faster while you are far away from the camera's location. This feature needs to be disabled to continuously stream from the Alarm.com for TV apps, and can be configured using the Alarm.com app or GoSafer Security customer portal (powered by Alarm.com).
Alarm.com app
Log in to the Alarm.com app.
Tap Video.
Tap Settings.
Select the desired video device.
In Settings, tap Video.
Tap the Speed Up Remote Connection Initiation toggle switch to enable or disable the setting as desired.
Tap Save.
GoSafer Security customer portal (powered by Alarm.com)
Log in to the GoSafer Security customer portal (powered by Alarm.com).
Click Video.
Click Settings.
Select the desired video device.
Click Video.
Click the Speed Up Remote Connection Initiation toggle switch to configure the setting as desired.
Click Save.
Digital zoom
You can digitally zoom in and out on a live video feed using the Alarm.com app and GoSafer Security customer portal (powered by Alarm.com).
Note: Digital zoom is not available on saved clips.
Alarm.com app
You can pinch to digitally zoom in/out on a live video feed and pan around when zoomed in, but the camera's video quality and optical zoom level will remain the same.
Note: This feature requires Alarm.com iOS app versions 4.1+ or Android app versions 4.2+.
Log in to the Alarm.com app.
Tap Video.
Tap the desired video.
To zoom in, move two of your fingers apart while they are touching the live video feed.
To zoom out, move two of your fingers together while they are touching the live video feed.
For a quick reset to default zoom, double-tap the video.
GoSafer Security customer portal (powered by Alarm.com)
You can use the video interface to digitally zoom in/out on a live video feed and pan around when zoomed in, but the camera's video quality and optical zoom level will remain the same.
Note: Some video devices have integrated digital or physical pan-tilt-zoom (PTZ) features and use a similar interface that allows you to save and apply preset orientations. For more information about presets and which cameras support them, see Change a pan/tilt camera's position presets.
Log in to the GoSafer Security customer portal (powered by Alarm.com).
Click Video.
Mouse over the desired video, then click Pan Tilt Video.
To zoom in, click Add.
To zoom out, click Minus.
To pan, click Details, Down, Collapse, or Up.
To reset to default, click Icn Target.
Alternatively, use the scroll wheel to zoom and click and drag to pan while mousing over the video.
Note: On the Onboard 24/7 and SVR Timelines, this feature is unavailable when the live feed is paused on the GoSafer Security customer portal (powered by Alarm.com).
Simultaneous viewers
The maximum number of simultaneous viewers of a video device is determined by the series of the video device.
Note: To determine the series of the video device, read the last two numbers on the camera model (i.e., 723, 523X, 622).
Viewer definition
A viewer is anything that requests streaming video from a video device. A viewer can be a local or remote streaming request. All of the following count as individual viewers:
A user streaming live or locally recorded footage from the video device using the GoSafer Security customer portal (powered by Alarm.com) or Alarm.com app
An SVR or CSVR streaming live video from the video device to a local display
An SVR or CSVR recording footage from the video device
Simultaneous viewers based on video device series
Camera series
Maximum simultaneous viewers
'10 Series
5
'20 Series
10
'21 Series
10
'22 Series
10
'23 Series
5
'24 Series
5
'25 Series
6
'26 Series
4
'36 Series
4
Pro Series
5
Prism Series
5
ADC-V729/V729AC/VC729P
5
ADC-VDB750
2*
ADC-VDB770
2*
ADC-VDB780B
2*
ADC-VDB755P
5
SkyBell Doorbell Camera (ADC-VDB101/102/105/106/105x/106x)
2
ADC-V515
5
ADC-V516
5
ADC-V730
5
ADC-VDB775
5
ADC-V731B
3
Note: *These video devices can support up to 2 viewers, but 1 viewer is the recommended use.
Multi-camera live view and group management for mobile
multi camera live view feed
Multi-camera live view for mobile allows customers to view up to 4 live streams simultaneously when using the Alarm.com app.
Note: Multi-camera live view is only available on the Alarm.com app through the Video Card. While doorbells can be added to groups and viewed on the GoSafer Security customer portal (powered by Alarm.com) together, this will not be seen on the Alarm.com app unless there are other video devices on the customer account.
Multi-camera view layout options
After logging in to the Alarm.com app, tap Play Forwards in the Video card to begin the live streams.
To change the live view:
Tap a single camera to view the individual live stream. Tap Grid View to return to the multi-camera live view.
Tap the All Cameras dropdown menu to select the desired camera group through the Video card on the home page and the expanded view.
multi camera feed all cameras drop down cropped
Tap Minimize Video to expand or minimize the multi-camera live view.
Swipe left/right to change the cameras and groups in both the expanded and minimized view.
Create and edit camera groups from the Manage Camera Groups page, which includes a preview of each camera. For more information about camera groups, see Create/edit a camera group.
Camera groups allow you to customize the position in which the cameras appear on the Video page.
Toggle high definition
Click Icn Video Layout Hd to toggle between high definition and non-HD. High definition offers the best quality resolution, but non-HD allows the user to reduce the quality if bandwidth is a concern.
Search for cameras
Type a name into the camera search bar to find individual cameras. This is ideal for accounts with many cameras.
Note: The search bar only appears when the selected camera group has more than four cameras.
Expand / Full screen
Using the Alarm.com app, view live video in full screen by tapping Video Full Screen (App).
Using the GoSafer Security customer portal (powered by Alarm.com), view live video in full screen by clicking Icn Screen Full, view in theater mode by clicking Icn Screen Theater, or view expanded live video by clicking Icn Video Fullscreen.
Layout options
Note: The live video streams will automatically resize to fit the screen.
Using the GoSafer Security customer portal (powered by Alarm.com), you can view up to 25 live video streams at a time.
Auto is the default live video stream layout. Click Minus or Add to decrease or increase the amount of cameras displayed up to a 5+5 layout.
To arrange live video streams with a preset layout, click Down and select the desired layout.
Click View 3+1 to arrange streams in a 1+3 layout.
Click View 1+5 to arrange streams in a 1+5 layout.
Click View 1+7 to arrange streams in a 1+7 layout.
Click View 2+8 to arrange streams in a 2+8 layout.
Click View 4+2+4 to arrange streams in a 4+2+4 layout.
Note: Live video stream layouts will not display if you do not have enough cameras to fill it.
If you have more than 25 cameras, click Collapse or Detailsto view additional stream pages.
Using the Alarm.com app, the live video streams are arranged in a grid based on screen size.
Flick up or down to scroll between streams.
Swipe between live video feeds
Users can swipe between different cameras on the Alarm.com app dashboard and when viewing feeds in landscape.
Note: This feature requires Alarm.com iOS app versions 4.5+ or Android app versions 4.5.1+.
Log in to the Alarm.com app.
On the Video card, swipe left/right between cameras.
Tap Play to play live video.
Live video card
Two-Way Audio user features
Two-Way Audio is compatible with Half-Duplex (i.e., only one communication channel can be used at a time like a walkie-talkie) and Full-Duplex (i.e., both communication channels can be used simultaneously like a telephone call) audio modes. For more information, see What is the difference between Half-Duplex and Full-Duplex audio?.
Talk or listen
Users can talk through or listen in to their cameras using the Alarm.com app and GoSafer Security customer portal (powered by Alarm.com).
Note: If no audio is heard, verify that mic permissions are enabled in your browser and that the correct speakers are being used. The audio is disabled if the microphone icon is grey and crossed out.
Expand all
To talk or listen using the Alarm.com app:Icn Chevron Up
Log in to the Alarm.com app.
Swipe to select the desired video device.
Tap Play.
Press and hold Microphone to speak through the video device.
Note: For Full-Duplex devices, you do not need to hold the Microphone icon after pressing it.
Release Microphone to listen.
To talk or listen using the Alarm.com app while in full screen:Icn Chevron Up
Log in to the Alarm.com app.
Tap Video.
Tap Play on the desired video device.
Tap Fullscreen.
Press and hold Microphone to speak through the video device.
Note: For Full-Duplex devices, you do not need to hold the Microphone icon after pressing it.
Release Microphone to listen.
To talk or listen using the GoSafer Security customer portal (powered by Alarm.com):Icn Chevron Up
Log in to the GoSafer Security customer portal (powered by Alarm.com).
Click Video.
Click Live View.
Click and hold Microphone, or press and hold the spacebar.
Note: For Full-Duplex devices, you do not need to hold the Microphone icon after pressing it.
Release Microphone to listen.
Note: Two-way Audio is available through the GoSafer Security customer portal (powered by Alarm.com) in both Single Camera and Multi-Camera view.
Mute or unmute incoming audio
Audio can be muted and unmuted using the Alarm.com app and GoSafer Security customer portal (powered by Alarm.com).
To mute or unmute incoming audio using the Alarm.com app:Icn Chevron Up
Log in to the Alarm.com app.
Swipe to select the desired video device.
Tap Play.
Tap Sound Mute / Icn Sound to toggle audio.
To mute or unmute incoming audio using the GoSafer Security customer portal (powered by Alarm.com):Icn Chevron Up
Log in to the GoSafer Security customer portal (powered by Alarm.com).
Click Video.
Mouse over the live video for the desired camera.
Tap Sound Mute / Icn Sound to toggle audio.
Configure a camera's microphone and speaker
Enable or disable the microphone and speaker for individual cameras and adjust the speaker's Call Volume using the Alarm.com app and GoSafer Security customer portal (powered by Alarm.com).
To configure a camera's microphone and speaker using the Alarm.com app:Icn Chevron Up
Log in to the Alarm.com app.
Tap Video.
Tap Settings.
In Video Devices, select the desired camera.
In Settings, tap Audio.
In Audio Settings:
Tap the Microphone / Speaker toggle switch to enable or disable the microphone and speaker for the selected camera. The camera cannot record audio while its microphone and speaker are disabled.
In Call Volume, tap or drag the slider to adjust the speaker's volume during Two-Way Audio calls.
Tap Save.
To configure a camera's microphone and speaker using the GoSafer Security customer portal (powered by Alarm.com):Icn Chevron Up
Log in to the GoSafer Security customer portal (powered by Alarm.com).
Click Video.
Click Settings.
Select the desired camera.
Click Audio.
In Audio Settings:
click the Microphone / Speaker toggle switch to enable or disable the microphone and speaker for the selected camera. The camera cannot record audio while its microphone and speaker are disabled.
In Call Volume, click or drag the slider to adjust the speaker's volume during Two-Way Audio calls.
Always verify safety, installation, compatibility, and current UI details against the original manufacturer documentation before operational use.
Video
What is enable advanced networking and why does it need microphone permission?
GoSafer Security Knowledge Base
This operational reference is organized for GoSafer Security customers and staff. Alarm.com product names are retained where required for technical accuracy.
Overview
If a video device is having difficulty establishing communication with your browser, the video platform may request microphone access. Granting this request only provides the video platform with additional information about your internet connection to try to connect in a different way.
Important: Alarm.com never listens to your microphone nor uses any of your microphone data on the GoSafer Security customer portal (powered by Alarm.com).
Platform
Customer Website
Content type
How-to / Configuration
Source last updated
2023-04-30
Procedure
If a video device is having difficulty establishing communication with your browser, the video platform may request microphone access. Granting this request only provides the video platform with additional information about your internet connection to try to connect in a different way.
Important: Alarm.com never listens to your microphone nor uses any of your microphone data on the GoSafer Security customer portal (powered by Alarm.com).
Always verify safety, installation, compatibility, and current UI details against the original manufacturer documentation before operational use.
Video
Why does live video appear dark when attempting to view the livestream?
GoSafer Security Knowledge Base
This operational reference is organized for GoSafer Security customers and staff. Alarm.com product names are retained where required for technical accuracy.
Overview
This is primarily a video or reference page. Open the original article link below for the current content.
Platform
General / Device
Content type
Troubleshooting
Source last updated
2025-04-02
Procedure
If live video appears dark
Verify that the camera lens is free of dust and smudges.
Verify the display is not causing the darkness; try live video on another device.
Adjust the Video Device Image settings. For information about what settings can be adjusted, see Change a camera's brightness, contrast, saturation, sharpness, exposure, or night vision sensitivity.
If changing the Video Device Image settings washes out the image, try changing the positioning or angle of the camera so exposure is more desirable.
Example: If the camera is placed in a dark room facing outside, bright sunlight may cause the camera to adjust its exposure to dark areas and, as a result, render the image too dark. Attempt to include more of the dark area in the view to lessen exposure-related issues.
Note: When HDR is enabled on compatible cameras, the exposure setting is set to Automatic and cannot be manually changed. The VDB755P and VDB750 will always be Automatic as HDR cannot be turned off for those models.
For further troubleshooting, contact your service provider.
Always verify safety, installation, compatibility, and current UI details against the original manufacturer documentation before operational use.
Video
Why is the Live View showing as solid blue for a camera?
GoSafer Security Knowledge Base
This operational reference is organized for GoSafer Security customers and staff. Alarm.com product names are retained where required for technical accuracy.
Overview
If the live video being streamed is solid blue, the camera is likely in privacy mode or, if you are using an Alarm.com Video Server plus an analog camera, the Video Server lost its connection to the analog camera.
Platform
General / Device
Content type
Troubleshooting
Source last updated
2026-02-04
Procedure
Step-by-step guide: Screenshots and videos are placed with the instruction they illustrate.
If the live video being streamed is solid blue, the camera is likely in privacy mode or, if you are using an Alarm.com Video Server plus an analog camera, the Video Server lost its connection to the analog camera.
Supported devices
The following Alarm.com cameras support privacy mode:
ADC-V510
ADC-V520
ADC-V520IR
ADC-V610PT
ADC-V620PT
The following Alarm.com Video Servers may display a solid blue stream if they lose connection to their analog camera:
ADC-VS1
ADC-VS120
ADC-VS121
ADC-VS420
For supported Alarm.com IP video cameras:
If the live video is blue, but you can see a timestamp in the upper left corner, the camera is in privacy mode. The LED on the camera should be solid blue to indicate it is in privacy mode.
Blue screen
To take Alarm.com IP cameras out of privacy mode:
Press and hold the WPS button on the camera for only 1 second. The camera LED should then return to solid green.
If the LED begins to flash blue, you may have held the button down for too long. Wait 2 minutes for this to time out, then press the button again 1 second to disable privacy mode.
For analog cameras connected to an Alarm.com Video Server:
An Alarm.com Video Server is a small device that connects to your router. The video server takes a camera's analog signal and translates it into a digital signal that Alarm.com can show on your account. When the video server is not receiving input from the analog camera, or the input type is incompatible with the video server, it will appear blue on the screen.
Verify that the analog camera has power and the BNC cable is not damaged. This can be tested by plugging the BNC cable into a monitor, a pre-existing DVR setup, or a different (working) camera.
If you are having trouble with the testing process or need help replacing the cable, contact your service provider. For more information about how to find your service provider's contact information, see Contact your service provider.
Always verify safety, installation, compatibility, and current UI details against the original manufacturer documentation before operational use.
Video
Check video usage
GoSafer Security Knowledge Base
This operational reference is organized for GoSafer Security customers and staff. Alarm.com product names are retained where required for technical accuracy.
Overview
Video Usage shows the system's current video storage as well as the amount of of video uploaded for the month.
Platform
Customer Website
Content type
Reference
Source last updated
2025-06-04
Procedure
To check video usage
Log in to the GoSafer Security customer portal (powered by Alarm.com).
Click Video.
Click Saved Video Clips. Monthly Clip Limit and Oldest Clip Uploaded are listed at the bottom of the page.
On either Monthly Clip Limit or Oldest Clip Uploaded, click [Help] to view more details. For more information about how storage works, see What happens when an account's video clip online storage limit is reached?.
If you have questions about your video usage, contact your service provider for further assistance.
Always verify safety, installation, compatibility, and current UI details against the original manufacturer documentation before operational use.
Video
Configure a Video Analytics rule for an Alarm.com doorbell camera
GoSafer Security Knowledge Base
This operational reference is organized for GoSafer Security customers and staff. Alarm.com product names are retained where required for technical accuracy.
Overview
Video Analytics for Alarm.com doorbell cameras is optimized for identifying people at the door and sending a timely notification to you.
Platform
App + Web
Content type
How-to / Configuration
Source last updated
2026-01-02
Procedure
Step-by-step guide: Screenshots and videos are placed with the instruction they illustrate.
Video Analytics for Alarm.com doorbell cameras is optimized for identifying people at the door and sending a timely notification to you.
At least one Alarm.com doorbell camera enrolled on the account:
Alarm.com Video Doorbell (ADC-VDB750)
Alarm.com PoE Video Door Station (ADC-VDB755P)
Alarm.com Video Doorbell (ADC-VDB770)
Alarm.com Wireless Video Doorbell (ADC-VDB780B)
Differences from general Video Analytics
The Video Analytics rule for doorbell cameras operates differently from general Video Analytics. Video Analytics for doorbell cameras has the following features:
One Video Analytics recording rule per device
Only Ground Zone rules can be created
Only people can be detected
Camera setup
Position
The Alarm.com Video Doorbell (ADC-VDB770) should be installed upright in the same place a typical doorbell is installed. The typical height for a doorbell is 40 to 44 inches (101.6 to 111.76 centimeters) from the ground.
Angle
The angle of the Alarm.com Video Doorbell (ADC-VDB770) can be adjusted using an angled mounting bracket if the angle needs to be adjusted to avoid obstacles or improve video coverage of the approach.
Distance
Video Analytics for the Alarm.com Video Doorbell (ADC-VDB770) is designed to detect all people day or night within 10 feet, and may detect people beyond that range that are included in the ground zone depending on the size of the person, angle, elevation, and sensitivity setting.
Create the Video Analytics rule
Expand all
To create the Video Analytics rule using the Alarm.com app:Icn Chevron Up
Note: Only one recording rule can be created per doorbell camera.
Log in to the Alarm.com app.
Tap Video.
Tap Settings.
Tap Recording Rules.
TapAdd.
Tap Video Analytics.
Tap to select the desired doorbell camera.
To create the Video Analytics rule using the GoSafer Security customer portal (powered by Alarm.com):Icn Chevron Up
Note: Only one recording rule can be created per doorbell camera.
Log in to the GoSafer Security customer portal (powered by Alarm.com).
Click Video.
Click Recording Rules.
Click Add New Rule.
Click to select Video Analytics.
Click to select the desired Alarm.com doorbell camera.
Configure the Video Analytics rule
To configure the trigger:
In the Rule Name field, enter a name for the recording rule.
Click and drag the corners of the shape to cover only the ground where the person's feet will be, or click and drag inside the shape to move the shape it. To clear the current area of interest and restart, click Clear ground zone.
Use the Detection Sensitivity slider to select the desired sensitivity.
To customize when the rule is active:
Using the Set Minimum Delay Between Clips dropdown menu, select the desired timeframe. This setting determines how long the camera must wait after recording a clip to trigger another recording.
In The Rule will run..., click to select At all times or Only during the following times.
If Only during the following times is selected:
Click to select the days of the week to record on.
Using the Begin dropdown menu, select the time for the recording rule to start.
Using the End dropdown menu, select the time for the recording rule to stop.
In Except when..., click to select any available exceptions that turn the rule off regardless of the schedule. Options depending on the equipment include: the panel is armed away, the panel is armed stay, and Geo-Device is inside a specified Geo-Fence.
Note: If the location has a security system with multiple partitions, the at-home settings only apply to the first/main partition.
To configure the notifications:
Click to select the desired notification recipients. It is recommended to use push notifications to a phone using the dropdown option to attach a thumbnail.
Camera-driven light automation rules require Lights to be enabled on your service package along with at least one light device enrolled on the account. If these requirements are met, the Light Automation section appears toward the bottom of the Video Analytics Rule.
Note: Lights cannot be enabled during a time when the Video Analytics rule is not set to record (e.g., if the device is set to record only at night, lights cannot be set to turn on during the daytime because no clip would have been recorded).
Using the Turn on selected lights for dropdown menu, select how long the lights should turn on for.
Click to select which lights are to be automated by the rule.
In During these time frames, click to select At all times, Only during the following times, or Only after sunset.
If Only during the following times is selected:
Click to select which days of the week on which to record.
Using the Begin dropdown menu, select the time for the recording rule to start.
Using the End dropdown menu, select the time for the recording rule to stop.
To enable Touchless Doorbell:
Click the Enable Touchless Doorbell toggle to enable Touchless Doorbell.
Click and drag to create an area where the guest can stand that triggers the Video Doorbell to ring.
Using the Duration Inside Area of Interest dropdown menu, select how long the guest must stay in the zone to trigger the Video Doorbell.
Click Save.
Note: Notifications triggered by the Touchless Doorbell feature appear as button press events. The event cannot be changed to something other than a button press.
Always verify safety, installation, compatibility, and current UI details against the original manufacturer documentation before operational use.
Video
Create Low Battery and Depleted Battery notifications for video devices
GoSafer Security Knowledge Base
This operational reference is organized for GoSafer Security customers and staff. Alarm.com product names are retained where required for technical accuracy.
Overview
You can receive notifications when a compatible video device's battery is low or completely depleted.
Platform
App + Web
Content type
How-to / Configuration
Source last updated
2026-01-12
Procedure
Compatible video devices
Alarm.com Wireless Video Doorbell (ADC-VDB780B)
4MP Indoor/Outdoor Battery Camera with Two-Way Audio and Integrated Spotlight (ADC-V731B)
Low Battery notifications
A Low Battery notification will be sent when the video device's battery level reaches 20%, and a Critical Low Battery notification will be sent when it reaches 10%.
Note: This notification is enabled by default.
Create/edit Low Battery Notifications
A Low Battery notification can be created using the Alarm.com app and GoSafer Security customer portal (powered by Alarm.com).
Alarm.com app
Log in to the Alarm.com app.
Tap Notifications.
Tap [Settings].
Tap [Add], or tap an existing notification to edit.
Tap Low Battery (Video) Notification.
Entered a name for the notification.
Select the desired video device.
In Recipients, tap Add to select which contacts receive the notification.
In the Address Book, tap to select the recipients to notify, or tap Add Contact to add a new Address Book recipient.
Tap Close.
Verify the notification is configured with the correct settings.
Tap Save.
GoSafer Security customer portal (powered by Alarm.com)
Log in to the GoSafer Security customer portal (powered by Alarm.com).
Click Notifications.
Click New Notification, or click [Edit] to edit an existing notification.
Click Low Battery (Video) Notification.
Enter a name for the notification.
Select the desired video device.
In Recipients, click Add to select which contacts receive the notification.
In the Address Book, click to select the recipients to notify, or click New Contact to add a new Address Book recipient.
Click Close.
Click Save.
Depleted Battery notifications
A Depleted Battery notification can be sent when the device's battery is completely depleted.
Note: This notification is enabled by default.
Create/edit Depleted Battery notifications
A Depleted Battery notification can be created and configured using the Alarm.com app and GoSafer Security customer portal (powered by Alarm.com).
Alarm.com app
Log in to the Alarm.com app.
Tap Notifications.
Tap [Settings].
Tap [Add], or tap an existing notification to edit.
Tap Depleted Battery (Video) Notification.
Entered a name for the notification.
Select the desired video device.
In Recipients, tap Add to select which contacts receive the notification.
In the Address Book, tap to select the recipients to notify, or tap Add Contact to add a new Address Book recipient.
Tap Close.
Verify the notification is configured with the correct settings.
Tap Save.
GoSafer Security customer portal (powered by Alarm.com)
Log in to the GoSafer Security customer portal (powered by Alarm.com).
Click Notifications.
Click New Notification, or click [Edit] to edit an existing notification.
Click Depleted Battery (Video) Notification.
Enter a name for the notification.
Select the desired video device.
In Recipients, click Add to select which contacts receive the notification.
In the Address Book, click to select the recipients to notify, or click New Contact to add a new Address Book recipient.
Always verify safety, installation, compatibility, and current UI details against the original manufacturer documentation before operational use.
Video
Create a Doorbell Call notification for the SkyBell Doorbell Camera
GoSafer Security Knowledge Base
This operational reference is organized for GoSafer Security customers and staff. Alarm.com product names are retained where required for technical accuracy.
Overview
The SkyBell Doorbell Camera can trigger a notification when it detects motion or when someone presses the doorbell button.
Platform
App + Web
Content type
How-to / Configuration
Source last updated
2025-06-04
Procedure
To create a Doorbell Call notification using the Alarm.com app
Log in to the Alarm.com app.
Tap [Video].
Tap [Settings].
Tap to select the desired Skybell doorbell camera.
In Automation, tap Setup Doorbell Call Notifications.
Tap Add.
Tap Doorbell Call.
Name the notification.
In For the selected devices, tap to select the desired doorbell camera.
In When the following event occurs, tap to select Motion, Button Pushed, or both.
In During this time frame, tap to select At all times or Only during the following times to choose a schedule for the doorbell camera to follow.
In Notification filtering, tap to select the desired filters.
In Recipients, tap Add.
In the Address book, tap to select the recipients to notify, or tap New Contact to add a new Address Book recipient.
Note: It is recommended to use a push notification (i.e., recipients with a phone icon next to their description) rather than an email or text notification. Users can answer a doorbell call directly through the push notification.
Verify the notification is configured with the correct settings.
Tap Save.
To create a Doorbell Call notification using the GoSafer Security customer portal (powered by Alarm.com)
Log in to the GoSafer Security customer portal (powered by Alarm.com).
Click Notifications.
Click New Notification.
Click Doorbell Call.
Name the notification.
In For the selected devices, click to select the desired doorbell camera.
In When the following event occurs, click to select Motion, Button Pushed, or both.
Note: The Alarm.com Video Doorbell (ADC-VDB770) has a different procedure for creating a motion recording rule. For more information, see Create a motion recording rule/notification for the Alarm.com Video Doorbell (ADC-VDB770).
Optional customization
In During this time frame, click to select At all times or Only during the following times to choose a schedule for the doorbell camera to follow.
In Notification filtering, click to select the desired filters.
In Recipients, click Add.
In the Address book, click to select the recipients to notify, or click New to add a new Address Book recipient.
Note: It is recommended to use a push notification (i.e., recipients with a phone icon next to their description) rather than an email or text notification. You can answer a doorbell call directly through the push notification. For more information about how to set up a push device, see How can a device start receiving Push Notifications?.
Click Close.
Verify the notification is configured with the correct settings.
Always verify safety, installation, compatibility, and current UI details against the original manufacturer documentation before operational use.
Video
Create a Wired Input/Output recording rule
GoSafer Security Knowledge Base
This operational reference is organized for GoSafer Security customers and staff. Alarm.com product names are retained where required for technical accuracy.
Overview
A Wired Input/Output recording rule records video when a sensor hardwired to the camera is triggered.
Platform
Customer Website
Content type
How-to / Configuration
Source last updated
2025-06-04
Procedure
To create a wired input/output recording rule
Log in to the GoSafer Security customer portal (powered by Alarm.com).
Click Video.
Click Recording Rules.
Click Add New Rule.
Click Wired input/Output.
Name the new recording rule.
Using the Record a clip when dropdown menu, select which camera should record a clip when its I/O port is triggered.
In During this time frame, select the time frame for the rule to be active.
Using the Minimum delay between camera-triggered clip uploads dropdown menu, select a delay time to limit the number of clips recorded.
In At home settings, select desired settings for the rule to not record when the system is Disarmed, Armed Stay, or a Geo-Device is inside the Home Geo-Fence.
In Video Clip Recipients, click Add Recipients to be notified when the recording rule is triggered.
Click the entries in the Address Book that are to be notified, or click New to add a new Address Book entry.
Once all desired recipients are selected, click Close.
Verify the recording rule is configured with the correct settings.
Always verify safety, installation, compatibility, and current UI details against the original manufacturer documentation before operational use.
Video
Create a button press notification for the Alarm.com Video Doorbell
GoSafer Security Knowledge Base
This operational reference is organized for GoSafer Security customers and staff. Alarm.com product names are retained where required for technical accuracy.
Overview
You can create a button push notification using the Notifications page.
Platform
App + Web
Content type
How-to / Configuration
Source last updated
2026-05-27
Procedure
Step-by-step guide: Screenshots and videos are placed with the instruction they illustrate.
Alarm.com doorbells can trigger a notification when the camera detects motion or someone presses the doorbell button. Doorbell call notifications and recording rules can be created and configured using the Alarm.com app and GoSafer Security customer portal (powered by Alarm.com).
After sending the initial notification, repeated button-press SMS, Email, and Push notifications will have a 20-second delay before a new notification can trigger. This does not impact the doorbell ringing on a wired or wireless chime.
Doorbell call push notifications will have a unique doorbell sound effect that is different than other push notification sounds and cannot be changed.
Doorbell call notifications vs. doorbell call recording rule notifications
Although both notification types will result in the user receiving a notification, doorbell call notifications serve a different purpose from doorbell call recording rule notifications.
Doorbell call notification
Doorbell call recording rule notification
What triggers the notification?
The doorbell button is pressed
The doorbell button is pressed and the doorbell uploads a saved clip for the event
When is the notification sent?
As soon as the system reports that the doorbell button was pressed
As soon as the saved clip is uploaded to the cloud
How can I use the notification?
You will be linked directly to the doorbell's Live View stream
Doorbell calls can be answered directly through push notifications
You will be linked to the saved clip that was created by the recording rule
Button-press notifications can be created using the Alarm.com app and GoSafer Security customer portal (powered by Alarm.com).
Expand all
To create a button-press notification using the Alarm.com app:Icn Chevron Up
Log in to the Alarm.com app.
Tap Video.
Tap Settings.
Tap to select the desired doorbell camera.
In Automation, tap Setup Doorbell Call Notifications.
Tap Add.
Tap Doorbell Call.
Name the notification.
In For the selected devices, tap to select the desired doorbell camera.
In When the following event occurs, tap to select Motion, Button Pushed, or both.
In During this time frame, tap to select At all times or Only during the following times to choose a schedule for the doorbell camera to follow.
In Notification filtering, tap to select the desired filters.
In Recipients, tap Add.
In the Address Book, tap to select the recipients to notify, or tap Add Contact to add a new Address Book recipient.
Note: It is recommended to use a push notification (i.e., recipients with a phone icon next to their description) rather than an email or text notification. Users can answer a doorbell call directly through the push notification.
Tap Close.
Verify the notification is configured with the correct settings.
Tap Save.
To create a button-press notification using the GoSafer Security customer portal (powered by Alarm.com):Icn Chevron Up
Log in to the GoSafer Security customer portal (powered by Alarm.com).
Click Notifications.
Click New Notification, or click Edit to edit an existing notification.
Click Doorbell Call.
I For the selected devices, click to select the desired device.
Click to select Button Pushed.
In During this time frame, click to select At all times or Only during the following times to choose a schedule for the doorbell camera to follow.
In Notification filtering, click to select the desired filters.
In Recipients, click Add.
In the Address Book, click to select the recipients to notify, or click New to add a new Address Book recipient.
Note: It is recommended to use a push notification (i.e., recipients with a phone icon next to their description) rather than an email or text notification. Users can answer a doorbell call directly through the push notification.
Click Close.
Verify the notification is configured with the correct settings.
Click Save.
Attach a thumbnail to a doorbell call push notification
A thumbnail picture can be attached to doorbell call push notifications for Button Pushed events. It is possible to long-press the push notification to expand the thumbnail image for a closer look, or tap the push notification to see the device's live view. These thumbnails are also stored in the Activity history feed.
Note: Thumbnails can only be attached to a doorbell call push notification for the ADC-VDB770 on firmware version 02234+. Push notification thumbnails are also compatible with Touchless Doorbell as long as that feature is enabled. For more information, see Enable Touchless Doorbell for the Alarm.com Video Doorbell.
To attach a thumbnail using the Alarm.com app:Icn Chevron Up
Note: Thumbnails can only be attached to doorbell call notifications with the Button Pushed event type.
Log in to the Alarm.com app.
Tap More options.
Tap Notifications.
Tap Settings.
Tap Doorbell Video Call.
Using the dropdown menu next to the intended recipient, select Attach Thumbnail.
Tap Save.
To attach a thumbnail using the GoSafer Security customer portal (powered by Alarm.com):Icn Chevron Up
Note: Thumbnails can only be attached to doorbell call notifications with the Button Pushed event type.
Log in to the GoSafer Security customer portal (powered by Alarm.com).
Click Notifications.
For the desired doorbell call notification, click Edit.
Using the dropdown menu next to the intended recipient, select Attach Thumbnail.
Always verify safety, installation, compatibility, and current UI details against the original manufacturer documentation before operational use.
Video
Create a video callout notification
GoSafer Security Knowledge Base
This operational reference is organized for GoSafer Security customers and staff. Alarm.com product names are retained where required for technical accuracy.
Overview
A video callout notification allows users to receive an alert to start a call when the camera call out button is pushed.
Platform
App + Web
Content type
How-to / Configuration
Source last updated
2025-06-04
Procedure
To create a notification using the Alarm.com app
Log in to the Alarm.com app.
Tap [Menu].
Tap Notifications.
Tap [Settings].
Tap [Add].
Tap Video Callout.
Enter the desired name for the notification.
In For the selected devices, tap to select the ADC-V622.
Tap to select Button Pushed if it isn't checked.
Configure the time frame and notification filtering.
In Recipients, tap Add to select which contacts receive the notification.
Tap to select the entries in the Address Book to be notified, then tap Close.
If a contact is not listed
Tap Add Contact to add a new Address Book entry.
Enter the new contact's information, then tap Add Contact.
Verify the notification is configured with the desired settings.
Tap Save. Allow a few minutes for the settings to save to the device, then test the notification.
To create a notification using the GoSafer Security customer portal (powered by Alarm.com)
Log in to the GoSafer Security customer portal (powered by Alarm.com).
Click Notifications.
Click New Notification.
Click Video Callout.
Enter the desired name for the notification.
In For the selected devices, click to select the ADC-V622.
Click to select Button Pushed if it isn't checked.
Configure the time frame and notification filtering.
In Recipients, click Add to select which contacts receive the notification.
Click to select the entries in the Address Book to be notified.
If a contact is not listed
Click New to add a new Address Book entry.
Enter the new contact's information, then click Add Contact.
Click Close.
Verify the notification is configured with the desired settings.
Click Save. Allow a few minutes for the settings to save to the device, then test the notification.
Always verify safety, installation, compatibility, and current UI details against the original manufacturer documentation before operational use.
Video
Create/edit a Doorbell Call recording rule
GoSafer Security Knowledge Base
This operational reference is organized for GoSafer Security customers and staff. Alarm.com product names are retained where required for technical accuracy.
Overview
A Doorbell Call recording rule records doorbell video calls when they occur.
Platform
Customer Website
Content type
How-to / Configuration
Source last updated
2025-06-04
Procedure
To create a Doorbell Call recording rule using the GoSafer Security customer portal (powered by Alarm.com)
Log in to the GoSafer Security customer portal (powered by Alarm.com).
Click Video.
Click Recording Rules.
Click Add New Rule.
Click Doorbell Call Recording Rule.
Name the new recording rule.
Using the Record a clip when dropdown menu, select which doorbell camera should trigger a clip recording when pushed or called.
In Video Clip Recipients, click Add Recipients to be notified when the recording rule is triggered.
Click the entries in the Address Book that are to be notified, or click New to add a new Address Book entry.
Once all desired recipients are selected, click Close.
Important: Notifications are sent to the recipients after the video clip is uploaded to the account. To create a notification that sends immediately after the doorbell camera is triggered, see Create a Doorbell Call notification.
Verify the recording rule is configured with the correct settings.
Click Save Rule.
To edit a Doorbell Call recording rule using the GoSafer Security customer portal (powered by Alarm.com)
Log in to the GoSafer Security customer portal (powered by Alarm.com).
Click Video.
Click Recording Rules.
Click [Edit] for the Doorbell Call recording rule.
If you do not see the Doorbell Call recording rule, it has not been created yet.
Always verify safety, installation, compatibility, and current UI details against the original manufacturer documentation before operational use.
Video
Create/edit a Doorbell Motion recording rule
GoSafer Security Knowledge Base
This operational reference is organized for GoSafer Security customers and staff. Alarm.com product names are retained where required for technical accuracy.
Overview
A Doorbell Motion recording rule records video when the doorbell detects motion.
Platform
Customer Website
Content type
How-to / Configuration
Source last updated
2025-06-04
Procedure
To create a Doorbell Motion recording rule using the GoSafer Security customer portal (powered by Alarm.com)
Log in to the GoSafer Security customer portal (powered by Alarm.com).
Click Video.
Click Recording Rules.
Click Add New Rule.
Click Doorbell Motion Recording Schedule.
Name the new recording rule.
Using the Record a clip when dropdown menu, select which doorbell camera should trigger a clip recording when motion is detected.
In Video Clip Recipients, click Add Recipients to be notified when a new clip is uploaded.
Click the entries in the Address Book that are to be notified, or click New to add a new Address Book entry.
Once all desired recipients are selected, click Close.
Important: Notifications are sent to the recipients after the video clip is uploaded to the account. To create a notification that sends immediately after the doorbell camera is triggered, see Create a Doorbell Call notification.
Verify the recording rule is configured with the correct settings.
Click Save Rule.
To edit a Doorbell Motion recording rule using the GoSafer Security customer portal (powered by Alarm.com)
Log in to the GoSafer Security customer portal (powered by Alarm.com).
Click Video.
Click Recording Rules.
Click the [Edit] for the Doorbell Motion recording rule.
If you do not see the Doorbell Motion recording rule, it has not been created yet.
Always verify safety, installation, compatibility, and current UI details against the original manufacturer documentation before operational use.
Video
Create/edit a Sensor Opened/Closed recording rule
GoSafer Security Knowledge Base
This operational reference is organized for GoSafer Security customers and staff. Alarm.com product names are retained where required for technical accuracy.
Overview
A Sensor Opened/Closed recording rule records video from a specified camera or video device when a specified sensor opens or closes.
Platform
Customer Website
Content type
How-to / Configuration
Source last updated
2025-06-04
Procedure
To create a Sensor Opened/Closed recording rule using the GoSafer Security customer portal (powered by Alarm.com)
Log in to the GoSafer Security customer portal (powered by Alarm.com).
Click Video.
Click Recording Rules.
Click Add New Rule.
Click Sensor Opened/Closed.
Name the new recording rule.
Using the When...is dropdown menus, select which sensor and status should trigger a clip recording.
In During this time frame, select the time frame for the rule to be active.
In Record clips from these cameras, click to select the cameras that should record.
In Video Clip Recipients, click Add Recipients to be notified when the recording rule is triggered.
Click the entries in the Address Book that are to be notified, or click New to add a new Address Book entry.
Once all desired recipients are selected, click Close.
Verify the recording rule is configured with the correct settings.
Click Save Rule.
To edit a Sensor Opened/Closed recording rule using the GoSafer Security customer portal (powered by Alarm.com)
Log in to the GoSafer Security customer portal (powered by Alarm.com).
Click Video.
Click Recording Rules.
Click the [Edit] for the Sensor Opened/Closed recording rule.
If you do not see the Sensor Opened/Closed recording rule, it has not been created yet.
Always verify safety, installation, compatibility, and current UI details against the original manufacturer documentation before operational use.
Video
Create/edit a System Armed or Disarmed recording rule
GoSafer Security Knowledge Base
This operational reference is organized for GoSafer Security customers and staff. Alarm.com product names are retained where required for technical accuracy.
Overview
A System Armed or Disarmed recording rule records video from a specified camera or video device when the system is armed or disarmed.
Platform
Customer Website
Content type
How-to / Configuration
Source last updated
2025-06-04
Procedure
To create a System Armed or Disarmed recording rule using the GoSafer Security customer portal (powered by Alarm.com)
Log in to the GoSafer Security customer portal (powered by Alarm.com).
Click Video.
Click Recording Rules.
Click Add New Rule.
Click System Armed or Disarmed.
Name the new recording rule.
Using the When...is...by dropdown menus, select which system, status, and user should trigger a recording.
In During this time frame, click to select the time frame for the rule to be active.
In Record clips from these cameras, click to select the cameras that should record.
In Video Clip Recipients, click Add Recipients to be notified when the recording rule is triggered.
Click the entries in the Address Book that are to be notified, or click New to add a new Address Book entry.
Once all desired recipients are selected, click Close.
Verify the recording rule is configured with the correct settings.
Click Save Rule.
To edit a System Armed or Disarmed recording rule using the GoSafer Security customer portal (powered by Alarm.com)
Log in to the GoSafer Security customer portal (powered by Alarm.com).
Click Video.
Click Recording Rules.
Click the [Edit] for the System Armed or Disarmed recording rule.
If you do not see the System Armed or Disarmed recording rule, it has not been created yet.
Always verify safety, installation, compatibility, and current UI details against the original manufacturer documentation before operational use.
Video
Create/edit a Video Motion Detection recording rule
GoSafer Security Knowledge Base
This operational reference is organized for GoSafer Security customers and staff. Alarm.com product names are retained where required for technical accuracy.
Overview
A Video Motion Detection recording rule records video when a camera detects motion.
Platform
Customer Website
Content type
How-to / Configuration
Source last updated
2025-05-07
Procedure
To create a Video Motion Detection recording rule
Log in to the GoSafer Security customer portal (powered by Alarm.com).
Click Video.
Click Recording Rules.
Click Add New Rule.
Click to select Video Motion Detection (VMD).
Enter a name for the recording rule.
Select which camera records when it detects motion.
Click to select any existing VMD windows using the in these VMD windows dropdown menu (if applicable).
Note: This option is not available for '25, '26, and '36 series cameras.
In During this time frame, select the times when the rule can be triggered.
In Minimum delay between camera-triggered clip uploads, select the desired minimum time between when the rule can be triggered.
If desired, click to select any of the options in the At home settings. The options include
Do not record when the system is Disarmed.
Do not record when the system is Armed Stay.
Do not record when any of the Geo-Devices are inside the Geo-Fence.
In Video Clip Recipients, click Add to select who should receive notifications.
Select any entries in the Address book to be notified, or click New to add a new Address Book entry.
Click Close.
Verify the recording rule is configured with the desired settings.
Click Save Rule.
To edit a Video Motion Detection recording rule
Log in to the GoSafer Security customer portal (powered by Alarm.com).
Click Video.
Click Recording Rules.
Click the [Edit] for the Video Motion Detection recording rule.
If you do not see the Video Motion Detection recording rule, it has not been created yet.
Always verify safety, installation, compatibility, and current UI details against the original manufacturer documentation before operational use.
Video
Create/edit an Alarm recording rule
GoSafer Security Knowledge Base
This operational reference is organized for GoSafer Security customers and staff. Alarm.com product names are retained where required for technical accuracy.
Overview
An Alarm video recording rule can record video clips when the system reports an alarm.
Platform
Customer Website
Content type
How-to / Configuration
Source last updated
2025-06-04
Procedure
To create an Alarm video recording rule
Log in to the GoSafer Security customer portal (powered by Alarm.com).
Click Video.
Click Recording Rules.
Click Add New Rule.
Click Alarm.
Name the new recording rule.
Using the When an alarm is triggered by dropdown menu, select which sensor alarms should trigger a clip recording.
In During this time frame, select the time frame for the rule to be active.
In Record clips from these cameras, click to select the cameras that should record.
In Video Clip Recipients, click Add Recipients to be notified when the recording rule is triggered.
Click the entries in the Address Book that are to be notified, or click New to add a new Address Book entry.
Once all desired recipients are selected, click Close.
Verify the recording rule is configured with the correct settings.
Click Save Rule.
To edit an Alarm video recording rule
Log in to the GoSafer Security customer portal (powered by Alarm.com).
Click Video.
Click Recording Rules.
Click the [Edit] for the Any Sensor Alarm recording rule.
If you do not see the Any Sensor Alarm recording rule, it has not been created yet.
Always verify safety, installation, compatibility, and current UI details against the original manufacturer documentation before operational use.
Video
Create/edit an Entry Delay recording rule
GoSafer Security Knowledge Base
This operational reference is organized for GoSafer Security customers and staff. Alarm.com product names are retained where required for technical accuracy.
Overview
An Entry Delay recording rule records video when specific sensors report an entry delay.
Platform
Customer Website
Content type
How-to / Configuration
Source last updated
2025-06-04
Procedure
To create an entry delay recording rule
Log in to the GoSafer Security customer portal (powered by Alarm.com).
Click Video.
Click Recording Rules.
Click Add New Rule.
Click Entry Delay.
Name the new recording rule.
Using the When an entry delay is triggered by dropdown menu, select which entry delay sensors should trigger a clip recording.
In During this time frame, select the time frame for the rule to be active.
In Record clips from these cameras, click to select the cameras that should record.
In Video Clip Recipients, click Add Recipients to be notified when the recording rule is triggered.
Click the entries in the Address Book that are to be notified, or click New to add a new Address Book entry.
Once all desired recipients are selected, click Close.
Verify the recording rule is configured with the correct settings.
Click Save Rule.
To edit an entry delay video recording rule
Log in to the GoSafer Security customer portal (powered by Alarm.com).
Click Video.
Click Recording Rules.
Click the [Edit] for the Entry Delay recording rule.
If you do not see the Entry Delay recording rule, it has not been created yet.
Always verify safety, installation, compatibility, and current UI details against the original manufacturer documentation before operational use.
Video
Delete a video recording rule
GoSafer Security Knowledge Base
This operational reference is organized for GoSafer Security customers and staff. Alarm.com product names are retained where required for technical accuracy.
Overview
Video recording rules can be deleted using the app or website.
Platform
App + Web
Content type
How-to / Configuration
Source last updated
2025-06-04
Procedure
To delete a Video Analytics recording rule using the Alarm.com app
Log in to the Alarm.com app.
Tap Video.
Tap [Settings].
Tap Recording Rules.
On the Video Analytics recording rule to delete, tap [Delete].
Tap Delete rule.
To delete a video recording rule using the GoSafer Security customer portal (powered by Alarm.com)
Caution: When deleting a local recording rule where a video device records to an SVR (Stream Video Recorder), the video device's associated footage will be removed from the SVR.
Log in to the GoSafer Security customer portal (powered by Alarm.com).
Click Video.
Click Recording Rules.
Click [Trash] on the recording rule to be deleted.
Always verify safety, installation, compatibility, and current UI details against the original manufacturer documentation before operational use.
Video
Enable Touchless Doorbell for an Alarm.com Video Doorbell
GoSafer Security Knowledge Base
This operational reference is organized for GoSafer Security customers and staff. Alarm.com product names are retained where required for technical accuracy.
Overview
Touchless Doorbell for the Alarm.com Video Doobell allows guests to stand in a designated area to ring the doorbell instead of touching the device.
Platform
General / Device
Content type
How-to / Configuration
Source last updated
2025-12-01
Procedure
Is the Touchless Doorbell notification different from a button press notification?
No. The experience is meant to mirror that of a guest pressing the doorbell button, and the notifications are identical.
Can the Touchless Doorbell feature control Z-Wave lights?
Yes. Users can configure the Video Analytics rule, which controls the Touchless Doorbell feature, to automate their lights.
Are there any differences between a button press and a Touchless Doorbell trigger?
No. Triggering the Touchless Doorbell feature activates the same rule as pressing the button.
Does the Touchless Doorbell feature still trigger if the rule it is associated to is disabled?
No. the Recording Rule being turned off includes the Touchless Doorbell feature. It is not possible to have a Touchless Doorbell rule without an active Video Analytics rule.
Can a Touchless Doorbell rule be created without a Video Analytics rule?
No. A Video Analytics rule with a Ground Zone selected must be created to be able to create a Touchless Doorbell rule.
Can the button press trigger be disabled so that only the Touchless Doorbell will trigger?
No. Setting the Chime Type to None from the Video Device Settings page turns it off completely.
Can the Outdoor Tone be set to trigger from only a button press or only a Touchless Doorbell trigger?
No. Deselecting the option for Outdoor Tone from the Video Device Settings page turns it off for both types of triggers.
How often can the Touchless Doorbell be triggered in a row?
The Touchless Doorbell feature can only be triggered once every 10 seconds.
If a guest presses the doorbell button after triggering Touchless Doorbell, is a second chime triggered?
Yes. If the guest presses the button after triggering the Touchless Doorbell, the chime will sound again.
Note: If a guest presses the button too many times, the indoor chime will stop ringing temporarily.
Always verify safety, installation, compatibility, and current UI details against the original manufacturer documentation before operational use.
Video
How does the Stream Video Recorder (SVR) work?
GoSafer Security Knowledge Base
This operational reference is organized for GoSafer Security customers and staff. Alarm.com product names are retained where required for technical accuracy.
Overview
Once a Stream Video Recorder (SVR) and video devices are enrolled to your customer account, a recording schedule can be created on your account to enable 24x7 recording. For more information about creating recording schedules, see Associate a video device to an Alarm.com Stream Video Recorder.
This recording schedule tells the camera to also send video to the SVR for 24x7 recording in the local network. The traffic for the camera to the SVR is maintained by your router, which requires the camera and SVR to be on the same local network. The camera continues to be accessible and able to record clips to Alarm.com and remotely view.
Platform
General / Device
Content type
How-to / Configuration
Source last updated
2025-09-12
Procedure
Once a Stream Video Recorder (SVR) and video devices are enrolled to your customer account, a recording schedule can be created on your account to enable 24x7 recording. For more information about creating recording schedules, see Associate a video device to an Alarm.com Stream Video Recorder.
This recording schedule tells the camera to also send video to the SVR for 24x7 recording in the local network. The traffic for the camera to the SVR is maintained by your router, which requires the camera and SVR to be on the same local network. The camera continues to be accessible and able to record clips to Alarm.com and remotely view.
Always verify safety, installation, compatibility, and current UI details against the original manufacturer documentation before operational use.
Video
Recording Video
GoSafer Security Knowledge Base
This operational reference is organized for GoSafer Security customers and staff. Alarm.com product names are retained where required for technical accuracy.
Overview
This GoSafer Security section brings together resources for Recording Video, including setup, configuration, everyday use, and troubleshooting. Choose the related page that matches your device, feature, or task, and follow the current manufacturer guidance linked on that page.
Platform
App + Web
Content type
How-to / Configuration
Source last updated
2023-04-30
Procedure
Browse the related pages in this chapter to open the specific procedure, configuration guide, or troubleshooting article you need.
Always verify safety, installation, compatibility, and current UI details against the original manufacturer documentation before operational use.
Video
Video Doorbell Call Notifications and Recording Rules - Video
GoSafer Security Knowledge Base
This operational reference is organized for GoSafer Security customers and staff. Alarm.com product names are retained where required for technical accuracy.
Overview
Doorbell call notifications and recording rules can be created using the Notifications page on the Alarm.com app and GoSafer Security customer portal (powered by Alarm.com).
For more information, see Create a button press notification for the Alarm.com Video Doorbell and Create/edit a Doorbell Call recording rule.
Platform
General / Device
Content type
Reference
Source last updated
2025-02-04
Procedure
Step-by-step guide: Screenshots and videos are placed with the instruction they illustrate.
Doorbell call notifications and recording rules can be created using the Notifications page on the Alarm.com app and GoSafer Security customer portal (powered by Alarm.com).
Always verify safety, installation, compatibility, and current UI details against the original manufacturer documentation before operational use.
Video
Video device does not trigger recordings or upload clips
GoSafer Security Knowledge Base
This operational reference is organized for GoSafer Security customers and staff. Alarm.com product names are retained where required for technical accuracy.
Overview
There are several reasons why video clips would not be triggered to record. A video device requires a strong network connection as well as the proper configuration settings to record clips and upload them to the customer account.
Platform
App + Web
Content type
FAQ / Explanation
Source last updated
2026-04-15
Procedure
To view video clips filtered to Other using the Alarm.com app
To view video clips filtered to Other using the GoSafer Security customer portal (powered by Alarm.com)
Always verify safety, installation, compatibility, and current UI details against the original manufacturer documentation before operational use.
Video
What is a locked recording rule?
GoSafer Security Knowledge Base
This operational reference is organized for GoSafer Security customers and staff. Alarm.com product names are retained where required for technical accuracy.
Overview
Recording rules can be locked by your service provider so that the rule can only be paused or resumed and have its recipients adjusted. A Locked icon next to the recording rule's name indicates that …
Platform
General / Device
Content type
How-to / Configuration
Source last updated
2022-01-31
Procedure
Additional details about locked recording rules
You can pause and resume a locked recording rule. For more information, see Pause or resume a recording rule.
You can edit a locked recording rule's notification recipients. For more information, see the recording rule's article in Recording Video.
Always verify safety, installation, compatibility, and current UI details against the original manufacturer documentation before operational use.
Video
Can video be deleted from the Stream Video Recorder (SVR)?
GoSafer Security Knowledge Base
This operational reference is organized for GoSafer Security customers and staff. Alarm.com product names are retained where required for technical accuracy.
Overview
Video that is saved to the Stream Video Recorder (SVR) cannot be manually deleted for specific time frames. This is to ensure that important data is not removed from the SVR.
Platform
App + Web
Content type
How-to / Configuration
Source last updated
2025-12-08
Procedure
Situations where footage is automatically deleted
When the SVR's hard drive storage is full. Video is automatically overwritten a full day at a time to make room for newly recorded video.
When the SVR recording schedule for a camera is deleted using the GoSafer Security customer portal (powered by Alarm.com). All previous video recordings from that camera are deleted from the SVR.
Manually limit the number of days to record
it is possible to manually limit the number of days to keep recorded footage an SVR. For the ADC-SVR100, ADC-SVR122, and ADC-CSVR126, this setting can be adjusted for each individual recording rule; for the ADC-SVR210, ADC-CSVR20XXP Pro Series, and ADC-CSVR21XXP Pro Series, this setting can be adjusted for all recording rules simultaneously. Limiting the number of days to record can be adjusted using the GoSafer Security customer portal (powered by Alarm.com) or Alarm.com app, depending on the SVR.
To limit the number of days to record for the ADC-SVR100, ADC-SVR122, and ADC-CSVR126
GoSafer Security customer portal (powered by Alarm.com)
Log in to the GoSafer Security customer portal (powered by Alarm.com).
Click Video.
Click Recording Rules.
Click Local Recordings.
Click [Edit] for the desired device.
Click Advanced Options.
Click the Limit the number of days to record toggle switch to enable a limit for the recording rule.
Using the dropdown menu, select the limit for the number of days to keep recorded footage.
Click Save.
Alarm.com app
Log in to the Alarm.com app.
Tap [Video].
Tap [Settings].
Tap Recording Rules.
Tap Local.
Tap [Edit] for the desired device.
Tap Advanced Options.
Tap the Limit the number of days to record toggle switch to enable a limit for the recording rule.
Using the dropdown menu, select the limit for the number of days to keep recorded footage.
Tap Save.
To limit the number of days to record for the ADC-SVR210, ADC-CSVR20XXP Pro Series, or ADC-CSVR21XXP Pro Series
Note: This process can only be done using the GoSafer Security customer portal (powered by Alarm.com) for the ADC-SVR210, ADC-CSVR20XXP Pro Series, and ADC-CSVR21XXP Pro Series.
Log in to the GoSafer Security customer portal (powered by Alarm.com).
Click Video.
Click Settings.
Select the desired Stream Video Recorder.
Click Recording Options.
Using the Keep Clips for the Selected Duration dropdown menu, select the number of days to keep recorded footage.
Always verify safety, installation, compatibility, and current UI details against the original manufacturer documentation before operational use.
Video
Change saved video view layout
GoSafer Security Knowledge Base
This operational reference is organized for GoSafer Security customers and staff. Alarm.com product names are retained where required for technical accuracy.
Overview
The Saved Video page can be viewed in multiple formats.
Platform
App + Web
Content type
Reference
Source last updated
2025-06-04
Procedure
Step-by-step guide: Screenshots and videos are placed with the instruction they illustrate.
The Saved Video page on the GoSafer Security customer portal (powered by Alarm.com) and Alarm.com app can be viewed in multiple formats (e.g., grid view or list view).
To change the saved video view layout on the GoSafer Security customer portal (powered by Alarm.com):
Log in to the GoSafer Security customer portal (powered by Alarm.com).
Click Video.
Click Saved Video Clips.
Click Grid View for grid view or List for list view.
Saved video (grid view)
Saved video (list view)
While in grid view, click the Clip details toggle switch to show clip descriptions under each clip.
To change the saved video view layout on the Alarm.com app:
Note: Alarm.com app support for grid view requires iOS app version 5.14.1+ and Android app version 5.11.1+. For iPad devices on all iOS app versions, grid view is the only available layout option.
Log in to the Alarm.com app.
Tap Video.
Tap Saved.
Tap Grid View for grid view or List for list view.
Always verify safety, installation, compatibility, and current UI details against the original manufacturer documentation before operational use.
Video
Change the number of days to keep video clips before deletion
GoSafer Security Knowledge Base
This operational reference is organized for GoSafer Security customers and staff. Alarm.com product names are retained where required for technical accuracy.
Overview
Recorded video clips can be deleted after a user customized duration or kept indefinitely.
Platform
Customer Website
Content type
How-to / Configuration
Source last updated
2025-12-08
Procedure
To change how many days a video clip can stay in online storage
This setting applies to individual cameras. Each camera on the account must be configured separately for clips to be deleted and at a specific age.
Note: The maximum available for the Limit the number of days to keep clips setting is determined by your service provider. If you have questions regarding this maximum, please reach out to your service provider for additional details.
Log in to the GoSafer Security customer portal (powered by Alarm.com).
Click Video.
Click Settings.
Select the desired video device.
Click Video.
In Recorded Video Settings, use the Keep Clips for the Selected Duration dropdown menu to select the number of days to keep clips before automatic deletion.
Caution: Changing Limit the number of days to keep clips to anything other than Unlimited will remove protected clips along with unprotected clips. For more information about protecting a video clip, see Protect a video clip.
Click Save.
Video clips do not stay on the account long enough
If your video clips are being overwritten too quickly, your camera may be recording too much or the storage on your account may be too small. Contact your service provider for assistance. For help reaching your service provider, see Contact your service provider.
To learn more about online storage and upload limits, see What happens when an account's video clip online storage limit is reached?.
Always verify safety, installation, compatibility, and current UI details against the original manufacturer documentation before operational use.
Video
Export saved video from Onboard Recording (SD card)
GoSafer Security Knowledge Base
This operational reference is organized for GoSafer Security customers and staff. Alarm.com product names are retained where required for technical accuracy.
Overview
Onboard Recording saved video can be downloaded using the GoSafer Security customer portal.
Platform
App + Web
Content type
Troubleshooting
Source last updated
2026-05-05
Procedure
Step-by-step guide: Screenshots and videos are placed with the instruction they illustrate.
Onboard Recording saved video can be downloaded using the GoSafer Security customer portal (powered by Alarm.com).
To download saved video from Onboard Recording:
Important: The ADC-V730, ADC-VDB770 and ADC-VDB775 support downloads up to and including a 15 minute duration.
Log in to the GoSafer Security customer portal (powered by Alarm.com).
Click Video.
Click Onboard 24/7 Timeline.
Click Downloadto export direct video.
Download
Click Export Video.
Using the camera selection dropdown menu, select the desired device.
In the Download Video pop-up window, choose the day, start time, whether to include audio, and a duration of up to 60 minutes.
clipboard e994c59e83d015e92f08e70b46cfed9c9
Click Export.
Click Ok.
The requested clip will begin downloading to the computer being used.
To download timelapse frames from Onboard Recording:
Log in to the GoSafer Security customer portal (powered by Alarm.com).
Click Video.
Click Onboard 24/7 Timeline.
Click Downloadto export direct video.
Download
Click Timelapse Frames.
Using the camera selection dropdown menu, select the desired device.
In Download Thumbnails, choose the day, start time, and duration of up to 1 day.
clipboard ef0da01f05f3ed5d1b86cd98699d8d33e
Click Download.
Click OK.
The requested timelapse will begin downloading to the device.
Manage exports in the Unified Download Manager
Users can track current export progress and view details for all exports on the customer account over the last 24 hours from the Unified Download Manager page using the GoSafer Security customer portal (powered by Alarm.com). The Download Manager syncs export requests across devices, so it is possible to request a clip export on the GoSafer Security customer portal (powered by Alarm.com) and view the progress of that export using the GoSafer Security customer portal (powered by Alarm.com) on a different device as needed.
Important: While it is possible to view download entries and their corresponding download link on all platforms, the actual video file will only be saved to the specific device where the export process was started.
Track download progress and file download details across devices
Retry downloads that fail, or re-download a file that was successfully downloaded on a different device
Clear completed or failed downloads from the list to keep the page organized and up to date
Bulk actions allow for retrying or clearing multiple or all downloads on the page
Unified Download Manager page
Feature limitations
This feature is for downloading clips to the local disk drive. This feature does not include exporting clips to the Alarm.com cloud from an SVR.
This feature is only available using the GoSafer Security customer portal (powered by Alarm.com). Clip downloads are not supported using the Alarm.com app.
Exports for the ADC-SVR100, ADC-SVR122, and ADC-CSVR126 cannot display thumbnail previews on the Unified Download Manager page.
The download progress bar is not available for SVR clip exports at this time.
To view the Unified Download Manager
Log in to the GoSafer Security customer portal (powered by Alarm.com).
Click Settings.
Click Download Manager.
To retry an export from the Unified Download Manager
Note: If you have already navigated to the Download Manager page, start at Step 4.
Log in to the GoSafer Security customer portal (powered by Alarm.com).
Click Settings.
Click Download Manager.
Click Options.
Click Retry to attempt to export the file to the current device.
Unified Download Manager Retry/Clear
Important: If you are unable to retry the export process and see the error Source Unavailable pop up on the page, the original footage is no longer available for access on the local hardware (e.g., it has been overwritten). In this case, the footage cannot be retrieved.
To clear exports from the Unified Download Manager
Note: If you have already navigated to the Download Manager page, start at Step 4.
Log in to the GoSafer Security customer portal (powered by Alarm.com).
Click Settings.
Click Download Manager.
Click Options.
Click Clear to remove the download card for a completed or failed export.
Unified Download Manager Retry/Clear
Important: The Clear action removes the entry from the Download Manager list, but it does not delete the saved video file from your device's local storage.
Always verify safety, installation, compatibility, and current UI details against the original manufacturer documentation before operational use.
Video
How does video storage work with Alarm.com cameras?
GoSafer Security Knowledge Base
This operational reference is organized for GoSafer Security customers and staff. Alarm.com product names are retained where required for technical accuracy.
Overview
Recorded clips can be uploaded to cloud storage for the customer to access from their account. Stored clips will be removed oldest first when capacity is reached. Upload limits cap the number of new …
Platform
App + Web
Content type
FAQ / Explanation
Source last updated
2025-06-04
Procedure
Step-by-step guide: Screenshots and videos are placed with the instruction they illustrate.
Alarm.com cameras can record video clips, which are then uploaded to the GoSafer Security customer portal (powered by Alarm.com) and Alarm.com app. Each video service package has two major components: monthly clip limit and storage limit. Each clip is treated the same regardless of its length, recording resolution, and quality.
To view video usage:
Log in to the GoSafer Security customer portal (powered by Alarm.com).
Click Video.
Click Saved Video Clips.
Monthly Clip Limit and Oldest Recorded Clip are displayed at the bottom of the page.
Click Help on either for more detailed status information.
Online storage overview
Monthly clip limit
Online storage
Monthly clip limit
This is the number of new clips that users can upload per calendar month.
If a user's account reaches its upload limit, all non-alarm and non-RVM recording rules are paused and cannot be resumed until the first day of the following month.
Online storage
This is the number of uploaded clips the account can store online at any given time. If there is no space left, clips are deleted automatically oldest first as new clips get uploaded.
It is possible for an account to display more monthly clips uploaded than the account limit if the uploaded clips are from alarm events.
Example: An account is configured to have 3000 monthly clips. If that clip limit is reached before the end of the month, and later in the same month an alarm event causes 3 recording rules to trigger, that account will show 3003 monthly clips.
Monthly uploads
Every time a camera recording is triggered, it uploads to Alarm.com. Each clip taken by the camera (i.e., motion detection, alarm recording, manual clip request) counts as a clip upload on the service package. Customers receive a predetermined number of monthly uploads based on the selected service package/add-on, and this limit resets on the first of every month.
Users cannot delete recordings to free up more upload space because the upload has already taken place.
Enhanced monthly clip limit alerts
Enhanced monthly clip-limit alerts are an early warning system that helps customers spot and fix recording rules before limits are reached and rules are paused. Email and push notifications are still sent when key benchmarks are reached, but notifications are also sent depending on how quickly the customer account reaches each benchmark. This ensures customers can address problem rules quickly.
Users can set up notifications to assist in monitoring their monthly upload usage. For more information about setting up video upload limit notifications, see Create a video upload limit notification.
If an account reaches its monthly clip limit
After an account's video clip upload limit is reached, the account recording rules are paused with the exception of Alarm-triggered rules and Remote Video Monitoring (RVM) rules. A pop-up appears on the Recording Rules page of the GoSafer Security customer portal (powered by Alarm.com) and the Alarm.com app warning the customer that their rules are paused.
If the customer has a service package that supports Video Analytics, recording rules will automatically restart capturing clips and uploading them on the first of the following month. They can also be resumed manually after the account's service package is upgraded to include additional video clips.
Note: While recording rules are paused, customers can still edit them to ensure they do not reach their clip limit as quickly upon restart.
Deleting clips after the limit has been reached will not cause clips to restart. Customers must wait for the first of the following month or upgrade their service package.
Online storage details
This is how many total clips Alarm.com stores on the account for all video devices on the customer's account.
If an account reaches its online storage limit
When an account's video clip storage is full, video clips continue to upload unless the recording rule is paused.
If a video clip is uploaded to an account with full online storage, the system overwrites the oldest unprotected video clip to make room for the newest clip. It is not necessary to free up online storage by deleting clips. If the user wishes to delete saved video clips, see Delete saved video clips.
Example: If a user has a service package that allows 1,000 clips to be stored online and they upload 500 clips in January and 500 clips in February, their online storage is full. Each time a new clip is recorded at this point, the oldest clip (in this case, starting from January) is overwritten unless it is protected. For information on how to protect clips, see Can certain clips be protected?.
To find which user deleted a video clip:
Note: Details about deleted clips are only retained on the GoSafer Security customer portal (powered by Alarm.com) for 60 days and cannot be viewed afterwards.
Log in to the GoSafer Security customer portal (powered by Alarm.com).
Click Video.
Click Saved Video Clips.
Click Filter.
In Clip Status, click to select Deleted. Deselect the other options in Clip Status to only show deleted clips.
Click Apply.
Click the Clip Details toggle switch.
The username of the user who deleted the clip appears as (Delete by username). If the username does not appear in gallery view and Clip Details are enabled, the clip was automatically deleted to make room for online storage of new saved clips.
Deleted Clip Example
If the online storage/monthly clip limit is too low
Increase the online storage/monthly clip limit
Extra video storage is available with expansion packs, which allow the customer to have more cameras and provide additional online storage and monthly uploads per video expansion. The account's clip upload limit can also be temporarily increased if a permanent upgrade is not necessary.
Decrease the number of clip uploads
Careful camera placement and recording rule configuration reduces unwanted recordings and optimizes the use of online storage capacity. If Video Analytics is an option, it is recommended because it produces fewer recordings that are not important to the customer.
Alternatively, Stream Video Recorders (SVRs) provide 24/7 recording that can either partially or fully replace the need to upload video clips at all. For more information about SVRs, see:
Yes. Users can protect clips to ensure they are never automatically overwritten due to online storage reaching its limit. Users can also download clips and store them on a hard drive.
Caution: Changing a video device's Limit the number of days to keep clips setting to anything other than Unlimited will remove protected clips along with unprotected clips.
To protect a clip using the GoSafer Security customer portal (powered by Alarm.com):Icn Chevron Up
To protect a clip using the Alarm.com app: Icn Chevron Up
To protect multiple clips using the GoSafer Security customer portal (powered by Alarm.com):
Log in to the GoSafer Security customer portal (powered by Alarm.com).
Click Video.
Click Saved Video Clips.
Click Bulk Actions.
Click each desired clip or click Video Checkbox to select all the videos shown on the page.
Always verify safety, installation, compatibility, and current UI details against the original manufacturer documentation before operational use.
Video
Protect a video clip
GoSafer Security Knowledge Base
This operational reference is organized for GoSafer Security customers and staff. Alarm.com product names are retained where required for technical accuracy.
Overview
Video clips can be protected from automatic, manual, or accidental deletion.
Platform
Mobile App
Content type
Reference
Source last updated
2025-06-04
Procedure
Step-by-step guide: Screenshots and videos are placed with the instruction they illustrate.
Video clips can be protected from automatic, manual, or accidental deletion. When the online storage is full, protected clips will be skipped when making room for new uploads. For more information about online storage, see What happens when an account's video clip online storage limit is reached?.
Caution: If the Limit the number of days to keep clips setting is set to a specific timeframe, protected clips are removed too if they reach the configured number of days. For more information, see Change the number of days to keep video clips before deletion.
To protect a video clip
Using the Alarm.com app:
On Android OS devices:Icn Chevron Up
Log in to the Alarm.com app.
Tap Video.
Tap Saved.
Long press on a clip to select it.
To select multiple clips for bulk actions, tap Grey Circle Checkmark, then tap to select the desired clips.
Tap Options.
Tap Protect.
On iOS devices:Icn Chevron Up
Log in to the Alarm.com app.
Tap Video.
Tap Saved.
Long press on a clip to select it.
To select multiple clips for bulk actions, tap Select, then tap to select the desired clips.
Tap Lock.
Using the GoSafer Security customer portal (powered by Alarm.com):
Log in to the GoSafer Security customer portal (powered by Alarm.com).
Click Video.
Click Saved Video Clips.
Choose whether to protect individual clips or multiple clips.
To protect individual clips:
Mouse over the desired clip, then click Options.
Click Protect clip.
Important: A Protected Clips Reminder may populate after selecting a clip to protect. Downloading the clip is recommended to ensure you retain access to it. Alternatively, you can change the Limited the number of days to keep clips setting to Unlimited. For more information, see Change the number of days to keep video clips before deletion.
Protected Clips Reminder
If you do not see the option to change the number of days to keep video clips before deletion, reach out to your service provider for more information.
To protect multiple video clips at once:
Click Bulk Actions.
Click each desired clip or click to select all the videos shown on the page.
Always verify safety, installation, compatibility, and current UI details against the original manufacturer documentation before operational use.
Video
Rename a video clip
GoSafer Security Knowledge Base
This operational reference is organized for GoSafer Security customers and staff. Alarm.com product names are retained where required for technical accuracy.
Overview
Video clips can be renamed to be more easily found or to describe the contents of the clip.
Platform
App + Web
Content type
How-to / Configuration
Source last updated
2026-06-18
Procedure
To rename a video clip from the Alarm.com app
Log in to the Alarm.com app.
Tap [Video].
Tap Saved.
Tap [Play] on the desired clip.
Tap [Edit].
Enter the new name.
Tap Ok.
To rename a video clip from the GoSafer Security customer portal (powered by Alarm.com)
Log in to the GoSafer Security customer portal (powered by Alarm.com).
Click Video.
Click Saved Video Clips.
Mouse over the desired clip, then click [Options], or click Bulk Actions followed by [Video Checkbox] to select all the videos shown on the page.
Always verify safety, installation, compatibility, and current UI details against the original manufacturer documentation before operational use.
Video
Saved Video
GoSafer Security Knowledge Base
This operational reference is organized for GoSafer Security customers and staff. Alarm.com product names are retained where required for technical accuracy.
Overview
This GoSafer Security section brings together resources for Saved Video, including setup, configuration, everyday use, and troubleshooting. Choose the related page that matches your device, feature, or task, and follow the current manufacturer guidance linked on that page.
Platform
Customer Website
Content type
How-to / Configuration
Source last updated
2022-01-31
Procedure
Browse the related pages in this chapter to open the specific procedure, configuration guide, or troubleshooting article you need.
Always verify safety, installation, compatibility, and current UI details against the original manufacturer documentation before operational use.
Video
View saved video
GoSafer Security Knowledge Base
This operational reference is organized for GoSafer Security customers and staff. Alarm.com product names are retained where required for technical accuracy.
Overview
Saved video from cameras and video devices can be viewed from the app and website.
Platform
App + Web
Content type
How-to / Configuration
Source last updated
2026-06-18
Procedure
To view saved video using the Alarm.com app
Log in to the Alarm.com app.
Tap [Video].
Tap Saved.
Tap [Play] on the desired clip to play it.
To view saved video using the GoSafer Security customer portal (powered by Alarm.com)
Log in to the GoSafer Security customer portal (powered by Alarm.com).
Click Video.
Click Saved Video Clips.
Click [Play] on the desired clip to play it.
To filter clips using the Alarm.com app
Note: The Alarm.com app returns a maximum of 50 clips per search. If you are having trouble finding the clip, use as narrow a date range as possible to ensure it appears.
Log in to the Alarm.com app.
Tap [Video].
Tap Saved.
Tap [Filter].
Choose any desired filters.
Tap Apply to filter the results.
Note: All filter preferences are removed after logging out or closing the Alarm.com app.
To filter clips using the GoSafer Security customer portal (powered by Alarm.com)
Note: The GoSafer Security customer portal (powered by Alarm.com) returns a maximum of 500 clips per search. If you are having trouble finding the clip, use as narrow a date range as possible to ensure it appears.
Log into the GoSafer Security customer portal (powered by Alarm.com).
Click Video.
Click Saved Video Clips.
Click Filter.
Choose any desired filters.
Click Apply to filter the results.
Note: Only the Other filter is saved for future visits to the page. All other filters must be selected again.
Always verify safety, installation, compatibility, and current UI details against the original manufacturer documentation before operational use.
Video
View.var archived SVR footage
GoSafer Security Knowledge Base
This operational reference is organized for GoSafer Security customers and staff. Alarm.com product names are retained where required for technical accuracy.
Overview
Files with a.var extension can only be opened using the Archive Viewer program, which is available for Windows.
Platform
Customer Website
Content type
How-to / Configuration
Source last updated
2026-05-27
Procedure
Files with the.var extension require the Archive Viewer program to view.
To download the Archive Viewer, click Archive Viewer program for Windows. This program enables you to view the.var file exported on your storage device.
Note: The Archive Viewer only works using the Windows operating system. For alterative ways to export and view footage, see Export video using the ADC-CSVR2000P/2008P/2016P local interface and Download saved video from an SVR.
Always verify safety, installation, compatibility, and current UI details against the original manufacturer documentation before operational use.
Video
What is the frame rate for video?
GoSafer Security Knowledge Base
This operational reference is organized for GoSafer Security customers and staff. Alarm.com product names are retained where required for technical accuracy.
Overview
The video frame rate determines how smooth the playback appears. The higher the number, the smoother the video. Live video and saved video frame rates can differ between each other.
Platform
App + Web
Content type
FAQ / Explanation
Source last updated
2025-12-08
Procedure
Step-by-step guide: Screenshots and videos are placed with the instruction they illustrate.
The video frame rate determines how smooth the playback appears. The higher the number, the smoother the video. Live video and saved video frame rates can differ between each other.
Live video frame rate
Alarm.com video devices stream live video with the highest frame rate the network and video device permit.
On a local area network (LAN), the maximum FPS may be achieved but can be lower if the available bandwidth is too low, shared by multiple cameras, or shared by multiple simultaneous viewers. Reducing resolution or image quality may increase the FPS when viewing live video from remote connections.
Adjust live video image quality and resolution
Select whether you are changing a camera's live video image quality using the Alarm.com app or GoSafer Security customer portal (powered by Alarm.com).
Alarm.com app
Log in to the Alarm.com app.
Tap Doorbell Video Call or Video.
Tap Settings.
In Video Devices, tap to select the desired camera.
In Settings, tap Video.
In Live Video Resolution, tap the desired live video image quality.
Note: Only some video devices' settings can be changed using the Alarm.com app. If the resolution options are not available for the camera, use the GoSafer Security customer portal (powered by Alarm.com) to change them.
Tap Save.
GoSafer Security customer portal (powered by Alarm.com)
Log in to the GoSafer Security customer portal (powered by Alarm.com).
Click Video.
Click Settings.
Select the desired video device.
Click Video.
In Live Video Resolution, click to select the desired image quality.
Note: The available options can vary slightly between video devices. Some video devices allow for different quality settings for the GoSafer Security customer portal (powered by Alarm.com) and the Alarm.com app at the same time.
Click Save.
Saved video frame rate
Users can choose the target frame rate for saved video. The available frame rates can range from 1 FPS to 30 FPS depending on the video device. A Stream Video Recorder (SVR) or Onboard Recording rule can match the chosen frame rate of each individual video device. The maximum frame rate an SVR or Onboard Recording rule can match is 30 FPS.
Note: Internet speeds, browser performance, and/or bandwidth can affect the quality of the image when viewing from the Alarm.com app or GoSafer Security customer portal (powered by Alarm.com). For best results or to see true image quality, it is suggested to download the clip.
Adjust saved video settings
Alarm.com app
Log in to the Alarm.com app.
Tap Video.
Tap Settings.
Select the desired video device.
Tap Video.
Adjust the saved video settings as desired.
Using the Clip Resolution dropdown menu, tap to select the desired saved clip resolution.
Tap Clip Quality Settings to adjust the image quality and frame rate of saved clips.
Tap Clip Length Settings to adjust alarm, camera-triggered, and event-triggered clips.
Change clip resolution in app
Tap Save.
GoSafer Security customer portal (powered by Alarm.com)
Log in to the GoSafer Security customer portal (powered by Alarm.com).
Click Video.
Click Settings.
Select the desired video device.
Click Video.
Adjust the saved video settings as desired.
Using the Clip Resolution dropdown menu, select the desired saved clip resolution.
Click Clip Quality Settings to adjust the image quality and frame rate of saved clips.
Click Clip Length Settings to adjust alarm, camera-triggered, and event-triggered clips.
Saved video settings
Note: Some settings cannot be changed on select cameras. If the setting is unavailable, it will be grayed out on the GoSafer Security customer portal (powered by Alarm.com).
Always verify safety, installation, compatibility, and current UI details against the original manufacturer documentation before operational use.
Video
Adjust the field of view and focus of a varifocal video device
GoSafer Security Knowledge Base
This operational reference is organized for GoSafer Security customers and staff. Alarm.com product names are retained where required for technical accuracy.
Overview
A video device with a varifocal lens allows you to zoom in and out using the website. Zooming in focuses on the center of the video device's field of view.
Platform
Customer Website
Content type
How-to / Configuration
Source last updated
2025-12-08
Procedure
To adjust the field of view and focus
Important: The device's Video Analytics rules and calibration need to be updated whenever you update the field of view/focus.
Log in to the GoSafer Security customer portal (powered by Alarm.com).
Click Video.
Click Settings.
Select the desired varifocal video device.
Click Video.
In Video Feature Settings, click Field of View.
Drag the Field of View slider to adjust the camera zoom. The focus automatically adjusts whenever the field of view is changed.
Use the Focus slider to manually adjust the camera focus, or click Auto Focus.
Click Continue to calibrate the video device for Video Analytics. For more information about the calibration procedure, see Calibrate a device for Video Analytics.
Adjust the enabled Video Analytics rules in a way that makes sense for the new view. For more information about Video Analytics, see Configure a Video Analytics rule.
Always verify safety, installation, compatibility, and current UI details against the original manufacturer documentation before operational use.
Video
Adjust the motion detection mode of a Slim Line Doorbell Camera
GoSafer Security Knowledge Base
This operational reference is organized for GoSafer Security customers and staff. Alarm.com product names are retained where required for technical accuracy.
Overview
You can switch between Motion Detection 2.0 and Motion Detection 1.0 using the GoSafer Security customer portal.
Platform
Customer Website
Content type
Reference
Source last updated
2025-06-04
Procedure
To adjust the motion detection mode
Log in to the GoSafer Security customer portal (powered by Alarm.com).
Click Video.
Click Settings.
Using the Video Device dropdown menu, select the desired device.
Click Video Device Info.
Using the Motion Detection dropdown menu, select the desired motion mode.
Always verify safety, installation, compatibility, and current UI details against the original manufacturer documentation before operational use.
Video
Calibrate a device for Video Analytics
GoSafer Security Knowledge Base
This operational reference is organized for GoSafer Security customers and staff. Alarm.com product names are retained where required for technical accuracy.
Overview
You can calibrate certain video devices for Video Analytics using the app or website.
Platform
App + Web
Content type
How-to / Configuration
Source last updated
2025-12-08
Procedure
Step-by-step guide: Screenshots and videos are placed with the instruction they illustrate.
Some video devices require calibration in order to enable Video Analytics. You can calibrate video devices for Video Analytics using the Alarm.com app or GoSafer Security customer portal (powered by Alarm.com). The calibration process involves taking five still images of a person in different locations visible to the camera.
Important: The video device needs to be recalibrated whenever it is moved to another location.
The following video devices require calibration before you can create a Video Analytics recording rule. For more information about creating a Video Analytics rule, see Change a camera's Video Analytics settings.
Video devices that require calibration include:
180° HD Camera (ADC-V622)
1080p Outdoor Wi-Fi Camera (ADC-V723/723X)
1080p Indoor Wi-Fi Camera (ADC-V523/523X)
1080p Outdoor Wi-Fi Camera with Two-Way Audio (ADC-V724/724X)
Pro Series 1080p Dome PoE Camera (ADC-VC827P)
Pro Series 1080p Dome PoE Camera with Varifocal Lens (ADC-VC847PF)
Pro Series 4MP Bullet PoE Camera with Varifocal Lens (ADC-VC728PF)
Pro Series 4MP Varifocal Turret Camera (ADC-VC838PF)
1080p Mini-Bullet Camera (ADC-VC727P)
4MP Outdoor Camera Floodlight (ADC-V729/V729AC/VC729P)
Calibration best practices
Verify that the person's entire body is in the field of view for each photo. Entire body
After taking each photo, take a few steps backward relative to the field of view instead of side to side. Move backwards
Use the Alarm.com app to make it easier to move around and take photos. mobile recommendation
To calibrate a camera during Video Analytics setup
Users can calibrate their cameras using the Alarm.com app or GoSafer Security customer portal (powered by Alarm.com). Using a mobile device to complete the calibration is recommended because you can take the calibration images without needing another person to stand in the camera's view.
Expand all
To calibrate the camera during Video Analytics setup using the Alarm.com app:Icn Chevron Up
Log in to the Alarm.com app.
Tap Video.
Tap Settings.
Tap Recording rules.
Tap Add.
Tap Video Analytics.
Tap to select the video device to be calibrated.
Note: The camera's existing Video Motion Detection (VMD) rules will be removed, but they can be added back later. Tap Ok to delete the VMD rules and continue with calibration.
After the camera completes Video Analytics setup, tap Close.
Tap to select the video device to be calibrated.
Tap Continue.
Verify the person is in the camera's field of view, then tap Take Photo.
Tap Next.
Repeat the previous two steps for each photo having the person move a few steps further from the camera each time.
After five photos are captured, tap Submit.
Once the calibration is complete, tap Done. The camera is now ready for a Video Analytics rule. For more information about how to create a Video Analytics rule, see Configure a Video Analytics rule.
To calibrate a camera during Video Analytics setup using the GoSafer Security customer portal (powered by Alarm.com):Icn Chevron Up
Log in to the GoSafer Security customer portal (powered by Alarm.com).
Click Video.
Click Recording rules.
Click Add New Rule.
Click Video Analytics.
Click to select the video device to be calibrated.
Note: The camera's existing Video Motion Detection (VMD) rules will be removed, but they can be added back later. Click Ok to delete the VMD rules and continue with calibration.
After the camera completes Video Analytics setup, click Close.
Click to select the video device to be calibrated.
Click Continue.
Verify the person is in the camera's field of view, then click Take Photo.
Click Next.
Repeat the previous two steps for each photo having the person move a few steps further from the camera each time.
After five photos are captured, click Submit.
Once the calibration is complete, click Done. The camera is now ready for a Video Analytics rule. For more information about how to create a Video Analytics rule, see Change a camera's Video Analytics settings.
To calibrate a camera
To calibrate a camera using the Alarm.com app:Icn Chevron Up
Log in to the Alarm.com app.
Tap Video.
Tap Settings.
Tap to select the video device to be calibrated.
Tap Video.
Tap Calibrate Video Device.
Tap Continue.
Verify the person is in the camera's field of view, then tap Take Photo.
Tap Next.
Repeat the previous two steps for each photo, having the person move a few steps further from the camera each time.
After five photos are captured, tap Submit.
Once the calibration is complete, tap Done. The camera is now ready for a Video Analytics rule. For more information about how to create a Video Analytics rule, see Change a camera's Video Analytics settings.
To calibrate a camera using the GoSafer Security customer portal (powered by Alarm.com):Icn Chevron Up
Log in to the GoSafer Security customer portal (powered by Alarm.com).
Click Video.
Click Settings.
Select the video device to calibrate.
Click Video.
In Recorded Video Settings, click Calibrate Video Device.
Click Continue.
Verify the person is in the camera's field of view, then click Take Photo.
Click Next.
Repeat the previous two steps for each photo having the person move a few steps further from the camera each time.
After five photos are captured, click Submit.
Once the calibration is complete, click Done. The camera is now ready for a Video Analytics rule. For more information about how to create a Video Analytics rule, see Change a camera's Video Analytics settings.
Always verify safety, installation, compatibility, and current UI details against the original manufacturer documentation before operational use.
Video
Can I restrict a secondary login to see only specific video devices
GoSafer Security Knowledge Base
This operational reference is organized for GoSafer Security customers and staff. Alarm.com product names are retained where required for technical accuracy.
Overview
Yes. You can create secondary logins and choose which video devices the login has access to.
Platform
Customer Website
Content type
How-to / Configuration
Source last updated
2025-06-04
Procedure
Step-by-step guide: Screenshots and videos are placed with the instruction they illustrate.
Yes. You can create secondary logins and choose which video devices the login has access to.
Page access for restricted logins
The secondary login can only access video pages related to the video devices they have access to.
Example: A secondary login can only see the Onboard Recording page if they have access to a video device that uses Onboard Recording.
To restrict video access to specific devices:
Log in to the GoSafer Security customer portal (powered by Alarm.com).
Click Users.
Click Manage Logins.
In Login Name, click the desired login to change permissions for. Otherwise, create a new login. For more information about how to create a new secondary login, see Create a new login.
Note: Login names that are underlined can be edited.
Click to select Limited Device Access.
Click to select Video Cameras.
Using the Video Cameras dropdown menu, select the desired video devices.
Always verify safety, installation, compatibility, and current UI details against the original manufacturer documentation before operational use.
Video
Change a SkyBell Doorbell Camera's motion sensitivity
GoSafer Security Knowledge Base
This operational reference is organized for GoSafer Security customers and staff. Alarm.com product names are retained where required for technical accuracy.
Overview
The motion sensitivity of the Alarm.com Doorbell Cameras can be adjusted to to be more or less sensitive to motion.
Platform
App + Web
Content type
Reference
Source last updated
2025-12-08
Procedure
Step-by-step guide: Screenshots and videos are placed with the instruction they illustrate.
The motion sensitivity for the SkyBell Doorbell Cameras can be adjusted to be more or less sensitive to motion using the Alarm.com app or GoSafer Security customer portal (powered by Alarm.com). The motion sensitivity affects what clips the SkyBell Doorbell Camera records based on motion. For more information about the available recording rules, see Create/edit a Doorbell Motion recording rule and Create/edit a Doorbell Call recording rule.
To adjust the motion sensitivity for SkyBell Doorbell Cameras
Alarm.com app
Log in to the Alarm.com app.
Tap Doorbell Video Call or Video.
Tap Settings.
Tap to select the desired doorbell camera.
Use the Motion Sensitivity slider to adjust to the desired sensitivity.
Tap Done.
GoSafer Security customer portal (powered by Alarm.com)
Log in to the GoSafer Security customer portal (powered by Alarm.com).
Click Video.
Click Settings.
Select the desired SkyBell Doorbell Camera.
Click Video.
Use the Sensitivity to Motion slider to adjust to the desired sensitivity.
SkyBell Sensitivity slider
Click Save.
How air temperature affects motion detection
Due to the nature of infrared motion sensors, it is common to see a change in sensitivity in triggered clips during different parts of the year. This variability is due to the difference in temperature between the person/vehicle being detected and the ambient air.
During warm months, clips tend to trigger less often.
During cold months, clips tend to trigger more often.
To counteract these changes, increase or decrease the doorbell camera's motion sensitivity as needed. Another option for a device that records too many clips is to angle it away from high-traffic areas.
Always verify safety, installation, compatibility, and current UI details against the original manufacturer documentation before operational use.
Video
Change a SkyBell Doorbell Camera's video resolution and quality
GoSafer Security Knowledge Base
This operational reference is organized for GoSafer Security customers and staff. Alarm.com product names are retained where required for technical accuracy.
Overview
Adjusting the video resolution and image quality of Alarm.com Doorbell Cameras can optimize the quality for a variety of conditions.
Platform
App + Web
Content type
Reference
Source last updated
2025-06-04
Procedure
To change a Skybell's video resolution and quality using the Alarm.com app
Log in to the Alarm.com app.
Tap Doorbell Camera.
Tap [Settings].
Using the Resolution and Quality dropdown menu, select the desired option.
Tap [Check].
To change a Skybell's video resolution and quality using the GoSafer Security customer portal (powered by Alarm.com)
Log in to the GoSafer Security customer portal (powered by Alarm.com).
Click Video.
Click Settings.
Using the Video Device dropdown menu, select the desired video device.
Click Video Device Info.
Using the Video Resolution & Quality dropdown, select the desired resolution.
Always verify safety, installation, compatibility, and current UI details against the original manufacturer documentation before operational use.
Video
Change a camera's Video Motion Detection settings
GoSafer Security Knowledge Base
This operational reference is organized for GoSafer Security customers and staff. Alarm.com product names are retained where required for technical accuracy.
Overview
Video Motion Detection (VMD) is the camera’s ability to trigger recordings based on any detected motion.
Platform
Customer Website
Content type
Reference
Source last updated
2025-12-08
Procedure
To change a camera's VMD settings using the GoSafer Security customer portal (powered by Alarm.com)
Log in to GoSafer Security customer portal (powered by Alarm.com).
Click Video.
Click Settings.
Select the desired video device.
Click Video.
Click Video Motion Detection.
For each Video Motion Detection (VMD) window
Drag your cursor on the Live View preview to draw a new VMD window.
Using the Sensitivity dropdown menu, select the motion sensitivity for the VMD window.
High sensitivity allows more motion to be detected by the camera and more clips to be recorded.
Note: For camera models ADC-V521IR, ADC-V522IR, and ADC-V722W, the sensitivity setting affects all Video Motion Detection (VMD) windows for the specific device.
Using the Target Size dropdown menu, select the motion target size for the VMD window.
Target size is the percentage of the VMD window that must detect motion for a clip to be recorded. Smaller target sizes require less motion to trigger a recording, resulting in more recorded clips.
Always verify safety, installation, compatibility, and current UI details against the original manufacturer documentation before operational use.
Video
Change a camera's brightness, contrast, saturation, sharpness, exposure, or night vision sensitivity
GoSafer Security Knowledge Base
This operational reference is organized for GoSafer Security customers and staff. Alarm.com product names are retained where required for technical accuracy.
Overview
Camera settings can be changed to alter or improve image quality.
Platform
App + Web
Content type
How-to / Configuration
Source last updated
2025-12-08
Procedure
Change Video Device Image settings
Alarm.com app
Log in to the Alarm.com app.
Tap [Video].
Tap [Settings].
In Video Devices, tap to select the desired video device.
In Settings, tap Video.
Tap Image Settings.
In Advanced Image Settings
Use the Night Vision Sensitivity dropdown menu to select High, Normal, or Low.
Use the Max Exposure dropdown menu to select Automatic, or choose from a range between 1/5 second and 1/480 second.
Note: When HDR is enabled on compatible cameras, the exposure setting is set to Automatic and cannot be manually changed. The VDB755P and VDB750 will always be Automatic as HDR cannot be turned off for those models.
In Image Quality
Use the Brightness slider to adjust the brightness.
Use the Contrast slider to adjust the contrast.
Use the Saturation slider to adjust the saturation.
Use the Sharpness slider to adjust the sharpness.
Tap Save.
GoSafer Security customer portal (powered by Alarm.com)
Log in to the GoSafer Security customer portal (powered by Alarm.com).
Click Video.
Click Settings.
Select the desired video device.
Click Video.
Click Image Settings.
In Advanced Image Settings
Use the Night Vision Sensitivity dropdown menu to select High, Normal, or Low.
Use the Max Exposure dropdown menu to select Automatic, or choose from a range between 1/5 second and 1/480 second.
Note: When HDR is enabled on compatible cameras, the exposure setting is set to Automatic and cannot be manually changed. The VDB755P and VDB750 will always be Automatic as HDR cannot be turned off for those models.
In Image Quality
Use the Brightness slider to adjust the brightness.
Use the Contrast slider to adjust the contrast.
Use the Saturation slider to adjust the saturation.
Always verify safety, installation, compatibility, and current UI details against the original manufacturer documentation before operational use.
Video
Change a camera's live video image quality
GoSafer Security Knowledge Base
This operational reference is organized for GoSafer Security customers and staff. Alarm.com product names are retained where required for technical accuracy.
Overview
Live video image quality can be optimized for motion and clarity.
Platform
App + Web
Content type
Reference
Source last updated
2025-12-08
Procedure
Change a camera's live video image quality
Select whether you are changing a camera's live video image quality using the Alarm.com app or GoSafer Security customer portal (powered by Alarm.com).
Alarm.com app
Log in to the Alarm.com app.
Tap [Doorbell Video Call] or [Video].
Tap [Settings].
In Video Devices, tap to select the desired camera.
In Settings, tap Video.
In Live Video Resolution, tap the desired live video image quality.
Note: Only some video devices' settings can be changed using the Alarm.com app. If the resolution options are not available for the camera, use the GoSafer Security customer portal (powered by Alarm.com) to change them.
Tap Save.
GoSafer Security customer portal (powered by Alarm.com)
Log in to the GoSafer Security customer portal (powered by Alarm.com).
Click Video.
Click Settings.
Select the desired video device.
Click Video.
In Live Video Resolution, click to select the desired image quality.
Note: The available options can vary slightly between video devices. Some video devices allow for different quality settings for the GoSafer Security customer portal (powered by Alarm.com) and the Alarm.com app at the same time.
Always verify safety, installation, compatibility, and current UI details against the original manufacturer documentation before operational use.
Video
Change a pan/tilt camera's position presets
GoSafer Security Knowledge Base
This operational reference is organized for GoSafer Security customers and staff. Alarm.com product names are retained where required for technical accuracy.
Overview
Pan/Tilt cameras have the ability to save a variety of position presets.
Platform
App + Web
Content type
Reference
Source last updated
2025-06-04
Procedure
To move a pan/tilt camera's view to a preset using the Alarm.com app
Log in to the Alarm.com app.
Tap Video.
Tap to select the pan/tilt camera to change the current position.
Tap [Pan Tilt Video].
Tap the preset you would like the camera to move to.
To move a pan/tilt camera's view to a preset using the GoSafer Security customer portal (powered by Alarm.com)
Log in to the GoSafer Security customer portal (powered by Alarm.com).
Click Video.
Mouse over the desired pan/tilt camera, and then click [Pan Tilt Video].
Click the preset you would like the camera to move to.
Always verify safety, installation, compatibility, and current UI details against the original manufacturer documentation before operational use.
Video
Change a video device name
GoSafer Security Knowledge Base
This operational reference is organized for GoSafer Security customers and staff. Alarm.com product names are retained where required for technical accuracy.
Overview
Video device names can be customized for easier system management.
Platform
App + Web
Content type
How-to / Configuration
Source last updated
2025-12-08
Procedure
Change a video device name
Note: Camera names can have a maximum of 16 characters each.
Alarm.com app
Log in to the Alarm.com app.
Tap [Menu].
Tap Manage Devices.
In Video Devices, tap [More Options].
Tap [Edit].
In the Rename Device field, enter the new name.
Tap Ok.
GoSafer Security customer portal (powered by Alarm.com)
Log in to the GoSafer Security customer portal (powered by Alarm.com).
Always verify safety, installation, compatibility, and current UI details against the original manufacturer documentation before operational use.
Video
Change an access point device name
GoSafer Security Knowledge Base
This operational reference is organized for GoSafer Security customers and staff. Alarm.com product names are retained where required for technical accuracy.
Overview
Access point device names can be changed using the Alarm.com app or GoSafer Security customer portal (powered by Alarm.com).
Platform
App + Web
Content type
Reference
Source last updated
2025-06-10
Procedure
To change an access point device name using the Alarm.com app
Log in to the Alarm.com app.
Tap [More Options].
In Account, tap Manage Devices.
Tap the name of the desired device.
Enter the new name for the device.
Tap OK.
To change an access point device name using the GoSafer Security customer portal (powered by Alarm.com)
Log in to the GoSafer Security customer portal (powered by Alarm.com).
Always verify safety, installation, compatibility, and current UI details against the original manufacturer documentation before operational use.
Video
Change the Wi-Fi network settings of a video device
GoSafer Security Knowledge Base
This operational reference is organized for GoSafer Security customers and staff. Alarm.com product names are retained where required for technical accuracy.
Overview
You can change a video device's network information manually using the GoSafer Security customer portal as long as the device has power and is still connected to an active network.
Platform
Customer Website
Content type
How-to / Configuration
Source last updated
2025-12-08
Procedure
Step-by-step guide: Screenshots and videos are placed with the instruction they illustrate.
You can change a video device's network information manually using the GoSafer Security customer portal (powered by Alarm.com) as long as the device has power and is still connected to an active network.
Using the GoSafer Security customer portal (powered by Alarm.com):
Log in to the GoSafer Security customer portal (powered by Alarm.com).
Click Video.
Click Settings.
Select the desired video device.
Click Network.
Click Change Network.
In My Wi-Fi Networks, you can view a list of networks that you have previously used with your Alarm.com account. To connect to one of those networks, click the name of the network.
My Wi Fi Networks
Note: You do not need the Wi-Fi password to connect to a network listed in My Wi-Fi Networks.
In Other Networks, you can view a list of networks currently detected by your video device that are not associated with your account. To connect to one of those networks, click the name of the network.
Other Networks
Click Manual Setup to manually enter the Network Name (SSID), Password, Security type, and Encryption type of the desired network. Once you have confirmed the information is inputted correctly, click Connect.
To change a Skybell Doorbell Camera's Wi-Fi settings:
Whenever the wireless network information is changed, the SkyBell Doorbell Camera must be re-enrolled. This may involve deleting the SkyBell Doorbell Camera from the account.
Always verify safety, installation, compatibility, and current UI details against the original manufacturer documentation before operational use.
Video
Change the brightness or color of a SkyBell Doorbell Camera's LED
GoSafer Security Knowledge Base
This operational reference is organized for GoSafer Security customers and staff. Alarm.com product names are retained where required for technical accuracy.
Overview
Alarm.com Doorbell Cameras have an LED with variable color and brightness which can be adjusted from the website or app.
Platform
App + Web
Content type
Reference
Source last updated
2025-12-08
Procedure
Step-by-step guide: Screenshots and videos are placed with the instruction they illustrate.
SkyBell Doorbell Cameras have an LED with variable color and brightness that can be adjusted from the Alarm.com app or GoSafer Security customer portal (powered by Alarm.com).
Expand all
To change the brightness/color of a SkyBell's LED using the Alarm.com app:Icn Chevron Up
Log in to the Alarm.com app.
Tap Doorbell Video Call or Video.
Tap Settings.
Tap LED.
Use the Brightness slider to adjust the brightness.
Drag the selector on the color palette to the desired color to change the LED color.
Tap Check to save the changes.
To change the brightness/color of a SkyBell's LED using the GoSafer Security customer portal (powered by Alarm.com):Icn Chevron Up
Log in to the GoSafer Security customer portal (powered by Alarm.com).
Click Video.
Click Settings.
Select the desired SkyBell device.
Click General.
Drag the LED Brightness slider to adjust the brightness.
SkyBell LED settings
Click the Doorbell LED Color swatch and drag the selector to change the LED color.
Always verify safety, installation, compatibility, and current UI details against the original manufacturer documentation before operational use.
Video
Configure Alarm.com video devices with a static IP address
GoSafer Security Knowledge Base
This operational reference is organized for GoSafer Security customers and staff. Alarm.com product names are retained where required for technical accuracy.
Overview
Video devices have the capability to have static IP addresses for advanced networking applications.
Platform
Customer Website
Content type
Troubleshooting
Source last updated
2025-12-08
Procedure
To apply a static IP address to a video device
Once a video device has been added to an account, it is possible to set a static IP address for the device using the GoSafer Security customer portal (powered by Alarm.com).
Important: These settings should only be adjusted by a networking expert who is familiar with the network.
Log in to the GoSafer Security customer portal (powered by Alarm.com).
If the account is part of an Enterprise group, select the desired location.
Use the dropdown menu to select the location. Enterprise groups have [Group Property] next to the Enterprise name, whereas locations will have [Enterprise Open] for commercial accounts or [Single Property] for residential accounts next to the location name.
Click Video.
Click Settings.
Select the desired video device.
Click Network.
Click Advanced Network Setup and Testing.
Click to select Use Fixed IP Address (For networking experts only).
Verify or enter the following information:
IP Address - This information should populate automatically
Subnet Mask - This information should populate automatically
Gateway Router - This information should populate automatically
HTTPS Port - This information should populate automatically
Primary DNS - This information should populate automatically
If it does not populate automatically, use Google's primary DNS, 8.8.8.8
Secondary DNS - This information may have to be manually entered
Either copy and paste the primary DNS information or use Google's secondary DNS, which is 8.8.4.4
Click Save.
Run a connectivity test
After setting up port forwarding for a video device, it is recommended to run a connectivity test to update the public IP and IP works flag immediately.
Log in to the GoSafer Security customer portal (powered by Alarm.com).
Click Video.
Click Settings.
Select the desired video device.
Click Network.
Click Advanced Network Setup and Testing.
Click Test Remote Access.
For further assistance with configuring or troubleshooting a static IP address, contact an IT or networking professional.
Always verify safety, installation, compatibility, and current UI details against the original manufacturer documentation before operational use.
Video
Configure a Video Analytics rule
GoSafer Security Knowledge Base
This operational reference is organized for GoSafer Security customers and staff. Alarm.com product names are retained where required for technical accuracy.
Overview
Video Analytics continuously scans your property and notifies you when a person, vehicle, or animal is detected. Advanced detection rules enhance perimeter security by alerting you when someone's …
Platform
App + Web
Content type
How-to / Configuration
Source last updated
2025-06-04
Procedure
Step-by-step guide: Screenshots and videos are placed with the instruction they illustrate.
Feature Notice: Business Activity Analytics (BAA) uses the monitoring capability of Video Analytics to help business owners understand traffic patterns and improve their business operations. For more information about BAA, see Business Activity Analytics (BAA) Setup.
Overview
Video Analytics continuously scans your property and notifies you when a person, vehicle, or animal is identified. Advanced detection rules enhance perimeter security by alerting you when someone's coming or going, or even loitering on your property.
With Video Analytics, you'll get enhanced notifications with thumbnail images showing people, vehicles, and animals. You can also use advanced detection rules to draw virtual tripwires across your driveway and virtual fenced-in zones on your property. Receive email and text notifications whenever:
A vehicle pulls into the driveway/parking lot or a person walks up to an entrance
Anyone loiters in a specific zone of a property
A person or vehicle is identified outside a business after-hours
A pet jumps up on the sofa or enters an off-limits flowerbed
A child leaves the yard or someone drives off at night
Video Analytics can spot what’s important, even if there’s a lot going on.
Requirements
The following video devices are compatible with Video Analytics:
1080p Indoor Wi-Fi Camera (ADC-V515)
1080p Indoor Wi-Fi Camera (ADC-V523/523X)
Indoor Fixed w/IR (ADC-V522IR)
Outdoor Wireless (ADC-V722W)
1080p Outdoor Wi-Fi Camera (ADC-V723/723X)
1080p Outdoor Wi-Fi Camera with Two-Way Audio (ADC-V724/724X)
180° HD Camera (ADC-V622)
Indoor/Outdoor Mini Bullet (ADC-VC726)
Indoor/Outdoor Dome (ADC-VC826)
Indoor/Outdoor Bullet Camera (ADC-VC736)
Indoor/Outdoor Turret Camera (ADC-VC836)
Pro Series 1080p Dome PoE Camera (ADC-VC827P)
Pro Series 1080p Dome PoE Camera with Varifocal Lens (ADC-VC847PF)
Pro Series 4MP Bullet PoE Camera with Varifocal Lens (ADC-VC728PF)
Pro Series 4MP Varifocal Turret Camera (ADC-VC838PF)
4MP Outdoor Floodlight Camera (ADC-V729/V729AC/VC729P)
For information about these cameras and the requirements to use Video Analytics, contact your service provider.
Video tutorials for creating a Video Analytics rule
Use a Tripwire rule to capture movement through a specified area. Use a Ground Zone rule to capture an object lingering in a specified area.
Expand all
To create a Tripwire rule using the GoSafer Security customer portal (powered by Alarm.com):Icn Chevron Down
To create a Ground Zone rule using the GoSafer Security customer portal (powered by Alarm.com):Icn Chevron Down
To use Video Analytics to control lights using the GoSafer Security customer portal (powered by Alarm.com):Icn Chevron Down
Camera setup
Camera placement
Position the camera so that targets can be fully seen inside the camera’s field of view and not farther than 25 feet away (15 feet at night).
The camera should be positioned 8-16 feet above the ground, angled downward between 30°-60° with a level horizon line.
Note: This recommended angle should provide for an ideal field of view while avoiding clouds and trees. Video Analytics is designed to work with an angled-down perspective; not horizontal, and not top-down.
Important: The camera should be mounted in such a way that a vehicle’s headlights do not shine directly into the camera, affecting exposure and IR settings.
Verify that the camera is clearly facing the ground or floor of the area being monitored.
Note: Video Analytics operates by tracking a target’s feet or a vehicle’s wheels.
Be aware of any bright lights (i.e., motion-triggered flood lights) near the camera that may attract insects or affect exposure and IR settings.
If the camera is repositioned, recreate all of the rules.
Camera location
Video Analytics detects objects and classifies them as people, animals, and vehicles. Position the camera with a clear view over an area of interest.
Successful camera positions include:
Overlooking a driveway
Overlooking a front porch monitoring or wherever packages are dropped off
An area of interest around a yard, where kids or animals are sometimes seen
Indoor entryways, exit ways, or hallways of interest
Avoid:
Areas with constant or uninteresting motion (e.g., roads with regular vehicle movement, trees constantly swaying in the wind, etc.)
Pointing cameras out a window, as screen interference and reflections cause Video Analytics performance issues
Create a rule with Video Analytics
Up to three Video Analytics rules per camera can be configured using the GoSafer Security customer portal (powered by Alarm.com) or Alarm.com app. Each rule includes either one Ground Zone or one Trip Wire.
Note: If you are planning to create Privacy Zones on your camera, it is recommended to configure the Privacy Zones before creating a Video Analytics rule. For more information, see Configure Privacy Zones.
Add the Video Analytics rule
A Video Analytics rule can be created using the Alarm.com app and GoSafer Security customer portal (powered by Alarm.com).
To create a rule using the Alarm.com app:Icn Chevron Up
Log in to the Alarm.com app.
Tap Video.
Tap Settings.
Tap Recording Rules.
TapAdd.
Tap Video Analytics.
To create a rule using the GoSafer Security customer portal (powered by Alarm.com):Icn Chevron Up
Log in to the GoSafer Security customer portal (powered by Alarm.com).
Click Video.
Click Recording Rules.
Click Add New Rule.
Click to select Video Analytics.
Rule selection
Click to select the desired camera. If the camera needs to be calibrated, you are directed to the Calibrate page. For more information about camera calibration, see Calibrate a device for Video Analytics.
select video device
Click to select the rule type.
Use a Tripwire rule when you expect a target to cross through the camera’s field of view or when objects enter or exit an area (e.g., a car pulling into or backing out of a driveway).
Tripwire select
Use a Ground Zone rule when you expect a target to loiter in the camera’s field of view (e.g., a person delivering a package on your front porch).
Ground Zone select
All Video Motion Detection (VMD) schedules associated with a camera must be deleted before setting up a Video Analytics rule. When prompted with this warning, click OK to continue.
Delete VMD schedules
Click Next.
Select the camera scene
In Scenery, click to select Indoors or Outdoors based on where the camera is installed. The camera should be marked outdoors if it will be exposed to rain, snow, spider webs, or moving trees and set to indoors if in a controlled outdoor environment (e.g., a screened-in porch).
Note: This selection must be the same across all recording rules associated with a specific camera.
Indoors vs outdoors
Use the Minimum Object Detection Size slider to adjust how small an object can be and still trigger a recording. It is recommended to keep this at its suggested value upon initial rule creation. Very Large captures the fewest recordings only of the largest objects, and Very Small captures the most recordings including large and small objects.
Minimum object detection selection
Note: The Minimum Object Detection Size does not appear for cameras that are calibrated. For more information about the calibration process, see Calibrate a device for Video Analytics.
Configure the Video Analytics rule
Once the rule type and scene are selected, you can configure the rule settings.
To configure a Ground Zone rule:Icn Chevron Up
In the Rule Name field, enter a name for the recording rule.
Click and drag the corners of the shape to cover only the ground where the target’s feet will be. To clear the current area of interest and restart, click Clear ground zone to create a new area of interest with up to 28 points.
Click and hold inside the shape to move the shape itself.
Configure rule Ground Zone 2
Using the Duration Inside Area of Interest dropdown menu, select the desired time an object needs to stay inside the Ground Zone to trigger a recording.
Duration Inside Area of Interest
To configure a Tripwire rule:Icn Chevron Up
In the Rule Name field, enter a name for the recording rule.
Click and drag the Tripwire to cover only the ground where the target's feet cross. The arrow determines which direction the object must be moving to trigger a recording. To clear the current Tripwire and restart, click Clear Tripwire.
Configure rule Trip wire 2
Customize the direction of movement to be recorded:
Direction switch or both
In Direction, click Switch directions to switch the direction of the movement to capture.
Click to select Both Directions to record when an object crosses the Tripwire regardless of which direction it is moving.
To ensure rule accuracy
Avoid drawing Tripwires or Ground Zones over objects that might move by themselves (e.g., trees, bushes, or other objects that move in the wind).
Only draw the rule where the feet or wheels of an object should cross.
Do not increase the size of the loiter zone or tripwire to cover the whole of the target.
Do not include furniture, walls, trees, or other structures in the rule/selection.
Bad ground zone example
Good ground zone example
Ground Zone Example Bad
Including the bush and garage door in the ground zone can make it difficult for the Video Analytics to positively classify subjects. In this case, reduce the size of the ground zone to only cover the driveway.
Ground Zone Example Good
This is a properly drawn ground zone that only covers the driveway, and excludes the bush and garage door.
Create up to three Video Analytics rules to capture separate areas of interest (e.g., a camera that monitors two entrances might need two tripwire rules, each one covering one of the entrances).
After observing what the rule detects over a few days, consider adjusting either the Minimum Object Detection Size slider or recalibrating the camera.
Note: Certain video devices have a calibration process that replaces the Minimum Object Detection Size setting. Minimum Object Detection Size will not appear on this page for those cameras. For more information about the calibration process, see Calibrate a device for Video Analytics.
When adjusting the Minimum Object Detection Size slider:
Increasing the minimum object size can reduce false detection.
Decreasing the minimum object size can detect smaller targets.
Rule scheduling and notifications
Using the Set Minimum Delay Between Clips dropdown menu, select the desired timeframe. This setting determines how long the camera must wait after beginning a clip to trigger another recording.
Minimum delay
In The Rule will run..., click to select At all times or Only during the following times.
If Only during the following times is selected:
Click to select the days of the week to record on.
Using the Begin dropdown menu, select the time for the recording rule to start.
Using the End dropdown menu, select the time for the recording rule to stop.
Rule scheduling
In Except when..., click to select any available exceptions that turn the rule off regardless of the schedule. Options depending on the equipment include: the panel is armed away, the panel is armed stay, and Geo-Device is inside a specified Geo-Fence.
Rule scheduling exceptions
Important: If the location has a security system with multiple partitions, Video Analytics rules will follow the arming settings of the first partition only.
In Send notification for clips containing..., click to select the types of clips that the user wants to be notified about. The camera records and uploads all motion it detects but only sends a notification to the user based on the selected notification options.
Uploaded clips to be notified about
Note: Clips included in the Other category are when the camera detects an object but is unable to determine which type of object it is. For more information about how a clip is classified as Other, see How does a Video Analytics clip get classified as Other?.
Click to select the desired notification recipients. It is recommended to use push notifications to a phone using the dropdown option to attach a thumbnail. The timing of the notification is based on the notification type. For more information, see How do Video Analytics notifications work?.
Notification types
Create a light automation rule
Camera-driven light automation rules require at least one light device enrolled on the account.
Note: Lights cannot be enabled during a time when the Video Analytics rule is not set to record (e.g., if a tripwire rule is drawn on a driveway and set to record only at night, lights cannot be set to turn on during the daytime because no clip would have been recorded).
Using the Turn on selected lights for dropdown menu, select how long the lights should turn on for.
Select which lights to be automated by the rule.
Select which events should turn on the lights when triggered.
Select a time frame for the rule to occur.
Light automation (VA)
Perimeter Guard™
Perimeter Guard™ sounds an alert and flashes the camera's status LED when unwanted visitors are detected.
In Perimeter Guard™ - Light & Sound, click the Camera Status LED toggle to enable the LED response.
Using the Duration dropdown menu, select how long the LED response lasts.
Using the Set Minimum Delay Between Alerts dropdown menu, select the desired amount of time the camera should not start a new alert after a previous alert has completed.
To enable the Camera Audio Alert (only available on cameras using the Two-Way Audio feature):
In Perimeter Guard™ - Light & Sound, click the Camera Audio Alert toggle to enable the Audio Alert.
Using the Audio Sound dropdown menu, select the type of sound the camera makes.
Adjust the volume using the Volume slider.
Set the alert delay
Using the Set Minimum Delay Between Alerts dropdown menu, select the desired amount of time the camera should not start a new alert after a previous alert has completed.
Package Alerts for the ADC-VDB770
You can be the first to know when a package is delivered to your home or business with Package Alerts for the Alarm.com Video Doorbell (ADC-VDB770). Using Video Analytics, the ADC-VDB770 can identify when a visitor leaves a parcel on your doorstep—notifying you immediately.
Package Alerts can be configured to notify you right when a delivery is made, remind you if the box is not picked up, or alert you if it goes missing.
Always verify safety, installation, compatibility, and current UI details against the original manufacturer documentation before operational use.
Video
Configure the chime settings for an Alarm.com Video Doorbell and Alarm.com Chime
GoSafer Security Knowledge Base
This operational reference is organized for GoSafer Security customers and staff. Alarm.com product names are retained where required for technical accuracy.
Overview
The chime settings for Alarm.com Video Doorbells and Chimes can be configured using the Alarm.com app and GoSafer Security customer portal (powered by Alarm.com).
Platform
App + Web
Content type
How-to / Configuration
Source last updated
2025-12-08
Procedure
Step-by-step guide: Screenshots and videos are placed with the instruction they illustrate.
The chime settings for Alarm.com Video Doorbells and Chimes can be configured using the Alarm.com app and GoSafer Security customer portal (powered by Alarm.com).
Adjust the chime sound and volume
The chime sound and volume can be changed to different tones using the Alarm.com app and GoSafer Security customer portal (powered by Alarm.com).
Expand all
To adjust the chime sound and volume using the Alarm.com app:Icn Chevron Up
Log in to the Alarm.com app.
Tap Manage Devices.
Tap More options.
Tap Device Settings.
In the Chime Sound dropdown menu, select a chime sound.
To adjust the chime volume, drag the Chime Volume slider to the desired volume.
chime sound and volume W115C app
Tap Test Chime Tone to test the selected chime sound.
Tap Save.
To adjust the chime sound and volume using the GoSafer Security customer portal (powered by Alarm.com):Icn Chevron Up
Log in to the GoSafer Security customer portal (powered by Alarm.com).
Click Settings.
Click Manage Devices.
Click More options.
Click Device Settings.
In the Chime Sound dropdown menu, select a chime sound.
To adjust the chime volume, drag the Chime Volume slider to the desired volume.
chime sound and volume W115C
Click Test Chime Tone to test the selected chime sound.
Click Save.
Enable or disable the chime LED
The chime LED is enabled by default, but can be disabled using the Alarm.com app and GoSafer Security customer portal (powered by Alarm.com).
To enable or disable the chime LED using the Alarm.com app:Icn Chevron Up
Log in to the Alarm.com app.
Tap Manage Devices.
Tap More options.
Tap Device Settings.
In Light, tap the Chime LED toggle switch to disable or enable the chime LED.
Chime LED button app
Tap Save.
To enable or disable the chime LED using the GoSafer Security customer portal (powered by Alarm.com):Icn Chevron Up
Log in to the GoSafer Security customer portal (powered by Alarm.com).
Click Settings.
Click Manage Devices.
Click More options.
Click Device Settings.
In Light, click the Chime LED toggle switch to disable or enable the chime LED.
Chime LED button website
Click Save.
Adjust the chime type
Configure an Alarm.com Video Doorbell's chime type so it matches the chime it is connected to. This setting can be adjusted using the Alarm.com app or GoSafer Security customer portal (powered by Alarm.com). Additionally, the ADC-VDB755P on firmware version 03008+ and ADC-VDB775 on firmware version 04023+ can adjust their chime type using the doorbell button.
To adjust the chime type using the Alarm.com app:Icn Chevron Up
Log in to the Alarm.com app.
Tap Video or Doorbell Video Call.
Tap Settings.
Tap to select the desired video doorbell.
Tap Audio.
Using the Chime Type dropdown menu, select the appropriate chime type.
If using both a wired chime and an Alarm.com Chime, select the chime type of the wired chime.
If using only an Alarm.com Chime, select None (or only using wireless chime).
Tap Save.
To adjust the chime type using the GoSafer Security customer portal (powered by Alarm.com):Icn Chevron Up
Log in to the GoSafer Security customer portal (powered by Alarm.com).
Click Video.
Click Settings.
Select the desired video device.
Click Audio.
Using the Chime Type dropdown menu, select the appropriate chime type.
If using both a wired chime and an Alarm.com Chime, select the chime type of the wired chime.
If using only an Alarm.com Chime, select None (or only using wireless chime).
Click Save.
To adjust the chime type for the ADC-VDB755P using the doorbell button:Icn Chevron Up
Press and hold the doorbell button for about 60-65 seconds.
The device LED will alternate yellow and white if the initial chime type is digital or none. Let go of the doorbell button during this period to set the chime type to mechanical.
The device LED will alternate blinking blue and white if the initial chime type is set to mechanical. Let go of the doorbell button during this period to set the chime type to digital.
To adjust the chime type for the ADC-VDB775 using the doorbell button:Icn Chevron Up
To set the chime type to mechanical:
Press and hold the doorbell button for about 60-65 seconds, until the LED is alternating yellow and white.
Let go of the doorbell button during this period to set the chime type to mechanical.
To set the chime type to digital:
Press and hold the doorbell button for about 65-70 seconds, until the LED is alternating blue and whilte.
Let go of the doorbell button during this period to set the chime type to digital.
Configure the Indoor Chime setting for a wired chime
Users can configure a wired mechanical or digital chime to ring or not ring when the doorbell button is pressed using the Alarm.com app or GoSafer Security customer portal (powered by Alarm.com).
To configure the Indoor Chime using the Alarm.com app:Icn Chevron Up
Log in to the Alarm.com app.
Tap Doorbell Video Call or Video.
Tap Settings.
If there are multiple video doorbells on the account, tap to select the desired device.
Tap Audio.
Tap the Indoor Chime toggle switch to enable the indoor chime to ring.
Note: If the Chime Type is set to None (or only using wireless chime), this option will not be available.
Tap Save.
Wait 2 minutes, and then test the video doorbell.
To configure the Indoor Chime using the GoSafer Security customer portal (powered by Alarm.com):Icn Chevron Up
Log in to the GoSafer Security customer portal (powered by Alarm.com).
Click Video.
Click Settings.
Select the desired device.
Click Audio.
Click the Indoor Chime toggle switch to enable the indoor chime to ring.
Note: If the Chime Type is set to None (or only using wireless chime), this option will not be available.
Click Save.
Wait 2 minutes, and then test the video doorbell.
Configure the Outdoor Tone for the Video Doorbell
The Outdoor Tone setting determines whether or not a Video Doorbell will chime at the device itself when the doorbell button is pressed. Additionally, SkyBell Doorbell Cameras can adjust the Outdoor Tone volume. The Outdoor Tone can be configured using the Alarm.com app or GoSafer Security customer portal (powered by Alarm.com).
To configure the Outdoor Tone using the Alarm.com app:Icn Chevron Up
Log in to the Alarm.com app.
Tap Doorbell Video Call or Video.
Tap Settings.
Select the desired video doorbell.
Tap Audio.
In Audio Settings:
Tap the Outdoor Tone toggle switch to enable the video doorbell to chime on a button press.
Use the Outdoor Tone Volume slider to select the volume of the video doorbell outside chime.
Note: The Outdoor Tone Volume slider is only available for SkyBell Doorbell Cameras.
Tap Save.
Wait 2 minutes, and then test the video doorbell.
To configure the Outdoor Tone using the GoSafer Security customer portal (powered by Alarm.com):Icn Chevron Up
Log in to the GoSafer Security customer portal (powered by Alarm.com).
Click Video
Click Settings
Select the desired video doorbell.
Click Audio.
In Audio Settings:
Click the Outdoor Tone toggle switch to enable the video doorbell to chime on a button press.
Use the Outdoor Tone Volume slider to select the volume of the video doorbell outside chime.
Note: The Outdoor Tone Volume slider is only available for SkyBell Doorbell Cameras.
Click Save.
Wait 2 minutes, and then test the video doorbell.
Enable video doorbell notifications to an Alarm.com Chime
Alarm.com Chimes use the local network to ring when a video doorbell button is pressed. If there are multiple Alarm.com Chimes on the account, by default, they all ring when the video doorbell button is pressed.
A video doorbell can be configured to ring an Alarm.com Chime using the Alarm.com app or GoSafer Security customer portal (powered by Alarm.com).
To enable video doorbell notifications to an Alarm.com Chime using the Alarm.com app: Icn Chevron Up
Log in to the Alarm.com app.
Tap Doorbell Video Call or Video.
Tap Settings.
Select the desired video doorbell.
In Settings, tap General.
Tap the Alarm.com Chime Notifications toggle switch to enable.
To enable video doorbell notifications to an Alarm.com Chime using the GoSafer Security customer portal (powered by Alarm.com): Icn Chevron Up
Log in to the GoSafer Security customer portal (powered by Alarm.com).
Click Video.
Click Settings.
Select the desired video doorbell.
Click General.
Click the Alarm.com Smart Notifications toggle switch to enable.
Click Save.
Configure automation rules for Alarm.com Chimes
Utilize the New Rules Builder for greater customization and awareness. Accounts with multiple video doorbells can create rules for each device to play unique chime tones. Additionally, users can create time-bound chime rules, like silencing their Smart Chime every day during their child's nap time. Sensor Triggered Alerts allow you to create automation rules for certain security sensor events that will trigger your Alarm.com Chime's tone.
Compatibility requirements
A service package that includes Video monitoring
One of the following compatible Alarm.com Chimes:
ADC-W114C on firmware version 2018+
ADC-W115C on firmware version 2.0.7+
For doorbell Button Pressed automation rules:
One of the following compatible doorbell cameras:
SkyBell Doorbell Camera (ADC-VDB101/102/105/106/105x/106x)
ADC-VDB750
ADC-VDB755P
ADC-VDB770
ADC-VDB780B
ADC-VDB775
The Audio for non-Doorbell Cameras Video monitoring add-on
An IQ Panel 4, IQP4 Hub, or IQP4 NS on software version 4.6.2+
One of the following compatible security sensors programmed to the security panel:
Sensor type
Event type
Contact sensor
Sensor Opened
Sensor Closed
Motion sensor
Motion Detected
Motion Inactive (Idle)
Garage Door sensor
Sensor Opened
Sensor Closed
Gate sensor
Sensor Opened
Sensor Closed
To configure an automation rule for an Alarm.com Chime
Button Pressed and Sensor Triggered Alert automation rules for Alarm.com Chimes can be configured using the GoSafer Security customer portal (powered by Alarm.com) and Alarm.com app.
Important: For Sensor Triggered Alerts, verify the security panel and chime are both online before saving the rule. If either device is offline when the rule is saved, the rule will appear to be functional but may not work as expected.
Using the Alarm.com app:
Log in to the Alarm.com app.
Tap Icn Menu.
Tap Automation.
Tap Icn Add.
Tap New Rule.
Tap When to select devices to trigger the rule.
For Doorbell Button Pressed automation rules:
Tap Doorbell.
In Select Device(s), select the desired doorbell(s). Button Pressed will automatically be selected for the Status.
Tap Done.
For Sensor Triggered Alert automation rules:
Tap Contact Sensor.
In Select Device(s), select the desired contact sensor(s).
In Select Status, select the sensor status(es) that will trigger the automation rule.
Important: While it is possible to select the Sensor Left Open status as the trigger for a Sensor Triggered Alert and save the rule, this trigger type is not supported. Sensor Triggered Alerts for contact sensors are only compatible with Sensor Opened and Sensor Closed events.
Tap Done.
Tap Then to select devices to be triggered.
Tap to select Smart Chime.
In Select Chime(s), tap to select the desired chime(s).
In Action, tap the Adjust Volume toggle switch to allow the automation rule to utilize a different volume level than the chime's programmed state if desired.
Drag the Chime Volume slider to the desired volume for the automation rule.
Using the Ringtone dropdown menu, select the desired sound for the automation rule.
Tap Done.
In Type Rule Name Here, enter a name for the rule.
If desired, configure when the rule will run:
Tap Run at All Times to edit when the rule will run.
Select one of the following options:
At All Times for the rule will be carried out any time of day.
Only during the following times to determine the specific days and times the rule will be carried out.
Tap to select the days of the week the rule will be active.
Using the Starting at dropdown menu, select the start time for this rule.
Using the Ending at dropdown menu, select the end time for this rule.
Tap Done.
Verify the rule is configured with the desired settings.
Tap Save.
Using the GoSafer Security customer portal (powered by Alarm.com):
Log in to the GoSafer Security customer portal (powered by Alarm.com).
Click Automation.
Click Add New Rule.
Click New Rules Builder.
Click When to select devices to trigger the rule.
For Doorbell Button Pressed automation rules:
Click Doorbell.
In Select Device(s), select the desired doorbell(s). Button Pressed will automatically be selected for the Status.
Click Done.
For Sensor Triggered Alerts:
Click Contact Sensor.
In Select Device(s), select the desired contact sensor(s).
In Select Status, select the sensor status(es) that will trigger the automation rule.
Important: While it is possible to select the Sensor Left Open status as the trigger for a Sensor Triggered Alert and save the rule, this trigger type is not supported. Sensor Triggered Alerts for contact sensors are only compatible with Sensor Opened and Sensor Closed events.
Click Done.
Click Then to select devices to be triggered.
Click to select Smart Chime.
In Select Chime(s), click to select the desired chime(s).
In Action, click the Adjust Volume toggle switch to allow the automation rule to utilize a different volume level than the chime's programmed state if desired.
Drag the Chime Volume slider to the desired volume for the automation rule.
Using the Ringtone dropdown menu, select the desired sound for the automation rule.
Click Done.
In Type Rule Name Here, enter a name for the rule.
If desired, configure when the rule will run:
Click Run at All Times to edit when the rule will run.
Select one of the following options:
At All Times for the rule will be carried out any time of day.
Only during the following times to determine the specific days and times the rule will be carried out.
Click to select the days of the week the rule will be active.
Using the Starting at dropdown menu, select the start time for this rule.
Using the Ending at dropdown menu, select the end time for this rule.
Click Done.
Verify the rule is configured with the desired settings.
Click Save.
Note: When saving a rule for an Alarm.com Chime, allow a few minutes for the chime tune to change. A pop-up appears: [Rule name] is saved. It may take a few minutes to update the configuration of the Alarm.com Chime.
Configure an Alarm.com Chime to work with multiple doorbells or Chimes
For systems with multiple doorbells:
If the user wants a unique Chime sound for each doorbell, each doorbell should have its own Chime automation rule created for the Chime with different tones.
For systems with multiple chimes:
If the user wants Chimes to be triggered by only one doorbell each, lower the default tone volume to 0% and only making one automation rule for that doorbell is the preferred way to configure this setup.
Default tone
The default tone setting for an Alarm.com Chime is configured during installation of the Chime. By default, any doorbell already on the account (or added at a later date) will play the default tone for the Chime upon a doorbell button-press, unless the default tone volume is lowered to 0%. It is possible to configure the default tone and volume for each Chime as desired. For the steps to configure the default tone, see Adjust the chime sound and volume.
If a Chime automation rule is configured for a doorbell, that rule will control the tone for button-press events from that doorbell instead of using the default tone.
Troubleshooting
If an Alarm.com Video Doorbell, wired chime, or Alarm.com Chime are not ringing correctly, verify the following information.
If the indoor chime is not ringing correctly:Icn Chevron Up
Verify the type of chime you have installed (e.g., mechanical chime, digital chime, tube chime, no chime, etc.).
If you have a mechanical door chime, verify the mechanical plungers in the chime hit their plates normally to ring the chime.
Verify the video doorbell's chime type is configured correctly on Alarm.com. For the steps to complete this process, proceed to Adjust the chime type.
Verify the doorbell has video doorbell notifications enabled to send to the chime. If they were already enabled, disable and re-enable them. For the steps to complete this process, proceed to Enable video doorbell notifications to an Alarm.com Chime.
Verify the firmware for the Alarm.com Video Doorbell and Chime are up to date. For assistance with verifying and updating the firmware for an Alarm.com Video Doorbell or Chime, contact your service provider.
Power cycle the Alarm.com Chime and your network router (if possible).
Verify your network's router settings. If the setup includes multiple Alarm.com Chimes, or the video doorbell is being connected to your home network instead of the Alarm.com Chime, additional router settings, such as Multicast Packet Forwarding/Filtering or Wi-Fi Client Isolation, may need to be adjusted.
For more information about and help with changing router settings, refer to the router manual, router manufacturer, or your Internet Service Provider.
Verify the original doorbell button works. If the chime is still not ringing after verifying the preceding settings, connect the original doorbell button back to the chime and verify that it still operates properly.
If the Alarm.com Video Doorbell itself is not ringing correctly: Icn Chevron Up
Verify the video doorbell is receiving enough power.
Frequently asked questions
How do I silence the chime outside of my recording rules? Icn Chevron Up
You can silence the chime by setting the default tone volume to zero. For the steps to set a chime's default tone volume to zero, see Adjust the chime sound and volume.
Can a doorbell have multiple rules? Icn Chevron Up
Yes. A single doorbell can have multiple rules at a time.
Can a single rule apply to multiple doorbells? Icn Chevron Up
Yes. You can apply a rule to multiple doorbells at a time.
Can I create rules on multiple chimes? Icn Chevron Up
Yes, you can select multiple chimes of the same model to ring for a single doorbell button press rule.
Example: Multiple W115Cs can be selected to ring for a single rule, but it is not possible to have a W115C and a different type of chime on the same rule.
When creating a new rule using the New Rules Builder, users can select multiple chimes. However, after saving and completing the unified flow, the devices will be separated, and a unique rule will be generated for each chime model selected. To view the rules saved for each chime device, visit the Device Settings.
Always verify safety, installation, compatibility, and current UI details against the original manufacturer documentation before operational use.
Video
Configure the local display password for an Alarm.com Stream Video Recorder
GoSafer Security Knowledge Base
This operational reference is organized for GoSafer Security customers and staff. Alarm.com product names are retained where required for technical accuracy.
Overview
Set the local display password for an Alarm.com Stream Video Recorder (SVR) using the GoSafer Security customer portal (powered by Alarm.com).
Platform
Customer Website
Content type
How-to / Configuration
Source last updated
2025-12-08
Procedure
To configure the local display password
Log in to the GoSafer Security customer portal (powered by Alarm.com).
Click Video.
Click Settings.
Select the desired SVR.
In Device Management, click Local Display.
In Local Device Password, enter the updated password.
Always verify safety, installation, compatibility, and current UI details against the original manufacturer documentation before operational use.
Video
Create temperature notifications for video devices
GoSafer Security Knowledge Base
This operational reference is organized for GoSafer Security customers and staff. Alarm.com product names are retained where required for technical accuracy.
Overview
You can receive notifications when an Alarm.com Wireless Video Doorbell's internal temperature nears the bounds of the operational temperature range.
Platform
App + Web
Content type
How-to / Configuration
Source last updated
2026-01-12
Procedure
Step-by-step guide: Screenshots and videos are placed with the instruction they illustrate.
You can receive notifications when a compatible video device's internal temperature nears the bounds of its operational temperature range.
Compatible video devices
Video Device
Operational temperature range
ADC-VDB780B
3°F to 131°F (-16°C to 55°C)
ADC-V731B
-4°F to 113°F (-20°C to 45°C)
Temperature notifications
Users will receive a low-temperature notification when the internal temperature of the device drops below its minimum threshold, and a high-temperature notification when the temperature exceeds the maximum threshold.
If the video device's internal temperature exceeds the minimum or maximum temperature, it will automatically turn off to prevent damage to the device. The device will automatically turn back on after its internal temperature is within the operational temperature range.
Note: This notification is enabled by default.
Cold weather performance
Low temperatures are known to reduce the capacity of lithium-ion batteries, so users in colder climates may experience shorter battery cycles. If there is a quick drop in ambient temperature the battery will deplete faster, and the device may not accurately reflect the remaining capacity. In sustained colder climates it is recommended to recharge the device more frequently.
Note: In the case of a low-temperature cutoff, it will take time for the video device's internal temperature to reach the functioning supported temperature.
For information about LED behavior during high and low temperatures, see:
Always verify safety, installation, compatibility, and current UI details against the original manufacturer documentation before operational use.
Video
Enable doorbell camera notifications to Alarm.com Chimes
GoSafer Security Knowledge Base
This operational reference is organized for GoSafer Security customers and staff. Alarm.com product names are retained where required for technical accuracy.
Overview
Alarm.com Chimes use the local network to ring when a doorbell camera button is pressed. If there are multiple Chimes on the account, by default, they all ring when the doorbell camera button is pressed. Alarm.com Chimes do not affect any wired chimes also in the setup (compatible mechanical or digital chime).
It is possible to set up more customizations with Alarm.com Chime automation rules. For more information about setting up automation rules, see Create automation rules for Alarm.com Chimes.
Platform
App + Web
Content type
Troubleshooting
Source last updated
2025-12-08
Procedure
Compatibility requirements
A service package that supports at least one doorbell camera
A compatible doorbell camera on its latest firmware
SkyBell Doorbell Camera (ADC-VDB101/102/105/106/105x/106x)
ADC-VDB770
ADC-VDB780B
ADC-VDB750
ADC-VDB755P
ADC-VDB775
A compatible Wi-Fi connection
Wi-Fi router that supports multicast broadcasts which are used to ring the Alarm.com Chime.
Note: If a doorbell camera is connected to an ADC-W115C as an access point, multicast is not required for that doorbell to ring the chime. However, ringing additional Alarm.com Chimes will require multicast to be enabled.
The Alarm.com Chime and doorbell camera must be on the same local network, but they do not need to be connected to each other directly.
Note: A single doorbell can ring multiple Alarm.com Chimes as long as they are all on the same local network.
Configure a doorbell camera to ring Alarm.com Chimes
The following steps configure an individual Alarm.com Video Doorbell to ring all Alarm.com Chimes on the customer account using the GoSafer Security customer portal (powered by Alarm.com) or Alarm.com app.
For more information and steps on configuring more complex Alarm.com Video Doorbell camera notifications (e.g., the user wants a unique Chime sound for each doorbell, or the user wants each Chime to be triggered by only one doorbell), see Configure the chime settings for an Alarm.com Video Doorbell and Alarm.com Chime.
GoSafer Security customer portal (powered by Alarm.com)
Log in to the GoSafer Security customer portal (powered by Alarm.com).
Click Video.
Click Settings.
Select the desired doorbell camera.
In Settings, click General.
Click the Alarm.com Chime Notifications toggle switch to enable.
Click Save.
Alarm.com app
Log in to the Alarm.com app.
Tap [Doorbell Video Call] or [Video].
Tap [Settings].
Select the desired doorbell camera.
In Settings, tap General.
Tap the Alarm.com Chime Notifications toggle switch to enable.
Troubleshooting
The Alarm.com Chime is not ringing when the doorbell camera button is pressed
Disable and re-enable Send button press notifications to Alarm.com Chime.
Power down the Alarm.com Chime.
Verify the correct chime type is selected on the customer account.
For more information, see Adjust the chime type.
Disconnect power from the router and any applicable access points, and wait 2 minutes.
Reconnect power to each device starting with the router and ending with the Alarm.com Chime.
For multiple Alarm.com Chimes, verify the following router settings
If the customer's setup includes multiple Alarm.com Chimes, or the doorbell is being connected to the customer's home network instead of a W115C, additional router settings may need to be adjusted. For more information about and help with changing router settings, refer to the router manual, router manufacturer, or customer's Internet Service Provider.
Multicast broadcasts are enabled on the Wi-Fi router.
Log in to the router and verify that Multicast Packet Forwarding is enabled.
If Multicast Packet Filtering is disabled, enable it.
If the router does not have a Multicast Packet forwarding/filtering option, then multicast broadcasts may not be an option on the router. Check with the Internet Service Provider or in the router's user manual to verify if the option is available. If a router does not support multicast broadcasts, it should be replaced with one that does support multicast broadcasts.
Verify that Wi-Fi Client Isolation is disabled. For some routers/access points, it is enabled by default.
Wi-Fi Client Isolation may also be called Client Isolation or some variation of this.
Always verify safety, installation, compatibility, and current UI details against the original manufacturer documentation before operational use.
Video
Flip a camera's image
GoSafer Security Knowledge Base
This operational reference is organized for GoSafer Security customers and staff. Alarm.com product names are retained where required for technical accuracy.
Overview
The image of a video device can be flipped in order to be compatible with a variety of mounting positions.
Platform
App + Web
Content type
Reference
Source last updated
2025-12-08
Procedure
To flip a camera's image
GoSafer Security customer portal (powered by Alarm.com)
Log in to the GoSafer Security customer portal (powered by Alarm.com).
Click Video.
Click Settings.
Select the desired video device.
Click Video.
In Live Video Settings, click Image Settings.
Click the Flip Image toggle switch to flip the image.
Click Save.
After a few minutes, have the customer view live video to verify the changes are applied.
Alarm.com app
Log in to the Alarm.com app.
Tap [Video].
Tap [Settings].
In Video Devices, tap to select the desired video device.
In Settings, tap Video.
Tap Image Settings.
Tap the Flip Image toggle switch to flip the image.
Tap Save.
After a few minutes, have the customer view live video to verify the changes are applied.
Always verify safety, installation, compatibility, and current UI details against the original manufacturer documentation before operational use.
Video
How can a camera be reconnected to a Wi-Fi network if the router, network equipment, or wireless settings change?
GoSafer Security Knowledge Base
This operational reference is organized for GoSafer Security customers and staff. Alarm.com product names are retained where required for technical accuracy.
Overview
When your wireless settings or networking equipment change, the Wi-Fi cameras connected to the old network will disconnect from the internet. This is because they are still programmed with the old Wi-Fi information. Once the cameras have the new Wi-Fi information, they can reconnect.
Note: If your cameras are connected to an Alarm.com Smart Gateway, they will stay connected even if your network changes.
Platform
App + Web
Content type
Troubleshooting
Source last updated
2022-12-05
Procedure
Step-by-step guide: Screenshots and videos are placed with the instruction they illustrate.
When your wireless settings or networking equipment change, the Wi-Fi cameras connected to the old network will disconnect from the internet. This is because they are still programmed with the old Wi-Fi information. Once the cameras have the new Wi-Fi information, they can reconnect.
Note: If your cameras are connected to an Alarm.com Smart Gateway, they will stay connected even if your network changes.
Prepare for a future network change
Let your service provider know that your networking equipment or wireless settings are going to change. They can then be prepared to help you reprogram your cameras after the change if necessary. For more information about contacting your service provider, see Contact your service provider.
Depending on how comfortable you are with reprogramming your camera's wireless information, you can also attempt to reprogram the camera yourself.
How to reconnect a disconnected camera to a Wi-Fi network
The GoSafer Security customer portal (powered by Alarm.com) and Alarm.com app have built-in troubleshooting wizards that you can access to get personalized reconnection steps. For more information about how to initialize the wizard, see Video Troubleshooting Wizard.
For general steps, there are three possible ways to reconnect a disconnected camera. Using WPS is the easiest method, but Access Point (AP) mode or Ethernet may also be an option if WPS does not work.
Expand all
To reconnect a camera using WPS mode:Icn Chevron Up
Use your router's WPS button to quickly reconnect your cameras to the network. WPS functions as a way for the router to share its Wi-Fi credentials with another device without the user having to enter the credentials. Both the router and the camera need to be in WPS mode at the same time for the camera to connect successfully.
Important: Some routers do not have WPS. If your router does not have a WPS button, or if the button is disabled (i.e., if the LED for the WPS button blinks red or does not light up when you press it), try using Access Point (AP) mode or Ethernet instead. For more details about whether WPS is available on your router, refer to the manufacturer's user manual.
Press and hold the WPS button on your router until the LED starts flashing. Typically this button is labeled with the letters WPS, two arrows forming a circle, or a lock icon.
While the router's WPS button is flashing, press and hold the WPS/Reset button on the camera for 3 seconds. Release the button as soon as the LED starts flashing blue.
Caution: Holding the WPS/Reset button too long (i.e., over 7 seconds), could result in the camera resetting to its factory default settings. The camera's LED will flash red and green to indicate it is resetting, after which the camera must be removed and re-enrolled on the account.
Wait for the LED on the camera to turn solid green. This can take up to 5 minutes, and the camera might go through a few different LED patterns.
Once the camera's LED is solid green, verify you can see live video on the GoSafer Security customer portal (powered by Alarm.com) or Alarm.com app. If the LED does not turn solid green, see LED troubleshooting.
To reconnect a camera using AP mode:Icn Chevron Up
Use a Wi-Fi enabled device (i.e., a smartphone, tablet, or computer) to connect your cameras to the network. Access Point (AP) mode functions by letting you connect to the camera directly and make changes to its Wi-Fi settings without the camera being connected to the internet.
Press and hold the WPS/Reset button on the camera for 5 seconds. Release the button as soon as the LED starts flashing white. The camera is now broadcasting its own Wi-Fi network.
Caution: Holding the WPS/Reset button too long (i.e., over 7 seconds), could result in the camera resetting to its factory default settings. The camera's LED will flash red and green to indicate it is resetting, after which the camera must be removed and re-enrolled on the account.
Using a computer, smartphone, or tablet, connect to the Wi-Fi network name that starts with either ALARM or the device name, followed by (XX:XX:XX). The numbers in parentheses are the last six digits of the video device’s MAC address.
Example: The network name for an ADC-V723/723X could read ALARM (XX:XX:XX) or ADC-V723/723X (XX:XX:XX).
Open a web browser on the device and enter the camera's Access Point web address (e.g., http://v723install, http://522irinstall, etc.) or 192.168.1.1 in the address bar and follow the onscreen instructions.
Click Scan for wireless networks.
Click to select your Wi-Fi network.
In Security Key, enter your Wi-Fi password.
Click Save.
Click Ok in the pop-up window that appears asking to refer to the website.
Once the camera's LED is solid green, verify you can see live video on the GoSafer Security customer portal (powered by Alarm.com) or Alarm.com app. If the LED does not turn solid green, see LED troubleshooting.
To reconnect a camera using Ethernet:Icn Chevron Up
Use an Ethernet (i.e., Cat5) cable to connect your camera directly to the router, then reprogram the camera's wireless settings using the GoSafer Security customer portal (powered by Alarm.com).
Note: Some cameras do not have an Ethernet port. If that is the case, try using WPS or AP to connect the cameras.
Remove power from your camera.
Attach one end of an Ethernet cable to the camera and the other end to your router.
Power on your camera.
Wait for the camera's status LED to turn solid green. This can take up to 5 minutes.
Configure your camera's Wi-Fi settings. For more information about configuring your camera's Wi-Fi settings using the GoSafer Security customer portal (powered by Alarm.com), see Change a video device's wireless network settings.
Remove the Ethernet cable and power cycle (i.e., remove power and then reapply it) your camera.
Once the camera's LED is solid green, verify you can see live video on the GoSafer Security customer portal (powered by Alarm.com) or Alarm.com app. If the LED does not turn solid green, see LED troubleshooting.
LED troubleshooting
Some troubleshooting steps vary between the connection methods. Look for the method (i.e., WPS mode, AP mode, or Ethernet) you are currently attempting to get accurate steps. If a method is not specified, it applies to all three.
LED color
Function
Troubleshooting
Flashing green
Led Blinking Green
The camera is able to speak to the router but does not have a full internet connection.
If the LED is flashing green for more than 2 minutes, power the camera down for a few seconds then apply power.
Allow the camera to boot up. If the LED is still flashing green after a few minutes, remove power from the router for at least one minute, and restore power.
Wait a few minutes for the internet connection to be re-established.
Solid red
Led Solid Red
The camera is unable to connect to a wireless network.
AP mode or Ethernet:
Double-check the Wi-Fi password and verify that you are entering the correct one.
Retry the same connection method.
If another attempt is unsuccessful, try a different method of reconnecting the camera.
WPS mode:
verify that WPS is enabled in the router. The router manual should have information about WPS.
Retry the same connection method.
If another attempt is unsuccessful, try a different method of reconnecting the camera.
Note: If the router is verified to have WPS enabled, it may indicate that the camera is too far away for WPS to take effect.
Alternating red and green
Led Alternating Red Green
Ethernet:
The password entered may be incorrect
WPS or AP mode:
The video device is resetting (AP or WPS methods)
Ethernet:
If the flashing starts after saving Wi-Fi settings, repeat steps for To reconnect a camera using Ethernetand enter the wireless information again.
WPS or AP mode:
If the flashing starts after holding the WPS/Reset button on the video device, the video device is resetting. Contact your service provider for assistance.
Need more help?
If you have tried multiple reconnection methods and the camera is still not reconnecting, contact your service provider for further assistance. For more information about contacting your service provider, see Contact your service provider.
Always verify safety, installation, compatibility, and current UI details against the original manufacturer documentation before operational use.
Video
How do I connect a video camera to a hidden Wi-Fi network?
GoSafer Security Knowledge Base
This operational reference is organized for GoSafer Security customers and staff. Alarm.com product names are retained where required for technical accuracy.
Overview
You can connect a video device to a hidden (i.e., not broadcasting) Wi-Fi network by configuring its network settings manually using the GoSafer Security customer portal (powered by Alarm.com) or the camera's access point network.
Important: When attempting to manually connect to a wireless network, it is necessary to type in all information about the network. Accuracy is crucial, so it is advisable to confirm the network information is correct. If you are uncertain, confirm with the person who set up the network.
Platform
App + Web
Content type
How-to / Configuration
Source last updated
2025-12-08
Procedure
Step-by-step guide: Screenshots and videos are placed with the instruction they illustrate.
You can connect a video device to a hidden (i.e., not broadcasting) Wi-Fi network by configuring its network settings manually using the GoSafer Security customer portal (powered by Alarm.com) or the camera's access point network.
Important: When attempting to manually connect to a wireless network, it is necessary to type in all information about the network. Accuracy is crucial, so it is advisable to confirm the network information is correct. If you are uncertain, confirm with the person who set up the network.
Manually configure a video device's wireless network
To manually configure a video device's wireless network using an Ethernet cable:Icn Chevron Up
Use this method when the video device is already installed on the account and connected with an Ethernet cable.
Log in to the GoSafer Security customer portal (powered by Alarm.com).
Click Video.
Click Settings.
Select the desired video device.
Click Network.
Click Change Network.
Click Manual.
In the Wireless Network Name (SSID) field, enter the Wi-Fi name. This is case-sensitive.
Using the Encryption Type dropdown menu. select the encryption type.
Using the Algorithm dropdown menu, select the encryption algorithm.
In the Password field, enter the Wi-Fi password. This is case-sensitive.
If you want these settings to apply to all wireless cameras on the account, click Advanced. Then click to select Apply these settings to all wireless cameras on this account.
Click Continue.
After the correct information is saved in these fields, remove the power cable from the camera, then remove the Ethernet cable.
Reconnect the power cable and wait for the status LED to turn solid green.
To manually configure a video device's wireless network using AP mode:Icn Chevron Up
Use this method when the video device is not installed on the account and cannot be installed temporarily with an Ethernet cable.
Put the camera into access point mode.
Press and hold the WPS button on the camera for 5 to 7 seconds. The camera LED will first blink blue before blinking white.
Release the button immediately once the LED begins to blink white.
From a Wi-Fi-enabled device, connect to the Wi-Fi network named ALARM (##:##:##).
The numbers in parentheses should be the last six digits of the camera’s MAC address.
Open a web browser on the Wi-Fi-enabled device (e.g., Chrome, Firefox, Edge, etc.).
In the browser address bar, enter 192.168.1.1.
Press Enter to go to the web address.
Click to select a language.
Manually enter the Wi-Fi information:
In the SSID field, enter the Wi-Fi name. This is case-sensitive.
Using the Security dropdown menu, select the encryption type.
Select the Key Format, which is the algorithm.
In the Security Key field, enter the Wi-Fi password. This is case-sensitive.
AP mode options
Click Save.
If the video device is not already installed on your account, proceed to the Alarm.com app or GoSafer Security customer portal (powered by Alarm.com) to install the video device.
Need more help?
If you have attempted the previous steps but are still unable to connect your camera to your hidden network, contact your service provider for further assistance. To learn more about where you can find your service provider's contact information, see Contact your service provider.
Always verify safety, installation, compatibility, and current UI details against the original manufacturer documentation before operational use.
Video
How do I use the Device Status History?
GoSafer Security Knowledge Base
This operational reference is organized for GoSafer Security customers and staff. Alarm.com product names are retained where required for technical accuracy.
Overview
The device status history can be used to help you understand your device's function over a long period of time. This data can provide insight into any patterns you may see regarding your device's online or offline status and can assist users in identifying roadblocks to a reliable connection.
Things you can ask yourself:
An automated connectivity check is run approximately every 8 hours. If two tests fail in a row we send a Video Device not Responding push notification to users set up to receive the system event notification. For more information please, see Create a system event notification.
Platform
General / Device
Content type
Troubleshooting
Source last updated
2023-10-12
Procedure
The device status history can be used to help you understand your device's function over a long period of time. This data can provide insight into any patterns you may see regarding your device's online or offline status and can assist users in identifying roadblocks to a reliable connection.
Things you can ask yourself
Does the device drop offline at certain times of day or days of the week?
Were there any issues with power, internet, severe weather, etc.?
Did my network change?
Has there been an increase in bandwidth usage on my network since installation?
An automated connectivity check is run approximately every 8 hours. If two tests fail in a row we send a Video Device not Responding push notification to users set up to receive the system event notification. For more information please, see Create a system event notification.
Always verify safety, installation, compatibility, and current UI details against the original manufacturer documentation before operational use.
Video
How much network bandwidth do Alarm.com video devices use?
GoSafer Security Knowledge Base
This operational reference is organized for GoSafer Security customers and staff. Alarm.com product names are retained where required for technical accuracy.
Overview
For the latest video devices, the minimum requirement is 2 Mbps of upload speed per video device for consistent performance at reduced quality.
To test the network and determine how many video devices your internet connection can support, see Perform an Internet speed test.
Platform
General / Device
Content type
FAQ / Explanation
Source last updated
2026-04-17
Procedure
When a video device uses bandwidth
Alarm.com video devices do not consume any bandwidth unless they are uploading recorded video clips or someone is actively looking at live video or SVR recorded footage.
Even when in use, the video device cannot consume all available bandwidth because routers allocate bandwidth fairly among all the devices that are on the network (e.g., computers, tablets, etc.).
Devices/features requiring additional bandwidth include
HD video streaming
Two-Way Audio for cameras
Stream Video Recorder integration
Doorbell cameras
Important: The SkyBell Doorbell Camera requires at least 2 Mbps of upload speed per device. For more information about the network requirements for the SkyBell Doorbell Camera, see What are the network requirements of the SkyBell Doorbell Cameras?.
The Alarm.com Video Doorbell (ADC-VDB770) and Wireless Video Doorbell (ADC-VDB780B) require at least 2.5 Mbps of upload speed per device.
Always verify safety, installation, compatibility, and current UI details against the original manufacturer documentation before operational use.
Video
How should I configure Video Motion Detection (VMD) settings for a video device?
GoSafer Security Knowledge Base
This operational reference is organized for GoSafer Security customers and staff. Alarm.com product names are retained where required for technical accuracy.
Overview
Video Motion Detection (VMD) works by looking for motion in specific areas (i.e., windows) of the camera's view. You can customize the size, location, sensitivity, and target size of the VMD windows to reduce false positive or missed motion. For more information about adjusting Video Motion Detection settings, see Change a camera's Video Motion Detection settings.
Platform
General / Device
Content type
How-to / Configuration
Source last updated
2025-05-07
Procedure
Step-by-step guide: Screenshots and videos are placed with the instruction they illustrate.
Notice: New accounts created after February 2023 will no longer have the option to create Video Motion Detection (VMD) recording rules. This change comes as we confidently move forward with Video Analytics as our premier motion recording solution.
This change will not affect any customer accounts created before February 2023. On older accounts, Alarm.com camera models that support VMD recording will continue to be able to use VMD recording rules. For assistance with the implementation and troubleshooting of the VMD solution on older accounts, contact your service provider.
Video Motion Detection (VMD) works by looking for motion in specific areas (i.e., windows) of the camera's view. You can customize the size, location, sensitivity, and target size of the VMD windows to reduce false positive or missed motion.
A video device's VMD windows work best if you think of them like tripwires. Create longer and narrower boxes in areas that must be passed through to reach the area of interest. Keep in mind that it is recommended to avoid placing VMD windows in highly dynamic areas (e.g., large reflective surfaces, large areas where shadows come and go, or trees and bushes that move due to wind).
VMD best practices for indoor cameras
Incorrectly configured
Best practice
indoorIncorrect
indoor
VMD best practices for outdoor cameras
Incorrectly configured
Best practice
outdoor
Pasted image at 2017 10 31 04 51 PM
Target size
Target size is the percentage of the window that includes movement to trigger a clip recording. If the target size is too large, the camera may not trigger for anything less than an object the size of a car. If the target size is too small, leaves blowing in the wind may trigger recordings. It is recommended to estimate the percentage of a window that a person, or whatever you want to record, would fill and then select one size larger.
Sensitivity
Sensitivity is a measure of how drastic a change is needed to trigger a clip. Higher sensitivity means a smaller change in the video is needed to trigger a clip, but if the sensitivity is too high, the camera may trigger constantly.
Note:For camera models ADC-V521IR, ADC-V522IR, and ADC-V722W, the sensitivity setting affects all Video Motion Detection (VMD) windows for the specific device.
At-Home Settings
The At-Home Setting, when enabled, pauses recording rules when the system is disarmed or a Geo-Device is inside of the Home Geo-Fence. This can help prevent unwanted or unnecessary recording.
Always verify safety, installation, compatibility, and current UI details against the original manufacturer documentation before operational use.
Video
Is it possible to use video devices or access video data after closing my account?
GoSafer Security Knowledge Base
This operational reference is organized for GoSafer Security customers and staff. Alarm.com product names are retained where required for technical accuracy.
Overview
No. All Video clips and SVR recordings associated with your account are cleared when your account is closed. The previously-enrolled video devices (e.g., video cameras, video servers, and SVRs) must be attached to a new account before they can be used again.
Platform
General / Device
Content type
Reference
Source last updated
2023-01-25
Procedure
No. All Video clips and SVR recordings associated with your account are cleared when your account is closed. The previously-enrolled video devices (e.g., video cameras, video servers, and SVRs) must be attached to a new account before they can be used again.
Always verify safety, installation, compatibility, and current UI details against the original manufacturer documentation before operational use.
Video
Package Alerts for Alarm.com Video Doorbells
GoSafer Security Knowledge Base
This operational reference is organized for GoSafer Security customers and staff. Alarm.com product names are retained where required for technical accuracy.
Overview
Be the first to know when a package is delivered to your home or business with Package Alerts for the Alarm.com Video Doorbell (ADC-VDB770).
Platform
App + Web
Content type
How-to / Configuration
Source last updated
2025-12-01
Procedure
Step-by-step guide: Screenshots and videos are placed with the instruction they illustrate.
Be the first to know when a package is delivered to your home or business with Package Alerts for the Alarm.com Video Doorbell (ADC-VDB770) and Alarm.com Premium Video Doorbell Camera (ADC-VDB775). Using Video Analytics, the ADC-VDB770 and ADC-VDB775 can identify when a visitor leaves a parcel on your doorstep—notifying you immediately.
Package Alerts can be configured to notify you right when a delivery is made, remind you if the box is not picked up, or alert you if it goes missing. The feature can be set up in seconds from the Recording Rules section of the GoSafer Security customer portal (powered by Alarm.com) and Alarm.com app.
Quick and easy set up as part of any ADC-VDB770 or ADC-VDB775 recording rule
Separate notifications for when the package is delivered and removed
Can be configured for SMS, email, and push notifications
A delivery notification is a package alert with a thumbnail of the parcel
A removal notification is a person alert with a thumbnail of the individual
Package events are searchable on the SVR and 24/7 Onboard Recording timelines, as well as Saved Clips
Clips of package deliver and remove events can be easily viewed in Highlights
Configure Package Alerts for the ADC-VDB770 and ADC-VDB775
Note: Package Alerts will not trigger unless a person is detected.
People detection recording rules are automatically created when a doorbell is installed, but they are disabled by default. You can enable and configure these recording rules to utilize Package Alerts using the Alarm.com app and GoSafer Security customer portal (powered by Alarm.com).
Important: To ensure the timeliness of Package Alerts, the minimum delay between Video Analytics notifications is set to 30 seconds. If this setting is changed, it may negatively affect the awareness value of the feature.
Expand all
For the Alarm.com Video Doorbell (ADC-VDB770):Icn Chevron Up
Alarm.com app
Log in to the Alarm.com app.
Tap Video.
Tap Settings.
Tap Recording Rules.
Tap Edit to edit the desired recording rule.
In Notification triggers:
Tap the Package Delivery toggle switch to enable notifications when a person has left a package in the camera's field of view.
Package Delivery toggle app
Tap the Package Retrieval toggle switch to enable notifications when a person has removed a package from a camera's field of view.
Package Retrieval toggle app
Configure the recording rule as desired.
Tap Save.
GoSafer Security customer portal (powered by Alarm.com)
Log in to the GoSafer Security customer portal (powered by Alarm.com).
Click Video.
Click Recording Rules.
Click Edit to edit the desired recording rule.
In Notification triggers:
Click the Package Delivery toggle switch to enable notifications when a person has left a package in the camera's field of view.
Package Delivery toggle
Click the Package Retrieval toggle switch to enable notifications when a person has removed a package from the camera's field of view.
Package Retrieval toggle
Configure the recording rule as desired.
Click Save.
For the Alarm.com Premium Video Doorbell Camera (ADC-VDB775):Icn Chevron Up
Alarm.com app
Log in to the Alarm.com app.
Tap Video.
Tap Settings.
Tap Recording Rules.
Tap Edit to edit the desired recording rule.
In Notification triggers:
Tap the Package Delivery toggle switch to enable notifications when a person has left a package in the camera's field of view.
Package Delivery toggle app
Tap the Package Retrieval toggle switch to enable notifications when a person has removed a package from a camera's field of view.
Package Retrieval toggle app
Configure the recording rule as desired.
Tap Save.
GoSafer Security customer portal (powered by Alarm.com)
Log in to the GoSafer Security customer portal (powered by Alarm.com).
Click Video.
Click Recording Rules.
Click Edit to edit the desired recording rule.
In Notifications:
Click Package Delivery to enable notifications when a person has left a package in the camera's field of view.
Click Package Retrieval to enable notifications when a person has removed a package from the camera's field of view.
Configure the recording rule as desired.
Click Save.
View Package Alert saved video clips
Saved video clips can be filtered to search for Package Alerts using the GoSafer Security customer portal (powered by Alarm.com) and Alarm.com app.
Alarm.com app
Log in to the Alarm.com app.
Tap Video.
Tap Saved.
Tap Filter.
Using the Cameras dropdown menu, select the desired video doorbell and any other desired parameters for the search.
Tap Apply.
GoSafer Security customer portal (powered by Alarm.com)
Log in to the GoSafer Security customer portal (powered by Alarm.com).
Click Video.
Click Saved Video Clips.
Click Filter.
Using the Cameras dropdown menu, select the desired video doorbell and any other desired parameters for the search.
Always verify safety, installation, compatibility, and current UI details against the original manufacturer documentation before operational use.
Video
Password protect the ADC-CSVR126 local interface
GoSafer Security Knowledge Base
This operational reference is organized for GoSafer Security customers and staff. Alarm.com product names are retained where required for technical accuracy.
Overview
The user can set up a password that must be entered to interact with the Commercial Stream Video Recorder (CSVR) local user interface.
Platform
Customer Website
Content type
Reference
Source last updated
2025-12-08
Procedure
Step-by-step guide: Screenshots and videos are placed with the instruction they illustrate.
The user can set up a password that must be entered to interact with the Commercial Stream Video Recorder (CSVR) local user interface.
To set a password for the ADC-CSVR126 local interface:
Note: The primary login for the account will be sent an email notification whenever the password is changed.
Log in to the GoSafer Security customer portal (powered by Alarm.com).
Click Video.
Click Settings.
Select the desired Stream Video Recorder.
Click Local Display.
In Local Device Password, enter the desired password.
Click Icn Visible to show the password temporarily.
Show password
Click Icn Invisible to hide the password again.
Hide password
In Password Protection, click to select Enabled.
Click Save.
Log in using the local interface
A connected mouse or the ADC-CSVR126's navigation buttons can be used to log in to the local interface.
Use a connected mouse:Icn Chevron Up
Right-click anywhere on the screen.
Click the Password field.
Use the virtual keyboard to enter the password.
Enter password
Click Log in.
To exit the login screen without entering a password, right-click.
Use the ADC-CSVR126's navigation buttons:Icn Chevron Up
Press [Menu].
Press and release the down button until the Password field is highlighted.
Press the center button.
Use the virtual keyboard to enter the password.
Enter password
Press [Esc].
Press the down button.
With Continue highlighted, press the center button.
To exit the login screen without entering a password, press [Esc] until the live video reappears.
Local interface too many login attempts
When the user submits an incorrect password more than five times in a row, the local interface is locked for 60 seconds. Once the 60-second timer expires, the interface is unlocked and the user can attempt to enter the password another five times.
locked out
To disable the password for the ADC-CSVR126 local interface:
Important: The currently configured password is always required after the ADC-CSVR126 loses its connection to the Internet or power.
Log in to the GoSafer Security customer portal (powered by Alarm.com).
Click Video.
Click Settings.
Select the desired Stream Video Recorder.
Click Local Display.
In Local DevicePassword, enter the desired password.
In Password Protection, click to select Disabled.
Configure the local display password
If a password was already created, the current password can be configured using the GoSafer Security customer portal (powered by Alarm.com).
Always verify safety, installation, compatibility, and current UI details against the original manufacturer documentation before operational use.
Video
Reconnect a SkyBell Doorbell Camera if the wireless network or router changes
GoSafer Security Knowledge Base
This operational reference is organized for GoSafer Security customers and staff. Alarm.com product names are retained where required for technical accuracy.
Overview
You can only configure the SkyBell Doorbell Camera's Wi-Fi network setting during device enrollment. Whenever the router's wireless network information is changed, the Doorbell Camera needs to be re-…
Platform
Mobile App
Content type
How-to / Configuration
Source last updated
2025-07-18
Procedure
Delete and factory reset the device
Remove the SkyBell Doorbell Camera from the account. For more information about the removal process, see Remove a video device. If you do not see the option to remove the device, contact your service provider.
Factory reset the SkyBell Doorbell Camera by pressing and holding the doorbell button until the LED starts blinking yellow.
Wait for the SkyBell Doorbell Camera to reboot and enter Access Point (AP) mode. The LED blinks red and green to indicate it is in AP mode.
Important: Verify the wireless credentials are entered correctly during the following installation. For hidden (i.e., not broadcasting) networks, temporarily un-hide the network to reconnect the device.
Reinstall the device on the desired network
Verify that the SkyBell Doorbell Camera is in AP mode. The LED should be blinking red and green.
To put the doorbell camera into access point (AP) mode, press and hold the button on the doorbell camera for one minute until the LED starts flashing green.
Log in to the Alarm.com app.
Tap Doorbell Camera.
Tap [Settings].
Tap Add Camera.
In Select Video Device, tap to select the desired device.
Follow the on-screen instructions to finish installing the SkyBell Doorbell Camera.
Always verify safety, installation, compatibility, and current UI details against the original manufacturer documentation before operational use.
Video
Remove a video device
GoSafer Security Knowledge Base
This operational reference is organized for GoSafer Security customers and staff. Alarm.com product names are retained where required for technical accuracy.
Overview
Most Alarm.com video devices (e.g., cameras, Video Servers, SVRs, etc.) can be removed from an account using the app or website.
Platform
App + Web
Content type
How-to / Configuration
Source last updated
2025-06-04
Procedure
To remove a video device using the Alarm.com app
Log in to the Alarm.com app.
Tap [Menu].
Tap Manage Devices.
Tap [More Options] next to the desired video device.
In Actions, tap [Delete].
Tap Delete.
To remove a video device using the GoSafer Security customer portal (powered by Alarm.com)
Log in to the GoSafer Security customer portal (powered by Alarm.com).
Click Settings.
Click Manage Devices.
Click [More Options] next to the desired video device.
Always verify safety, installation, compatibility, and current UI details against the original manufacturer documentation before operational use.
Video
Request a video device's wireless signal strength
GoSafer Security Knowledge Base
This operational reference is organized for GoSafer Security customers and staff. Alarm.com product names are retained where required for technical accuracy.
Overview
Video device wireless signal strength can be checked remotely at any time.
Platform
App + Web
Content type
How-to / Configuration
Source last updated
2026-05-11
Procedure
Step-by-step guide: Screenshots and videos are placed with the instruction they illustrate.
Video device wireless signal strength can be checked remotely for devices on the customer account at any time using the Alarm.com app or GoSafer Security customer portal (powered by Alarm.com), or during device installation using the Alarm.com app. It is generally recommended for video devices to have at least 66% wireless signal strength.
Request a video device's Wi-Fi signal strength
During installation
A camera's Wi-Fi signal strength can be tested through the Alarm.com app during the installation process. To use this feature, you will need one of the following compatible Alarm.com cameras:
ADC-V515
ADC-V516
ADC-V523/523X
ADC-V530
ADC-V723/723X
ADC-V724/724X
ADC-V730
ADC-V731B
ADC-VDB750
ADC-VDB770
ADC-VDB775
How to request a video device's Wi-Fi signal strength during installation:
Log in to the Alarm.com app.
Tap Video.
Tap Settings.
Tap Add Device.
Tap the specific device or enter the MAC address to start the installation wizard.
Enter a name for the device.
Tap Next.
In Configure Device, tap Next after the device is installed.
Tap Request Signal Strength to request an updated Wi-Fi signal strength.
Wi Fi Signal Strength Test Customer App
Tap Next to continue and configure the camera as desired.
Alarm.com app
Log in to the Alarm.com app.
Tap Video Camera.
Ta Settings.
Tap to select the desired video device.
Tap the Wi-Fi signal strength card.
Wi Fi signal strength card
Note: The online status and Wi-Fi signal strength cards automatically display the date and time of the most recent check-in.
Tap Request Signal Strength.
GoSafer Security customer portal (powered by Alarm.com)
Log in to the GoSafer Security customer portal (powered by Alarm.com).
Click Video.
Click Settings.
Select the desired video device.
Click the Wi-Fi signal strength card.
cx website wi fi signal strength card
Note: The online status and Wi-Fi signal strength cards automatically display the date and time of the most recent check-in.
Always verify safety, installation, compatibility, and current UI details against the original manufacturer documentation before operational use.
Video
Resolve a Camera or SVR - Firmware Out of Date trouble condition
GoSafer Security Knowledge Base
This operational reference is organized for GoSafer Security customers and staff. Alarm.com product names are retained where required for technical accuracy.
Overview
If you see a trouble condition on your account labeled Camera - Firmware Out of Date or SVR - Firmware Out of Date, your video device's firmware is out of date and an updated version is available for …
Platform
Customer Website
Content type
How-to / Configuration
Source last updated
2025-12-08
Procedure
Requirements
Video device is installed on the account
Video device has power
Video device is connected to the internet
To upgrade the video device's firmware
Log in to the GoSafer Security customer portal (powered by Alarm.com).
Click Video.
Click Settings.
Select the video device to update.
Click General.
Click Update Firmware to send the update to the video device.
Note: The Upgrade Firmware option only appears when there is an available update for the video device.
If you are having trouble updating your video device's firmware, contact your service provider for further assistance. For more information about how to find your service provider's contact information, see Contact your service provider.
Always verify safety, installation, compatibility, and current UI details against the original manufacturer documentation before operational use.
Video
The ADC-VDB770 is warm to the touch and has a solid yellow LED
GoSafer Security Knowledge Base
This operational reference is organized for GoSafer Security customers and staff. Alarm.com product names are retained where required for technical accuracy.
Overview
Like most powered consumer electronic devices, the ADC-VDB770 will warm when operated and normally have a higher temperature than the surrounding air (ambient) temperature.
Platform
General / Device
Content type
Troubleshooting
Source last updated
2022-01-26
Procedure
Quick reference
The ADC-VDB770 is designed to channel heat away from key components to the backplate. As a result, the backplate may reach higher temperatures than other exterior surfaces.
The ADC-VDB770 is rated to operate in temperatures between -22°F (-30°C) and 104°F (40°C). In regions where temperatures are expected be near or above 104°F, avoid placing in direct sunlight.
If the ADC-VDB770 gets too warm to operate fully, it enters a cool-down mode indicated by a solid yellow LED.
Overview
Like most powered consumer electronic devices, the ADC-VDB770 will warm when operated and normally have a higher temperature than the surrounding air (ambient) temperature. The product is designed to channel heat towards the backplate and away from the button surface and internal components to maximize the conditions under which the button’s surface remains within recommended surface contact guidelines and to maximize the device’s operating range.
If a person holds their finger on the doorbell for a prolonged period of time, it will feel warmer than the air temperature and may feel hot, particularly if the device is installed in direct sunlight. For regular use we recommend touching the doorbell’s button surface for about 1 second to ring the doorbell.
We recommend contacting your service provider before completing work that requires handling the backplate or handling the button surface for longer than 10 seconds, especially if the ambient temperature is greater than room temperature (72°F), or if the unit is mounted in a location where it is facing intense direct sunlight.
Cool-down mode
If your device is exposed to sunlight and the ambient temperature is near the device’s maximum operating temperature (104°F), its automatic cooling algorithms may activate so that the device is not damaged by the hot conditions. In this case, it will enter a Cool-Down mode, indicated by a solid yellow LED, where the indoor chime can normally still be triggered by pressing the button, but all other features (notifications, video recording, video streaming, and Video Analytics features such as Touchless Doorbell) are temporarily disabled.
When the environmental conditions improve and the device has cooled to a normal operating temperature, the device will automatically restore functionality. Please contact your service provider before completing any troubleshooting if your device has entered this state.
Always verify safety, installation, compatibility, and current UI details against the original manufacturer documentation before operational use.
Video
Turn off a video device's IR LEDs and night vision
GoSafer Security Knowledge Base
This operational reference is organized for GoSafer Security customers and staff. Alarm.com product names are retained where required for technical accuracy.
Overview
Video device infrared LEDs can be disabled remotely at any time.
Platform
Customer Website
Content type
How-to / Configuration
Source last updated
2026-05-28
Procedure
To turn off the video device's IR LEDs
Note: If the video device does not have any IR LEDs, this option will not appear.
Log in to the GoSafer Security customer portal (powered by Alarm.com).
Click Video.
Click Settings.
Select the desired video device.
Click Video.
In Live Video Settings, click Image Settings.
In Advanced Image Settings, click the Infrared LEDs toggle switch to configure the setting as desired.
Click Save.
To disable night vision
Note: The ability to disable night vision is not supported for some cameras.
Log in to the GoSafer Security customer portal (powered by Alarm.com).
Click Video.
Click Settings.
Select the desired video device.
Click Video.
In Live Video Settings, click Image Settings.
In Advanced Image Settings, click the Night Vision toggle switch to configure the setting as desired.
Nightvision can be disabled on the following cameras
Always verify safety, installation, compatibility, and current UI details against the original manufacturer documentation before operational use.
Video
Turn off a video device's LED
GoSafer Security Knowledge Base
This operational reference is organized for GoSafer Security customers and staff. Alarm.com product names are retained where required for technical accuracy.
Overview
The LED on a video device can be turned on or off at any time.
Platform
Customer Website
Content type
Reference
Source last updated
2025-12-08
Procedure
To turn off a video device's status LED
Log in to the GoSafer Security customer portal (powered by Alarm.com).
Click Video.
Click Settings.
Select the desired video device.
Click General.
Click the Status LED toggle switch to turn off the video device's status LED.
Always verify safety, installation, compatibility, and current UI details against the original manufacturer documentation before operational use.
Video
Update a video device's firmware
GoSafer Security Knowledge Base
This operational reference is organized for GoSafer Security customers and staff. Alarm.com product names are retained where required for technical accuracy.
Overview
Video device firmware can be updated remotely through the device's network connection.
Platform
Customer Website
Content type
How-to / Configuration
Source last updated
2025-12-08
Procedure
To update a video device's firmware
Log in to the GoSafer Security customer portal (powered by Alarm.com).
Click Video.
Click Settings.
Select the video device to update.
Click General.
Click Firmware Version.
Click Update Firmware to send the update to the video device.
Note: If the video device is up to date, the Update Firmware link is hidden.
Always verify safety, installation, compatibility, and current UI details against the original manufacturer documentation before operational use.
Video
Video Installation Wizard for the app
GoSafer Security Knowledge Base
This operational reference is organized for GoSafer Security customers and staff. Alarm.com product names are retained where required for technical accuracy.
Overview
Users can add video devices to their own accounts using the app. The Video Installation Wizard gives the power to self-install video devices using an intuitive in-app wizard.
Platform
Mobile App
Content type
Troubleshooting
Source last updated
2025-06-04
Procedure
Step-by-step guide: Screenshots and videos are placed with the instruction they illustrate.
Important: If you do not see the options outlined on this page, you may not have the required permissions to complete this action.
Please contact your service provider for more information.
Users can add video devices to their own accounts using the Alarm.com app. The Video Installation Wizard gives the power to self-install video devices using an intuitive in-app wizard.
Video Installation Wizard considerations
The wizard supports all Alarm.com video cameras, SVRs, and doorbell cameras.
Users may begin installing other video devices while other devices are actively being installed, speeding up the overall installation.
Users may navigate away from the wizard to view other parts of the Alarm.com app during installation.
Note: Closing the app will cause the installation to fail. A warning message is given before closing the app.
To access the Video Installation Wizard using the Alarm.com app:
Log in to the Alarm.com app.
Tap Video.
Tap Settings.
Tap Add Device.
In Add Video Device, perform any of the following:
Tap the desired video device to be installed.
Enter the video device MAC address in Enter MAC Address, or tap Scan barcode to scan a MAC address.
Manual add video
If video devices are already connected to the WiFi network, tap Install for the desired video device to be installed.
Found devices
Follow the on-screen prompts for installing the video device.
Video Installation Wizard steps overview
The wizard directs users through three major steps during the installation process:
Introductory steps
Each installation starts with basic instructions to get the video device in place for installation and in the correct mode for connecting to the internet and account.
The wizard determines for the user whether the device supports Access Point (AP) mode, which will be the preferred installation procedure. If AP mode is not supported, the user is seamlessly directed to use Ethernet mode or Wi-Fi Protected Setup (WPS) mode.
The user names their device.
Introductory step examples:
Verify LEDName device
Installation
The wizard guides users through the installation process, which may consist of AP mode, Ethernet mode, or WPS mode depending on the device.
For devices that support AP mode, the wizard allows the user to select a Wi-Fi network to connect to. The user can choose a network from a list of networks the video device finds, manually type in a network, or copy from another video device already on the account. After the device is connected, it begins communicating with the account.
For devices that support Ethernet or WPS mode, the user is presented with a list of possible devices to install.
If the users's phone is on the same network but the device is not in the list of available devices, the user can review troubleshooting instructions.
If the user's phone is not on the same network, they can find the video device by typing or scanning the MAC address.
Installation step examples:
Network selectionVideos for installDevices Installed
Post-installation configuration
After the device is successfully connected to the account, the user is be prompted to set up essential functionality for the device. The post-installation steps vary by video device and may include:
All video and doorbell cameras - Peek-In
Configuration of recording schedules/rules
Doorbell Camera - Preview, Enable Push Notification for Calls, Recording Schedules
Call Out Button Configuration
Post-Installation configuration example:
Call out rule
If there is trouble enrolling a camera, contact your service provider for additional troubleshooting. For more information about contacting your service provider, see Contact your service provider.
Always verify safety, installation, compatibility, and current UI details against the original manufacturer documentation before operational use.
Video
Video Settings
GoSafer Security Knowledge Base
This operational reference is organized for GoSafer Security customers and staff. Alarm.com product names are retained where required for technical accuracy.
Overview
This GoSafer Security section brings together resources for Video Settings, including setup, configuration, everyday use, and troubleshooting. Choose the related page that matches your device, feature, or task, and follow the current manufacturer guidance linked on that page.
Platform
App + Web
Content type
Troubleshooting
Source last updated
2023-05-01
Procedure
Browse the related pages in this chapter to open the specific procedure, configuration guide, or troubleshooting article you need.
Always verify safety, installation, compatibility, and current UI details against the original manufacturer documentation before operational use.
Video
Video Troubleshooting Wizard
GoSafer Security Knowledge Base
This operational reference is organized for GoSafer Security customers and staff. Alarm.com product names are retained where required for technical accuracy.
Overview
The Video Troubleshooting Wizard guides you through basic steps for bringing your video devices back online after they become disconnected.
Platform
App + Web
Content type
Troubleshooting
Source last updated
2025-06-04
Procedure
Step-by-step guide: Screenshots and videos are placed with the instruction they illustrate.
The Video Troubleshooting Wizard guides you through basic steps for bringing your video devices back online after they become disconnected. These troubleshooting steps include:
All Alarm.com video devices are supported by the Video Troubleshooting Wizard available on the Alarm.com app and GoSafer Security customer portal (powered by Alarm.com). The Video Troubleshooting Wizard is not available until a video device is offline for at least five minutes.
Access the Video Troubleshooting Wizard
The Video Troubleshooting Wizard can be accessed using the Alarm.com app or GoSafer Security customer portal (powered by Alarm.com).
To access the Video Troubleshooting Wizard using the Alarm.com app:Icn Chevron Up
Log in to the Alarm.com app.
Tap Video.
Tap to select the video device.
Tap Troubleshoot.
Troubleshoot wizard
Tap Get Started.
Video Troubleshooting Wizard get started (customer app)
Proceed through the wizard until the device is found and successfully connects.
To access the Video Troubleshooting Wizard using the GoSafer Security customer portal (powered by Alarm.com):Icn Chevron Up
Log in to the GoSafer Security customer portal (powered by Alarm.com).
Click Video.
Click Live Video.
In the camera feed window of the malfunctioning device, click Troubleshoot.
Unable to load video (customer site)
Click Get Started.
Proceed through the wizard until the device is found and successfully connects.
Always verify safety, installation, compatibility, and current UI details against the original manufacturer documentation before operational use.
Video
View the connected Wi-Fi frequency of a video device
GoSafer Security Knowledge Base
This operational reference is organized for GoSafer Security customers and staff. Alarm.com product names are retained where required for technical accuracy.
Overview
You can view the frequency (i.e., whether the Wi-Fi band is 2.4 GHz or 5 GHz) of the network that some of your cameras are connected to using the website.
Platform
App + Web
Content type
Reference
Source last updated
2025-12-08
Procedure
Step-by-step guide: Screenshots and videos are placed with the instruction they illustrate.
Video device wireless signal strength can be checked remotely for devices on the customer account at any time using the Alarm.com app or GoSafer Security customer portal (powered by Alarm.com), or during device installation using the Alarm.com app. It is generally recommended for video devices to have at least 66% wireless signal strength.
Request a video device's Wi-Fi signal strength
During installation
A camera's Wi-Fi signal strength can be tested through the Alarm.com app during the installation process. To use this feature, you will need one of the following compatible Alarm.com cameras:
ADC-V515
ADC-V516
ADC-V523/523X
ADC-V530
ADC-V723/723X
ADC-V724/724X
ADC-V730
ADC-V731B
ADC-VDB750
ADC-VDB770
ADC-VDB775
How to request a video device's Wi-Fi signal strength during installation:
Log in to the Alarm.com app.
Tap Video.
Tap Settings.
Tap Add Device.
Tap the specific device or enter the MAC address to start the installation wizard.
Enter a name for the device.
Tap Next.
In Configure Device, tap Next after the device is installed.
Tap Request Signal Strength to request an updated Wi-Fi signal strength.
Wi Fi Signal Strength Test Customer App
Tap Next to continue and configure the camera as desired.
Alarm.com app
Log in to the Alarm.com app.
Tap Video Camera.
Ta Settings.
Tap to select the desired video device.
Tap the Wi-Fi signal strength card.
Wi Fi signal strength card
Note: The online status and Wi-Fi signal strength cards automatically display the date and time of the most recent check-in.
Tap Request Signal Strength.
GoSafer Security customer portal (powered by Alarm.com)
Log in to the GoSafer Security customer portal (powered by Alarm.com).
Click Video.
Click Settings.
Select the desired video device.
Click the Wi-Fi signal strength card.
cx website wi fi signal strength card
Note: The online status and Wi-Fi signal strength cards automatically display the date and time of the most recent check-in.
Always verify safety, installation, compatibility, and current UI details against the original manufacturer documentation before operational use.
Video
What is Motion Detection 2.0 on the Alarm.com Slim Line Doorbell Camera?
GoSafer Security Knowledge Base
This operational reference is organized for GoSafer Security customers and staff. Alarm.com product names are retained where required for technical accuracy.
Overview
Motion Detection 2.0 is an improved process that pairs enhanced motion detection technology with the existing passive infrared (PIR) technology used in Motion Detection 1.0.
Platform
General / Device
Content type
How-to / Configuration
Source last updated
2022-01-28
Procedure
Step-by-step guide: Screenshots and videos are placed with the instruction they illustrate.
Motion Detection 2.0 is an improved process that pairs enhanced motion detection technology with the existing passive infrared (PIR) technology used in Motion Detection 1.0.
Increases and decreases the seconds of continuous motion before trigger occurs
Sensitivity slider:
Increases and decreases the size of the fixed area
Increases and decreases the minimum object size
Extremely High sensitivity disables PIR
Automatic settings configuration after upgrade
When the Alarm.com Slim Line Doorbell Camera's firmware is updated from 3052 or lower to 3058 +, it is automatically configured based on its existing sensitivity setting. You can readjust the sensitivity and motion detection mode after the update is complete.
Firmware before update
Sensitivity before update
Settings after update
3052 or lower
Medium
Sensitivity: Medium
Motion Detection mode: 1.0
3052 or lower
Low, High, Very High, or Extremely High
Sensitivity: Medium
Motion Detection mode: 2.0
3054 (Rare — beta firmware that was used to test Motion Detection 2.0)
Always verify safety, installation, compatibility, and current UI details against the original manufacturer documentation before operational use.
Video
Where does the thumbnail for cameras come from in the app?
GoSafer Security Knowledge Base
This operational reference is organized for GoSafer Security customers and staff. Alarm.com product names are retained where required for technical accuracy.
Overview
The thumbnail for the Alarm.com app camera live feeds are periodically pulled from saved videos that were captured by the camera.
For more information about creating recording rules for cameras, see Recording Video.
For more information about deleting saved videos, see Delete a video clip.
Platform
Mobile App
Content type
How-to / Configuration
Source last updated
2023-03-29
Procedure
The thumbnail for the Alarm.com app camera live feeds are periodically pulled from saved videos that were captured by the camera.
For more information about creating recording rules for cameras, see Recording Video.
For more information about deleting saved videos, see Delete a video clip.
Always verify safety, installation, compatibility, and current UI details against the original manufacturer documentation before operational use.
Video
Why can't I hear anything during a doorbell call?
GoSafer Security Knowledge Base
This operational reference is organized for GoSafer Security customers and staff. Alarm.com product names are retained where required for technical accuracy.
Overview
This is an article for troubleshooting a lack of audio during a doorbell video call.
Platform
Mobile App
Content type
Troubleshooting
Source last updated
2024-12-11
Procedure
If unable to hear audio during a doorbell call
Verify the Alarm.com app is updated to the most recent version.
Verify the media volume on the mobile device isn't muted and the sound is turned up.
Verify the app has access to the mobile device's microphone.
Verify the mobile device does not have any Do Not Disturb settings enabled.
Listen for sound out of the device's speaker as well as with headphones to determine if the issue to related to one of these.
Test other applications for audio functionality.
Test a doorbell call using another mobile device.
For device-specific instructions about how to verify these settings, refer to Apple Support or Android Help.
Always verify safety, installation, compatibility, and current UI details against the original manufacturer documentation before operational use.
Website and App
GoSafer Security procedures and references for Website and App.
Website and App
Website and App
GoSafer Security Knowledge Base
This operational reference is organized for GoSafer Security customers and staff. Alarm.com product names are retained where required for technical accuracy.
Overview
This GoSafer Security section brings together resources for Website and App, including setup, configuration, everyday use, and troubleshooting. Choose the related page that matches your device, feature, or task, and follow the current manufacturer guidance linked on that page.
Platform
App + Web
Content type
How-to / Configuration
Source last updated
2021-12-22
Procedure
Browse the related pages in this chapter to open the specific procedure, configuration guide, or troubleshooting article you need.
Always verify safety, installation, compatibility, and current UI details against the original manufacturer documentation before operational use.
Wellness
GoSafer Security procedures and references for Wellness.
Wellness
Wellness
GoSafer Security Knowledge Base
This operational reference is organized for GoSafer Security customers and staff. Alarm.com product names are retained where required for technical accuracy.
Overview
This GoSafer Security section brings together resources for Wellness, including setup, configuration, everyday use, and troubleshooting. Choose the related page that matches your device, feature, or task, and follow the current manufacturer guidance linked on that page.
Platform
General / Device
Content type
How-to / Configuration
Source last updated
2022-01-31
Procedure
Browse the related pages in this chapter to open the specific procedure, configuration guide, or troubleshooting article you need.
Always verify safety, installation, compatibility, and current UI details against the original manufacturer documentation before operational use.
Wellness
Edit a Wellness sensor name
GoSafer Security Knowledge Base
This operational reference is organized for GoSafer Security customers and staff. Alarm.com product names are retained where required for technical accuracy.
Overview
Wellness sensor names can be edited for easier system management.
Platform
Customer Website
Content type
How-to / Configuration
Source last updated
2025-06-04
Procedure
To edit a wellness sensor name
Log in to the GoSafer Security customer portal (powered by Alarm.com).
On the Sensors card, click [Details].
In Sensor Name, enter the new sensor name for the sensor to update.
Always verify safety, installation, compatibility, and current UI details against the original manufacturer documentation before operational use.
Wellness
View Wellness behaviors
GoSafer Security Knowledge Base
This operational reference is organized for GoSafer Security customers and staff. Alarm.com product names are retained where required for technical accuracy.
Overview
Wellness behaviors help users understand average daily behaviors and if behaviors are deviating from the norm.
Platform
App + Web
Content type
Reference
Source last updated
2025-06-04
Procedure
Step-by-step guide: Screenshots and videos are placed with the instruction they illustrate.
The Behaviors are created by gathering information from the sensors around the home. Behaviors are tied to sensors in specific rooms, which allow Wellness to only display relevant information that fits your needs. The dashboard is set up in an intuitive Red, Yellow, Green format, which indicates how close to average that day’s behaviors were. The farther the arrow that points into one of the five sections is from the middle, the more unusual that day’s behaviors were compared to that of an average day.
Wellness behavior
To compare the average and day’s behavior directly, simply scroll over the arrow that correlates to the desired behavior. This displays both the average and the behavior’s actual data.
To see past days, simply click the calendar and choose a date within the previous 2 months.
To view Wellness behaviors using the Alarm.com app:
Log in to the Alarm.com app.
Tap Wellness.
Tap Behaviors.
The graph with display unusual, notable, and routine behaviors over the specified period of time.
To view Wellness behaviors using the GoSafer Security customer portal (powered by Alarm.com):
Log in to the GoSafer Security customer portal (powered by Alarm.com).
Click Activity.
Click Wellness.
Click Behaviors.
The graph with display unusual, notable, and routine behaviors over the specified period of time.
Note: Using the Select a View dropdown menu, click View Behaviors to show possible irregularities in a daily routine.
Always verify safety, installation, compatibility, and current UI details against the original manufacturer documentation before operational use.
Wellness
View Wellness trends
GoSafer Security Knowledge Base
This operational reference is organized for GoSafer Security customers and staff. Alarm.com product names are retained where required for technical accuracy.
Overview
Wellness behaviors help users understand changing behavior trends.
Platform
Customer Website
Content type
Reference
Source last updated
2025-06-04
Procedure
Step-by-step guide: Screenshots and videos are placed with the instruction they illustrate.
Wellness enables you to look at multiple days’ worth of behaviors to get a better picture of long term behavior trends.
To view wellness trends:
Log in to the GoSafer Security customer portal (powered by Alarm.com).
Click Activity.
Click Wellness.
Click Behaviors.
Using the Select a View dropdown menu, click View trends to show possible emerging behavioral changes.
The Trends page defaults to show the past week’s behaviors. To change the date range of the graph, click on the first calendar Dateto select a starting date and then click on the second calendar Dateto select an ending date.
While in Trends view, you have the ability to mouse over a specific data point to see the actual value, instead of its relative position on the graph. When you mouse over a specific data point, it displays the date the point represents and the value it represents.
Always verify safety, installation, compatibility, and current UI details against the original manufacturer documentation before operational use.
Wellness
View the Wellness activity report
GoSafer Security Knowledge Base
This operational reference is organized for GoSafer Security customers and staff. Alarm.com product names are retained where required for technical accuracy.
Overview
Wellness activity reports help users understand room and sensor activity.
Platform
App + Web
Content type
Reference
Source last updated
2025-06-04
Procedure
To view the wellness activity report using the Alarm.com app
Log in to the Alarm.com app.
Tap Wellness.
Tap Daily Sensor Activity.
View activity based on sensor or room.
Tap Sensor to view daily sensor activity on an individual sensor level.
Tap Room to view the daily sensor activity on a room-by-room basis.
To view the wellness activity report using the GoSafer Security customer portal (powered by Alarm.com)
Log in to the GoSafer Security customer portal (powered by Alarm.com).
Click Activity.
Click Wellness.
Using the Select a View dropdown menu, select either
Activity by Sensor to show activity by the specific sensor name.
Activity by Room to show activity by sensors assigned to specific rooms.
Always verify safety, installation, compatibility, and current UI details against the original manufacturer documentation before operational use.
Wellness
Wellness Management
GoSafer Security Knowledge Base
This operational reference is organized for GoSafer Security customers and staff. Alarm.com product names are retained where required for technical accuracy.
Overview
This GoSafer Security section brings together resources for Wellness Management, including setup, configuration, everyday use, and troubleshooting. Choose the related page that matches your device, feature, or task, and follow the current manufacturer guidance linked on that page.
Platform
General / Device
Content type
How-to / Configuration
Source last updated
2022-01-31
Procedure
Browse the related pages in this chapter to open the specific procedure, configuration guide, or troubleshooting article you need.
Always verify safety, installation, compatibility, and current UI details against the original manufacturer documentation before operational use.
Wellness
Create/edit a Missed Medication or Sensor Not Activated notification
GoSafer Security Knowledge Base
This operational reference is organized for GoSafer Security customers and staff. Alarm.com product names are retained where required for technical accuracy.
Overview
A missed medication or sensor not activated notification can notify users if a sensor such as a medication cabinet door sensor is not activated during the specified timeframe.
Platform
App + Web
Content type
How-to / Configuration
Source last updated
2025-06-04
Procedure
To create/edit a Missed Medication or Sensor Not Activated notification using the Alarm.com app
Log in to the Alarm.com app.
Tap [Menu].
Tap Notifications.
Tap [Settings].
To edit a notification, tap to select the Missed Medication or Sensor Not Activated notification to configure.
To create a new notification if there is no notification created yet
Tap [Add].
Tap Use A Template.
In Wellness, tap More.
Tap Missed Medication or Sensor Not Activated.
Name the new notification rule.
In When any of these sensors are not activated, tap to select the sensors you would like to receive notifications from.
In During this time frame, select the days of the week the notification is active.
Using the Starting at dropdown menu, select the time the notification begins activation for the selected days of the week.
Using the Ending at dropdown menu, select the time the notification is deactivated for the selected days of the week.
Tap Add to select recipients to be notified.
Tap the entries in the Address Book that are to be notified, or tap Add Contact to add a new Address Book entry.
Once all desired recipients are selected, tap Close.
Verify the notification is configured with the correct settings.
Tap Save.
To create/edit a Missed Medication or Sensor Not Activated notification using the GoSafer Security customer portal (powered by Alarm.com):
Log in to the GoSafer Security customer portal (powered by Alarm.com).
Click Notifications.
To edit a notification, click [Edit] for the Missed Medication or Sensor Not Activated notification to configure.
To create a new notification if there is no notification created yet
Click New Notification.
Click Wellness.
Click Missed Medication or Sensor Not Activated.
Name the notification rule.
In When any of these sensors are not activated, click to select the sensors you would like to receive notifications from.
In During this time frame, select the days of the week the notification is active.
Using the Starting at dropdown menu, select the time the notification begins activation for the selected days of the week.
Using the Ending at dropdown menu, select the time the notification is deactivated for the selected days of the week.
Click Add to select recipients to be notified.
Click the entries in the Address Book that are to be notified, or click New to add a new Address Book entry.
Once all desired recipients are selected, click Close.
Verify the notification is configured with the correct settings.
Always verify safety, installation, compatibility, and current UI details against the original manufacturer documentation before operational use.
Wellness
Create/edit a Personal Emergency notification
GoSafer Security Knowledge Base
This operational reference is organized for GoSafer Security customers and staff. Alarm.com product names are retained where required for technical accuracy.
Overview
A personal emergency notification can notify users when a personal emergency button is pressed.
Platform
App + Web
Content type
How-to / Configuration
Source last updated
2025-06-04
Procedure
To create/edit a Personal Emergency notification using the Alarm.com app
Log in to the Alarm.com app.
Tap [Menu].
Tap Notifications.
Tap [Settings].
To edit a notification, tap to select the personal emergency notification to configure.
To create a new notification if there is not an up and about notification yet
Tap [Add].
Tap Use A Template.
In Wellness, tap More.
Tap Personal Emergency.
Name the new notification rule.
In When Alarm type of, tap to select the alarm type you would like to receive notifications from.
Using the Is reported by dropdown menu, select the sensors that affect the notification.
Tap Add to select recipients to be notified.
Tap the entries in the Address Book that are to be notified, or tap Add Contact to add a new Address Book entry.
Once all desired recipients are selected, tap Close.
Verify the notification is configured with the correct settings.
Tap Save.
To create/edit a Personal Emergency notification using the GoSafer Security customer portal (powered by Alarm.com)
Log in to the GoSafer Security customer portal (powered by Alarm.com).
Click Notifications.
To edit a notification, click [Edit] for the personal emergency notification to configure.
To create a new notification if there is not an away from bed notification yet
Click New Notification.
Click Wellness.
Click Personal Emergency.
Name the notification rule.
In When Alarm type of, click to select the alarm type you would like to receive notifications from.
Using the Is reported by dropdown menu, select the sensors that affect the notification.
Click Add to select recipients to be notified.
Click the entries in the Address Book that are to be notified, or click New to add a new Address Book entry.
Once all desired recipients are selected, click Close.
Verify the notification is configured with the correct settings.
Always verify safety, installation, compatibility, and current UI details against the original manufacturer documentation before operational use.
Wellness
Create/edit a Safe Inside notification
GoSafer Security Knowledge Base
This operational reference is organized for GoSafer Security customers and staff. Alarm.com product names are retained where required for technical accuracy.
Overview
A safe inside notification can notify users when a sensor is open or activated.
Platform
App + Web
Content type
How-to / Configuration
Source last updated
2025-06-04
Procedure
To create/edit a Safe Inside notification using the Alarm.com app
Log in to the Alarm.com app.
Tap [Menu].
Tap Notifications.
Tap [Settings].
To edit a notification, tap to select the safe inside notification to configure.
To create a new notification if there is not an up and about notification yet
Tap [Add].
Tap Use A Template.
In Wellness, tap More.
Tap Safe Inside.
Name the new notification rule.
In When any of these sensors open or are activated, tap to select the sensors you would like to receive notifications from.
In During this time frame, select either
At All Times to notify you any time of the day when it is triggered.
Only During the Following Times to set up notifications to only take place during certain hours of the day.
In Notification Filtering, tap to select desired settings.
Tap Add to select who is notified.
Tap the entries in the Address Book that are to be notified, or tap Add Contact to add a new Address Book entry.
Once all desired recipients are selected, tap Close.
Verify the notification is configured with the correct settings.
Tap Save.
To create/edit a Safe Inside notification using the GoSafer Security customer portal (powered by Alarm.com)
Log in to the GoSafer Security customer portal (powered by Alarm.com).
Click Notifications.
To edit a notification, click [Edit] for the safe inside notification to configure.
To create a new notification if there is not a safe inside notification yet
Click New Notification.
Click Wellness.
Click Safe Inside.
Name the notification rule.
In When any of these sensors open or are activated, click to select the sensors you would like to receive notifications from.
In During this time frame, select either
At All Times to notify you any time of the day when it is triggered.
Only During the Following Times to set up notifications to only take place during certain hours of the day.
In Notification Filtering, click to select desired settings.
Click Add to select recipients to be notified.
Click the entries in the Address Book that are to be notified, or click New to add a new Address Book entry.
Once all desired recipients are selected, click Close.
Verify the notification is configured with the correct settings.
Always verify safety, installation, compatibility, and current UI details against the original manufacturer documentation before operational use.
Wellness
Create/edit a Sensor Activity notification
GoSafer Security Knowledge Base
This operational reference is organized for GoSafer Security customers and staff. Alarm.com product names are retained where required for technical accuracy.
Overview
A sensor activity notification can notify users if a contact sensor is opened or a motion sensor is activated.
Platform
App + Web
Content type
How-to / Configuration
Source last updated
2025-06-04
Procedure
To create/edit a Sensor Activity notification using the Alarm.com app
Log in to the Alarm.com app.
Tap [Menu].
Tap Notifications.
Tap [Settings].
To edit a notification, tap to select the sensor activity notification to configure.
To create a new notification if there is not an up and about notification yet
Tap [Add].
Tap Use A Template.
In Wellness, tap More.
Tap Sensor Activity.
Name the new notification rule.
In When any of these sensors open or are activated, tap to select the sensors you would like to receive notifications from.
In During this time frame, select either
At All Times to notify you any time of the day when it is triggered.
Only During the Following Times to set up notifications to only take place during certain hours of the day.
Tap Add to select who is notified.
Tap the entries in the Address Book that are to be notified, or tap Add Contact to add a new Address Book entry.
Once all desired recipients are selected, tap Close.
Verify the notification is configured with the correct settings.
Tap Save.
To create/edit a Sensor Activity notification using the GoSafer Security customer portal (powered by Alarm.com)
Log in to the GoSafer Security customer portal (powered by Alarm.com).
Click Notifications.
To edit a notification, click [Edit] for the sensor activity notification to configure.
To create a new notification if there is not one created yet
Click New Notification.
Click Wellness.
Click Sensor Activity.
Name the notification rule.
In When any of these sensors open or are activated, click to select the sensors you would like to receive notifications from.
In During this time frame, select either
At All Times to notify you any time of the day when it is triggered.
Only During the Following Times to set up notifications to only take place during certain hours of the day.
Click Add to select who is notified.
Click the entries in the Address Book that are to be notified, or click New to add a new Address Book entry.
Once all desired recipients are selected, click Close.
Verify the notification is configured with the correct settings.
Always verify safety, installation, compatibility, and current UI details against the original manufacturer documentation before operational use.
Wellness
Create/edit a Sensor Closed or Occupied notification
GoSafer Security Knowledge Base
This operational reference is organized for GoSafer Security customers and staff. Alarm.com product names are retained where required for technical accuracy.
Overview
A Sensor Closed or Occupied notification can notify users if a sensor is closed or occupied.
Platform
App + Web
Content type
How-to / Configuration
Source last updated
2025-06-04
Procedure
To create/edit Sensor Closed or Occupied notification using the Alarm.com app
Log in to the Alarm.com app.
Tap [Menu].
Tap Notifications.
Tap [Settings].
To edit a notification, tap to select the sensor closed or occupied notification to configure.
To create a new notification if there is not an up and about notification yet
Tap [Add].
Tap Use A Template.
In Wellness, tap More.
Tap Sensor Closed or Occupied.
Name the new notification rule.
In When any of these sensors close or are occupied, tap to select the sensors you would like to receive notifications from.
In During this time frame, select either
At All Times to notify you any time of the day when the notification is triggered.
Only During the Following Times to set up notifications to only take place during certain hours of the day.
Tap Add to select who is notified.
Tap the entries in the Address Book that are to be notified, or tap Add Contact to add a new Address Book entry.
Once all desired recipients are selected, tap Close.
Verify the notification is configured with the correct settings.
Tap Save.
To create/edit Sensor Closed or Occupied notification using the GoSafer Security customer portal (powered by Alarm.com):
Log in to the GoSafer Security customer portal (powered by Alarm.com).
Click Notifications.
To edit a notification, click [Edit] for the sensor closed or occupied notification to configure.
To create a new notification if there is not a sensor closed or occupied notification yet
Click New Notification.
Click Wellness.
Click Sensor Closed or Occupied.
Name the notification rule.
In When any of these sensors close or are occupied, click to select the sensors you would like to receive notifications from.
In During this time frame, select either
At All Times to notify you any time of the day when it is triggered.
Only During the Following Times to set up notifications to only take place during certain hours of the day.
Click Add to select who is notified.
Click the entries in the Address Book that are to be notified, or click New to add a new Address Book entry.
Once all desired recipients are selected, click Close.
Verify the notification is configured with the correct settings.
Always verify safety, installation, compatibility, and current UI details against the original manufacturer documentation before operational use.
Wellness
Create/edit a Sensor Left Closed or Occupied notification
GoSafer Security Knowledge Base
This operational reference is organized for GoSafer Security customers and staff. Alarm.com product names are retained where required for technical accuracy.
Overview
A Sensor Left Closed or Occupied notification can notify users if a sensor is closed or activated for longer than a specified duration.
Platform
App + Web
Content type
How-to / Configuration
Source last updated
2025-06-04
Procedure
To create/edit a Sensor Left Closed or Occupied notification using the Alarm.com app
Log in to the Alarm.com app.
Tap [Menu].
Tap Notifications.
Tap [Settings].
To edit a notification, tap to select the sensor left closed or occupied notification to configure.
To create a new notification if one has not been created yet
Tap [Add].
Tap Use A Template.
In Wellness, tap More.
Tap Sensor Left Closed Or Occupied.
Name the new notification rule.
In When any of these sensors, tap to select the sensors you would like to receive notifications from.
Using the Is Left Closed for this duration dropdown menu, select the amount of time the sensor must remain close to trigger the notification.
In During this time frame, select either
At All Times to notify you any time of the day when it is triggered.
Only During the Following Times to set up notifications to only take place during certain hours of the day.
Tap Add to select who is notified.
Tap the entries in the Address Book that are to be notified, or tap Add Contact to add a new Address Book entry.
Once all desired recipients are selected, tap Close.
Verify the notification is configured with the correct settings.
Tap Save.
To create/edit a Sensor Left Closed or Occupied notification using the GoSafer Security customer portal (powered by Alarm.com):
Log in to the GoSafer Security customer portal (powered by Alarm.com).
Click Notifications.
To edit a notification, click [Edit] for the sensor left closed or occupied notification to configure.
To create a new notification if one has not been created yet
Click New Notification.
Click Wellness.
Click Sensor Left Closed or Occupied.
Name the notification rule.
In When any of these sensors, click to select the sensors you would like to receive notifications from.
Using the Is Left Closed for this duration dropdown menu, select the amount of time the sensor must remain close to trigger the notification.
In During this time frame, select either
At All Times to notify you any time of the day when it is triggered.
Only During the Following Times to set up notifications to only take place during certain hours of the day.
Click Add to select who is notified.
Click the entries in the Address Book that are to be notified, or click New to add a new Address Book entry.
Once all desired recipients are selected, click Close.
Verify the notification is configured with the correct settings.
Always verify safety, installation, compatibility, and current UI details against the original manufacturer documentation before operational use.
Wellness
Create/edit a Sensor Left Open or Vacant notification
GoSafer Security Knowledge Base
This operational reference is organized for GoSafer Security customers and staff. Alarm.com product names are retained where required for technical accuracy.
Overview
A Sensor Left Open or Vacant notification can notify users if a sensor is left open or unactivated for a specified duration.
Platform
App + Web
Content type
How-to / Configuration
Source last updated
2025-06-04
Procedure
To create/edit a Sensor Left Open or Vacant notification using the Alarm.com app
Log in to the Alarm.com app.
Tap [Menu].
Tap Notifications.
Tap [Settings].
To edit a notification, tap to select the sensor left open or vacant notification to configure.
To create a new notification if there is not an up and about notification yet
Tap [Add].
Tap Use A Template.
In Wellness, tap More.
Tap Away From Bed.
Name the new notification rule.
In When any of these sensors, tap to select the sensors you would like to receive notifications from.
In Is Left Open, select either
For this duration to select an amount of time in minutes the sensor must remain open before sending the notification.
When selected people cross a Geo-Fence to select Geo-Devices and its action with a specified Geo-Fence that triggers the notification.
In During this time frame, select either
At All Times to notify you any time of the day when it is triggered.
Only During the Following Times to set up notifications to only take place during certain hours of the day.
Tap Add to select who is notified.
Tap the entries in the Address Book that are to be notified, or tap Add Contact to add a new Address Book entry.
Once all desired recipients are selected, tap Close.
Verify the notification is configured with the correct settings.
Tap Save.
To create/edit a Sensor Left Open or Vacant notification using the GoSafer Security customer portal (powered by Alarm.com):
Log in to the GoSafer Security customer portal (powered by Alarm.com).
Click Notifications.
To edit a notification, click [Edit] for the sensor left open or vacant notification to configure.
To create a new notification if there is not a sensor left open or vacant notification yet
Click New Notification.
Click Wellness.
Click Sensor left open or Vacant.
Name the notification rule.
In When any of these sensors, click to select the sensors you would like to receive notifications from.
In Is Left Open, select either
For this duration to select an amount of time in minutes the sensor must remain open before sending the notification.
When selected people cross a Geo-Fence to select Geo-Devices and its action with a specified Geo-Fence that triggers the notification.
In During this time frame, select either
At All Times to notify you any time of the day when it is triggered.
Only During the Following Times to set up notifications to only take place during certain hours of the day.
Click Add to select who is notified.
Click the entries in the Address Book that are to be notified, or click New to add a new Address Book entry.
Once all desired recipients are selected, click Close.
Verify the notification is configured with the correct settings.
Always verify safety, installation, compatibility, and current UI details against the original manufacturer documentation before operational use.
Wellness
Create/edit a Still in Bed notification
GoSafer Security Knowledge Base
This operational reference is organized for GoSafer Security customers and staff. Alarm.com product names are retained where required for technical accuracy.
Overview
A Still in Bed notification can notify users if a bed sensor is activated longer than a specified duration.
Platform
App + Web
Content type
How-to / Configuration
Source last updated
2025-06-04
Procedure
To create/edit a Still in Bed notification using the Alarm.com app
Log in to the Alarm.com app.
Tap [Menu].
Tap Notifications.
Tap [Settings].
To edit a notification, tap to select the still in bed notification to configure.
To create a new notification if there is not an up and about notification yet
Tap [Add].
Tap Use A Template.
In Wellness, tap More.
Tap Still in Bed.
Name the new notification rule.
In When any of these sensors, tap to select the sensors you would like to receive notifications from.
Using the Is Left Open for this duration dropdown menu, select the amount of time the sensor must remain closed before sending the notification.
In During this time frame, select either
At All Times to notify you any time of the day when it is triggered.
Only During the Following Times to set up notifications to only take place during certain hours of the day.
Tap Add to select who is notified.
Tap the entries in the Address Book that are to be notified, or tap Add Contact to add a new Address Book entry.
Once all desired recipients are selected, tap Close.
Verify the notification is configured with the correct settings.
Tap Save.
To create/edit a Still in Bed notification using the GoSafer Security customer portal (powered by Alarm.com)
Log in to the GoSafer Security customer portal (powered by Alarm.com).
Click Notifications.
To edit a notification, click [Edit] for the still in bed notification to configure.
To create a new notification if one has not been created yet
Click New Notification.
Click Wellness.
Click Still In Bed.
Name the notification rule.
In When any of these sensors, click to select the sensors you would like to receive notifications from.
Using the Is Left Open for this duration dropdown menu, select the amount of time the sensor must remain closed before sending the notification.
In During this time frame, select either
At All Times to notify you any time of the day when it is triggered.
Only During the Following Times to set up notifications to only take place during certain hours of the day.
Click Add to select who is notified.
Click the entries in the Address Book that are to be notified, or click New to add a new Address Book entry.
Once all desired recipients are selected, click Close.
Verify the notification is configured with the correct settings.
Always verify safety, installation, compatibility, and current UI details against the original manufacturer documentation before operational use.
Wellness
Create/edit an Away From Bed notification
GoSafer Security Knowledge Base
This operational reference is organized for GoSafer Security customers and staff. Alarm.com product names are retained where required for technical accuracy.
Overview
An Away From Bed notification can notify users if a bed sensor is unoccupied for a specified duration in a specific timeframe.
Platform
App + Web
Content type
How-to / Configuration
Source last updated
2025-06-04
Procedure
To create/edit an Away From Bed notification using the Alarm.com app
Log in to the Alarm.com app.
Tap [Menu].
Tap Notifications.
Tap [Settings].
To edit a notification, tap to select the Away From Bed notification to configure.
To create a new notification if there is not an Away From Bed notification yet
Tap [Add].
Tap Use A Template.
In Wellness, tap More.
Tap Away From Bed.
Name the new notification rule.
In When any of these sensors, tap to select the sensors you would like to receive notifications from.
In Is Left Open, select either
For this duration to select an amount of time in minutes the sensor must remain open before sending the notification.
When selected people cross a Geo-Fence to select Geo-Devices and its action with a specified Geo-Fence that triggers the notification.
In During this time frame, select either
At All Times to notify you any time of the day when it is triggered.
Only During the Following Times to set up notifications to only take place during certain hours of the day.
Tap Add to select who is notified.
Tap the entries in the Address Book that are to be notified, or tap Add Contact to add a new Address Book entry.
Once all desired recipients are selected, tap Close.
Verify the notification is configured with the correct settings.
Tap Save.
To create/edit an Away From Bed notification using the GoSafer Security customer portal (powered by Alarm.com)
Log in to the GoSafer Security customer portal (powered by Alarm.com).
Click Notifications.
To edit a notification, click [Edit] for the Away From Bed notification to configure.
To create a new notification if there is not an Away From Bed notification yet
Click New Notification.
Click Wellness.
Click Away From Bed.
Name the notification rule.
In When any of these sensors, click to select the sensors you would like to receive notifications from.
In Is Left Open, select either
For this duration to select an amount of time in minutes the sensor must remain open before sending the notification.
When selected people cross a Geo-Fence to select Geo-Devices and its action with a specified Geo-Fence that triggers the notification.
In During this time frame, select either
At All Times to notify you any time of the day when it is triggered.
Only During the Following Times to set up notifications to only take place during certain hours of the day.
Click Add to select who is notified.
Click the entries in the Address Book that are to be notified, or click New to add a new Address Book entry.
Once all desired recipients are selected, click Close.
Verify the notification is configured with the correct settings.
Always verify safety, installation, compatibility, and current UI details against the original manufacturer documentation before operational use.
Wellness
Create/edit an Up and About notification
GoSafer Security Knowledge Base
This operational reference is organized for GoSafer Security customers and staff. Alarm.com product names are retained where required for technical accuracy.
Overview
An up and about notification can notify users if there has been a long period of no activity at the home.
Platform
App + Web
Content type
How-to / Configuration
Source last updated
2025-06-04
Procedure
To create/edit an Up and About notification using the Alarm.com app
Log in to the Alarm.com app.
Tap [Menu].
Tap Notifications.
Tap [Settings].
To edit a notification, tap to select the Up and About notification to configure.
To create a new notification if there is not an Up and About notification yet
Tap [Add].
Tap Use A Template.
In Wellness, tap More.
Tap Up And About.
Enter the desired name for the notification rule.
Using the System is inactive for dropdown menus, configure the required inactivity duration.
In During this time frame, select either
At All Times to notify you any time of the day the system is inactive for the set time.
Only During the Following Times to set up notifications to only take place during certain hours of the day.
In Recipients, tap Add to select recipients to be notified.
Tap the entries in the Address Book that are to be notified, or tap Add Contact to add a new Address Book entry.
Once all desired recipients are selected, tap Close.
Verify the notification is configured with the correct settings.
Tap Save.
To create/edit an Up and About notification using the GoSafer Security customer portal (powered by Alarm.com)
Log in to the GoSafer Security customer portal (powered by Alarm.com).
Click Notifications.
To edit a notification, click [Edit] for the Up and About notification to configure.
To create a new notification if there is not an Up and About notification yet
Click New Notification.
Click Wellness.
Click Up And About.
Enter the desired name for the notification rule.
Using the System is inactive for dropdown menus, configure the required inactivity duration.
In During this time frame, select either
At All Times to notify you any time of the day the system is inactive for the set time.
Only During the Following Times to set up notifications to only take place during certain hours of the day.
In Recipients, click Add to select recipients to be notified.
Click the entries in the Address Book that are to be notified, or click New to add a new Address Book entry.
Once all desired recipients are selected, click Close.
Verify the notification is configured with the correct settings.
Always verify safety, installation, compatibility, and current UI details against the original manufacturer documentation before operational use.
Wellness
Wellness Notifications
GoSafer Security Knowledge Base
This operational reference is organized for GoSafer Security customers and staff. Alarm.com product names are retained where required for technical accuracy.
Overview
This GoSafer Security section brings together resources for Wellness Notifications, including setup, configuration, everyday use, and troubleshooting. Choose the related page that matches your device, feature, or task, and follow the current manufacturer guidance linked on that page.
Platform
General / Device
Content type
How-to / Configuration
Source last updated
2022-01-31
Procedure
Browse the related pages in this chapter to open the specific procedure, configuration guide, or troubleshooting article you need.
This operational reference is organized for GoSafer Security customers and staff. Alarm.com product names are retained where required for technical accuracy.
Overview
The Wellcam allows you to stay connected to your families while away and establish peace of mind. Stay closer to loved ones even when they might not be present. Use the Wellcam’s Video …
Platform
App + Web
Content type
How-to / Configuration
Source last updated
2022-01-31
Procedure
Step-by-step guide: Screenshots and videos are placed with the instruction they illustrate.
The Wellcam allows you to stay connected to your families while away and establish peace of mind. Stay closer to loved ones even when they might not be present.
Use the Wellcam’s Video Callout feature to maintain interactions from a distance.
The following videos explain how to set up this option using the Alarm.com app or the GoSafer Security customer portal (powered by Alarm.com).
Configure Two-Way Audio calls using the Alarm.com app
Configure Two-Way Audio calls using the GoSafer Security customer portal (powered by Alarm.com)
Always verify safety, installation, compatibility, and current UI details against the original manufacturer documentation before operational use.
Wellness
Alarm.com Wellcam Installation - Connect to Wi-Fi
GoSafer Security Knowledge Base
This operational reference is organized for GoSafer Security customers and staff. Alarm.com product names are retained where required for technical accuracy.
Overview
When adding the Wellcam to the account, first connect the camera to the location’s network.
The following videos explain the steps needed to successfully pair the camera to the router using either Access Point (AP) Mode or WPS Mode.
Platform
General / Device
Content type
Reference
Source last updated
2024-07-30
Procedure
Step-by-step guide: Screenshots and videos are placed with the instruction they illustrate.
When adding the Wellcam to the account, first connect the camera to the location’s network.
The following videos explain the steps needed to successfully pair the camera to the router using either Access Point (AP) Mode or WPS Mode.
Connect to Wi-Fi using AP Mode
Connect to Wi-Fi using WPS Mode
Not all routers support WPS. For further support with pairing the camera, view the AP Mode video.
Always verify safety, installation, compatibility, and current UI details against the original manufacturer documentation before operational use.
Wellness
Alarm.com Wellcam Installation - Enroll to an account
GoSafer Security Knowledge Base
This operational reference is organized for GoSafer Security customers and staff. Alarm.com product names are retained where required for technical accuracy.
Overview
Adding the Wellcam to Alarm.com is easy. Before being able to view Live Video and Saved Clips, the camera must be enrolled to the account. The following video explains how to attach the camera to …
Platform
General / Device
Content type
Reference
Source last updated
2022-01-31
Procedure
Step-by-step guide: Screenshots and videos are placed with the instruction they illustrate.
Adding the Wellcam to Alarm.com is easy. Before being able to view Live Video and Saved Clips, the camera must be enrolled to the account.
The following video explains how to attach the camera to Alarm.com and begin interacting with loved ones.
Always verify safety, installation, compatibility, and current UI details against the original manufacturer documentation before operational use.
Wellness
Alarm.com Wellcam Installation - Placing the Wellcam
GoSafer Security Knowledge Base
This operational reference is organized for GoSafer Security customers and staff. Alarm.com product names are retained where required for technical accuracy.
Overview
Before installing the Wellcam, find an ideal location for phoning your family. Maintaining high-quality video calls is important to seeing and hearing loved ones on the other end. Verify that the …
Platform
General / Device
Content type
How-to / Configuration
Source last updated
2022-01-31
Procedure
Step-by-step guide: Screenshots and videos are placed with the instruction they illustrate.
Before installing the Wellcam, find an ideal location for phoning your family.
Maintaining high-quality video calls is important to seeing and hearing loved ones on the other end. Verify that the location has sufficient internet bandwidth.
The following video contains details about identifying ideal placement conditions and learning how to run a speed test.
Always verify safety, installation, compatibility, and current UI details against the original manufacturer documentation before operational use.
Wellness
Alarm.com Wellcam Installation - Using Two-Way Audio
GoSafer Security Knowledge Base
This operational reference is organized for GoSafer Security customers and staff. Alarm.com product names are retained where required for technical accuracy.
Overview
The Wellcam allows you to stay connected to your family while away and establish peace of mind. Stay closer to loved ones even when they might not be present. The following video shows the Video Callout notification in action. For more information about creating a Video Callout notification, see Alarm.com Wellcam Installation - Configure Two-Way Audio.
Platform
General / Device
Content type
How-to / Configuration
Source last updated
2022-01-31
Procedure
Step-by-step guide: Screenshots and videos are placed with the instruction they illustrate.
The Wellcam allows you to stay connected to your family while away and establish peace of mind. Stay closer to loved ones even when they might not be present.
Always verify safety, installation, compatibility, and current UI details against the original manufacturer documentation before operational use.
Wellness
Wellness video
GoSafer Security Knowledge Base
This operational reference is organized for GoSafer Security customers and staff. Alarm.com product names are retained where required for technical accuracy.
Overview
This GoSafer Security section brings together resources for Wellness video, including setup, configuration, everyday use, and troubleshooting. Choose the related page that matches your device, feature, or task, and follow the current manufacturer guidance linked on that page.
Platform
General / Device
Content type
How-to / Configuration
Source last updated
2022-01-31
Procedure
Browse the related pages in this chapter to open the specific procedure, configuration guide, or troubleshooting article you need.
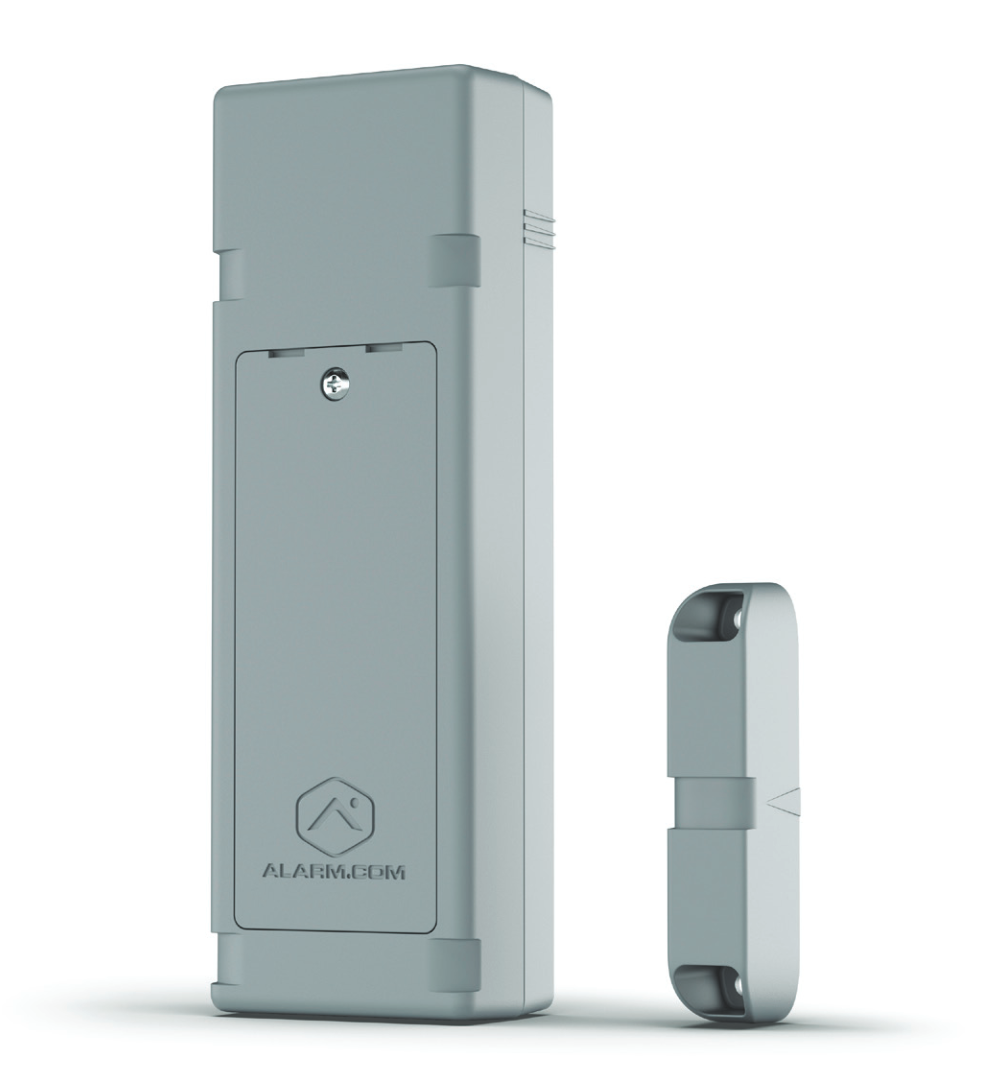

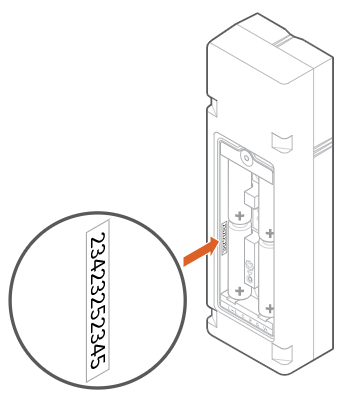
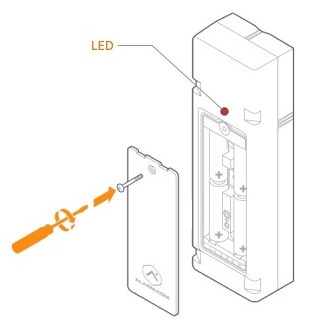
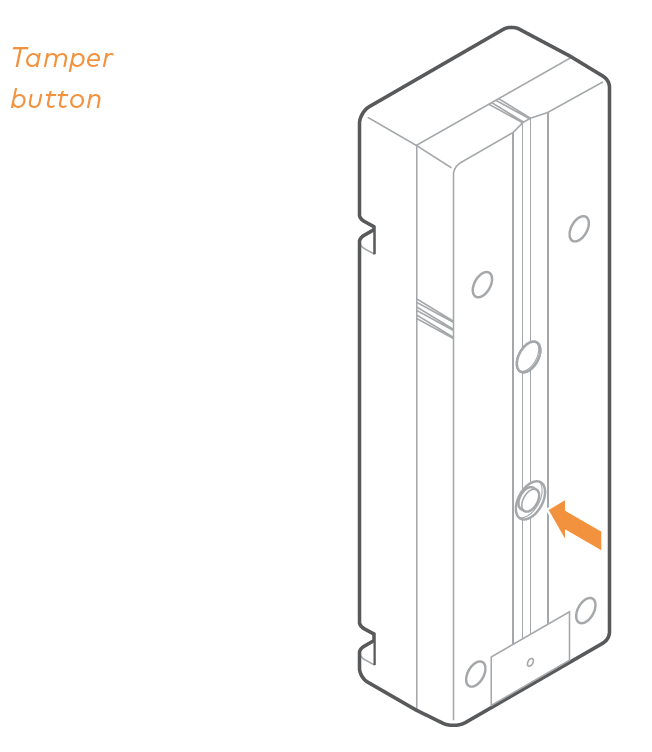
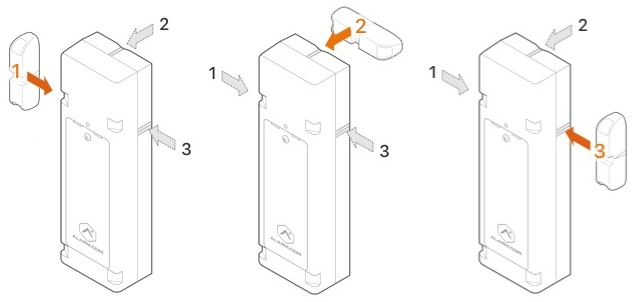
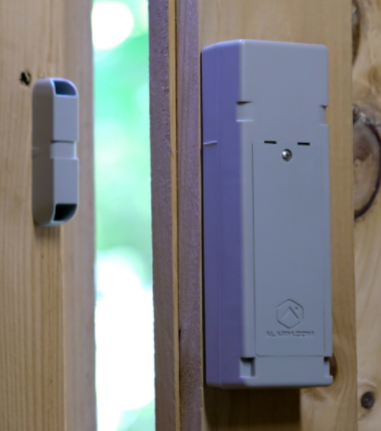
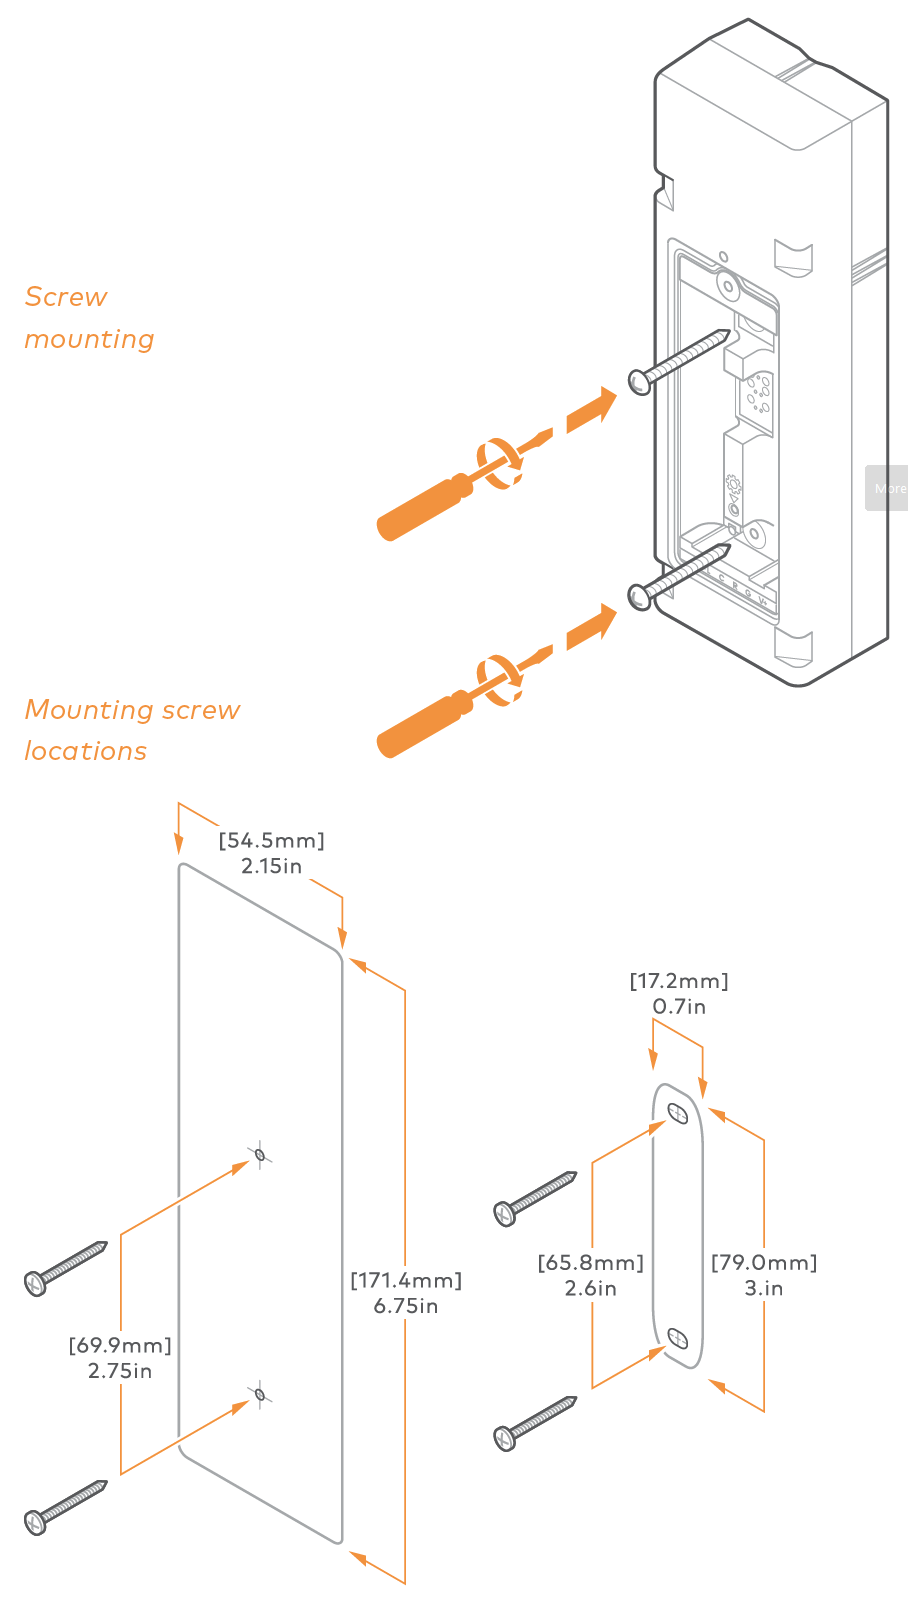
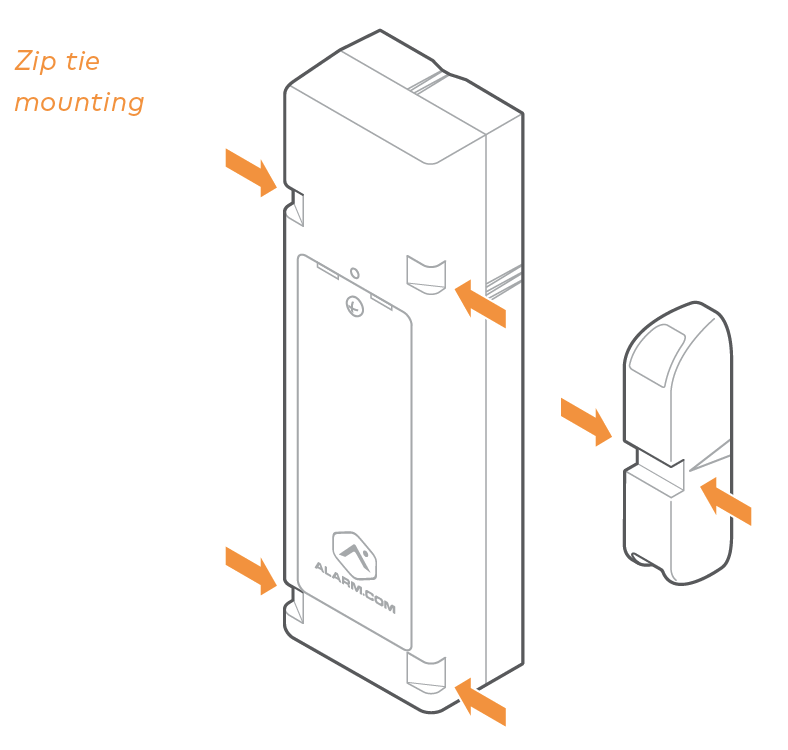
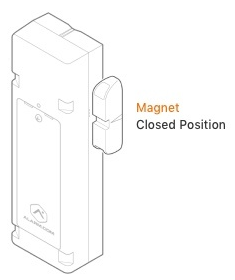
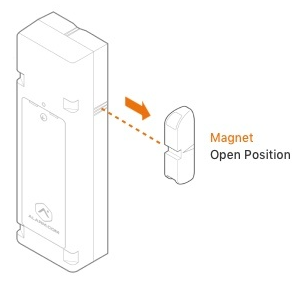
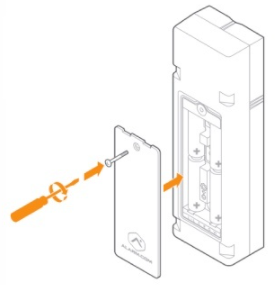
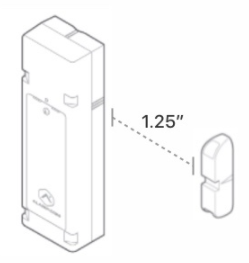
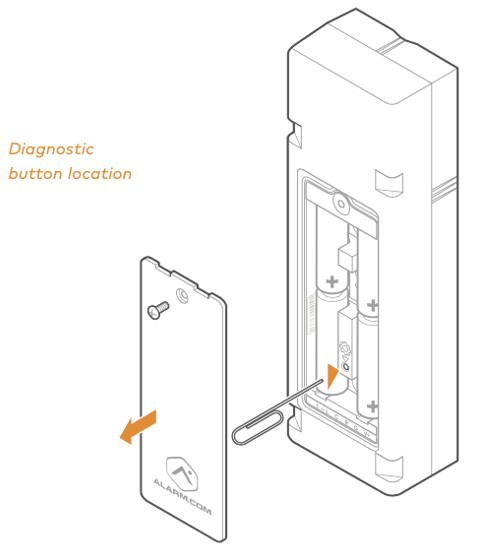









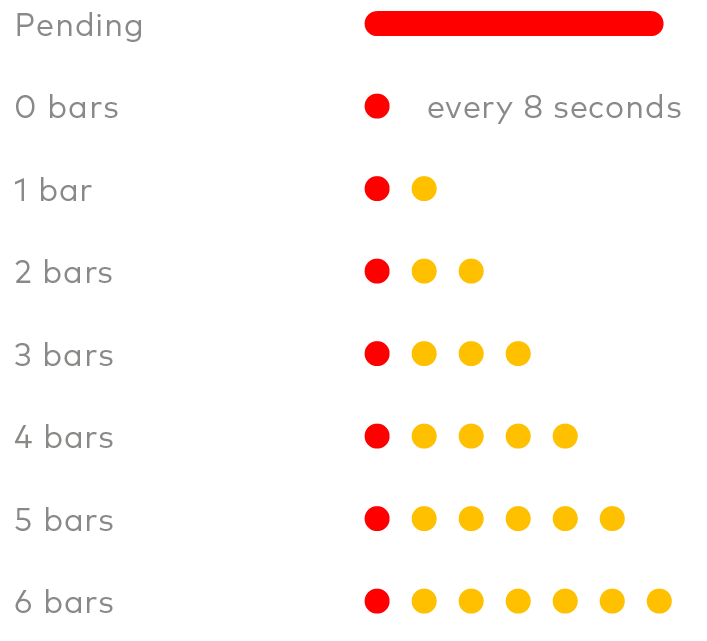







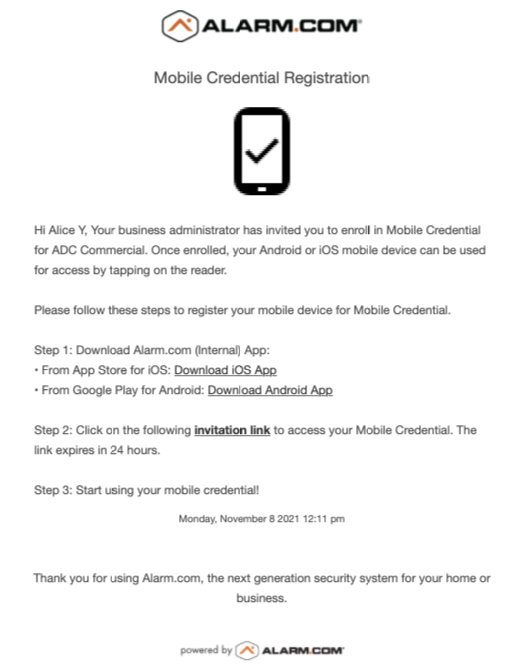
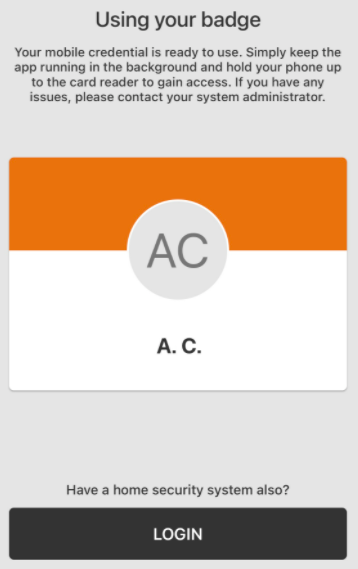
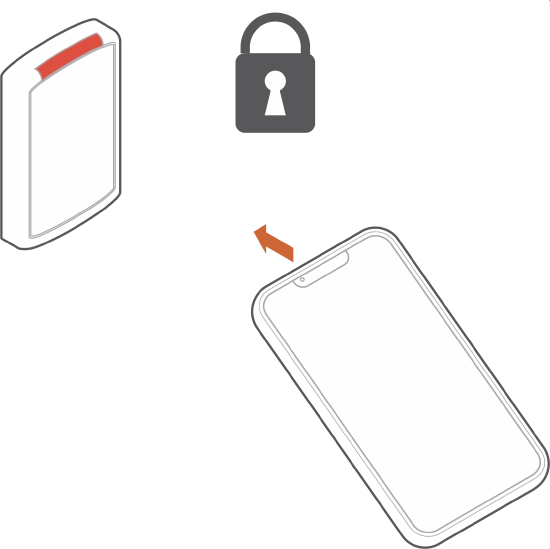
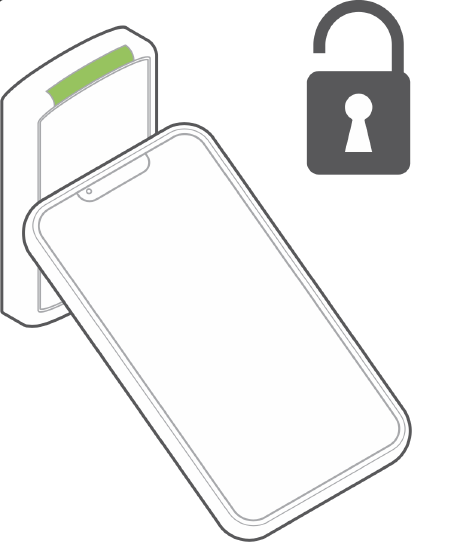
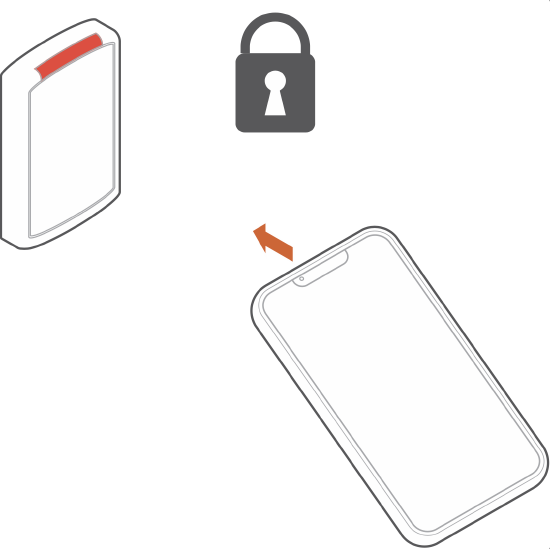
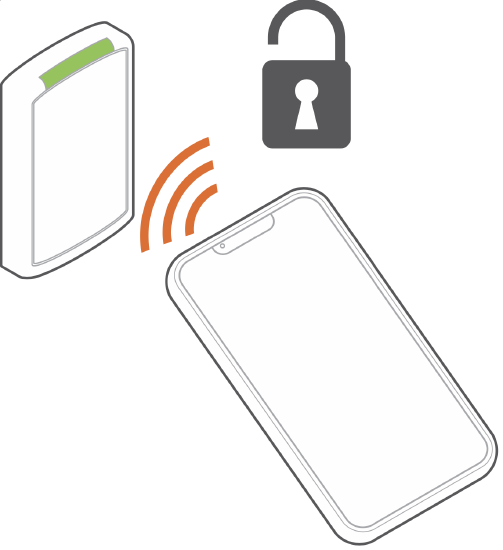
.png?revision=1)
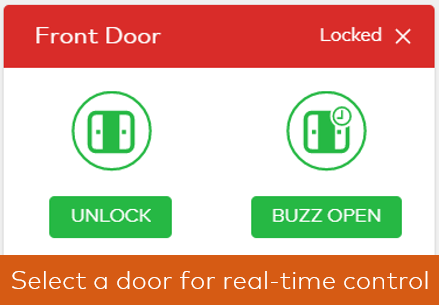
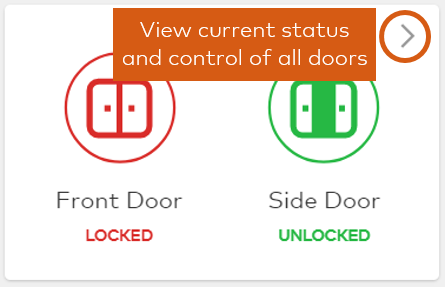
.png?revision=1)
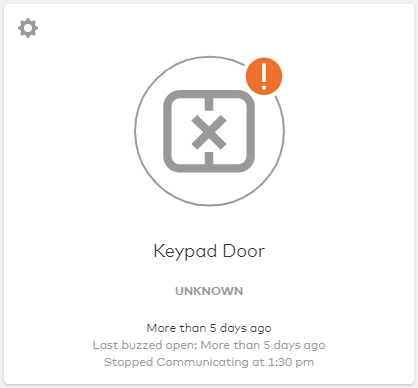
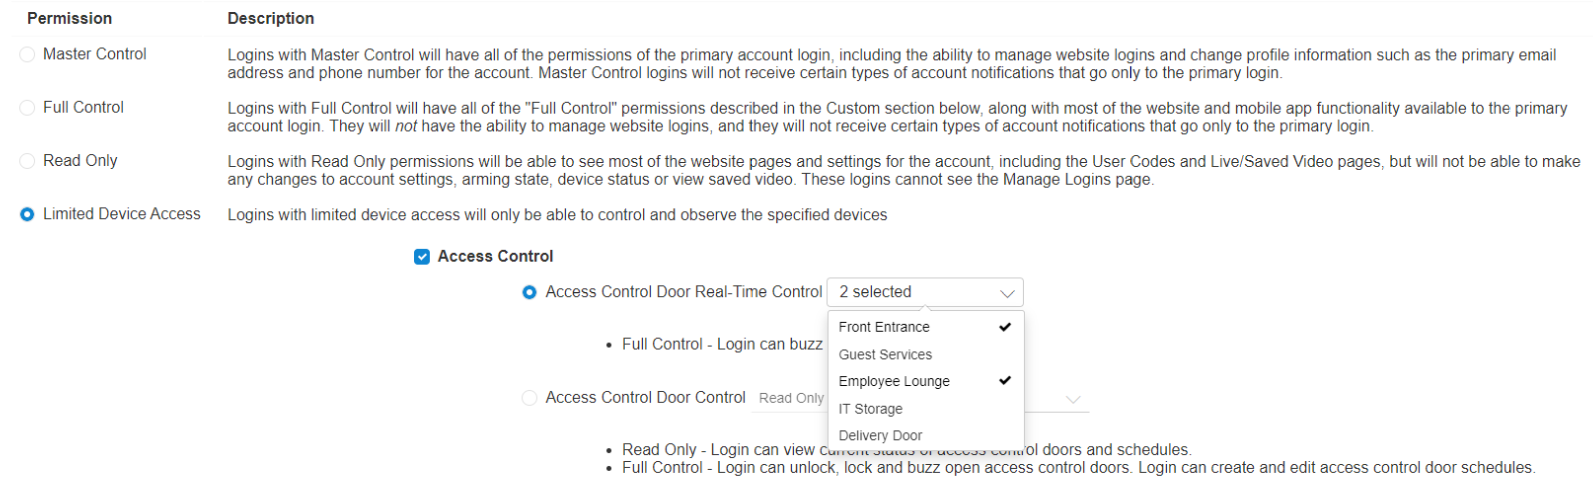
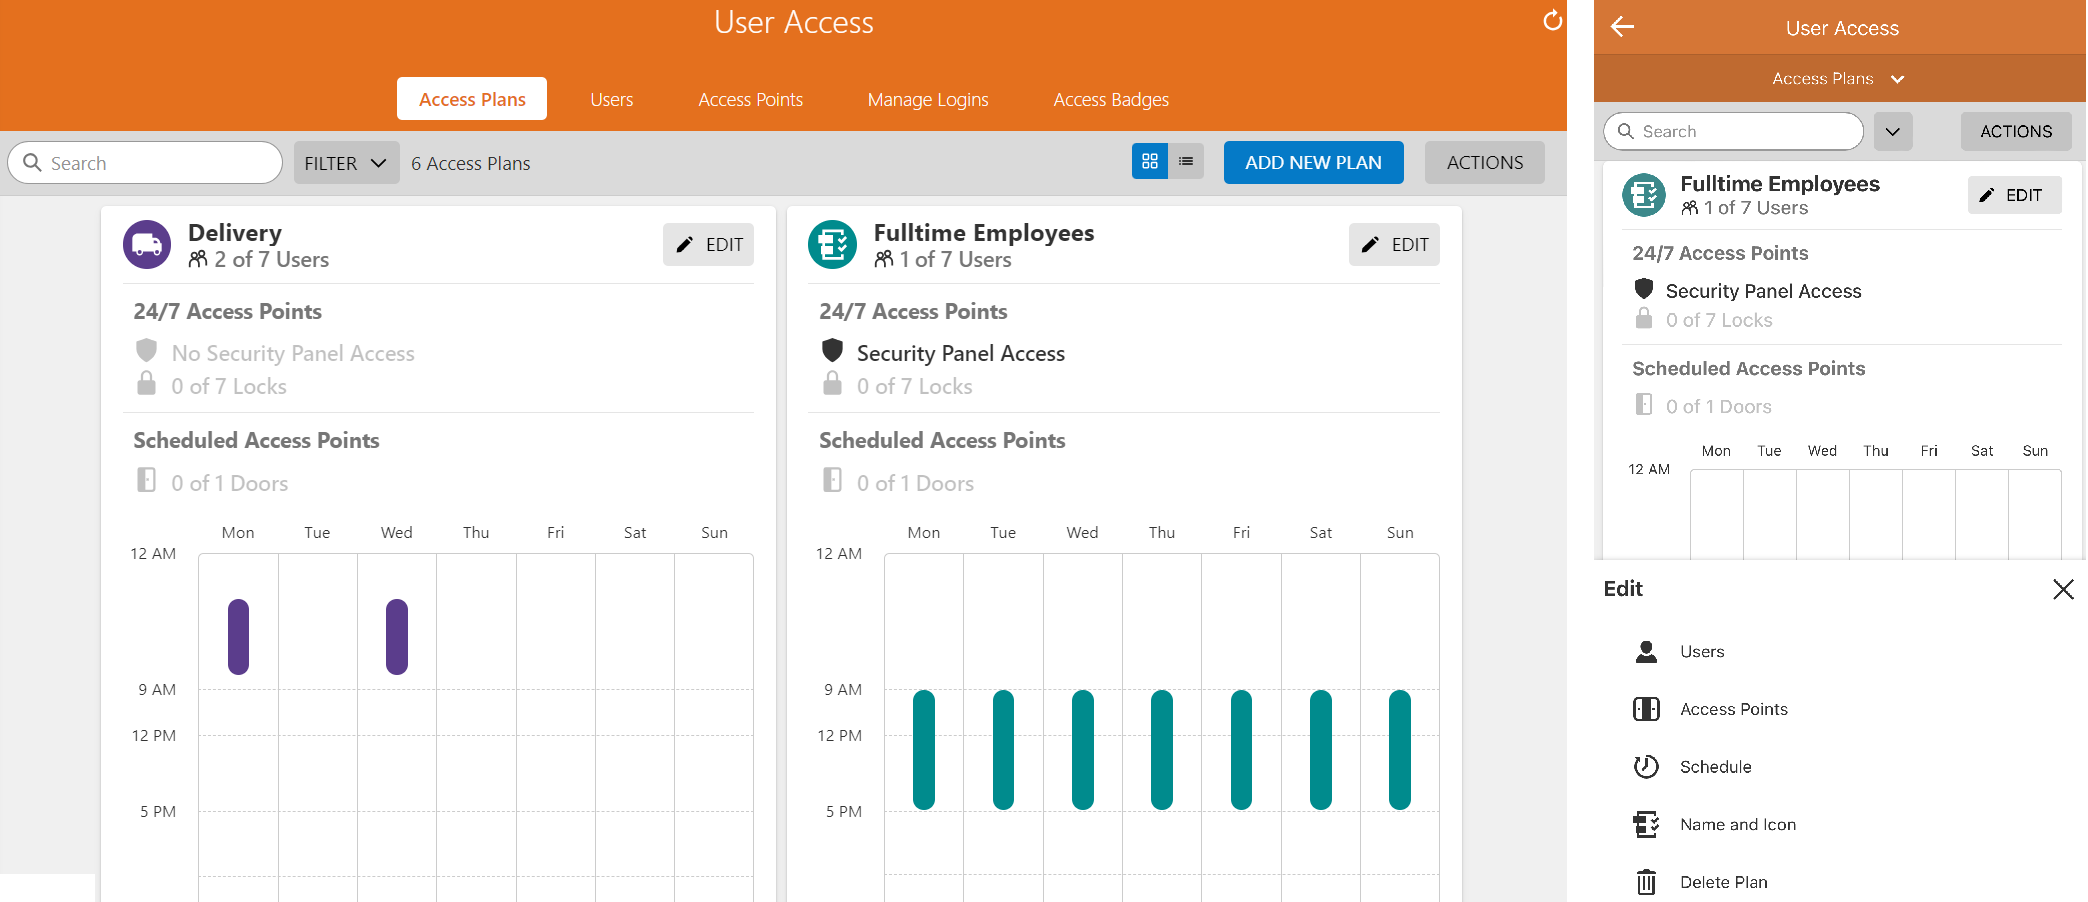


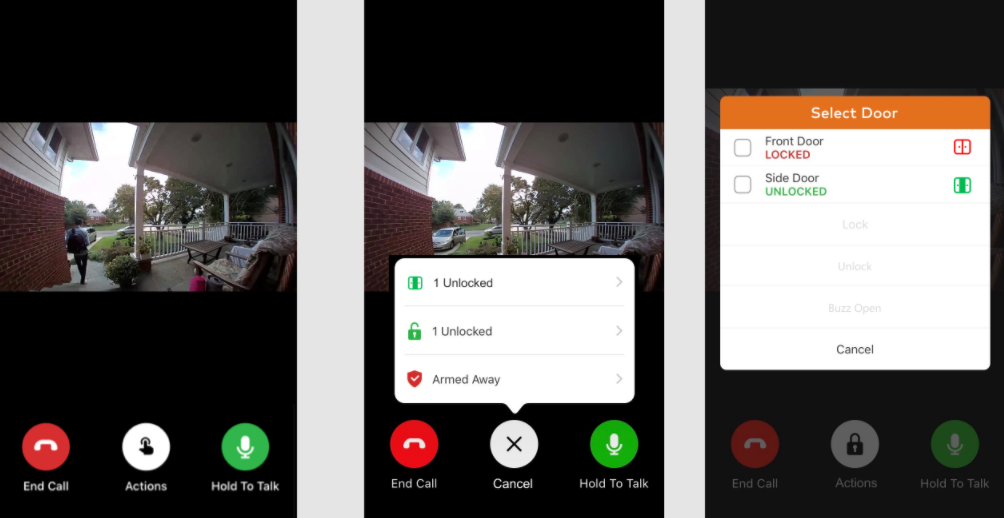
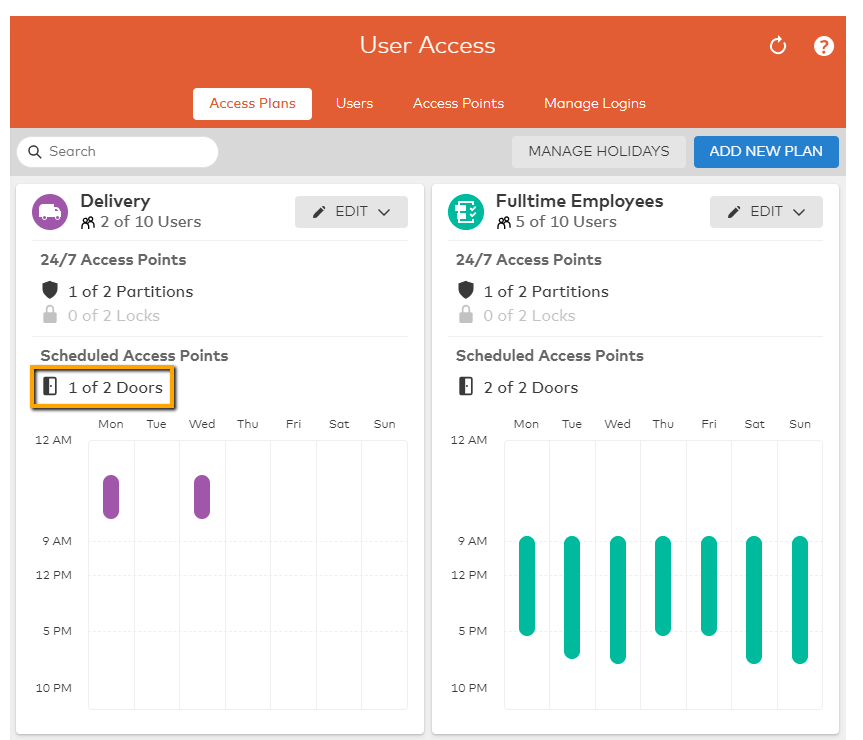
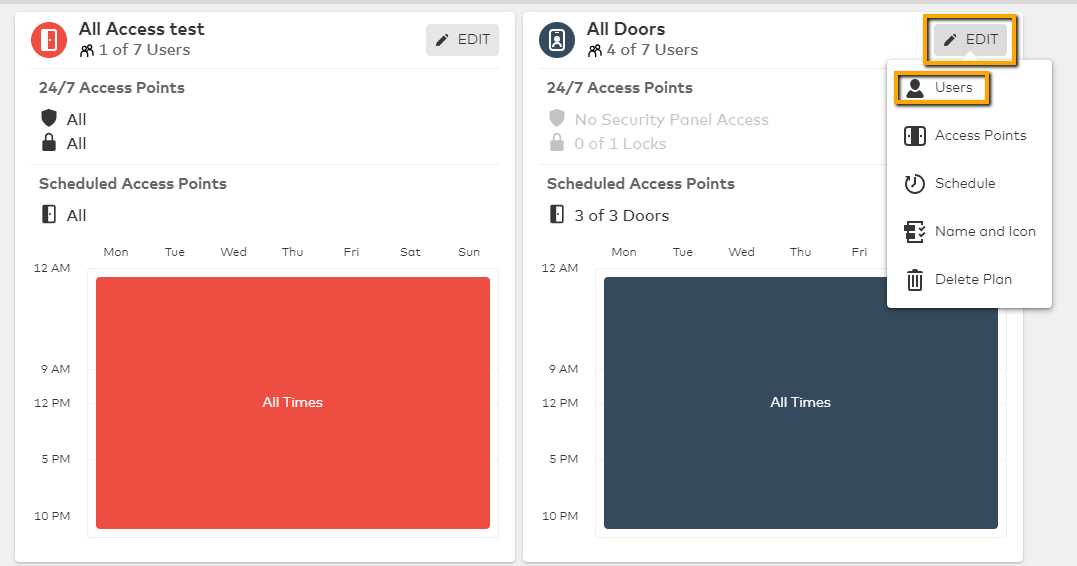
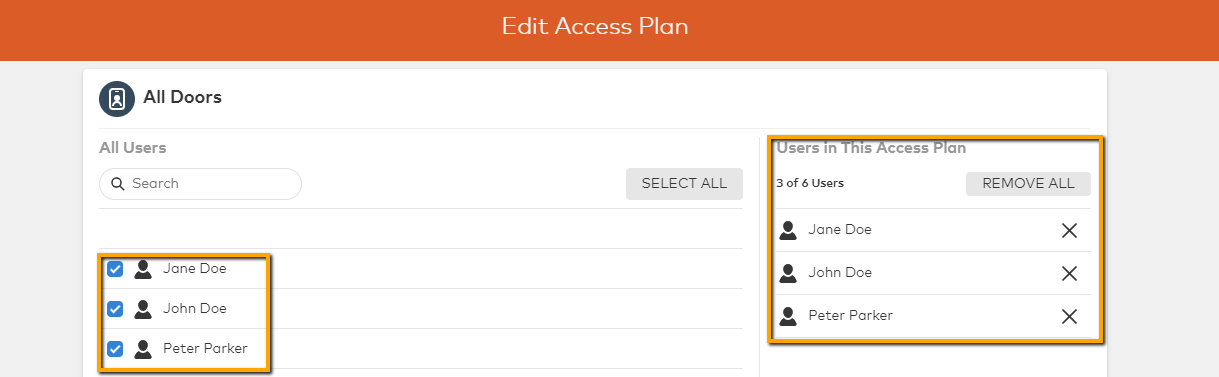
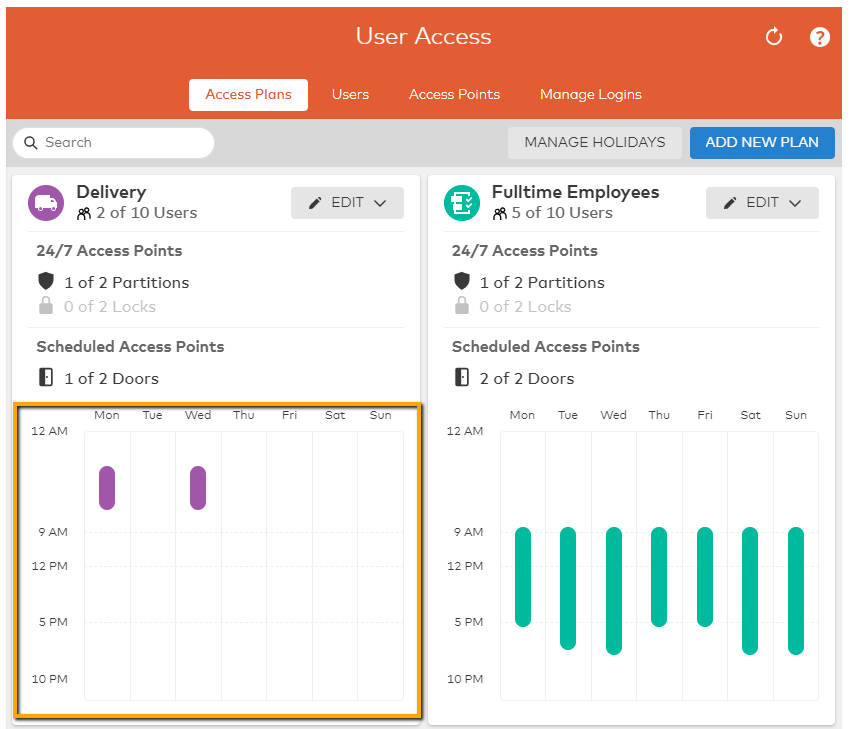
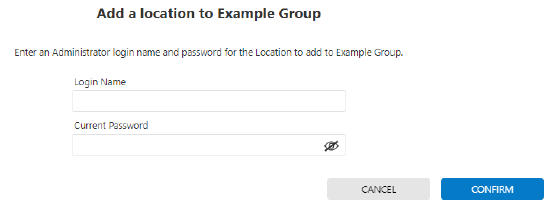
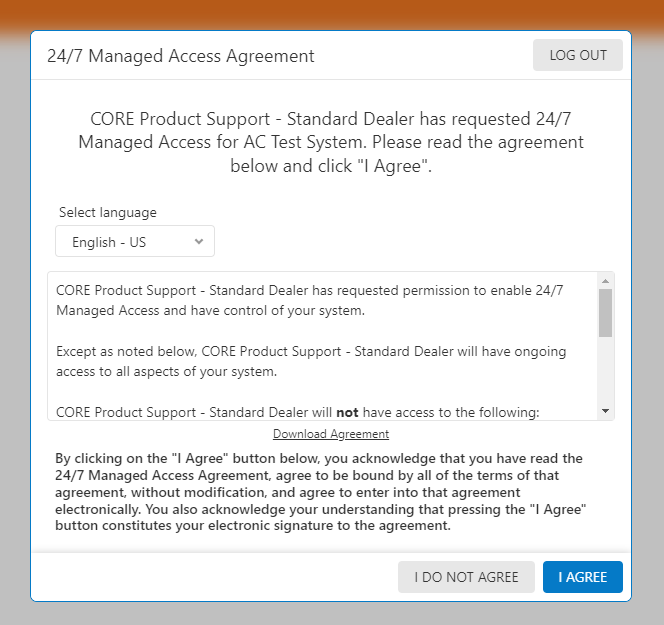
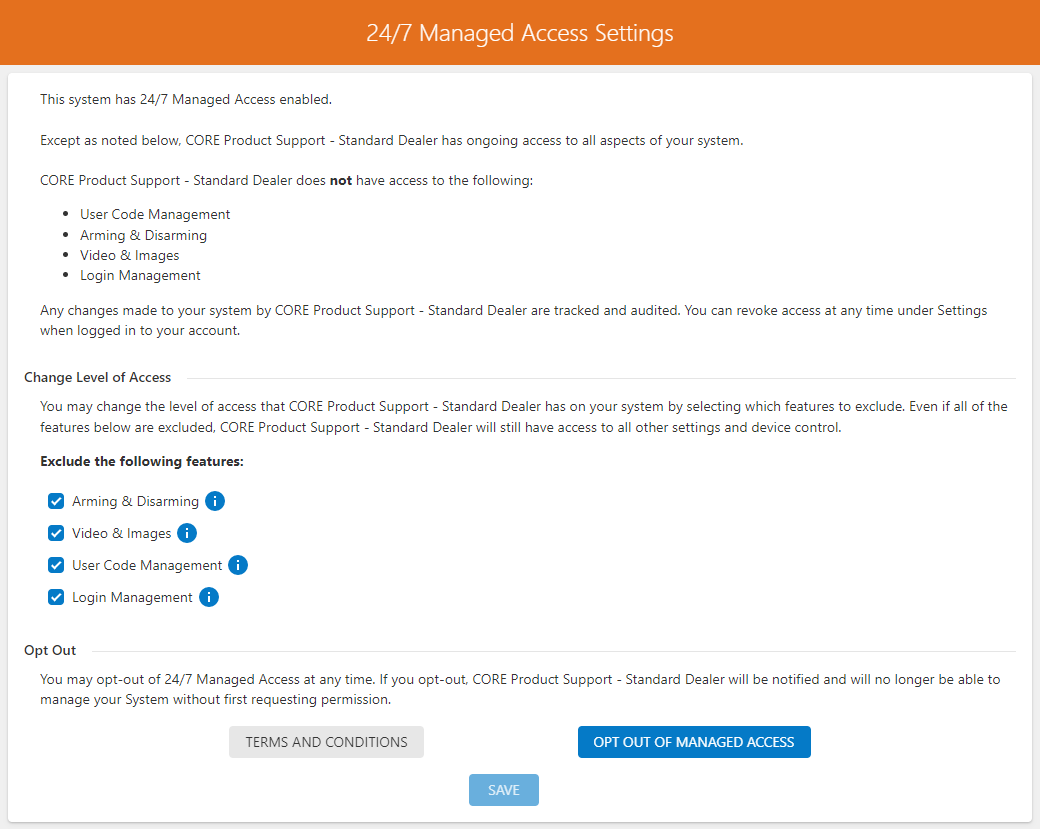


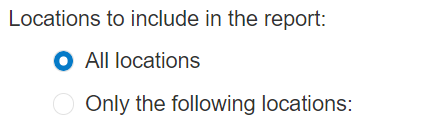
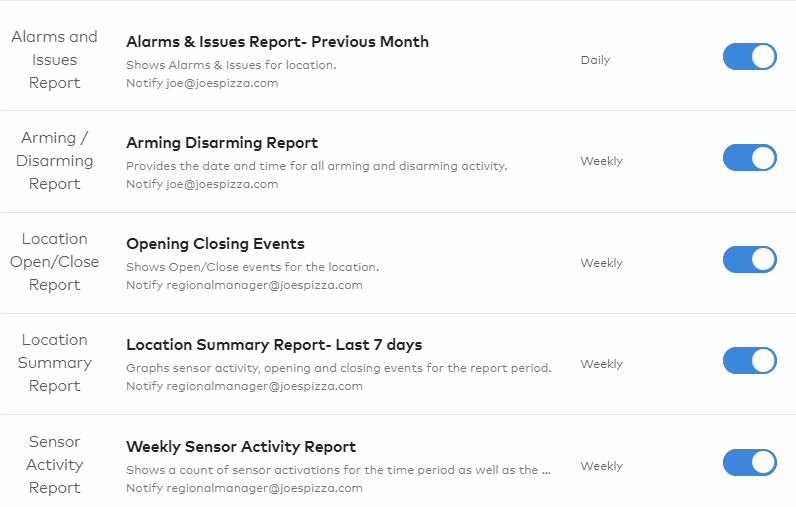


.png?revision=1)

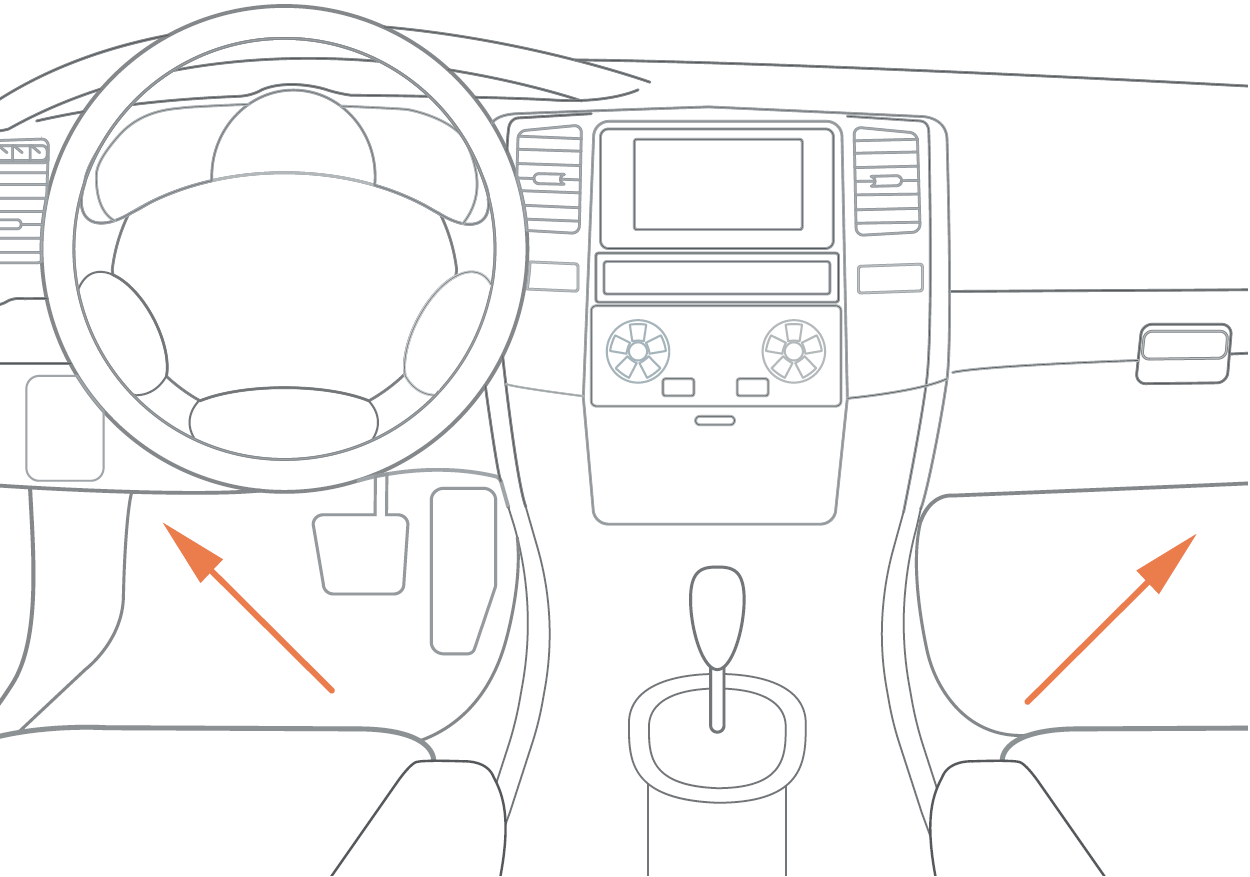
.png?revision=1&size=bestfit&width=415&height=250)


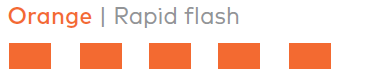
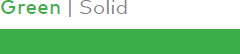
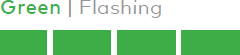

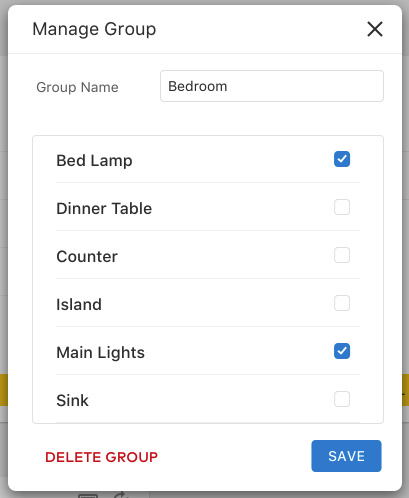


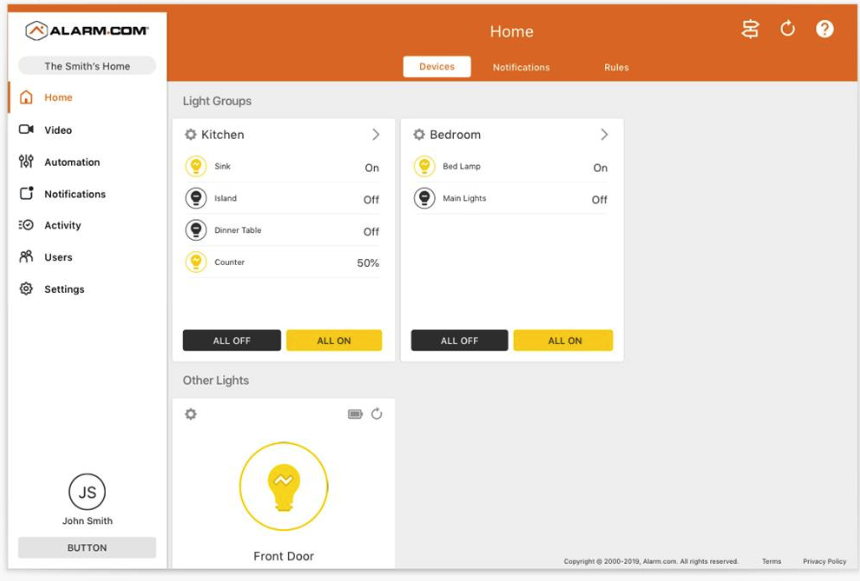
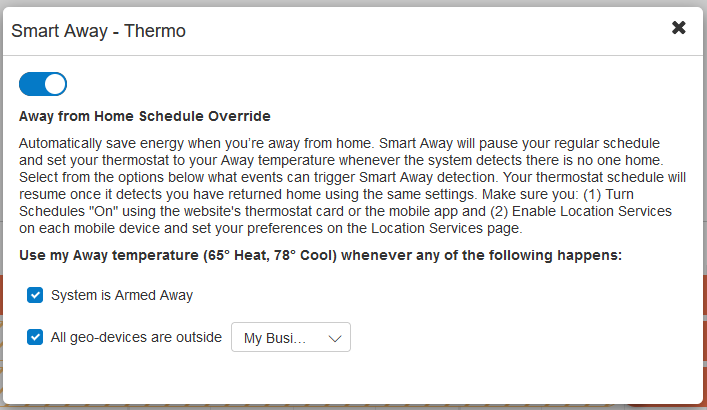
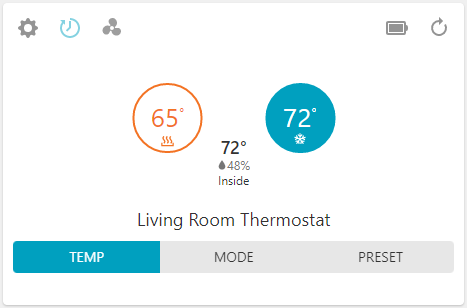

.png?revision=1)



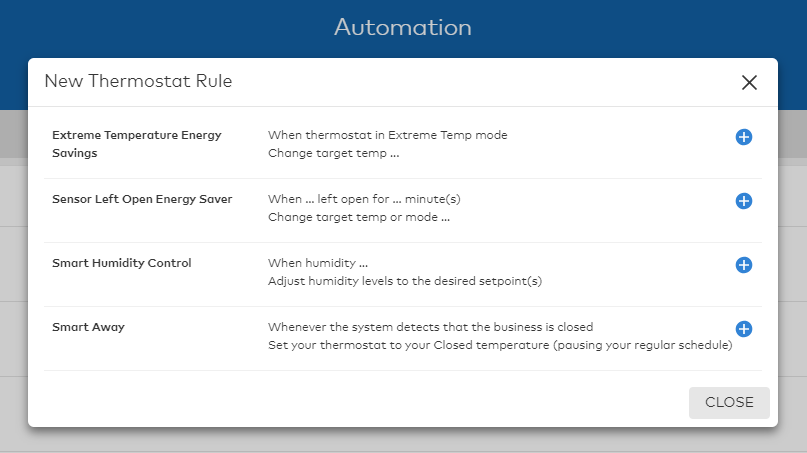
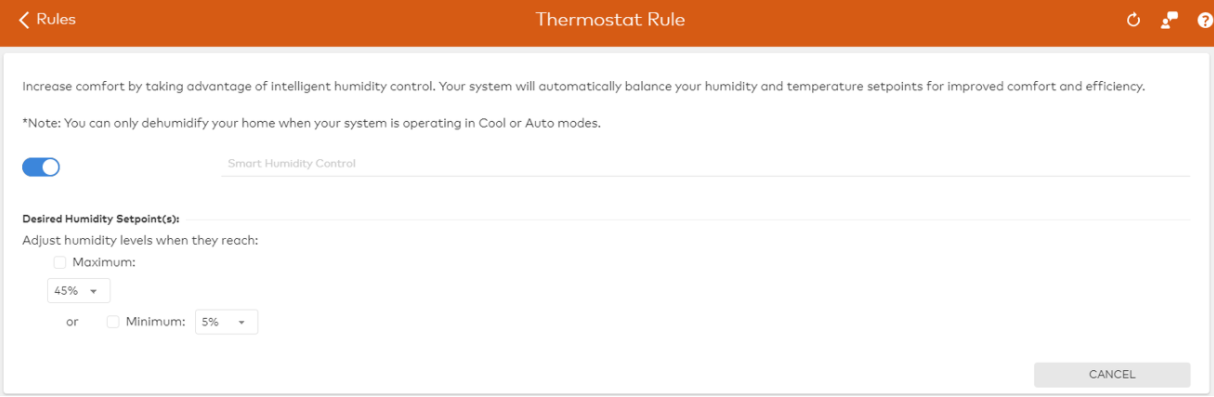
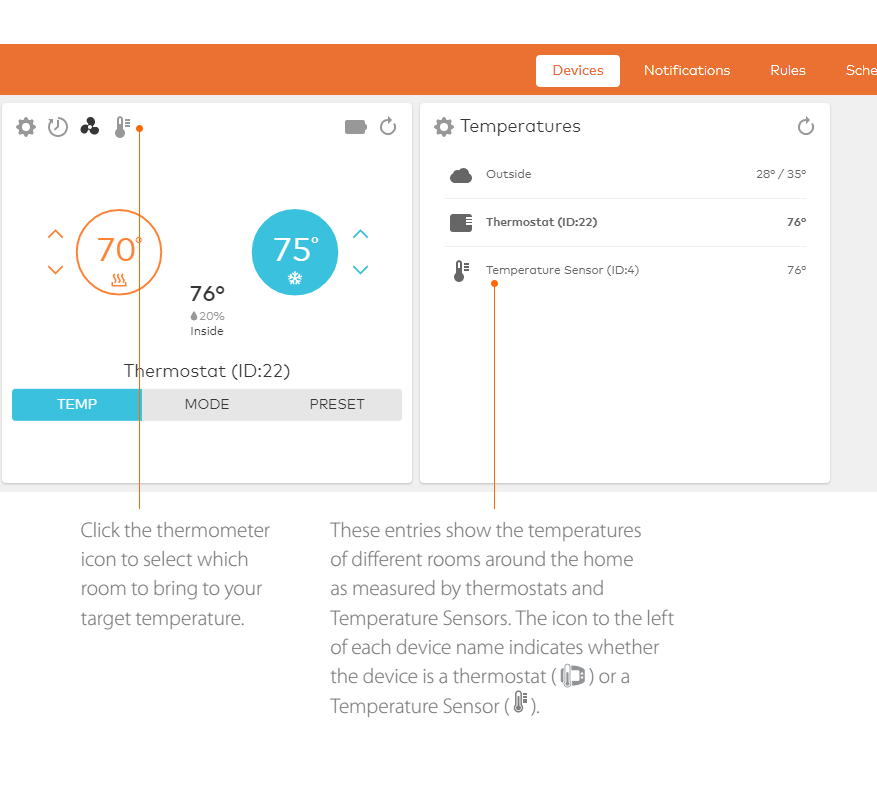
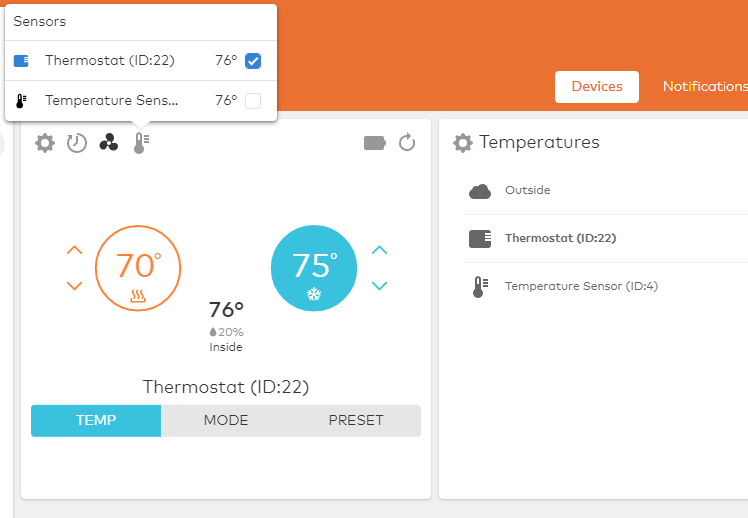
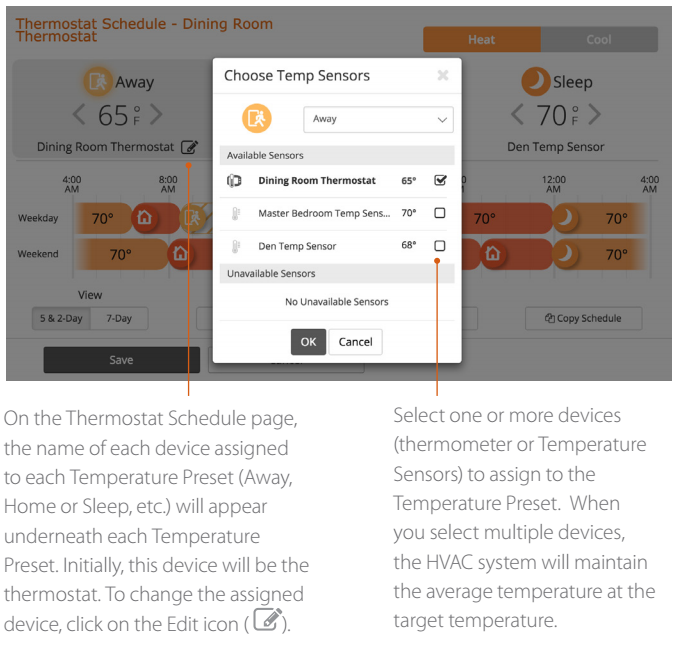
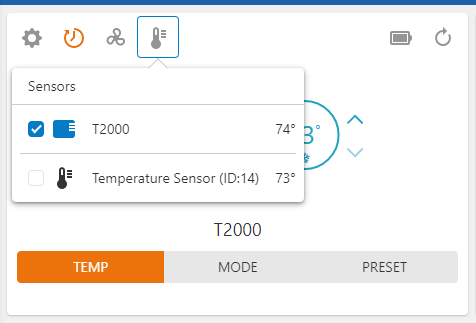
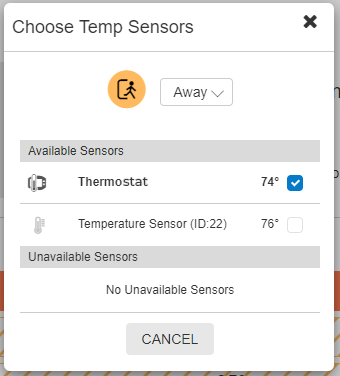
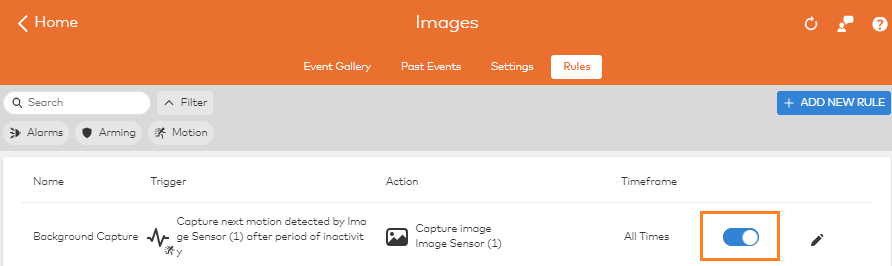
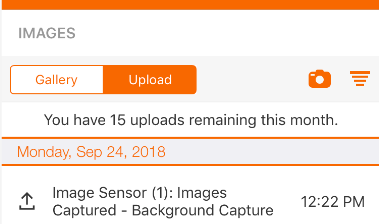
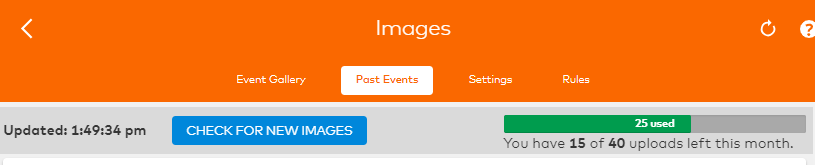
 .
. .
. .
.


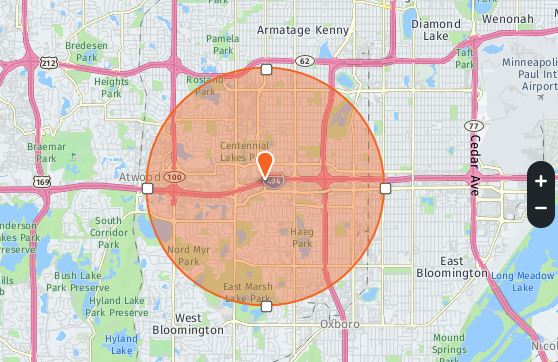
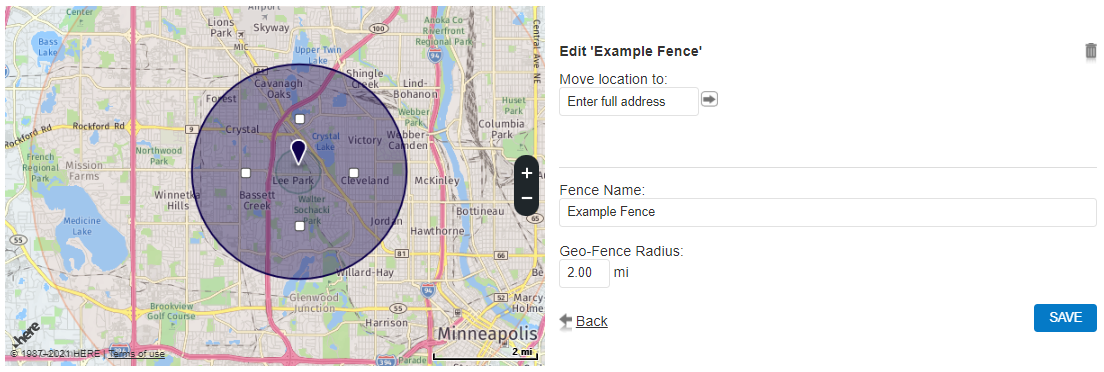
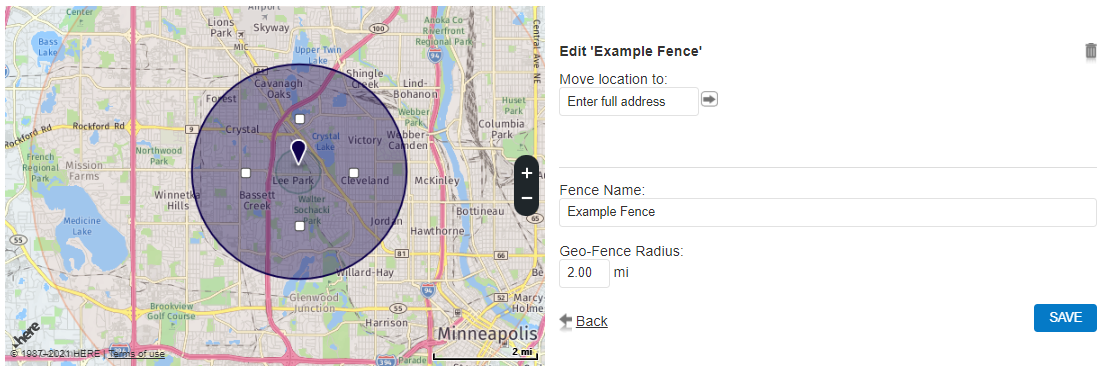
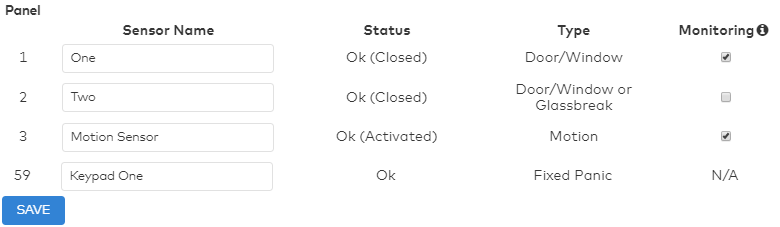
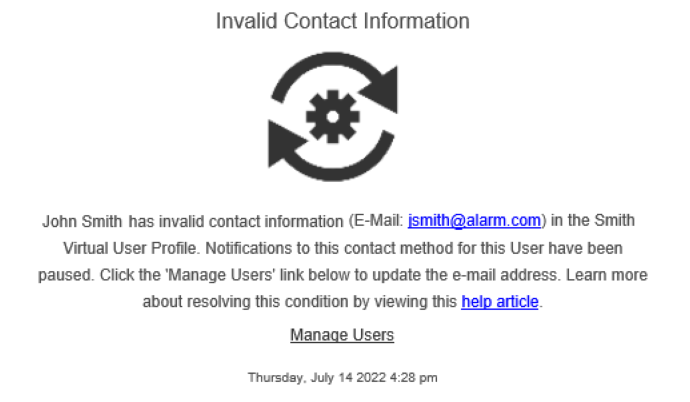
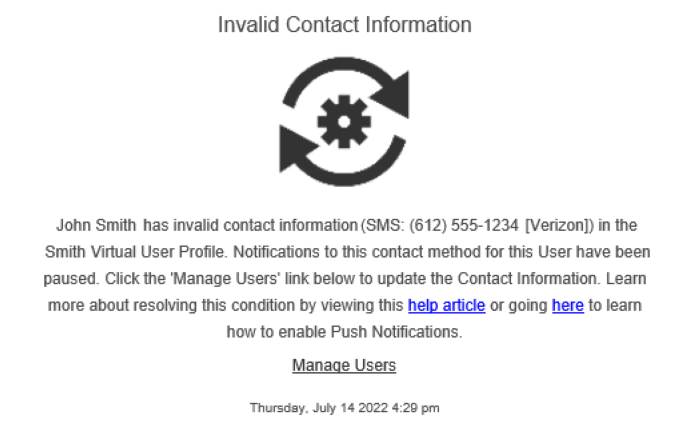


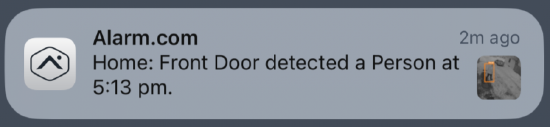

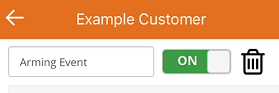
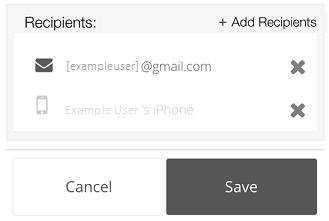
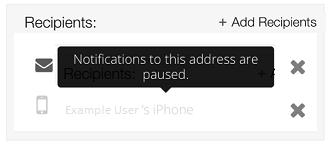

.jpg?revision=1&size=bestfit&width=300&height=149)

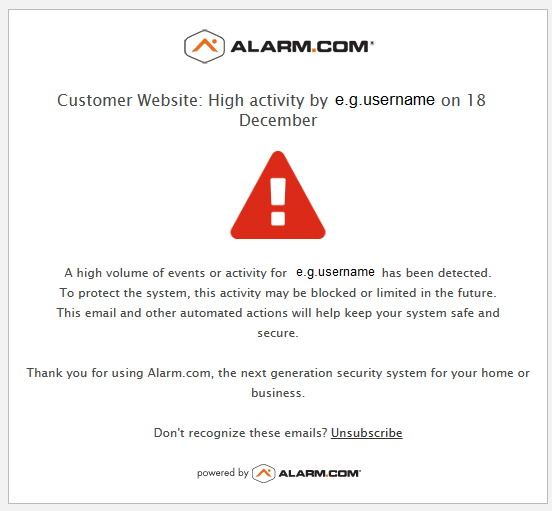
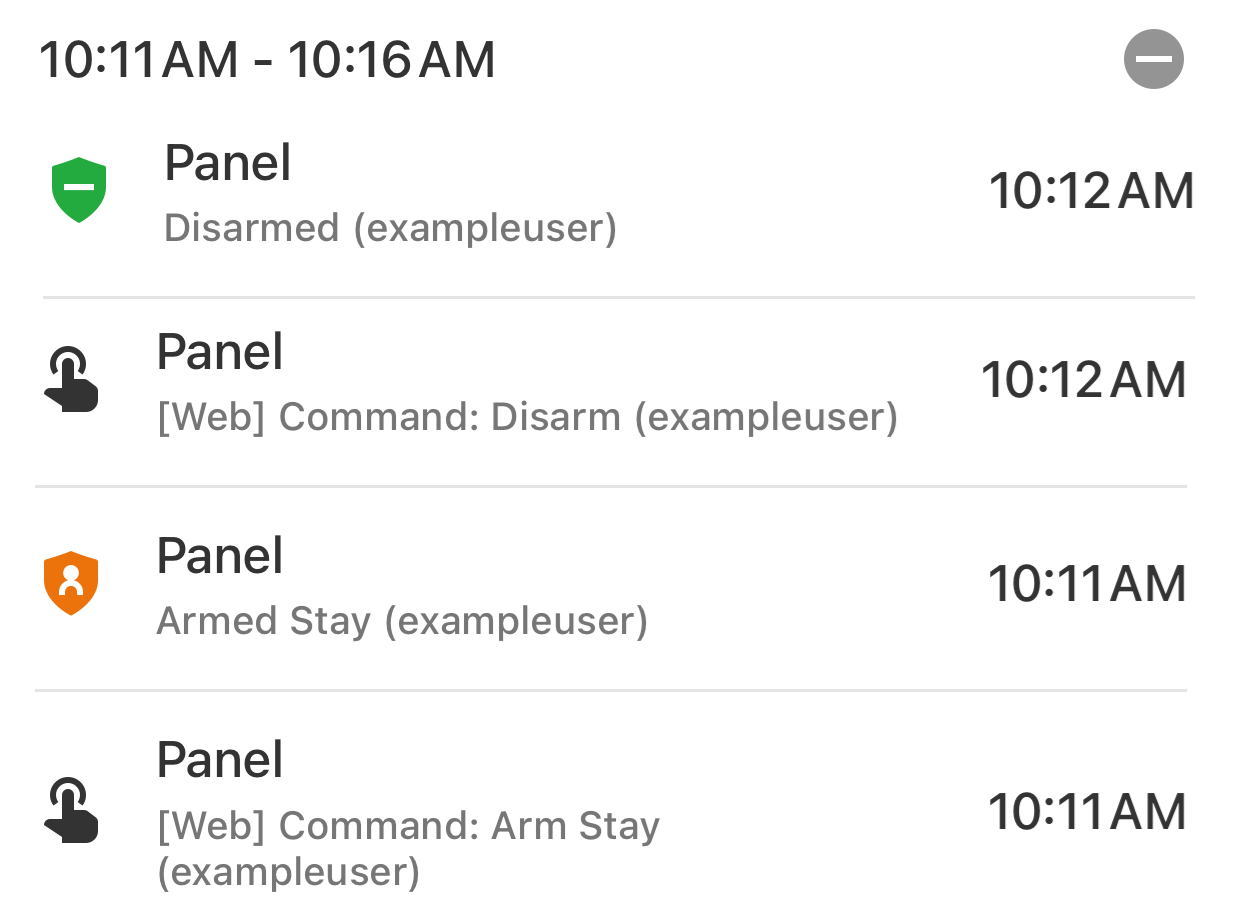
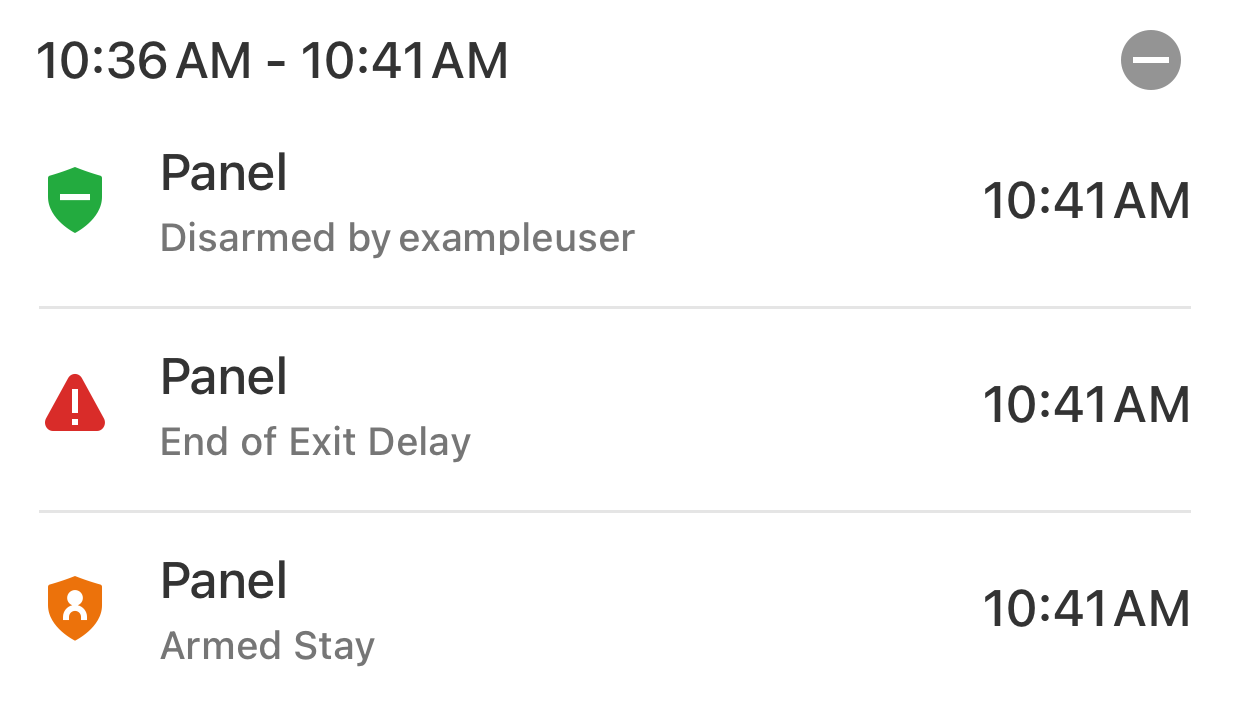

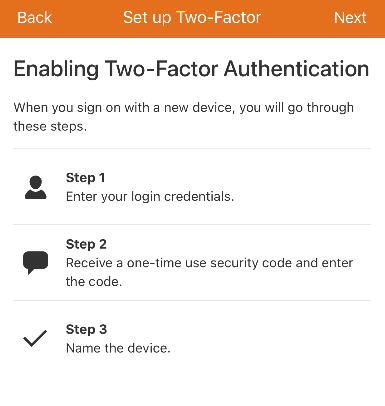
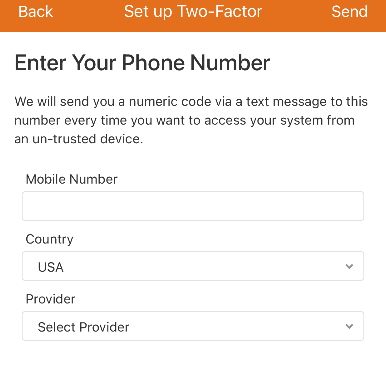
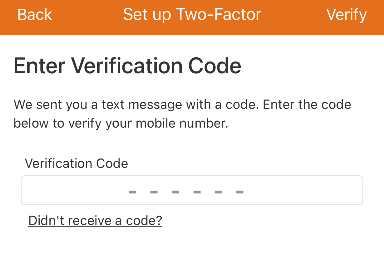
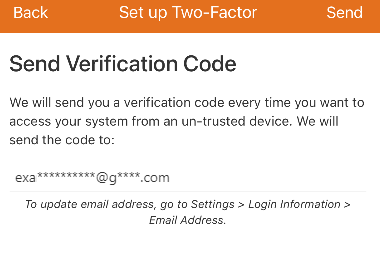
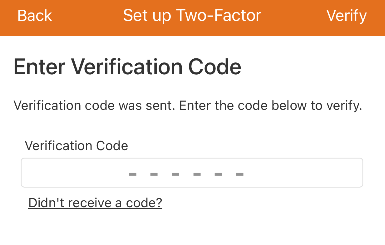
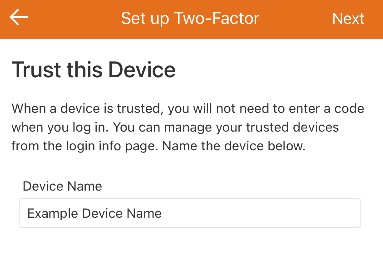
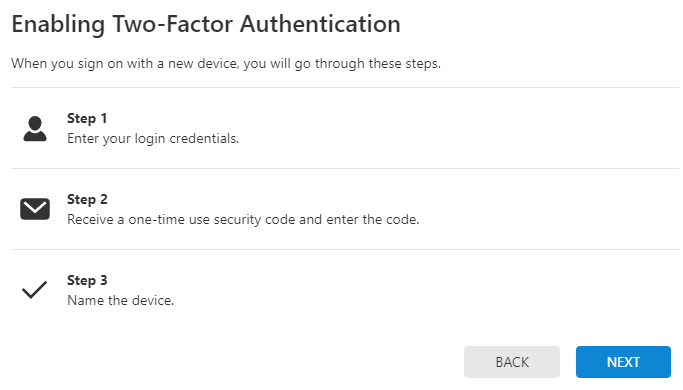
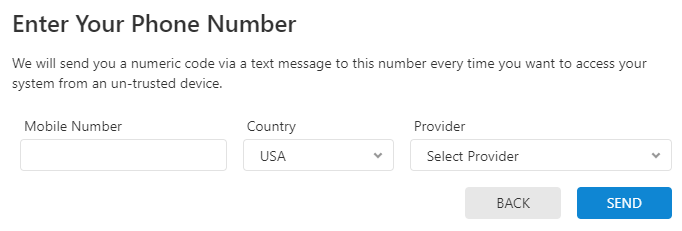
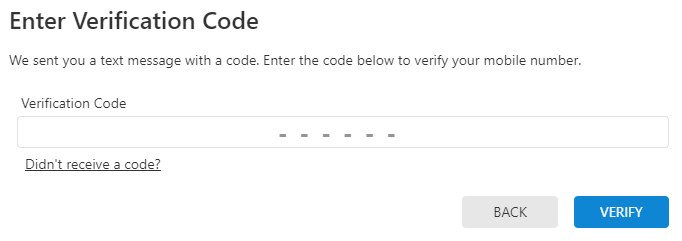
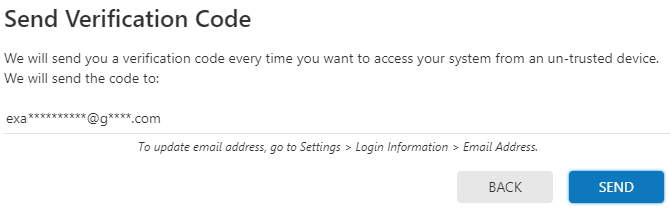
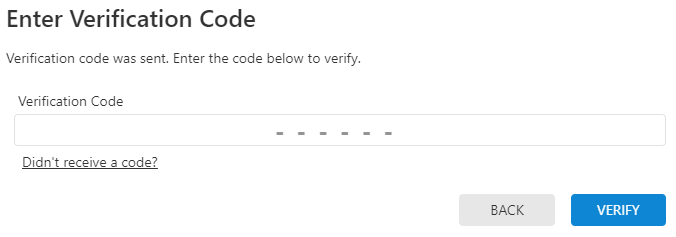
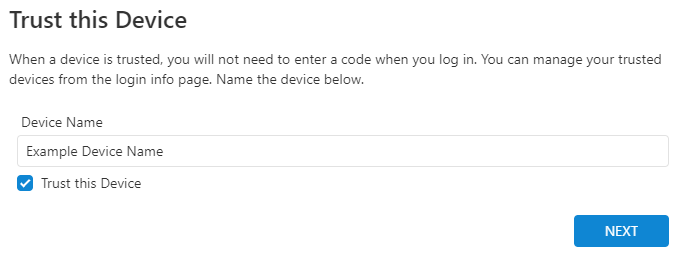


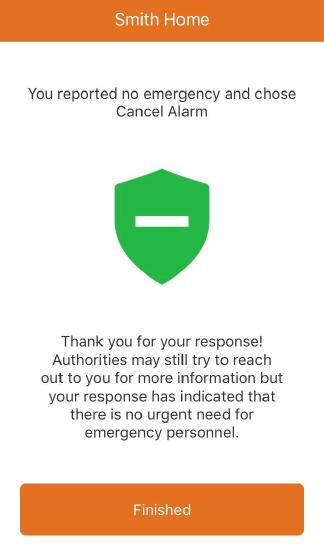
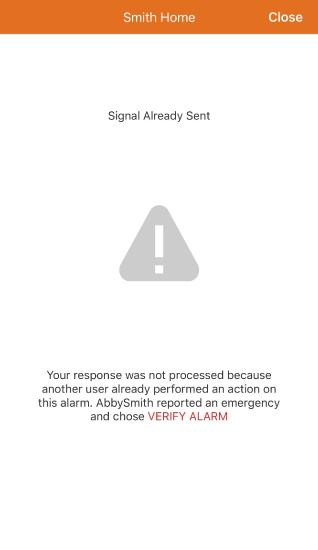
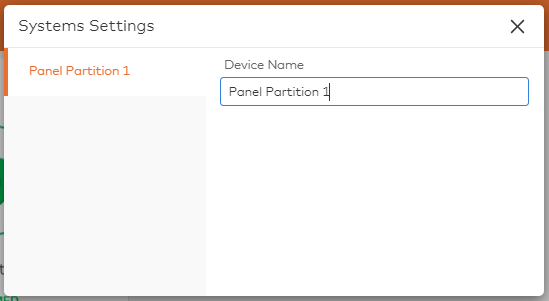

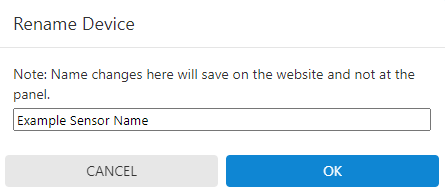
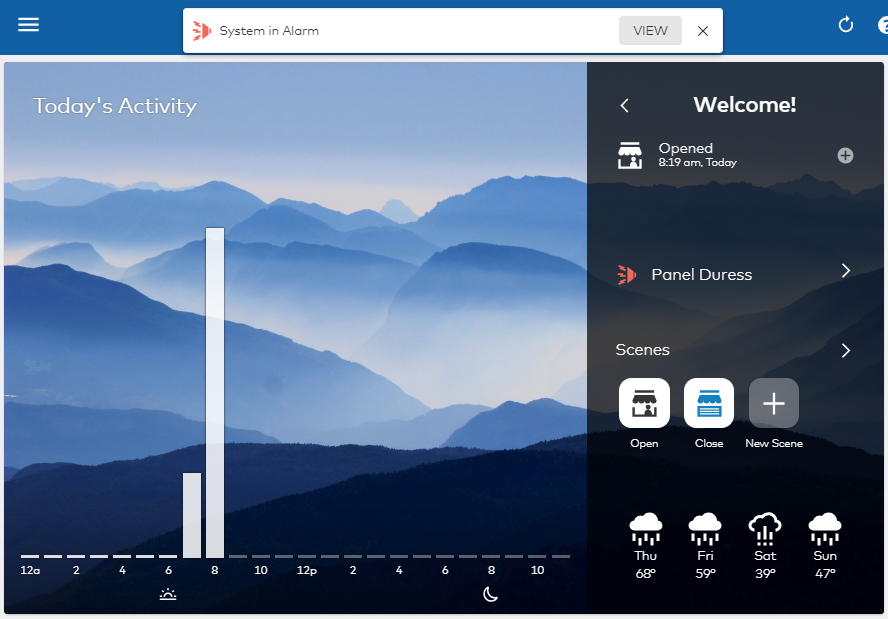
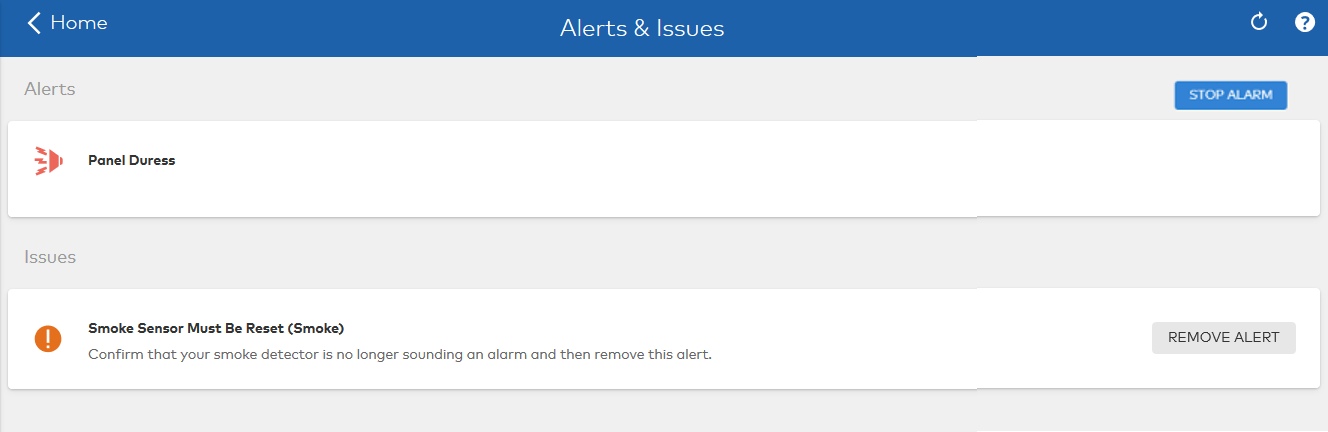
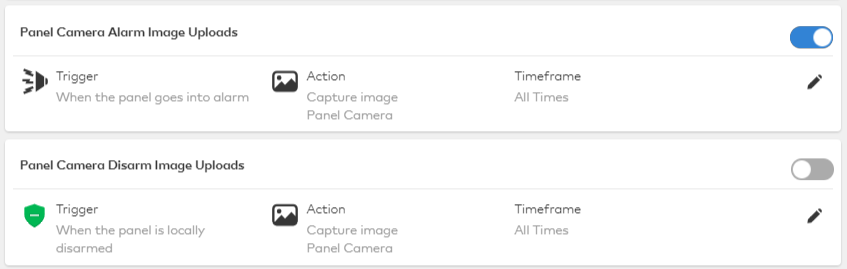


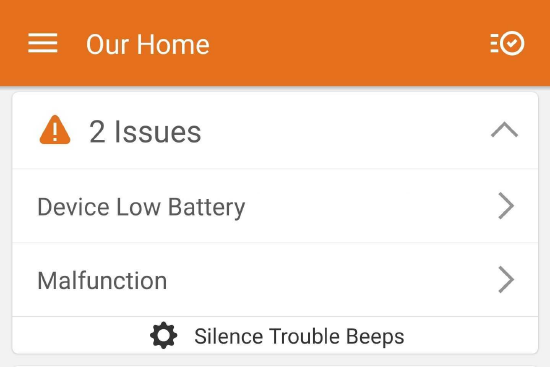

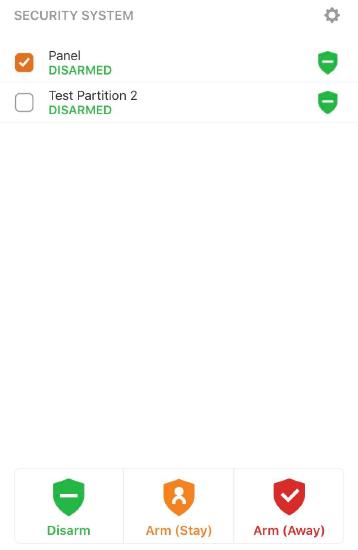
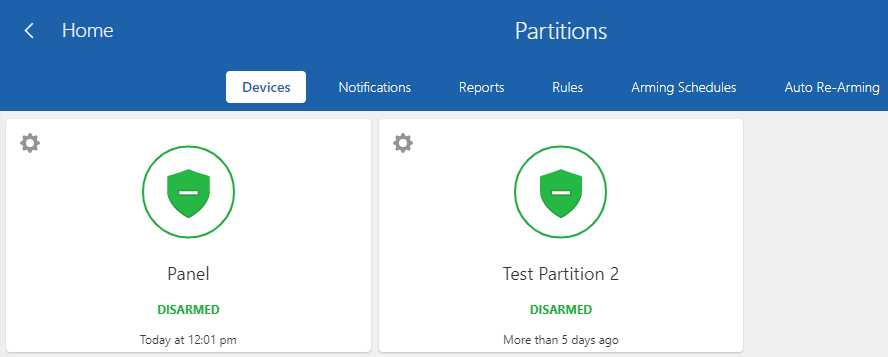

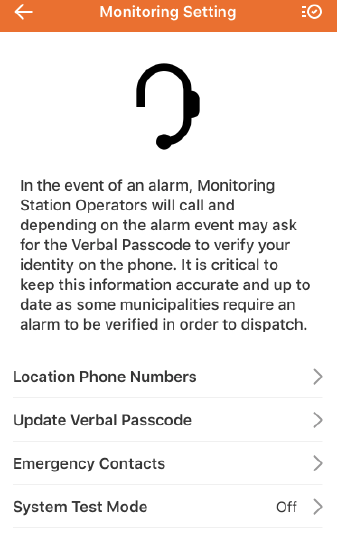
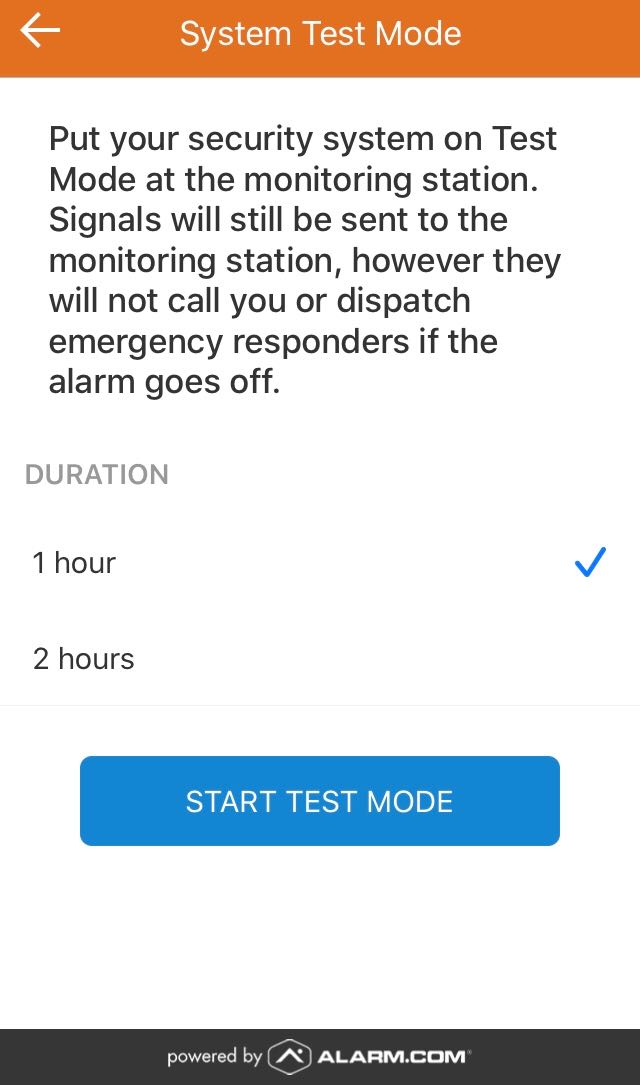.jpg?revision=1&size=bestfit&width=250&height=424)
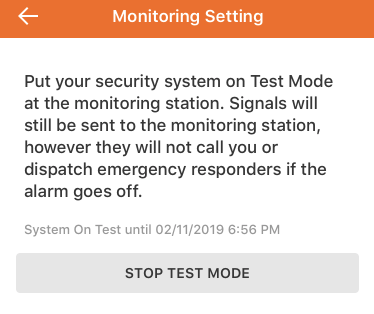

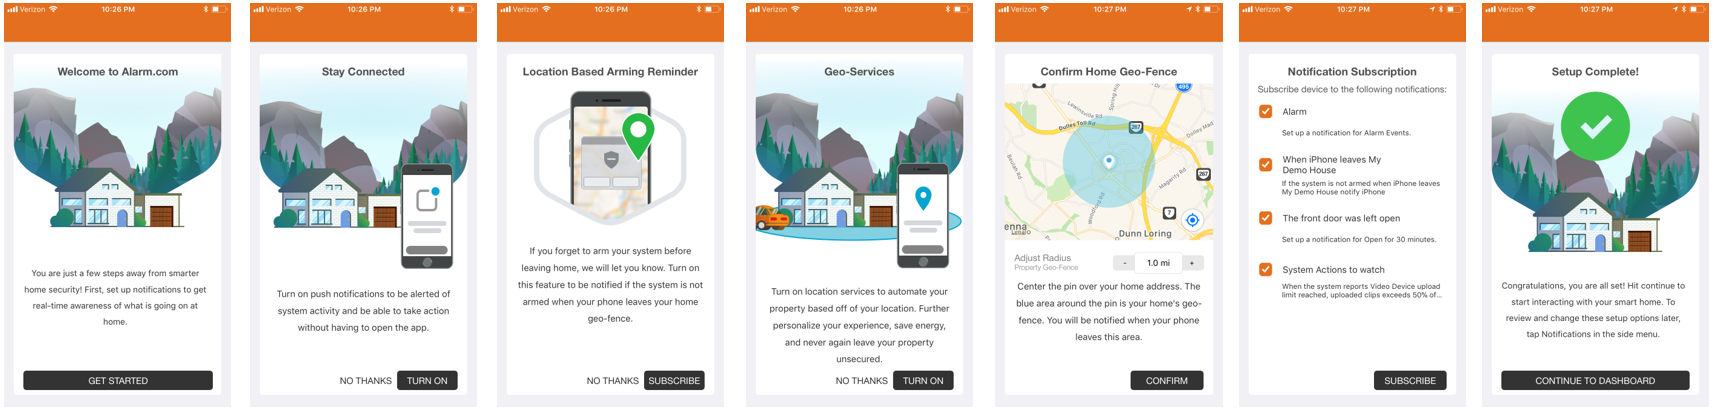
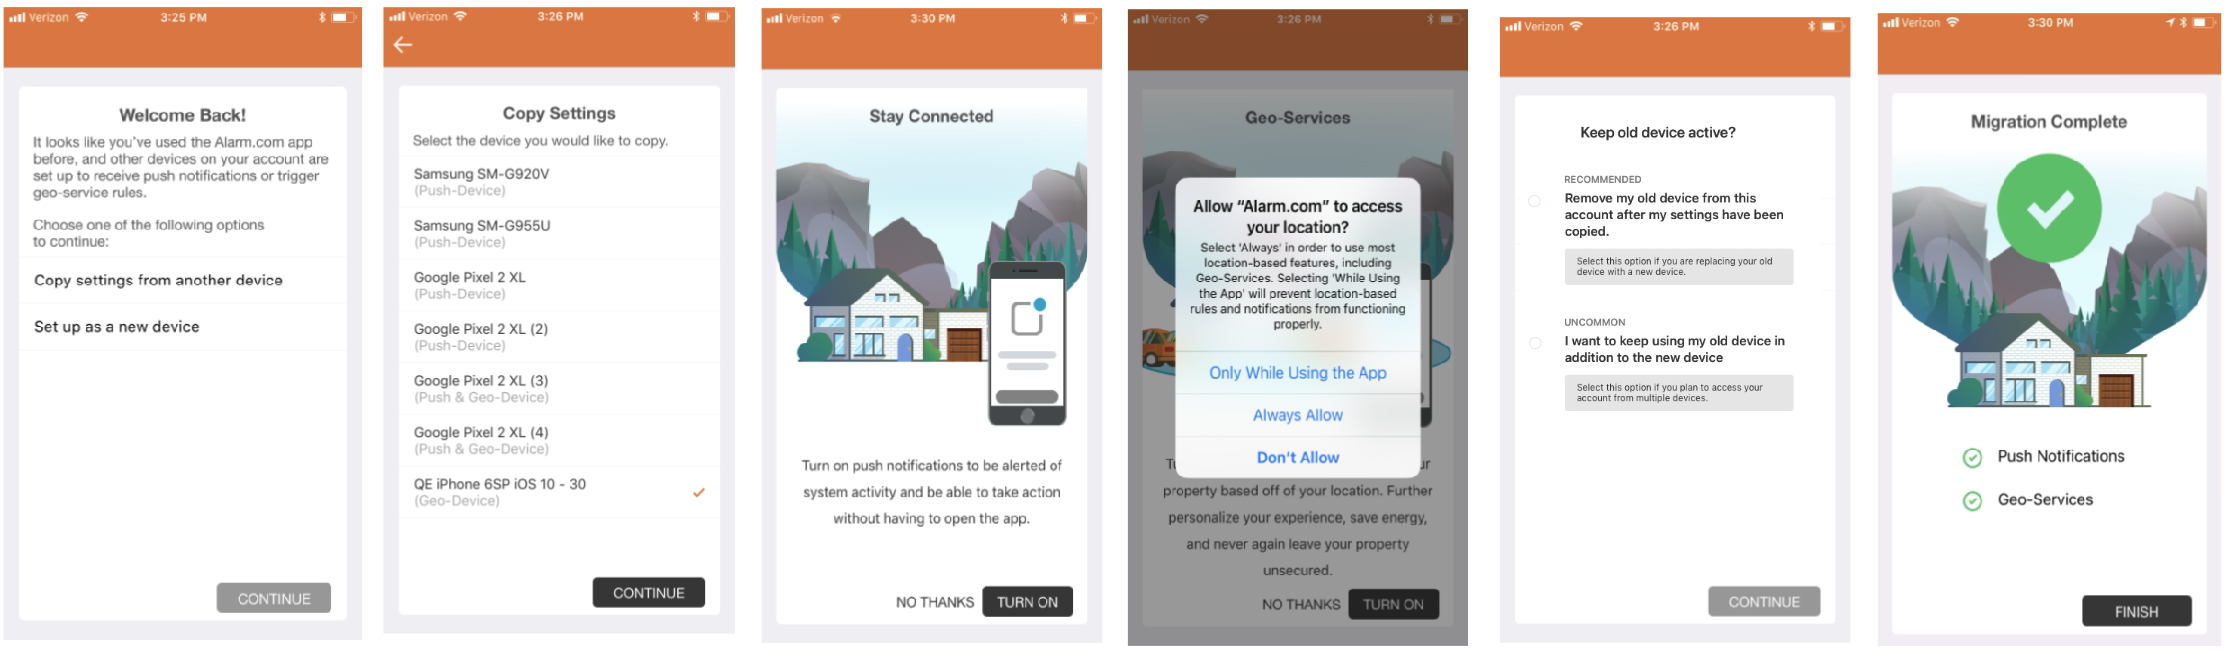
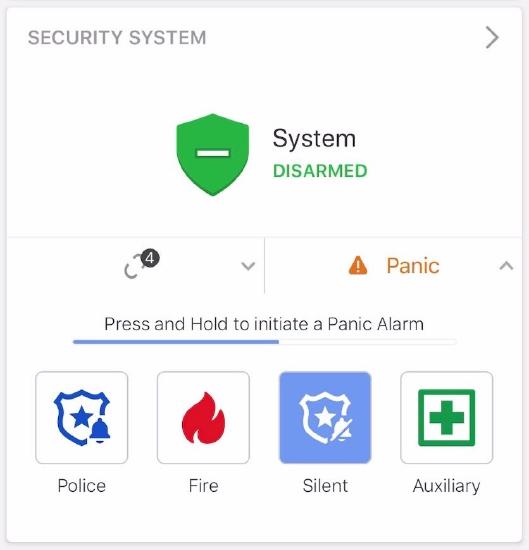
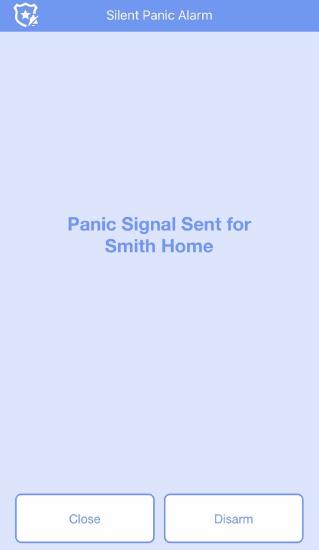
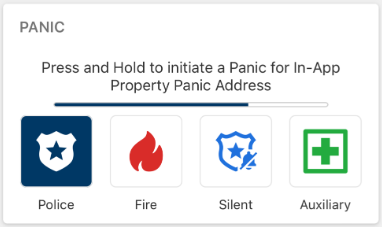
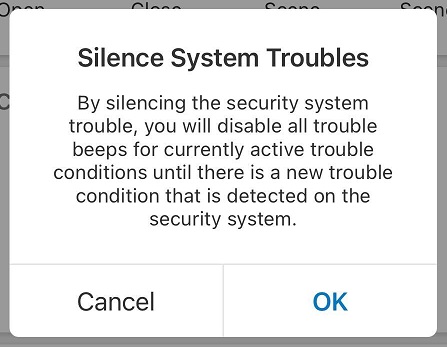
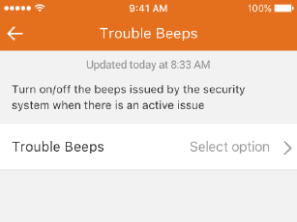
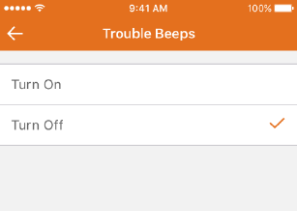
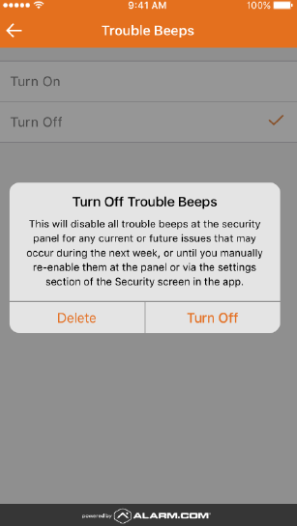

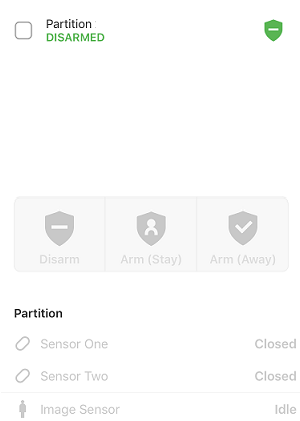
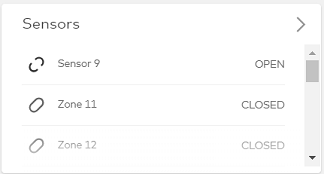
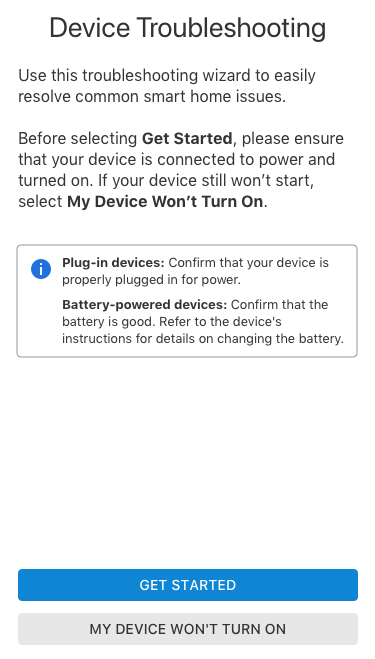
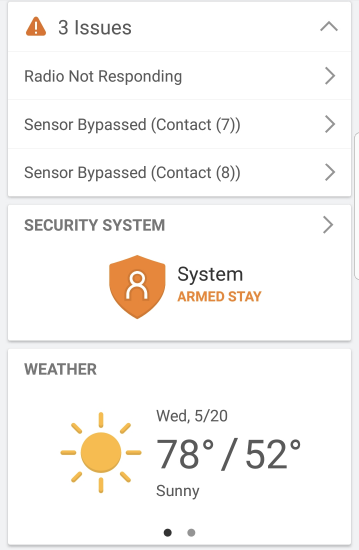
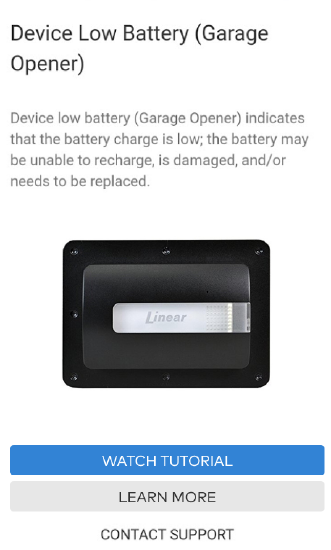
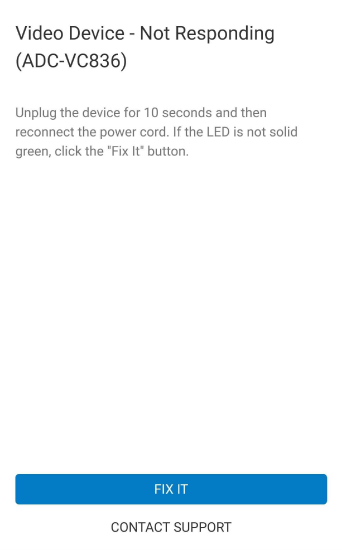
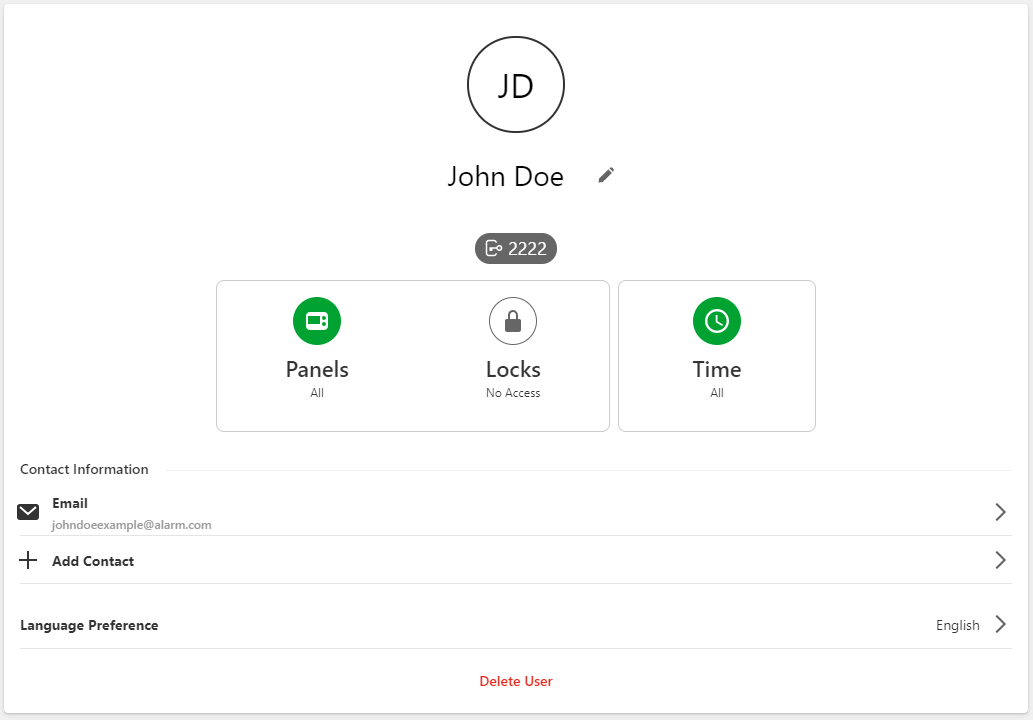
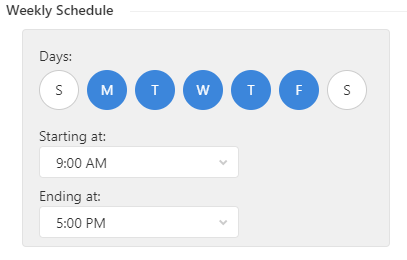
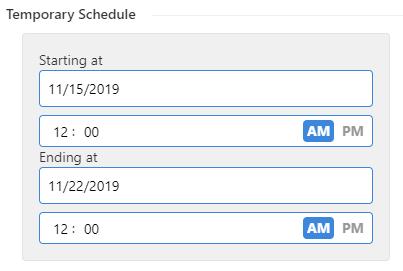
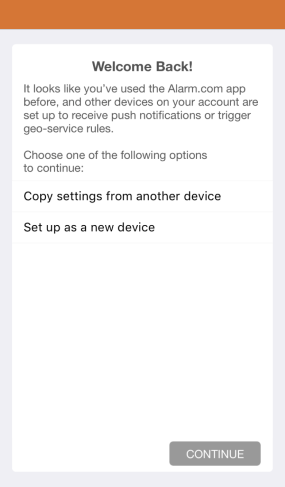
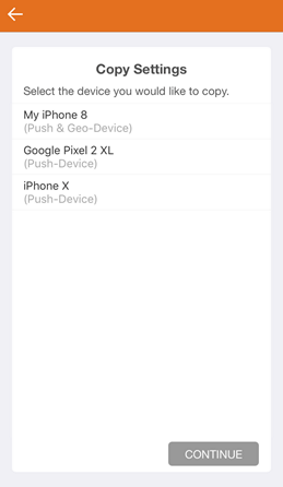
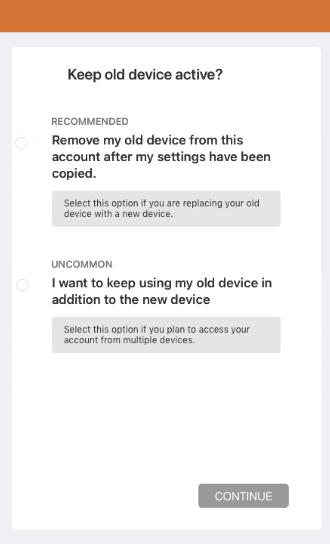
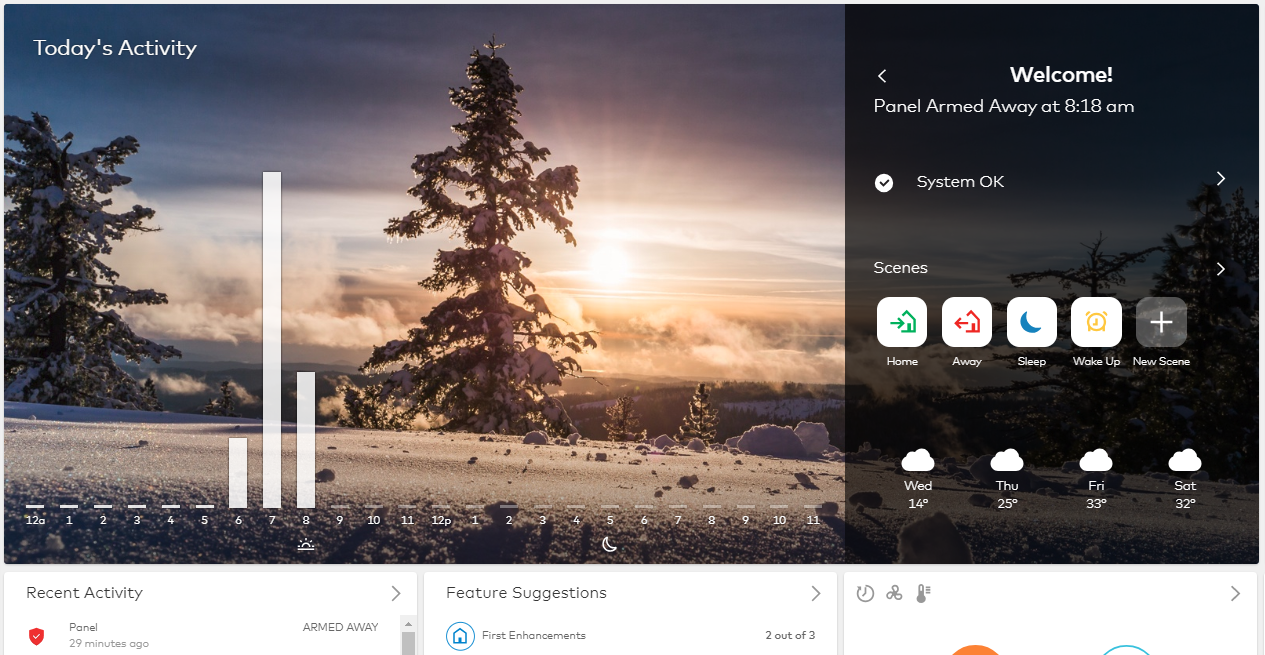
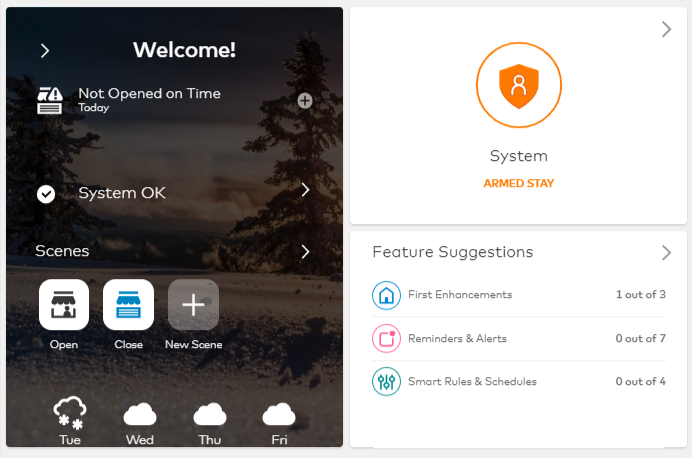

.png?revision=1)

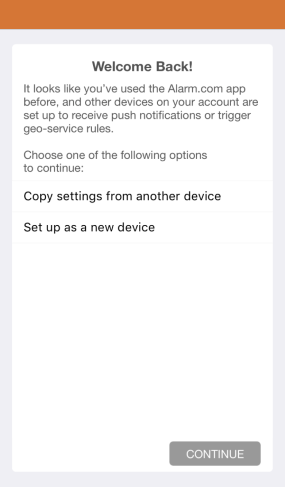
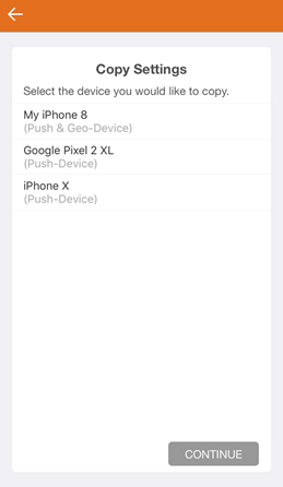
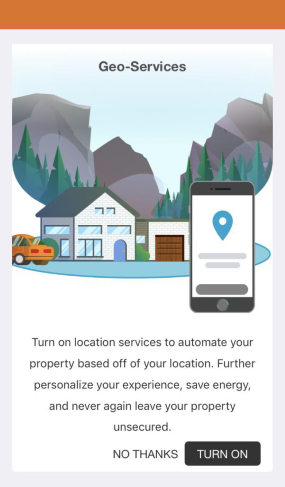
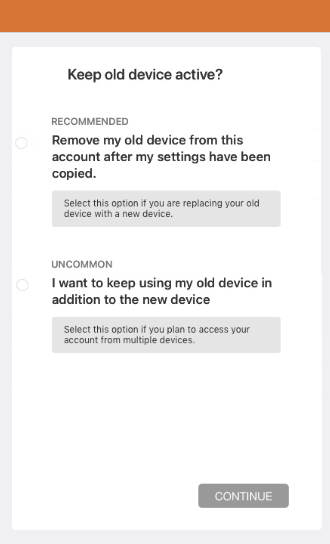

.png?revision=1)
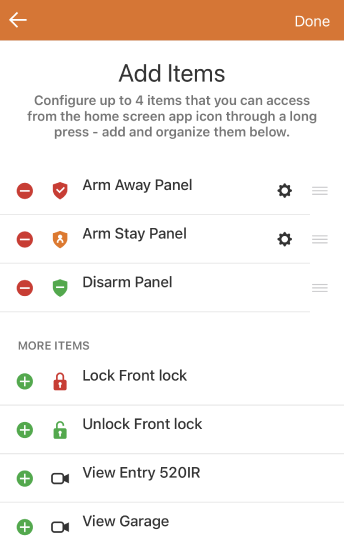
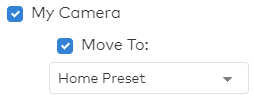
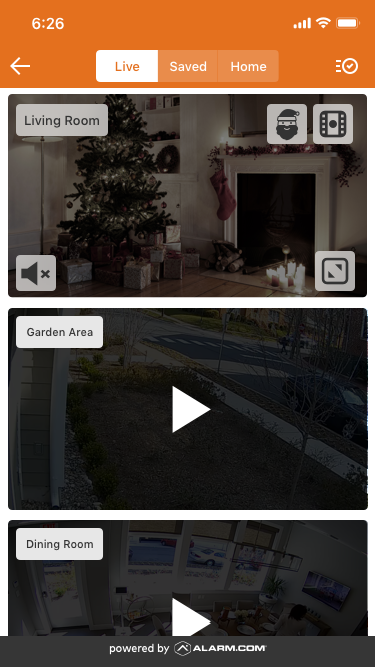


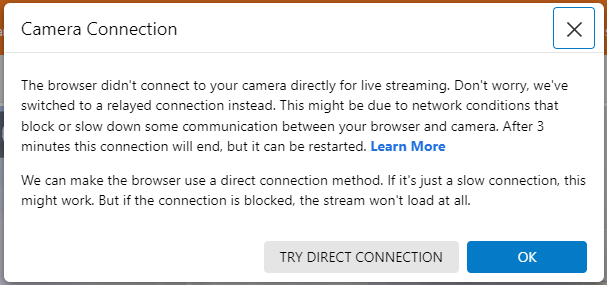
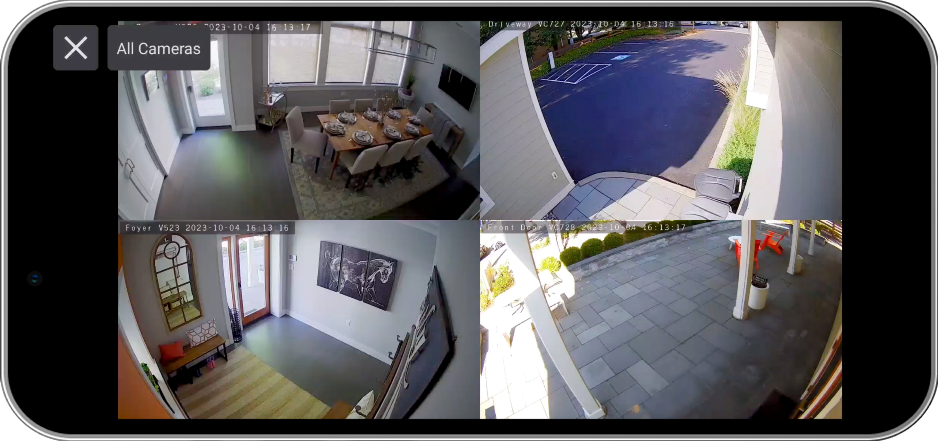

.png?revision=1)
.png?revision=1)





.PNG?revision=4&size=bestfit&width=600&height=327)
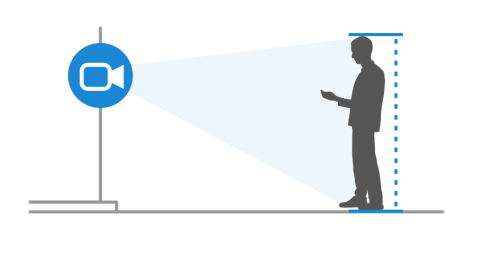
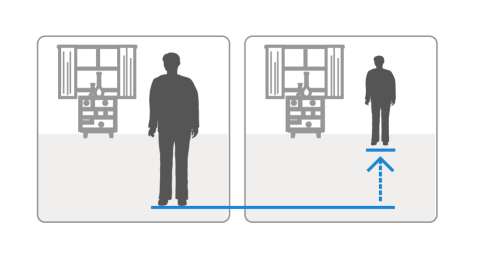
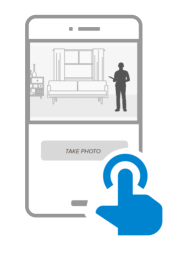
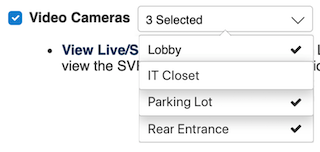


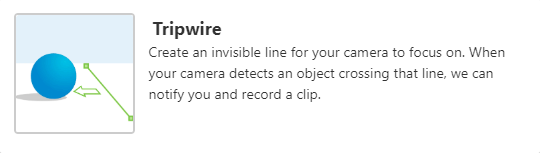
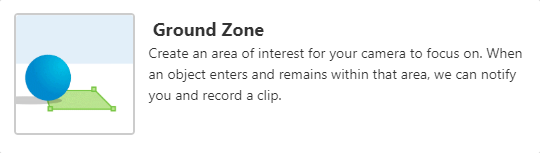
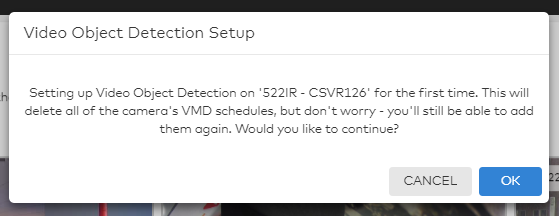
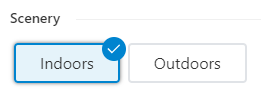
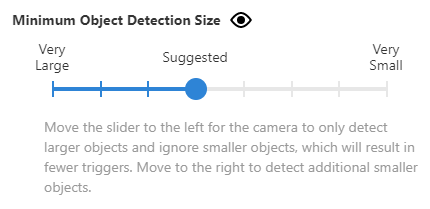
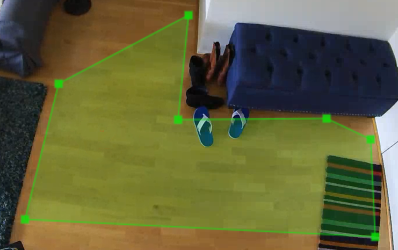
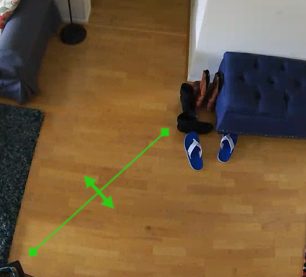
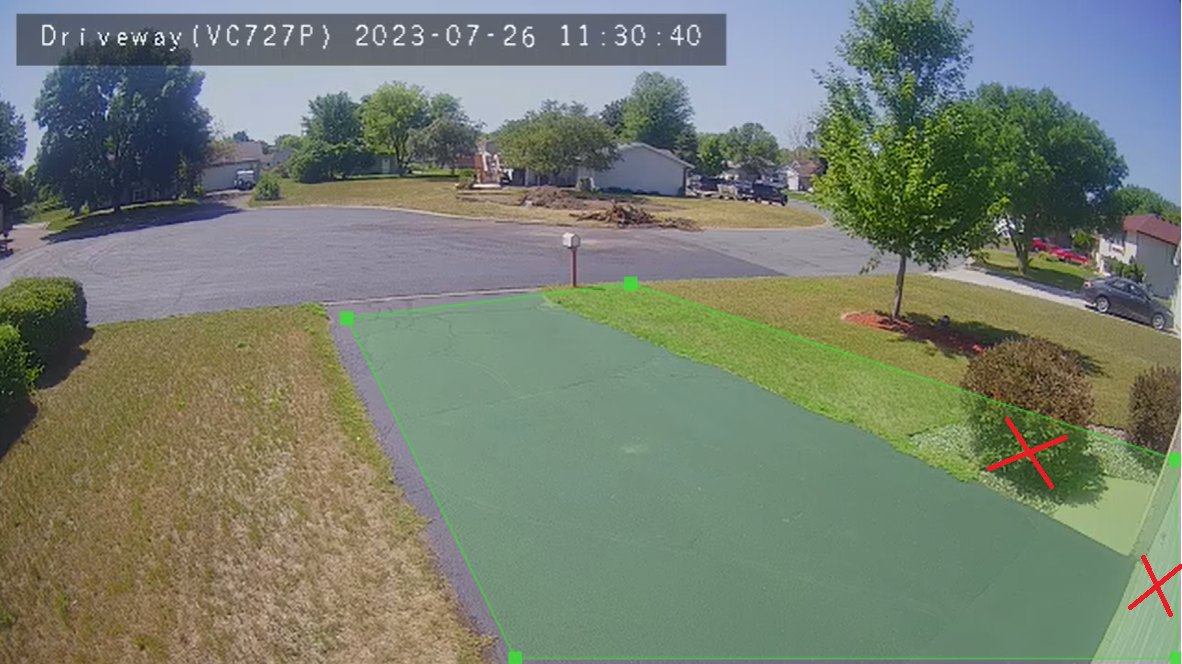
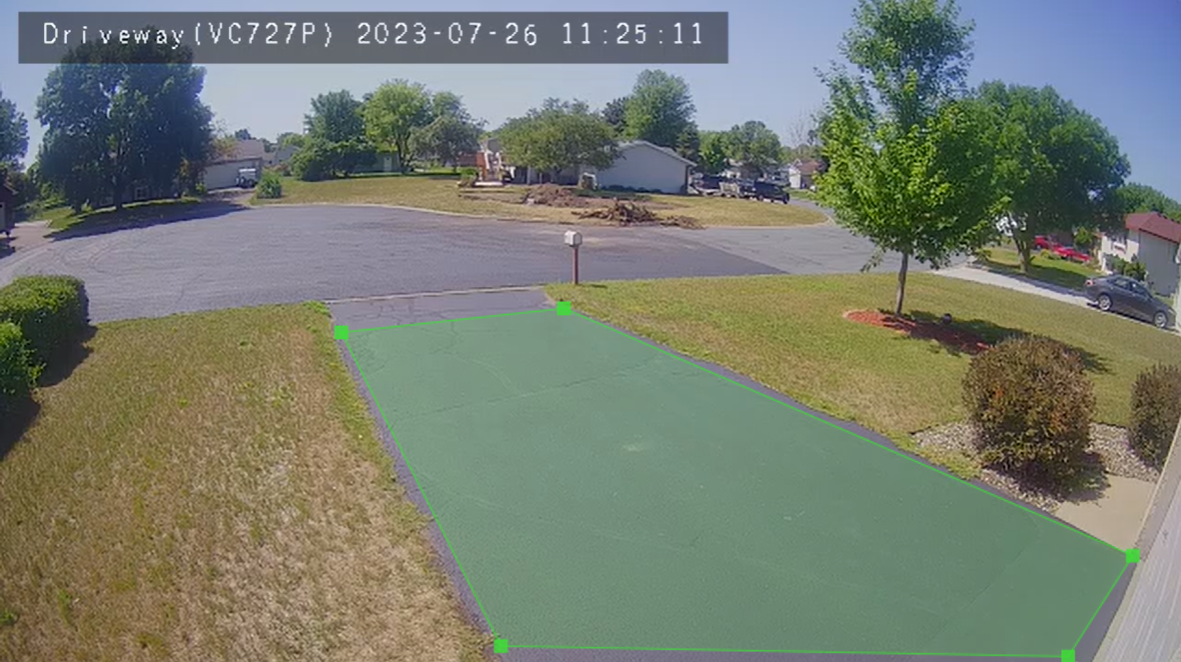
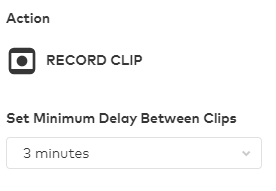
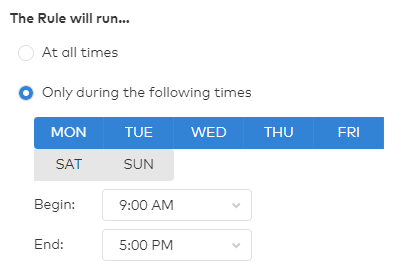
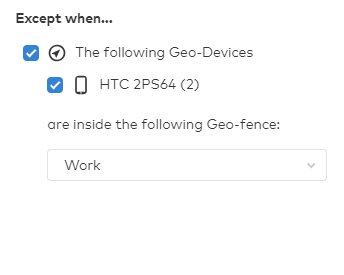
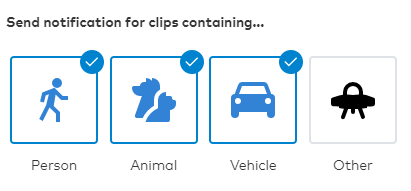
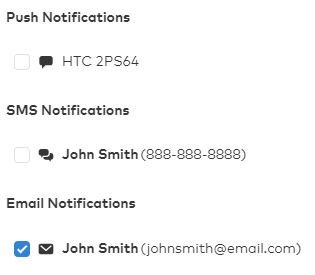
.PNG?revision=1)

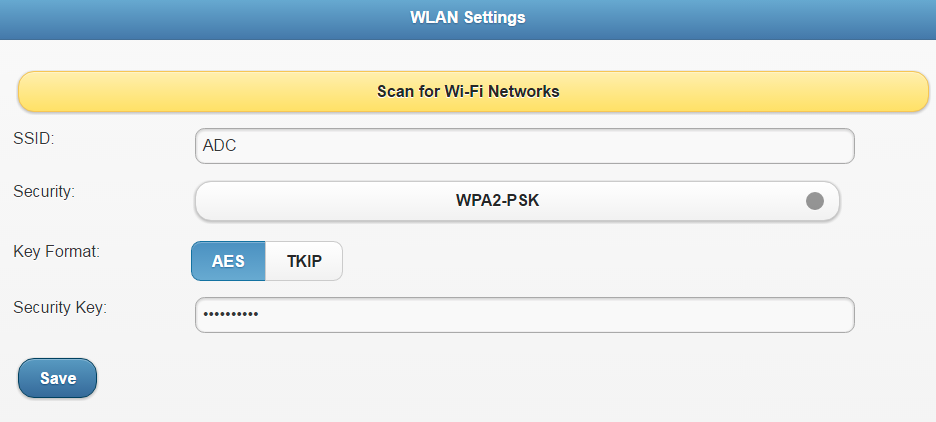
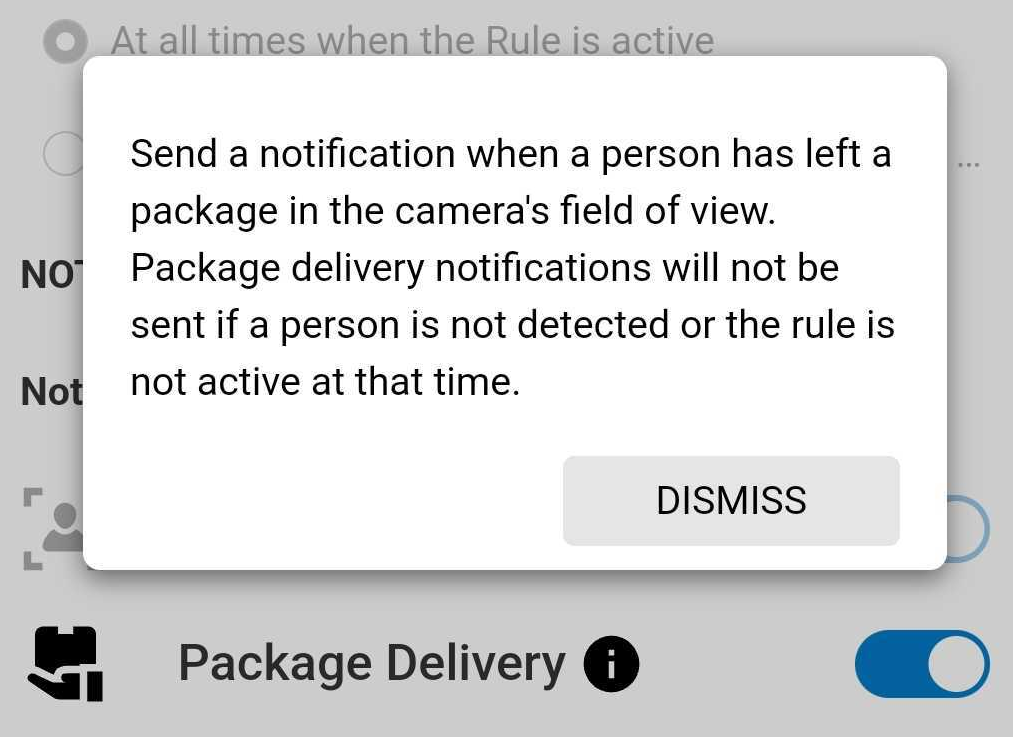
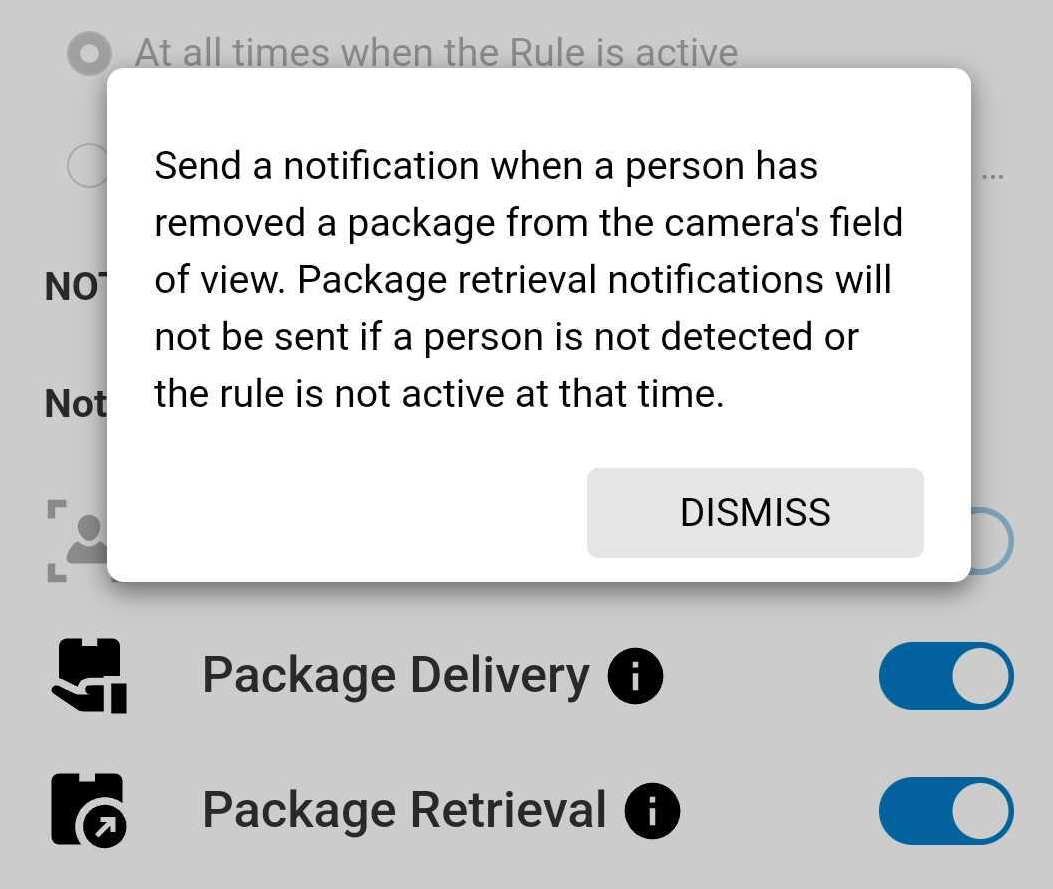
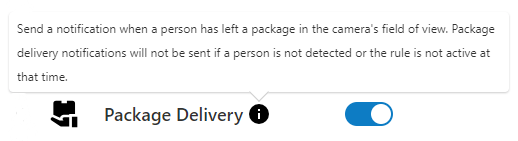
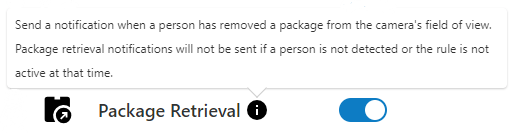


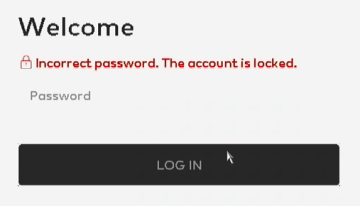

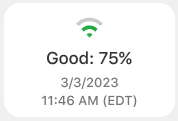

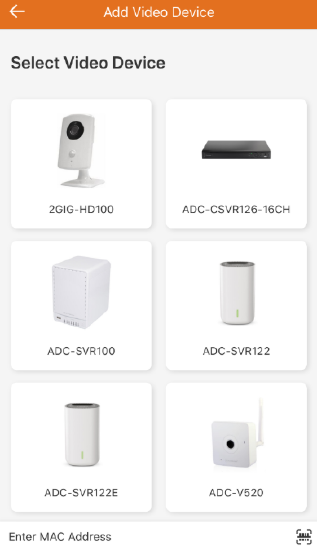
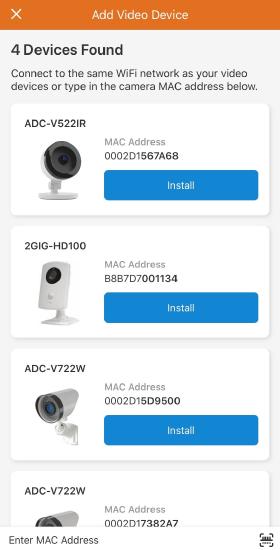
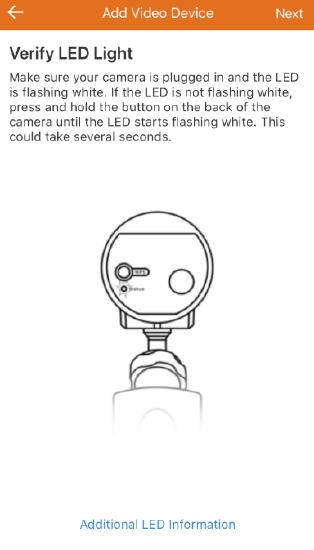
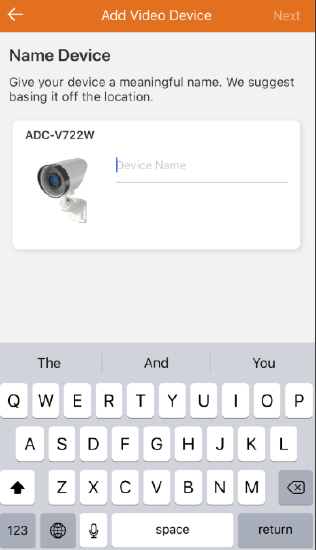
.png?revision=1&size=bestfit&width=300)