System Management
GoSafer Security procedures and references for System Management.
- System Management
- Can I be alerted when a user code is changed?
- Can I create text (SMS) notifications if my cell carrier is not an option?
- Configure Email Format
- Configure notification recipients
- Create a No-Show Alert notification
- Create a sensor activity notification
- Create a sensor left open notification
- Create an alarm notification
- Create an arming event notification
- Create an arming reminder notification
- How can I opt out of in-app notifications?
- How can I update the carrier for a mobile contact?
- How can the language of notifications be changed?
- How many notifications can you add to an account?
- Invalid Contact Information
- Notifications
- User Access Summary Email
- Voice Notifications User Guide
- What are actionable notifications?
- What are the differences between push, text, and email notifications?
- What can I do if mobile push notifications do not play sound?
- What can I do if someone is not receiving SMS text notifications?
- What can I do if someone is not receiving email notifications?
- What can I do if someone is not receiving notifications?
- What can I do if someone is not receiving push notifications?
- Why did I receive an e-mail notification for high activity by a login?
- Will the Arming Event notification include the name of the user who armed or disarmed the system?
- AI Activity Filters
- Export the system activity history
- System History
- View the system activity history
- View which user sent remote commands to the system
- Why are sensors sometimes combined as an open/closed event and sometimes separate in the activity history?
- Account setup - Initial login
- Alarm Mode
- Arm the system remotely
- Cancel or Verify Alarms using the app
- Change a partition name
- Change a sensor name remotely
- Change the monitoring station emergency contact information
- Change the monitoring station location phone number
- Change the monitoring station verbal passcode
- Clear a duress, panic, or smoke alarm
- Configure Qolsys panel camera image uploads for alarms and local disarms
- Device is in malfunction
- Disarm the system remotely
- Enable Smart Arming
- Export panel slot number for a system
- Getting started with a Residential account
- How can I change the batteries in my device?
- How can I know if there is a local power outage on the app?
- How can I view legal agreements and documents?
- How do I change my time zone?
- How do I control multiple partitions of a security panel?
- How do I make sure my account is secure?
- How do I switch between my accounts?
- How many sensors can be displayed in the app?
- Is the Alarm.com app compatible with text to speech applications?
- Manage central station monitoring settings
- Put a system in test mode with the monitoring station
- Qolsys panel is disarming by itself
- Remotely arm and disarm multiple partitions at once
- Remotely change 2GIG GC3 panel settings
- Remotely change 2GIG GoControl panel settings
- Remotely change DSC iotega panel settings
- Remotely change Interlogix Simon XT panel settings
- Remotely change Interlogix Simon XTi panel settings
- Remotely change Qolsys IQ Panel 2 settings
- Sensor is showing incorrect status on the website or app
- Set up the app using setup wizards
- Smoke Sensor Not Reset
- System Usage
- Take a Peek-in from a Qolsys panel camera
- Trigger a panic using the app
- Turn off system trouble beeps using the app
- Turn sensor activity monitoring on/off
- View all system sensors
- View current sensor activity
- Visual Verification device selection
- Vulnerability Disclosure Program
- What does Radio Not Responding mean for broadband hubs?
- What happens when my system reports an alarm?
- What is the Emergency Message on the app?
- What security measures does Alarm.com use?
- Where can I find a monitoring certificate?
- Who should I contact about billing information?
- Z-Wave Troubleshooting Wizard
- Z-Wave sensor is in malfunction
- AC Power Failure
- Access the Knowledge Base
- Access trouble condition help
- Battery Absent Trouble
- Device Power Issue
- Dual-Path Communication Failure - Cellular
- Fire Sensor Trouble
- Heat Or Probe Sensor Trouble
- Heating and Cooling Alert
- Installer Reset Needed
- Not Networked Trouble
- RF Jam Trouble
- Radio Not Responding
- Sensor Tamper
- Siren Tamper
- System Locked: Installer Verification Required
- Trouble Condition Help
System Management
GoSafer Security Knowledge Base
This operational reference is organized for GoSafer Security customers and staff. Alarm.com product names are retained where required for technical accuracy.
Overview
This GoSafer Security section brings together resources for System Management, including setup, configuration, everyday use, and troubleshooting. Choose the related page that matches your device, feature, or task, and follow the current manufacturer guidance linked on that page.
| Platform | App + Web |
|---|---|
| Content type | Troubleshooting |
| Source last updated | 2021-10-22 |
Procedure
Source and support
For GoSafer Security assistance, visit gosafersecurity.com.
Original Alarm.com reference: https://answers.alarm.com/Customer/Website_and_App/System_Management
Always verify safety, installation, compatibility, and current UI details against the original manufacturer documentation before operational use.
Can I be alerted when a user code is changed?
GoSafer Security Knowledge Base
This operational reference is organized for GoSafer Security customers and staff. Alarm.com product names are retained where required for technical accuracy.
Overview
Yes. When a user code is changed remotely, a notification is sent to the email of the primary user on the account. This email notification is triggered automatically and cannot be turned off. To change who receives the user code change notification email, update the email address of the primary user. For more information about how to configure the email address of the primary user of an account, see Change an email address.
| Platform | General / Device |
|---|---|
| Content type | How-to / Configuration |
| Source last updated | 2025-09-16 |
Procedure
Yes. When a user code is changed remotely, a notification is sent to the email of the primary user on the account. This email notification is triggered automatically and cannot be turned off.
To change who receives the user code change notification email, update the email address of the primary user. For more information about how to configure the email address of the primary user of an account, see Change an email address.
Source and support
For GoSafer Security assistance, visit gosafersecurity.com.
Original Alarm.com reference: https://answers.alarm.com/Customer/Website_and_App/System_Management/Notifications/Can_I_be_alerted_when_a_user_code_is_changed%3F
Always verify safety, installation, compatibility, and current UI details against the original manufacturer documentation before operational use.
Can I create text (SMS) notifications if my cell carrier is not an option?
GoSafer Security Knowledge Base
This operational reference is organized for GoSafer Security customers and staff. Alarm.com product names are retained where required for technical accuracy.
Overview
Yes. If the desired carrier is not listed when adding a cell phone number for text notifications, you can use the phone’s email address (SMS/SMTP format, i.e., 1234567890@vtext.com) so the recipient can be configured for email notifications that they will receive to their phone as a text message. Note: This feature may not be available based on the carrier. Contact your cellular provider for additional assistance. For most mobile carriers' SMS email addresses, refer to NotePage's SMTP Email Delivery address formats. Alternatively, you can send a text message from that phone to an email address and use the from address on the email.
| Platform | App + Web |
|---|---|
| Content type | How-to / Configuration |
| Source last updated | 2025-06-04 |
Procedure
Step-by-step guide: Screenshots and videos are placed with the instruction they illustrate.
Yes. If the desired carrier is not listed when adding a cell phone number for text notifications, you can use the phone’s email address (SMS/SMTP format, i.e., 1234567890@vtext.com) so the recipient can be configured for email notifications that they will receive to their phone as a text message.
Note: This feature may not be available based on the carrier. Contact your cellular provider for additional assistance.
For most mobile carriers' SMS email addresses, refer to NotePage's SMTP Email Delivery address formats. Alternatively, you can send a text message from that phone to an email address and use the from address on the email.
Note: SMS (text notifications) is only available in the United States and Canada. It is recommended to use push notifications for accounts outside the United States and Canada.
Add the mobile carrier SMS email address as contact information
A mobile carrier SMS email address can be added as contact information using the Alarm.com app or GoSafer Security customer portal (powered by Alarm.com).
To add the mobile carrier SMS email address as contact information using the Alarm.com app:Icn Chevron Down
- Log in to the Alarm.com app.
- Tap Menu.
- Tap Users.
- Tap to select the user to edit. If the user is not created yet, tap Add to create a new user.
- Tap Add Contact.
- Tap Email Address to add the mobile carrier SMS email address for the user's phone.
- In Email Address, enter the user's mobile carrier SMS email address (i.e., 1234567890@vtext.com).
- Using the Email Format dropdown menu, select the format the user would like to receive notifications.
- It is recommended to select Plain Text since the notification is being sent to a phone as a text message.
- Verify all user information is correct.
- Tap Save to update the user's information. Then add the new contact information to the notifications the user wants to receive.
To add the mobile carrier SMS email address as contact information using the GoSafer Security customer portal (powered by Alarm.com):Icn Chevron Down
- Log in to the GoSafer Security customer portal (powered by Alarm.com).
- Click Users.
- Click Edit for the user to edit. If the user is not created yet, then click Add to create a new user.
- In Contact Information, click Add.
- Click Email Address to add the mobile carrier SMS email address for the user's phone.
- In Email Address enter the user's mobile carrier SMS email address (i.e., 1234567890@vtext.com).
- Using the Email Format dropdown menu, select the format the user would like to receive notifications.
- It is recommended to select Plain Text since the notification is being sent to a phone as a text message.
- Verify all user information is correct.
- Click Save to update the user's information. Then add the new contact information to the notifications the user wants to receive.
Add the mobile carrier SMS email address as a notification recipient
Once the mobile carrier SMS email address is added as contact information as instructed in To add the mobile carrier SMS email address as contact information, the user can now be added as a recipient to notifications.
A mobile carrier SMS email address can be added as a notification recipient using the Alarm.com app or GoSafer Security customer portal (powered by Alarm.com).
To add the mobile carrier SMS email address as a notification recipient using the Alarm.com app:Icn Chevron Down
- Log in to the Alarm.com app.
- Tap Menu.
- Tap Notifications.
- Tap Settings.
- Tap the notification the user would like to receive text notifications for (e.g., Arming Event).
- In Recipients, tap Add.
- In the Address Book, tap to select the mobile carrier SMS email address for the user. The following image is an example where only the mobile carrier SMS email address is selected as a recipient:
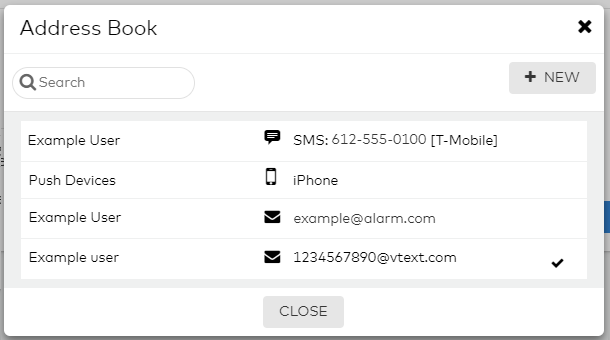
Example Address book
- Tap Close to exit out of the Address Book.
- Tap Save.
To add the mobile carrier SMS email address as a notification recipient using the Alarm.com app:Icn Chevron Down
- Log in to the GoSafer Security customer portal (powered by Alarm.com).
- Click Notifications.
- Click Edit to configure the notification the user would like to receive text notifications for (e.g., Arming Event).
- In Recipients, click Add.
- In the Address Book, click to select the mobile carrier SMS email address for the user. The following image is an example where only the mobile carrier SMS email address is selected as a recipient:
Example Address book
- Click Close to exit out of the Address Book.
- Click Save.
Source and support
For GoSafer Security assistance, visit gosafersecurity.com.
Original Alarm.com reference: https://answers.alarm.com/Customer/Website_and_App/System_Management/Notifications/Can_I_create_text_SMS_notifications_if_my_cell_carrier_is_not_an_option
Always verify safety, installation, compatibility, and current UI details against the original manufacturer documentation before operational use.
Configure Email Format
GoSafer Security Knowledge Base
This operational reference is organized for GoSafer Security customers and staff. Alarm.com product names are retained where required for technical accuracy.
Overview
The format of emails sent to you can be configured to send as plain text or HTML. Plain text can be configured if you experience difficulty viewing the content within an email using HTML format.
| Platform | App + Web |
|---|---|
| Content type | How-to / Configuration |
| Source last updated | 2025-06-04 |
Procedure
To configure Email Format using the Alarm.com app
- Log in to the Alarm.com app.
- Tap [Menu].
- Tap Users.
- Tap to select the user to edit.
In Contact Information, click Email.
- Verify the email address for the selected user is correct.
Using the Email Format dropdown menu, select either Plain Text or HTML.
- Tap Save.
To configure Email Format using the GoSafer Security customer portal (powered by Alarm.com)
- Log in to the GoSafer Security customer portal (powered by Alarm.com).
- Click Users.
- Click to select the user to edit.
In Contact Information, click Email.
- Verify the email address for the selected user is correct.
Using the Email Format dropdown menu, select either Plain Text or HTML.
- Click Save.
Source and support
For GoSafer Security assistance, visit gosafersecurity.com.
Original Alarm.com reference: https://answers.alarm.com/Customer/Website_and_App/System_Management/Notifications/Configure_Email_Format
Always verify safety, installation, compatibility, and current UI details against the original manufacturer documentation before operational use.
Configure notification recipients
GoSafer Security Knowledge Base
This operational reference is organized for GoSafer Security customers and staff. Alarm.com product names are retained where required for technical accuracy.
Overview
Notice: For Canadian Dealers, text based notifications to Bell subscribers will be degraded on December 31, 2025, due to changes in how Bell handles messaging. For phones with Bell, it is recommended to set up Push Notifications. For more information about configuring push devices and notifications, see Configure mobile push notification devices. For more information about the Bell SMS/MMS notification sunset, see Bell text messaging notification sunset. Recipients must be added to each notification the user wants to receive. There is no limit to the number of recipients that can be added to receive a notification.
| Platform | App + Web |
|---|---|
| Content type | How-to / Configuration |
| Source last updated | 2025-11-24 |
Procedure
To configure notification recipients using the Alarm.com app
- Log in to the Alarm.com app.
- Tap [Menu].
- Tap Notifications.
- Tap [Settings].
- Tap [Add] to create a new notification, or tap an existing notification to update.
To choose notification recipients, tap Add.
- Tap to select the entries in the Address Book to be notified, or tap Add Contact to add a new Address Book entry.
Note: If a notification recipient does not have the desired method of communication listed (e.g., phone, email, SMS), it can be added to their user profile.
Once all desired recipients are selected, tap Close.
- Verify all recipients are correct.
- Tap Save.
To configure notification recipients using the GoSafer Security customer portal (powered by Alarm.com)
- Log in to the GoSafer Security customer portal (powered by Alarm.com).
- Click Notifications.
- Click New Notification to create a new notification, or click [Edit] for an existing notification to update.
To choose notification recipients, click Add.
- Click to select the entries in the Address Book to be notified, or click New to add a new Address Book entry.
Note: If a notification recipient does not have the desired method of communication listed (e.g., phone, email, SMS), it can be added to their user profile. For more information, see Add a mobile phone number to receive SMS notifications.
Once all desired recipients are selected, click Close.
- Verify all recipients are correct.
- Click Save.
To remove recipients from a notification using the Alarm.com app
- Log in to the Alarm.com app.
- Tap [Menu].
- Tap Notifications.
- Tap [Settings].
- Tap to select the notification to edit.
In Recipients, tap [Delete] to remove the desired notification recipient.
- Tap Save.
To remove recipients from a notification using the GoSafer Security customer portal (powered by Alarm.com)
- Log in to the GoSafer Security customer portal (powered by Alarm.com).
- Click Notifications.
- Click [Edit] on the notification to edit.
In Recipients, click [Delete] to remove the desired notification recipient.
- Click Save.
Source and support
For GoSafer Security assistance, visit gosafersecurity.com.
Original Alarm.com reference: https://answers.alarm.com/Customer/Website_and_App/System_Management/Notifications/Configure_notification_recipients
Always verify safety, installation, compatibility, and current UI details against the original manufacturer documentation before operational use.
Create a No-Show Alert notification
GoSafer Security Knowledge Base
This operational reference is organized for GoSafer Security customers and staff. Alarm.com product names are retained where required for technical accuracy.
Overview
A no-show alert notification can notify users if a given user code was not used to disarm the system within a specified time frame.
| Platform | App + Web |
|---|---|
| Content type | How-to / Configuration |
| Source last updated | 2025-06-04 |
Procedure
To create a No-Show Alert notification using the Alarm.com app
- Log in to the Alarm.com app.
- Tap [Menu].
- Tap Notifications.
- Tap [Settings].
Create a new No-Show Alert notification or edit an existing one.
If the notification has not been created, tap [Add], tap to expand Create Your Own, then tap No-Show Alert.
To edit an existing notification, tap to select the No-Show Alert notification.
Name the new notification rule.
Using the If the system is NOT disarmed by dropdown menu, select a specific user.
In During this time frame, configure the days and times the user should disarm the system.
Note: If the system is already disarmed and the user doesn't need to disarm the system a No-Show Alert will still be sent.
To choose notification recipients, tap Add.
- Tap the entries in the Address book that are to be notified, or tap Add Contact to add a new Address Book entry.
- Tap Close.
- Verify the notification is configured with the correct settings.
- Tap Save.
To create a No-Show Alert notification using the GoSafer Security customer portal (powered by Alarm.com)
- Log in to the GoSafer Security customer portal (powered by Alarm.com).
- Click Notifications.
Create a new No-Show Alert notification or edit an existing one.
If the notification has not been created, click New Notification, then click to select No-Show Alert.
To edit an existing notification, click [Edit] for the No-Show Alert notification.
Name the new notification rule.
Using the If the system is NOT disarmed by dropdown menu, select a specific user.
In During this time frame, configure the days and times the user should disarm the system.
Note: If the system is already disarmed and the user doesn't need to disarm the system a No-Show Alert will still be sent.
To choose notification recipients, click Add.
- Click the entries in the Address book that are to be notified, or click New to add a new Address Book entry.
- Click Close.
- Verify the notification is configured with the correct settings.
- Click Save.
Source and support
For GoSafer Security assistance, visit gosafersecurity.com.
Original Alarm.com reference: https://answers.alarm.com/Customer/Website_and_App/System_Management/Notifications/Create_a_No-Show_Alert_notification
Always verify safety, installation, compatibility, and current UI details against the original manufacturer documentation before operational use.
Create a sensor activity notification
GoSafer Security Knowledge Base
This operational reference is organized for GoSafer Security customers and staff. Alarm.com product names are retained where required for technical accuracy.
Overview
A sensor activity notification can notify users if a contact sensor is opened or a motion sensor is activated.
| Platform | App + Web |
|---|---|
| Content type | How-to / Configuration |
| Source last updated | 2025-06-04 |
Procedure
Step-by-step guide: Screenshots and videos are placed with the instruction they illustrate.
Sensor activity monitoring (SAM) allows users to view the current status of the system's sensors.
Once SAM is enabled for sensors, sensor activity notifications can be configured to receive direct notifications about a sensor's activity by email, text message, or push notification. For more information about setting up sensor activity notifications, see Create a sensor activity notification.
To turn sensor activity monitoring on/off:
This setting can only be updated using the GoSafer Security customer portal (powered by Alarm.com). For further assistance, contact your service provider.
- Log in to the GoSafer Security customer portal (powered by Alarm.com).
- Click Settings.
- Click Manage Devices.
- Click More options next to the device to update.
- Click Device Settings.
- In the Monitoring column, click to select the sensors that should have sensor activity monitoring. Alternatively, click to uncheck to remove activity monitoring.
Note: In the following example, sensors 1 and 3 have SAM enabled, sensor 2 has SAM disabled, and SAM is not available for the fixed panic keypad.
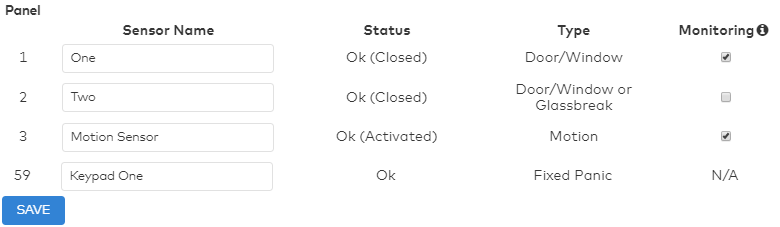
Sensor list
- Click Save.
Turn sensor activity monitoring on/off videos
Turn SAM on - VideoIcn Chevron Up
Turn SAM off - Video
Icn Chevron Up
Source and support
For GoSafer Security assistance, visit gosafersecurity.com.
Original Alarm.com reference: https://answers.alarm.com/Customer/Website_and_App/System_Management/Notifications/Create_a_sensor_activity_notification
Always verify safety, installation, compatibility, and current UI details against the original manufacturer documentation before operational use.
Create a sensor left open notification
GoSafer Security Knowledge Base
This operational reference is organized for GoSafer Security customers and staff. Alarm.com product names are retained where required for technical accuracy.
Overview
A Sensor Left Open notification can notify users if a door, window or other sensor is left open for a specified duration.
| Platform | App + Web |
|---|---|
| Content type | How-to / Configuration |
| Source last updated | 2025-06-04 |
Procedure
To create a sensor left open notification using the Alarm.com app
- Log in to the Alarm.com app.
- Tap [Menu].
- Tap Notifications.
- Tap [Settings].
- Tap [Add].
In Create Your Own, tap Sensor Left Open.
Name the new notification rule.
In When any of these sensors, tap to select any of the sensors to be notified about.
In Is Left Open, tap to select either of the following
For this duration and then use the dropdown menu to select the required duration.
When selected people cross a Geo-Fence to select a user and Geo-Fence.
To choose notification recipients, tap Add.
- Tap the entries in the Address book that are to be notified, or tap Add Contact to add a new Address Book entry.
- Tap Close.
- Verify the notification is configured with the correct settings.
- Tap Save.
To create a Sensor Left Open notification using the GoSafer Security customer portal (powered by Alarm.com)
- Log in to the GoSafer Security customer portal (powered by Alarm.com).
- Click Notifications.
- Click New Notification.
In Standard, click Sensor Left Open.
Name the new notification rule.
In When any of these sensors, click to select any of the sensors to be notified about.
In Is Left Open, click to select either of the following
For this duration and then use the dropdown menu to select the required duration.
When selected people cross a Geo-Fence to select a user and Geo-Fence.
In During this time frame, click to select either of the following
At All Times to receive a notification at any time.
Only During the Following Times to select specific times for the sensors to be monitored.
To choose notification recipients, click Add.
- Click the entries in the Address book that are to be notified, or click New to add a new Address Book entry.
- Click Close.
- Verify the notification is configured with the correct settings.
- Click Save.
Source and support
For GoSafer Security assistance, visit gosafersecurity.com.
Original Alarm.com reference: https://answers.alarm.com/Customer/Website_and_App/System_Management/Notifications/Create_a_sensor_left_open_notification
Always verify safety, installation, compatibility, and current UI details against the original manufacturer documentation before operational use.
Create an alarm notification
GoSafer Security Knowledge Base
This operational reference is organized for GoSafer Security customers and staff. Alarm.com product names are retained where required for technical accuracy.
Overview
An alarm notification can notify users if there has been an alarm event at the property.
| Platform | App + Web |
|---|---|
| Content type | How-to / Configuration |
| Source last updated | 2025-06-04 |
Procedure
To create an alarm notification using the Alarm.com app
- Log in to the Alarm.com app.
- Tap [Menu].
- Tap Notifications.
- Tap [Settings].
- Tap [Add].
- Tap Alarm.
Name the new notification rule.
Under When Alarm of type, tap to select the alarm types to be notified about.
In the Is reported by dropdown menu, tap to select which sensors are to be monitored.
To choose notification recipients, tap Add.
- Tap the entries in the Address book that are to be notified, or tap Add Contact to add a new Address Book entry.
Note: Do not choose to send a Duress Panic SMS or push notification to a potential Duress Code user.
- Tap Close.
- Verify the notification is configured with the correct settings.
- Tap Save.
To create an alarm notification using the GoSafer Security customer portal (powered by Alarm.com)
- Log in to the GoSafer Security customer portal (powered by Alarm.com).
- Click Notifications.
- Click New Notification.
- Click Alarm.
Name the new notification rule.
In When Alarm of type, click to select the alarm types to be notified about.
Using the Is reported by dropdown menu, select either
Any Sensor to be notified about any sensor alarms.
Specific Sensor to only be notified about specific sensors you select.
To choose notification recipients, click Add.
- Click the entries in the Address book that are to be notified, or click New to add a new Address Book entry.
Note: Do not choose to send a Duress Panic SMS or push notification to a potential Duress Code user.
- Click Close.
- Verify the notification is configured with the correct settings.
- Click Save.
Source and support
For GoSafer Security assistance, visit gosafersecurity.com.
Original Alarm.com reference: https://answers.alarm.com/Customer/Website_and_App/System_Management/Notifications/Create_an_alarm_notification
Always verify safety, installation, compatibility, and current UI details against the original manufacturer documentation before operational use.
Create an arming event notification
GoSafer Security Knowledge Base
This operational reference is organized for GoSafer Security customers and staff. Alarm.com product names are retained where required for technical accuracy.
Overview
An arming event notification can notify users when and who is arming and disarming the system.
| Platform | App + Web |
|---|---|
| Content type | How-to / Configuration |
| Source last updated | 2025-06-04 |
Procedure
To create an arming event notification using the Alarm.com app
- Log in to the Alarm.com app.
- Tap [Menu].
- Tap Notifications.
- Tap [Settings].
- Tap [Add].
- Tap to expand Create Your Own.
- Tap Arming Event.
Name the new notification rule.
Using the When dropdown menu, select either of the following
Any User or Keyfob to be notified about any user arming/disarming.
- Select Users and Keyfobs for specific users.
In Perform and of these system actions, tap to select any of the following
Disarm to notify you when the panel is disarmed.
Arm Stay to notify you when the panel is set to Arm Stay.
Arm Away to notify you when the panel is set to Arm Away.
In During this time frame, tap to select either of the following
At All Times to receive a notification anytime an arming event occurs.
Only during the Following Times to configure specific days and times to receive notifications.
In Notification Filtering, tap to select the desired notification filtering.
To choose notification recipients, tap Add.
- Tap the entries in the Address book that are to be notified, or tap Add Contact to add a new Address Book entry.
- Tap Close.
- Verify the notification is configured with the correct settings.
- Tap Save.
To create an arming event notification using the GoSafer Security customer portal (powered by Alarm.com)
- Log in to the GoSafer Security customer portal (powered by Alarm.com).
- Click Notifications.
- Click New Notification.
- Click Business.
- Click Employee arming activity.
Name the new notification rule.
Using the When dropdown menu, select either of the following
Any User or Keyfob to be notified about any user arming/disarming.
- Select Users and Keyfobs for specific users.
In Perform and of these system actions, click to select any of the following
Disarm to notify you when the panel is disarmed.
Arm Stay to notify you when the panel is set to Arm Stay.
Arm Away to notify you when the panel is set to Arm Away.
In During this time frame, click to select either of the following
At All Times to receive a notification anytime an arming event occurs.
Only during the Following Times to configure specific days and times to receive notifications.
In Notification Filtering, click to select the desired notification filtering.
To choose notification recipients, click Add.
- Click the entries in the Address book that are to be notified, or click New to add a new Address Book entry.
- Click Close.
- Verify the notification is configured with the correct settings.
- Click Save.
Source and support
For GoSafer Security assistance, visit gosafersecurity.com.
Original Alarm.com reference: https://answers.alarm.com/Customer/Website_and_App/System_Management/Notifications/Create_an_arming_event_notification
Always verify safety, installation, compatibility, and current UI details against the original manufacturer documentation before operational use.
Create an arming reminder notification
GoSafer Security Knowledge Base
This operational reference is organized for GoSafer Security customers and staff. Alarm.com product names are retained where required for technical accuracy.
Overview
An arming reminder notification can notify users if the system has not been armed by a certain time.
| Platform | App + Web |
|---|---|
| Content type | How-to / Configuration |
| Source last updated | 2025-06-04 |
Procedure
Step-by-step guide: Screenshots and videos are placed with the instruction they illustrate.
An arming reminder notification can notify users if the system has not been armed by a certain time.
For more information about how to add users, see Create a new login. For more information about how to associate a cell phone number with a user, see Add a mobile phone number to receive SMS notifications.
Note: It is possible that arming reminders may have a 3-minute delay based on how arming updates are received from the panel.
Create an arming reminder notification
To create an arming reminder notification using the Alarm.com app:Icn Chevron Down
- Log in to the Alarm.com app.
- Tap Icn Menu.
- Tap Notifications.
- Tap Settings.
- Tap Add.
- Tap Arming Reminder.
- Name the new notification rule.
- In Send an Arming Reminder if the system is NOT armed, select one of the following:
- At a specific time to enter a desired time.
- When selected people cross a Geo-Fence to select the desired Geo-Devices.
Important: If multiple Geo-Devices are selected, it will require the last of these devices to enter or exit the Geo-Fence before the notification is sent.
- In During this time frame, select one of the following:
- At All Times to notify you every day if the system has not been armed by a certain time.
- Only During the Following Times to set up notifications to only take place during certain days.
- In Recipients, tap Add.
- Tap the entries in the Address book that are to be notified, or tap Add Contact to add a new Address Book entry.
- Tap Close.
- Verify the notification is configured with the correct settings.
- Tap Save.
To create an arming reminder notification using the GoSafer Security customer portal (powered by Alarm.com):Icn Chevron Down
- Log in to the GoSafer Security customer portal (powered by Alarm.com).
- Click Notifications.
- Click New Notification.
- Click Arming Reminder.
- Name the new notification rule.
- In Send an Arming Reminder if the system is NOT armed, select one of the following:
- At a specific time to enter the desired time.
- When selected people cross a Geo-Fence to select the desired Geo-Devices.
Important: If multiple Geo-Devices are selected, it will require the last of these devices to enter or exit the Geo-Fence before the notification is sent.
- In During this time frame, select one of the following:
- At All Times to notify you every day if the system has not been armed by a certain time.
- Only During the Following Times to set up notifications to only take place during certain days.
- To choose notification recipients, click Add.
- Click the entries in the Address book that are to be notified, or click New to add a new Address Book entry.
- Click Close.
- Verify the notification is configured with the correct settings.
- Click Save.
Source and support
For GoSafer Security assistance, visit gosafersecurity.com.
Original Alarm.com reference: https://answers.alarm.com/Customer/Website_and_App/System_Management/Notifications/Create_an_arming_reminder_notification
Always verify safety, installation, compatibility, and current UI details against the original manufacturer documentation before operational use.
How can I opt out of in-app notifications?
GoSafer Security Knowledge Base
This operational reference is organized for GoSafer Security customers and staff. Alarm.com product names are retained where required for technical accuracy.
Overview
You can opt-out from promotional in-app notifications (e.g., Upsell Offers, etc.) using the Alarm.com app or GoSafer Security customer portal (powered by Alarm.com).
| Platform | App + Web |
|---|---|
| Content type | FAQ / Explanation |
| Source last updated | 2025-06-04 |
Procedure
To opt-out of in-app notifications using the Alarm.com app
- Log in to the Alarm.com app.
- Tap [More Options].
- Tap Login Information.
- Tap Communication Preferences.
Use the toggle switch to disable the desired notifications.
- Tap Save.
To opt-out of in-app notifications using the GoSafer Security customer portal (powered by Alarm.com)
- Log in to the GoSafer Security customer portal (powered by Alarm.com).
- Click Settings.
- Click Login Information.
- Click Communication Preferences.
Use the toggle switch to disable the desired notifications.
- Click Save.
Source and support
For GoSafer Security assistance, visit gosafersecurity.com.
Original Alarm.com reference: https://answers.alarm.com/Customer/Website_and_App/System_Management/Notifications/How_can_I_opt_out_of_in-app_notifications
Always verify safety, installation, compatibility, and current UI details against the original manufacturer documentation before operational use.
How can I update the carrier for a mobile contact?
GoSafer Security Knowledge Base
This operational reference is organized for GoSafer Security customers and staff. Alarm.com product names are retained where required for technical accuracy.
Overview
You can update the carrier for a mobile contact using the Alarm.com app or GoSafer Security customer portal (powered by Alarm.com).
| Platform | App + Web |
|---|---|
| Content type | How-to / Configuration |
| Source last updated | 2026-02-26 |
Procedure
To update the carrier for a mobile contact using the Alarm.com app
- Log in to the Alarm.com app.
- Tap [More Options].
- Tap Users or User Access.
- Tap [Options] next to the desired user, then tap [Edit].
In Contact Information, tap Mobile.
Using the Carrier dropdown, select the desired carrier.
- Tap Save.
To update the carrier for a mobile contact using the GoSafer Security customer portal (powered by Alarm.com)
- Log in to the GoSafer Security customer portal (powered by Alarm.com).
- Click Users or User Access.
- Click [Options] next to the desired user, then click [Edit].
In Contact Information, click Mobile.
Using the Carrier dropdown, select the desired carrier.
- Click Save.
Source and support
For GoSafer Security assistance, visit gosafersecurity.com.
Original Alarm.com reference: https://answers.alarm.com/Customer/Website_and_App/System_Management/Notifications/How_can_I_update_the_carrier_for_a_mobile_contact
Always verify safety, installation, compatibility, and current UI details against the original manufacturer documentation before operational use.
How can the language of notifications be changed?
GoSafer Security Knowledge Base
This operational reference is organized for GoSafer Security customers and staff. Alarm.com product names are retained where required for technical accuracy.
Overview
If there is a preferred language that notifications would like to be received in, this can be changed on either the Alarm.com app or GoSafer Security customer portal (powered by Alarm.com). To do so for all notifications, you will need to utilize both.
| Platform | App + Web |
|---|---|
| Content type | How-to / Configuration |
| Source last updated | 2025-06-04 |
Procedure
To change the language of SMS or email notifications using the Alarm.com app
- Log in to the Alarm.com app.
- Tap [Menu].
- Tap Users.
- Tap the desired user name to edit.
- Tap Language Preference.
- Tap to select the desired language for notifications.
- Tap Save.
To change the language of SMS or email notifications using the GoSafer Security customer portal (powered by Alarm.com)
- Log in to the GoSafer Security customer portal (powered by Alarm.com).
- Click Users.
- Click the desired user name to edit.
- Click Language Preference.
- Click to select the desired language for notifications.
- Click Save.
Source and support
For GoSafer Security assistance, visit gosafersecurity.com.
Original Alarm.com reference: https://answers.alarm.com/Customer/Website_and_App/System_Management/Notifications/How_can_the_language_of_notifications_be_changed
Always verify safety, installation, compatibility, and current UI details against the original manufacturer documentation before operational use.
How many notifications can you add to an account?
GoSafer Security Knowledge Base
This operational reference is organized for GoSafer Security customers and staff. Alarm.com product names are retained where required for technical accuracy.
Overview
There is no limit to the number of notifications that can be added to an account. The types of notifications that can be added depend on which features are available on your account.
| Platform | General / Device |
|---|---|
| Content type | How-to / Configuration |
| Source last updated | 2026-03-06 |
Procedure
There is no limit to the number of notifications that can be added to an account. The types of notifications that can be added depend on which features are available on your account.
Source and support
For GoSafer Security assistance, visit gosafersecurity.com.
Original Alarm.com reference: https://answers.alarm.com/Customer/Website_and_App/System_Management/Notifications/How_many_notifications_can_you_add_to_an_account%3F
Always verify safety, installation, compatibility, and current UI details against the original manufacturer documentation before operational use.
Invalid Contact Information
GoSafer Security Knowledge Base
This operational reference is organized for GoSafer Security customers and staff. Alarm.com product names are retained where required for technical accuracy.
Overview
Invalid Contact Information indicates that an email or text recipient is not receiving automated notifications.
| Platform | App + Web |
|---|---|
| Content type | How-to / Configuration |
| Source last updated | 2026-04-10 |
Procedure
Step-by-step guide: Screenshots and videos are placed with the instruction they illustrate.
Invalid Contact Information indicates that an email or text recipient is not receiving automated notifications. For more information about troubleshooting email or text notifications, see Additional troubleshooting.
Note: It is recommended to use push notifications as they provide a more reliable notification experience. For more information about setting up push notifications, see How can a device start receiving Push Notifications?.
Invalid Contact Information examples
The following is an example of an Invalid Contact Information email a user will receive when their email information is invalid.
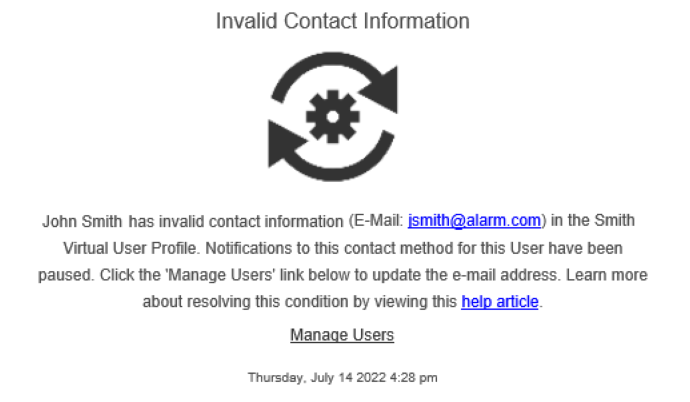
Text (SMS)
The following is an example of an Invalid Contact Information email a user will receive when their SMS information is invalid.
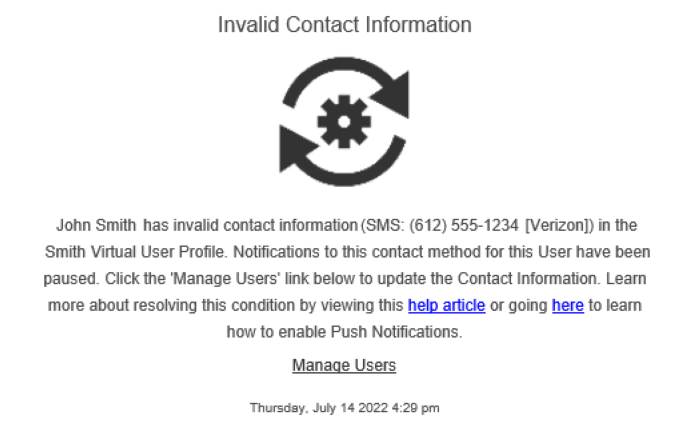
Resolve an email or text recipient with Invalid Contact Information
An email or text recipient with Invalid Contact Information can be resolved using the Alarm.com app or GoSafer Security customer portal (powered by Alarm.com).
To resolve an email or text recipient with Invalid Contact Information using the Alarm.com app:Icn Chevron Up
- Navigate to the Alarm.com app.
- Tap Users.
- Tap the user with the email address or phone number that was listed in the Invalid Contact Information notification.
- Tap the email address or phone number.
- Verify the email address or phone number is entered correctly and the email domain or cell provider is accurate.
- Verify the toggle switch is set to Enabled.
- Tap Save.
To resolve an email or text recipient with Invalid Contact Information using the GoSafer Security customer portal (powered by Alarm.com): Icn Chevron Up
- Navigate to the GoSafer Security customer portal (powered by Alarm.com).
- Click Users.
- Click the user with the email address or phone number that was listed in the Invalid Contact Information notification.
- Click the email address or phone number.
- Verify the email address or phone number is entered correctly and the email domain or cell provider is accurate.
- Verify the toggle switch is set to Enabled.
- Click Save.
Additional troubleshooting
Text notifications
- Restart the device and confirm it has a reliable cellular connection.
- If the device has only opted into video notifications with thumbnails, set the notifications to text-only. Notifications with thumbnails are sent as MMS notifications which may have more limitations that would need further troubleshooting from the cellular provider.
- Contact the cellular provider to ensure shortcode and email-to-text messages are enabled on the cellular service package.
Note: If there is difficulty receiving SMS/MMS notifications and the device is using Sprint or T-Mobile as a cellular provider, it is recommended to opt into push notifications as an alternative due to email-to-text restrictions with these providers that interfere with the delivery of notifications. For more information about setting up push notifications, see How can a device start receiving Push Notifications?.
Email notifications
- Verify there are no rules or filters that could block incoming emails.
- Verify the inbox has not reached its capacity.
- Verify there are no firewalls or security add-ins to the email inbox that may be blocking notifications. If a private email domain is being used (e.g., work email), contact an IT professional.
- If the preceding steps do not resolve the behavior, contact the email domain's support team.
Source and support
For GoSafer Security assistance, visit gosafersecurity.com.
Original Alarm.com reference: https://answers.alarm.com/Customer/Website_and_App/System_Management/Notifications/Invalid_Contact_Information
Always verify safety, installation, compatibility, and current UI details against the original manufacturer documentation before operational use.
Notifications
GoSafer Security Knowledge Base
This operational reference is organized for GoSafer Security customers and staff. Alarm.com product names are retained where required for technical accuracy.
Overview
This GoSafer Security section brings together resources for Notifications, including setup, configuration, everyday use, and troubleshooting. Choose the related page that matches your device, feature, or task, and follow the current manufacturer guidance linked on that page.
| Platform | General / Device |
|---|---|
| Content type | Troubleshooting |
| Source last updated | 2025-11-24 |
Procedure
Source and support
For GoSafer Security assistance, visit gosafersecurity.com.
Original Alarm.com reference: https://answers.alarm.com/Customer/Website_and_App/System_Management/Notifications
Always verify safety, installation, compatibility, and current UI details against the original manufacturer documentation before operational use.
User Access Summary Email
GoSafer Security Knowledge Base
This operational reference is organized for GoSafer Security customers and staff. Alarm.com product names are retained where required for technical accuracy.
Overview
You can receive User Access Summary emails that summarize login and user code access at-a-glance, every 3 months. Regular review and management of system access is a security best practice that protects customers from intrusion and gives them increased peace of mind. Note: Accounts with a residential property type and commercial service package that are not part of an Enterprise group will have this report by default. In these cases, the report can be paused but it cannot be edited or deleted.
| Platform | General / Device |
|---|---|
| Content type | Reference |
| Source last updated | 2023-05-17 |
Procedure
Step-by-step guide: Screenshots and videos are placed with the instruction they illustrate.
You can receive User Access Summary emails that summarize login and user code access at-a-glance, every 3 months. Regular review and management of system access is a security best practice that protects customers from intrusion and gives them increased peace of mind.
Note: Accounts with a residential property type and commercial service package that are not part of an Enterprise group will have this report by default. In these cases, the report can be paused but it cannot be edited or deleted.
Features
- Email reminders to regularly review and limit users with login, smart lock, and panel access
- Includes the total number of users with login and user code access to their system with links to their account settings for more details
- Emails are sent to the Primary Login's email address
- By default, email frequency will occur every 90 days
- Customers can opt-out by clicking Manage Reports in the footer of the email
Use cases
- Revoke access when a roommate moves out, as well as when access is no longer needed for a dog walker, service technician, childcare worker, and more.
- Reminder to limit access for your weekly cleaning person from Monday through Friday to Tuesdays and Thursdays only.
Example User Access Summary emails
The following are examples of User Access Summary emails you may receive.
Note: Accounts that are a part of an Enterprise group are excluded from receiving the Logins and User Codes section of the email.
Logins

User Codes

Source and support
For GoSafer Security assistance, visit gosafersecurity.com.
Original Alarm.com reference: https://answers.alarm.com/Customer/Website_and_App/System_Management/Notifications/User_Access_Summary_Email
Always verify safety, installation, compatibility, and current UI details against the original manufacturer documentation before operational use.
Voice Notifications User Guide
GoSafer Security Knowledge Base
This operational reference is organized for GoSafer Security customers and staff. Alarm.com product names are retained where required for technical accuracy.
Overview
Voice Notifications is a feature that allows you to receive a phone call for notifications. There are two types of Voice Notifications: If there is an alarm, there is a prompt to disarm. If there is a non-alarm event, a notification update is sent.
| Platform | App + Web |
|---|---|
| Content type | How-to / Configuration |
| Source last updated | 2026-01-29 |
Procedure
To add Voice Notifications using the Alarm.com app
- Log in to the Alarm.com app.
- Tap [Menu].
- Tap Users.
- Tap [More Options], then [Edit] for the user to receive voice notifications.
In Contact Information, tap Add Contact.
- Tap Phone Number.
In the Phone Number field, enter the phone number that will receive the notifications.
Using the Type dropdown menu, select the type of phone that will receive the notifications.
- Tap Save.
- Tap [Back].
- Tap [Menu].
- Tap Notifications.
- Tap [Settings].
- Tap [Details] on the notification to add voice notifications.
- Tap Add.
- Tap on users with a Voice number, then tap Close.
For Alarm notifications, all recipients added using the Alarm.com app will have the notification order position set to 1ST by default. Notification order position for recipients (i.e., 1ST, 2ND, and 3RD) can be adjusted using the GoSafer Security customer portal (powered by Alarm.com).
Note: Up to three voice notification numbers can be added to an Alarm notification. Once the Voice Notification successfully connects with a recipient, it will not perform additional notification attempts.
- Verify the recipients are set up correctly, then tap Save.
To add Voice Notifications using the GoSafer Security customer portal (powered by Alarm.com)
- Log in to the GoSafer Security customer portal (powered by Alarm.com).
- Click Users.
- Click [More Options], then [Edit] for the user to receive voice notifications.
In Contact Information, click Add Contact.
- Click Phone Number.
In the Phone Number field, enter the phone number that will receive the notifications.
Using the Type dropdown menu, select the type of phone that will receive the notifications.
- Click Save.
- Click Notifications.
- Click [Edit] on the notification to add voice notifications.
- Click Add.
- Click on users with a Voice number, then click Close.
For Alarm notifications, select a notification order position for recipients (i.e., 1ST, 2ND, and 3RD). Each selection represents a notification attempt and recipients can be selected for multiple attempts. Any recipient that has 1ST selected will receive the first notification attempt and if the alarm is not canceled after an attempt, the next attempt will be made about 90 seconds later.
Note: Up to three voice notification numbers can be added to an Alarm notification and a notification order position must be selected for the recipients of Alarm notifications. Once the Voice Notification successfully connects with a recipient, it will not perform additional notification attempts.
- Verify the recipients are set up correctly, then click Save.
Source and support
For GoSafer Security assistance, visit gosafersecurity.com.
Original Alarm.com reference: https://answers.alarm.com/Customer/Website_and_App/System_Management/Notifications/Voice_Notifications_User_Guide
Always verify safety, installation, compatibility, and current UI details against the original manufacturer documentation before operational use.
What are actionable notifications?
GoSafer Security Knowledge Base
This operational reference is organized for GoSafer Security customers and staff. Alarm.com product names are retained where required for technical accuracy.
Overview
Actionable notifications allow you to perform certain actions directly from the notification (e.g., arming the system, locking a door, etc.). For more information about the types of notifications, see What are the differences between push, text, and email notifications?.
| Platform | General / Device |
|---|---|
| Content type | FAQ / Explanation |
| Source last updated | 2024-10-14 |
Procedure
Step-by-step guide: Screenshots and videos are placed with the instruction they illustrate.
Notice: Text-based notifications to AT&T subscribers were degraded on August 15, 2025, due to changes in how AT&T handles messaging. For phones with AT&T, it is recommended to set up Push Notifications. For more information about configuring push devices and notifications, see Configure mobile push notification devices.
For Canadian customers, text based notifications to Bell subscribers will be degraded on December 31, 2025, due to changes in how Bell handles messaging. For phones with Bell, it is recommended to set up Push Notifications. For more information about configuring push devices and notifications, see Configure mobile push notification devices.
Notification method performance can vary based on factors such as the device in use (e.g., iOS, Android, etc.) or your network provider.
For more information about configuring notifications, see Configure notification recipients.
Push notifications
Note: It is recommended to use push notifications over other notification types (i.e., text and email) as push notifications offer several benefits. For more information about configuring push notifications, see Configure mobile push notification devices.
Push notifications are sent from the Alarm.com server directly to the Alarm.com app. As long as your device has a strong and consistent internet connection, push notifications should arrive within a few seconds after being sent.
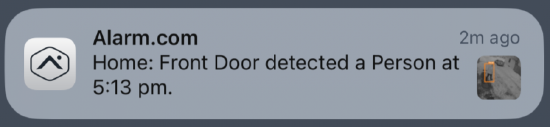
Note: A thumbnail image will only display in a push notification if the user is logged into the Alarm.com app.
Benefits
| Benefit | Description |
|---|---|
| Push notifications are actionable |
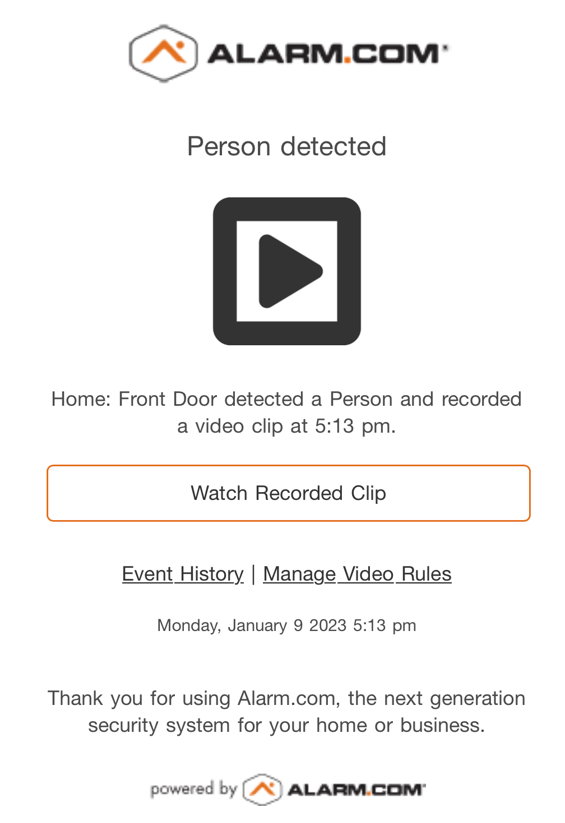
Since push notifications are received using the Internet, they can be actionable. This means you can tap on the notification to be instantly brought within the Alarm.com app, or send commands directly from certain notifications (e.g., closing a garage door that was left open, answering the doorbell, etc.). Note: On iOS, actions may require a long press to be visible. The following is an image of a garage door push notification:  The following is an image of a video doorbell push notification: 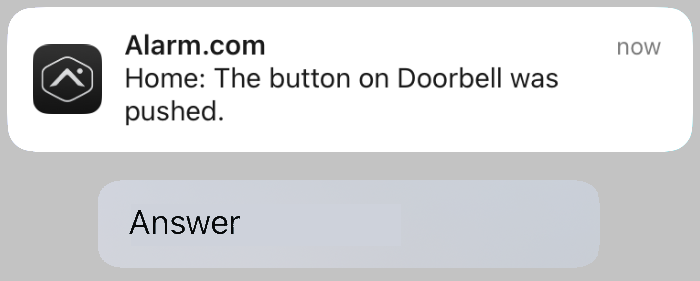 |
| It is clear where the notification came from |
Push notifications come directly from the app, so the app logo and name are prominently displayed. This provides an extra layer of trust, knowing the information is coming directly from the app, and is not a spam notification. |
| Push notifications allow for Critical Alerts (iOS) |
Critical Alerts are special notifications that are sent even if the customer's phone is on Do Not Disturb. For more information, see Configure Critical Alert notifications. For Android, customers are able to choose to override Do Not Distrurb within the App's Notification settings. |
| Video notifications are better with Push |
Push notifications can be set up to send either plain text or thumbnail images for certain notifications (e.g., video clips). Links within push notifications will bring you to a specific place within the app. If the notification indicates that motion has been detected, the link will redirect to the camera's live view. If the notification indicates that a clip has been uploaded, the link will redirect you directly to the saved clip. |
| Push notifications have customizable sounds (Android) |
Android allows customers to change which sound plays for their notifications. For more information, see Can I choose which sounds play when push notifications are received?. |
| Push notifications do not depend on your carrier | While text notifications may be susceptible to low signal or carrier messaging delays, push notifications only rely on a data connection. Whether the connection is on cellular data or a local wifi network, push notifications arrive quickly. |
| Push notifications can be sent to all of your devices | Push notifications allow you to stay connected across all your devices, including tablets and smart watches. |
| Pause notifications | Allows you to pause push notifications directly from the notification. |
| Continuous enhancements | Allows continuous enhancements as iOS and Android functionality evolves. |
For more information about configuring push notifications, see Configure mobile push notification devices.
Text notifications
Note: It is recommended to use push notifications.
Text messages can be sent two ways depending on the type of event that triggers it. Text messages are sent from the Alarm.com server to a phone number using a non-data portion of the cellular network (i.e., SMS) and a low-level data network (i.e., MMS). These messages should arrive within seconds of being sent out.
Note: Limitations with your cellular carrier's infrastructure can cause inconsistencies, delays, or possibly prevent delivery entirely.
Text messages are not actionable and therefore are not compatible with Unexpected Activity notifications. For more information about Unexpected Activity Alerts, see Configure Unexpected Activity Alert notifications.
Cellular provider service plan conflicts can occur with T-Mobile customers, Canadian cellular plans, and less common cellular carriers. It is also possible to block the From address in your phone, which prevents delivery of these notifications. This process changes based on the device in use and it is recommended to contact the cellular provider for assistance.
Note: The alert sound for text notifications may be customizable if this is a feature the phone's operating software supports.
SMS (Short Message Service)
SMS is limited by the length of the message and can only contain plain text. Since the file size is very small for these messages, these can be received with only a connection to the cellular carrier voice network (no data access required). This type of notification is recommended if you have inconsistent access to Cellular data connections.
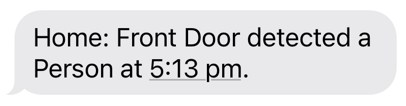
MMS (Multi-Media Service)
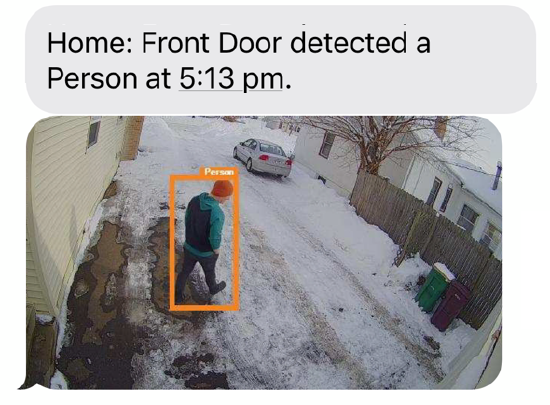
Note: T-Mobile and Verizon users cannot receive multimedia attachments (i.e., video clips and thumbnail images) and instead receive SMS messages with links to the same content. These links are only available to Verizon and T-Mobile users for 72 hours. If the link expires, use the Alarm.com app to view the video clip. It is recommended to use push notifications. For more information, see Push Notification Benefits.
MMS can contain media in the form of video and pictures (e.g., thumbnails, video clips, etc.) and therefore requires a connection to a data section of their cellular carrier. MMS notifications are sent to your Email to SMS address which is based on your cellular provider.
Important: A data connection is required to receive all contents of an MMS notification and send times can be inconsistent due to file size, processing time, the Cellular Provider, or potential SPF conflicts.
Note: Some carriers may have restrictions that prevent Alarm.com from delivering SMS notifications or limit the ability to attach video clips to messages. The use of video features may also incur data charges by your cellular provider. For more information about SMS limitation see Customer is not receiving notifications.
Email notifications
Note: It is recommended to use push notifications.
Email notifications are delivered from the Alarm.com server directly to your email inbox using an internet connection. Since they are sent to an email inbox, they can be viewed from any device with an internet connection and access to the inbox.
Email apps/clients may provide the ability to receive a push notification when a new email arrives. However, these push notifications will redirect you to the email in your inbox instead of Alarm.com.
Depending on your email provider, you may have different experiences with potential spam and junk filters. Email notifications can accidentally go to a spam or junk folder based on personal filters and email-provided filters that have been created. For more information, see What can I do if someone is not receiving notifications?.
The alert sound for email notifications may be customizable if the device being used to view the notifications supports this ability. Alert sounds for email notifications may vary based on the device in use.
Example: The Gmail application will have different alert sound options for computers and mobile devices.
Source and support
For GoSafer Security assistance, visit gosafersecurity.com.
Original Alarm.com reference: https://answers.alarm.com/Customer/Website_and_App/System_Management/Notifications/What_are_actionable_notifications
Always verify safety, installation, compatibility, and current UI details against the original manufacturer documentation before operational use.
What are the differences between push, text, and email notifications?
GoSafer Security Knowledge Base
This operational reference is organized for GoSafer Security customers and staff. Alarm.com product names are retained where required for technical accuracy.
Overview
Notice: Text-based notifications to AT&T subscribers were degraded on August 15, 2025, due to changes in how AT&T handles messaging. For phones with AT&T, it is recommended to set up Push Notifications. For more information about configuring push devices and notifications, see Configure mobile push notification devices. For Canadian customers, text based notifications to Bell subscribers will be degraded on December 31, 2025, due to changes in how Bell handles messaging. For phones with Bell, it is recommended to set up Push Notifications. For more information about configuring push devices and notifications, see Configure mobile push notification devices. Notification method performance can vary based on factors such as the device in use (e.g., iOS, Android, etc.) or your network provider. For more information about configuring notifications, see Configure notification recipients.
| Platform | Mobile App |
|---|---|
| Content type | Troubleshooting |
| Source last updated | 2025-11-24 |
Procedure
Step-by-step guide: Screenshots and videos are placed with the instruction they illustrate.
Notice: Text-based notifications to AT&T subscribers were degraded on August 15, 2025, due to changes in how AT&T handles messaging. For phones with AT&T, it is recommended to set up Push Notifications. For more information about configuring push devices and notifications, see Configure mobile push notification devices.
For Canadian customers, text based notifications to Bell subscribers will be degraded on December 31, 2025, due to changes in how Bell handles messaging. For phones with Bell, it is recommended to set up Push Notifications. For more information about configuring push devices and notifications, see Configure mobile push notification devices.
Notification method performance can vary based on factors such as the device in use (e.g., iOS, Android, etc.) or your network provider.
For more information about configuring notifications, see Configure notification recipients.
Push notifications
Note: It is recommended to use push notifications over other notification types (i.e., text and email) as push notifications offer several benefits. For more information about configuring push notifications, see Configure mobile push notification devices.
Push notifications are sent from the Alarm.com server directly to the Alarm.com app. As long as your device has a strong and consistent internet connection, push notifications should arrive within a few seconds after being sent.
Note: A thumbnail image will only display in a push notification if the user is logged into the Alarm.com app.
Benefits
| Benefit | Description |
|---|---|
| Push notifications are actionable |
Since push notifications are received using the Internet, they can be actionable. This means you can tap on the notification to be instantly brought within the Alarm.com app, or send commands directly from certain notifications (e.g., closing a garage door that was left open, answering the doorbell, etc.). Note: On iOS, actions may require a long press to be visible. The following is an image of a garage door push notification: The following is an image of a video doorbell push notification: |
| It is clear where the notification came from |
Push notifications come directly from the app, so the app logo and name are prominently displayed. This provides an extra layer of trust, knowing the information is coming directly from the app, and is not a spam notification. |
| Push notifications allow for Critical Alerts (iOS) |
Critical Alerts are special notifications that are sent even if the customer's phone is on Do Not Disturb. For more information, see Configure Critical Alert notifications. For Android, customers are able to choose to override Do Not Distrurb within the App's Notification settings. |
| Video notifications are better with Push |
Push notifications can be set up to send either plain text or thumbnail images for certain notifications (e.g., video clips). Links within push notifications will bring you to a specific place within the app. If the notification indicates that motion has been detected, the link will redirect to the camera's live view. If the notification indicates that a clip has been uploaded, the link will redirect you directly to the saved clip. |
| Push notifications have customizable sounds (Android) |
Android allows customers to change which sound plays for their notifications. For more information, see Can I choose which sounds play when push notifications are received?. |
| Push notifications do not depend on your carrier | While text notifications may be susceptible to low signal or carrier messaging delays, push notifications only rely on a data connection. Whether the connection is on cellular data or a local wifi network, push notifications arrive quickly. |
| Push notifications can be sent to all of your devices | Push notifications allow you to stay connected across all your devices, including tablets and smart watches. |
| Pause notifications | Allows you to pause push notifications directly from the notification. |
| Continuous enhancements | Allows continuous enhancements as iOS and Android functionality evolves. |
For more information about configuring push notifications, see Configure mobile push notification devices.
Text notifications
Note: It is recommended to use push notifications.
Text messages can be sent two ways depending on the type of event that triggers it. Text messages are sent from the Alarm.com server to a phone number using a non-data portion of the cellular network (i.e., SMS) and a low-level data network (i.e., MMS). These messages should arrive within seconds of being sent out.
Note: Limitations with your cellular carrier's infrastructure can cause inconsistencies, delays, or possibly prevent delivery entirely.
Text messages are not actionable and therefore are not compatible with Unexpected Activity notifications. For more information about Unexpected Activity Alerts, see Configure Unexpected Activity Alert notifications.
Cellular provider service plan conflicts can occur with T-Mobile customers, Canadian cellular plans, and less common cellular carriers. It is also possible to block the From address in your phone, which prevents delivery of these notifications. This process changes based on the device in use and it is recommended to contact the cellular provider for assistance.
Note: The alert sound for text notifications may be customizable if this is a feature the phone's operating software supports.
SMS (Short Message Service)
SMS is limited by the length of the message and can only contain plain text. Since the file size is very small for these messages, these can be received with only a connection to the cellular carrier voice network (no data access required). This type of notification is recommended if you have inconsistent access to Cellular data connections.
MMS (Multi-Media Service)
Note: T-Mobile and Verizon users cannot receive multimedia attachments (i.e., video clips and thumbnail images) and instead receive SMS messages with links to the same content. These links are only available to Verizon and T-Mobile users for 72 hours. If the link expires, use the Alarm.com app to view the video clip. It is recommended to use push notifications. For more information, see Push Notification Benefits.
MMS can contain media in the form of video and pictures (e.g., thumbnails, video clips, etc.) and therefore requires a connection to a data section of their cellular carrier. MMS notifications are sent to your Email to SMS address which is based on your cellular provider.
Important: A data connection is required to receive all contents of an MMS notification and send times can be inconsistent due to file size, processing time, the Cellular Provider, or potential SPF conflicts.
Note: Some carriers may have restrictions that prevent Alarm.com from delivering SMS notifications or limit the ability to attach video clips to messages. The use of video features may also incur data charges by your cellular provider. For more information about SMS limitation see Customer is not receiving notifications.
Email notifications
Note: It is recommended to use push notifications.
Email notifications are delivered from the Alarm.com server directly to your email inbox using an internet connection. Since they are sent to an email inbox, they can be viewed from any device with an internet connection and access to the inbox.
Email apps/clients may provide the ability to receive a push notification when a new email arrives. However, these push notifications will redirect you to the email in your inbox instead of Alarm.com.
Depending on your email provider, you may have different experiences with potential spam and junk filters. Email notifications can accidentally go to a spam or junk folder based on personal filters and email-provided filters that have been created. For more information, see What can I do if someone is not receiving notifications?.
The alert sound for email notifications may be customizable if the device being used to view the notifications supports this ability. Alert sounds for email notifications may vary based on the device in use.
Example: The Gmail application will have different alert sound options for computers and mobile devices.
Source and support
For GoSafer Security assistance, visit gosafersecurity.com.
Original Alarm.com reference: https://answers.alarm.com/Customer/Website_and_App/System_Management/Notifications/What_are_the_differences_between_push_text_and_email_notifications
Always verify safety, installation, compatibility, and current UI details against the original manufacturer documentation before operational use.
What can I do if mobile push notifications do not play sound?
GoSafer Security Knowledge Base
This operational reference is organized for GoSafer Security customers and staff. Alarm.com product names are retained where required for technical accuracy.
Overview
If there is no sound played when a push notification is received, perform the following troubleshooting:
| Platform | Mobile App |
|---|---|
| Content type | Troubleshooting |
| Source last updated | 2023-10-31 |
Procedure
- Verify mobile device notification settings
- Verify that the media volume on the mobile device is not muted.
- Verify that the mobile device does not have any Do Not Disturb settings enabled or select Do Not Disturb override options in the device's settings.
- Verify that the mobile device allows push notifications to both play sounds and wake the screen.
- Verify that the Alarm.com app has access to notifications sounds in the mobile device’s settings.
- Verify the mobile device speaker function
Test other applications on the mobile device for audio functionality.
Listen for sound out of the mobile device’s speaker as well as with headphones to determine if the issue is related to one of these.
Note: Some mobile device cases can muffle sounds.
- Verify the mobile device launcher settings
If using a launcher app on an Android phone, turn the launcher app off and see if notifications are affected in the same way.
Apps that manage notifications are known to affect both the sounds of notifications and are known to hide notifications in some cases.
- Additional troubleshooting
For more information about how to configure mobile push notifications, see How can a device start receiving Push Notifications?.
For more information about how to troubleshoot mobile push notifications, see What can I do if someone is not receiving push notifications?.
Depending on the device the user has, the instructions to verify settings may vary. For device-specific instructions about how to verify these settings, refer to Apple Support or Android Help.
Source and support
For GoSafer Security assistance, visit gosafersecurity.com.
Original Alarm.com reference: https://answers.alarm.com/Customer/Website_and_App/System_Management/Notifications/What_can_I_do_if_mobile_push_notifications_do_not_play_sound
Always verify safety, installation, compatibility, and current UI details against the original manufacturer documentation before operational use.
What can I do if someone is not receiving SMS text notifications?
GoSafer Security Knowledge Base
This operational reference is organized for GoSafer Security customers and staff. Alarm.com product names are retained where required for technical accuracy.
Overview
Note: T-Mobile & Verizon users cannot receive multimedia attachments (i.e., video clips and thumbnail images) and instead receive SMS messages with links to the same content. It is recommended to use push notifications. For more information, see Push Notification Benefits. Missing notifications are typically explained by the contact having incorrect information or having their notifications paused on the account. Note: If a Resolve button prompt is present next to a notification on the GoSafer Security customer portal (powered by Alarm.com), this means the notification is currently enabled but does not have any recipients. Click Resolve and follow the prompts to add notification recipients.
| Platform | App + Web |
|---|---|
| Content type | Troubleshooting |
| Source last updated | 2025-08-15 |
Procedure
If someone is not receiving text (SMS) notifications
- Verify that the phone number and cellular provider/carrier are correct
Using the Alarm.com app
- Log in to the Alarm.com app.
- Tap [Menu].
- Tap Users.
- Tap the affected user.
- Tap Mobile.
Make any corrections needed. If your provider is not listed, see How can I create text (SMS) notifications if my cell carrier is not an option?.
Using the GoSafer Security customer portal (powered by Alarm.com)
- Log in to the GoSafer Security customer portal (powered by Alarm.com).
- Click Users.
- Click the affected user.
- Click Mobile.
Make any corrections needed. If your provider is not listed, see How can I create text (SMS) notifications if my cell carrier is not an option?.
- Verify that the notifications for the number are enabled
Using the Alarm.com app
- Log in to the Alarm.com app.
- Tap [Menu].
- Tap Users.
- Tap the affected user.
- Tap Mobile.
- Tap the Enable toggle switch to enable notifications.
Using the GoSafer Security customer portal (powered by Alarm.com)
- Log in to the GoSafer Security customer portal (powered by Alarm.com).
- Click Users.
- Click the affected user.
- Click Mobile.
- Click the Enable toggle switch to enable notifications.
- Verify that the triggering event happened using the Activity page
Using the Alarm.com app
- Log in to the Alarm.com app.
- Tap [Activity History].
- Verify that the event that should have triggered the notification happened. If the event did not happen as expected, contact your service provider for further assistance.
Using the GoSafer Security customer portal (powered by Alarm.com)
- Log in to the GoSafer Security customer portal (powered by Alarm.com).
- Click Activity.
- Verify that the event that should have triggered the notification happened. If the event did not happen as expected, contact your service provider for further assistance.
- Additional troubleshooting steps
If everything else appears normal, the cell phone may not be receiving text messages properly.
- Restarting the phone and ensuring it has a good cellular connection can help resolve this. Otherwise, it may be necessary to contact the cellular provider to explore additional troubleshooting options.
If the notification is from a video recording rule, verify that the notification is text only. The other options send MMS notifications which may behave differently from SMS and need additional troubleshooting from the cellular provider. To verify the notification is text only:
- Log in to the GoSafer Security customer portal (powered by Alarm.com).
- Click Video
- Click Recording Rules.
- Click [Edit].
Using the notification dropdown menu, select Text Only.
If you use T-Mobile, and your text notifications have been paused, please contact T-Mobile in regards to your personal phone and request that shortcode messages be allowed on your account.
Source and support
For GoSafer Security assistance, visit gosafersecurity.com.
Original Alarm.com reference: https://answers.alarm.com/Customer/Website_and_App/System_Management/Notifications/What_can_I_do_if_someone_is_not_receiving_SMS_text_notifications%3F
Always verify safety, installation, compatibility, and current UI details against the original manufacturer documentation before operational use.
What can I do if someone is not receiving email notifications?
GoSafer Security Knowledge Base
This operational reference is organized for GoSafer Security customers and staff. Alarm.com product names are retained where required for technical accuracy.
Overview
If someone is not receiving email notifications, verify the following information. Note: If a Resolve button prompt is present next to a notification, this means the notification is currently enabled but does not have any recipients. Click Resolve and follow the prompts to add notification recipients.
| Platform | App + Web |
|---|---|
| Content type | Troubleshooting |
| Source last updated | 2025-06-04 |
Procedure
Step-by-step guide: Screenshots and videos are placed with the instruction they illustrate.
If someone is not receiving email notifications, verify the following information.
Note: If a Resolve button prompt is present next to a notification, this means the notification is currently enabled but does not have any recipients. Click Resolve and follow the prompts to add notification recipients.
Email notification is correct and enabled
Verify the notification and the email address you are using is enabled on the account. The notification and email recipients can be verified using the Alarm.com app or GoSafer Security customer portal (powered by Alarm.com).
To verify the email notification is enabled using the Alarm.com app:Icn Chevron Up
- Log in to the Alarm.com app.
- Tap Menu.
- Tap Notifications.
- Tap Settings.
- Tap the notification you are expecting to receive.
- Verify the notification is turned on.
- If the notification is disabled, tap the toggle switch to enable it. The following image displays a toggle switch that is enabled:
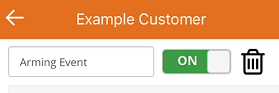
Notification toggle switch enabled on Customer app
- If the notification is disabled, tap the toggle switch to enable it. The following image displays a toggle switch that is enabled:
- In Recipients, verify your email address is listed as a recipient and spelled correctly.
- If your email address is listed as a recipient:
- Verify you are not paused. Paused users are grayed out. In the following image, the email is active, and the mobile device is paused.
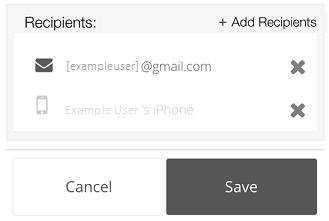
Recipients enabled and disabled example on Customer app
Note: To verify if a user is paused, tap on the recipient and a message appears as shown in the following image:
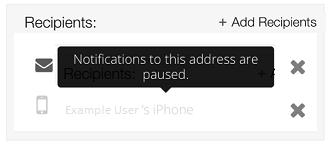
Recipient paused on Customer app
- Verify you are not paused. Paused users are grayed out. In the following image, the email is active, and the mobile device is paused.
- If your email address is not listed as a recipient:
- In Recipients, tap Add.
- Tap the recipients to select.
- Once all desired recipients are selected in the Address Book, then click Close.
- If the desired recipient is not listed in the Address Book:
- Tap Add Contact to add a new recipient address.
- Enter the contact's information.
- Tap Add Contact.
- If your email address is listed as a recipient:
- Verify all desired recipients are selected for the notification, then click Save.
To verify the email notification is enabled using the GoSafer Security customer portal (powered by Alarm.com):Icn Chevron Up
- Log in to the GoSafer Security customer portal (powered by Alarm.com).
- Click Notifications.
- Click Edit on the notification you are expecting to receive.
- Verify the notification is turned on.
- If the notification is disabled, click the toggle switch to enable it.
- Under Recipients, verify your email address is listed as a recipient and spelled correctly.
- If your email address is listed as a recipient:
- Mouse over the address to verify that it's not paused. The following image is an example of what appears if the address is paused:

Paused notification email
- Mouse over the address to verify that it's not paused. The following image is an example of what appears if the address is paused:
- If your email address is not listed as a recipient:
- Click Add.
- Click the recipients to select. Selected recipients in the Address Book have a Check next to their address.
- If the address to add is not listed in the Address Book:
- Click New to add a new recipient address.
- Enter the contact's information.
- Click Add Contact.
- If the address to add is not listed in the Address Book:
- Verify all desired recipients are selected in the Address Book, then click Close.
- If your email address is listed as a recipient:
- Click Save.
The email address needs to be updated
If the email address is incorrect or disabled, the email address can be updated using the Alarm.com app or GoSafer Security customer portal (powered by Alarm.com).
To update an email address using the Alarm.com app:Icn Chevron Up
- Log in to the Alarm.com app.
- Tap Menu.
- Tap Users.
- Tap the user to update.
- Tap Email.
- Update the user:
- If the user's email address is incorrect, enter the correct email address under the Email Address text field.
- If the user's email address is correct but disabled, click the toggle switch to enable the email address. The following image is an example of an email address that is enabled on the website:
.jpg?revision=1&size=bestfit&width=300&height=149)
Edit email address (app)
- Click Save.
To update an email address using the GoSafer Security customer portal (powered by Alarm.com):Icn Chevron Up
- Log in to the GoSafer Security customer portal (powered by Alarm.com).
- Click Users.
- On the user to update, click Edit.
- Update the user:
- If the user's email address is incorrect, enter the correct email address under the Email Address text field.
- If the user's email address is correct but disabled, click the toggle switch to enable the email address. The following image is an example of an email address that is enabled on the website:

Update User page email
- Click Save.
Email troubleshooting
Verify the email address is correct
Verify the email address is entered correctly and there are no spelling errors such as:
- Misspellings or typos
- Similar characters, (e.g., a capital i versus a lowercase l, the letter O versus the number 0, etc.)
Note: If similar characters may be an issue, copy and paste the address into a word processor and changing the font may help distinguish any differences.
Spam/junk folders
Check all folders (e.g., spam, receipts, junk, etc.) to verify the email was not marked as spam/junk. Run a search in the spam/junk folder separately, as these results do not populate during inbox searches. For email notifications search for key terms of the expected notification (e.g., Alarm, arm, disarm, panel, etc.).
If the email was marked as spam/junk, add the From Address to the safe senders list.
Email filters and rules
Verify the email was not placed into another folder via filters/rules. Users should be able to view the filter/rules created when on a web browser. This option may not be available when checking email on a mobile browser or mobile app (i.e., phone/tablet).
Method used to access email
Are you accessing email from an app, web browser, or desktop (e.g., Gmail app versus mail.google.com)?
Certain apps run their Inbox differently so filters cannot be checked, and emails may be more difficult to locate. For best results, move to a desktop version of the email service.
Blocked senders list
If the From Address is on your blocked senders list, remove the domain from the blocked senders list and add the domain to the safe senders list.
Inbox storage capacity
If the inbox has reached its storage capacity, the email address may not be able to receive emails. You may need to delete old emails, or set up a new email address to receive emails.
Private email address
Is your email address a private email address instead of a public email, like Hotmail or Gmail?
If you have a private email address, there may be a firewall or email filtering that may be beyond your control. If this is the case, contact your IT professionals. To verify this is the cause, change your account's email address to a popular email service (e.g., Hotmail, Gmail, or Yahoo, etc.), and then trigger a notification to send.
Missing email troubleshooting provided by their email service provider
If the preceding steps do not resolve the behavior, you can contact their email service provider to attempt missing email troubleshooting.
Source and support
For GoSafer Security assistance, visit gosafersecurity.com.
Original Alarm.com reference: https://answers.alarm.com/Customer/Website_and_App/System_Management/Notifications/What_can_I_do_if_someone_is_not_receiving_email_notifications
Always verify safety, installation, compatibility, and current UI details against the original manufacturer documentation before operational use.
What can I do if someone is not receiving notifications?
GoSafer Security Knowledge Base
This operational reference is organized for GoSafer Security customers and staff. Alarm.com product names are retained where required for technical accuracy.
Overview
There are a few possible reasons someone may not receive notifications. The causes vary depending on what type of notification should be sent. Select any of the following links to see recommended troubleshooting for receiving each type of notification:
| Platform | App + Web |
|---|---|
| Content type | Troubleshooting |
| Source last updated | 2021-12-06 |
Procedure
Step-by-step guide: Screenshots and videos are placed with the instruction they illustrate.
Yes. If the desired carrier is not listed when adding a cell phone number for text notifications, you can use the phone’s email address (SMS/SMTP format, i.e., 1234567890@vtext.com) so the recipient can be configured for email notifications that they will receive to their phone as a text message.
Note: This feature may not be available based on the carrier. Contact your cellular provider for additional assistance.
For most mobile carriers' SMS email addresses, refer to NotePage's SMTP Email Delivery address formats. Alternatively, you can send a text message from that phone to an email address and use the from address on the email.
Note: SMS (text notifications) is only available in the United States and Canada. It is recommended to use push notifications for accounts outside the United States and Canada.
Add the mobile carrier SMS email address as contact information
A mobile carrier SMS email address can be added as contact information using the Alarm.com app or GoSafer Security customer portal (powered by Alarm.com).
To add the mobile carrier SMS email address as contact information using the Alarm.com app:Icn Chevron Down
- Log in to the Alarm.com app.
- Tap Menu.
- Tap Users.
- Tap to select the user to edit. If the user is not created yet, tap Add to create a new user.
- Tap Add Contact.
- Tap Email Address to add the mobile carrier SMS email address for the user's phone.
- In Email Address, enter the user's mobile carrier SMS email address (i.e., 1234567890@vtext.com).
- Using the Email Format dropdown menu, select the format the user would like to receive notifications.
- It is recommended to select Plain Text since the notification is being sent to a phone as a text message.
- Verify all user information is correct.
- Tap Save to update the user's information. Then add the new contact information to the notifications the user wants to receive.
To add the mobile carrier SMS email address as contact information using the GoSafer Security customer portal (powered by Alarm.com):Icn Chevron Down
- Log in to the GoSafer Security customer portal (powered by Alarm.com).
- Click Users.
- Click Edit for the user to edit. If the user is not created yet, then click Add to create a new user.
- In Contact Information, click Add.
- Click Email Address to add the mobile carrier SMS email address for the user's phone.
- In Email Address enter the user's mobile carrier SMS email address (i.e., 1234567890@vtext.com).
- Using the Email Format dropdown menu, select the format the user would like to receive notifications.
- It is recommended to select Plain Text since the notification is being sent to a phone as a text message.
- Verify all user information is correct.
- Click Save to update the user's information. Then add the new contact information to the notifications the user wants to receive.
Add the mobile carrier SMS email address as a notification recipient
Once the mobile carrier SMS email address is added as contact information as instructed in To add the mobile carrier SMS email address as contact information, the user can now be added as a recipient to notifications.
A mobile carrier SMS email address can be added as a notification recipient using the Alarm.com app or GoSafer Security customer portal (powered by Alarm.com).
To add the mobile carrier SMS email address as a notification recipient using the Alarm.com app:Icn Chevron Down
- Log in to the Alarm.com app.
- Tap Menu.
- Tap Notifications.
- Tap Settings.
- Tap the notification the user would like to receive text notifications for (e.g., Arming Event).
- In Recipients, tap Add.
- In the Address Book, tap to select the mobile carrier SMS email address for the user. The following image is an example where only the mobile carrier SMS email address is selected as a recipient:
Example Address book
- Tap Close to exit out of the Address Book.
- Tap Save.
To add the mobile carrier SMS email address as a notification recipient using the Alarm.com app:Icn Chevron Down
- Log in to the GoSafer Security customer portal (powered by Alarm.com).
- Click Notifications.
- Click Edit to configure the notification the user would like to receive text notifications for (e.g., Arming Event).
- In Recipients, click Add.
- In the Address Book, click to select the mobile carrier SMS email address for the user. The following image is an example where only the mobile carrier SMS email address is selected as a recipient:
Example Address book
- Click Close to exit out of the Address Book.
- Click Save.
Source and support
For GoSafer Security assistance, visit gosafersecurity.com.
Original Alarm.com reference: https://answers.alarm.com/Customer/Website_and_App/System_Management/Notifications/What_can_I_do_if_someone_is_not_receiving_notifications
Always verify safety, installation, compatibility, and current UI details against the original manufacturer documentation before operational use.
What can I do if someone is not receiving push notifications?
GoSafer Security Knowledge Base
This operational reference is organized for GoSafer Security customers and staff. Alarm.com product names are retained where required for technical accuracy.
Overview
If push notifications are not being received on a smartphone or tablet, try the following troubleshooting steps. Note: If a Resolve button prompt is present next to a notification, this means the notification is currently enabled but does not have any recipients. Click Resolve and follow the prompts to add notification recipients.
| Platform | App + Web |
|---|---|
| Content type | Troubleshooting |
| Source last updated | 2025-10-03 |
Procedure
To verify notifications are enabled using the Alarm.com app
- Log in to the Alarm.com app.
- Tap [Menu].
- Tap Notifications.
- Tap [Settings].
- Tap the desired notification to verify.
- Verify the notification toggle switch is toggled ON.
If the notification is toggled off, click the toggle switch to enable the notification. Allow a few minutes for it to save, and then test the notification.
Flick to scroll to verify desired push devices are shown under Recipients.
If desired push devices are not showing
In Recipients, tap Add.
- Tap to select the desired push devices.
- Tap Close.
- Tap Save to save any changes made. Allow a few minutes for it to save, and then test the notification.
To verify notifications are enabled using the GoSafer Security customer portal (powered by Alarm.com)
- Log in to the GoSafer Security customer portal (powered by Alarm.com).
- Click Notifications.
- Verify the desired notification is toggled on.
If the notification is toggled off, click the toggle switch to enable the notification. Allow a few minutes for it to save, and then test the notification.
- Click [Edit] for the desired notification to verify.
In Recipients, verify desired push devices are shown.
If desired push devices are not showing
In Recipients, click Add.
- Click to select the desired push devices.
- Click Close.
- Click Save. Allow a few minutes for it to save, and then test the notification.
To verify events are reporting using the Alarm.com app
- Log in to the Alarm.com app.
- Tap [Date Picker].
- Verify the events that you want push notifications for (e.g., Arming reminder, system armed away, sensor opened/closed, etc.) are appearing in the History.
Flick down to refresh the history.
To verify events are reporting using the GoSafer Security customer portal (powered by Alarm.com)
- Log in to the GoSafer Security customer portal (powered by Alarm.com).
- Click Activity.
- Verify the events that you want push notifications for (e.g., Arming reminder, system armed away, sensor opened/closed, etc.) are appearing on the Activity page.
Source and support
For GoSafer Security assistance, visit gosafersecurity.com.
Original Alarm.com reference: https://answers.alarm.com/Customer/Website_and_App/System_Management/Notifications/What_can_I_do_if_someone_is_not_receiving_push_notifications
Always verify safety, installation, compatibility, and current UI details against the original manufacturer documentation before operational use.
Why did I receive an e-mail notification for high activity by a login?
GoSafer Security Knowledge Base
This operational reference is organized for GoSafer Security customers and staff. Alarm.com product names are retained where required for technical accuracy.
Overview
Alarm.com will send an email notification when a login is observed to have an unusual amount of high activity relative to a typical user. The email is sent to the e-mail address associated with the login in question, as well as the e-mail of the account owner (the primary login). The purpose of the high activity notification is to alert users to ensure account security and to prevent unauthorized access or potentially malicious activity. The following is an example of the high activity email notification.
| Platform | General / Device |
|---|---|
| Content type | FAQ / Explanation |
| Source last updated | 2024-01-16 |
Procedure
Step-by-step guide: Screenshots and videos are placed with the instruction they illustrate.
Alarm.com will send an email notification when a login is observed to have an unusual amount of high activity relative to a typical user. The email is sent to the e-mail address associated with the login in question, as well as the e-mail of the account owner (the primary login).
The purpose of the high activity notification is to alert users to ensure account security and to prevent unauthorized access or potentially malicious activity.
The following is an example of the high activity email notification.
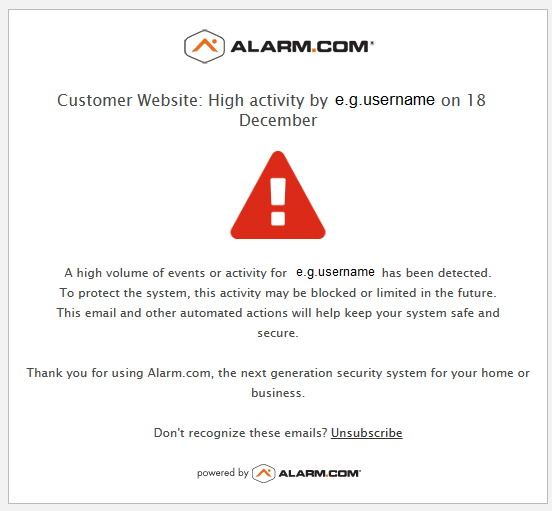
Source and support
For GoSafer Security assistance, visit gosafersecurity.com.
Original Alarm.com reference: https://answers.alarm.com/Customer/Website_and_App/System_Management/Notifications/Why_did_I_receive_an_e-mail_notification_for_high_activity_by_a_login%3F
Always verify safety, installation, compatibility, and current UI details against the original manufacturer documentation before operational use.
Will the Arming Event notification include the name of the user who armed or disarmed the system?
GoSafer Security Knowledge Base
This operational reference is organized for GoSafer Security customers and staff. Alarm.com product names are retained where required for technical accuracy.
Overview
This is primarily a video or reference page. Open the original article link below for the current content.
| Platform | App + Web |
|---|---|
| Content type | How-to / Configuration |
| Source last updated | 2022-11-03 |
Procedure
Using the panel
When the system is locally armed or disarmed using a code, the name of the user associated with the user code is included in the notification. User code information can be managed using the website. For more information about user code management, see Change a system user code.
Note: The panel must be configured to be armed by a user code to include a name. If a panel has Quick Arm enabled or Secure Arm disabled, the user that armed the system is unknown so the notification does not include a name.
Using a key fob
If a key fob is used and the panel programmed accordingly with a specific user code, the name of the associated user code is included in the notification.
If the key fob used is not associated with a specific user code, then a name is not included in the notification.
Using the Alarm.com app or GoSafer Security customer portal (powered by Alarm.com)
If the system is armed or disarmed using the GoSafer Security customer portal (powered by Alarm.com) or Alarm.com app, the notification includes the login name of the user that performed the command.
For more information about creating a new login, see Create a new login.
For more information about viewing who sent remote commands, see View which user sent remote commands to a system.
Source and support
For GoSafer Security assistance, visit gosafersecurity.com.
Original Alarm.com reference: https://answers.alarm.com/Customer/Website_and_App/System_Management/Notifications/Will_the_Arming_Event_notification_include_the_name_of_the_user_who_armed_or_disarmed_the_system
Always verify safety, installation, compatibility, and current UI details against the original manufacturer documentation before operational use.
AI Activity Filters
GoSafer Security Knowledge Base
This operational reference is organized for GoSafer Security customers and staff. Alarm.com product names are retained where required for technical accuracy.
Overview
AI Activity Filters allows you to type or speak a question and get the answers you need in seconds. It searches across all your property’s system events, saving time and making it easy to stay in the know. AI Activity Filters is available using the Alarm.com app and GoSafer Security customer portal (powered by Alarm.com).
| Platform | App + Web |
|---|---|
| Content type | How-to / Configuration |
| Source last updated | 2026-07-16 |
Procedure
Step-by-step guide: Screenshots and videos are placed with the instruction they illustrate.
AI Activity Filters allows you to type or speak a question and get the answers you need in seconds. It searches across all your property’s system events, saving time and making it easy to stay in the know. AI Activity Filters is available using the Alarm.com app and GoSafer Security customer portal (powered by Alarm.com).
Requirements
- A compatible service package (e.g., Interactive + Automation, Interactive Gold, Commercial Plus, etc.)
Note: This feature is available as a free AI Activity Filters add-on for most interactive service packages. - For the Alarm.com app, a mobile app version of 5.14+ for iOS or 5.11+ for Android is required
Features
- Harness the power of large language models (LLMs) to quickly know what happened at your property
- Get AI-powered assistance to intelligently filter your Activity feed so you can save time finding and monitoring relevant activity on the go
- Zero in on specific events (e.g., alarms, door openings, package alerts, Video Analytics detection clips, etc.)
- Quickly search for activity related to specific devices or device types (e.g., cameras, video doorbells, sensors, locks, etc.)
- Narrow by a particular time frame (i.e., the last 24 hours, the past week, or a custom date range)
- Keep tabs on user activity (e.g., who unlocked the door, who disarmed the system, etc.)
- Get a filtered view of relevant system activity and events in seconds
- View top results, ranked by most recent in the Activity history feed
- See the total number of applied filters at a glance
- Use Quick Filters to create and save custom quick filters based on your question
Additional information
- Prompts and questions are limited to 200 characters.
- An error message will appear if a question is unclear or not related to activity search or if there is a technical issue, service error, or no internet connectivity.
- Currently, previous questions and prompts are not remembered. Each new query produces a new Activity search.
- For customers with AI Video Event Search, AI Activity Filters can also surface relevant video clips directly within the activity timeline when users search visual keywords such as blue SUV or man with a baseball hat. Matching clips will appear under Top Video Results, creating a more unified search experience across both system activity and video events. For more information about how these features are related, see How are AI Activity Filters and AI Video Event Search related?.
Access AI Activity Filters
AI Activity Filters can be accessed using the Alarm.com app and GoSafer Security customer portal (powered by Alarm.com).
To access AI Activity Filters using the Alarm.com app:Icn Chevron Up
- Log in to the Alarm.com app.
- Tap Activity.
- Tap Ask About Activity.
- Enter a question or tap Microphone to ask a question about system activity.
To access AI Activity Filters using the GoSafer Security customer portal (powered by Alarm.com):Icn Chevron Up
- Log in to the GoSafer Security customer portal (powered by Alarm.com).
- Click Activity.
- Click Ask About Activity.
Enable or disable AI Activity Filters
AI Activity Filters can be enabled or disabled using the Alarm.com app or GoSafer Security customer portal (powered by Alarm.com).
To enable or disable AI Activity Filters using the Alarm.com app:Icn Chevron Up
- Log in to the Alarm.com app.
- If the account is included in an Enterprise group, verify the desired location is selected.
- Tap More.
- Tap AI Activity Filters.
- Tap the Enable AI Activity Filtering toggle switch to enable or disable the feature.
To enable or disable AI Activity Filters using the GoSafer Security customer portal (powered by Alarm.com):Icn Chevron Up
- Log in to the GoSafer Security customer portal (powered by Alarm.com).
- If the account is included in an Enterprise group, verify the desired location is selected.
- Click AI Activity Filters.
- Click the Enable AI Activity Filtering toggle switch to enable or disable the feature.
Frequently asked questions
How are AI Activity Filters and AI Video Event Search related? Icn Chevron Up
AI Activity Filters and AI Video Event Search work together to provide a faster, more intuitive way to understand what’s happening at a property, but each feature serves a different purpose.
| AI Activity Filters | AI Video Event Search | |
|---|---|---|
| What It Is | A natural-language search tool that searches system-wide activity and standard video analytics only (i.e., locks, sensors, package alerts, garage door openings, Video Analytics detections, and user actions) | A natural-language search tool that scans saved video clips using identify visual details like people, vehicles, clothing, animals, or objects. |
| Purpose | Helps customers instantly answer what happened and when, by pulling relevant activity from the entire property without scrolling (e.g., “Who unlocked the door?” or “When was the garage opened?”). | Helps customers quickly find what the activity looked like by locating the exact video clip that matches a description or timeframe. Ideal for investigations and visual confirmation (e.g., “red truck yesterday” or “person in black hoodie last night"). |
| Limitations |
|
|
| Requirements |
|
What are some examples of questions and prompts?Icn Chevron Up
The following are example questions and prompts for a home and business:
| For your home: | For your business: |
|---|---|
|
|
Are there any query types that are not supported by AI Activity Filters?Icn Chevron Up
Yes. The following query types are not supported by AI Activity Filters:
- Search queries that include vulgar or offensive words
- Requests to contact emergency services, such as “Can you call the police?” or “Call 911”
- Questions that are not related to activity history at your property
Source and support
For GoSafer Security assistance, visit gosafersecurity.com.
Original Alarm.com reference: https://answers.alarm.com/Customer/Website_and_App/System_Management/System_History/AI_Activity_Filters
Always verify safety, installation, compatibility, and current UI details against the original manufacturer documentation before operational use.
Export the system activity history
GoSafer Security Knowledge Base
This operational reference is organized for GoSafer Security customers and staff. Alarm.com product names are retained where required for technical accuracy.
Overview
The system activity history can be exported from the website.
| Platform | Customer Website |
|---|---|
| Content type | Reference |
| Source last updated | 2025-06-04 |
Procedure
To export the system activity history
- Log in to the GoSafer Security customer portal (powered by Alarm.com).
- Click Activity.
- Click to expand Filters.
- Select any of the following filters to search with:
Using the Search bar to view activity matching specific keywords.
Using the Date Range to view activity within a specified timeframe.
Using the Users dropdown menu to view the activity of specified users.
Using the Event Type dropdown menu to view activity from specific events.
Using the Device Type dropdown menu to view activity from specific device types.
Using the Device Name dropdown menu to view activity from specific devices.
- Click [Download], and then select to export the filtered system activity search as either a CSV or PDF file. The file is downloaded to your computer.
Source and support
For GoSafer Security assistance, visit gosafersecurity.com.
Original Alarm.com reference: https://answers.alarm.com/Customer/Website_and_App/System_Management/System_History/Export_the_system_activity_history
Always verify safety, installation, compatibility, and current UI details against the original manufacturer documentation before operational use.
System History
GoSafer Security Knowledge Base
This operational reference is organized for GoSafer Security customers and staff. Alarm.com product names are retained where required for technical accuracy.
Overview
This GoSafer Security section brings together resources for System History, including setup, configuration, everyday use, and troubleshooting. Choose the related page that matches your device, feature, or task, and follow the current manufacturer guidance linked on that page.
| Platform | Customer Website |
|---|---|
| Content type | FAQ / Explanation |
| Source last updated | 2026-03-19 |
Procedure
Source and support
For GoSafer Security assistance, visit gosafersecurity.com.
Original Alarm.com reference: https://answers.alarm.com/Customer/Website_and_App/System_Management/System_History
Always verify safety, installation, compatibility, and current UI details against the original manufacturer documentation before operational use.
View the system activity history
GoSafer Security Knowledge Base
This operational reference is organized for GoSafer Security customers and staff. Alarm.com product names are retained where required for technical accuracy.
Overview
The system activity history shows system, website, and user activity.
| Platform | App + Web |
|---|---|
| Content type | How-to / Configuration |
| Source last updated | 2026-07-16 |
Procedure
To view the system activity history using the Alarm.com app
- Log in to the Alarm.com app.
- Tap Activity.
Specific system activity history can be searched for in various ways
In Quick Filters, tap to select a previously created filter.
To create a new Quick Filter, tap [Edit], then tap [Add].
To edit a Quick Filter, tap [Edit], then tap the desired filter to edit.
- Tap [Filter] to apply basic filters such as:
In Timeframe, tap Recent Activity for recent events or tap Specific Date Range to select a specific time range.
In Video, tap to expand a specific video category, then select the desired filters.
In Features, tap to expand a specific device category, then select the desired filters.
- Tap Apply once the desired filters are selected.
To view the system activity history using the GoSafer Security customer portal (powered by Alarm.com)
Note: Only 1,000 events can be displayed at a time. If a filtered search returns more than 1,000 events, then more filters need to be applied to narrow the search.
- Log in to the GoSafer Security customer portal (powered by Alarm.com).
- Click Activity.
Note: By default, the last 100 events are displayed on the first page and up to 10 pages of events can be accessed.
Specific system activity history can be searched for in various ways
Using the Search field, enter specific keywords to search for the desired activity.
- Click Quick Filters to access previously created filters.
To create a new Quick Filter, click [Edit], then click [Add].
To edit a Quick Filter, click [Edit], then click [Edit] next to the desired filter to edit.
- Click Filter to apply basic filters such as:
In Timeframe, select Recent Activity to view the recent activity or Specified Date Range to select a specific date or date range.
In Features, click to expand the desired device category, then select the desired filters.
- Click + Quick Filter to create a customized filter. New Quick Filters can be found at the top of the Activity section.
Source and support
For GoSafer Security assistance, visit gosafersecurity.com.
Original Alarm.com reference: https://answers.alarm.com/Customer/Website_and_App/System_Management/System_History/View_the_system_activity_history
Always verify safety, installation, compatibility, and current UI details against the original manufacturer documentation before operational use.
View which user sent remote commands to the system
GoSafer Security Knowledge Base
This operational reference is organized for GoSafer Security customers and staff. Alarm.com product names are retained where required for technical accuracy.
Overview
When a remote command (i.e., arming/disarming, etc.) is sent from the app or website, the user's login name that sent the command appears in the activity history.
| Platform | App + Web |
|---|---|
| Content type | Reference |
| Source last updated | 2025-11-07 |
Procedure
Step-by-step guide: Screenshots and videos are placed with the instruction they illustrate.
When a remote command (e.g., arming/disarming, etc.) is sent from the GoSafer Security customer portal (powered by Alarm.com) or Alarm.com app, the user's login name that sent the command appears in the activity history.
Note: Remote arming and disarming commands use the master user's code. Therefore, the activity history will display the remote command from the user's login name along with an arm or disarm event from the master user.
It is recommended to create a separate login for each user who is going to be sending remote commands to the system. For more information about creating logins, see Create a new login.
For information about navigating to the activity history, see View the system activity history.
Examples of activity
The following examples are of how arming/disarming appears in the activity history on the Alarm.com app and GoSafer Security customer portal (powered by Alarm.com) when it is armed/disarmed remotely versus locally.
Note: Remote commands can also be sent using voice integration (e.g., Siri voice shortcuts, Amazon Alexa, etc.) and an Apple Watch. In the Event History, Alexa commands will display as Voice [login name] command, Siri voice shortcuts will display as [login name] command, and Apple Watch commands will display as Apple Watch [login name] command. For more information about voice commands, see Voice device feature comparisons.
Example of activity on the Alarm.com appIcn Chevron Up
| Remote arming | Locally arming |
|---|---|
|
In the following example, the user's login name sending the remote command is exampleuser. 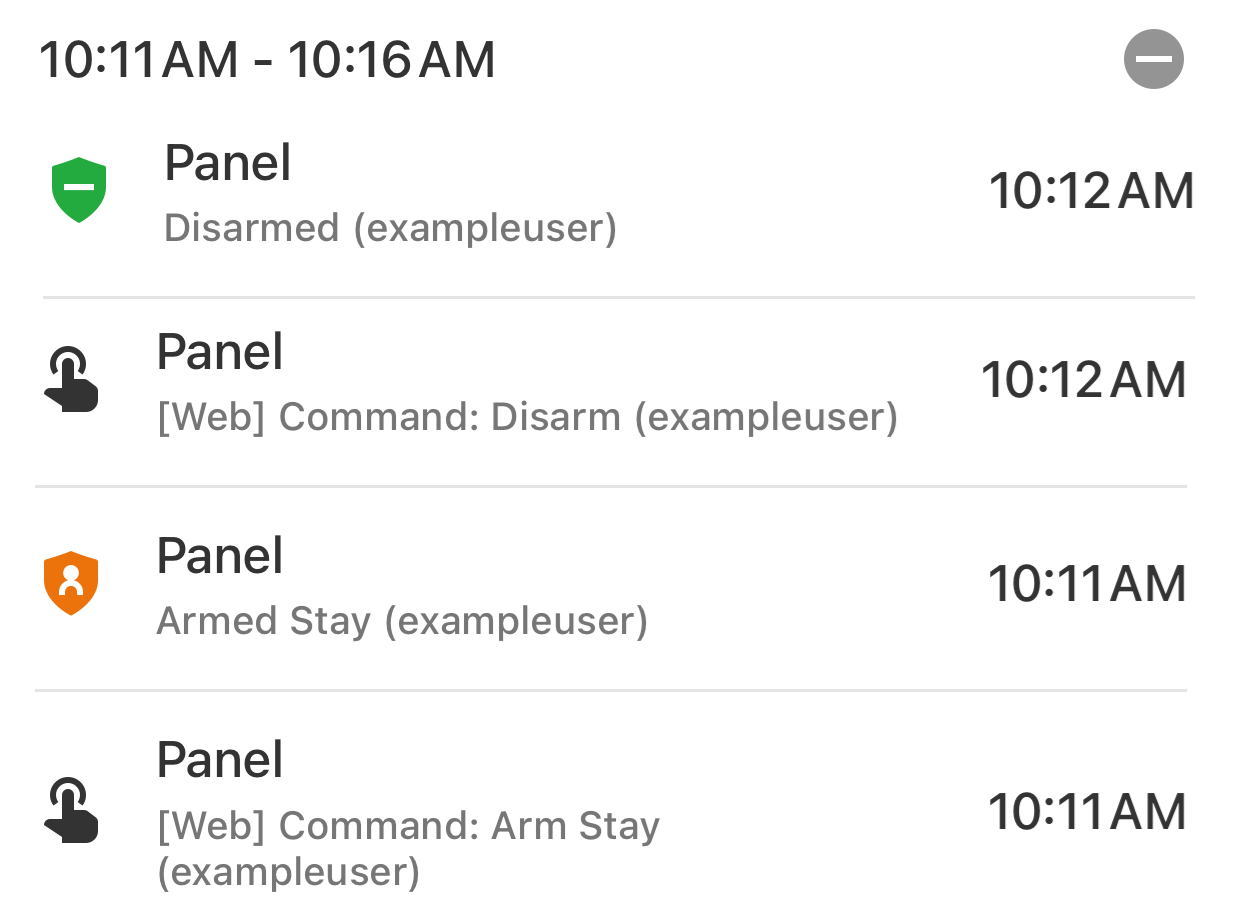 |
In the following example, the name associated with the user code disarming the system is exampleuser. 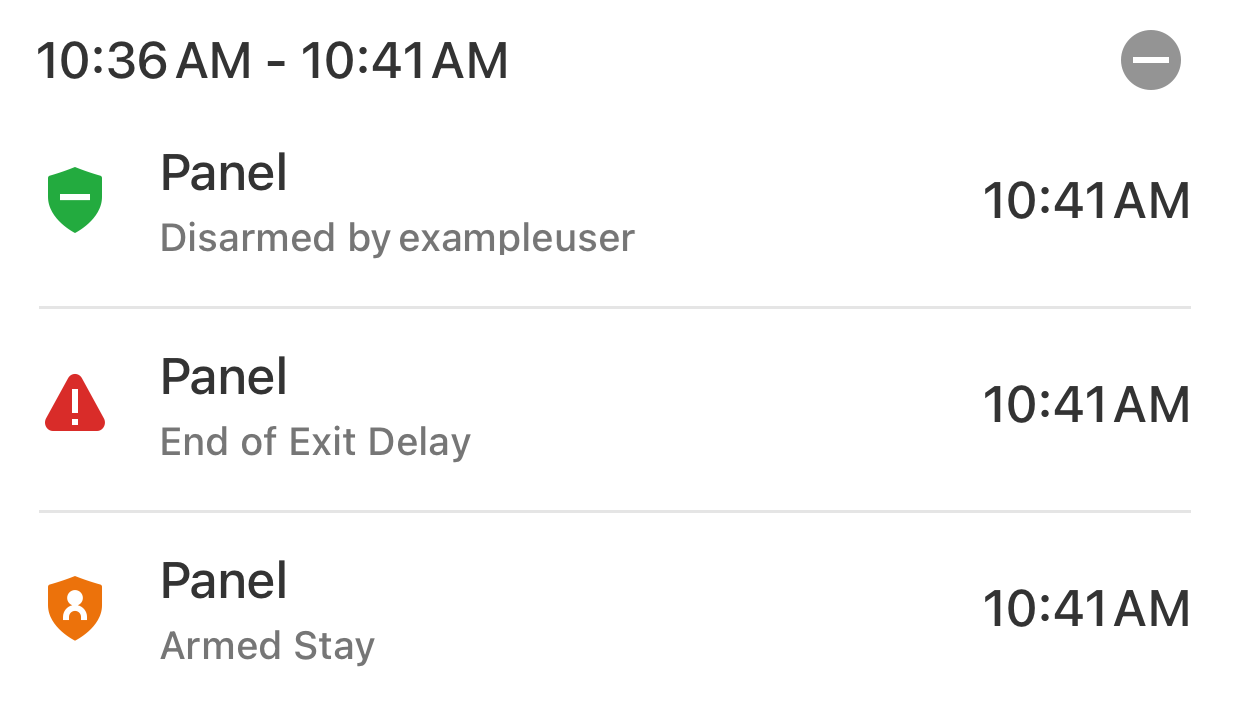 |
Example of activity on the GoSafer Security customer portal (powered by Alarm.com)
Icn Chevron Up
| Remote arming | Locally arming |
|---|---|
|
In the following example, the user's login name sending the remote command is exampleuser.  |
In the following example, the name associated with the user code disarming the system is exampleuser.  |
Source and support
For GoSafer Security assistance, visit gosafersecurity.com.
Original Alarm.com reference: https://answers.alarm.com/Customer/Website_and_App/System_Management/System_History/View_which_user_sent_remote_commands_to_the_system
Always verify safety, installation, compatibility, and current UI details against the original manufacturer documentation before operational use.
Why are sensors sometimes combined as an open/closed event and sometimes separate in the activity history?
GoSafer Security Knowledge Base
This operational reference is organized for GoSafer Security customers and staff. Alarm.com product names are retained where required for technical accuracy.
Overview
A sensor's Open and Close events typically get combined into one line in the activity history when the events occur within a few minutes of each other. If a sensor is opened and then not closed again for a longer period of time, there will be two separate events in the activity history: one for the sensor being opened and another for the sensor being closed. For more information about configuring Sensor Activity Monitoring for sensors, see Turn sensor activity monitoring on/off.
| Platform | General / Device |
|---|---|
| Content type | FAQ / Explanation |
| Source last updated | 2023-11-15 |
Procedure
A sensor's Open and Close events typically get combined into one line in the activity history when the events occur within a few minutes of each other.
If a sensor is opened and then not closed again for a longer period of time, there will be two separate events in the activity history: one for the sensor being opened and another for the sensor being closed.
For more information about configuring Sensor Activity Monitoring for sensors, see Turn sensor activity monitoring on/off.
Source and support
For GoSafer Security assistance, visit gosafersecurity.com.
Original Alarm.com reference: https://answers.alarm.com/Customer/Website_and_App/System_Management/System_History/Why_are_sensors_sometimes_combined_as_an_open_closed_event_and_sometimes_separate_in_the_activity_history
Always verify safety, installation, compatibility, and current UI details against the original manufacturer documentation before operational use.
Account setup - Initial login
GoSafer Security Knowledge Base
This operational reference is organized for GoSafer Security customers and staff. Alarm.com product names are retained where required for technical accuracy.
Overview
This article details steps for a new customer, starting by accessing the welcome letter, with a walkthrough for account access and set-up via the Alarm.com Customer app.
| Platform | App + Web |
|---|---|
| Content type | How-to / Configuration |
| Source last updated | 2024-12-06 |
Procedure
Step-by-step guide: Screenshots and videos are placed with the instruction they illustrate.
Note: Two Factor Authentication can be referred to as 2FA, Multi-Factor Authentication, or MFA.
Two Factor Authentication adds an extra layer of security to protect access to your system. This makes it harder for potential intruders to gain access to your system, so your system and your property are even more secure. Whenever you sign into your system from a new or untrusted device, you will have to enter both your password and a code sent to your mobile phone.
Enable or disable Two Factor Authentication
Two Factor Authentication can be enabled or disabled using the Alarm.com app and GoSafer Security customer portal (powered by Alarm.com).
Note: If Two Factor Authentication is enabled, all active sessions on the Alarm.com app and GoSafer Security customer portal (powered by Alarm.com) will end. Two Factor Authentication will be required to log back in.
To enable or disable Two Factor Authentication for a login using the Alarm.com app: Icn Chevron Down
Note: If you have changed your phone number or email address, see If you change your cell carrier, phone number, or email address.
- Log in to the Alarm.com app.
- Tap Menu.
- Tap Login Information.
- Tap Two Factor Authentication.
- To disable Two Factor Authentication, tap Disable and then tap Confirm.
Note: Two Factor Authentication may be required or suggested by your service provider. For additional assistance, contact your service provider. - To enable Two Factor Authentication, select Text Message, Email, or Authentication app.
Note: It is recommended to set up Two Factor Authentication using multiple methods. If multiple methods cannot be enabled, contact your service provider- To enable Two Factor Authentication for text message:
- Tap Text Message.
- Tap Next.
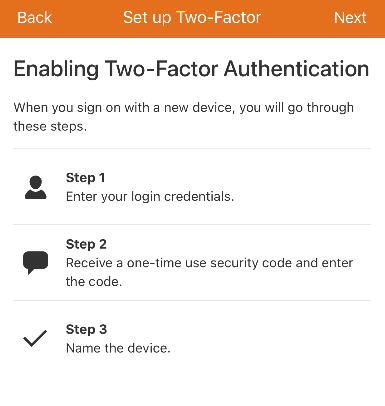
Mobile Two Factor Authentication Enable
- In Mobile Number, enter the mobile number to receive the Two Factor Authentication confirmation code.
- Using the Country dropdown menu, select either USA or Canada.
- Using the Provider dropdown menu, select the cellular carrier of the mobile phone number that will receive the Two Factor Authentication confirmation code.
Note: The Provider dropdown menu displays the full list of Two Factor Authentication compatible cellular carriers.- If the carrier is not listed, select Other.
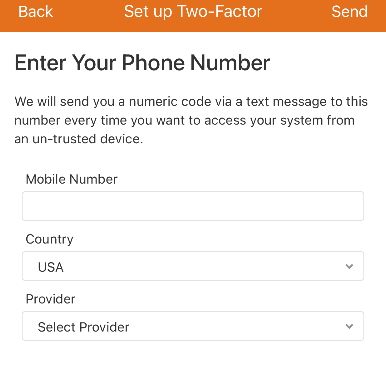
Mobile Two Factor Authentication Phone Number
Note: This displays the full list of Two Factor Authentication compatible cellular carriers.
- If the carrier is not listed, select Other.
- Tap Send to send the verification code to the mobile number entered.
- In Verification Code, enter the code that is provided in a text message to the mobile number entered.
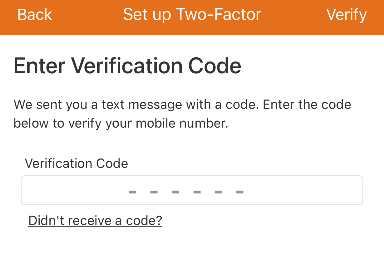
Mobile Two Factor Authentication Verification Code
- Tap Verify.
- To enable Two Factor Authentication for email:
- Tap Email.
- In Send Verification Code, verify the correct email is displayed. For more information about how to update the email address, see Change an email address.
- Tap Send.
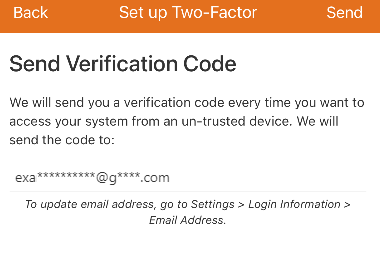
Mobile Two Factor Authentication Email
- In Verification Code, enter the code that is provided in the received email.
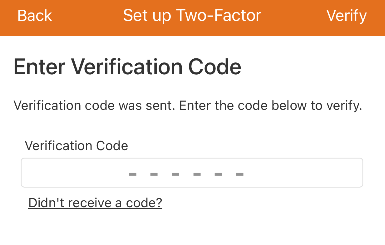
Mobile Two Factor Authentication Email Code
- Tap Verify.
- To enable Two Factor Authentication using an authentication app:
Important: An authenticator app is required to complete this process and the steps may vary based on the authenticator app in use.- Tap Authentication App.
- Generate an authentication code:
Note: The Duo authenticator app may experience unexpected behavior and it is recommended to use an alternative authenticator app.- Use an authenticator app to scan the QR code or manually enter the code provided on the Alarm.com app or GoSafer Security customer portal (powered by Alarm.com) into the authenticator app.
- In the Enter Code field, enter the code that is generated on the authenticator app to verify the device.
- Click Next.
- To enable Two Factor Authentication for text message:
- In Device Name, enter the desired name for the device that will be trusted.
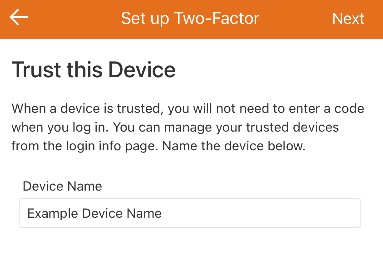
Mobile Two Factor Authentication Trust this Device
- Tap Next.
- In Linked Devices, tap Trust next to any additional devices that can be trusted.
- Tap Done.
To enable or disable Two Factor Authentication for a login using the GoSafer Security customer portal (powered by Alarm.com):Icn Chevron Down
Note: If you have changed your phone number or email address, see If you change your cell carrier, phone number, or email address.
- Log in to the GoSafer Security customer portal (powered by Alarm.com).
- Click Settings.
- Click Login Information.
- Click Two Factor Authentication.
- To disable Two Factor Authentication, click Disable.
Note: Two Factor Authentication may be required or suggested by your service provider. For additional assistance, contact your service provider. - To enable Two Factor Authentication, select Text Message, Email, or Authentication app.
Note: It is recommended to set up Two Factor Authentication using multiple methods. If multiple methods cannot be enabled, contact your service provider.- To enable Two Factor Authentication for text message:
- Click Text Message.
- Click Next.
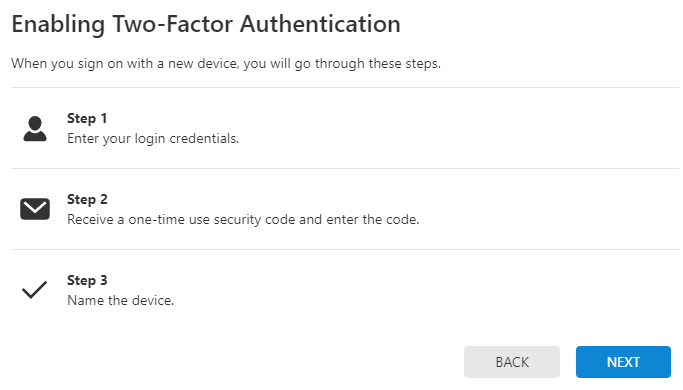
Two Factor Authentication GoSafer Security customer portal
- In Mobile Number, enter the mobile number to receive the Two Factor Authentication confirmation code.
- Using the Country dropdown menu, select either USA or Canada.
- Using the Provider dropdown menu, select the cellular carrier of the mobile phone number that will receive the Two Factor Authentication confirmation code.
Note: The Provider dropdown menu displays the full list of Two Factor Authentication compatible cellular carriers.- If the carrier is not listed, select Other.
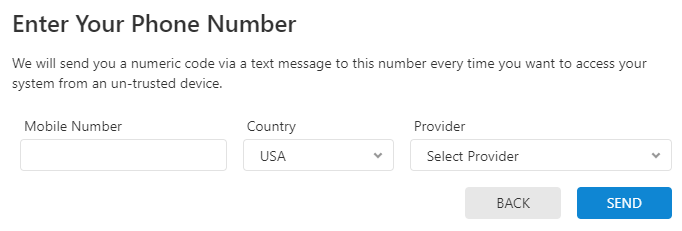
Two Factor Authentication Phone Number
- If the carrier is not listed, select Other.
- Click Send to send a verification code to the mobile number.
- In Verification Code, enter the code that is provided in a text message to the mobile number.
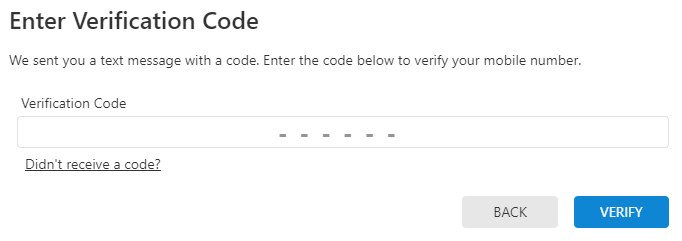
Two Factor Authentication Verification Code
- Click Verify.
- To enable Two Factor Authentication for email:
- Click Email.
- In Send Verification Code, verify the correct email is displayed. For more information about how to update the email address, see Change an email address.
- Click Send.
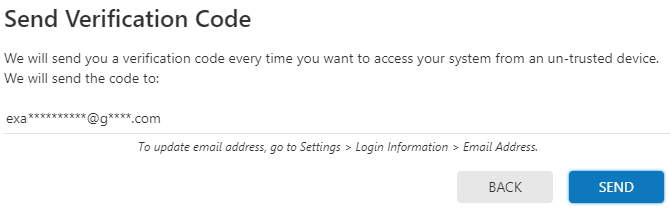
Two Factor Authentication Email Code
- In Verification Code, enter the code that is provided in the received email.
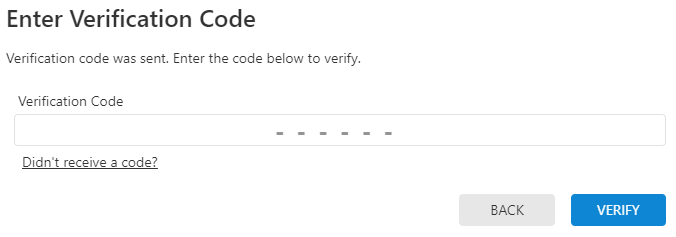
Two Factor Authentication Email Code Sent
- Click Verify.
- To enable Two Factor Authentication using an authentication app:
Important: A mobile device with an authenticator app is required to complete this process and the steps may vary based on the authenticator app in use.- Click Authentication App.
- Generate an authentication code:
Note: The Duo authenticator app may experience unexpected behavior and it is recommended to use an alternative authenticator app.- Use a mobile device with an authenticator app to scan the QR code or manually enter the code provided on the Alarm.com app or GoSafer Security customer portal (powered by Alarm.com) into the authenticator app.
- In the Enter Code field, enter the code that is generated on the authenticator app to verify the device.
- Click Next.
- To enable Two Factor Authentication for text message:
- In Device Name, enter the desired name for the device that is accessing the account.
- If the device is trusted, click to select Trust This Device.
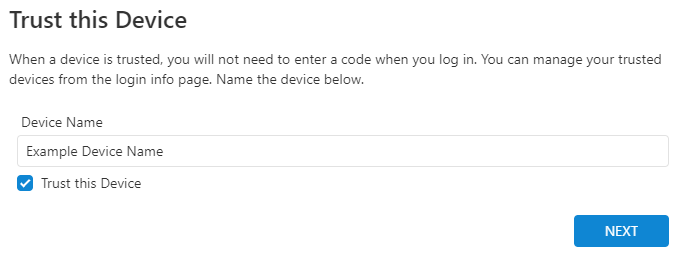
Two Factor Authentication Trust Device
- If the device is trusted, click to select Trust This Device.
- Click Next.
- In Linked Devices, click Trust next to any additional devices that can be trusted.
- Click Done.
Manage trusted devices
To manage trusted devices using the Alarm.com app:Icn Chevron Down
- Log in to the Alarm.com app.
- Tap Menu.
- Tap Login Information.
- Tap Two Factor Authentication.
- Tap Details next to the device name.
- Make the desired changes:
- To rename the device, enter the desired device name, then tap Save.
- To delete the device, click Delete Trusted Device, then tap Confirm.
To manage trusted devices using the GoSafer Security customer portal (powered by Alarm.com):Icn Chevron Down
- Log in to the GoSafer Security customer portal (powered by Alarm.com).
- Click Settings.
- Click Login Information.
- Click Two Factor Authentication.
- Click Details next to the device name.
- Make the desired changes:
- To rename the device, enter the desired device name, then click Save.
- To delete the device, click Delete Trusted Device, then click Confirm.
If you change your cell carrier or no longer have access to the phone number or authenticator app:
If you change your cell carrier or no longer have access to the phone number or authenticator app, Two-Factor Authentication can be reset using email. For more information, see Reset Two-Factor Customer.
If email Two Factor Authentication is set up and you no longer have access to your email address, contact your service provider for assistance with resetting your Two-Factor Authentication configuration.
Reset Two Factor Authentication
Two Factor Authentication can be reset using the Alarm.com app or GoSafer Security customer portal (powered by Alarm.com).
To reset Two Factor Authentication:Icn Chevron Down
- Log in to the Alarm.com app or GoSafer Security customer portal (powered by Alarm.com).
- In Enter Verification Code, click or tap Down next to Don't have access to your device?.
- Select to reset Two-Factor Authentication or to contact your service provider:
- If you have access to your email address associated with the login:
- In Option 1: Reset Two-Factor Authentication, tap or click Reset 2FA to send a reset link to the email address associated with the login.
- If you do not have access to your email address associated with the login:
- In Option 2: Contact your Service Provider, use the contact information listed to contact your service provider.
- If you have access to your email address associated with the login:
Note: The ability to reset your own Two-Factor Authentication configuration is only available to users using SMS or an authenticator application.
Source and support
For GoSafer Security assistance, visit gosafersecurity.com.
Original Alarm.com reference: https://answers.alarm.com/Customer/Website_and_App/System_Management/System_Usage/Account_setup_Initial_login
Always verify safety, installation, compatibility, and current UI details against the original manufacturer documentation before operational use.
Alarm Mode
GoSafer Security Knowledge Base
This operational reference is organized for GoSafer Security customers and staff. Alarm.com product names are retained where required for technical accuracy.
Overview
Alarm Mode presents users with a streamlined, full-picture view of what is happening at their home or business during an alarm. With Alarm Mode, you can quickly assess the situation and take action by viewing video clip thumbnails, accessing live camera feeds, and reviewing recent system activity all in one place. Additionally, property owners with Cancel/Verify can dismiss false alarms or confirm true alarms for expedited emergency response with the press of a button. For more information about Cancel/Verify, see Cancel or Verify Alarms using the app.
| Platform | Mobile App |
|---|---|
| Content type | How-to / Configuration |
| Source last updated | 2026-01-21 |
Procedure
Is Alarm Mode available with multiple partitions?
Yes. Alarm Mode is available for multiple partition security systems. Alarm Mode displays which partition(s) is in an alarm state and enables you to disarm all partition(s) to resolve the alarm(s).
Is Alarm Mode available for commercial accounts?
Yes. The Alarm Mode assessment card is viewable from the individual business location's system rather than at the Enterprise Group level for commerical accounts.
Does Alarm Mode work with all alarm types?
No. Alarm Mode is not available for duress alarms, Silent Police Panel Panics, or In-App Property Panics events.
What information about video clips is available?
The video clip thumbnail section shows any videos saved 5 minutes prior to the start of the alarm. New clips appear as they are captured during the alarm event and no refresh is required.
Users can scroll through video clip thumbnails when there are more than two clips.
Detection clips (i.e., people, vehicles, and animals) display the full-camera view and are shown first in the video clip thumbnail section. All other clips are ordered from newest to oldest.
The Recent Events section displays activity that occurred 5 minutes before the alarm. New events appear automatically as they occur. By default, a maximum of five events are displayed in the section, however, you can go to the tap Activity in the Alarm Mode card to view all event history.
Source and support
For GoSafer Security assistance, visit gosafersecurity.com.
Original Alarm.com reference: https://answers.alarm.com/Customer/Website_and_App/System_Management/System_Usage/Alarm_Mode
Always verify safety, installation, compatibility, and current UI details against the original manufacturer documentation before operational use.
Arm the system remotely
GoSafer Security Knowledge Base
This operational reference is organized for GoSafer Security customers and staff. Alarm.com product names are retained where required for technical accuracy.
Overview
Arming the system sets the security sensors to an alarm state. The Armed Away status sets both contact sensors and motion sensor into an alarm state, while Armed Stay status only sets contact sensors …
| Platform | App + Web |
|---|---|
| Content type | How-to / Configuration |
| Source last updated | 2025-06-04 |
Procedure
Step-by-step guide: Screenshots and videos are placed with the instruction they illustrate.
Arming the system sets the security sensors to an alarm state. The Armed Away status sets both contact sensors and motion sensors into an alarm state, while Armed Stay status only sets contact sensors to an alarm state.

Note: If the system is not arming properly, check if any unbypassed sensors are open. If the system continues to be unable to arm remotely, contact your service provider.
Arming options
When arming using the Alarm.com app or GoSafer Security customer portal (powered by Alarm.com), some of the following options may be available for you to select. Options vary depending on your system's configuration.
- Silent Arming - This allows you to arm the system without any noise. By default, the panel makes exit delay beeps when you arm your system.
- No Entry Delay - This allows the system to bypass the entry delay once the system is armed. Entry delay is the time set to allow you to walk from an entry/exit zone to the location of your panel to disarm the panel.
- Bypass Open Zones - This allows the system to bypass open zones while arming the system. This feature can be used to attempt to force the system to arm regardless of zones that may be open. Zones that are bypassed will not trigger an alarm on the system.
To arm the system using the Alarm.com app:
- Log in to the Alarm.com app.
- In the Security System card, tap Disarmed.
- Select the desired arming options, if applicable.
- Tap either Arm (Stay) to arm the system to stay mode, or Arm (Away) to arm the system to away mode.
To arm the system using the GoSafer Security customer portal (powered by Alarm.com):
- Log in to the GoSafer Security customer portal (powered by Alarm.com).
- Click Disarmed in the Security card.
- Select the desired arming options, if applicable.
- Click either Stay to arm the system to stay mode, or Away to arm the system to away mode.
To arm the system using Scenes:
Scenes allow you to configure a button on the Alarm.com app and GoSafer Security customer portal (powered by Alarm.com) that triggers multiple actions across multiple devices at once. For more information about Scenes, see How do Scenes work?.
- Log in to the Alarm.com app or GoSafer Security customer portal (powered by Alarm.com).
- In Scenes, select the Scene you want to run that includes the arming command.
- For more information about creating or editing Scenes, see Create/edit a Scene.
- Confirm that you want to send the command to run that Scene.
Source and support
For GoSafer Security assistance, visit gosafersecurity.com.
Original Alarm.com reference: https://answers.alarm.com/Customer/Website_and_App/System_Management/System_Usage/Arm_the_system_remotely
Always verify safety, installation, compatibility, and current UI details against the original manufacturer documentation before operational use.
Cancel or Verify Alarms using the app
GoSafer Security Knowledge Base
This operational reference is organized for GoSafer Security customers and staff. Alarm.com product names are retained where required for technical accuracy.
Overview
Cancel/Verify Alarms gives the opportunity for you to respond to alarm events directly and to communicate to a monitoring station when the cause might be accidental or a real emergency.
| Platform | Mobile App |
|---|---|
| Content type | FAQ / Explanation |
| Source last updated | 2026-06-09 |
Procedure
Step-by-step guide: Screenshots and videos are placed with the instruction they illustrate.
Cancel/Verify Alarms allows you to respond to alarm events directly and to communicate to a monitoring station when the cause might be accidental or a real emergency. If you wish to opt-in to the Cancel/Verify feature, contact your service provider.
Important considerations:
- Cancel/Verify only appears when the panel has registered that sensors have been tripped and the system is in a full alarm state.
- When the panel is in pending alarm, the option to Disarm to Clear appears, or Clear Alarm appears if the panel is in disarm state.
- When Cancel/Verify has been activated, only logins with Master level permissions on the account can interact with it. Any login with a permission level less than Master cannot view or use the feature.

To cancel or verify an alarm using the Alarm.com app:
- Once the system is in alarm, log in to the app.
- Cancel/Verify remains active in the app until 2 minutes past the alarm signal was sent.
- During the 2-minute countdown, quickly review video cameras or communicate with those at home.
- Press and hold Cancel Alarm or Verify Alarm until the alarm has been canceled or verified.
- A confirmation screen pops up to let you know the signal has been canceled or verified.
Frequently asked questions
Why use Cancel/Verify?
The Cancel/Verify monitoring station-supported feature has the potential to help reduce the number of accidental alarm dispatches made each year. You can quickly resolve an alarm situation with the press of a button if the cause is known, accidental, or emergency.
Additionally, accidental dispatches can result in fines at all levels of accountability: you, service providers, and monitoring stations — not to mention distracting emergency personnel from potential real emergencies. With the press of a button and without needing to wait for a call from a monitoring station, an entire situation can be resolved saving time and money.
When can Cancel/Verify be used?
Whenever an alarm is triggered at the home location and the entry delay timer has elapsed, the alarm signal is sent to the monitoring station, and the Cancel/Verify card appears in the Alarm.com app. Cancel/Verify appears for all alarm events but does not appear in the Alarm.com app outside of an alarm event.
Who can use the feature once it is activated?
The Cancel/Verify feature is included with any type of interactive service package and once it is activated, only the primary login or users with Master Control on the account can interact with it. Any logins with permission levels less than Master cannot view or use the feature.
Can Cancel/Verify be used with Linked Logins?
No. Cancel/Verify is only available to individual accounts.
How long is Cancel/Verify active during an alarm?
Cancel/Verify remains active in the Alarm.com app until 2 minutes past the alarm signal was sent.
What does the two-minute counter represent?
The two minutes is the estimated amount of time for a monitoring station to receive, process, act on, and dispatch based on an alarm signal or event. Response times vary between monitoring stations so your signal may be sent after dispatch has occurred while still in the 2-minute Cancel/Verify window. Monitoring stations still receive the signal if sent before the time has elapsed and may adjust their response accordingly.
Are alarm signals held until a Cancel/Verify button is pressed?
No. All alarm signals still send as expected and no communications are inhibited in any way. You can interact with the Cancel/Verify buttons once the signal has been sent to and received by the monitoring station.
What happens when you press a button?
When you press and hold either False Alarm or Confirm Alarm, a signal is sent from the Alarm.com app through Alarm.com’s backend to the monitoring station and communicates the selection. Depending at what stage the monitoring station is at with handling the original alarm signal, the selection may resolve situational concerns or may help influence post-dispatch communications between the monitoring station and the emergency personnel.
The following are examples of what is shown when canceling or verifying an alarm using the Alarm.com app:
| Cancel Confirmation | Verify Confirmation |
|---|---|
|
When pressing False Alarm, a disarm signal is sent to the panel, similar to disarming directly at the panel. The following is what is shown when submitting a Cancel response to an alarm event: 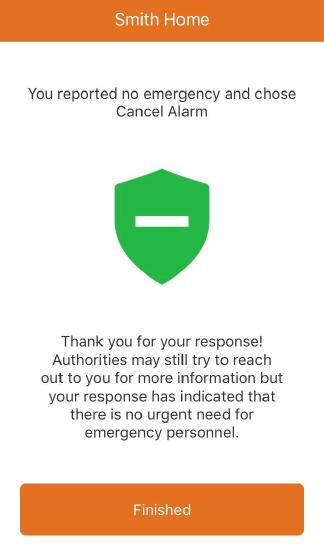 The following is the confirmation message that appears on the Alarm.com app home page after submitting a Cancel response to an alarm event: 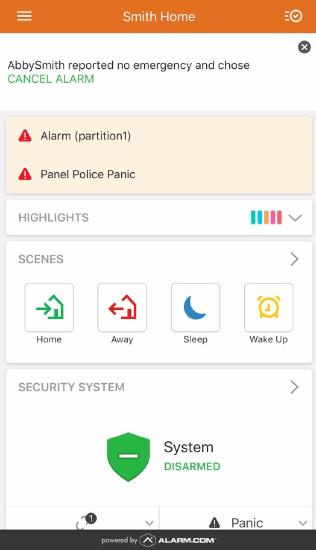 |
When pressing Verify Alarm, the alarm signal is verified and sent to the monitoring station. The following is what is shown when submitting a Verify response to an alarm event: 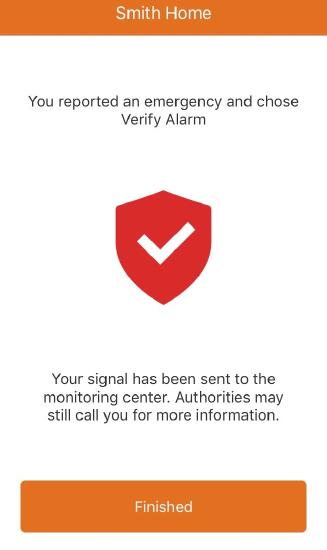 The following is the confirmation message that appears on the Alarm.com app home page after submitting a Verify response to an alarm event: 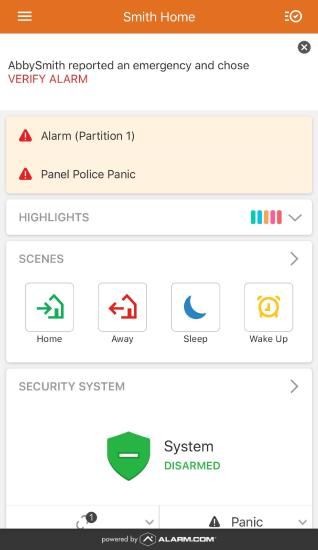 |
What if multiple users attempt to Cancel/Verify an alarm from different devices?
Only the first user to enter the Alarm.com app and respond with a Cancel or Verify has the corresponding event code forwarded to the monitoring station. Any other users attempting to submit a simultaneous response are presented with a Signal Already Sent Cancel or Signal Already Sent Verify message.
Signal Already Sent examples:
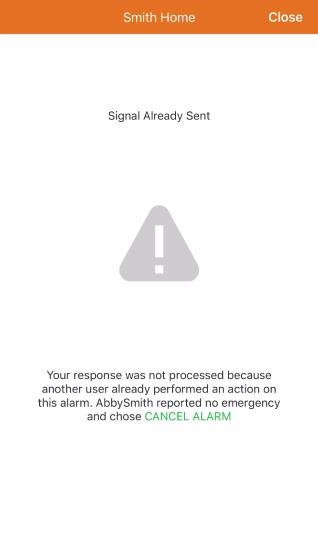
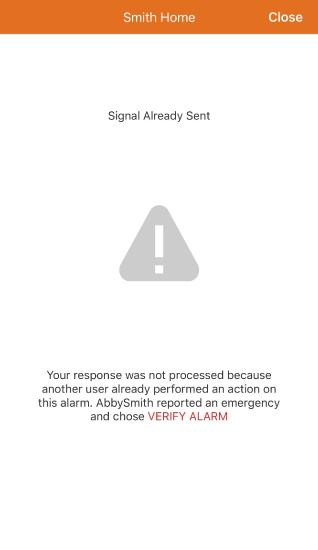
Why is there a five-minute refresh period?
Alarms triggered within a five-minute period are likely linked to the same situation. Monitoring stations still receive all alarms as expected, the Cancel/Verify signal provides a contextual clue to the cause/urgency, and the reps can interpret the scenario based on the signal sent from you. The monitoring station may deem within its protocol to still call in any situation as a follow-up, as each monitoring station is individually consulted before providing support for the features.
How can I get Cancel/Verify?
Contact your service provider for more information about supported features. If your service provider does not support Cancel/Verify, ask whether the monitoring station supports it. Service providers can work directly with monitoring stations to determine which features are supported.
Source and support
For GoSafer Security assistance, visit gosafersecurity.com.
Original Alarm.com reference: https://answers.alarm.com/Customer/Website_and_App/System_Management/System_Usage/Cancel_or_Verify_Alarms_using_the_app
Always verify safety, installation, compatibility, and current UI details against the original manufacturer documentation before operational use.
Change a partition name
GoSafer Security Knowledge Base
This operational reference is organized for GoSafer Security customers and staff. Alarm.com product names are retained where required for technical accuracy.
Overview
Systems with multiple partitions can be more easily managed with customized partition names.
| Platform | App + Web |
|---|---|
| Content type | How-to / Configuration |
| Source last updated | 2025-06-04 |
Procedure
Step-by-step guide: Screenshots and videos are placed with the instruction they illustrate.
Systems with multiple partitions can be more easily managed with customized partition names. Partitions are ordered alphabetically in the app, so renaming a partition can help change a partition's position in a partition list.
To change a partition name:
Partition names can only be updated using the GoSafer Security customer portal (powered by Alarm.com). It cannot be updated using the Alarm.com app.
- Log in to the GoSafer Security customer portal (powered by Alarm.com).
- In the Security card, click Details as outlined in the following image:
Details Icon On Security Card - Click Settings for the partition to be edited.
Panel partition card
- In Device Name, enter the new partition name.
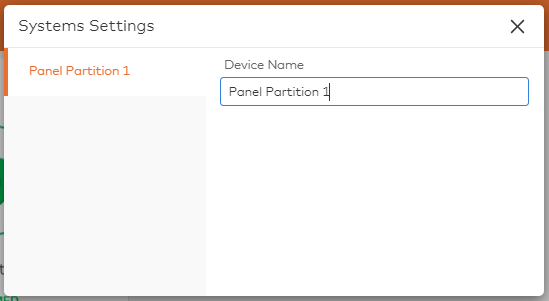
Partition settings
- Click Icn Close to close the Systems Settings window. This saves the changes automatically.
Source and support
For GoSafer Security assistance, visit gosafersecurity.com.
Original Alarm.com reference: https://answers.alarm.com/Customer/Website_and_App/System_Management/System_Usage/Change_a_partition_name
Always verify safety, installation, compatibility, and current UI details against the original manufacturer documentation before operational use.
Change a sensor name remotely
GoSafer Security Knowledge Base
This operational reference is organized for GoSafer Security customers and staff. Alarm.com product names are retained where required for technical accuracy.
Overview
Systems with multiple sensors can be more easily managed with customized sensor names.
| Platform | App + Web |
|---|---|
| Content type | Reference |
| Source last updated | 2025-06-04 |
Procedure
Step-by-step guide: Screenshots and videos are placed with the instruction they illustrate.
Sensor names can be managed remotely using the Alarm.com app or GoSafer Security customer portal (powered by Alarm.com).
To change a sensor name using the Alarm.com app:
- Log in to the Alarm.com app.
- Tap Menu.
- Tap Manage Devices.
- Tap More options next to the device to rename.
- Tap Rename Device.
- Enter the desired name for the sensor.
- Tap OK.
To change a sensor name using the GoSafer Security customer portal (powered by Alarm.com):
- Log in to the GoSafer Security customer portal (powered by Alarm.com).
- Click Settings.
- Click Manage Devices.
- Click More options next to the device to rename.

Manage Devices Sensors
- Click Rename Device.
- Enter the desired name for the sensor.
- Click OK.
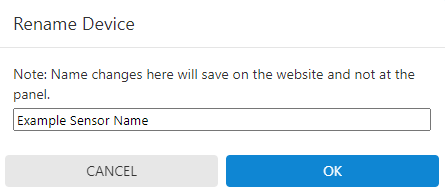
Manage Devices Rename Sensor
Source and support
For GoSafer Security assistance, visit gosafersecurity.com.
Original Alarm.com reference: https://answers.alarm.com/Customer/Website_and_App/System_Management/System_Usage/Change_a_sensor_name_remotely
Always verify safety, installation, compatibility, and current UI details against the original manufacturer documentation before operational use.
Change the monitoring station emergency contact information
GoSafer Security Knowledge Base
This operational reference is organized for GoSafer Security customers and staff. Alarm.com product names are retained where required for technical accuracy.
Overview
When a monitoring station contact list is outdated or incorrect, the monitoring station may call the wrong numbers to address an alarm event. The Emergency Contact Management integration puts this …
| Platform | App + Web |
|---|---|
| Content type | How-to / Configuration |
| Source last updated | 2025-10-07 |
Procedure
To change the emergency contact information using the Alarm.com app
Note: Up to three emergency contacts can be attached to an account by default. To add more than three emergency contacts, contact your service provider.
- Log in to the Alarm.com app.
- Tap [Menu].
- Tap Monitoring Settings.
- Tap Emergency Contacts.
In Emergency Contacts, tap Add Contact.
- Tap either of the following to add contacts:
- Add Manually to create a contact from scratch.
- Add from Contacts to automatically add a contact from the device address book.
- Tap Sort to arrange the contact list priority as desired.
Important: The monitoring station contacts the attached numbers in the order they appear in the list.
- Tap and drag [Reorder] for each contact to rearrange the list.
To change the emergency contact information using the GoSafer Security customer portal (powered by Alarm.com)
Note: Up to three emergency contacts can be attached to an account by default. To add more than three emergency contacts, contact your service provider.
- Log in to the GoSafer Security customer portal (powered by Alarm.com).
- Click Settings.
- Click Monitoring Station.
- Click Emergency Contacts.
- Click + Contact.
- Enter the first and last name of the emergency contact.
- Click + Phone Number.
- Enter the desired phone numbers and select the Phone Type.
In Verbal Passcode, enter the desired verbal passcode for each contact.
- Click Save.
The contact order is the order in which the monitoring station will attempt to contact the provided numbers (i.e., If 1 is chosen, that person is contacted first). For steps on re-ordering Emergency Contacts, proceed to Configure Emergency Contact lists using the GoSafer Security customer portal (powered by Alarm.com).
To edit the contact list order using the GoSafer Security customer portal (powered by Alarm.com)
- Log in to the GoSafer Security customer portal (powered by Alarm.com).
- Click Settings.
- Click Monitoring Station.
- Click Emergency Contacts.
- Click [Reorder Mode].
- Click and drag [Reorder] to reorder the contact list as desired.
Note: It is not possible to move contacts between lists with these steps. To move contacts between lists, proceed to To move existing contacts from one list to the other using the GoSafer Security customer portal (powered by Alarm.com).
- Click Save.
To move existing contacts from one list to the other using the GoSafer Security customer portal (powered by Alarm.com)
- Log in to the GoSafer Security customer portal (powered by Alarm.com).
- Click Settings.
- Click Monitoring Station.
- Click Emergency Contacts.
- Click [Down] for the desired contact.
- Click Edit.
- Click Move to After Dispatch or Move to Before Dispatch as applicable.
- Click Save.
To change ECV emergency contact information using the Alarm.com app
Note: Up to three contacts can be attached for contact before and after law enforcement dispatch. To add more than three emergency contacts before and after dispatch, contact your service provider.
- Log in to the Alarm.com app.
- Tap [Menu].
- Tap Monitoring Settings.
- Tap Emergency Contacts.
In Prior to Dispatch, tap Add Contact to add contacts that will be notified before dispatch.
- Tap either of the following to add contacts:
- Add Manually to create a contact from scratch.
- Add from Contacts to automatically add a contact from the device address book.
In After Dispatch, tap Add Contact to add contacts that will be notified after dispatch.
- Tap either of the following to add contacts:
- Add Manually to create a contact from scratch.
- Add from Contacts to automatically add a contact from the device address book.
- Tap Sort to arrange the contact list priority as desired.
Important: The monitoring station contacts the attached numbers in the order they appear in the list.
- Tap and drag [Reorder] for each contact to rearrange the list.
To change ECV emergency contact information using the GoSafer Security customer portal (powered by Alarm.com)
Note: Up to three contacts can be attached for contact before and after law enforcement dispatch. To add more than three emergency contacts before and after dispatch, contact your service provider.
- Log in to the GoSafer Security customer portal (powered by Alarm.com).
- Click Settings.
- Click Monitoring Station.
- Click Emergency Contacts.
- Click + Contact.
Using the When to Contact dropdown menu, select Before Dispatch or After Dispatch.
- Enter the first and last name of the emergency contact.
Use the first dropdown menu to select the number of contacts to be called before dispatch.
- Click + Phone Number.
- Enter the desired phone numbers and select the Phone Type.
In Verbal Passcode, enter the desired verbal passcode for each contact.
- Click Save.
The contact order is the order in which the monitoring station attempts to contact the provided numbers (i.e., If 1 is chosen, that person is contacted first). For steps on re-ordering Emergency Contacts, proceed to Configure Emergency Contact lists using the GoSafer Security customer portal (powered by Alarm.com).
Source and support
For GoSafer Security assistance, visit gosafersecurity.com.
Original Alarm.com reference: https://answers.alarm.com/Customer/Website_and_App/System_Management/System_Usage/Change_the_monitoring_station_emergency_contact_information
Always verify safety, installation, compatibility, and current UI details against the original manufacturer documentation before operational use.
Change the monitoring station location phone number
GoSafer Security Knowledge Base
This operational reference is organized for GoSafer Security customers and staff. Alarm.com product names are retained where required for technical accuracy.
Overview
In the case of an emergency where you are unable to disarm the system, the monitoring station may call to verify the alarm. This typically involves contacting you at the location where the system is …
| Platform | App + Web |
|---|---|
| Content type | How-to / Configuration |
| Source last updated | 2025-06-04 |
Procedure
Step-by-step guide: Screenshots and videos are placed with the instruction they illustrate.
Depending on the type of alarm event, the location phone number may be contacted either before or after a dispatch to authorities has been made to verify the alarm.
Emergency contact information (e.g., Location [Premise] phone numbers, verbal passcodes, contact lists, and per-contact passcodes) can be modified using the website and app. For more information about how to change emergency contact information, see the following:
- Verbal passcode - Change the monitoring station verbal passcode.
- Emergency contact information - Change the monitoring station emergency contact information.
Important: This feature is only available if it is supported by the selected monitoring station and enabled by your service provider.
To change the monitoring station location phone number using the Alarm.com app:
- Log in to the Alarm.com app.
- Tap Menu.
- Tap Monitoring Settings.
- Tap Location Phone Number.
- Enter the phone number of the location where the system is installed (e.g., landline).
Note: If there is no landline on location, enter a main contact number.
ECM Location Phone Mobile
- Tap Done.
To change the monitoring station location phone number using the GoSafer Security customer portal (powered by Alarm.com):
- Log in to the GoSafer Security customer portal (powered by Alarm.com).
- Click Settings.
- Click Monitoring Station.
- Click Location Settings.
- Click Edit.
- In Phone Number, enter the phone number of the location where the system is installed (e.g., landline).
Note: If there is no landline on location, enter a primary contact number. - Click Update.
Source and support
For GoSafer Security assistance, visit gosafersecurity.com.
Original Alarm.com reference: https://answers.alarm.com/Customer/Website_and_App/System_Management/System_Usage/Change_the_monitoring_station_location_phone_number_on_a_customer_account
Always verify safety, installation, compatibility, and current UI details against the original manufacturer documentation before operational use.
Change the monitoring station verbal passcode
GoSafer Security Knowledge Base
This operational reference is organized for GoSafer Security customers and staff. Alarm.com product names are retained where required for technical accuracy.
Overview
When the monitoring station calls, you will be asked to provide their verbal passcode to verify their identity, confirm if the alarm is valid, and cancel it if it is a false alarm.
| Platform | App + Web |
|---|---|
| Content type | How-to / Configuration |
| Source last updated | 2025-06-04 |
Procedure
To change the verbal passcode using Alarm.com app
- Log in to the Alarm.com app.
- Tap [Menu].
- Tap Monitoring Settings.
- Tap Update Verbal Passcode.
- Tap Confirm.
- Enter the desired passcode in the Verbal Passcode field.
Re-enter the same password in the Confirm Verbal Passcode field. These must match in order to be saved.
- Tap Done.
To change the verbal passcode using the GoSafer Security customer portal (powered by Alarm.com)
- Log in to the GoSafer Security customer portal (powered by Alarm.com).
- Click Settings.
- Click Monitoring Station.
- Click Location Settings.
- Click Edit.
- Enter the desired passcode in the Verbal Passcode field.
Re-enter the same password in the Confirm Verbal Passcode field. These must match in order to be saved.
- Click Update.
Source and support
For GoSafer Security assistance, visit gosafersecurity.com.
Original Alarm.com reference: https://answers.alarm.com/Customer/Website_and_App/System_Management/System_Usage/Change_the_monitoring_station_verbal_passcode
Always verify safety, installation, compatibility, and current UI details against the original manufacturer documentation before operational use.
Clear a duress, panic, or smoke alarm
GoSafer Security Knowledge Base
This operational reference is organized for GoSafer Security customers and staff. Alarm.com product names are retained where required for technical accuracy.
Overview
A duress or smoke alarm message can only be cleared using the website. It cannot be cleared using the mobile app.
| Platform | App + Web |
|---|---|
| Content type | Troubleshooting |
| Source last updated | 2025-06-04 |
Procedure
Step-by-step guide: Screenshots and videos are placed with the instruction they illustrate.
A duress, panic, or smoke alarm message can only be cleared using the GoSafer Security customer portal (powered by Alarm.com). It cannot be cleared using the Alarm.com app.
The message will eventually disappear on its own after a few days. For duress alarms, the Alert message will also clear when the system is disarmed by a user code that is not the duress code. If the alarm is not clearing, contact your service provider.
Important: If an alarm is still active locally, you must acknowledge the alarm at the panel before the trouble can clear on the GoSafer Security customer portal (powered by Alarm.com) and Alarm.com app.
To clear a duress or smoke alarm alert:
- Log in to the GoSafer Security customer portal (powered by Alarm.com).
- In the Welcome card, click Details for Panel Duress, Panic, or Smoke Sensor Must Be Reset.
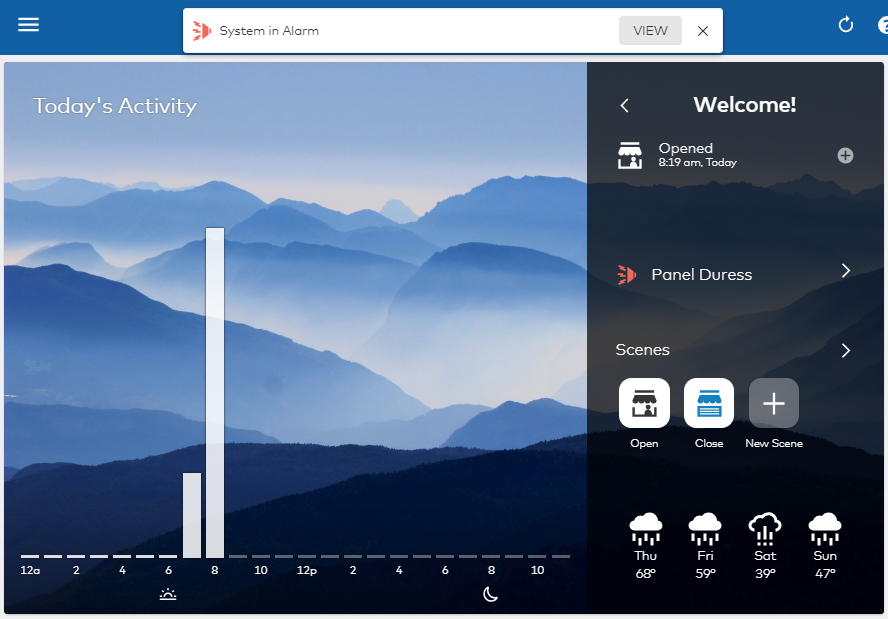
System in duress - You can also click View in the System in Alarm banner to navigate to the Alerts & Issues page.
- If you do not see the Welcome card, you may have it hidden. For more information about locating and arranging the Welcome card, see Rearrange Home page of website or app.
- In Alerts & Issues:
- For a duress alert, click Stop Alarm and confirm to stop the alarm.
- For a smoke sensor reset alert, click Remove Alert.
- Once it's confirmed to stop or remove the alert, it acknowledges the alarm and clears the alert message from the GoSafer Security customer portal (powered by Alarm.com) and Alarm.com app.
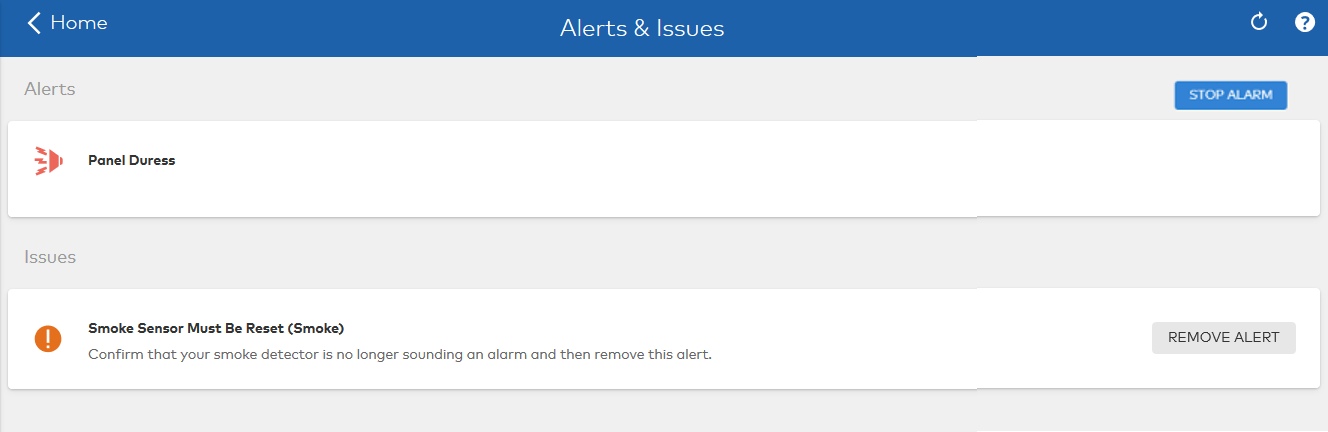
Clear a duress or smoke
For more information about this feature, contact your service provider.
Source and support
For GoSafer Security assistance, visit gosafersecurity.com.
Original Alarm.com reference: https://answers.alarm.com/Customer/Website_and_App/System_Management/System_Usage/Clear_a_duress_panic_or_smoke_alarm
Always verify safety, installation, compatibility, and current UI details against the original manufacturer documentation before operational use.
Configure Qolsys panel camera image uploads for alarms and local disarms
GoSafer Security Knowledge Base
This operational reference is organized for GoSafer Security customers and staff. Alarm.com product names are retained where required for technical accuracy.
Overview
Qolsys panel camera images uploads for local disarms and alarms can be configured using the Alarm.com website and app.
| Platform | Customer Website |
|---|---|
| Content type | How-to / Configuration |
| Source last updated | 2025-06-04 |
Procedure
Step-by-step guide: Screenshots and videos are placed with the instruction they illustrate.
Qolsys panels with a panel camera (i.e., IQ Panel 2 and IQ Panel 4) can upload the panel camera images for local disarms and alarms. Panel camera images can be configured using the GoSafer Security customer portal (powered by Alarm.com).
Captured images are saved in the Images event gallery and count towards the monthly image upload limit. For more information about viewing the event gallery, see View the Images Gallery.
Important: The panel must be connected to Wi-Fi to upload panel images to the Alarm.com app and GoSafer Security customer portal (powered by Alarm.com).
To configure panel camera images:
This can only be configured using the GoSafer Security customer portal (powered by Alarm.com). If you are unable to see the option to configure panel camera images, contact your service provider.
- Log in to the GoSafer Security customer portal (powered by Alarm.com).
- Click Automation.
- Click Rules, if not selected already.
- To enable/disable panel camera disarm and/or alarm images, click the toggle switch for the Panel Camera Alarm Image Uploads and/or Panel Camera Disarm Image Uploads automation rules.
In the following example, alarm image uploads are enabled and disarm image uploads are disabled:
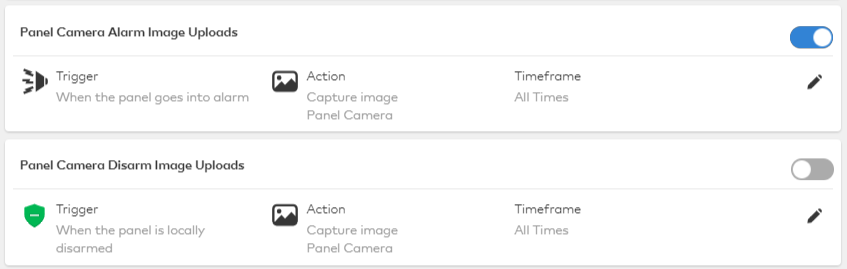
IQP2 panel camera rules
- To configure recipient notifications:
- Click Edit for the automation rule to configure.
- Click Add.
- Select any recipients to be notified from the Address Book dropdown. If the intended recipient is not listed, click New to add a new recipient address.
- Once desired recipients are selected, click Close.
- Click Save.
Source and support
For GoSafer Security assistance, visit gosafersecurity.com.
Original Alarm.com reference: https://answers.alarm.com/Customer/Website_and_App/System_Management/System_Usage/Configure_Qolsys_panel_camera_image_uploads_for_alarms_and_local_disarms
Always verify safety, installation, compatibility, and current UI details against the original manufacturer documentation before operational use.
Device is in malfunction
GoSafer Security Knowledge Base
This operational reference is organized for GoSafer Security customers and staff. Alarm.com product names are retained where required for technical accuracy.
Overview
The Malfunction trouble condition indicates a device is unable to properly communicate.
| Platform | General / Device |
|---|---|
| Content type | Troubleshooting |
| Source last updated | 2024-01-22 |
Procedure
If a device is in malfunction
- Verify which device is in malfunction.
It is possible that the device in malfunction may be a Geo-Device. This is usually indicated by the name of the device that is in malfunction matching the name of a device that is serving as a Geo-Device. If the device appears to be a Geo-Device (e.g., smartphone), see Geo-Service device is in malfunction.
- Verify that the device is still active and powered on.
- Power cycle the device, if possible. If applicable, power off the device for a couple of minutes, and then power the device back on.
- Verify there is nothing that could be interfering with communication, such as range or interfering devices. If possible, move the device closer to the main system.
Trigger the device, if possible (e.g., open and close a sensor). Verify if the status is able to update.
If the device is still in malfunction, contact your service provider for further assistance.
Troubleshooting by device type
Some device types have troubleshooting articles dedicated to that device type
Connected Car is in malfunction
Garage door is in malfunction
Geo-Service device is in malfunction
Light is in malfunction
Shade control device is in malfunction
Lock is in malfunction
Thermostat or remote temperature sensor is in malfunction
Source and support
For GoSafer Security assistance, visit gosafersecurity.com.
Original Alarm.com reference: https://answers.alarm.com/Customer/Website_and_App/System_Management/System_Usage/Device_is_in_malfunction
Always verify safety, installation, compatibility, and current UI details against the original manufacturer documentation before operational use.
Disarm the system remotely
GoSafer Security Knowledge Base
This operational reference is organized for GoSafer Security customers and staff. Alarm.com product names are retained where required for technical accuracy.
Overview
The system can be disarmed or put into a non-alarm state for when the system is occupied.
| Platform | App + Web |
|---|---|
| Content type | How-to / Configuration |
| Source last updated | 2025-06-04 |
Procedure
Step-by-step guide: Screenshots and videos are placed with the instruction they illustrate.
The system can be remotely disarmed using the Alarm.com app or GoSafer Security customer portal (powered by Alarm.com). Disarming the system puts it into a non-alarm state when the location is occupied.
To disarm the system using the Alarm.com app:
- Log in to the Alarm.com app.
- In the Security System card, tap the shield icon that indicates the current arming state.
- Tap Disarm.
To disarm the system using the GoSafer Security customer portal (powered by Alarm.com):
- Log in to the GoSafer Security customer portal (powered by Alarm.com).
- In the Security card, click the shield icon that indicates the current arming state.
- Click Disarm.
To disarm the system using Scenes:
Scenes allow users to configure a button on the Alarm.com app and GoSafer Security customer portal (powered by Alarm.com) that triggers multiple actions across multiple devices at once. For more information about Scenes, see How do Scenes work?.
- Log in to the Alarm.com app or GoSafer Security customer portal (powered by Alarm.com).
- In Scenes, select the Scene you want to run that includes the disarm command.
- For more information about creating or editing Scenes, see Create/edit a Scene.
- Confirm that you want to run that Scene.
Source and support
For GoSafer Security assistance, visit gosafersecurity.com.
Original Alarm.com reference: https://answers.alarm.com/Customer/Website_and_App/System_Management/System_Usage/Disarm_the_system_remotely
Always verify safety, installation, compatibility, and current UI details against the original manufacturer documentation before operational use.
Enable Smart Arming
GoSafer Security Knowledge Base
This operational reference is organized for GoSafer Security customers and staff. Alarm.com product names are retained where required for technical accuracy.
Overview
For residential customers, the Smart Arming feature automatically arms the customer's system Arm Stay when they go to bed and Disarm it when they wake up. Smart Arming can be activated at a set time or when sensors detect activity. Smart Arming ensures that the system is secure every night while preventing false alarms. Use-Case Example: A family with a regular nighttime routine schedules Smart Arming to arm the panel at 10:00 PM each night. Because they have small children who may wake early and let the dog out, they auto-disarm when activity is detected between 6:00 AM and 9:00 AM.
| Platform | App + Web |
|---|---|
| Content type | How-to / Configuration |
| Source last updated | 2026-01-27 |
Procedure
Step-by-step guide: Screenshots and videos are placed with the instruction they illustrate.
For residential customers, the Smart Arming feature automatically arms the customer's system Arm Stay when they go to bed and Disarm it when they wake up. Smart Arming can be activated at a set time or when sensors detect activity. Smart Arming ensures that the system is secure every night while preventing false alarms.
Use-Case Example: A family with a regular nighttime routine schedules Smart Arming to arm the panel at 10:00 PM each night. Because they have small children who may wake early and let the dog out, they auto-disarm when activity is detected between 6:00 AM and 9:00 AM.
System considerations
- Not all panels are compatible with Smart Arming. Contact your service provider for more information about if your panel is compatible.
- Smart Arming will not activate if a system is in Arm Away
- Smart Arming is only available for security systems with one partition
- Sensor-based Arm Stay uses contact and motion sensors to detect activity; users select which sensors to include
- Sensor-based Disarm uses motion sensors only so someone breaking in can not disarm the panel; users select which sensors to include
- Smart Arming schedules that overlap may cause unexpected behavior. It is not recommended to set up overlapping schedules.
Note: Motion sensors with PIR cameras cannot be selected with Sensor-based Arm Stay or Sensor-based Disarm.
Enable Smart Arming
Smart Arming can be configured using the Alarm.com app or GoSafer Security customer portal (powered by Alarm.com).
Important: To manage the Smart Arming rule, the customer login must have Master Control, Full Control, or Custom with Remote Arming selected. Additionally, Limited Device Access with Remote Panel Control and Read Only logins are able to view existing Smart Arming settings, but not manage them. For more information about customer permissions, see Manage login permissions for secondary logins.
To enable Smart Arming using the Alarm.com app: Icn Chevron Up
Important: Managing this feature on the Alarm.com app requires app version iOS 4.21.14+ and Android 4.21.12+. For custom schedules for each day of the week, iOS 5.13 and Android 5.10+ Alarm.com app version is required.
- Log in to the Alarm.com app.
- On the Security System card, tap Smart Arming for Smart Arming. Tap Smart Arming.
- Tap + to create a Smart Arming schedule, or Edit on an existing schedule to configure it.
- In Select Smart Arming Action, tap to select either Wake Up for disarming or Goodnight for arming stay.
- In Name Schedule, enter a name for the schedule.
- In Select Schedule Type, tap either:
- Specified Time to run the schedule at a specific time. If this is selected:
- In Configure Schedule, use the dropdown menus to select the Days and Starting at time for this rule to run.
- Or, if available, Activity Detected to run the schedule based on compatible sensor activity. If this is selected:
- For the Wake Up schedule, this option is available if the customer has motion sensors in compatible groups to disarm when activity is detected between specific times for selected sensors included in the rule.
- Use the dropdown menus to select the Days, Starting at time, Ending at time, and Inactivity Period for this rule to run.
- In Select Sensor(s), tap to select the sensors used to detect activity for this rule to activate.
- Additional considerations:
- This schedule only activates when the panel is armed stay.
- When Disarm at X:XX even if no activity is detected is selected, the panel disarms at the end of the selected time frame if no motion is detected during the selected time period.
- This rule is designed to disarm once during the selected time period. If the panel has disarmed once due to motion, it will not disarm again at the end of the selected time period.
Example: A user sets the Wake Up rule to disarm the panel due to no activity. The Wake Up rule is triggered to disarm the panel. Within the time frame, the user arms the panel remotely or locally. The Wake Up rule will no longer disarm the panel until the following day.
- For the Goodnight schedule, this option is available if the customer has motion/contact sensors in compatible groups to arm stay between specific times when no activity has been detected for a specified duration for selected sensors included in the rule.
- Use the dropdown menus to select the Days, Starting at time, Ending at time, and Inactivity Period for this rule to run.
- In Select Sensor(s), tap to select the sensors used to detect activity for this rule to activate.
- Additional considerations:
- This rule can arm the panel multiple times in the selected time period.
Example: A user sets the Goodnight rule to arm stay after 30 minutes of inactivity. During the time frame, the Goodnight rule triggers to arm stay the panel and the user disarms the panel remotely or locally. Once the inactivity time period is reached again, the rule will trigger the panel to arm stay again.
- This rule can arm the panel multiple times in the selected time period.
- For the Wake Up schedule, this option is available if the customer has motion sensors in compatible groups to disarm when activity is detected between specific times for selected sensors included in the rule.
- Specified Time to run the schedule at a specific time. If this is selected:
- Tap Save.

To enable Smart Arming using the GoSafer Security customer portal (powered by Alarm.com): Icn Chevron Up
- Log in to the GoSafer Security customer portal (powered by Alarm.com).
- On the Security System card, click Smart Arming.
Note: Smart Arming can also be accessed from the Automation page.
- Click + Schedule to create a Smart Arming schedule, or Edit on an existing schedule to configure it.
- In Select Smart Arming Action, click to select either Wake Up for disarming or Goodnight for arming stay.
- In Name Schedule, enter a name for the schedule.
- In Select Schedule Type, click either:
- Specified Time to run the schedule at a specific time. If this is selected:
- In Configure Schedule, use the dropdown menus to select the Days and Starting at time for this rule to be active.
- Or, if available, Activity Detected to run the schedule based on compatible sensor activity. If this is selected:
- For the Wake Up schedule, this option is available if the customer has motion sensors in compatible groups to disarm when activity is detected between specific times for selected sensors included in the rule.
- Use the dropdown menus to select the Days, Starting at time, Ending at time, and Inactivity Period for this rule to activate.
- In Select Sensor(s), click to select the sensors used to detect activity for this rule to activate.
- Additional considerations:
- This schedule only activates when the panel is armed stay.
- When Disarm at X:XX even if no activity is detected is selected, the panel disarms at the end of the selected time frame if no motion is detected during the selected time period.
- This rule is designed to disarm once during the selected time period. If the panel has disarmed once due to motion, it will not disarm again at the end of the selected time period.
Example: A user sets the Wake Up rule to disarm the panel due to no activity. The Wake Up rule is triggered to disarm the panel. Within the time frame, the user arms the panel remotely or locally. The Wake Up rule will no longer disarm the panel until the following day.
- For the Goodnight schedule, this option is available if the customer has motion/contact sensors in compatible groups to arm stay between specific times when no activity has been detected for a specified duration for selected sensors included in the rule.
- Use the dropdown menus to select the Days, Starting at time, Ending at time, and Inactivity Period for this rule to activate.
- In Select Sensor(s), click to select the sensors used to detect activity for this rule to activate.
- Additional considerations:
- This rule can arm the panel multiple times in the selected time period.
Example: A user sets the Goodnight rule to arm stay after 30 minutes of inactivity. During the time frame, the Goodnight rule triggers to arm stay the panel and the user disarms the panel remotely or locally. Once the inactivity time period is reached again, the rule will trigger the panel to arm stay again.
- This rule can arm the panel multiple times in the selected time period.
- For the Wake Up schedule, this option is available if the customer has motion sensors in compatible groups to disarm when activity is detected between specific times for selected sensors included in the rule.
- Specified Time to run the schedule at a specific time. If this is selected:
- Click Save.

Source and support
For GoSafer Security assistance, visit gosafersecurity.com.
Original Alarm.com reference: https://answers.alarm.com/Customer/Website_and_App/System_Management/System_Usage/Enable_Smart_Arming
Always verify safety, installation, compatibility, and current UI details against the original manufacturer documentation before operational use.
Export panel slot number for a system
GoSafer Security Knowledge Base
This operational reference is organized for GoSafer Security customers and staff. Alarm.com product names are retained where required for technical accuracy.
Overview
The panel slot numbers report is a downloadable.csv file that shows all users associated with the system. This is useful for keeping personal records of users in a system.
| Platform | App + Web |
|---|---|
| Content type | Reference |
| Source last updated | 2025-06-04 |
Procedure
To export panel slot numbers using the Alarm.com app
- Log in to the Alarm.com app.
- Tap [Menu].
- Tap Account Management.
- Tap User Slot Management.
- Tap Export.
To export panel slot numbers using the GoSafer Security customer portal (powered by Alarm.com)
- Log in to the GoSafer Security customer portal (powered by Alarm.com).
- Click Settings.
- Click Account Management.
- Click User Slot Management.
- Click Export.
Source and support
For GoSafer Security assistance, visit gosafersecurity.com.
Original Alarm.com reference: https://answers.alarm.com/Customer/Website_and_App/System_Management/System_Usage/Export_panel_slot_number_for_a_system
Always verify safety, installation, compatibility, and current UI details against the original manufacturer documentation before operational use.
Getting started with a Residential account
GoSafer Security Knowledge Base
This operational reference is organized for GoSafer Security customers and staff. Alarm.com product names are retained where required for technical accuracy.
Overview
This video walks through some of the basic features associated with an Alarm.com Residential account.
| Platform | General / Device |
|---|---|
| Content type | How-to / Configuration |
| Source last updated | 2026-03-06 |
Procedure
Step-by-step guide: Screenshots and videos are placed with the instruction they illustrate.
For more information about how to set up notifications, see Notifications.
For more information about how to set up scenes, see Scenes.
For more information about how to set up Alarm.com Places, see Configure Alarm.com Places.
Source and support
For GoSafer Security assistance, visit gosafersecurity.com.
Original Alarm.com reference: https://answers.alarm.com/Customer/Website_and_App/System_Management/System_Usage/Getting_started_with_a_Residential_account
Always verify safety, installation, compatibility, and current UI details against the original manufacturer documentation before operational use.
How can I change the batteries in my device?
GoSafer Security Knowledge Base
This operational reference is organized for GoSafer Security customers and staff. Alarm.com product names are retained where required for technical accuracy.
Overview
If the batteries in a device need to be changed, a Device Low Battery trouble condition should appear in the Alarm.com app. [Issues Card]
| Platform | App + Web |
|---|---|
| Content type | Troubleshooting |
| Source last updated | 2025-06-04 |
Procedure
Step-by-step guide: Screenshots and videos are placed with the instruction they illustrate.
If the batteries in a device need to be changed, a Device Low Battery trouble condition should appear in the Alarm.com app.
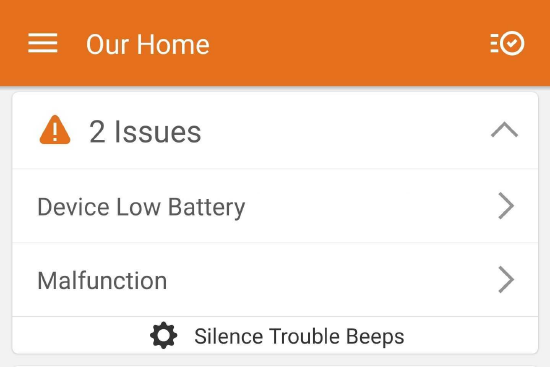
To learn how to change the batteries in a device:
- Log in to the Alarm.com app.
- In Issues, tap the Device Low Battery trouble condition for the relevant device.
- Tap Fix It.
- Follow the instructions to change the batteries.
Caution: When removing and replacing batteries, always take precautions (e.g., ensuring the device is powered off, any panel-specific requirements, etc.).
Note: If instructions to replace the batteries are not available, refer to the installation guide packaged with the device or on the manufacturer's website, or contact your service provider for assistance.
Source and support
For GoSafer Security assistance, visit gosafersecurity.com.
Original Alarm.com reference: https://answers.alarm.com/Customer/Website_and_App/System_Management/System_Usage/How_can_I_change_the_batteries_in_my_device
Always verify safety, installation, compatibility, and current UI details against the original manufacturer documentation before operational use.
How can I know if there is a local power outage on the app?
GoSafer Security Knowledge Base
This operational reference is organized for GoSafer Security customers and staff. Alarm.com product names are retained where required for technical accuracy.
Overview
A real-time notification about local power outages only displays in the Alarm.com app during instances when there may be a power outage in your area.
| Platform | Mobile App |
|---|---|
| Content type | FAQ / Explanation |
| Source last updated | 2026-06-09 |
Procedure
Step-by-step guide: Screenshots and videos are placed with the instruction they illustrate.
A real-time notification about local power outages only displays in the Alarm.com app during instances when there may be a power outage in your area.
To view the power outage notification on the Alarm.com app:
- Log in to the Alarm.com app.
- In the Top Recommendations card, find the power outage notifications, then tap Learn More.
The following is an example of how an power outage notification appears in the Top Recommendations card in the Alarm.com app:

Source and support
For GoSafer Security assistance, visit gosafersecurity.com.
Original Alarm.com reference: https://answers.alarm.com/Customer/Website_and_App/System_Management/System_Usage/How_can_I_know_if_there_is_a_local_power_outage_on_the_app%3F
Always verify safety, installation, compatibility, and current UI details against the original manufacturer documentation before operational use.
How can I view legal agreements and documents?
GoSafer Security Knowledge Base
This operational reference is organized for GoSafer Security customers and staff. Alarm.com product names are retained where required for technical accuracy.
Overview
Alarm.com’s general legal agreements and documents are available at www.alarm.com/legal for reference at any time.
| Platform | General / Device |
|---|---|
| Content type | FAQ / Explanation |
| Source last updated | 2026-03-06 |
Procedure
General legal agreements and documents can be accessed anytime by visiting www.alarm.com/legal.
To view the specific legal agreements that you agreed to when you initially began service, contact your service provider.
Source and support
For GoSafer Security assistance, visit gosafersecurity.com.
Original Alarm.com reference: https://answers.alarm.com/Customer/Website_and_App/System_Management/System_Usage/How_can_I_view_legal_agreements_and_documents
Always verify safety, installation, compatibility, and current UI details against the original manufacturer documentation before operational use.
How do I change my time zone?
GoSafer Security Knowledge Base
This operational reference is organized for GoSafer Security customers and staff. Alarm.com product names are retained where required for technical accuracy.
Overview
The time zone for an account can be changed using the Alarm.com app or GoSafer Security customer portal (powered by Alarm.com). Note: The system's time automatically adjusts for daylight savings based on the time zone that is selected.
| Platform | App + Web |
|---|---|
| Content type | How-to / Configuration |
| Source last updated | 2025-06-04 |
Procedure
To change the time zone using the Alarm.com app
- Log in to the Alarm.com app.
- Tap [Menu].
- Tap Account Management.
- Tap System Information.
Using the Time Zone dropdown menu, select the desired time zone.
- Tap Update.
Note: If you are unable to access the Account Management page, or if the panel is showing the incorrect time, contact your service provider for assistance.
To change the time zone using the GoSafer Security customer portal (powered by Alarm.com)
- Log in to the GoSafer Security customer portal (powered by Alarm.com).
- Click Settings.
- Click Account Management.
- Click System Information.
Note: If using a mobile device web browser, tap [Menu], then tap System Information on the Account Management page.
Using the Time Zone dropdown menu, select the desired time zone.
- Click Update.
Note: If you are unable to access the Account Management page, or if the panel is showing the incorrect time, contact your service provider for assistance.
Source and support
For GoSafer Security assistance, visit gosafersecurity.com.
Original Alarm.com reference: https://answers.alarm.com/Customer/Website_and_App/System_Management/System_Usage/How_do_I_change_my_time_zone
Always verify safety, installation, compatibility, and current UI details against the original manufacturer documentation before operational use.
How do I control multiple partitions of a security panel?
GoSafer Security Knowledge Base
This operational reference is organized for GoSafer Security customers and staff. Alarm.com product names are retained where required for technical accuracy.
Overview
Secondary partitions become available on a customer account after the partition is enabled in the security panel and at least one sensor is assigned to it, with no additional service package cost …
| Platform | App + Web |
|---|---|
| Content type | Reference |
| Source last updated | 2026-03-06 |
Procedure
Step-by-step guide: Screenshots and videos are placed with the instruction they illustrate.
A secondary partition will appear on an account after the partition is enabled in the security panel and has at least one sensor associated with it. There are no additional service package costs to remotely control or use partitions on a customer account.
- On the Alarm.com app, the arming level of a partition can be set to whatever is desired by checking the box next to the partition's current status and you can select multiple partitions at the same time. For example, eight partitions can be Armed Away at once.
- On the GoSafer Security customer portal (powered by Alarm.com), the second partition will appear below the first partition under Current Arming States.
Note: Selecting multiple partitions can only be done using the Alarm.com app and only if those partitions are all disarmed or if they are all armed (either stay or away). You can also send different commands to different partitions as well (e.g., arm partitions 1 and 2 while leaving partitions 3 and 4 disarmed).
Control multiple partitions using the Alarm.com app:
To view and control secondary partitions individually from the app home screen, you can scroll through them on the Security System card by swiping left or right on the partition status and then tapping the partition to send commands to the individual partition.
Multiple partitions can be commanded at once by using the Security System menu. Tap the Security System card on the home screen and use the checkboxes to select multiple partitions to send commands to.
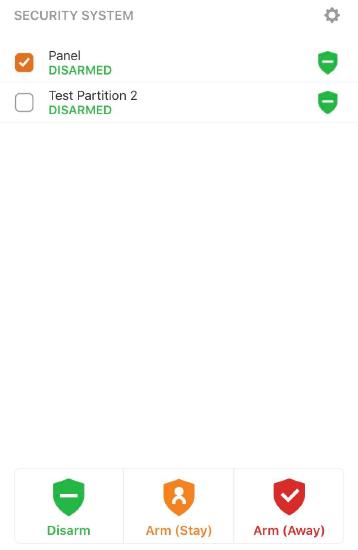
Control multiple partitions using the GoSafer Security customer portal (powered by Alarm.com):
Partitions can be controlled through the Security System page on the GoSafer Security customer portal (powered by Alarm.com). On this page, you can select any desired partition and send commands to individual partitions.
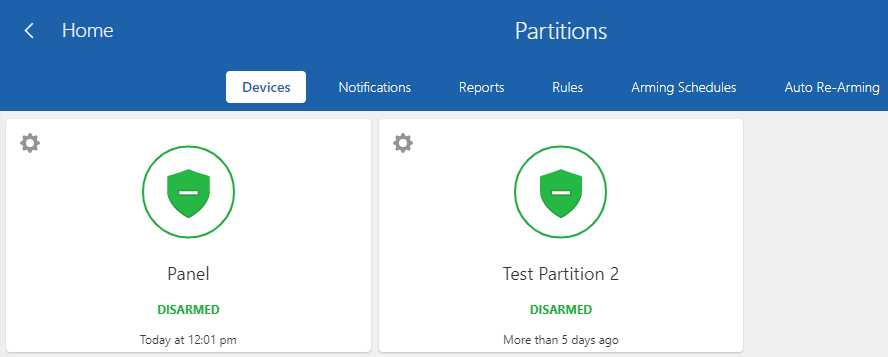
Source and support
For GoSafer Security assistance, visit gosafersecurity.com.
Original Alarm.com reference: https://answers.alarm.com/Customer/Website_and_App/System_Management/System_Usage/How_do_I_control_multiple_partitions_of_a_security_panel
Always verify safety, installation, compatibility, and current UI details against the original manufacturer documentation before operational use.
How do I make sure my account is secure?
GoSafer Security Knowledge Base
This operational reference is organized for GoSafer Security customers and staff. Alarm.com product names are retained where required for technical accuracy.
Overview
This guide outlines best practices for improving the security of an Alarm.com account and monitored system.
| Platform | App + Web |
|---|---|
| Content type | How-to / Configuration |
| Source last updated | 2026-03-06 |
Procedure
Create unique user codes for each individual who needs access to the security system
If other people are going to have access to your property and will need to disarm the security system, give them each their own user code. This will ensure you always know who disarmed your system.
For more information, see: Create a system user code.
Create specific logins for each person who accesses the website and mobile applications
If other people are going to have regular access to your account, it is recommended to give them each their own secondary login. This will ensure you always know who logged in. Additionally, you can limit their access to specific devices within your system.
For more information, see
Create a login for the GoSafer Security customer portal (powered by Alarm.com)
Manage login permissions for secondary logins
Passwords
Regularly updating user passwords for Alarm.com app and GoSafer Security customer portal (powered by Alarm.com) users helps keep your account more secure. When creating new passwords, remember:
The new password cannot be the same as the previous password.
The new password must be at least 10 characters, including at least one letter, one number, and one special character.
It is recommended to only use passwords that are indicated as Strong by the password strength indicator.
It is recommended to make your password for your online account different from other passwords you use.
For more information, see Change or reset a password.
Two-factor authentication
Two-Factor Authentication adds an extra layer of security to protect access to your system. This makes it harder for unauthorized persons or potential intruders to gain access to your system, so your system and your property can be even more secure. Whenever you sign into your system from a new or untrusted device, you'll have to enter both your password and a one-time code sent to your mobile phone or email.
For more information, see Enable Two-Factor Authentication.
Push Notifications
Use push notifications for instant, reliable notifications about your account and system. To receive Push Notifications for an account, enable the feature for each mobile device that will receive push notifications.
For more information, see How can a device start receiving Push Notifications.
Successful and Unsuccessful Login Attempt notifications
You can use the System Event Notification to set up notifications for login attempts as well as other events so you are always aware of what is happening with your system.
For more information, see Create a system event notification.
User Code created or updated notifications
We automatically send System Awareness notifications to the primary email of a user's account when certain actions occur. These default notifications cannot be configured or disabled and are always sent whenever certain actions occur on a user's account.
For more information, see Default System Awareness Notifications.
Unexpected Activity Alerts (Events)
Our platform works in the background to analyze system data and learn the normal activity patterns of a property. The system can then send notifications whenever unusual activity occurs in a home or business. Unexpected Activity notifications are intended to provide information only.
For more information, see Configure Unexpected Activity Alert notifications.
Sensor and Arming Activity Notifications
You can customize which system activity events trigger notifications to be sent to you through the Alarm.com app and GoSafer Security customer portal (powered by Alarm.com).
For more information see
Create an arming event notification
Create a sensor activity notification
Create a system event notification
Create an alarm notification
Review system activity regularly
The system activity history shows system, GoSafer Security customer portal (powered by Alarm.com), and user activity that has occurred within the past 60 days. The system activity history is useful for accessing the information you need, storing key records, and gaining new insights for your system.
For more information, see View the system activity history.
Set up Touch ID or Face ID
This will require an additional step of verification before someone can access your account on your mobile device.
For more information, see
How can I set up fingerprint scanning on Android?
How can I set up Touch ID or Face ID for iOS?
Source and support
For GoSafer Security assistance, visit gosafersecurity.com.
Original Alarm.com reference: https://answers.alarm.com/Customer/Website_and_App/System_Management/System_Usage/How_do_I_make_sure_my_account_is_secure
Always verify safety, installation, compatibility, and current UI details against the original manufacturer documentation before operational use.
How do I switch between my accounts?
GoSafer Security Knowledge Base
This operational reference is organized for GoSafer Security customers and staff. Alarm.com product names are retained where required for technical accuracy.
Overview
It is possible to switch between multiple Alarm.com accounts from the Alarm.com app or GoSafer Security customer portal (powered by Alarm.com) from the same login after a login name has been granted Linked Systems. Note: If the following options do not appear, Linked Systems may not be activated for the login being used. For more information on how to activate Linked Systems, see How can I link multiple accounts together?.
| Platform | App + Web |
|---|---|
| Content type | Reference |
| Source last updated | 2023-10-27 |
Procedure
Step-by-step guide: Screenshots and videos are placed with the instruction they illustrate.
It is possible to switch between multiple Alarm.com accounts from the Alarm.com app or GoSafer Security customer portal (powered by Alarm.com) from the same login after a login name has been granted Linked Systems.
Note: If the following options do not appear, Linked Systems may not be activated for the login being used. For more information on how to activate Linked Systems, see How can I link multiple accounts together?.
Switch between accounts
Accounts can be switched between using the GoSafer Security customer portal (powered by Alarm.com) and Alarm.com app.
To switch between accounts using the Alarm.com app:Icn Chevron Down
- Log into the Alarm.com app.
- Tap the system description.
Switch Systems
- Select the desired system to access.
To switch between accounts on the GoSafer Security customer portal (powered by Alarm.com):Icn Chevron Down
- Log into the GoSafer Security customer portal (powered by Alarm.com).
- In the system description, click Down.

Linked Systems System Description
- Select the desired system to access.
Source and support
For GoSafer Security assistance, visit gosafersecurity.com.
Original Alarm.com reference: https://answers.alarm.com/Customer/Website_and_App/System_Management/System_Usage/How_do_I_switch_between_my_accounts
Always verify safety, installation, compatibility, and current UI details against the original manufacturer documentation before operational use.
How many sensors can be displayed in the app?
GoSafer Security Knowledge Base
This operational reference is organized for GoSafer Security customers and staff. Alarm.com product names are retained where required for technical accuracy.
Overview
The Alarm.com app can display all sensors that have Sensor Activity Monitoring enabled (e.g., door/window sensors, motion sensors, etc.). For more information about verifying if the sensor has Sensor Activity Monitoring available, see Turn sensor activity monitoring on/off. For more information about verifying if the sensor has Sensor Activity Monitoring available, see Enable or disable Sensor Activity Monitoring. Note: Sensors are listed in alphabetical order on the Alarm.com app. On the GoSafer Security customer portal (powered by Alarm.com), sensors are listed in order of their device ID.
| Platform | App + Web |
|---|---|
| Content type | How-to / Configuration |
| Source last updated | 2024-02-12 |
Procedure
The Alarm.com app can display all sensors that have Sensor Activity Monitoring enabled (e.g., door/window sensors, motion sensors, etc.). For more information about verifying if the sensor has Sensor Activity Monitoring available, see Turn sensor activity monitoring on/off.
Note: Certain sensor statuses may not display on the Alarm.com app, but most sensors, including glass break and life safety sensors, can be viewed from the Manage Devices page.
For more information about verifying if the sensor has Sensor Activity Monitoring available, see Enable or disable Sensor Activity Monitoring.
Note: Sensors are listed in alphabetical order on the Alarm.com app. On the GoSafer Security customer portal (powered by Alarm.com), sensors are listed in order of their device ID.
Sensors like smoke detectors, fire detectors, and carbon monoxide detectors put a panel into alarm regardless of the panel's current arming state (e.g., alarm sends even if disarmed). These types of sensors are ineligible for Sensor Activity Monitoring and do not appear in the Alarm.com app unless the sensor is in alarm or has a trouble condition. If these types of sensors are in alarm or report a trouble condition, the sensor alarm or alert appears in the Alarm.com app.
Note: There is no maximum limit to the number of sensors that can display on the app other than the number of sensors that can have Sensor Activity Monitoring enabled on the system.
For more information about eligibility for Sensor Activity Monitoring, see Why are some sensors, such as smoke detectors, not eligible for Sensor Activity Monitoring?.
Source and support
For GoSafer Security assistance, visit gosafersecurity.com.
Original Alarm.com reference: https://answers.alarm.com/Customer/Website_and_App/System_Management/System_Usage/How_many_sensors_can_be_displayed_in_the_app
Always verify safety, installation, compatibility, and current UI details against the original manufacturer documentation before operational use.
Is the Alarm.com app compatible with text to speech applications?
GoSafer Security Knowledge Base
This operational reference is organized for GoSafer Security customers and staff. Alarm.com product names are retained where required for technical accuracy.
Overview
An article about text to speech compatibility with Alarm.com.
| Platform | Mobile App |
|---|---|
| Content type | How-to / Configuration |
| Source last updated | 2024-12-11 |
Procedure
Yes. The Alarm.com app is compatible with text-to-speech applications (e.g., IOS VoiceOver, Android Talkback, etc.). To enable these applications, refer to the device manufacturer guides.
Source and support
For GoSafer Security assistance, visit gosafersecurity.com.
Original Alarm.com reference: https://answers.alarm.com/Customer/Website_and_App/System_Management/System_Usage/Is_the_Alarm.com_app_compatible_with_text_to_speech_applications
Always verify safety, installation, compatibility, and current UI details against the original manufacturer documentation before operational use.
Manage central station monitoring settings
GoSafer Security Knowledge Base
This operational reference is organized for GoSafer Security customers and staff. Alarm.com product names are retained where required for technical accuracy.
Overview
A Monitoring Station, also known as an Alarm Monitoring Center, Central Station, or Central Monitoring Station, takes the signals forwarded from Alarm.com and dispatches to the proper authorities.
| Platform | App + Web |
|---|---|
| Content type | Reference |
| Source last updated | 2025-06-04 |
Procedure
To manage monitoring station settings using the Alarm.com app
- Log in to the Alarm.com app.
- Tap [Menu].
- Tap Monitoring Settings.
To manage monitoring station settings using the GoSafer Security customer portal (powered by Alarm.com)
- Log in to the GoSafer Security customer portal (powered by Alarm.com).
- Click Settings.
- Click Monitoring Station.
Source and support
For GoSafer Security assistance, visit gosafersecurity.com.
Original Alarm.com reference: https://answers.alarm.com/Customer/Website_and_App/System_Management/System_Usage/Manage_central_station_monitoring_settings
Always verify safety, installation, compatibility, and current UI details against the original manufacturer documentation before operational use.
Put a system in test mode with the monitoring station
GoSafer Security Knowledge Base
This operational reference is organized for GoSafer Security customers and staff. Alarm.com product names are retained where required for technical accuracy.
Overview
When a system is in test mode with the monitoring station, the monitoring station is not going to respond to alarms (i.e., dispatch police) from the system during that time.
| Platform | Mobile App |
|---|---|
| Content type | FAQ / Explanation |
| Source last updated | 2025-07-18 |
Procedure
Step-by-step guide: Screenshots and videos are placed with the instruction they illustrate.
When a system is in test mode with the monitoring station, the monitoring station is not going to respond to alarms (i.e., dispatch police) from the system during that time. This allows tests and system maintenance to be performed without having to worry about the police being dispatched.
This is particularly useful for troubleshooting sensors without triggering false alarms.
How does it work?
The system will send a signal to the monitoring station platform to flag the account for testing and will initiate the process for the duration selected. Once the selected time elapses, the account will automatically exit test mode.
To put a system in test mode:
Important: Only the primary login and secondary logins with master permissions can put the system on test mode. If you are logged in to these logins and still do not see the option, contact your service provider.
- Log in to the Alarm.com app.
- Tap Menu.
- Tap Monitoring Settings.
- Tap System Test Mode.
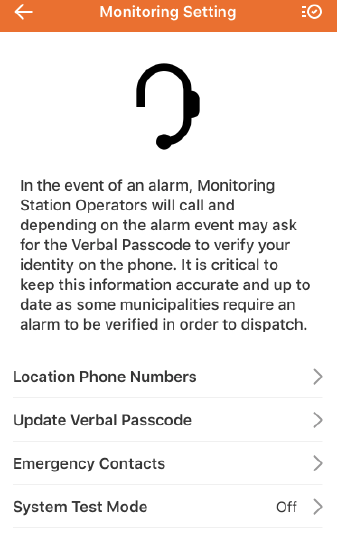
image2019 5 7 13 49 48
- Tap to select the test duration.
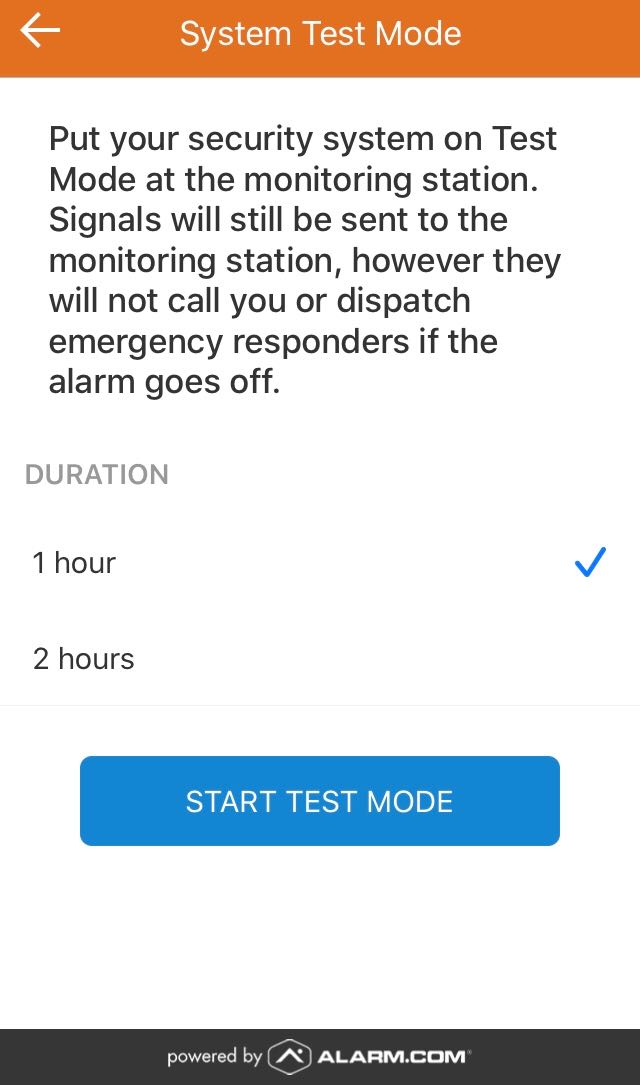.jpg?revision=1&size=bestfit&width=250&height=424)
Duration Options (1 and 2 Hour)
- Tap Start Test Mode.
- Tap Confirm.
- If test mode needs to be canceled before the duration expires, tap Stop Test Mode.
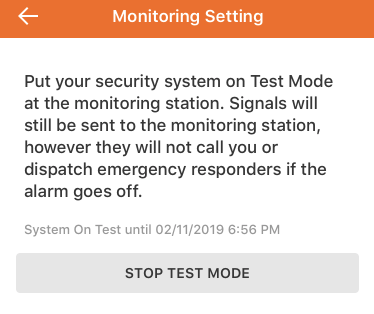
image2019 5 7 13 50 29
Source and support
For GoSafer Security assistance, visit gosafersecurity.com.
Original Alarm.com reference: https://answers.alarm.com/Customer/Website_and_App/System_Management/System_Usage/Put_a_system_in_test_mode_with_the_monitoring_station
Always verify safety, installation, compatibility, and current UI details against the original manufacturer documentation before operational use.
Qolsys panel is disarming by itself
GoSafer Security Knowledge Base
This operational reference is organized for GoSafer Security customers and staff. Alarm.com product names are retained where required for technical accuracy.
Overview
If a Qolsys panel is disarming by itself, verify if you have Bluetooth disarming enabled. A compatible Qolsys panel has the ability to enable a Bluetooth device to disarm the system from an armed away state when it comes within range of the panel. Compatible Qolsys panels include Qolsys IQ Panel 2, IQ Hub, IQ Panel 4, and IQ4 Hub. If the system is disarmed by a Bluetooth device, the name of the Bluetooth device displays as disarming the system in Activity as shown in the following example. [Bluetooth Device Iqp2 Disarming Example]
| Platform | App + Web |
|---|---|
| Content type | How-to / Configuration |
| Source last updated | 2025-06-04 |
Procedure
Step-by-step guide: Screenshots and videos are placed with the instruction they illustrate.
If a Qolsys panel is disarming by itself, verify if you have Bluetooth disarming enabled. A compatible Qolsys panel has the ability to enable a Bluetooth device to disarm the system from an armed away state when it comes within range of the panel. Compatible Qolsys panels include Qolsys IQ Panel 2, IQ Hub, IQ Panel 4, and IQ4 Hub.
If the system is disarmed by a Bluetooth device, the name of the Bluetooth device displays as disarming the system in Activity as shown in the following example.

To verify Bluetooth disarming devices using the GoSafer Security customer portal (powered by Alarm.com):
- Log in to the GoSafer Security customer portal (powered by Alarm.com).
- Click Settings.
- Click Manage Devices.
- In Security, Bluetooth disarming devices display similar to a sensor.
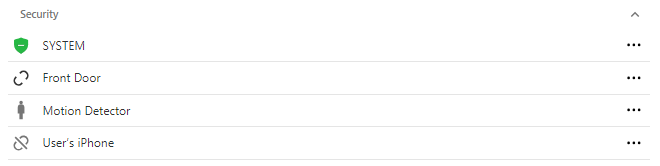
Note: The panel must be used to disable Bluetooth disarming devices.
To verify Bluetooth disarming devices using the panel:
- Flick to access the settings tray on the panel.
- Tap Settings.
- Tap Advanced Settings.
- Enter your code.
- Tap Bluetooth Devices.
- Tap Edit Device.
- Verify if the device disarming the system is listed as a Bluetooth device.
- If you want to disable disarming for a Bluetooth device:
- Tap Edit for the device to disable.
- Using the Disarming dropdown menu, select Disable Disarming.
- Tap Update.
- If you want to disable disarming for a Bluetooth device:
Note: The Bluetooth Disarm Timeout setting is the amount of time the system waits until the Bluetooth device is able to disarm. This allows time for the Bluetooth device to get out of range of the panel so that the panel is not automatically disarmed.
Source and support
For GoSafer Security assistance, visit gosafersecurity.com.
Original Alarm.com reference: https://answers.alarm.com/Customer/Website_and_App/System_Management/System_Usage/Qolsys_panel_is_disarming_by_itself
Always verify safety, installation, compatibility, and current UI details against the original manufacturer documentation before operational use.
Remotely arm and disarm multiple partitions at once
GoSafer Security Knowledge Base
This operational reference is organized for GoSafer Security customers and staff. Alarm.com product names are retained where required for technical accuracy.
Overview
Users can remotely arm and disarm separate partitions individually using the website or app.
| Platform | App + Web |
|---|---|
| Content type | Reference |
| Source last updated | 2025-06-04 |
Procedure
Step-by-step guide: Screenshots and videos are placed with the instruction they illustrate.
If the system has multiple partitions, users can remotely arm and disarm separate partitions individually using the Alarm.com app or GoSafer Security customer portal (powered by Alarm.com). Partitions are listed in alphabetical order in the Alarm.com app to help organize systems with large amounts of partitions.
To arm/disarm multiple partitions using the Alarm.com app:
- Log in to the Alarm.com app.
- In the Security System card, swipe to navigate to the partition to adjust. Then tap to select the partition.
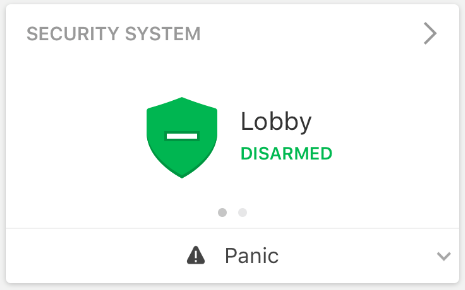
clipboard e21710cf6593caa5e33f65fbfd0d0a70b 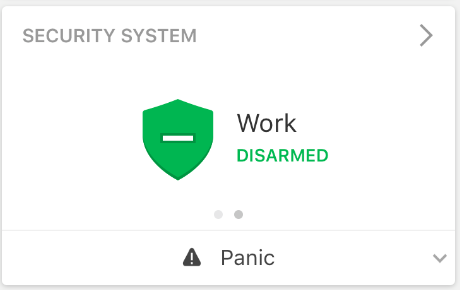
clipboard efba193167b19eb04d005206291564d1a
Note: The arming states can also be changed from the Security System page by tapping Detailsin the Security System card. - Tap to select the desired arming state.
To arm/disarm multiple partitions using the GoSafer Security customer portal (powered by Alarm.com):
- Log in to the GoSafer Security customer portal (powered by Alarm.com).
- In the Security System card, click any partition.
Security System card
Note: The arming states can also be changed from the Partitions page by clicking Detailsin the Security System card. - Click to select the desired arming state.
Source and support
For GoSafer Security assistance, visit gosafersecurity.com.
Original Alarm.com reference: https://answers.alarm.com/Customer/Website_and_App/System_Management/System_Usage/Remotely_arm_and_disarm_multiple_partitions_at_once
Always verify safety, installation, compatibility, and current UI details against the original manufacturer documentation before operational use.
Remotely change 2GIG GC3 panel settings
GoSafer Security Knowledge Base
This operational reference is organized for GoSafer Security customers and staff. Alarm.com product names are retained where required for technical accuracy.
Overview
Change some of your panel settings using the app including beeps, and temperature display units.
| Platform | Mobile App |
|---|---|
| Content type | How-to / Configuration |
| Source last updated | 2025-06-04 |
Procedure
Step-by-step guide: Screenshots and videos are placed with the instruction they illustrate.
Compatible panel settings can be changed using the Alarm.com app.
Note: If these options are not available, contact your service provider for more information.
To change panel settings:
- Log in to the Alarm.com app.
- Tap Security System.
- Tap Settings.
- Tap the setting to be configured.
- Tap the desired value.
- Tap Save.
Compatible panel settings:
| Setting | Description |
|---|---|
| Temperature Display | Select if the temperature is displayed in Fahrenheit or Celsius |
Source and support
For GoSafer Security assistance, visit gosafersecurity.com.
Original Alarm.com reference: https://answers.alarm.com/Customer/Website_and_App/System_Management/System_Usage/Remotely_change_2GIG_GC3_panel_settings
Always verify safety, installation, compatibility, and current UI details against the original manufacturer documentation before operational use.
Remotely change 2GIG GoControl panel settings
GoSafer Security Knowledge Base
This operational reference is organized for GoSafer Security customers and staff. Alarm.com product names are retained where required for technical accuracy.
Overview
Change some of your panel settings using the app including beeps, chimes, and temperature display format.
| Platform | Mobile App |
|---|---|
| Content type | How-to / Configuration |
| Source last updated | 2025-06-04 |
Procedure
Step-by-step guide: Screenshots and videos are placed with the instruction they illustrate.
Compatible panel settings can be changed using the Alarm.com app.
Note: If these options are not available, contact your service provider for more information.
To change panel settings:
- Log in to the Alarm.com app.
- Tap Security System.
- Tap Settings.
- Tap the setting to be configured.
- Tap the desired value.
- Tap Save.
Compatible panel settings:
| Setting | Description |
|---|---|
| Silence Trouble Beeps at Night | If this feature is enabled then trouble conditions such as AC loss system low battery RF low battery fail to communicate cell radio faults will not be audible between the hour of 10 pm and 9 am. For UL 985 installations, this feature must be disabled. |
| Temperature Display | Select if the temperature is displayed in Fahrenheit or Celsius |
| Closing Acknowledgement Sound | Enable or disable the sound for an arming acknowledgment at the end of the exit delay |
| Data and Time Format | Select the format date and time format |
Source and support
For GoSafer Security assistance, visit gosafersecurity.com.
Original Alarm.com reference: https://answers.alarm.com/Customer/Website_and_App/System_Management/System_Usage/Remotely_change_2GIG_GoControl_panel_settings
Always verify safety, installation, compatibility, and current UI details against the original manufacturer documentation before operational use.
Remotely change DSC iotega panel settings
GoSafer Security Knowledge Base
This operational reference is organized for GoSafer Security customers and staff. Alarm.com product names are retained where required for technical accuracy.
Overview
Change some of your panel settings using the app including beeps, and chimes.
| Platform | Mobile App |
|---|---|
| Content type | How-to / Configuration |
| Source last updated | 2025-06-04 |
Procedure
Step-by-step guide: Screenshots and videos are placed with the instruction they illustrate.
Compatible panel settings can be changed using the Alarm.com app.
Note: If these options are not available, contact your service provider for more information.
To change panel settings:
- Log in to the Alarm.com app.
- Tap Security System.
- Tap Settings.
- Tap the setting to be configured.
- Tap the desired value.
- Tap Save.
Compatible panel settings:
| Setting name | Setting options | Description |
|---|---|---|
| Sound Settings | Chime on Zone Opening | Enable/Disable if the chime sounds each time an appropriately configured zone is opened. |
| Sound Settings | Chime on Zone Closing | Enable/Disable if the chime sounds each time an appropriately configured zone is closed. |
| Sound Settings | Panel Internal Siren | Enable/Disable the panel siren on the unit. |
| Sound Settings | Internal Buzzer | Enable/Disable the internal buzzer. |
| Sound Settings | Partition Chime | Enable/Disable the partition chime. Download only setting. |
Source and support
For GoSafer Security assistance, visit gosafersecurity.com.
Original Alarm.com reference: https://answers.alarm.com/Customer/Website_and_App/System_Management/System_Usage/Remotely_change_DSC_iotega_panel_settings
Always verify safety, installation, compatibility, and current UI details against the original manufacturer documentation before operational use.
Remotely change Interlogix Simon XT panel settings
GoSafer Security Knowledge Base
This operational reference is organized for GoSafer Security customers and staff. Alarm.com product names are retained where required for technical accuracy.
Overview
Change some of your panel settings using the app including beeps, chimes, and speaker volume.
| Platform | Mobile App |
|---|---|
| Content type | Troubleshooting |
| Source last updated | 2025-06-04 |
Procedure
Step-by-step guide: Screenshots and videos are placed with the instruction they illustrate.
Compatible panel settings can be changed using the Alarm.com app.
Note: If these options are not available, contact your service provider for more information.
To change settings using the Alarm.com app:
- Log in to the Alarm.com app.
- Tap Security System.
- Tap Settings.
- Tap the setting to be edited.
- Tap the desired value.
- Tap Save.
Compatible panel settings:
| Setting name | Setting options | Description |
|---|---|---|
| Sounds Settings | Piezo Beeps | Determines whether the panel piezo produces beeps based on system activity |
| Sounds Settings | Chime Voice | Determines whether the panel announces the sensor name |
| Sound Settings | Chime Type | Determines the type of chime for the sensors that chime (i.e., voice, bell, soft bell, off) |
| Sound Settings | Speaker Volume | Determines the volume of voice messages from the panel speaker |
| Sound Settings | Status Beep Volume | Determines the panel piezo volume level for status sounds such as arming, trouble, and status beeps |
| Sound Settings | System Status Announcement | Determines whether the panel announces arming level changes |
| Sound Settings | Panel Piezo Alarm | Determines whether the panel piezo siren turns on for alarms |
| Trouble Beeps | Trouble Beeps | Turns on/off the beeps issued by the security system when there is an active trouble |
| 24 Hour Clock | 24 Hour Clock | Determines whether the system uses a 24 hour clock (enable) or a 12 hour clock (disable) |
Source and support
For GoSafer Security assistance, visit gosafersecurity.com.
Original Alarm.com reference: https://answers.alarm.com/Customer/Website_and_App/System_Management/System_Usage/Remotely_change_Interlogix_Simon_XT_panel_settings
Always verify safety, installation, compatibility, and current UI details against the original manufacturer documentation before operational use.
Remotely change Interlogix Simon XTi panel settings
GoSafer Security Knowledge Base
This operational reference is organized for GoSafer Security customers and staff. Alarm.com product names are retained where required for technical accuracy.
Overview
Change some of your panel settings using the app including beeps, chimes, and speaker volume.
| Platform | Mobile App |
|---|---|
| Content type | How-to / Configuration |
| Source last updated | 2025-06-04 |
Procedure
Step-by-step guide: Screenshots and videos are placed with the instruction they illustrate.
Compatible panel settings can be changed using the Alarm.com app.
Note: If these options are not available, contact your service provider for more information.
To change panel settings:
- Log in to the Alarm.com app.
- Tap Security System.
- Tap Settings.
- Tap the setting to be configured.
- Tap the desired value.
- Tap Save.
Compatible panel settings:
| Setting name | Setting options | Description |
|---|---|---|
| Sounds Settings | Piezo Beeps | Determines whether the panel piezo produces beeps based on system activity |
| Sounds Settings | Chime Voice | Determines whether the panel announces the sensor name |
| Sounds Settings | Chime Type | Determines the type of chime for the sensors that chime (i.e., voice, bell, soft bell, off) |
| Sounds Settings | Speaker Volume | Determines the volume of voice messages from the panel speaker |
| Sounds Settings | Status Beep Volume | Determines the panel piezo volume level for status sounds such as arming, trouble, and status beeps |
| Sounds Settings | System Status Announcement | Determines whether the panel announces arming level changes |
| Sounds Settings | Panel Piezo Alarm | Determines whether the panel piezo siren turns on for alarms |
| 24 Hour Clock | System Options - 24 Hour Clock | Determines whether the system uses a 24 hour clock or a 12 hour clock |
Source and support
For GoSafer Security assistance, visit gosafersecurity.com.
Original Alarm.com reference: https://answers.alarm.com/Customer/Website_and_App/System_Management/System_Usage/Remotely_change_Interlogix_Simon_XTi_panel_settings
Always verify safety, installation, compatibility, and current UI details against the original manufacturer documentation before operational use.
Remotely change Qolsys IQ Panel 2 settings
GoSafer Security Knowledge Base
This operational reference is organized for GoSafer Security customers and staff. Alarm.com product names are retained where required for technical accuracy.
Overview
Change some of your panel settings using the app including beeps, chimes, and speaker volume.
| Platform | Mobile App |
|---|---|
| Content type | How-to / Configuration |
| Source last updated | 2025-06-04 |
Procedure
Step-by-step guide: Screenshots and videos are placed with the instruction they illustrate.
Compatible panel settings can be changed using the Alarm.com app.
Note: If these options are not available, contact your service provider for more information.
To change panel settings:
- Log in to the Alarm.com app.
- Tap Security System.
- Tap Settings.
- Tap the setting to be configured.
- Tap the desired value.
- Tap Save.
Compatible panel settings:
| Setting name | Setting options | Description |
|---|---|---|
| Sound Settings | Chimes |
|
| Sound Settings | Voice |
|
| Sound Settings | Speaker Level |
|
| Sound Settings | Touch Sounds | Enable/Disable Touch Sounds |
Source and support
For GoSafer Security assistance, visit gosafersecurity.com.
Original Alarm.com reference: https://answers.alarm.com/Customer/Website_and_App/System_Management/System_Usage/Remotely_change_Qolsys_IQ_Panel_2_settings
Always verify safety, installation, compatibility, and current UI details against the original manufacturer documentation before operational use.
Sensor is showing incorrect status on the website or app
GoSafer Security Knowledge Base
This operational reference is organized for GoSafer Security customers and staff. Alarm.com product names are retained where required for technical accuracy.
Overview
If a panel is reporting the correct sensor status but the Alarm.com app and GoSafer Security customer portal (powered by Alarm.com) are not, try the following steps.
| Platform | App + Web |
|---|---|
| Content type | Troubleshooting |
| Source last updated | 2023-11-15 |
Procedure
- Verify sensor status
Trip the sensor, and verify the status is reporting properly at the panel.
Note: Allow a few minutes for the status to display on Alarm.com.
Refresh the equipment list page
To refresh the Alarm.com app, swipe down on the screen. A refreshing icon will become visible and will spin before refreshing the Alarm.com app.
To refresh the GoSafer Security customer portal (powered by Alarm.com), click [Refresh] on any page on the GoSafer Security customer portal (powered by Alarm.com).
- Disable/enable Sensor Activity Monitoring
If the preceding steps have not corrected the status, refresh Sensor Activity Monitoring.
To refresh Sensor Activity Monitoring
- Disable Sensor Activity Monitoring on the sensor. For instructions on enabling or disabling Sensor Activity Monitoring, see Turn sensor activity monitoring on/off.
It may take a few minutes for Sensor Activity Monitoring to disable. Refresh the Equipment List page to verify that Sensor Activity Monitoring is disabled.
Once disabled, re-enable Sensor Activity Monitoring again.
After a few minutes, refresh the equipment list page to verify that Sensor Activity monitoring is re-enabled.
Once enabled, verify the sensor is reporting the correct status.
Trip the sensor again to test that it is properly reporting its status.
Contact your service provider
For additional troubleshooting steps or information about sensor statuses, contact your service provider.
Source and support
For GoSafer Security assistance, visit gosafersecurity.com.
Original Alarm.com reference: https://answers.alarm.com/Customer/Website_and_App/System_Management/System_Usage/Sensor_is_showing_incorrect_status_on_the_website_or_app
Always verify safety, installation, compatibility, and current UI details against the original manufacturer documentation before operational use.
Set up the app using setup wizards
GoSafer Security Knowledge Base
This operational reference is organized for GoSafer Security customers and staff. Alarm.com product names are retained where required for technical accuracy.
Overview
There are two setup wizards that can appear upon first logging into the Alarm.com app to assist you with getting the most out of your Alarm.com system right from the start.
| Platform | App + Web |
|---|---|
| Content type | How-to / Configuration |
| Source last updated | 2024-12-11 |
Procedure
Step-by-step guide: Screenshots and videos are placed with the instruction they illustrate.
There are two setup wizards (Mobile App Setup and App Settings Migration) that appear upon first logging into the Alarm.com app to assist you with getting the most out of your Alarm.com system right from the start.
Compatibility
The Mobile App Setup and App Settings Migration setup wizards are compatible with:
- Android devices.
- iOS devices.
- Alarm.com Places is not supported on iPads.
Mobile App Setup wizard
The Mobile App Setup wizard guides Mobile Apps through the set up for the best practices in the Alarm.com app.
Note: The Mobile App Setup wizard only launches the very first time the user logs into the Alarm.com app. So, if you close the app after the wizard has launched, you are not able to return to the Mobile App Setup wizard.
Primary customer logins have immediate access to engaging app features. Using the Mobile App Setup wizard, primary customer logins are prompted to:
- Turn on push notifications.
- This allows the user to receive notifications through the Alarm.com app.
- Create a location-based arming reminder.
- This allows the user to receive a reminder to arm the system if the mobile device leaves the Geo-Fence.
- Turn on Alarm.com Places.
- This allows the user to automate their system based on the location of the mobile device.
- Create their first Geo-Fence.
- This allows the user to adjust the Geo-Fence's location and radius.
- Subscribe the mobile device to notifications.
- This allows the user to select which notifications they wish to receive.
The following is an example of the process the user goes through during the Mobile App Setup wizard:
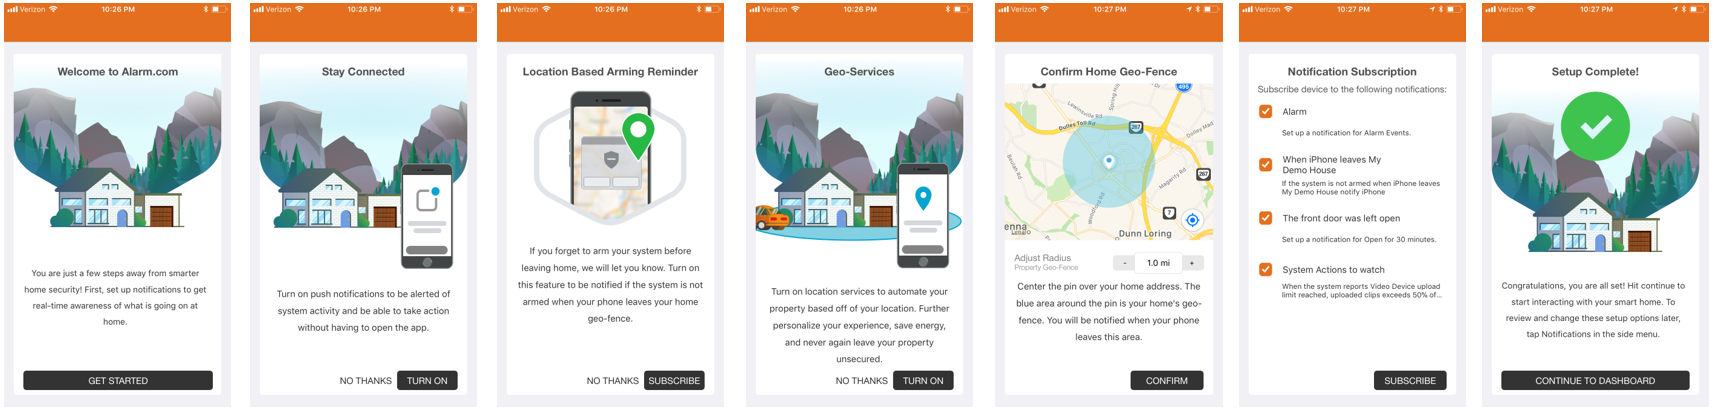
Secondary customer logins are also connected to some of the features when they first login. Using the Mobile App Setup wizard, secondary customer logins are prompted to:
- Turn on push notifications.
- Turn on Alarm.com Places.
- Subscribe the mobile device to notifications.
Note: If it is the very first time the user is logging into either the GoSafer Security customer portal (powered by Alarm.com) or app, the user also sees the Terms & Condition agreements to review and agree to.
App Settings Migration wizard
The Apps Settings Migration wizard allows users to transfer their app settings from an old mobile device to a new mobile device. In just a few steps, users with a new mobile device can seamlessly transfer their settings for push notifications, Alarm.com Places, and other specific notification types.
Using the App Settings Migration wizard, the user is prompted to select either:
- Copy settings from another device - If the user selects to Copy settings from another device, the App Settings Migration wizard prompts the user to:
- Select the old mobile device to copy settings (i.e., push notifications or Alarm.com Places) and notifications from to transfer the new mobile device.
- Depending on which settings the old mobile device has, the wizard prompts the user to turn on push notifications and/or Alarm.com Places.
- Choose to replace the old device (remove it from the account after the migration to the new device is complete), or add the new device to the notifications as an additional device on the account and the old device is kept active.
- Set up as a new device - If the user selects to Set up as a new device, the App Settings Migration wizard prompts the user to set up the new device for push notifications, Alarm.com Places, and subscribe to notifications.
The following is an example of the process the user goes through when Copy settings from another device is selected during the App Settings Migration wizard:
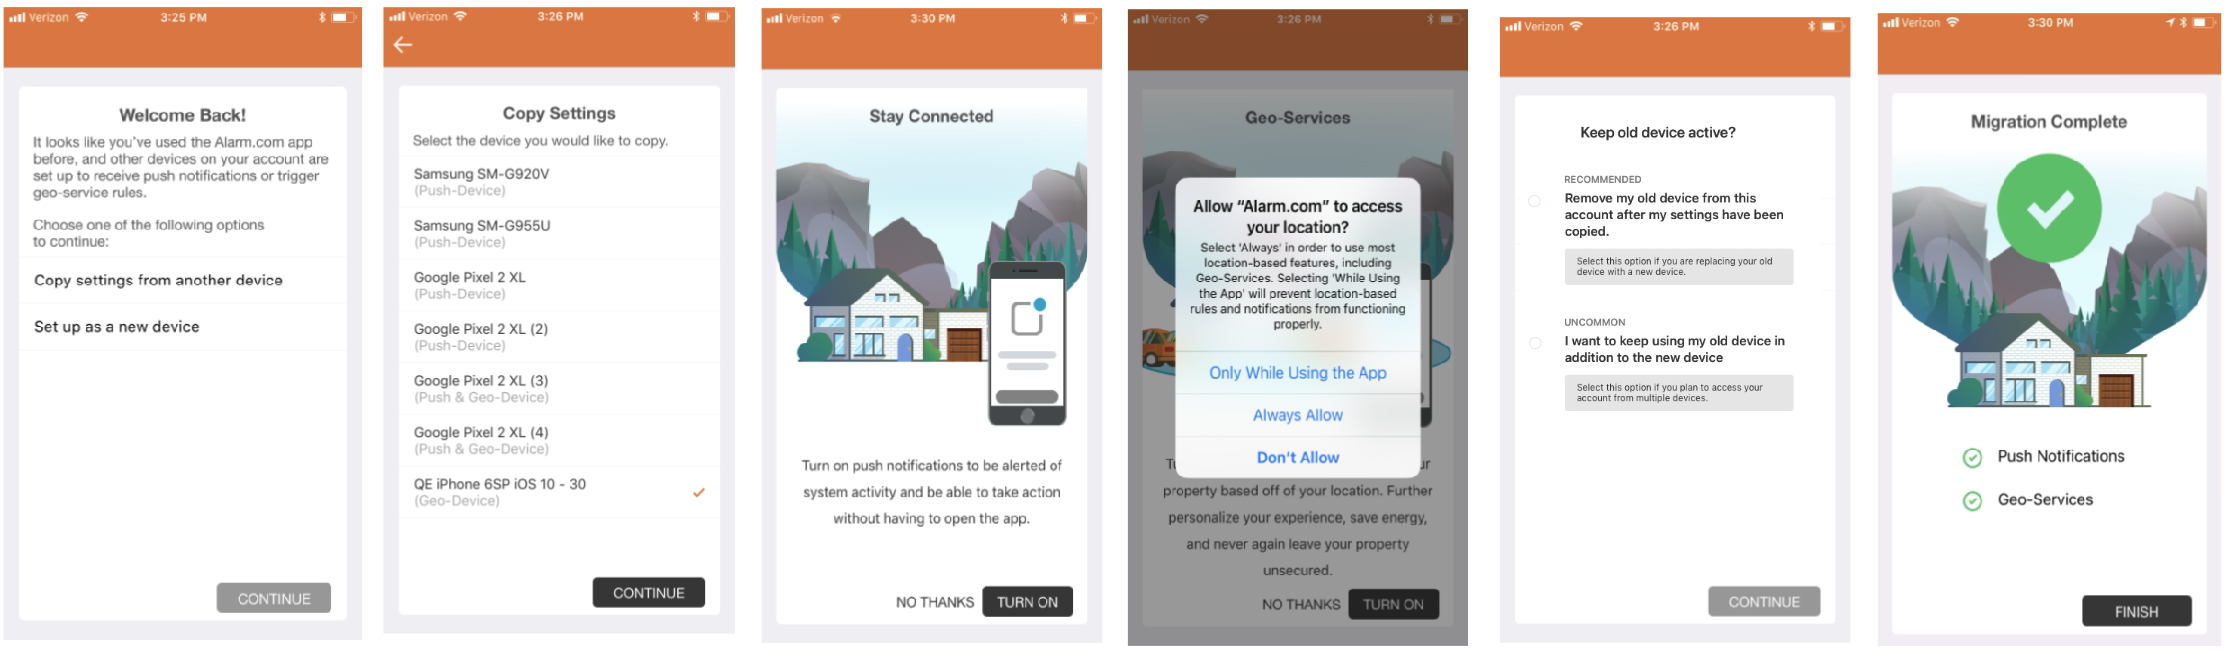
Source and support
For GoSafer Security assistance, visit gosafersecurity.com.
Original Alarm.com reference: https://answers.alarm.com/Customer/Website_and_App/System_Management/System_Usage/Set_up_the_app_using_setup_wizards
Always verify safety, installation, compatibility, and current UI details against the original manufacturer documentation before operational use.
Smoke Sensor Not Reset
GoSafer Security Knowledge Base
This operational reference is organized for GoSafer Security customers and staff. Alarm.com product names are retained where required for technical accuracy.
Overview
The Smoke Sensor Not Reset trouble condition indicates a system smoke sensor was activated, but the condition has not yet cleared from the servers.
| Platform | Customer Website |
|---|---|
| Content type | Troubleshooting |
| Source last updated | 2025-06-04 |
Procedure
To remove this trouble condition
- Log in to the GoSafer Security customer portal (powered by Alarm.com).
On the Home page, click Alerts and Issues.
In Alerts & Issues, locate Smoke Sensor Must Be Reset (Sensor Name), then click Remove Alert.
Source and support
For GoSafer Security assistance, visit gosafersecurity.com.
Original Alarm.com reference: https://answers.alarm.com/Customer/Website_and_App/System_Management/System_Usage/Smoke_Sensor_Not_Reset
Always verify safety, installation, compatibility, and current UI details against the original manufacturer documentation before operational use.
System Usage
GoSafer Security Knowledge Base
This operational reference is organized for GoSafer Security customers and staff. Alarm.com product names are retained where required for technical accuracy.
Overview
This GoSafer Security section brings together resources for System Usage, including setup, configuration, everyday use, and troubleshooting. Choose the related page that matches your device, feature, or task, and follow the current manufacturer guidance linked on that page.
| Platform | App + Web |
|---|---|
| Content type | Troubleshooting |
| Source last updated | 2026-03-19 |
Procedure
Source and support
For GoSafer Security assistance, visit gosafersecurity.com.
Original Alarm.com reference: https://answers.alarm.com/Customer/Website_and_App/System_Management/System_Usage
Always verify safety, installation, compatibility, and current UI details against the original manufacturer documentation before operational use.
Take a Peek-in from a Qolsys panel camera
GoSafer Security Knowledge Base
This operational reference is organized for GoSafer Security customers and staff. Alarm.com product names are retained where required for technical accuracy.
Overview
Peek-Ins allow users to take on demand snapshots from the Qolsys IQ Panel 2 panel camera using the Alarm.com website or app.
| Platform | App + Web |
|---|---|
| Content type | How-to / Configuration |
| Source last updated | 2025-06-04 |
Procedure
Requirements
A compatible Qolsys panel
Qolsys IQ Panel 2 on software version 2.3.0+.
Qolsys IQ Panel 4 on any software version.
The panel must be connected to Wi-Fi.
Note: If you do not see the following options, contact your service provider.
To request a Peek-In using the Alarm.com app
- Log in to the Alarm.com app.
In Images card, tap [Peek In].
- Tap Peek-In Now.
- Tap Send to capture and upload an image immediately.
The image is uploaded to the Images event gallery. When the image is available for viewing, a notification is sent to all Peek-In notification recipients.
To request a Peek-In using the GoSafer Security customer portal (powered by Alarm.com)
- Log in to the GoSafer Security customer portal (powered by Alarm.com).
- Click [Peek In] on the Images card.
- Click [Peek In] for the Panel Camera to capture and upload an image immediately.
The image is uploaded to the Images event gallery. When the image is available for viewing, a notification is sent to all Peek-In notification recipients.
To configure Peek-In recipients
Note: This can only be configured using the GoSafer Security customer portal (powered by Alarm.com).
- Log in to the GoSafer Security customer portal (powered by Alarm.com).
- Click Automation.
- Click [Edit] for Peek-Ins & Manual Image Uploads.
To choose notification recipients, click Add.
- Click to select the desired recipients from the Address book, to add an unlisted recipient click New. When a recipient has been selected, a checkmark appears next to their contact information.
Note: When a Peek-In is requested, an image of the capture is attached to the email or SMS message.
- Click Close.
- Verify the rule is configured with the correct settings.
- Click Save.
Source and support
For GoSafer Security assistance, visit gosafersecurity.com.
Original Alarm.com reference: https://answers.alarm.com/Customer/Website_and_App/System_Management/System_Usage/Take_a_Peek-in_from_a_Qolsys_panel_camera
Always verify safety, installation, compatibility, and current UI details against the original manufacturer documentation before operational use.
Trigger a panic using the app
GoSafer Security Knowledge Base
This operational reference is organized for GoSafer Security customers and staff. Alarm.com product names are retained where required for technical accuracy.
Overview
The In-App Panel Panic monitoring station supported feature can expedite the dispatch of emergency personnel when help is needed at home. When the panel is not in arm’s reach, and the keyfob is …
| Platform | Mobile App |
|---|---|
| Content type | How-to / Configuration |
| Source last updated | 2025-06-04 |
Procedure
Step-by-step guide: Screenshots and videos are placed with the instruction they illustrate.
The In-App Panel Panic and In-App Property Panic monitoring station supported features can expedite the dispatch of emergency personnel when help is needed at your account's location. If enabled on your account, In-App Panics are available on the home dashboard of the Alarm.com app.
Important: Sending a panic with the In-App Panic interface will act as if a panic is being sent from the account location. Emergency personnel will not arrive at your geographic location. They will only go to the address listed on your monitoring station account. It is encouraged to keep that information up-to-date.
Triggering a panic
This feature depends on if your account has a security panel. For more information about opting-in to the In-App Panic feature, contact your service provider.
If your account has a security panel: Icn Chevron Up
Considerations:
- Some panels send an audible alarm when Police, Fire, or Auxilary panics are sent.
- If your account has Two-Way Voice enabled, Two-Way Voice is initiated through the panel when a Police Panic is sent.
To trigger a panel panic:
- Log in to the Alarm.com app.
Important: To interact with In-App Panel Panic, a customer login with Master, Full Control, or Custom logins with the In-App Panel Panic permission must be used. Any other permission level cannot view or use the feature. - In the Security System card, tap Panic.
- Press and hold the type of panic to be triggered.
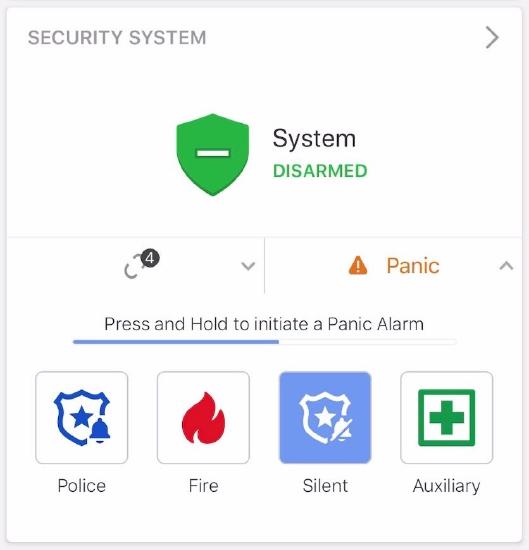
In app Panel panic sending a Silent Police Panic
- After a 3 second countdown in which the panic can be canceled or immediately sent, the panic is sent to the monitoring station and an audible alarm occurs at the panel, if applicable.
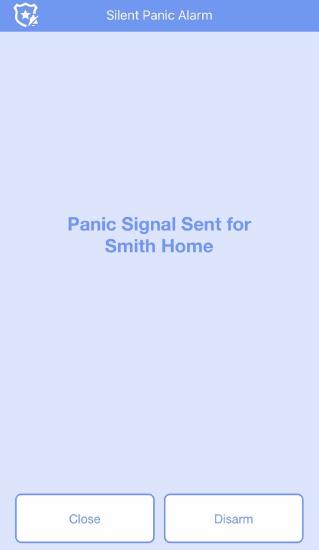
In app Panel panic Silent Police Panic sent
- Tap Close to wait for assistance or Disarm to disarm the panel.
- Tapping Disarm will negate the panic signal that was triggered.
If your account does not have a security panel:Icn Chevron Up
To trigger a property panic:
- Log in to the Alarm.com app.
- Only the primary login is able to interact with In-App Property Panic. Secondary logins cannot view or use the feature.
- In the Panic card, tap and hold the type of panic to be triggered.
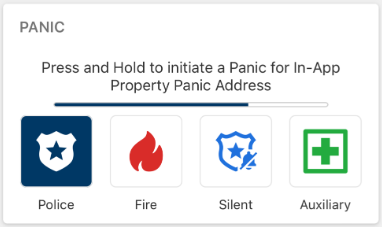
In App property Panic card Holding Police
- A 3 second countdown screen appears. Tap Cancel to cancel the panic, or Send Now to immediately send the panic.
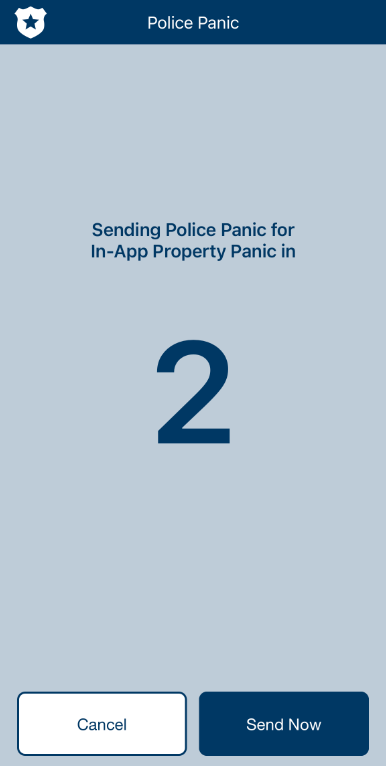
In App property Panic Countdown screen
- After the 3 second countdown, tap Close to wait for assistance.
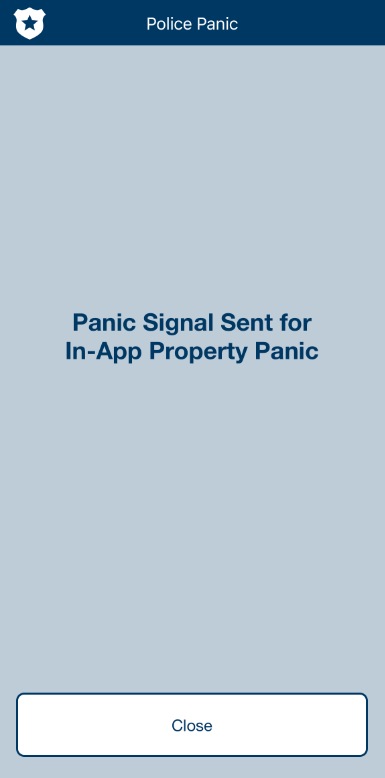
In App property Panic Close screen
Source and support
For GoSafer Security assistance, visit gosafersecurity.com.
Original Alarm.com reference: https://answers.alarm.com/Customer/Website_and_App/System_Management/System_Usage/Trigger_a_panic_using_the_app
Always verify safety, installation, compatibility, and current UI details against the original manufacturer documentation before operational use.
Turn off system trouble beeps using the app
GoSafer Security Knowledge Base
This operational reference is organized for GoSafer Security customers and staff. Alarm.com product names are retained where required for technical accuracy.
Overview
System trouble beeps coming from the security panel can be turned off using the mobile app.
| Platform | Mobile App |
|---|---|
| Content type | Troubleshooting |
| Source last updated | 2025-06-04 |
Procedure
Step-by-step guide: Screenshots and videos are placed with the instruction they illustrate.
System trouble beeps coming from the security panel can be turned off using the Alarm.com app when an active trouble condition is reported. This feature disables trouble beeps for 7 days, but it can be re-enabled at any time.
System trouble beeps can only be turned off using the Alarm.com app. It cannot be turned off using the GoSafer Security customer portal (powered by Alarm.com). Turning off trouble beeps using the Alarm.com app disables beeps at the panel, but the trouble condition remains on the Alarm.com app and website until it is resolved.
Feature compatibility
- This feature is supported on most Alarm.com compatible security panels.
- Some panels require the system to be disarmed to successfully turn off the trouble beeps.
- This feature functions differently on 2GIG panels since there is no way to indefinitely disable trouble beeps at all times.
- If there is a smoke or carbon monoxide detector associated with the system, this feature is not available and will not appear in the Alarm.com app.
If this feature does not appear in the Alarm.com app when a trouble condition is present, contact your service provider for assistance.
Turn off System Trouble Beeps
You can access the Trouble Beeps page when there is an active trouble condition on the security system using one of the following methods:
- By tapping Silence Trouble Beeps in the Issues card on the Home screen.
- This option only appears if one of the following troubles is present:
- Panel Power Failure
- Device Low Battery
- Panel Low Battery
- Sensor Tamper
- Dual-Path Communication Failure - Broadband
- Dual-Path Communication Failure – Cellular
- This option only appears if one of the following troubles is present:
- By accessing the Security System page.
If the system trouble beeps continue at the security panel after performing the following steps, verify the panel and module are communicating properly. If the panel and module are not communicating, trouble beeps cannot be turned off using remote commands. Contact your service provider for further assistance.
To turn off System Trouble Beeps from the Issues card:
- Log in to the Alarm.com app.
- Tap Silence Trouble Beeps in the Issues card on the Home screen when an active trouble condition is reported on the system.
- If you do not see this option, try to turn off system trouble beeps by accessing the Security System settings page. For more information, see To turn off System Trouble Beeps from the Security System card .
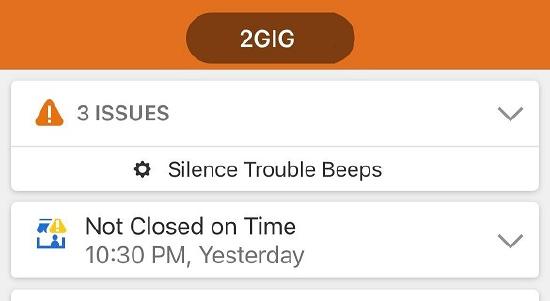
Silence Trouble Beeps
Important: For 2GIG panels, the following message for Silence System Troubles displays. Tap Ok to disable all trouble beeps for currently active trouble conditions until there is a new trouble detected. This is the only step available to take for 2GIG panels.
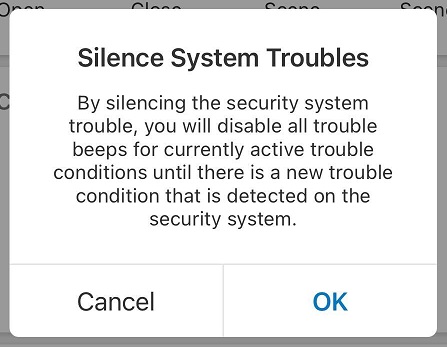
2GIG Silence System Troubles message
- If you do not see this option, try to turn off system trouble beeps by accessing the Security System settings page. For more information, see To turn off System Trouble Beeps from the Security System card .
- Tap Trouble Beeps.
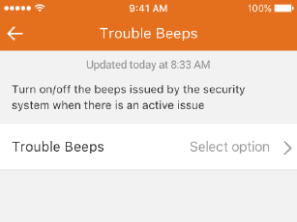
Trouble beeps page on app
- Tap Turn Off to select it.
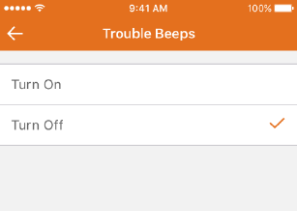
Trouble beeps turn on off options
- Tap Turn Off to confirm the selection. This turns off the trouble beeps for any current or future issues that occur during the next 7 days, or until it is manually turned on again.
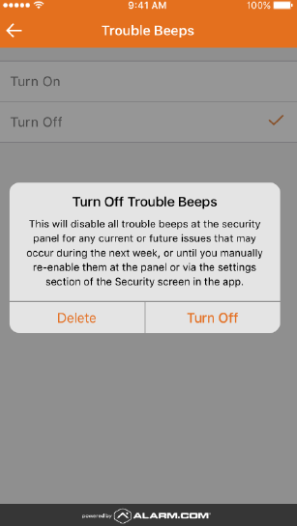
Turn off trouble beeps confirmation on app
To turn off System Trouble Beeps from the Security System card:
Note: 2GIG panels do not have this option.
- Log in to the Alarm.com app.
- Tap Security System.
- Tap Settings to access the Trouble Beeps page.
- If you do not see this option, your panel may not be compatible. For information about compatibility, see Feature compatibility.
- Tap Turn Off to select it.
- Tap Turn Off to confirm the selection. This turns off the trouble beeps for any current or future issues that occur during the next 7 days, or until it is manually turned on again.
Note: If the system trouble beeps continue at the security panel after performing the preceding steps, contact your service provider.
Source and support
For GoSafer Security assistance, visit gosafersecurity.com.
Original Alarm.com reference: https://answers.alarm.com/Customer/Website_and_App/System_Management/System_Usage/Turn_off_system_trouble_beeps_using_the_app
Always verify safety, installation, compatibility, and current UI details against the original manufacturer documentation before operational use.
Turn sensor activity monitoring on/off
GoSafer Security Knowledge Base
This operational reference is organized for GoSafer Security customers and staff. Alarm.com product names are retained where required for technical accuracy.
Overview
Sensor Activity Monitoring allows users to view the current status of the system's sensors.
| Platform | Customer Website |
|---|---|
| Content type | How-to / Configuration |
| Source last updated | 2026-01-06 |
Procedure
Step-by-step guide: Screenshots and videos are placed with the instruction they illustrate.
Sensor activity monitoring (SAM) allows users to view the current status of the system's sensors.
Once SAM is enabled for sensors, sensor activity notifications can be configured to receive direct notifications about a sensor's activity by email, text message, or push notification. For more information about setting up sensor activity notifications, see Create a sensor activity notification.
To turn sensor activity monitoring on/off:
This setting can only be updated using the GoSafer Security customer portal (powered by Alarm.com). For further assistance, contact your service provider.
- Log in to the GoSafer Security customer portal (powered by Alarm.com).
- Click Settings.
- Click Manage Devices.
- Click More options next to the device to update.
- Click Device Settings.
- In the Monitoring column, click to select the sensors that should have sensor activity monitoring. Alternatively, click to uncheck to remove activity monitoring.
Note: In the following example, sensors 1 and 3 have SAM enabled, sensor 2 has SAM disabled, and SAM is not available for the fixed panic keypad.
Sensor list
- Click Save.
Turn sensor activity monitoring on/off videos
Turn SAM on - VideoIcn Chevron Up
Turn SAM off - Video
Icn Chevron Up
Source and support
For GoSafer Security assistance, visit gosafersecurity.com.
Original Alarm.com reference: https://answers.alarm.com/Customer/Website_and_App/System_Management/System_Usage/Turn_sensor_activity_monitoring_on_off
Always verify safety, installation, compatibility, and current UI details against the original manufacturer documentation before operational use.
View all system sensors
GoSafer Security Knowledge Base
This operational reference is organized for GoSafer Security customers and staff. Alarm.com product names are retained where required for technical accuracy.
Overview
A list of the all the system's sensors can be viewed from the GoSafer Security customer portal.
| Platform | App + Web |
|---|---|
| Content type | How-to / Configuration |
| Source last updated | 2025-06-04 |
Procedure
Step-by-step guide: Screenshots and videos are placed with the instruction they illustrate.
A list of all the system's sensors can be viewed using the Alarm.com app or GoSafer Security customer portal (powered by Alarm.com).
Sensors with Sensor Activity Monitoring (SAM) enabled can be viewed using the Alarm.com app and GoSafer Security customer portal (powered by Alarm.com). For more information about sensor statuses, see View current sensor activity.
To view all system sensors using the Alarm.com app:
- Log in to the Alarm.com app.
- Tap More options.
- Tap Manage Devices.
Note: Sensor names and device settings can be updated by tapping More options.
To view all system sensors using the GoSafer Security customer portal (powered by Alarm.com):
- Log in to the GoSafer Security customer portal (powered by Alarm.com).
- Click Settings.
- Click Manage Devices.
Note: Sensor names and device settings can be updated by clicking More options.

Source and support
For GoSafer Security assistance, visit gosafersecurity.com.
Original Alarm.com reference: https://answers.alarm.com/Customer/Website_and_App/System_Management/System_Usage/View_all_system_sensors
Always verify safety, installation, compatibility, and current UI details against the original manufacturer documentation before operational use.
View current sensor activity
GoSafer Security Knowledge Base
This operational reference is organized for GoSafer Security customers and staff. Alarm.com product names are retained where required for technical accuracy.
Overview
Sensors with Sensor Activity Monitoring enabled can have a variety of statuses.
| Platform | App + Web |
|---|---|
| Content type | Troubleshooting |
| Source last updated | 2025-06-04 |
Procedure
Step-by-step guide: Screenshots and videos are placed with the instruction they illustrate.
Sensors with Sensor Activity Monitoring (SAM) enabled can have a variety of statuses.
For more information about configuring Sensor Activity Monitoring, see Turn sensor activity monitoring on/off.
View current sensor activity using the Alarm.com app:
- Log in to the Alarm.com app.
- Tap Security System.
- Current sensor activity is displayed by panel partition.
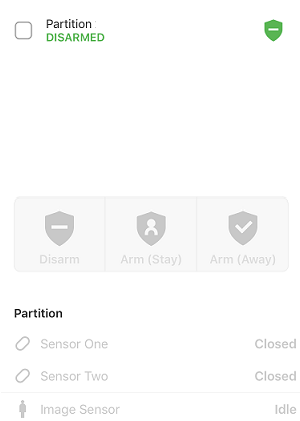
Security Systems page on app sensors
For more information about what the status indicates, see Description of sensor statuses.
View current sensor activity using the GoSafer Security customer portal (powered by Alarm.com):
- Log in to the GoSafer Security customer portal (powered by Alarm.com).
- Sensor statuses display on the Sensors card.
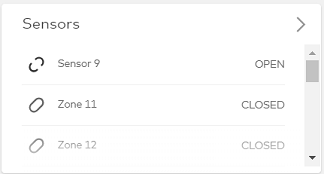
Sensors card
For more information about what the status indicates, see Description of sensor statuses.
Description of sensor statuses
| Status | Description | Sensor Types That Show This Status |
|---|---|---|
| OK | No alarm, error, or problem has been reported. If it is a door or window, it is closed. If it is a motion sensor, it has not been activated within the last 60 minutes. | All Sensors |
| Open | The door or window is currently open. | Door/Window Contacts |
| Activated | The motion sensor has detected activity within the last 60 minutes. | Motion Sensors |
| Idle | A motion sensor becomes idle when motion has not been detected for 60 minutes. The time shown is the time the motion last reported activity. | Motion Sensors |
| Alarm! | The sensor has been tripped and has set off an alarm. Important: Hardwired smoke sensors need to be disarmed twice in order to reset.
|
All Sensors |
| Bypassed |
A door/window sensor will be bypassed if it was open while the system was being armed (indirect bypass; usually occurs 4 minutes after the system arms). A user can directly bypass a sensor after the system is armed through the control panel. Refer to control panel operating instructions for information about bypassing sensors. When a sensor is bypassed either directly or indirectly, it is not active and therefore will not trigger an alarm even though the system is armed. To remove the Bypassed status, close the sensor and re-arm the system. |
All sensors except Fire and CO |
| Low Battery | The sensor is reporting a low battery. Carefully open the sensor cover, check the type of battery it uses, and replace the battery. | All Sensors |
| Tampering/ Malfunction | The sensor has been tampered with, or it has lost contact with the panel. If the status persists, contact your service provider. | All Sensors |
| N/A | The current state of the sensor is unknown. If this persists for more than a few hours, contact your service provider. | All Sensors |
Source and support
For GoSafer Security assistance, visit gosafersecurity.com.
Original Alarm.com reference: https://answers.alarm.com/Customer/Website_and_App/System_Management/System_Usage/View_current_sensor_activity
Always verify safety, installation, compatibility, and current UI details against the original manufacturer documentation before operational use.
Visual Verification device selection
GoSafer Security Knowledge Base
This operational reference is organized for GoSafer Security customers and staff. Alarm.com product names are retained where required for technical accuracy.
Overview
Visual Verification is a feature the monitoring station uses to verify a system that is in an alarm state. The monitoring station operator can: For accounts that have Visual Verification enabled, there is the option to select which devices the monitoring station uses for Visual Verification. If a device is deselected, monitoring station operators can no longer view any events from those devices or their live streams.
| Platform | Customer Website |
|---|---|
| Content type | Reference |
| Source last updated | 2025-06-04 |
Procedure
To select devices for Visual Verification using the GoSafer Security customer portal (powered by Alarm.com)
- Log in to the GoSafer Security customer portal (powered by Alarm.com).
- Click Settings.
- Click Monitoring Station.
- Click Video Monitoring Setting.
In Visual Verification, click to select the devices that allow Visual Verification.
- Click Save.
Source and support
For GoSafer Security assistance, visit gosafersecurity.com.
Original Alarm.com reference: https://answers.alarm.com/Customer/Website_and_App/System_Management/System_Usage/Visual_Verification_device_selection
Always verify safety, installation, compatibility, and current UI details against the original manufacturer documentation before operational use.
Vulnerability Disclosure Program
GoSafer Security Knowledge Base
This operational reference is organized for GoSafer Security customers and staff. Alarm.com product names are retained where required for technical accuracy.
Overview
Alarm.com is a leading platform solution for connected homes and businesses through cloud-based services, making this technology broadly accessible to millions of property owners. The multi-tenant …
| Platform | General / Device |
|---|---|
| Content type | Reference |
| Source last updated | 2026-03-06 |
Procedure
If you believe you have discovered a vulnerability in an Alarm.com product
Please contact privacy@alarm.com. This email address is continuously monitored, and you will receive a response no later than 5 business days.
Source and support
For GoSafer Security assistance, visit gosafersecurity.com.
Original Alarm.com reference: https://answers.alarm.com/Customer/Website_and_App/System_Management/System_Usage/Vulnerability_Disclosure_Program
Always verify safety, installation, compatibility, and current UI details against the original manufacturer documentation before operational use.
What does Radio Not Responding mean for broadband hubs?
GoSafer Security Knowledge Base
This operational reference is organized for GoSafer Security customers and staff. Alarm.com product names are retained where required for technical accuracy.
Overview
The “Radio Not Responding” trouble condition means the Building36 Hub or hub36 is not connected to the internet and cannot communicate with Alarm.com.
| Platform | General / Device |
|---|---|
| Content type | FAQ / Explanation |
| Source last updated | 2026-03-06 |
Procedure
If the Building36 Hub radio is not responding
- Power down your Building36 Hub by removing its power cable. Leave it unplugged for now.
- Power down your router by removing its power cable.
Leave your router powered down for 2 minutes. This 2 minute period is important, so do not power it up prematurely.
- Wait for your router to completely boot up and for the router’s internet connection to be restored.
Reapply the power cable to your Building36 Hub. The indicator light on the hub will then cycle through orange, green, and white. It will then start flashing white.
- Wait a few minutes for the indicator light to turn solid white. This indicates that the hub has established a connection with the internet.
- Wait a few more minutes for the Building36 Hub to process any backed-up commands, then try controlling your thermostat remotely.
If the hub36 radio is not responding
- Power down your hub36 by removing its power cable. Leave it unplugged for now.
- Power down your router by removing its power cable.
Leave your router powered down for 2 minutes. This 2 minute period is important, so do not power it up prematurely.
- Wait for your router to completely boot up and for the router’s internet connection to be restored.
Reapply the power cable to your hub36.
- Wait a few minutes for the green indicator LED to turn solid green. This indicates that the hub has established a connection with the internet.
- Wait a few more minutes for the hub36 to process any backed up commands, then try controlling your thermostat remotely.
Source and support
For GoSafer Security assistance, visit gosafersecurity.com.
Original Alarm.com reference: https://answers.alarm.com/Customer/Website_and_App/System_Management/System_Usage/What_does_Radio_Not_Responding_mean_for_broadband_hubs
Always verify safety, installation, compatibility, and current UI details against the original manufacturer documentation before operational use.
What happens when my system reports an alarm?
GoSafer Security Knowledge Base
This operational reference is organized for GoSafer Security customers and staff. Alarm.com product names are retained where required for technical accuracy.
Overview
This is primarily a video or reference page. Open the original article link below for the current content.
| Platform | General / Device |
|---|---|
| Content type | Troubleshooting |
| Source last updated | 2023-11-17 |
Procedure
When your system reports an alarm, the following happens
Your control panel transmits an alarm signal to Alarm.com.
Alarm.com immediately forwards the signal to the monitoring station.
The monitoring station then tries to verify the alarm and may notify fire, police, or emergency medical help. Because your system communicates wirelessly, alarms are forwarded to the monitoring station even if the phone line is cut or damaged.
If your system issues an alarm, the Operations Center will follow the Alarm Notification sequence defined for any Alarm Notifications (these updates are not synchronized with the monitoring station call list). At the same time, a live operator from your monitoring station will be trying to contact you to verify the alarm.
Source and support
For GoSafer Security assistance, visit gosafersecurity.com.
Original Alarm.com reference: https://answers.alarm.com/Customer/Website_and_App/System_Management/System_Usage/What_happens_when_my_system_reports_an_alarm
Always verify safety, installation, compatibility, and current UI details against the original manufacturer documentation before operational use.
What is the Emergency Message on the app?
GoSafer Security Knowledge Base
This operational reference is organized for GoSafer Security customers and staff. Alarm.com product names are retained where required for technical accuracy.
Overview
An Emergency Message only displays in the Alarm.com app during instances when there may be a severe weather event in your area.
| Platform | Mobile App |
|---|---|
| Content type | FAQ / Explanation |
| Source last updated | 2026-06-09 |
Procedure
Step-by-step guide: Screenshots and videos are placed with the instruction they illustrate.
An Emergency Message only displays in the Alarm.com app during instances when there may be a severe weather event in your area.
To view the Emergency Message on the Alarm.com app:
- Log in to the Alarm.com app.
- In Emergency Event Message in the Top Recommendations card, tap Learn More.
- This opens the Emergency Message page. For further questions, contact your service provider at their provided phone number.
The following is an example of how an Emergency Message appears in the Top Recommendations card in the Alarm.com app:
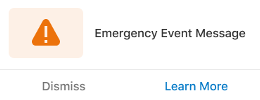
Source and support
For GoSafer Security assistance, visit gosafersecurity.com.
Original Alarm.com reference: https://answers.alarm.com/Customer/Website_and_App/System_Management/System_Usage/What_is_the_Emergency_Message_on_the_app
Always verify safety, installation, compatibility, and current UI details against the original manufacturer documentation before operational use.
What security measures does Alarm.com use?
GoSafer Security Knowledge Base
This operational reference is organized for GoSafer Security customers and staff. Alarm.com product names are retained where required for technical accuracy.
Overview
Alarm.com uses a trusted third party for Secure Sockets Layer (SSL) connection between the customer and Alarm.com interfaces. The certificate requires that the user be authenticated. Secure cookies are used to store timeout and validation information about the session. All data passed through the Secure Sockets and all passwords are one-way encrypted. Alarm.com has security measures in place to protect the loss, misuse, and alteration of customer information. We protect customer information through a unique username and password, and we protect certain sensitive communications with our website through server authentication and secure connections. Alarm.com uses Thawte for our SSL. The details of the certificate are available when you click on the lock icon when going to https://www.alarm.com.
| Platform | Customer Website |
|---|---|
| Content type | FAQ / Explanation |
| Source last updated | 2022-12-12 |
Procedure
Alarm.com uses a trusted third party for Secure Sockets Layer (SSL) connection between the customer and Alarm.com interfaces. The certificate requires that the user be authenticated. Secure cookies are used to store timeout and validation information about the session. All data passed through the Secure Sockets and all passwords are one-way encrypted.
Alarm.com has security measures in place to protect the loss, misuse, and alteration of customer information. We protect customer information through a unique username and password, and we protect certain sensitive communications with our website through server authentication and secure connections.
Alarm.com uses Thawte for our SSL. The details of the certificate are available when you click on the lock icon when going to https://www.alarm.com.
Source and support
For GoSafer Security assistance, visit gosafersecurity.com.
Original Alarm.com reference: https://answers.alarm.com/Customer/Website_and_App/System_Management/System_Usage/What_security_measures_does_Alarm.com_use
Always verify safety, installation, compatibility, and current UI details against the original manufacturer documentation before operational use.
Where can I find a monitoring certificate?
GoSafer Security Knowledge Base
This operational reference is organized for GoSafer Security customers and staff. Alarm.com product names are retained where required for technical accuracy.
Overview
For more information about proof of monitoring certificates, contact your service provider.
| Platform | General / Device |
|---|---|
| Content type | How-to / Configuration |
| Source last updated | 2025-06-04 |
Procedure
Monitoring certificates are provided by the monitoring station associated with your account. For more information about obtaining proof of monitoring certificates, contact your service provider. For more information about how to contact your service provider, see Contact your service provider.
Source and support
For GoSafer Security assistance, visit gosafersecurity.com.
Original Alarm.com reference: https://answers.alarm.com/Customer/Website_and_App/System_Management/System_Usage/Where_can_I_find_a_monitoring_certificate
Always verify safety, installation, compatibility, and current UI details against the original manufacturer documentation before operational use.
Who should I contact about billing information?
GoSafer Security Knowledge Base
This operational reference is organized for GoSafer Security customers and staff. Alarm.com product names are retained where required for technical accuracy.
Overview
For information on billing and/or making payments, contact your service provider.
| Platform | General / Device |
|---|---|
| Content type | Reference |
| Source last updated | 2023-10-27 |
Procedure
For more information about billing and/or making payments for your system, contact your service provider.
Source and support
For GoSafer Security assistance, visit gosafersecurity.com.
Original Alarm.com reference: https://answers.alarm.com/Customer/Website_and_App/System_Management/System_Usage/Who_should_I_contact_about_billing_information
Always verify safety, installation, compatibility, and current UI details against the original manufacturer documentation before operational use.
Z-Wave Troubleshooting Wizard
GoSafer Security Knowledge Base
This operational reference is organized for GoSafer Security customers and staff. Alarm.com product names are retained where required for technical accuracy.
Overview
The Z-Wave Troubleshooting Wizard provides users with step-by-step resolutions for a host of supported devices, including lights, thermostats, water devices, and more. The wizard is accessible through both Trouble Conditions Help, as well as from the Manage Devices section of the Alarm.com app and GoSafer Security customer portal (powered by Alarm.com).
| Platform | App + Web |
|---|---|
| Content type | Troubleshooting |
| Source last updated | 2025-06-04 |
Procedure
Step-by-step guide: Screenshots and videos are placed with the instruction they illustrate.
The Z-Wave Troubleshooting Wizard provides users with step-by-step resolutions for a host of supported devices, including lights, thermostats, water devices, and more. The wizard is accessible through both Trouble Conditions Help, as well as from the Manage Devices section of the Alarm.com app and GoSafer Security customer portal (powered by Alarm.com).
Common Z-Wave device issues may include:
- Low battery alerts
- Device range and network issues
- Device tamper alerts
- Device malfunctions
Note: This feature is not available for Z-Wave devices in sleep mode (i.e., a temperature sensor, etc.).
Access the Z-Wave Troubleshooting Wizard
The wizard can be accessed from both the Alarm.com app and GoSafer Security customer portal (powered by Alarm.com).
To access the Z-Wave Troubleshooting Wizard using the Alarm.com app:Icn Chevron Up
To access the wizard from the Trouble Condition alert on the Alarm.com app:
- Log in to the Alarm.com app.
- Tap Detailson the Trouble Condition alert.
- Tap Fix It.
- Verify the device is connected to power and turned on.
- If the device is powered on, tap Get Started. If the device will not power on, tap My Device Won't Turn On.
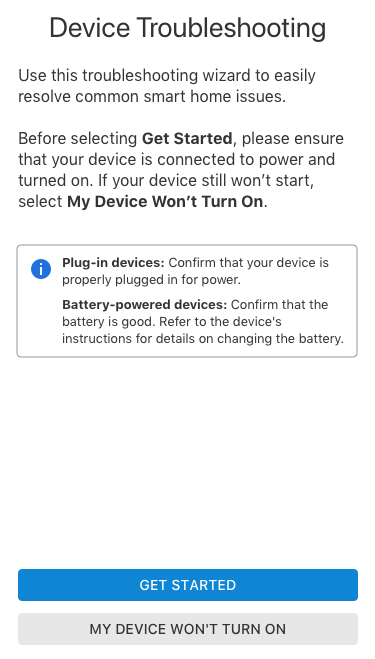
Z Wave Troubleshooting Intro Mobile App
- The wizard will evaluate the device, troubleshoot or advise the next necessary steps.
Caution: Do not interact with the devices while troubleshooting is in progress.
To access the wizard from the Manage Devices page on the Alarm.com app:
- Log in to the Alarm.com app.
- Tap Menu.
- Tap Manage Devices.
- Tap More options on the desired device.
- Tap Troubleshoot.
- Verify the device is connected to power and turned on.
- If the device is powered on, tap Get Started. If the device will not power on, tap My Device Won't Turn On.
Z Wave Troubleshooting Intro Mobile App
- The wizard will evaluate the device, troubleshoot or advise the next necessary steps.
Caution: Do not interact with the devices while troubleshooting is in progress.
To access the Z-Wave Troubleshooting Wizard using the GoSafer Security customer portal (powered by Alarm.com):Icn Chevron Up
To access the wizard from the Trouble Condition alert on the GoSafer Security customer portal (powered by Alarm.com):
- Log in to the GoSafer Security customer portal (powered by Alarm.com).
- Click Fix It on the Trouble Condition alert.
- Verify the device is connected to power and turned on.
- If the device is powered on, click Get Started. If the device will not power on, click My Device Won't Turn On.
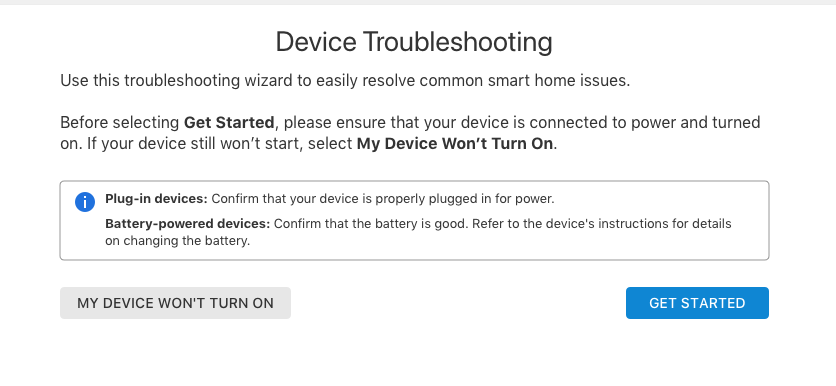
Z Wave Troubleshooting Intro Desktop
- The wizard will evaluate the device, troubleshoot, or advise the next necessary steps.
To access the wizard from the Manage Devices page on the GoSafer Security customer portal (powered by Alarm.com):
- Log in to the GoSafer Security customer portal (powered by Alarm.com).
- Click Settings.
- Click Manage Devices.
- Click More options on the desired device.
- Click Troubleshoot.
- Verify the device is connected to power and turned on.
- If the device is powered on, click Get Started. If the device will not power on, click My Device Won't Turn On.
Z Wave Troubleshooting Intro Desktop - The wizard will evaluate the device, troubleshoot, or advise the next necessary steps.
Caution: Do not interact with the devices while troubleshooting is in progress.
Source and support
For GoSafer Security assistance, visit gosafersecurity.com.
Original Alarm.com reference: https://answers.alarm.com/Customer/Website_and_App/System_Management/System_Usage/Z-Wave_Troubleshooting_Wizard
Always verify safety, installation, compatibility, and current UI details against the original manufacturer documentation before operational use.
Z-Wave sensor is in malfunction
GoSafer Security Knowledge Base
This operational reference is organized for GoSafer Security customers and staff. Alarm.com product names are retained where required for technical accuracy.
Overview
The Malfunction trouble condition indicates a device is unable to properly communicate. This article relates specifically to Z-Wave sensors. For alarm sensors, refer to your service provider for assistance.
| Platform | General / Device |
|---|---|
| Content type | Troubleshooting |
| Source last updated | 2024-03-05 |
Procedure
If a Z-Wave sensor is in malfunction or offline
- Verify the Z-Wave sensor has sufficient battery power. Replace the battery if the device has a Low Battery trouble condition or the battery is dead.
Trigger the device to establish communication with the panel or hub. Depending on the sensor type, triggering the sensor may include:
- Opening and closing a contact sensor
Activating a motion sensor
- Pressing a side button on the sensor
- Opening the battery compartment
If the behavior is still not resolved, contact your service provider for assistance.
Source and support
For GoSafer Security assistance, visit gosafersecurity.com.
Original Alarm.com reference: https://answers.alarm.com/Customer/Website_and_App/System_Management/System_Usage/Z-Wave_sensor_is_in_malfunction
Always verify safety, installation, compatibility, and current UI details against the original manufacturer documentation before operational use.
AC Power Failure
GoSafer Security Knowledge Base
This operational reference is organized for GoSafer Security customers and staff. Alarm.com product names are retained where required for technical accuracy.
Overview
AC Power Failure indicates that your security panel lost AC power. To ensure continued system functionality, your system needs to be plugged into the outlet.
| Platform | General / Device |
|---|---|
| Content type | How-to / Configuration |
| Source last updated | 2023-11-17 |
Procedure
How to resolve
- Verify that the panel is plugged into an outlet and that the outlet has power.
If you need additional support, contact your service provider.
Source and support
For GoSafer Security assistance, visit gosafersecurity.com.
Original Alarm.com reference: https://answers.alarm.com/Customer/Website_and_App/System_Management/Trouble_Condition_Help/AC_Power_Failure
Always verify safety, installation, compatibility, and current UI details against the original manufacturer documentation before operational use.
Access the Knowledge Base
GoSafer Security Knowledge Base
This operational reference is organized for GoSafer Security customers and staff. Alarm.com product names are retained where required for technical accuracy.
Overview
The Knowledge Base contains useful user guides and documentation to help you get the most out of your system.
| Platform | App + Web |
|---|---|
| Content type | Reference |
| Source last updated | 2023-10-30 |
Procedure
To access the Knowledge Base using the Alarm.com app
- Log into the Alarm.com app.
- Tap [Menu].
- Tap Support.
- Tap Help Documentation.
To access the Knowledge Base using the GoSafer Security customer portal (powered by Alarm.com)
- Log into the GoSafer Security customer portal (powered by Alarm.com).
- Click Support.
- Click Help Documentation.
Source and support
For GoSafer Security assistance, visit gosafersecurity.com.
Original Alarm.com reference: https://answers.alarm.com/Customer/Website_and_App/System_Management/Trouble_Condition_Help/Access_the_Knowledge_Base
Always verify safety, installation, compatibility, and current UI details against the original manufacturer documentation before operational use.
Access trouble condition help
GoSafer Security Knowledge Base
This operational reference is organized for GoSafer Security customers and staff. Alarm.com product names are retained where required for technical accuracy.
Overview
By simply tapping a trouble condition wherever it appears, you can access more information about the issue. The information provided may include basic troubleshooting steps, launching additional …
| Platform | Mobile App |
|---|---|
| Content type | Troubleshooting |
| Source last updated | 2025-06-04 |
Procedure
Step-by-step guide: Screenshots and videos are placed with the instruction they illustrate.
Some trouble conditions can be resolved without the need to involve your service provider. By simply tapping a trouble condition wherever it appears, you can access more information about the issue. The information provided may include basic troubleshooting steps, launching additional troubleshooting wizards, and your service provider info for further assistance.
Trouble condition explanations and help are available wherever trouble condition alerts appear:
- The GoSafer Security customer portal (powered by Alarm.com)
- The Alarm.com app
- Trouble condition emails
To access trouble condition help:
- Log in to the Alarm.com app.
- In Issues, tap the trouble condition.
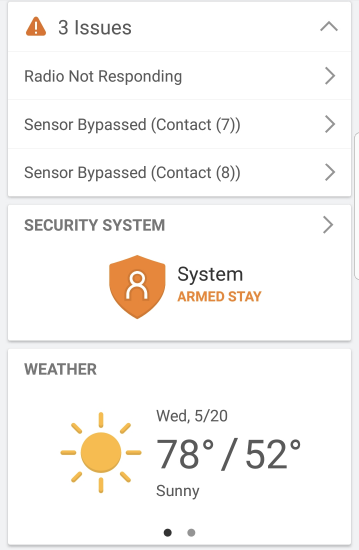
Issues screen
- On this page, more information about what the trouble condition means and what caused it is found.
- For trouble conditions with simple solutions (e.g., Sensor Bypassed), the page includes information about how to resolve the issue.
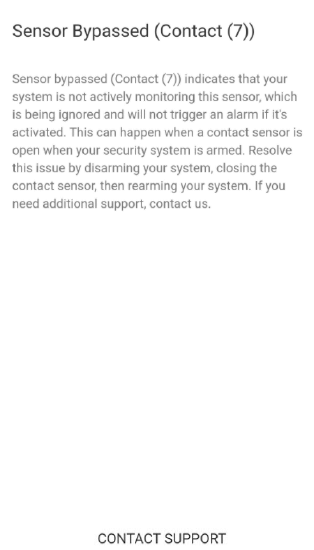
Sensor Bypassed
- For common trouble conditions (e.g., Device Low Battery), a Watch Tutorial button is available to view videos for more information.
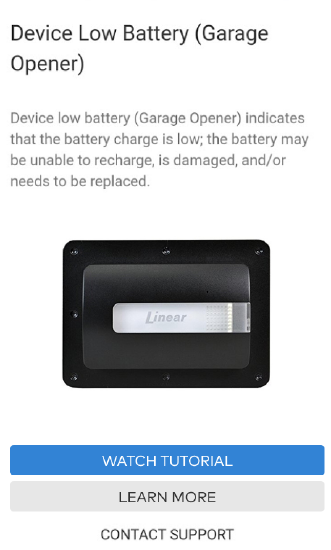
Device Low Battery
- Some trouble conditions (e.g., Video Device Not Responding) include a Fix It button that launches any related troubleshooting wizards.
Fix It
- For trouble conditions with simple solutions (e.g., Sensor Bypassed), the page includes information about how to resolve the issue.
Trouble condition help also contains a link to Contact Support, so you can receive additional guidance from your service provider if needed.
Example trouble condition explanations and help text
Front Door Sensor Bypassed: Indicates that your system is not actively monitoring this sensor, which is being ignored and will not trigger an alarm if it's activated. This can happen when a contact sensor is open when your security system is armed. Resolve this issue by disarming your system, closing the contact sensor, then rearming your system. If you need additional support, contact us.
Image Sensor Tamper: Indicates that this image sensor was moved, opened, or shaken. Image sensors have an accelerometer that senses when it is in motion or tilted. Any time your image sensor is moved or something causes it to vibrate (like a door closing hard), you will see this issue. Make sure your image sensor is upright and leave it motionless for at least 5 minutes. If this does not resolve the issue, contact us for support.
Panel Low Battery: Indicates that the backup battery in your security panel is drained, which typically happens after an AC power failure. To resolve the issue, let the battery recharge. If the battery cannot recharge, it may need to be replaced by support.
Thermostat Too Warm: Indicates that the temperature reported by your thermostat is higher than the threshold that you have specified in the Temperature Notification rule. Check your thermostat and rule settings. If you need additional support, contact us.
Source and support
For GoSafer Security assistance, visit gosafersecurity.com.
Original Alarm.com reference: https://answers.alarm.com/Customer/Website_and_App/System_Management/Trouble_Condition_Help/Access_trouble_condition_help
Always verify safety, installation, compatibility, and current UI details against the original manufacturer documentation before operational use.
Battery Absent Trouble
GoSafer Security Knowledge Base
This operational reference is organized for GoSafer Security customers and staff. Alarm.com product names are retained where required for technical accuracy.
Overview
Battery Absent Trouble indicates that the panel battery is or was missing.
| Platform | General / Device |
|---|---|
| Content type | How-to / Configuration |
| Source last updated | 2023-11-17 |
Procedure
How to resolve
- Verify that the panel battery is securely in place.
If you need additional support, contact your service provider.
Source and support
For GoSafer Security assistance, visit gosafersecurity.com.
Original Alarm.com reference: https://answers.alarm.com/Customer/Website_and_App/System_Management/Trouble_Condition_Help/Battery_Absent_Trouble
Always verify safety, installation, compatibility, and current UI details against the original manufacturer documentation before operational use.
Device Power Issue
GoSafer Security Knowledge Base
This operational reference is organized for GoSafer Security customers and staff. Alarm.com product names are retained where required for technical accuracy.
Overview
{companyname}} has detected that your device is not receiving sufficient power from the battery/bracket.
| Platform | General / Device |
|---|---|
| Content type | Troubleshooting |
| Source last updated | 2023-11-20 |
Procedure
How to resolve
- Verify if your battery is depleted or if your device has become disconnected from the mounting bracket.
If you need additional support, contact your service provider.
Source and support
For GoSafer Security assistance, visit gosafersecurity.com.
Original Alarm.com reference: https://answers.alarm.com/Customer/Website_and_App/System_Management/Trouble_Condition_Help/Device_Power_Issue
Always verify safety, installation, compatibility, and current UI details against the original manufacturer documentation before operational use.
Dual-Path Communication Failure - Cellular
GoSafer Security Knowledge Base
This operational reference is organized for GoSafer Security customers and staff. Alarm.com product names are retained where required for technical accuracy.
Overview
Dual-Path Communication Failure - Cellular indicates that your panel is currently unable to communicate through the cellular network and is only communicating through broadband network/Wi-Fi. Until resolved, your panel is without back-up communication and will stop working if you lose power or you experience a broadband/WiFi outage.
| Platform | General / Device |
|---|---|
| Content type | How-to / Configuration |
| Source last updated | 2023-11-20 |
Procedure
How to resolve
If possible, move metal or electrical objects away from the panel to improve cellular network signaling.
If you need additional support, contact your service provider.
Source and support
For GoSafer Security assistance, visit gosafersecurity.com.
Original Alarm.com reference: https://answers.alarm.com/Customer/Website_and_App/System_Management/Trouble_Condition_Help/Dual-Path_Communication_Failure_-_Cellular
Always verify safety, installation, compatibility, and current UI details against the original manufacturer documentation before operational use.
Fire Sensor Trouble
GoSafer Security Knowledge Base
This operational reference is organized for GoSafer Security customers and staff. Alarm.com product names are retained where required for technical accuracy.
Overview
Fire Sensor Trouble indicates that your smoke detector may not be properly connected or installed correctly.
| Platform | General / Device |
|---|---|
| Content type | How-to / Configuration |
| Source last updated | 2023-11-20 |
Procedure
How to resolve
Contact your service provider for assistance.
Source and support
For GoSafer Security assistance, visit gosafersecurity.com.
Original Alarm.com reference: https://answers.alarm.com/Customer/Website_and_App/System_Management/Trouble_Condition_Help/Fire_Sensor_Trouble
Always verify safety, installation, compatibility, and current UI details against the original manufacturer documentation before operational use.
Heat Or Probe Sensor Trouble
GoSafer Security Knowledge Base
This operational reference is organized for GoSafer Security customers and staff. Alarm.com product names are retained where required for technical accuracy.
Overview
Heat Or Probe Sensor Trouble indicates that a probe has been disconnected from a temperature sensor, and the temperature sensor may no longer be working properly.
| Platform | General / Device |
|---|---|
| Content type | How-to / Configuration |
| Source last updated | 2022-11-01 |
Procedure
How to resolve
- Verify the probe is properly connected to the sensor.
If you need additional support, contact your service provider.
Source and support
For GoSafer Security assistance, visit gosafersecurity.com.
Original Alarm.com reference: https://answers.alarm.com/Customer/Website_and_App/System_Management/Trouble_Condition_Help/Heat_Or_Probe_Sensor_Trouble
Always verify safety, installation, compatibility, and current UI details against the original manufacturer documentation before operational use.
Heating and Cooling Alert
GoSafer Security Knowledge Base
This operational reference is organized for GoSafer Security customers and staff. Alarm.com product names are retained where required for technical accuracy.
Overview
A Heating and Cooling Alert indicates that thermostat data shows the heating or cooling system is not performing as expected.
| Platform | General / Device |
|---|---|
| Content type | How-to / Configuration |
| Source last updated | 2026-03-25 |
Procedure
How to resolve
We recommend contacting a heating and cooling professional to make sure your system is properly maintained and your home stays comfortable.
If you need additional support, contact your service provider.
Source and support
For GoSafer Security assistance, visit gosafersecurity.com.
Original Alarm.com reference: https://answers.alarm.com/Customer/Website_and_App/System_Management/Trouble_Condition_Help/Heating_and_Cooling_Alert
Always verify safety, installation, compatibility, and current UI details against the original manufacturer documentation before operational use.
Installer Reset Needed
GoSafer Security Knowledge Base
This operational reference is organized for GoSafer Security customers and staff. Alarm.com product names are retained where required for technical accuracy.
Overview
Installer Reset Needed indicates that your system is reporting an issue.
| Platform | General / Device |
|---|---|
| Content type | How-to / Configuration |
| Source last updated | 2023-11-20 |
Procedure
How to resolve
Contact your service provider for assistance.
Source and support
For GoSafer Security assistance, visit gosafersecurity.com.
Original Alarm.com reference: https://answers.alarm.com/Customer/Website_and_App/System_Management/Trouble_Condition_Help/Installer_Reset_Needed
Always verify safety, installation, compatibility, and current UI details against the original manufacturer documentation before operational use.
Not Networked Trouble
GoSafer Security Knowledge Base
This operational reference is organized for GoSafer Security customers and staff. Alarm.com product names are retained where required for technical accuracy.
Overview
Not Networked Trouble indicates that a device (usually a door/window contact sensor or a motion sensor) is out of sync with the wireless network or was not synchronized with the network after it was enrolled into your security panel.
| Platform | General / Device |
|---|---|
| Content type | How-to / Configuration |
| Source last updated | 2023-11-20 |
Procedure
How to resolve
Contact your service provider for assistance.
Source and support
For GoSafer Security assistance, visit gosafersecurity.com.
Original Alarm.com reference: https://answers.alarm.com/Customer/Website_and_App/System_Management/Trouble_Condition_Help/Not_Networked_Trouble
Always verify safety, installation, compatibility, and current UI details against the original manufacturer documentation before operational use.
RF Jam Trouble
GoSafer Security Knowledge Base
This operational reference is organized for GoSafer Security customers and staff. Alarm.com product names are retained where required for technical accuracy.
Overview
RF Jam Trouble indicates that the device is detecting radio frequency (RF) noise that could affect its ability to properly communicate signals to your control panel.
| Platform | General / Device |
|---|---|
| Content type | How-to / Configuration |
| Source last updated | 2022-11-01 |
Procedure
How to resolve
Contact your service provider for assistance.
Source and support
For GoSafer Security assistance, visit gosafersecurity.com.
Original Alarm.com reference: https://answers.alarm.com/Customer/Website_and_App/System_Management/Trouble_Condition_Help/RF_Jam_Trouble
Always verify safety, installation, compatibility, and current UI details against the original manufacturer documentation before operational use.
Radio Not Responding
GoSafer Security Knowledge Base
This operational reference is organized for GoSafer Security customers and staff. Alarm.com product names are retained where required for technical accuracy.
Overview
Radio Not Responding indicates that your security panel is not able to communicate with the network and may not trigger an alarm or signal for help in an emergency.
| Platform | General / Device |
|---|---|
| Content type | How-to / Configuration |
| Source last updated | 2023-11-20 |
Procedure
How to resolve
Contact your service provider for assistance.
Source and support
For GoSafer Security assistance, visit gosafersecurity.com.
Original Alarm.com reference: https://answers.alarm.com/Customer/Website_and_App/System_Management/Trouble_Condition_Help/Radio_Not_Responding
Always verify safety, installation, compatibility, and current UI details against the original manufacturer documentation before operational use.
Sensor Tamper
GoSafer Security Knowledge Base
This operational reference is organized for GoSafer Security customers and staff. Alarm.com product names are retained where required for technical accuracy.
Overview
The Sensor Tamper trouble condition indicates a sensor on the system is reporting a tamper condition. Tamper reports are issued by the system for a device whose tamper switch is released.
| Platform | General / Device |
|---|---|
| Content type | Troubleshooting |
| Source last updated | 2023-11-20 |
Procedure
Step-by-step guide: Screenshots and videos are placed with the instruction they illustrate.
The Sensor Tamper trouble condition indicates a sensor on the system is reporting a tamper condition. Tamper reports are issued by the system for a device whose tamper switch is released.
How to resolve:
For wireless devices, verify the device's battery cover is tightly secured to ensure the tamper switch is closed. Securing the tamper switch varies for each device. For specific information about resolving the sensor's tamper locally, refer to the sensor's installation guide.
Access Control tampers
Tamper trouble conditions for Access Control controllers, expansions, and OSDP doors have additional troubleshooting steps that may help resolve the trouble condition.
To resolve an OSDP door tamper:
- Verify the reader or keypad is OSDP capable and correctly configured to output OSDP.
- Verify the reader or keypad is wired to the correct reader terminal on the controller or expansion.
- Verify the reader or keypad wiring has not been severed or disconnected from the controller or expansion.
- Verify the reader or keypad has not been removed from its wall mount and/or has been placed in a position other than its required upright position.
- Verify the reader or keypad has not been damaged.
For more information about Access Control device tampers, see any of the following:
| Access Control controllers and expansions | Troubleshooting article |
|---|---|
| Access Control Door Controller (ADC-ACC1-17) | Access Control Door Controller (ADC-ACC1-17) is showing tamper |
| LP1501 PoE Door Controller (ADC-AC-LP1501) | LP1501 PoE Door Controller (ADC-AC-LP1501) is showing tamper |
| Access Control LP1502 Door Controller (ADC-AC-LP1502) | Access Control LP1502 Door Controller (ADC-AC-LP1502) is showing tamper |
| Single Reader Expansion Module (ADC-ACX1) | Single Reader Expansion Module (ADC-ACX1) is showing tamper |
| Two Reader Expansion Module (ADC-ACX2) | Two Reader Expansion Module (ADC-ACX2) is showing tamper |
| MR50 Single Reader Expansion Module (ADC-AC-MR50) | MR50 Single Reader Expansion Module (ADC-AC-MR50) is showing tamper |
| X1100 Door Controller (ADC-AC-X1100) | X1100 Door Controller (ADC-AC-X1100) is showing tamper |
Source and support
For GoSafer Security assistance, visit gosafersecurity.com.
Original Alarm.com reference: https://answers.alarm.com/Customer/Website_and_App/System_Management/Trouble_Condition_Help/Sensor_Tamper
Always verify safety, installation, compatibility, and current UI details against the original manufacturer documentation before operational use.
Siren Tamper
GoSafer Security Knowledge Base
This operational reference is organized for GoSafer Security customers and staff. Alarm.com product names are retained where required for technical accuracy.
Overview
Siren Tamper indicates your system is reporting an issue.
| Platform | General / Device |
|---|---|
| Content type | How-to / Configuration |
| Source last updated | 2023-11-20 |
Procedure
How to resolve
Contact your service provider for assistance.
Source and support
For GoSafer Security assistance, visit gosafersecurity.com.
Original Alarm.com reference: https://answers.alarm.com/Customer/Website_and_App/System_Management/Trouble_Condition_Help/Siren_Tamper
Always verify safety, installation, compatibility, and current UI details against the original manufacturer documentation before operational use.
System Locked: Installer Verification Required
GoSafer Security Knowledge Base
This operational reference is organized for GoSafer Security customers and staff. Alarm.com product names are retained where required for technical accuracy.
Overview
System Locked: Installer Verification Required indicates your system is reporting an issue.
| Platform | General / Device |
|---|---|
| Content type | How-to / Configuration |
| Source last updated | 2022-11-01 |
Procedure
How to resolve
Contact your service provider for assistance.
Source and support
For GoSafer Security assistance, visit gosafersecurity.com.
Original Alarm.com reference: https://answers.alarm.com/Customer/Website_and_App/System_Management/Trouble_Condition_Help/System_Locked_Installer_Verification_Required
Always verify safety, installation, compatibility, and current UI details against the original manufacturer documentation before operational use.
Trouble Condition Help
GoSafer Security Knowledge Base
This operational reference is organized for GoSafer Security customers and staff. Alarm.com product names are retained where required for technical accuracy.
Overview
This GoSafer Security section brings together resources for Trouble Condition Help, including setup, configuration, everyday use, and troubleshooting. Choose the related page that matches your device, feature, or task, and follow the current manufacturer guidance linked on that page.
| Platform | General / Device |
|---|---|
| Content type | Troubleshooting |
| Source last updated | 2022-02-01 |
Procedure
Source and support
For GoSafer Security assistance, visit gosafersecurity.com.
Original Alarm.com reference: https://answers.alarm.com/Customer/Website_and_App/System_Management/Trouble_Condition_Help
Always verify safety, installation, compatibility, and current UI details against the original manufacturer documentation before operational use.